Make It Mine: Hats Off!

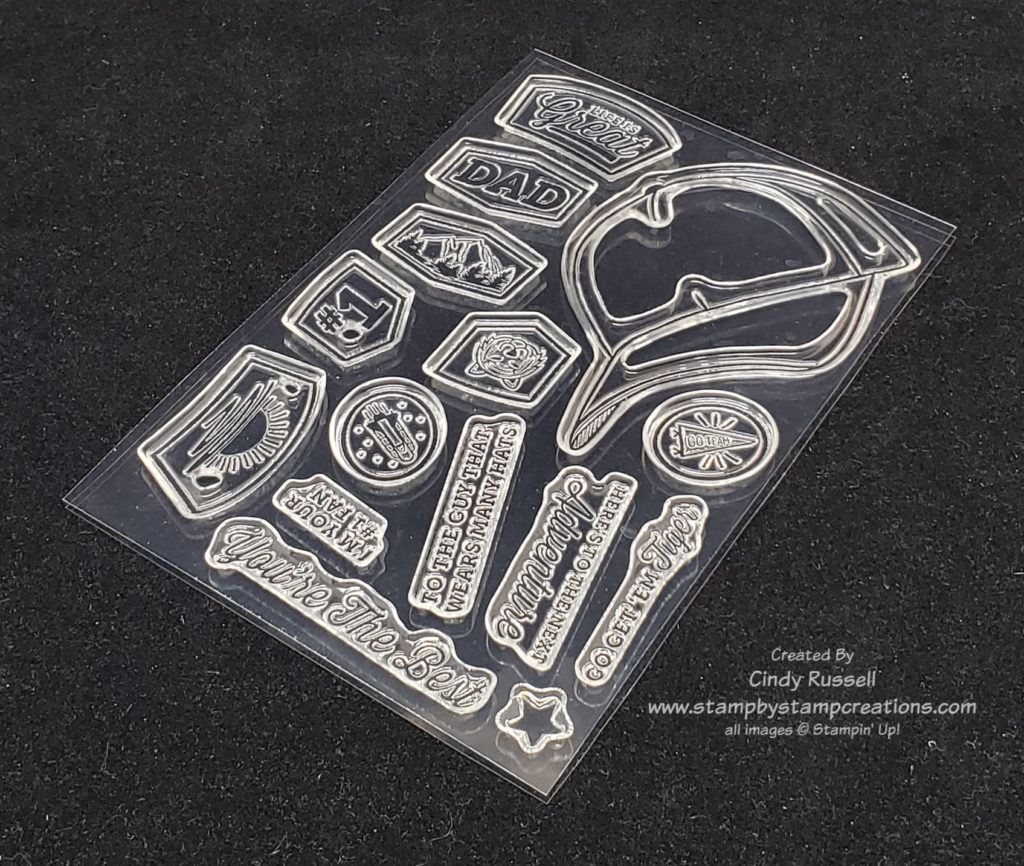
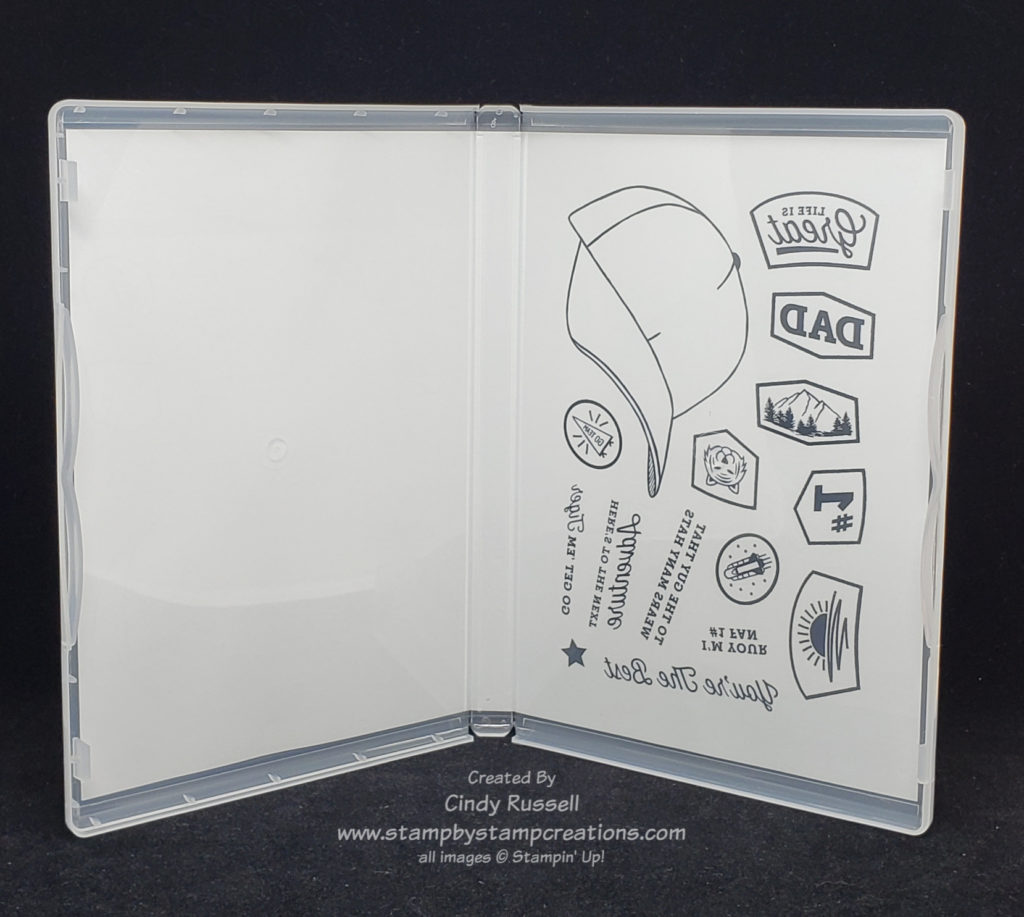
When I first saw the Hats Off stamp set in Stampin’ Up!’s new annual catalog I thought it would be a great masculine stamp set. Of course, girls wear baseball caps too, right?

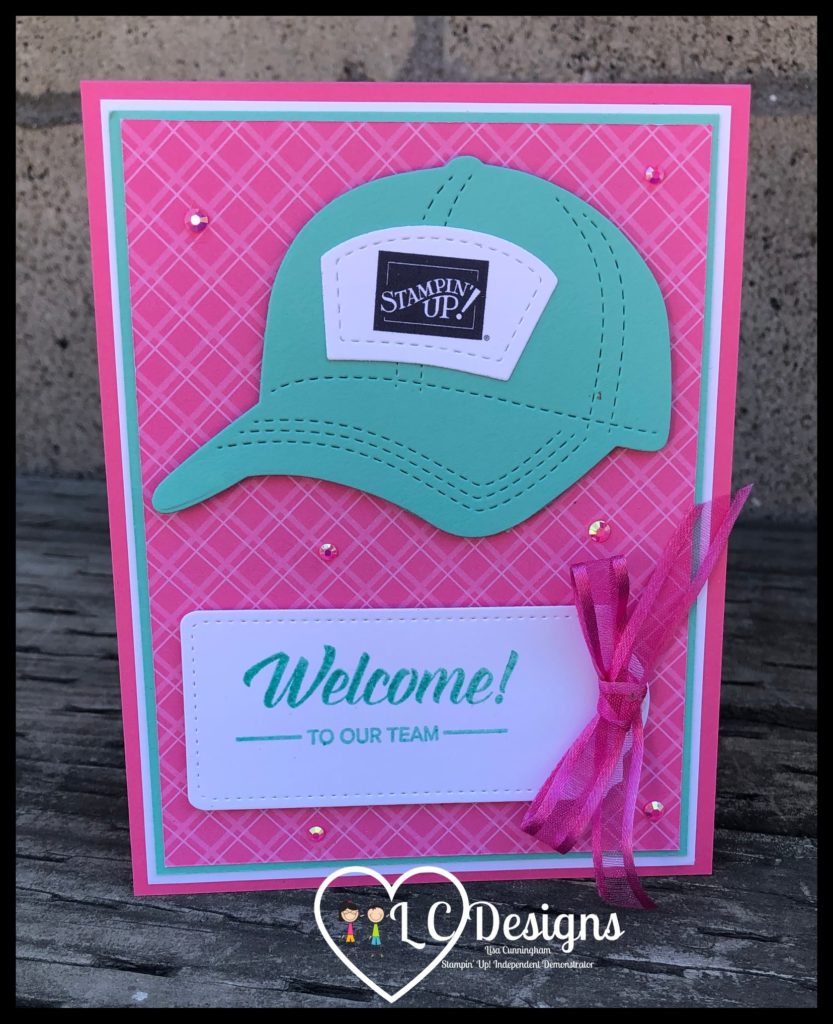
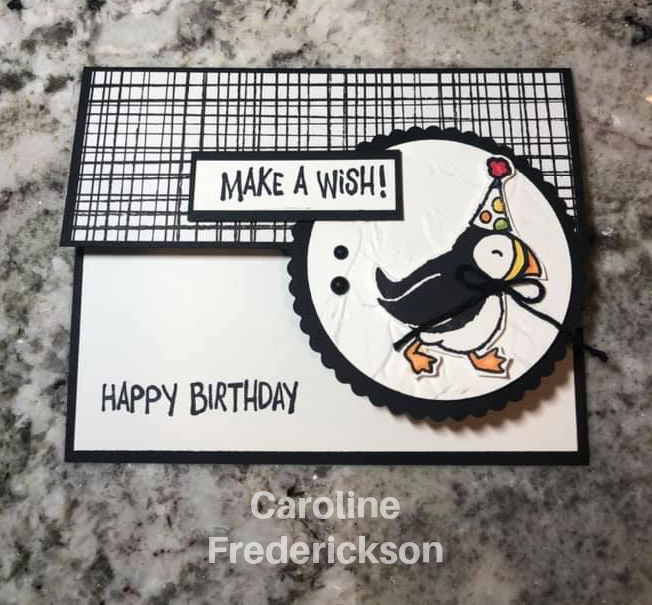
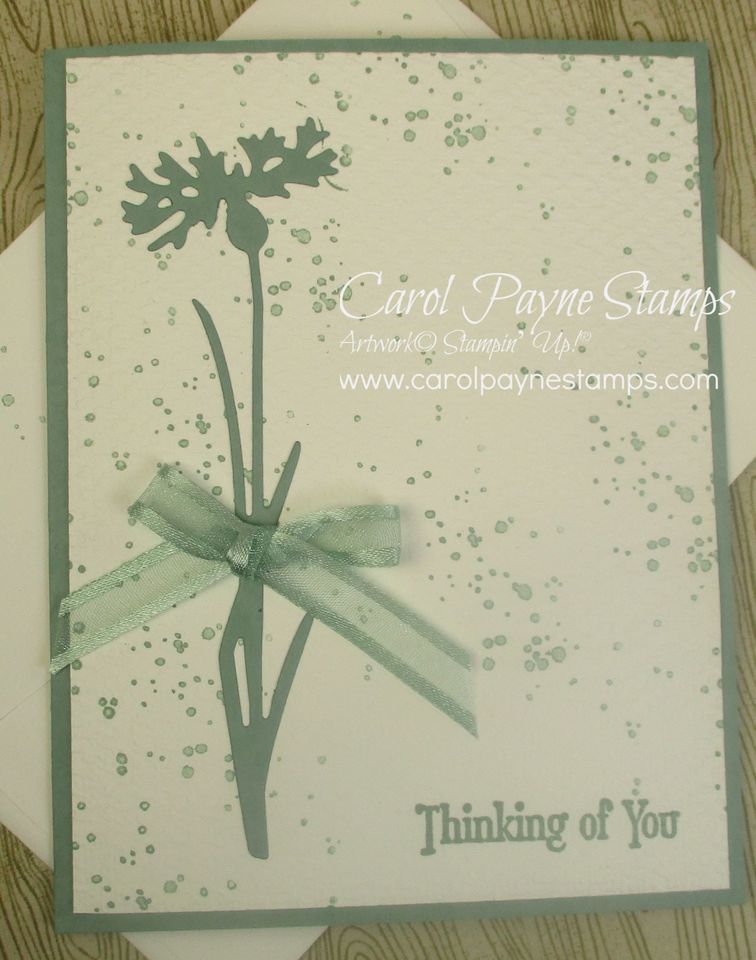
I came across this bright and cheerful card by Lisa Cummings and knew I wanted to recreate it. I had also come across a couple of hat cards that had flowers on them so that’s what I wanted to incorporate on my card along with color combination.

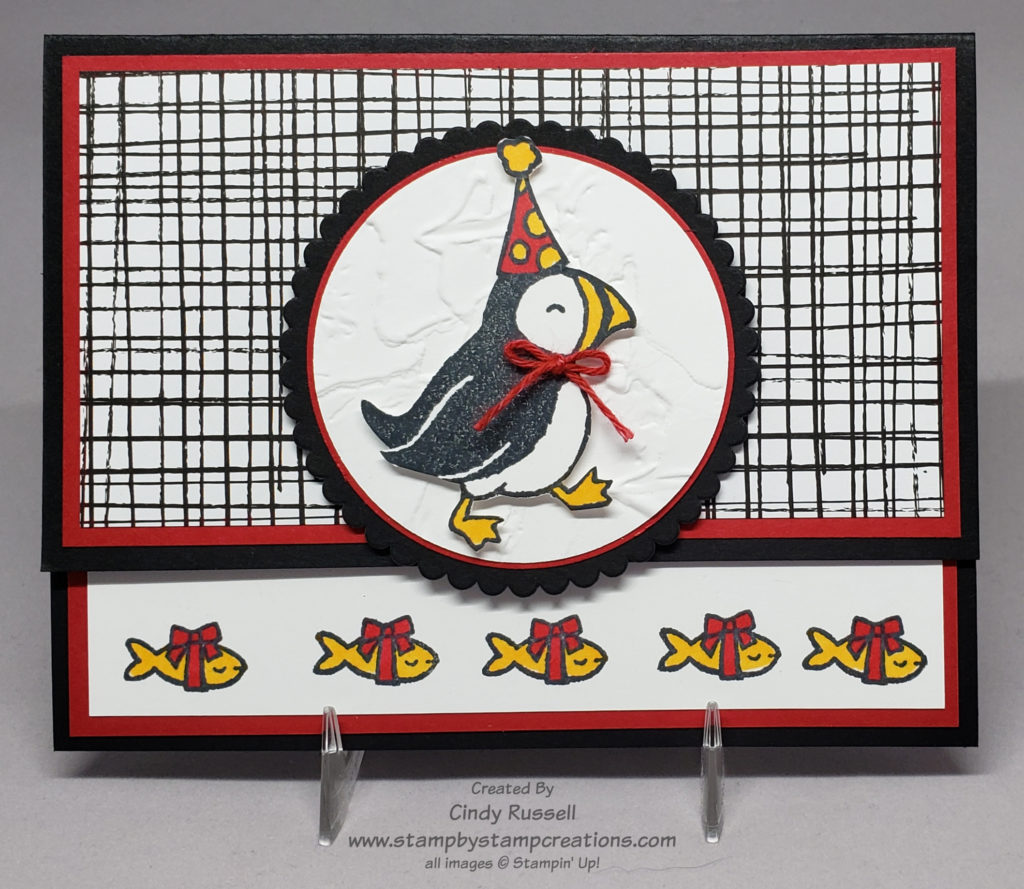
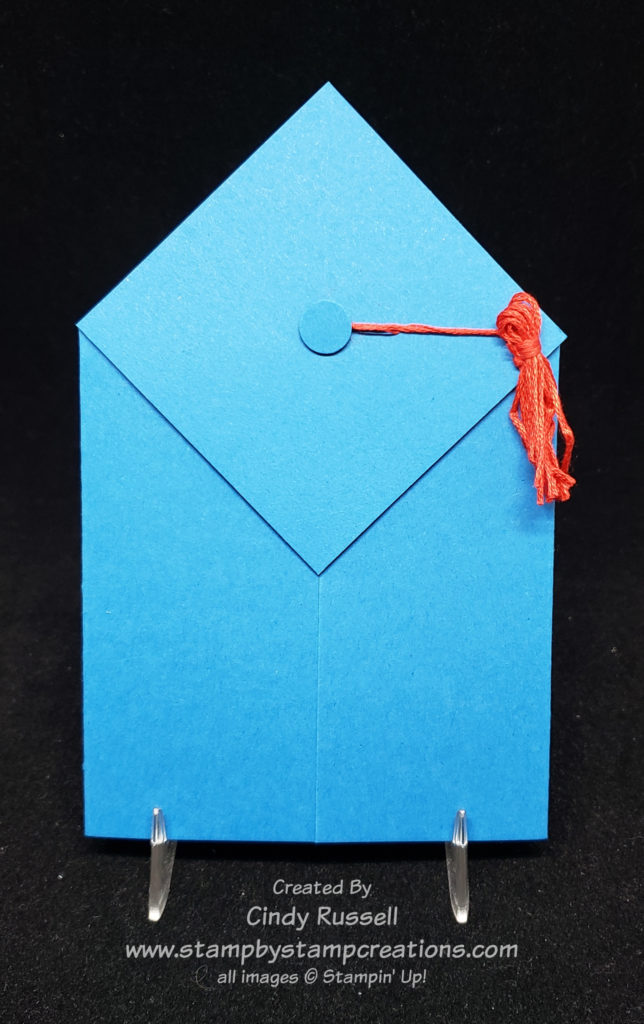
Before I share my version of Lisa’s card with you I want to share a little tip I learned. To give your ball cap a little dimension, use your bone folder to give it a little ben like you do with curling ribbon. Then, when you adhere the cap to the card (or other project) place some dimensionals in the center of the cap. That’s all I used on my card to adhere the cap.

Feminine Hats Off Card

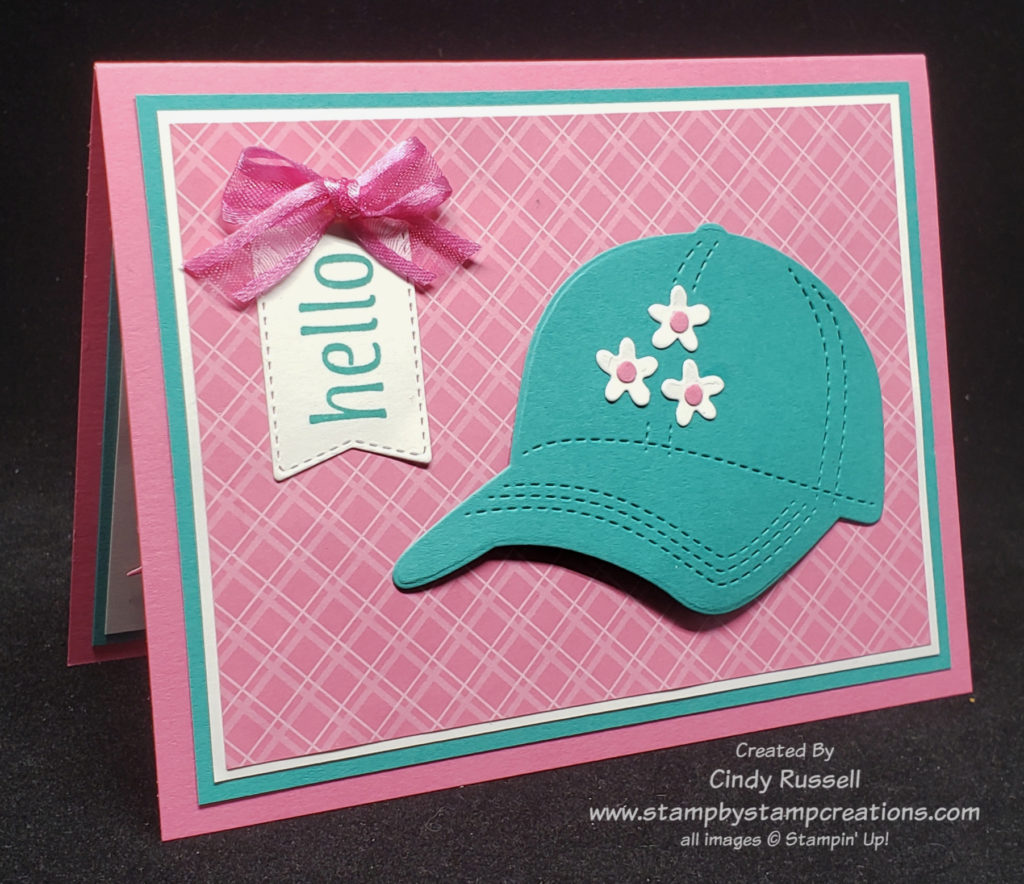
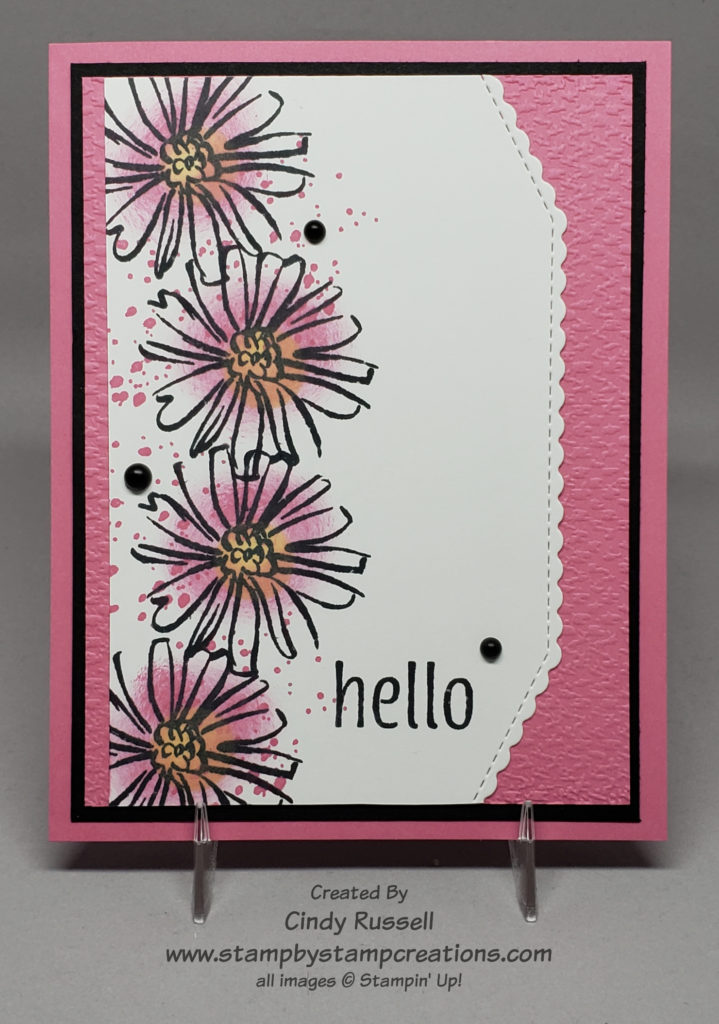
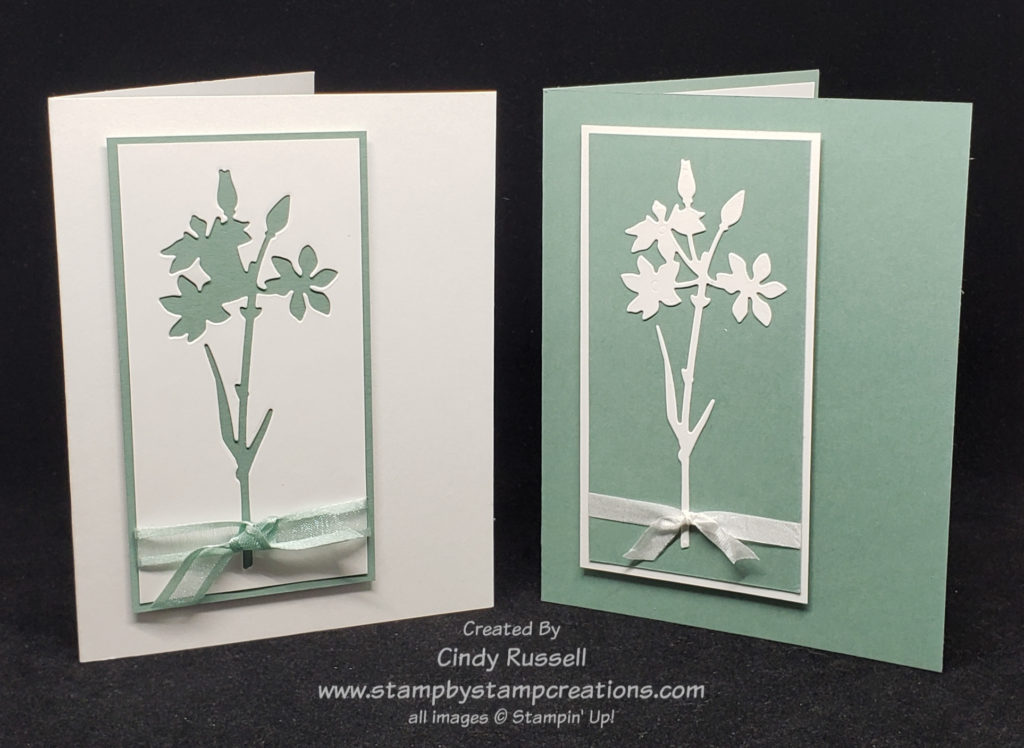
Here’s my card. It looks a little more washed out than Lisa’s but we both used Polished Pink on our card. I used Bermuda Bay but I think Lisa may have used Coastal Cabana.

After completion, this card was one of those that just tickles your fancy because it turned out cuter than you imagined. 🙂

You can see be the shadow under the brim of my ball cap how I curved it a little. I think it really adds to the card.

The little flowers on my card are from the Pierced Blooms dies (one of my favorites that makes me sad it’s retiring). The “hello” is from the Artistically Inked stamp set and the pennant die is from the Tasteful Lables dies.

I love the new 3/8″ Open Weave Ribbon that comes in the new in-colors. It’s got a little stiffness to it that makes it easy to make the perfect bow, even small ones.

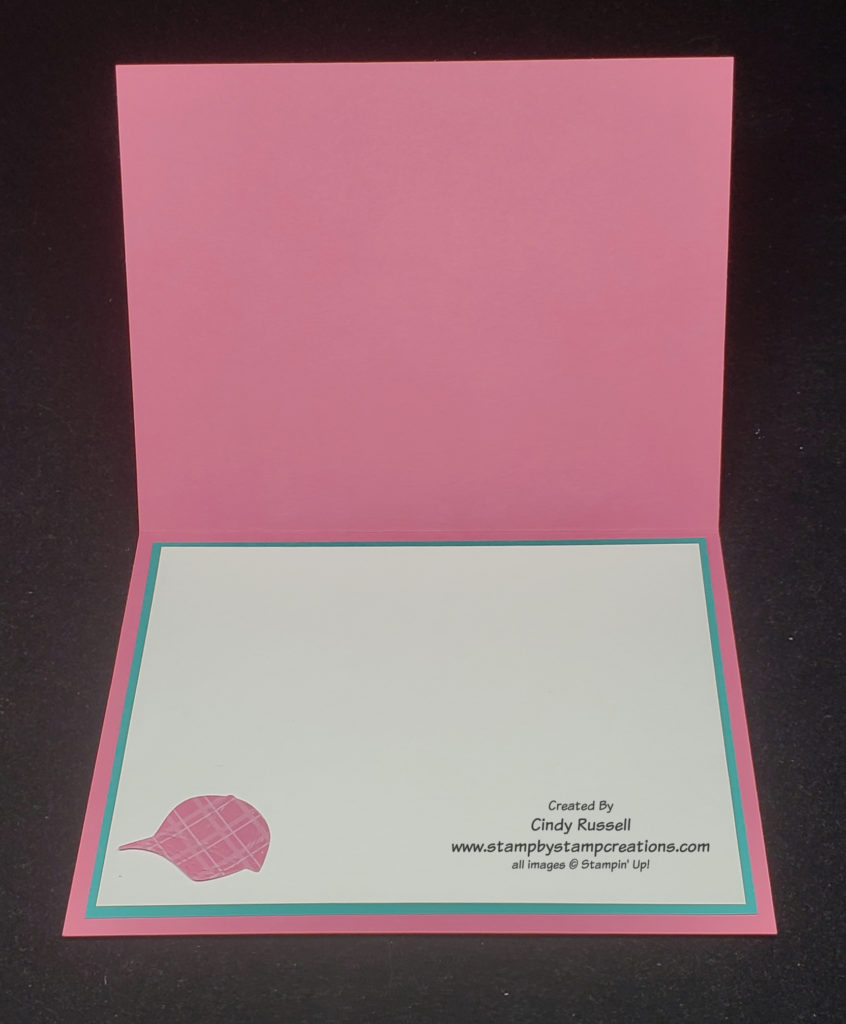
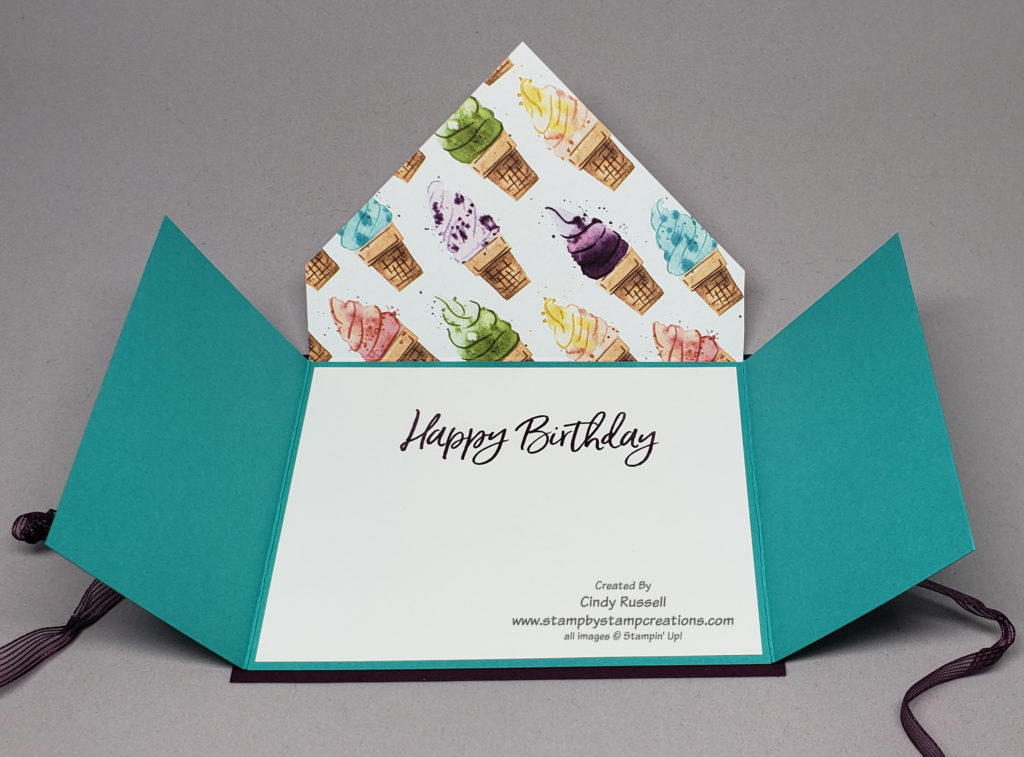
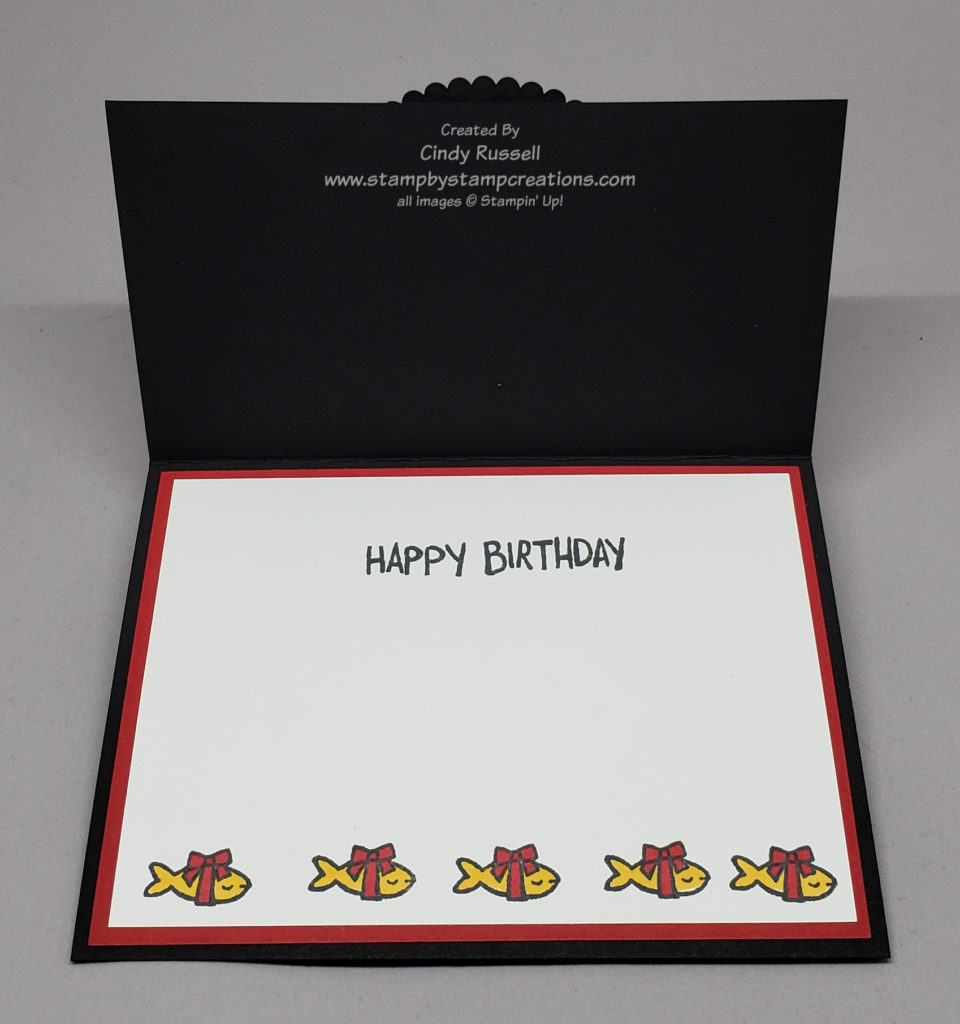
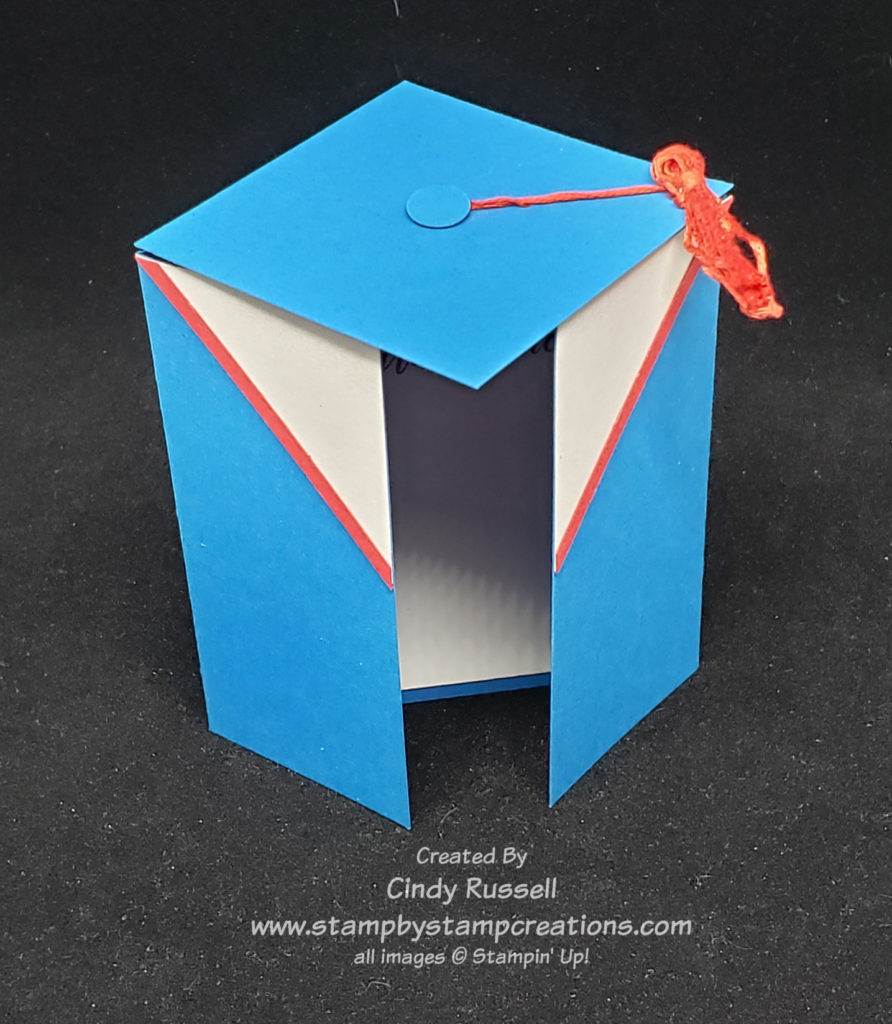
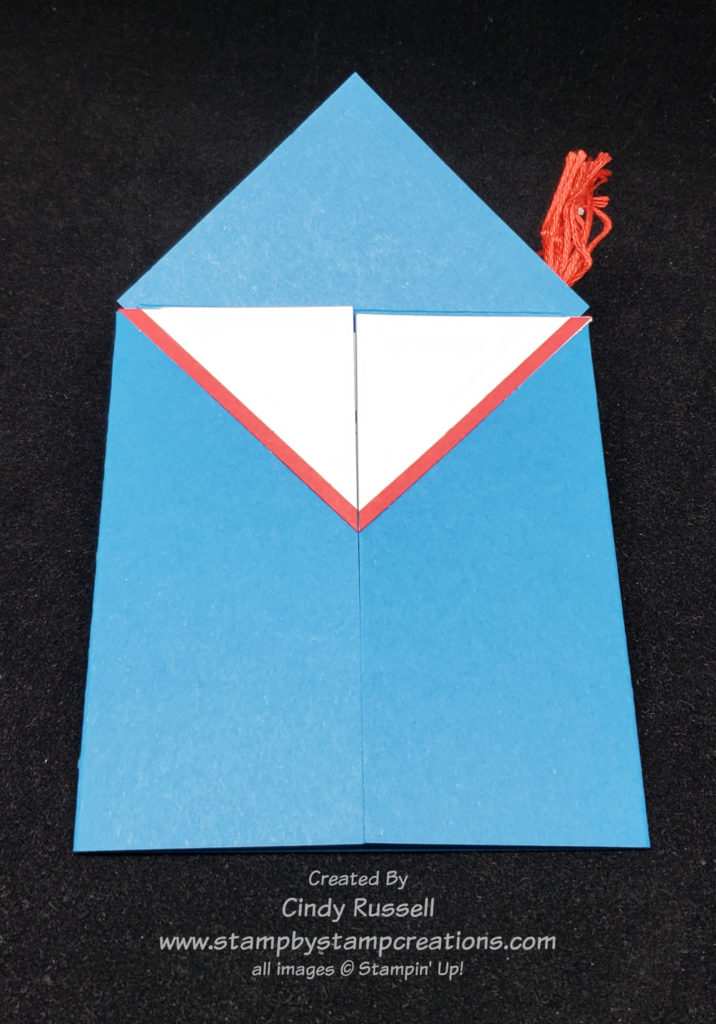
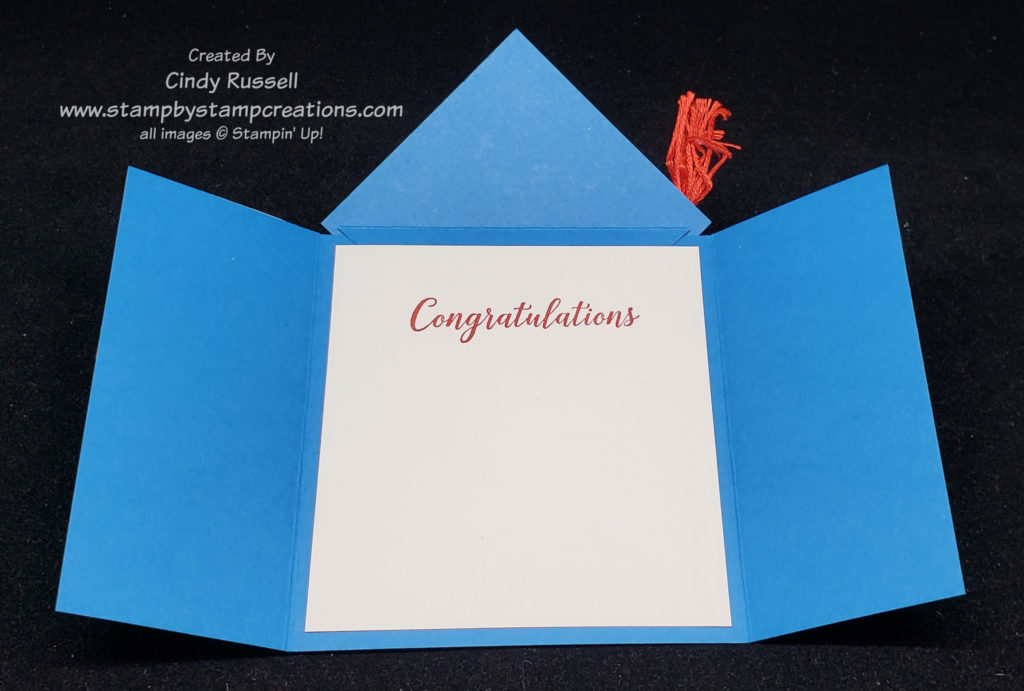
Here’s a photo of the inside of my card. I had to share it with you so you could see the smaller little ball cap die. It’s about 1 1/4″ x 7/8″. So cute!

Be sure to check out the Hats Off bundle. I think you’re going to like it!

Have a great day! Take care and Happy Stamping!

Father’s Day Polo Shirt Easel Card

Hello! I’m back from the MN Homeland where I helped put on a bridal shower for my niece. This photo is my mom, my sisters and myself. The shower was lovely and it was great to see family again. We haven’t seen them since last October.

I apologize for not getting any posts ready for you while I was gone. I hope you didn’t miss me too much! Ha! This week will be a little mixed up because I just had to share this Fun Fold with you today so that you could maybe duplicate this week for Father’s Day.

Polo Shirt Easel Card

We’re always looking for masculine cards, right? Today you hit the jackpot. This fun card can be used for any occasion. I originally saw it online and knew I had to try making it myself. The card I saw was actually larger so I had to adjust the measurement so that the card would fit into Stampin’ Up!’s regular size envelope.

The card isn’t too difficult to make and you can add a pocket on the back for a gift card! That’s what I’ll be doing for my dad’s Father’s Day card.

To see exactly how I made this card please view the video below.

If you like written instructions I’ve got you covered you can view the pdf with step by step instructions and photos here.

I hope you liked the video. My videos are a little rough but I think I’ve covered everything. If you like this project please leave a comment below. If you liked the video I’d appreciate it if you could head on over to my YouTube channel and subscribe. Thanks!

Have a great day! Take care and Happy Stamping!

Card Sketch & Challenge!

It’s a new month so I think it’s time to try something new.  We’re going to move on from Tools of the Trade to Card Sketches!

What is a Card Sketch?  It’s exactly what the name says.  It’s a sketch of a design you can use as the basis for your card.  Many of us have a difficult time making decisions.  (Yep!  That’s me!).  A card sketch gives you the design starting point for your card.  From there you choose the stamp set, colors and embellishments you want to add to the card.

You can come up with your own card sketches but I’ve found this fabulous site called Freshly Made Sketches that has almost 500 sketches on it and they keep adding to it! Be sure to check it out sometime! I will be sharing one of their sketches every week along with the card I make using it.

When using a card sketch you can keep your project as close to the sketch as you want.  As you can see on my card, I kept the basic elements of the shape in the upper left corner with the diagonal strips behind it.  But I added to that.  I (naturally) added a couple of layers and I also added a sentiment on the front of my card.

Working with card sketches should be pretty fun.  I don’t think I’ve worked with them much.  Here’s my challenge for you.  My challenge for you is to make a card using this sketch and send it to me.  I really would like to see what you do with the sketch.  Then, I would like to share your creations on my blog and possibly my Facebook Page (with your permission of course).  You can email your card to me at cindy@stampbystampcreations.com or add it to the comments for this post. Will you join the challenge and play along?  I hope so!

Have a great day!  Take care and Happy Stamping.  Don’t forget to join the challenge!  I can’t wait to see your projects!

Make It Mine Monday: Pink & Black

Of course Barb Mullikin’s card caught my eye! It’s probably my favorite color combination. Of course, black does go well with a lot of colors. It makes the other color pop!

I really like the simplicity of this card. Barb gave this card a little extra something-something by using this fun scalloped border from the Basic Borders dies. I’m sure I’ve mentioned this before but this die set is one of my favorites in Stampin’ Up!’s new Annual Catalog. It’s so versatile with six different border dies to choose from!

Did you notice how Barb made the flowers pop by adding just a hint of color? What a fun technique!

I liked Barb’s card so much I decided not to stray too far from the orignal. Naturally I added another layer. Could there be a Make It Mine card where I didn’t? Ha!

I embossed the Polished Pink background with the Tasteful Textile 3D Embossing Folder which just happens to be my go-to for a hint of texture. I also added a little color to the centers of my flowers with Pale Papaya.

You’re probably wondering how Barb and I added that little bit of color to our flowers. Sponge Dauber! That little sponge tool was perfect for both making a little circle of pink around the center of the flowers and for dabbing a spot of color in the middle of the flower.

You can’t go wrong with a pink and black card (unless you really don’t like the color pink!). Have a great Memorial Day! Take care and Happy Stamping!

Fun Fold: Twisted Gate Fold Card

Twisted Gate Fold Card

Today’s Fun Fold is the Twisted Gate Fold or Diagonal Gate Fold card.  This unique fold is a lot easier to make than it looks.  I would almost call it the Twisted Double-Flap Gate Fold because like the regular Double-Flap Gate Fold card that I showed you a few weeks ago, you fold the front panels back on themselves. In this fun fold though you fold the front panels back on the diagonal.

I just had to use the Hey Chick stamp set again before it is gone for good. It’s only available until June 30th or until supplies last and that goes for the fabulous coordinating dies. If you love them as much as I do be sure to get them while you can!

Here is the template for the base of the card. The dimensions are 7 1/2″ x 4 1/4″. Score along the long side at 2 1/2″ and 5″. Then score diagonally as shown on the template.

These are the two decorative pieces of designer paper. They both measure 4″ x 2 1/4 and are cut on the diagonal but one is cut from the upper left to the lower right and the other is cut from the upper right to the lower left.

The four triangles are labeled for you in this photo and the photo below shows where to adhere them on the card. I found it was easier to figure out where to place them while I had the card closed. I’ve labeled the pieces here so you can see where I placed them on the card below.

Honestly, figuring out where to put these four decorative pieces was the hardest part of making the card. When you are adhering your focal point to the front of the card you need to make sure you only adhere it to the L1 piece or you won’t be able to open the card.

I’ve attached a couple more photos of the card below so you can see it both fully open and partially open. It really is a fun fold and it will fit into a regular-sized envelope.

Have a great day! Take care and Happy Stamping

Tools of the Trade: Cling Stamps

Stampin’ Up! currently carries two basic types of stamps:  photopolymer and cling.  Last week I told you about the photopolymer stamps and this week I’d like to share with you about cling stamps.   As I was preparing this post I came across a video made by Stampin’ Up! when cling stamps first came out.  It covers pretty much everything that I was going to share with you so here it is:

The video does a great job of covering most of the key points of Stampin’ Up!’s red rubber cling stamps. The one thing it doesn’t mention is that unlike photopolymer stamps, you can use your Stampin’ Write Markers on cling stamps. This means you can actually color directly on the stamp with the markers. If you do use your markers on the stamp, be sure to “huff” on the stamp before stamping the image on your paper. The moisture from your breath will keep the ink from drying on the stamp before you stamp it on the paper.

Now that you’ve learned about both types of stamps that Stampin’ Up! carries, which is your favorite? Leave a comment and let me know! Have a great day. Take care and Happy Stamping!

Make It Mine: Hand-Penned

I will admit (again…?) that the Hand-Penned Suite in Stampin’ Up!’s in new annual catalog is one of my favorites!  I can’t seem to get enough of it!  I really love the designer paper.  You will see a lot of it in my projects.

The card that inspired me today was made by Julie Sperman.  Thank you Julie!  Pale Papaya isn’t my favorite color but it looks so nice with Misty Moonlight!  Julie used the Penned Flower Dies as well as the Tailor Made Tags Dies. These tag dies are becoming another favorite of mine! (Honestly, there aren’t too many Stampin’ Up! products that I don’t like!) She also used the Genial Gems on her card that coordinate perfectly with the Hand-Penned Designer Paper.  Coordination!  Love it!

I liked Julie’s card so much I was having trouble figuring out how to change it! How do you alter something so lovely?

I started with the card base itself.  On her card, Julie layered a piece of Pale Papaya on a Pale Papaya card base.  To change it up I decide to go with a Misty Moonlight card base.  Even after telling you to check your die sets for nice border dies I left off the scallop border on my card and used a larger piece of the designer paper since it’s so pretty!  The tags on both of our cards are pretty similar but I threaded my ribbon differently and used my gems as the centers for the flowers.

Have you tried any Make It Mine projects?  You should!  It’s pretty fun.  Go ahead and give it a try!

Have a great day! Take care and Happy Stamping!

Fun Fold: Envelope Flap Gate Fold

Envelope Flap Gate Fold Card

Last week I shared with the Graduation Cap & Gown Gate Fold Card and this week’s card is very similar.  Today I want to share with you the Envelope Flap Gatefold Card.  So fun and not too difficult. I used the Ice Cream Corner Suite of products on my card. 

Before I go into detail, I want to mention that if you like these products many of them will be retiring starting on June 1st so you may want to snap them up now before they’re gone.  The only items from the suite that are in the new 2021-2022 Annual Catalog are the Sweet Ice Cream stamp set and the Ice Cream Cone Builder Punch.

This card was fun to make and I do want to thank Debbie Crowley for her wonderful tutorial on this fun fold.  I was going to describe in detail how to make this card here on my blog but decided it was easier to write up my own tutorial with photos. Be sure to check it out for all of the dimensions and instructions on how to make the card.

Below you can see a few more photos of the card.  Can you see how similar it is to the graduation card I made last week.  The main differences is that the gate fold portion of this card is adhered to a base.  I also added ribbon to help keep the card closed.

Isn’t this a fun card? I hope you like it. There are so many different types of gate fold cards. I may have to see if I can find another one for next week’s post! Have a great day. Take care and Happy Stamping!

Tools of the Trade: Photopolymer Stamps

One of the major Tools of the Trade for paper crafters, especially those of us that stamp, would be….stamps!  I can’t believe I haven’t talked about them yet.

Stampin’ Up! Photopolymer Stamps

Stampin’ Up! makes two different types of stamps, photopolymer and cling.  Today I want to talk about Photopolymer.  Photopolymer stamps are the transparent, harder rubber stamps.  They are perfect when you need precise alignment.  You’ll find that most Two-step stamping and scene-building stamp sets are photopolymer.

The thing I love about photopolymer stamps is that you can see exactly what and where you are stamping.  I especially like this when using words or sentiments.  I wish all words and sentiments were photopolymer!  😊

Here’s how Stampin’ Up! describes their photopolymer stamps:  “Our top-quality photopolymer stamps are entirely transparent for perfect image placement, and they adhere well to our clear blocks. They’re flexible and easy to line up, giving you even more creative possibilities with each set. You can mix and match, bend, and layer images easily.”

Tips for working with photopolymer stamps:

  • Don’t just tap a photopolymer stamp on the ink pad.  Let it sit a few seconds to pick up the ink.
  • When stamping, let a photopolymer stamp sit on the paper for a few seconds before lifting it up.
  • You can’t color directly on the photopolymerstamp with Stampin’ Write markers like you can with red rubber (cling) stamps.
  • Use a Stampin’ Pierce Mat for even pressure and ink coverage when using photopolymer stamps.
  • Photopolymer stamps don’t work well with StazOn ink.  The ink makes the stamp sticky and it could pull up some of the paper you are stamping on.  If you do use StazOn ink with a photopolymer stamp be sure to clean the stamp immediately (but not with StazOn Cleaner).
  • Do not us StazOn Cleaner on photopolymer stamps.  It could ruin your stamps.
  • Photopolymer stamps stain easily but this does not affect their use.
  • You can bend photopolymer stamps.  If you have a long stamp you may want to lay it on the table in front of you and place the block on the stamp to make sure it stays straight.
  • On the other hand, you can curve your long photopolymer stamp if you want.
  • It’s best to use the Simply Shammy to clean photopolymer stamps as they can pick up lint and fibers from any type of wipe.

In the photo above you can see that Stampin’ Up!’s photopolymer stamps come sandwiched between two sheets of plastic. Older stamp sets will have the images printed on the harder piece of plastic so you can make sure you get them all back in the case when you’re done with your project.

New stamp sets will have the images printed on the paper sleeve of the stamp case. This is nice because you can then get rid of those sheets of plastic.

I do love my photopolymer stamps. How about you? Leave a comment and let me know what you think of photopolymer stamps! Have a great day! Take care and Happy Stamping!

Make It Mine: Party Puffins!

The Party Puffins stamp set was another one of those stamp sets that I didn’t think I needed. Once again, I was wrong. Sheesh! You try to be good and then someone posts a really cute card and you want to copy it.

I was looking at this adorable stamp set sitting on my shelf and knew that I wanted to use it for today’s post. So I hit the internet looking for a fun sample. Caroline’s card here was the one that caught my eye. Isn’t it cute?

If you’re looking at this fun paper and trying to figure out where it is in the catalog I’m going to give you a hint….it’s on page 171 and is a hostess only choice. Honestly, it might be worth it to host a gathering (or place a large order) just so that you can choose the Pattern Party 12 x 12 Designer Series Paper. It will only cost $18 of your hostess rewards and you get 48 sheets of 12″ x 12″ paper! One side is fun and colorful and the other side is black and white. Too fun!

Party Puffins Birthday Card

But let’s get back to the card. Of course the first thing I had to switch up on Caroline’s card was to add a few layers. Red always looks good with black and white so I added a red layer on both the front and the inside of the card.

I would have been remiss if I hadn’t included the little fishies with bows on my card. They’re actually one of my favorite parts of the stamp set! Ha!

Party Puffins Birthday Card – inside

The other thing I changed was that I just used one sentiment and put it on the inside of the card.

I was tickled with how cute this fun little card turned out and I can’t wait to make more of them! You’ll definitely see me sharing more cards using this adorable stamp set!

Have a great day! Take care and Happy Stamping!

Tools of the Trade: Adhesive Removers

I hate to break it to you but none of us are perfect. Well, there are times I think I’m close but then it’s time for that darn reality check.

It happens. While making that over-the-top card or project you got adhesive where you don’t want it. How do you get rid of it so your card doesn’t stick in the envelope?

It’s time to get that adhesive eraser out! This little square of rubber is a crafters best friend. Like many of the smaller tools that a crafter uses I have more than one laying around at any time. This little gem of a tool not only works on double-sided tape, it can also remove a residue made by liquid glue. I know this for a fact….

Then there’s the time that you’re almost done with your card and you manage to put a layer on crooked. How many times has this happened to you? Me? Too many times to count. Now it’s time for the big gun: liquid adhesive remover. There are a couple of brand names like Un-Do or Goo Gone. These are amazing! I like the Un-Do best because it has a little scraper attached to the bottle that you slip between the layers of your project while squirting out the liquid. There’s a bottle of adhesive remover sitting front and center on my desk! This stuff dries quickly too so you don’t have to wait to long to put your project together the right way! Ha!

My one disclaimer is that the liquid adhesive removers won’t get your layers apart if you’ve used liquid glue. They work best with the tape type of adhesives.

You can find adhesive erasers and adhesive removers at most craft stores and if they don’t have it the online store that carries everything has them. Stampin’ Up! used to carry the adhesive erasers but not anymore. Darn!

If you’re like me these items are a must for your craft room! Have a great day! Take care and Happy Stamping!

Make It Mine: 2 For 1

I saw this card on Pinterest and liked the simplicity of it.  It was the perfect card to showcase the gorgeous new Soft Succulent In-Color as well as the fun silhouette dies from the Meadow dies. (These dies can be bundled with the Quite Meadow stamp set).

The first thing I thought of after admiring this card was “2 for 1”!  I’m not sure if Carol die cut the floral image from the green or if she die cut it from the white and the green we see is from the background layer.  It doesn’t really matter because I saw it both ways and figured I could make two cards with one die-cut image! So that’s what I did!

Here are the two cards that I made from Carol’s inspiration. As you can see, I die cut the floral silhouette from Basic White cardstock to make the focal point for both cards.

On the white card I used the die-cut space of white cardstock as the focal point and on the Soft Succulent card I used the die-cut image.

From there I simply added layers and coordinating ribbon to finish off my cards. As I was creating these cards I kept thinking to myself that they needed something else….maybe an embossed or stamped background or something but then I decided that the simplicity of the cards made them work. Sometimes it’s good to remember that less is more.

The Meadows dies are gorgeous. There are 6 floral/greenery silhouette images along with 2 butterflies, 2 labels and some small leaves. I can’t wait to begin my next project using these dies and the coordinating Quite Meadow stamp set!

Have a great day! Take care and Happy Stamping!

Fun Fold: Cap & Gown Gatefold

It’s Monday. I know I should be writing a Make It Mine post but I absolutely just HAD to share this fun fold with you today. It’s graduation season and you might be needing to make a card or two.

If you really want to get picky about today’s post you could say that it is a Make it Mine card as well as a fun fold. The original card that I saw online was larger and fit into a Memories & More envelope sized for a 6 1/4″ x 4 1/4″ card (closed). My card that you see here fits in a regular envelope sized for 5 1/2″ x 4 1/4″ card (closed). I had to do a lot of math to figure this out but to be honest, I kind of enjoy that. 🙂

When closed all of the way this card looks a little boring but wait until you open it. You really get the full effect.

When the card is open like it is in the picture to the left you have the cap sitting on the gown. Too fun!

The first thing you have to do to make this fun card is to figure out your colors. When you choose the secondary color for the trim on the collar you need to make sure you have something the same color to make the tassel from. I went to my local craft store and purchased embroidery floss because I couldn’t find the right color in the thousands of skeins I already owned! Sheesh! If you don’t know how to make a tassel don’t worry. I’ve included that in the video below.

Here’s a couple of more pictures of the card so you can see how it looks:

As you can see, the card has a simple gatefold base and then you add the cap. I’ve cut a piece of cardstock slightly smaller than the cap and scored it diagonally. the bottom portion of this piece is adhered to the card base and the top portion is adhered to the cap. Most of the bottom portion is hidden by the white insert.

Dimensions for 3 ½” x 5 ½” Card
Base:  3 ¾” x 7”  score at 1 ¾” from each short side
Cap:  2 ½” x 2 ½”
Smaller Square to attach cap to card:  2 ¼” x 2 ¼”  score diagonally
Collar:  1 ¾” x 1 ¾” cut diagonally
Collar Edging:  2 strips 1/8” x 3”
Card Insert:  3 ¼” x 3 ½”
Cardstock to wrap tassel around:  1 ½” x 2”
Embroidery Floss or Baker’s Twine for tassel:  about 36” or more
Dimensions for 4 ¼” x 6 ¼” Card
Base:  4 1/8” x 8 ½”  score at 2 1/8” from each short side
Cap:  3” x 3”
Smaller Square to attach cap to card:  2 ¾” x 2 ¾”  score diagonally
Collar:  2 1/8” x 2 1/8” cut diagonally
Collar Edging:  2 strips 1/8” x 3 ½”
Card Insert:  4” x 4 7/8”
Cardstock to wrap tassel around:  1 ½” x 2 ¼”
Embroidery Floss or Baker’s Twine for tassel:  about 38” or more

Now that you know how to make these fun cards the question is this….what colors will you make your cards? Leave me a comment and let me know! Have a great day! Take care and Happy Stamping!

Fun Fold: Double-Flap Gatefold Card

Double-Flap Gatefold Card

It’s time for another fun fold and this week’s fun fold is another Gatefold card. It’s the Double-Flap Gatefold. As you can see from the photo, a little flap of the card front is folded back on itself. This card also has a bellyband like last week.

Do you ever finish making a card and just have to stop and smile? That’s what happened when I finished this card. It turned out even better than I imagined!

I used the gorgeous Hydrangea Hill designer paper to layer on the card base. After I made my bellyband I was stuck. I didn’t know what to use as the focal point on my bellyband. I couldn’t use anything from the Hydrangea Haven bundle because I didn’t have it! It was at this point that I regretted not owning it. But then, I noticed the Butterfly Brilliance stamp set on my shelf and thought “buttefly die!”. Of course then I had to figure out what to die-cut it from. Back to my package of designer paper and I found the perfect pattern that coordinated with the front of my card!

Now for the details on how to make this fun fold. You need to start with a piece of cardstock that is larger than your regular card base. You want a piece that is 5 1/2″ x 10 1/2″. I’ll give you a hint though. It works best if you measure just short of the 10 1/2″ mark on your cutter.

Lay your cardstock on your Simply Scored scoring tool with the long edge at the top. Score at 1″ and 3 1/8″. Now turn it over so that the other long edge is at the top and score at 1″ and 3 1/8″ again. The inside score marks will be valley folds and the outside score marks will be mountain folds.

The larger pieces of designer paper are 1 7/8″ x 5 1/4″. The smaller ones are 3/4″ x 5 1/4″. You can see how to make the bellyband on last week’s post. Before I die cut the butterfly I adhered a piece of designer paper to a piece of cardstock to give it a little more support. Instead of adhering the butterfly directly to the bellyband I die cut a small circle to adhere it to.

In the second photo you can see that I added another die-cut butterfly to the inside of the card as well as adding a layer behind the Basic White. Don’t forget to decorate the inside of your card too!

I liked this card so much I had to make two more for Mother’s Day. One for my mom and one for my mother-in-law! I hope you liked it too.

Have a great day! Take care and Happy Stamping!

Tools of the Trade: Take Your Pick Tool

Stampin’ Up!’s Take Your Pick Tool

If you’re looking for an all-around useful tool for your craft room, Stampin’ Up!’s Take Your Pick Tool is the one for you!

Here’s what Stampin’ Up! has to say about this tool:

“Multipurpose pickup and precision tool simplifies meticulous task. Includes 2 changeable, double-ended tips with paper piercer, mini spatula, small stylus, large stylus, and a tacky putty tip that easily picks up sequins, paper accents, and other small objects. Includes protective end caps.”

Wow! That’s a lot of versatility packed in to a 6 1/2″ long tool! I use a paper piercing tool all the time to pick up jewels (and their adhesive backing) for my projects. The putty tip is perfect for picking up sequins and other loose accents. You can even purchase a putty refill tip!

Die Brush Tip and Foam Mats for Stampin’ Up!’s Take Your Pick Tool

There is also a Die Brush Tip for the Take Your Pick Tool that comes with two foam mats! Die brushes are so useful when you are working with intricate dies.

Yes, you can probably find all of these tools separately at a craft store but why clutter your craft room with all those tools when you can find everything you need in one little tool!

As I mentioned before, this tool is a must-have for any craft room! Have a great day! Take care and Happy Stamping!