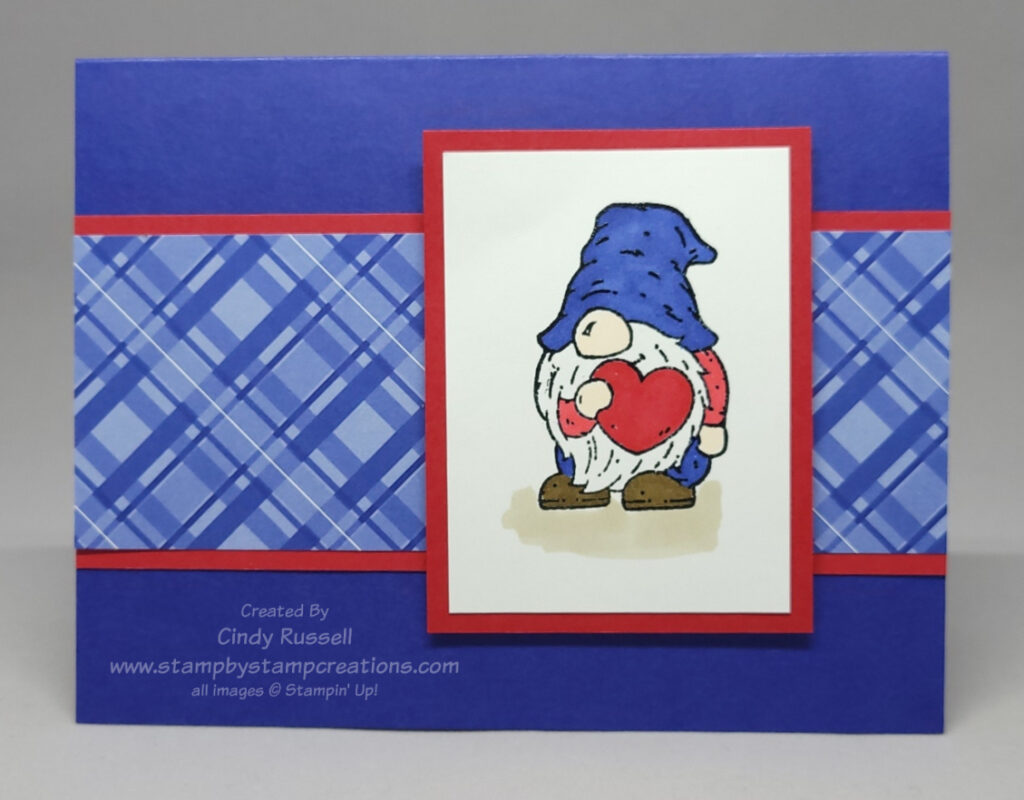
I have a thing for gnomes. They’re just so dang cute! Since it’s already February, I need to be sharing valentines with you so here is a cute gnome valentine just for you!
The Friendly Gnome stamp set is pretty darn cute. Not only does it include three adorable gnomes, it also has some fun sentiments for love, birthday and spring!
Guess what? This gnome stamp set coordinates with the Gnome Dies that were featured in the July – December 2022 Mini Catalog and that are still available online! Ah, coordination! 🙂
This card was easy to make. The hardest part was choosing the colors for the gnome! The colors I used were Starry Sky and Real Red for both the paper and the Stampin’ Blend markers. The designer paper is from the 2022-2024 In-Color package.
I heat embossed the stamped gnome with clear embossing powder after stamping the image. I do this often because sometimes the lighter colors of Stampin’ Blend Markers bleed a bit when the image is just stamped with the Memento Black ink. This also makes it a little easier to color in the lines if you’re coloring challenged like me. Ha!
This is a cute valentine to send to just about anyone. I think I might send it to my dad. Who would you send it to? Leave a comment and let me know!
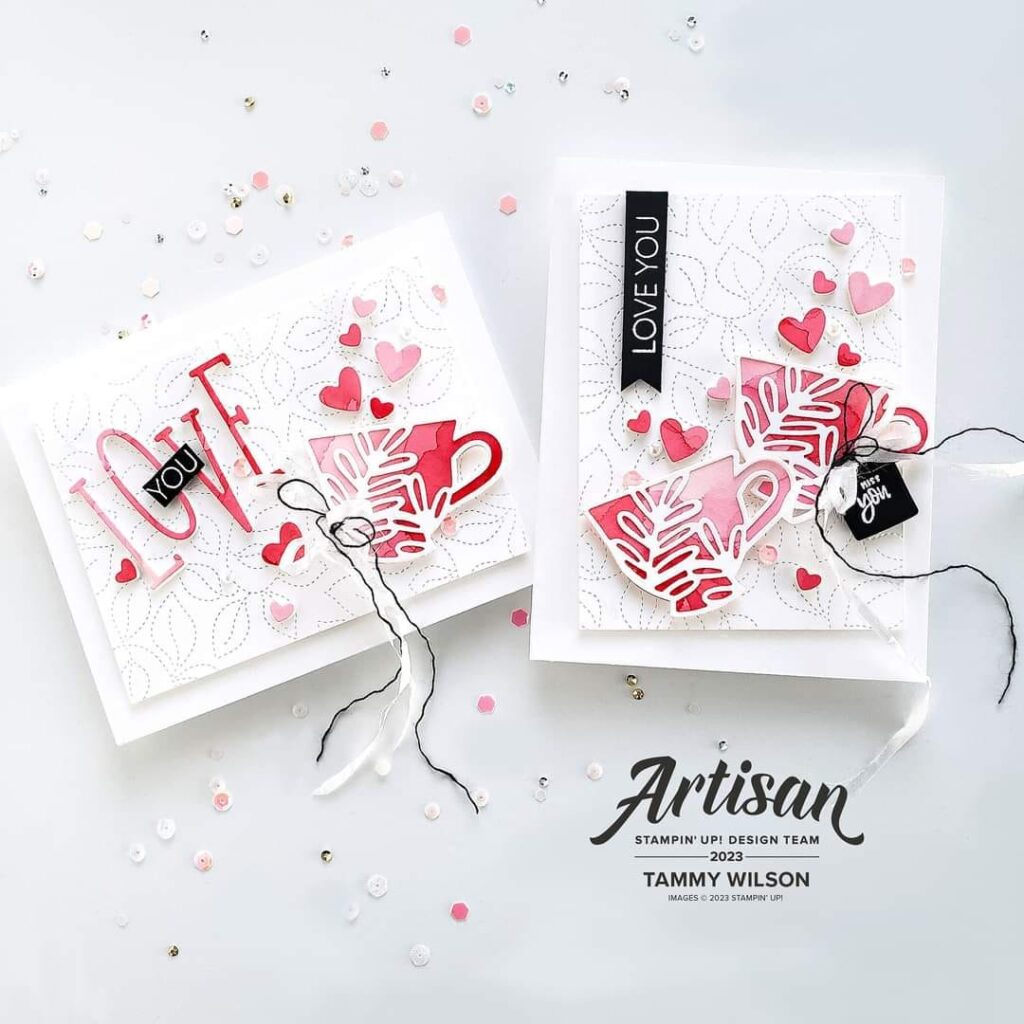
It’s valentine-making time and I couldn’t resist sharing these gorgeous cards with you!
Each year, Stampin’ Up! has an Artisan Design Team made up of demonstrators from around the world who have applied. These are talented demonstrators!
These lovely and unique cards are made by Tammy Wilson. All of the pink/red images on her card die-cut watercolor paper which she colored with ink refills. So clever! The hearts and cups are die-cut using the Teacup Dies from the Annual Catalog and the alphabet letters are die-cut using the new Alphabet a la Mode dies from the January – April Mini Catalog. The leafy background is die cut with theStitched Greenery die.
These cards aren’t really my style but I sure do love them. I may have to try making them myself. I love how something so different from your own tastes can inspire you to step outside your own little box. 🙂
I’m changing things up a little this week! I know it’s Monday and I usually do a Make-It-Mine Monday post but I couldn’t wait to share today’s card with you so you’re getting another Fun Fold card. Valentine’s Day is less than a week away so this week will be all about Valentine cards.
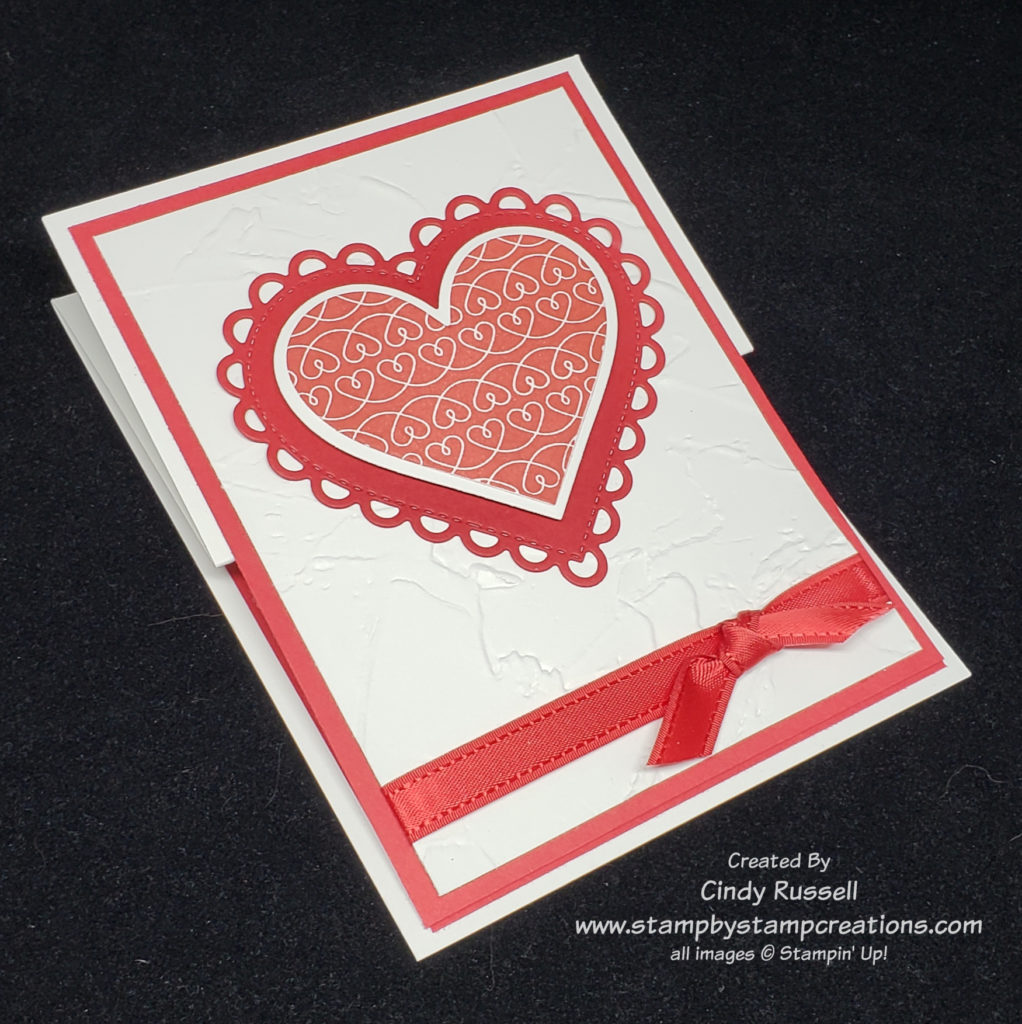
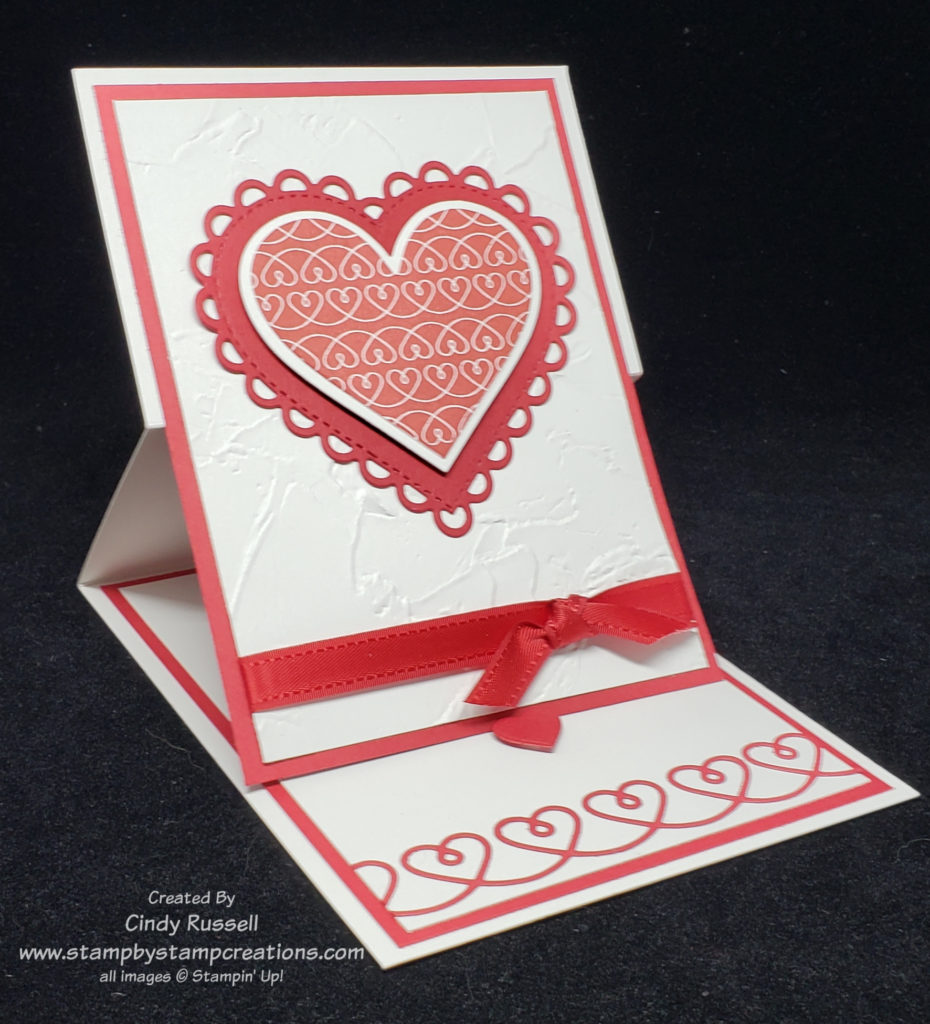
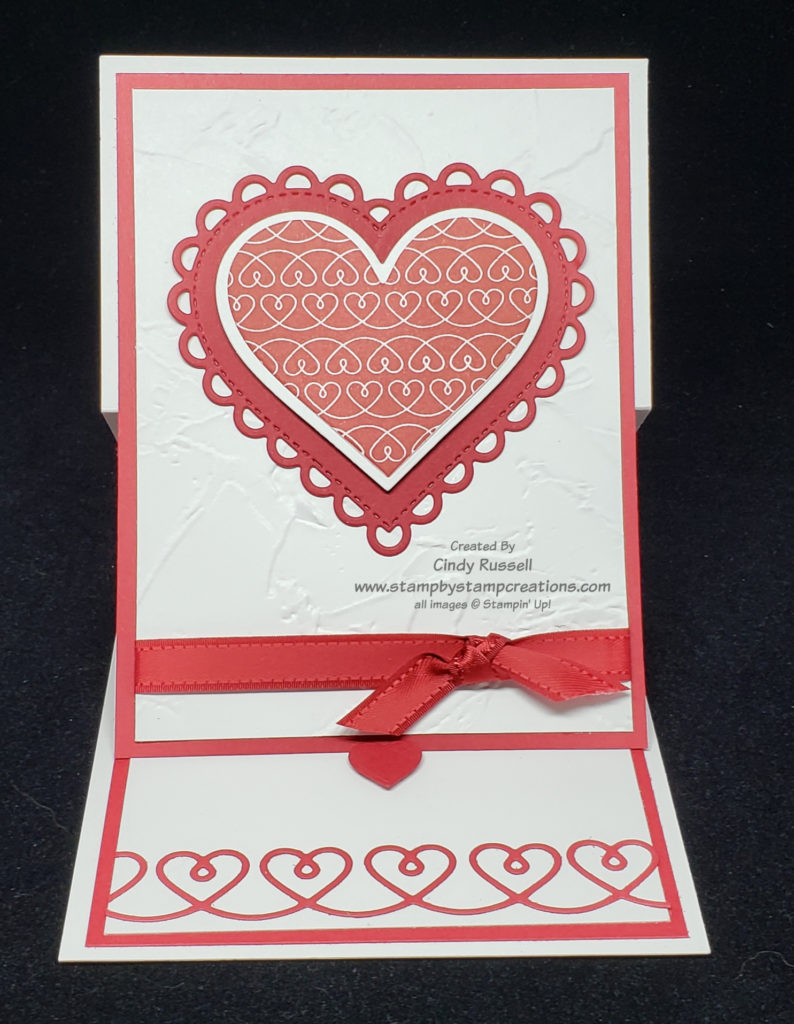
I love the Lots of Heart Bundle from Stampin’ Up!’s January – June Mini Catalog. So many hearts to choose from!
In December, I participated in a swap where I had to make about 20 of the same card, send them in and then get 20 different cards back. Swaps are fun to do because you get so many new ideas.
I tend to get carried away when I participate in swaps. I usually try to do a fairly fancy card and this swap was no exception. I knew I wanted to use the fabulous stamp set. There is a checked heart in the stamp set that I started my design with but when you look through the other photos in this post you’ll see why I changed things up.
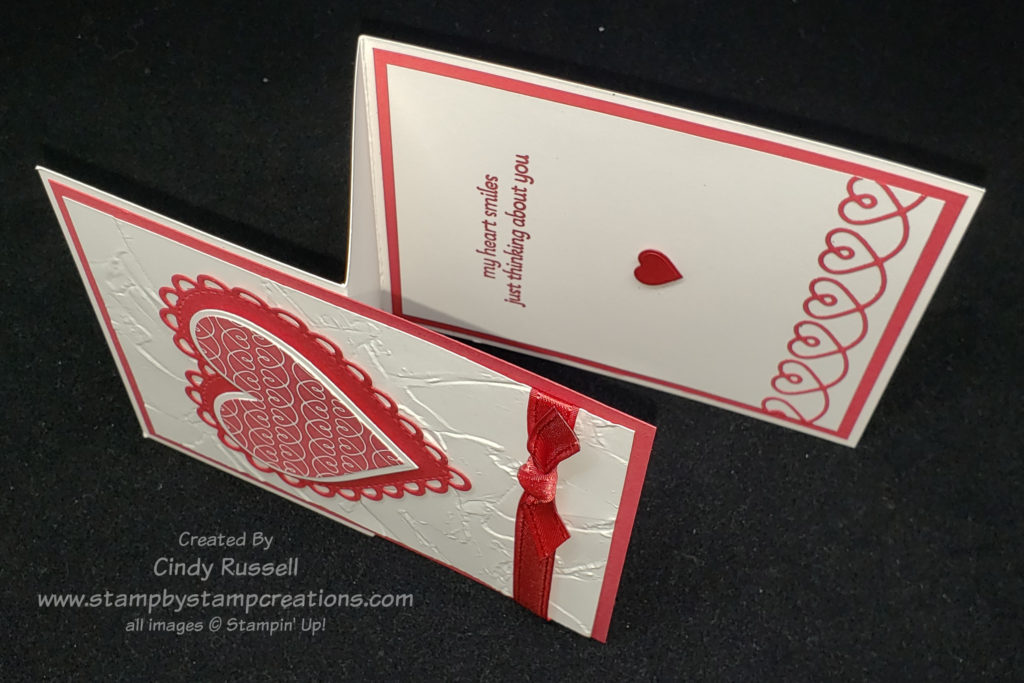
Last Friday, I shared with you the Basic Z-Fold card. I told you that after you make your card base into a Z you usually add a smaller panel to the front piece as your focal point. With this Easel Z-Fold card, instead of adding a smaller panel I added a large panel that was almost the size of the regular card. This larger piece actually forms the “easel” portion of my card. To help the easel stand up I popped up a small heart on the inside of the card. This little popped up heart then holds the easel open.
Can you see why I didn’t use the checked heart on my card and used the swirly heart stamp? I just had to use the swirly heart dies at the bottom of my card and there just happened to be a swirly heart stamp that worked perfectly on the front! Can you say “coordination”?
The key to this design was the large pieces of Real Red cardstock. I first adhered the inside piece to the inside of the card base. I then closed the card and lined up the front piece of Real Red cardstock directly over the inside piece of red cardstock. This way you can’t see the inside portion of the card until you open it.
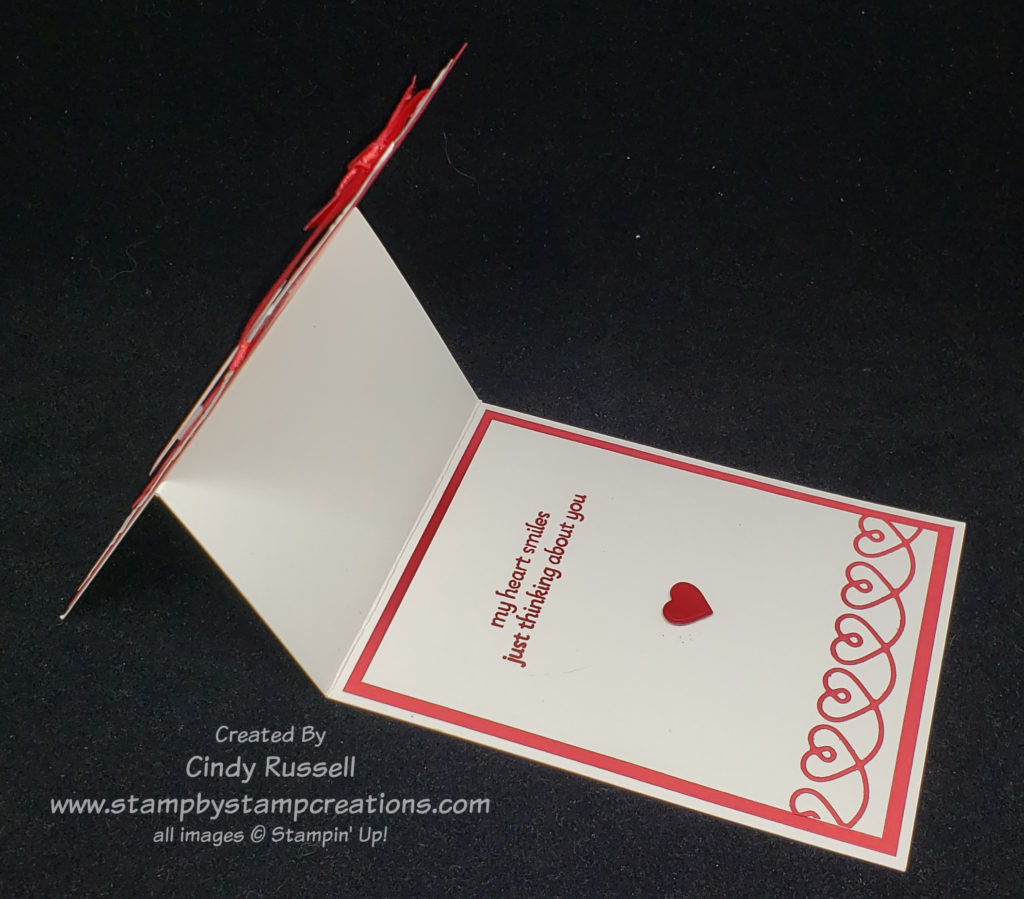
I didn’t get a great picture of the inside of the card but the sentiment says “my heart smiles just thinking about you”. I love that it’s not your typical Valentine sentiment which makes this stamp set perfect for any occasion.
It’s time for another Fun Fold post! Last week, with my first Fun Fold post, we went back to the beginning. I talked about the different ways to cut your cardstock and the different orientations you can have your cards when starting with an 8 1/2″ x 11″ piece of cardstock.
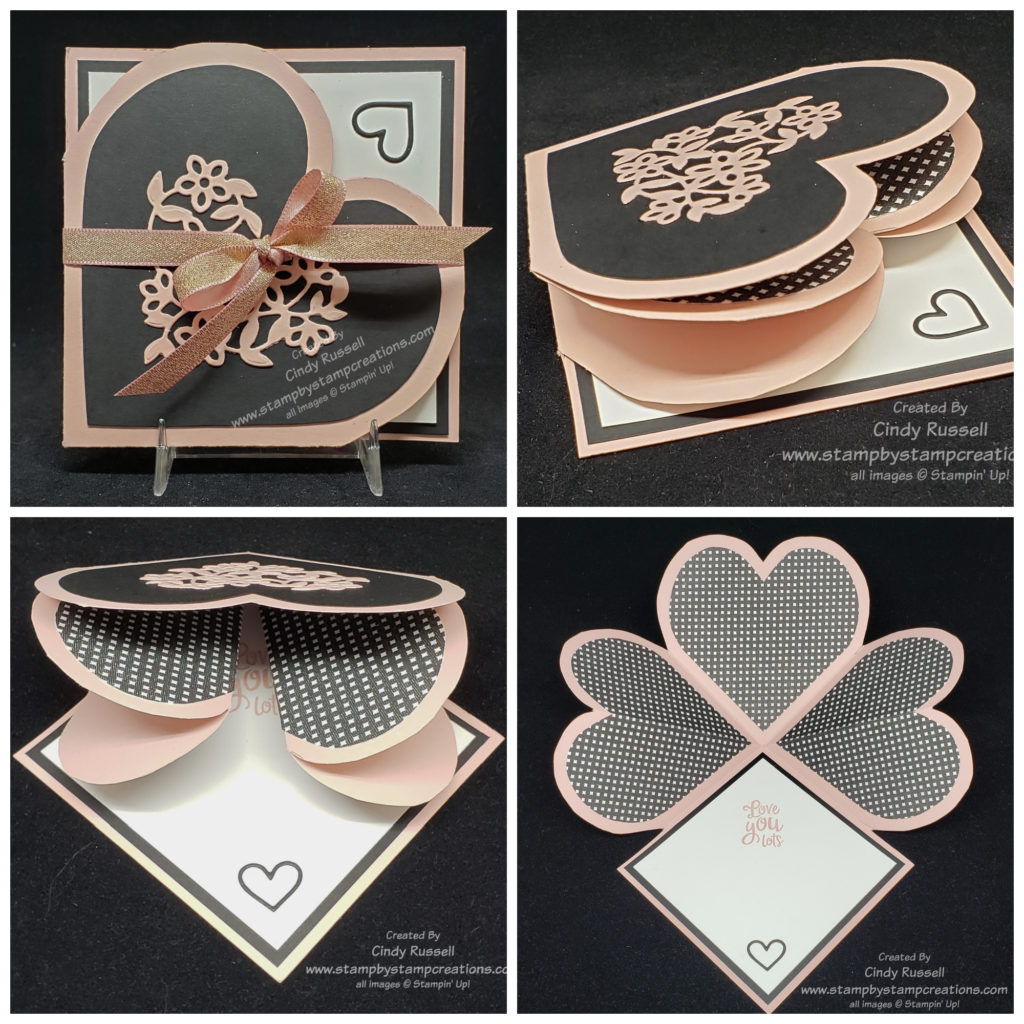
This week I was going to share a simple and popular fun fold but when I was hopping around the internet looking for ideas I came upon this fun design! With Valentines Day coming up soon I knew I had to share this fun Squashed Heart Fun Fold Card with you.
Fun Fold: Squashed Heart Card
This card might look like it’s complicated to make but it really is pretty easy. The hardest part in making it was coming up with the right size heart. Don’t worry. If you’re hoping to recreate this card design I’ve included a template for the heart at the end of this post. 🙂
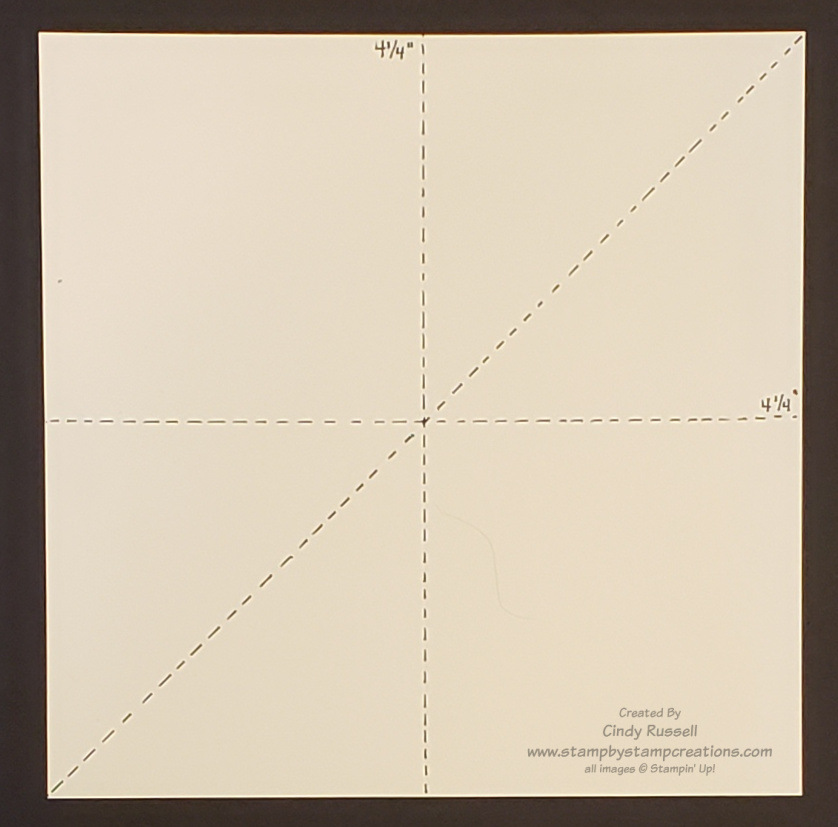
Start this project with a piece of cardstock that is 8 1/2″ x 8 1/2″ square. Score one side at 4 1/4″. Turn the cardstock 90 degrees and score again at 4 1/4″. You should now have four equal squares. Now score from one corner to the opposite corner. It doesn’t matter which corner you start in.
Squashed Heart Card
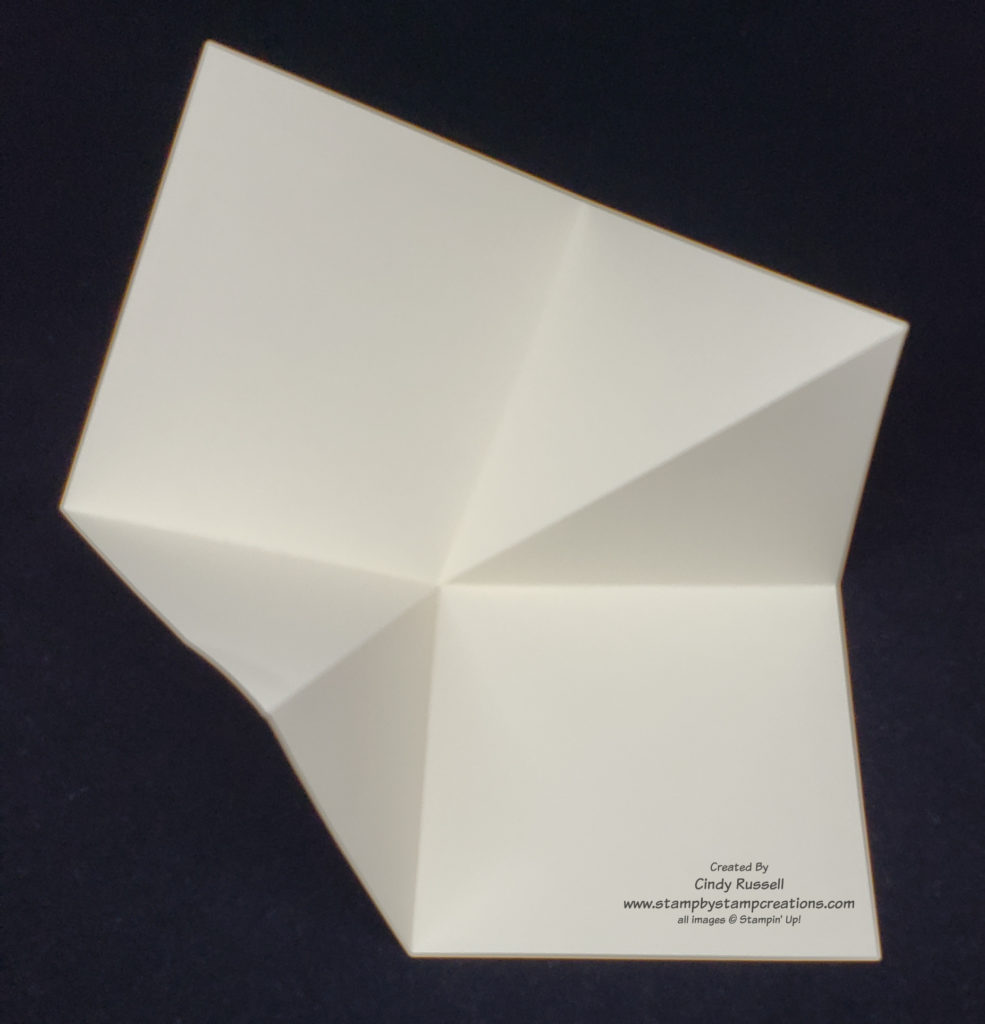
Fold and crease all score lines well. The key to this design is folding the diagonal line in the opposite direction that you folded the other two lines. Fold the square lines in valley folds and the the diagonal fold in a mountain fold.
As you can see in the first picture above, the diagonal line is folded in the opposite direction of the other two lines. In the second picture you can see how to fold, or squash, the card. Push in on the two diagonal folds and your folded card will become a square.
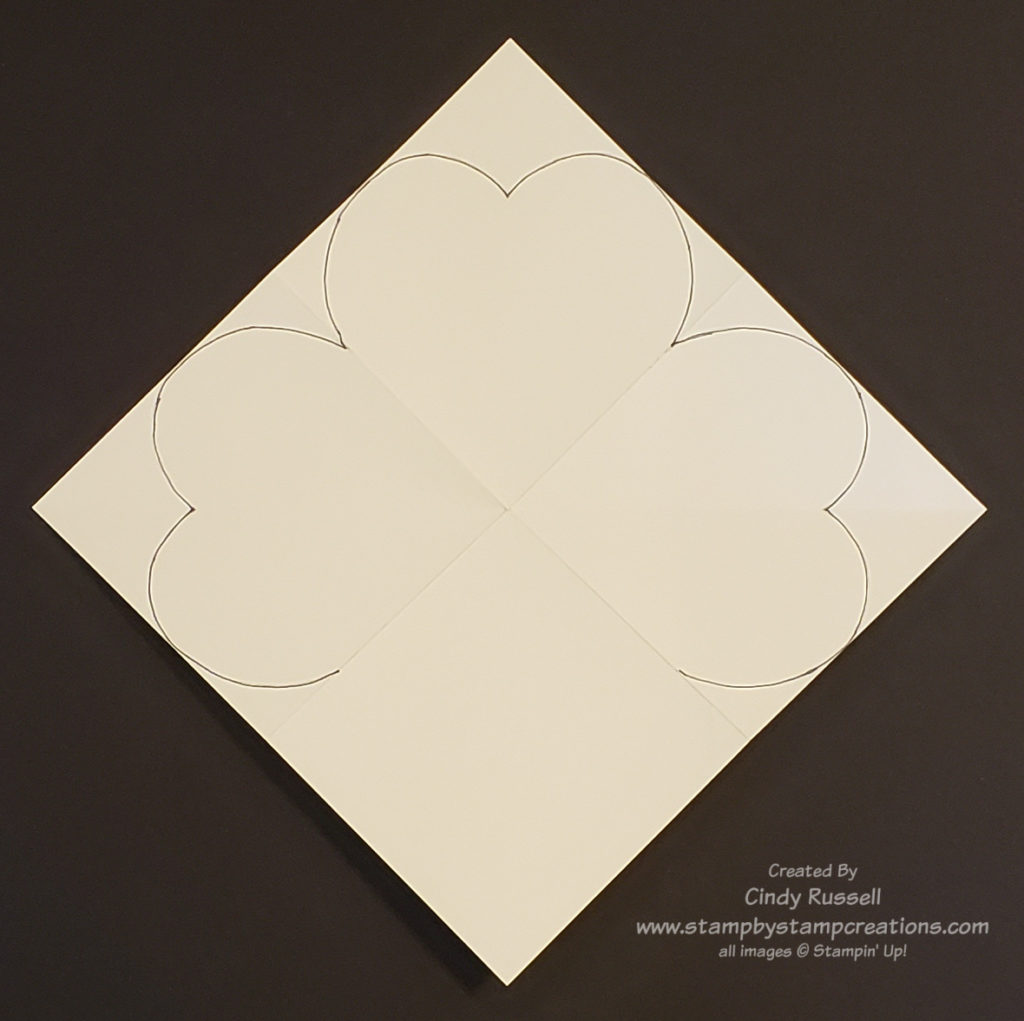
Now we need to make the hearts. In the video that I watched on making this card the gal simply took her scissors and cut the hearts. I knew that wouldn’t work for me. After many failed trials I finally came up with a heart that fit perfectly.
Once you have your template, you want to draw it on the two squares with diagonals and one of the flat squares.
It’s hard to tell in my photo above but the two side hearts are the ones with the diagonal score marks through them. Cut along the drawn lines to form the tops of your hearts. With the two side hearts you will need to cut from the edge of the paper to where the heart outline begins. If you look at the collage photo of the card at the beginning of the post you can see what I mean in the last photo.
You can find the template for the heart here. Are you wondering how you can mail or even present this card? What size envelope would work? The finished, closed card is 4 1/4″ x 4 1/4″ so it will fit in a normal Stampin’ Up! envelope that is about 5 3/4″ x 4 3/8″ with a little extra room in one direction. However…..next session I will share with you how to create your own envelope which is perfectly sized for this card along with tips on making any size envelope. So stay tuned!
I hope you’ve enjoyed viewing this fun card. Please leave a comment if you did. Be sure to contact me with any questions you may have either in the comments or by email (cindy@stampbystampcreations.com).