Make-It-Mine (Thursday): Lots of Heart

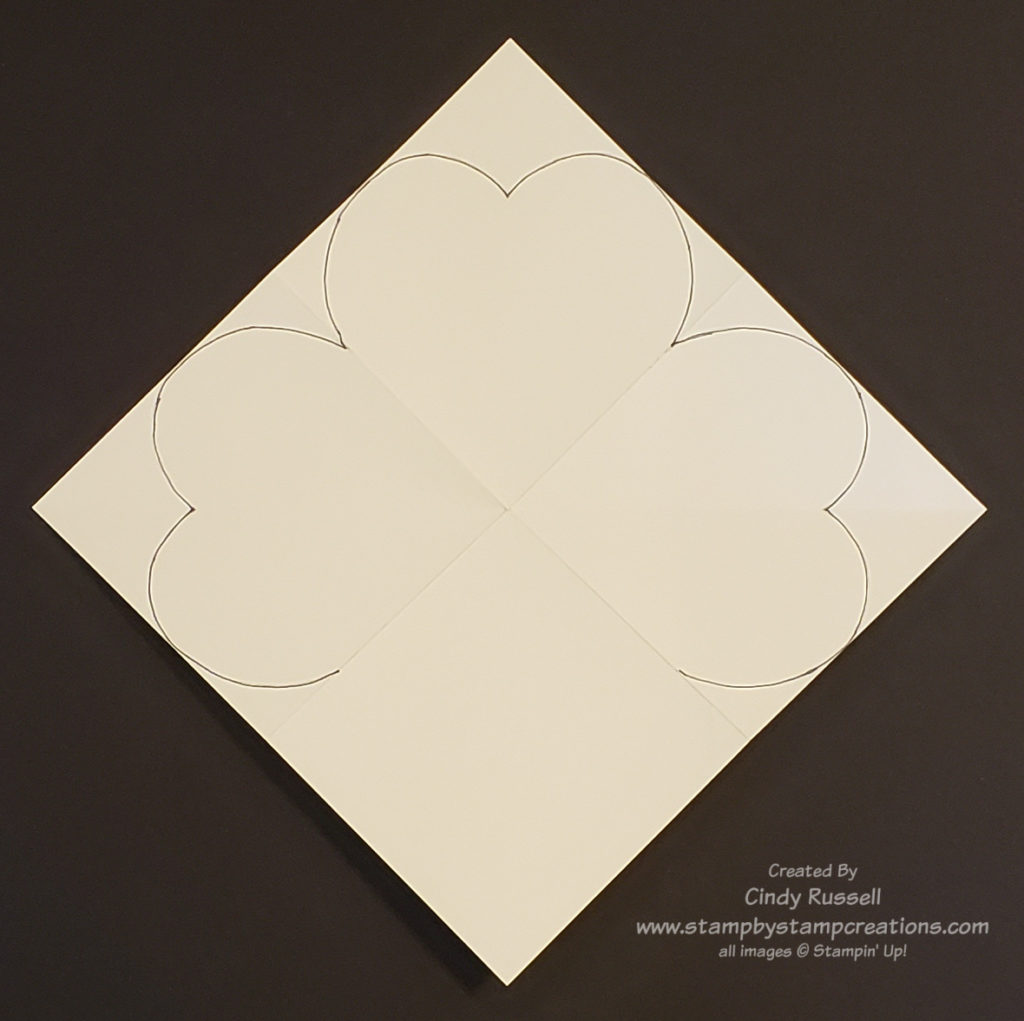
If you read my blog post on Monday you are aware that I am changing things up a bit this week. Monday was a fabulous Easel Fun Fold. Today will be Make-It-Mine and tomorrow will be a Tools of the Trade post. I hope I don’t throw anyone off too much! Ha!

Lots of Heart in pink

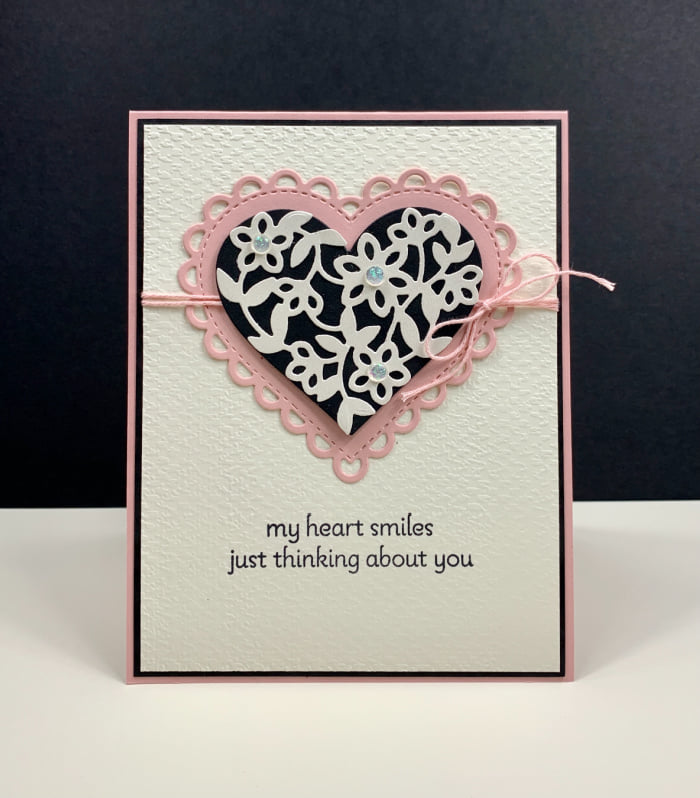
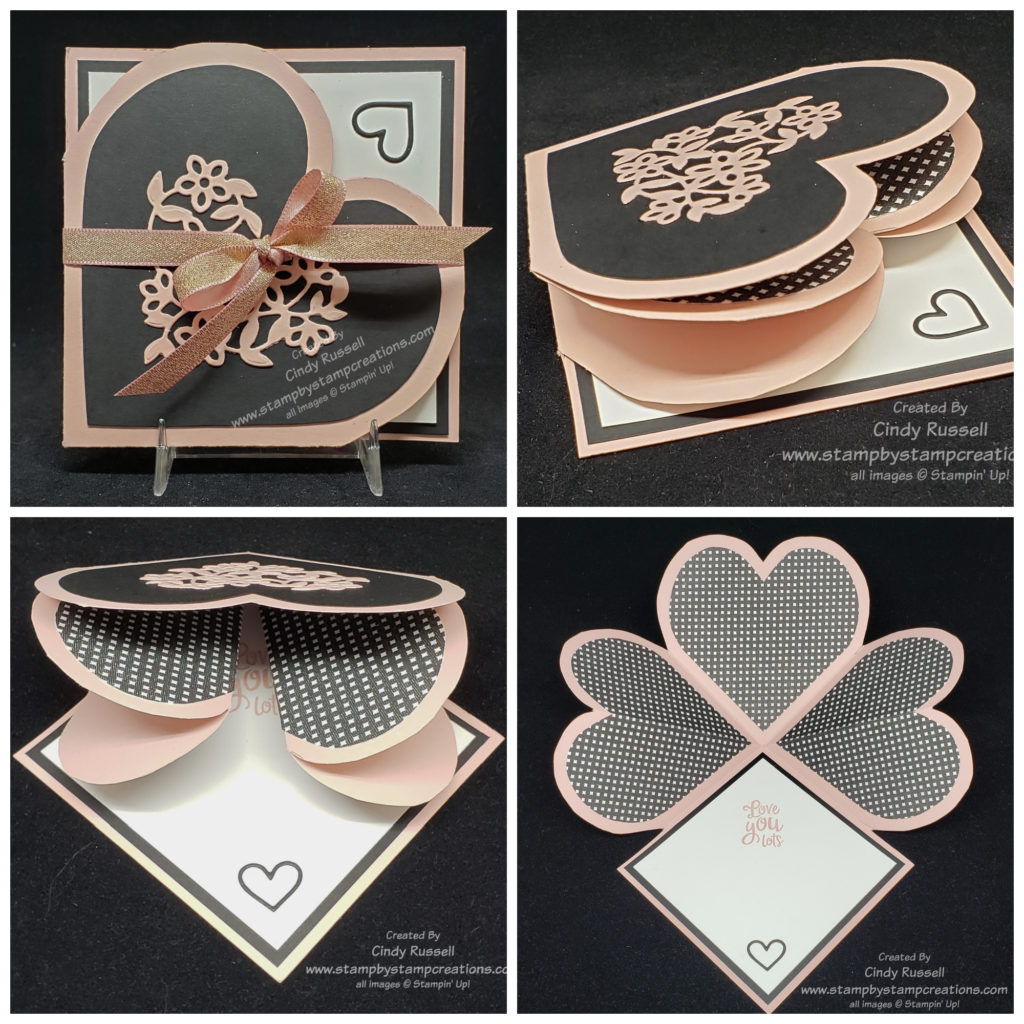
I love the Lots of Heart bundle.  Not only are the stamps in the bundle fabulous but the dies are great too!  Check out this card I found on the internet.  Isn’t the floral heart lovely?  And the large pink scalloped heart is the perfect background.  Even though the checked heart (my favorite from the stamp set) isn’t used on this card I couldn’t resist trying to copy it and Make-It-Mine.

Naturally I got carried away.  The only things I really copied were the card design itself and the basic colors. I’m sure this doesn’t surprise you. If I’m going to make a card my own I like to go for it. 🙂

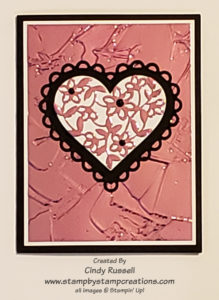
When I was getting started on my version my eye caught the Love You Always Foil Sheets in my craft room and I knew I had to give them a try.  Not only did I use the Rococo Rose Foil Sheets for my floral heart but I decided to give them a try on the background.  But I couldn’t just use the foil sheet plain, I wanted to see how it looked embossed with my new favorite embossing folder – The Painted Texture Embossing Folder!

I love it!  My version turned out perfectly!  The card I copied is soft and sweet but I think my version is shiny and bright.  Fun!  Don’t be afraid to experiment a little when making someone else’s card your own.

I need to tell you that it’s really difficult to photograph a card with with so much foil sheet on it. It’s so shiny! It not only reflects the light but a lot of time you get your own reflection in it. I hope you get at least an idea of how pretty this card really is.

Have a great day! Take care and Happy Stamping!

Fun Folds: Squashed Heart Card

It’s time for another Fun Fold post! Last week, with my first Fun Fold post, we went back to the beginning. I talked about the different ways to cut your cardstock and the different orientations you can have your cards when starting with an 8 1/2″ x 11″ piece of cardstock.

This week I was going to share a simple and popular fun fold but when I was hopping around the internet looking for ideas I came upon this fun design! With Valentines Day coming up soon I knew I had to share this fun Squashed Heart Fun Fold Card with you.

Fun Fold: Squashed Heart Card

This card might look like it’s complicated to make but it really is pretty easy. The hardest part in making it was coming up with the right size heart. Don’t worry. If you’re hoping to recreate this card design I’ve included a template for the heart at the end of this post. 🙂

Start this project with a piece of cardstock that is 8 1/2″ x 8 1/2″ square. Score one side at 4 1/4″. Turn the cardstock 90 degrees and score again at 4 1/4″. You should now have four equal squares. Now score from one corner to the opposite corner. It doesn’t matter which corner you start in.

Squashed Heart Card

Fold and crease all score lines well. The key to this design is folding the diagonal line in the opposite direction that you folded the other two lines. Fold the square lines in valley folds and the the diagonal fold in a mountain fold.

As you can see in the first picture above, the diagonal line is folded in the opposite direction of the other two lines. In the second picture you can see how to fold, or squash, the card. Push in on the two diagonal folds and your folded card will become a square.

Now we need to make the hearts. In the video that I watched on making this card the gal simply took her scissors and cut the hearts. I knew that wouldn’t work for me. After many failed trials I finally came up with a heart that fit perfectly.

Once you have your template, you want to draw it on the two squares with diagonals and one of the flat squares.

It’s hard to tell in my photo above but the two side hearts are the ones with the diagonal score marks through them. Cut along the drawn lines to form the tops of your hearts. With the two side hearts you will need to cut from the edge of the paper to where the heart outline begins. If you look at the collage photo of the card at the beginning of the post you can see what I mean in the last photo.

You can find the template for the heart here. Are you wondering how you can mail or even present this card? What size envelope would work? The finished, closed card is 4 1/4″ x 4 1/4″ so it will fit in a normal Stampin’ Up! envelope that is about 5 3/4″ x 4 3/8″ with a little extra room in one direction. However…..next session I will share with you how to create your own envelope which is perfectly sized for this card along with tips on making any size envelope. So stay tuned!

I hope you’ve enjoyed viewing this fun card. Please leave a comment if you did. Be sure to contact me with any questions you may have either in the comments or by email (cindy@stampbystampcreations.com).

Have a great day! Take care and Happy Stamping!