Make It Mine With Daisy Garden

Daisy Garden

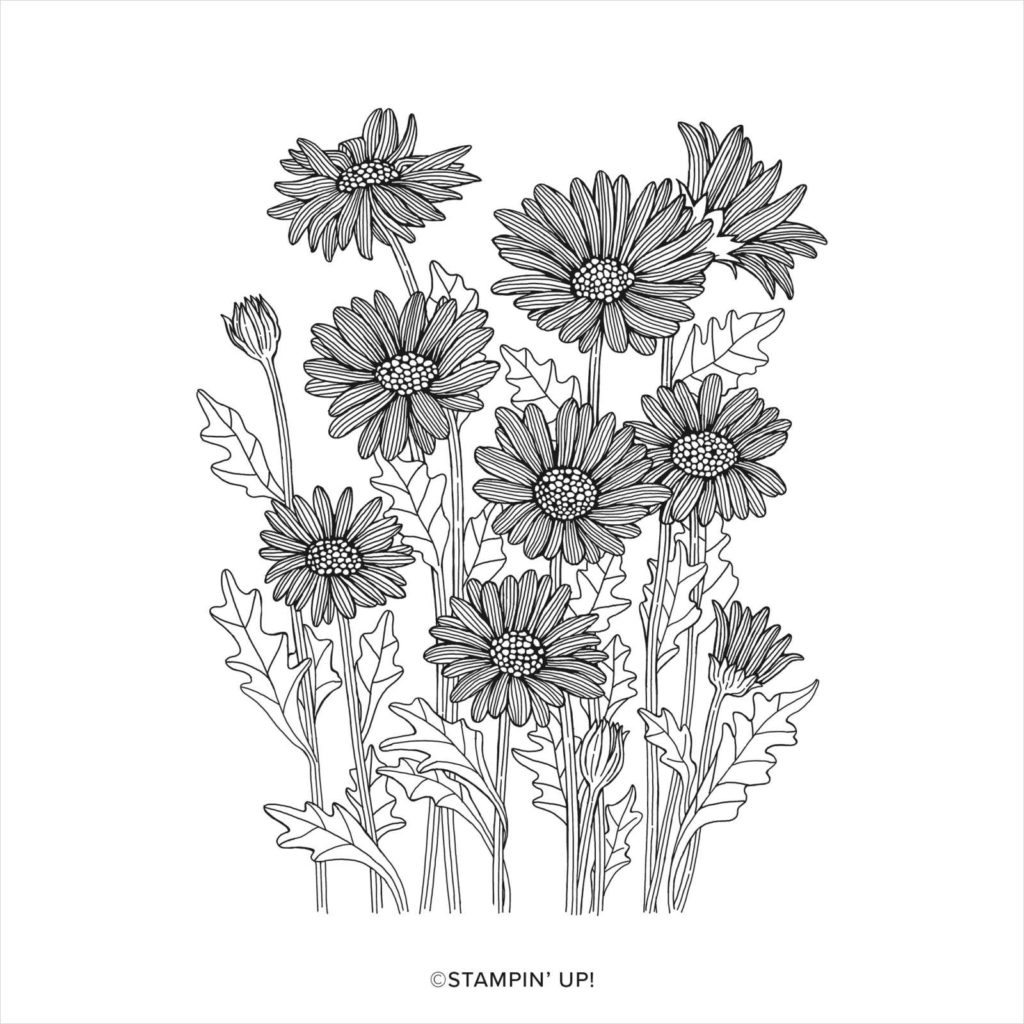
You may have missed the Daisy Garden stamp on your first, second and maybe even third time through Stampin’ Up!’s Annual Catalog. It’s a hidden gem on page 106. The colored samples on the page are what catch your eye and the image of the stamp is on the smaller size.

Daisy Garden is a single large stamp. It’s perfect for backgrounds but also works well as a focal point. Once I finally noticed it I knew I needed it on my stamp shelf. Who doesn’t like daisies? (wink, wink!)

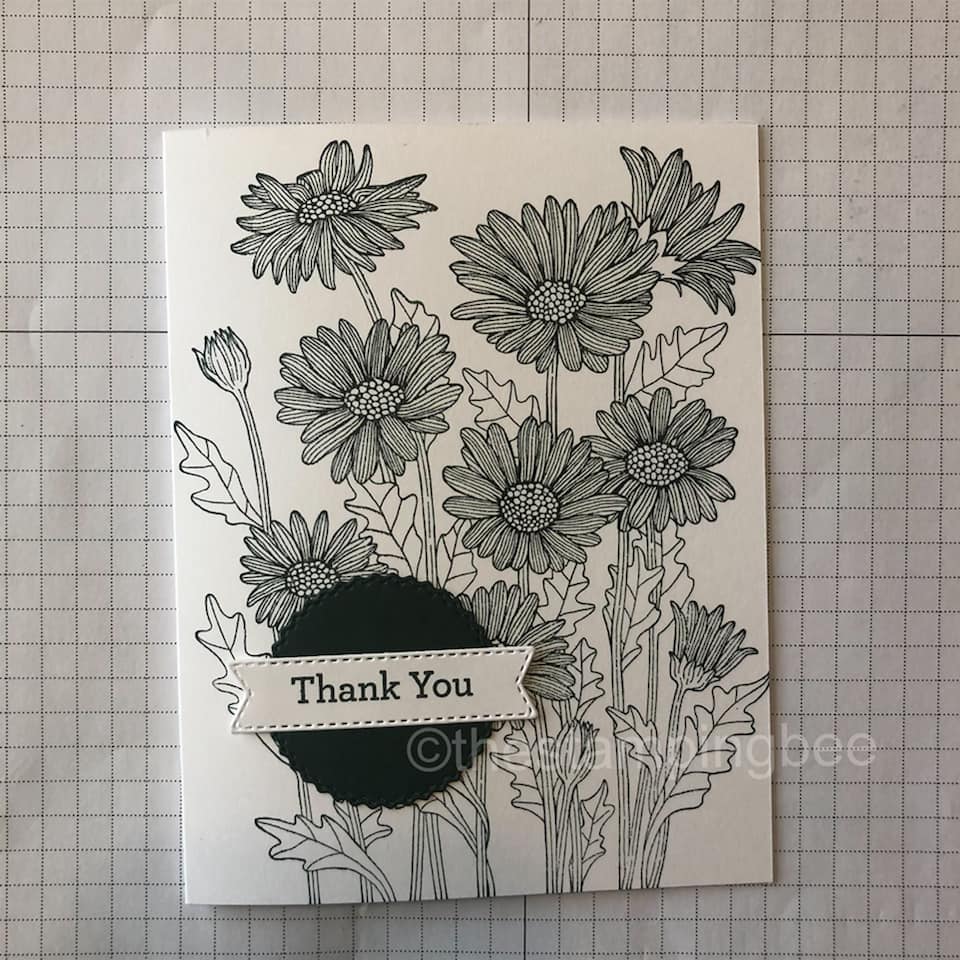
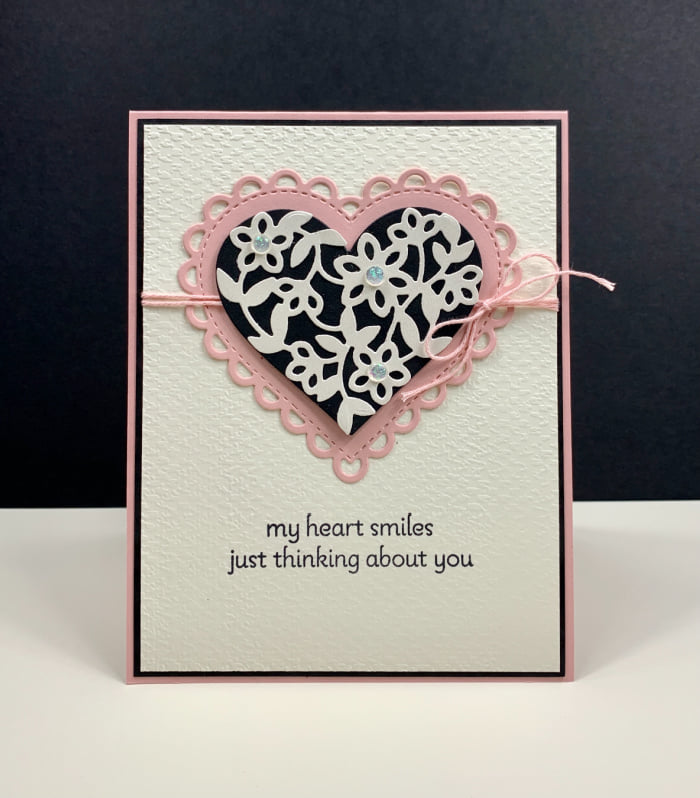
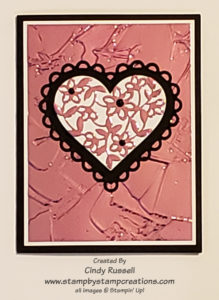
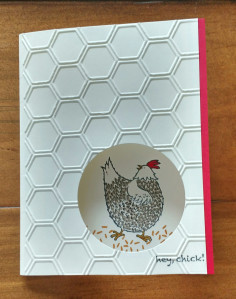
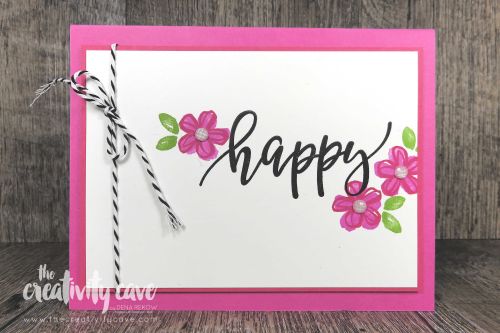
When looking for a card to make with the fun Daisy Garden stamp I came across this striking black and white card. It’s simplicity caught my eye. There I go again with the simple cards. My tastes must be changing. Anyway, I liked this card so much I decided to Make It Mine.

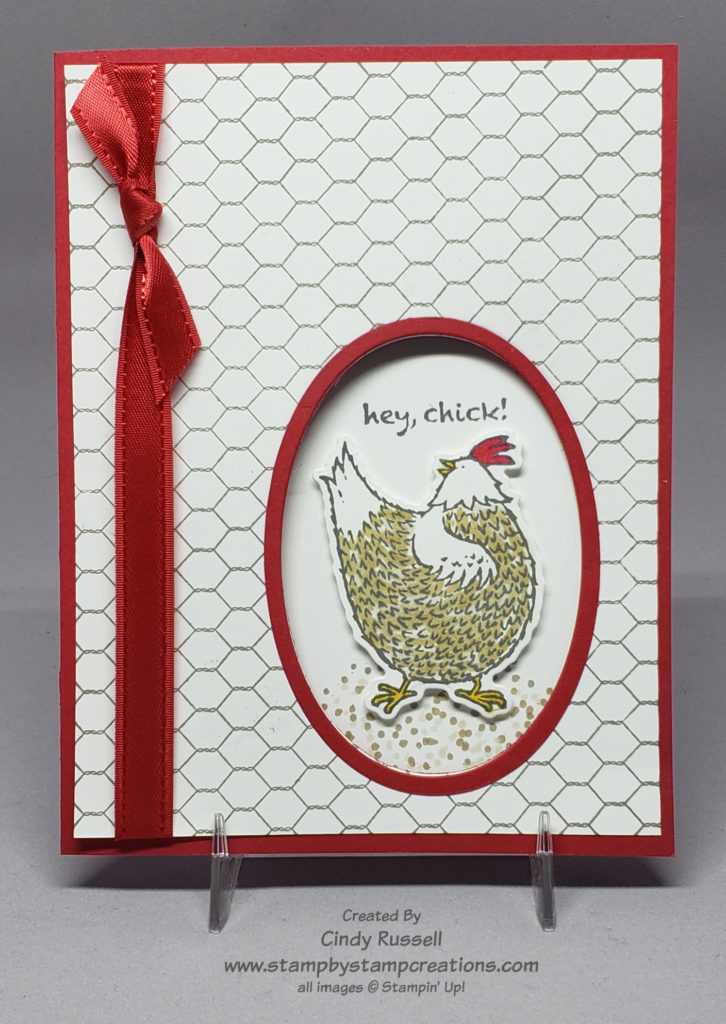
The first thing I had to do was add another layer to the card. You know me and my layers. Then I decided it needed a little color so I added the layer of Bumblebee cardstock and colored the centers of the flowers with my Bumblebee Stampin’ Write Marker. Next was adding the Bumblebee Gingham Ribbon.

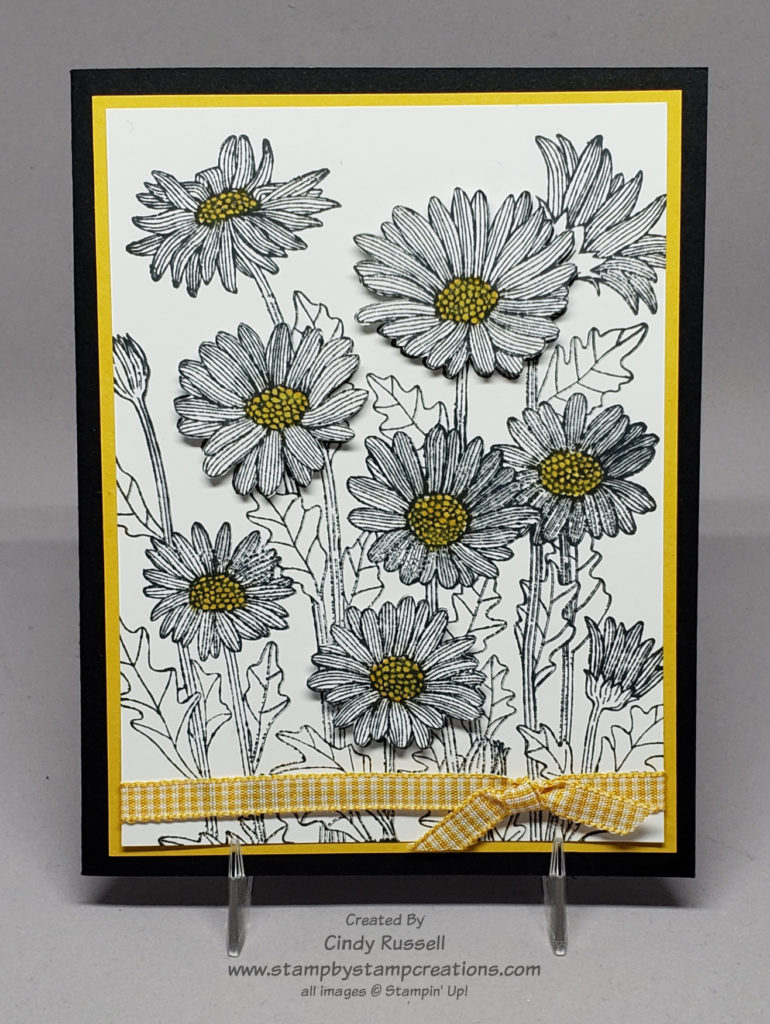
As you can see from the photo of my card I didn’t stop there. I liked the card but it looked a little flat. I had seen another card online where the creator had stamped the daisies a second time, cut out three of them and popped them on to the card with Stampin’ Dimensionals. So that’s what I did and it made the card just right! It gave the card a little dimension.

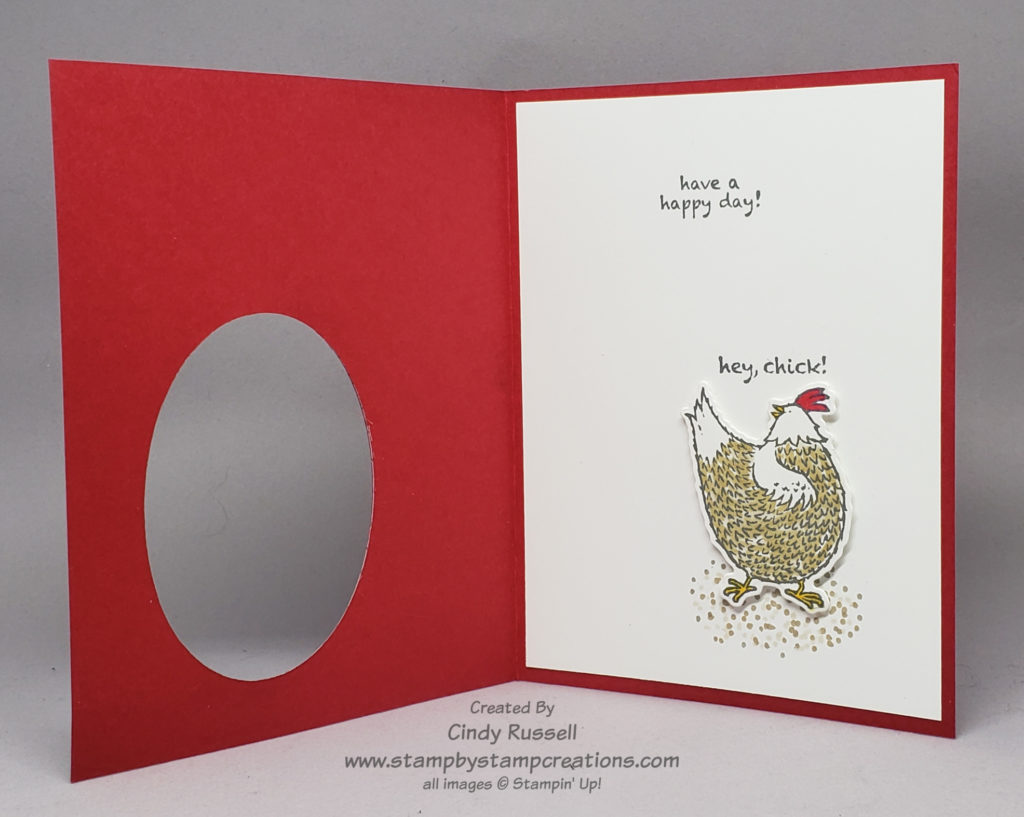
What you can’t see from the phot is that I also added a little Wink of Stella Glitter Brush to the centers of the flowers. Such a fun and summery card! I love the way it turned out!

Have a great day! Take care and Happy Stamping!

Dutch Door Fun Fold Card

What the heck is a Dutch Door and how can you make it into a fun fold card?

Dutch Door

In the first photo above you can see what a Dutch Door is. It’s one of those doors where the top and bottom of the door open separately. The second photo is the adorable card I’m sharing with you today.

I know, you’re looking at the photos thinking that the card doesn’t look anything like the Dutch Door. It looks like a regular card.

That’s what is so fun about this design. Check out the photo on the left. You can now see that only the bottom of this card opens! Sneaky, right?

The top section of the front of the card base is trimmed away. The focal point is then adhered to the bottom section of the card front so when it’s closed it looks like a normal card.

I lined up the short edge of the card front at the 2 3/4″ mark on my paper trimmer and cut down to the fold. Then I lined up the fold of the card on the cutting line and cut down to the edge of the paper. Easy Peasy. All that was left to do was decorate!

The adorable Penguin Place stamp set from the new Mini Catalog and the coordinating Penguin Playmates Designer Series Paper from the Sale-a-bration Brochure were the perfect choices for this card. Cheerful and fun!

The two pieces of designer paper as well as the Basic White insert for the card all measure 4″ x 2 1/2″. When adhering the focal point to the card base just remember to put your adhesive (I used Stampin’ Dimensionals) on the lower portion of the card.

Have a great day! Take care and Happy Stamping!

Fun Fold: Panel Card

Panel Card Fun Fold

This Fun Fold card is so fun and easy!  Four score marks, gorgeous designer paper and some coordinating pieces of paper for the layers.  I used Stampin’ Up!’s absolutely stunning Peaceful Place Specialty Designer Series Paper that you will be able to find on page 37 of the new (Holiday) Mini Catalog.  The only colors in this package of papers are Smoky Slate, Basic Gray, Basic Black and Silver.  Amazing!  You will definitely want to check out this paper.

For the card base of this fun fold card you start with a piece of cardstock that is 8 ½” x 5 ½”.  Score along the long side at 1 7/8”, 3”, 5 ½” and 6 5/8”.  When folding along the score lines the two outside score marks will be valley folds and the two inside score marks will be mountain folds.  When folded closed, the card measures 5 ½” x 4”.

The sheet of designer paper that I chose for this card has large snow-covered trees on the bottom portion and silver snowflakes falling from the sky on the top portion.  I used the top portion for my two outside panels and cut them 5 1/8” x 1 ½”.  Then I used one of the smaller trees and cut a panel that is 5 1/8” x 2 1/8”.  I cut the silver foil layers 5 ¼” x 1 5/8” (2x) and 5 ¼” x 2 ¼”.

I did add a piece of Basic White cardstock to the back of the large panel so I could add a sentiment.  Since I didn’t have the coordinating Peaceful Cabin stamp set (which is on my wish list!) yet I had to search my stash for a sentiment that would fit.  Most of the sentiments in the Peaceful Cabin stamp set should fit perfectly.  I guess I’m going to put that on my August shopping list so I can recreate this card!

After looking at the Peaceful Place Suite in the new Mini Catalog it dawned on me that I could maybe “close” my card with a belly band of the gorgeous White Glittered Organdy Ribbon.  Of course, as I was grabbing it off my ribbon shelf I noticed the Black Glittered Organdy Ribbon.  Oh, dear. Decisions, decisions!  Since I couldn’t decide, I cut a 20” piece of each of the ribbons and made two belly bands.  Now I need your help?  If you were going to recreate this card which ribbon would you use for your belly band?  White or Black?  Please let me a comment below and help me make this decision!  Have a great day!  Take care and Happy Stamping!

Fun Fold: Interlocking Gatefold Card

Interlocking Gatefold Card

Can you believe that I found another type of gatefold card?  There are SO many and they’re SO fun!  This fun fold isn’t too difficult, especially since I used the Stitched Rectangles Dies to make my interlocking pieces.  What’s really fun about this fun fold is that you can use any kind of shape(s) to make your interlocking pieces!

The base of my card is the usual for a gatefold card. 5 ½” x 8 ½”.  Score in from each short side at 2 1/8” and make sure the sides meet in the middle of the card base when you fold both sides in towards the center.

The frame of my card is made from Stampin’ Up!’s gorgeous Beauty of the Earth Designer Series Paper.  (Yes, this is one of the patterns that is on sale this month!).  To give my frame a little extra support I adhered a piece of the designer paper to a piece of Basic White cardstock before die cutting.  To make the frame I chose two different sized rectangles.  I first die cut the inside of the frame with the rectangle that is the 5th largest (outside measures about 2 3/8” x 3 ¾”).  Then I centered the 3rd largest frame (outside measure about 3 1/8” x 4 ½”) around the opening I had created.  When you go to adhere the frame to the card remember that you only want to adhere the left side of the frame to the left flap on the front of the card.

The solid Basic White piece that interlocks with the frame was also die cut from the 3rd largest rectangle of the Stitched Rectangle Dies.  The stitched design I added to this piece of Basic White cardstock is a border piece from the Stitched Leaves Dies.  I die cut the leaf using the same die set.  It is die-cut from another piece of designer paper from the Beauty of the Earth package.  I love gorgeous paper!

When I adhered the right side of the Basic White piece of cardstock to the right flap of the card base I had the card closed so that I could make sure that it fit perfectly inside of the die-cut frame.  Then I added the die-cut leaf and decorated with a piece of linen thread.  Done!  Oh…in the last picture did you notice that I added a little strip of designer paper to the piece of cardstock on the inside of the card?  Don’t forget to decorate the inside!

Interlocking Gatefold Card

Have a great day! Take care and Happy Stamping!

Fun Fold: Envelope Flap Gate Fold

Envelope Flap Gate Fold Card

Last week I shared with the Graduation Cap & Gown Gate Fold Card and this week’s card is very similar.  Today I want to share with you the Envelope Flap Gatefold Card.  So fun and not too difficult. I used the Ice Cream Corner Suite of products on my card. 

Before I go into detail, I want to mention that if you like these products many of them will be retiring starting on June 1st so you may want to snap them up now before they’re gone.  The only items from the suite that are in the new 2021-2022 Annual Catalog are the Sweet Ice Cream stamp set and the Ice Cream Cone Builder Punch.

This card was fun to make and I do want to thank Debbie Crowley for her wonderful tutorial on this fun fold.  I was going to describe in detail how to make this card here on my blog but decided it was easier to write up my own tutorial with photos. Be sure to check it out for all of the dimensions and instructions on how to make the card.

Below you can see a few more photos of the card.  Can you see how similar it is to the graduation card I made last week.  The main differences is that the gate fold portion of this card is adhered to a base.  I also added ribbon to help keep the card closed.

Isn’t this a fun card? I hope you like it. There are so many different types of gate fold cards. I may have to see if I can find another one for next week’s post! Have a great day. Take care and Happy Stamping!

Fun Fold: Double-Flap Gatefold Card

Double-Flap Gatefold Card

It’s time for another fun fold and this week’s fun fold is another Gatefold card. It’s the Double-Flap Gatefold. As you can see from the photo, a little flap of the card front is folded back on itself. This card also has a bellyband like last week.

Do you ever finish making a card and just have to stop and smile? That’s what happened when I finished this card. It turned out even better than I imagined!

I used the gorgeous Hydrangea Hill designer paper to layer on the card base. After I made my bellyband I was stuck. I didn’t know what to use as the focal point on my bellyband. I couldn’t use anything from the Hydrangea Haven bundle because I didn’t have it! It was at this point that I regretted not owning it. But then, I noticed the Butterfly Brilliance stamp set on my shelf and thought “buttefly die!”. Of course then I had to figure out what to die-cut it from. Back to my package of designer paper and I found the perfect pattern that coordinated with the front of my card!

Now for the details on how to make this fun fold. You need to start with a piece of cardstock that is larger than your regular card base. You want a piece that is 5 1/2″ x 10 1/2″. I’ll give you a hint though. It works best if you measure just short of the 10 1/2″ mark on your cutter.

Lay your cardstock on your Simply Scored scoring tool with the long edge at the top. Score at 1″ and 3 1/8″. Now turn it over so that the other long edge is at the top and score at 1″ and 3 1/8″ again. The inside score marks will be valley folds and the outside score marks will be mountain folds.

The larger pieces of designer paper are 1 7/8″ x 5 1/4″. The smaller ones are 3/4″ x 5 1/4″. You can see how to make the bellyband on last week’s post. Before I die cut the butterfly I adhered a piece of designer paper to a piece of cardstock to give it a little more support. Instead of adhering the butterfly directly to the bellyband I die cut a small circle to adhere it to.

In the second photo you can see that I added another die-cut butterfly to the inside of the card as well as adding a layer behind the Basic White. Don’t forget to decorate the inside of your card too!

I liked this card so much I had to make two more for Mother’s Day. One for my mom and one for my mother-in-law! I hope you liked it too.

Have a great day! Take care and Happy Stamping!

Make-It-Mine (Thursday): Lots of Heart

If you read my blog post on Monday you are aware that I am changing things up a bit this week. Monday was a fabulous Easel Fun Fold. Today will be Make-It-Mine and tomorrow will be a Tools of the Trade post. I hope I don’t throw anyone off too much! Ha!

Lots of Heart in pink

I love the Lots of Heart bundle.  Not only are the stamps in the bundle fabulous but the dies are great too!  Check out this card I found on the internet.  Isn’t the floral heart lovely?  And the large pink scalloped heart is the perfect background.  Even though the checked heart (my favorite from the stamp set) isn’t used on this card I couldn’t resist trying to copy it and Make-It-Mine.

Naturally I got carried away.  The only things I really copied were the card design itself and the basic colors. I’m sure this doesn’t surprise you. If I’m going to make a card my own I like to go for it. 🙂

When I was getting started on my version my eye caught the Love You Always Foil Sheets in my craft room and I knew I had to give them a try.  Not only did I use the Rococo Rose Foil Sheets for my floral heart but I decided to give them a try on the background.  But I couldn’t just use the foil sheet plain, I wanted to see how it looked embossed with my new favorite embossing folder – The Painted Texture Embossing Folder!

I love it!  My version turned out perfectly!  The card I copied is soft and sweet but I think my version is shiny and bright.  Fun!  Don’t be afraid to experiment a little when making someone else’s card your own.

I need to tell you that it’s really difficult to photograph a card with with so much foil sheet on it. It’s so shiny! It not only reflects the light but a lot of time you get your own reflection in it. I hope you get at least an idea of how pretty this card really is.

Have a great day! Take care and Happy Stamping!

Make-It-Mine Monday: Hey Chick!

Hey Chick!  I love this stamp set!  The images are SO adorable!  Tomorrow is the big day when you can order this stamp set and the coordinating dies for it!  If you didn’t get this stamp set a few years back when it was a Sale-a-bration item you’re going to want to get now!

I knew I wanted to make a card using this adorable stamp set for today so I had to search for a card to copy.  I found this fun card on Pinterest.  Unfortunately there wasn’t a watermark on the photo so I don’t know who to thank for the inspiration.  This card was made when the stamp set was first available in 2017 and also used the chicken wire embossing folder that was available at that time. I’m going to have to check my stash to see if I had this embossing folder and saved it. I did save my Hey Chick stamp set from back then so you never know.

Hey Chick!

I wasn’t able to use the chicken wire embossing folder but I was lucky enough to be reminded that there is a chicken wire background stamp in Stampin’ Up!’s current Annual Catalog called All Wired Up.  It was perfect for the front of my card.

On my card I was able to die cut the stamped chicken since there are now coordinating dies.  You know how much I love coordination!  I made the red frame on the front of the card by using two different sizes of the Layering Ovals dies.  I die cut the smaller one first and then fit the larger oval around the opening. I found that it was easier to do it this way than die cutting the larger one first and fitting the smaller one inside.

Hey Chick card – inside

I had a lot of fun making this card and I can’t wait to play with these new products again. Don’t forget that you too can purchase these fun products starting tomorrow. The Chick Dies not only cut out the images from the stamp set but they also cut out some other fun images that you can see in the image below.

  • Hey Chick Bundle (#158627 $44)
  • Hey Chick Cling Stamp Set (#158190 $17)
  • Chick Dies (#158199 $32)
Chick Dies

These fun, coordinating products will be available until June 30th. You have plenty of time to order them but why wait? 🙂

Have a great day! Take care and Happy Stamping!

Make It Mine Monday: Pretty Perennials

Happy Monday!  I hope you all had a good weekend.  Besides the plugged-up kitchen sink, our weekend was quiet.  Luckily my husband is very handy and was able to fix it after working on it for almost two hours!  Hmm….now what should I do with all that money we just saved on a plumber?  Ha!

Have you seen the Pretty Perennials stamp set on page 31 in Stampin’ Up!’s new January – June Mini Catalog?  It’s a fun flower set that has a 22-piece coordinating die set!  You know how I feel about coordination….woo hoo!  I had fun playing with this stamp set about a week ago.  As I was searching the internet for samples I liked I came across this very simple one made by Helen Wigham.  Isn’t is lovely?

Make it Mine Monday: Pretty Perennials

You know me though, I have a really tough time making a card without layers.  If you’re going to add one layer, then you may as well add two, right?  That’s what I did.  The focal point of my card is pretty much exactly the same as Helen’s but I just framed it before putting it on a card base.  The only other thing I changed was the color of the word “happy”.

Pretty Perennials simple card

Why stop at one change though?  I was on a creative roll when I made this first card so I decided to keep going.  This time I switched the orientation of my card and added some ribbon which I think makes the card a little more flirty.  Did you notice that I actually used a real bow on my card?  I haven’t done that in a long time.  The card definitely needed it though to fill in that upper corner.  I like how it turned out so you may seeing more bows on my cards these days.

After writing most of this post I was looking at other samples made using the Pretty Perennials stamp set and I discovered that without realizing it, I had actually CASEd (copy and share everything) another card when I made my second one!  I guess my subconscious is working well!  Ha!  The second card I copied was actually made by Dena Rekow who designed the Pretty Perennial stamp set!

Pretty Perennials by Dena Rekow

I really had fun playing with this stamp set and can’t wait to play with it some more! Have a great day! Take care and Happy Stamping!