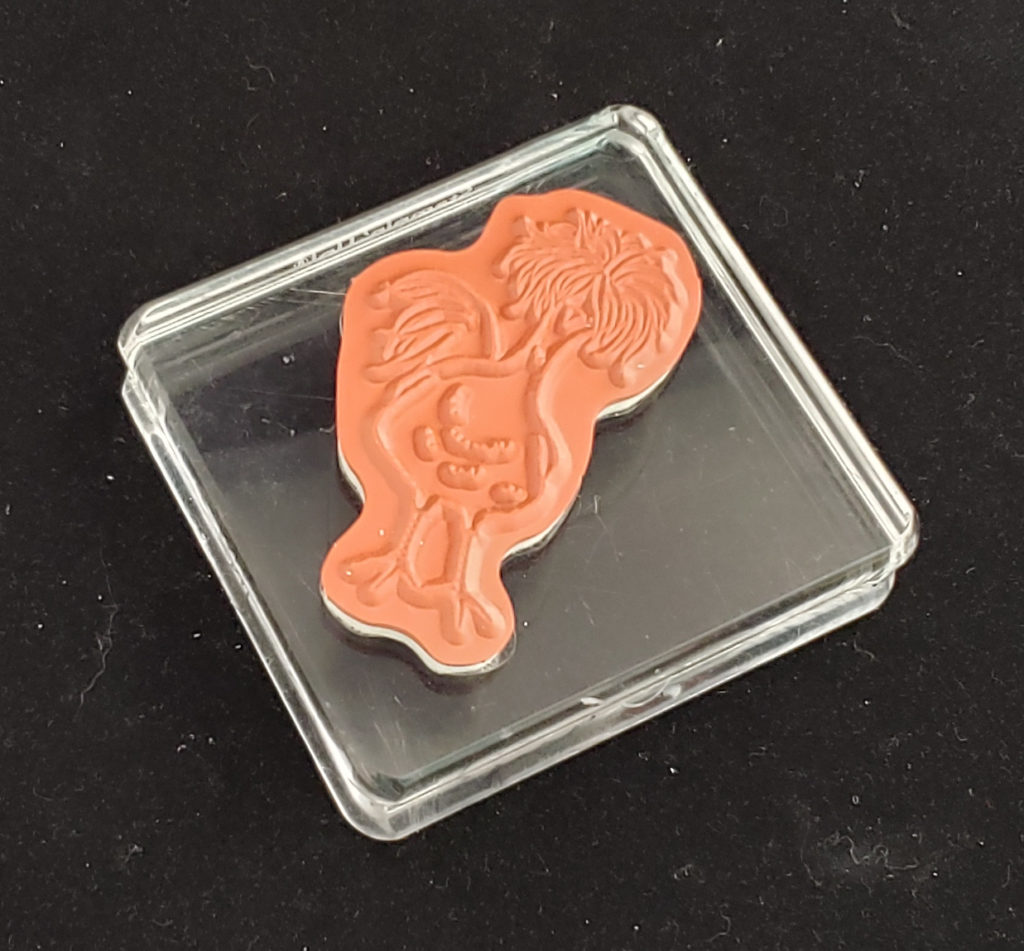
Stampin’ Up! currently carries two basic types of stamps: photopolymer and cling. Last week I told you about the photopolymer stamps and this week I’d like to share with you about cling stamps. As I was preparing this post I came across a video made by Stampin’ Up! when cling stamps first came out. It covers pretty much everything that I was going to share with you so here it is:
The video does a great job of covering most of the key points of Stampin’ Up!’s red rubber cling stamps. The one thing it doesn’t mention is that unlike photopolymer stamps, you can use your Stampin’ Write Markers on cling stamps. This means you can actually color directly on the stamp with the markers. If you do use your markers on the stamp, be sure to “huff” on the stamp before stamping the image on your paper. The moisture from your breath will keep the ink from drying on the stamp before you stamp it on the paper.
Now that you’ve learned about both types of stamps that Stampin’ Up! carries, which is your favorite? Leave a comment and let me know! Have a great day. Take care and Happy Stamping!
One of the major Tools of the Trade for paper crafters, especially those of us that stamp, would be….stamps! I can’t believe I haven’t talked about them yet.
Stampin’ Up! Photopolymer Stamps
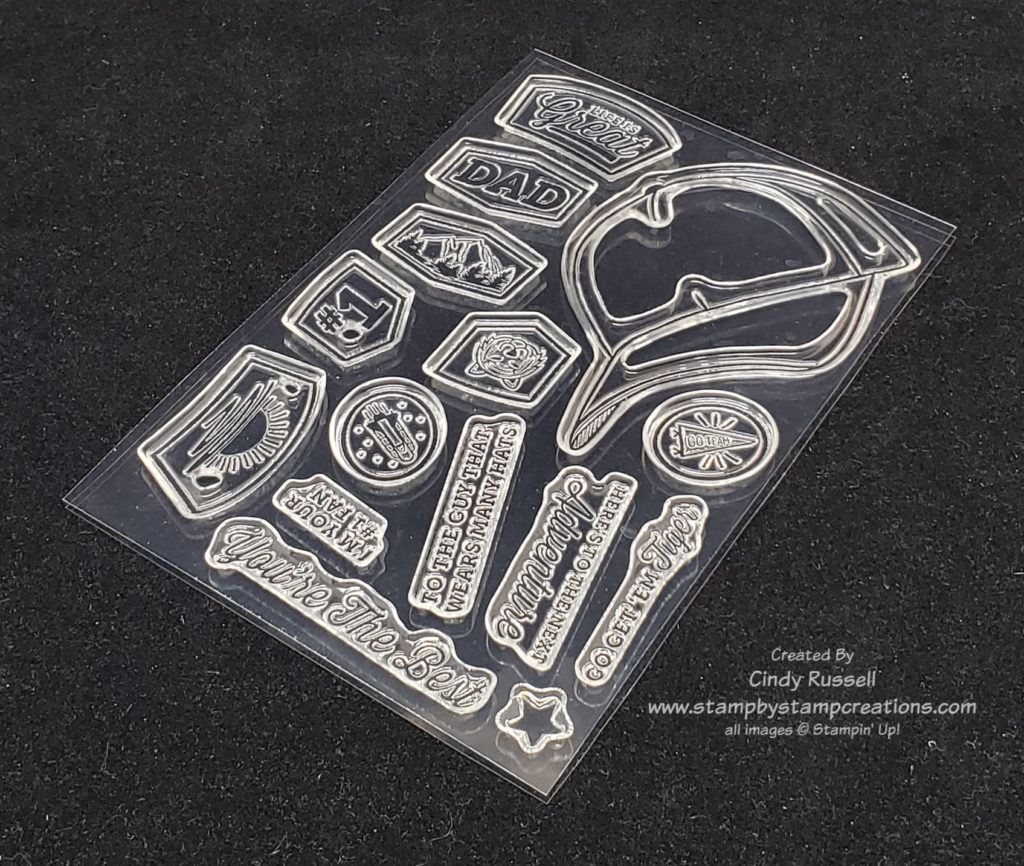
Stampin’ Up! makes two different types of stamps, photopolymer and cling. Today I want to talk about Photopolymer. Photopolymer stamps are the transparent, harder rubber stamps. They are perfect when you need precise alignment. You’ll find that most Two-step stamping and scene-building stamp sets are photopolymer.
The thing I love about photopolymer stamps is that you can see exactly what and where you are stamping. I especially like this when using words or sentiments. I wish all words and sentiments were photopolymer! 😊
Here’s how Stampin’ Up! describes their photopolymer stamps: “Our top-quality photopolymer stamps are entirely transparent for perfect image placement, and they adhere well to our clear blocks. They’re flexible and easy to line up, giving you even more creative possibilities with each set. You can mix and match, bend, and layer images easily.”
Tips for working with photopolymer stamps:
Don’t just tap a photopolymer stamp on the ink pad. Let it sit a few seconds to pick up the ink.
When stamping, let a photopolymer stamp sit on the paper for a few seconds before lifting it up.
You can’t color directly on the photopolymerstamp with Stampin’ Write markers like you can with red rubber (cling) stamps.
Use a Stampin’ Pierce Mat for even pressure and ink coverage when using photopolymer stamps.
Photopolymer stamps don’t work well with StazOn ink. The ink makes the stamp sticky and it could pull up some of the paper you are stamping on. If you do use StazOn ink with a photopolymer stamp be sure to clean the stamp immediately (but not with StazOn Cleaner).
Do not us StazOn Cleaner on photopolymer stamps. It could ruin your stamps.
Photopolymer stamps stain easily but this does not affect their use.
You can bend photopolymer stamps. If you have a long stamp you may want to lay it on the table in front of you and place the block on the stamp to make sure it stays straight.
On the other hand, you can curve your long photopolymer stamp if you want.
It’s best to use the Simply Shammy to clean photopolymer stamps as they can pick up lint and fibers from any type of wipe.
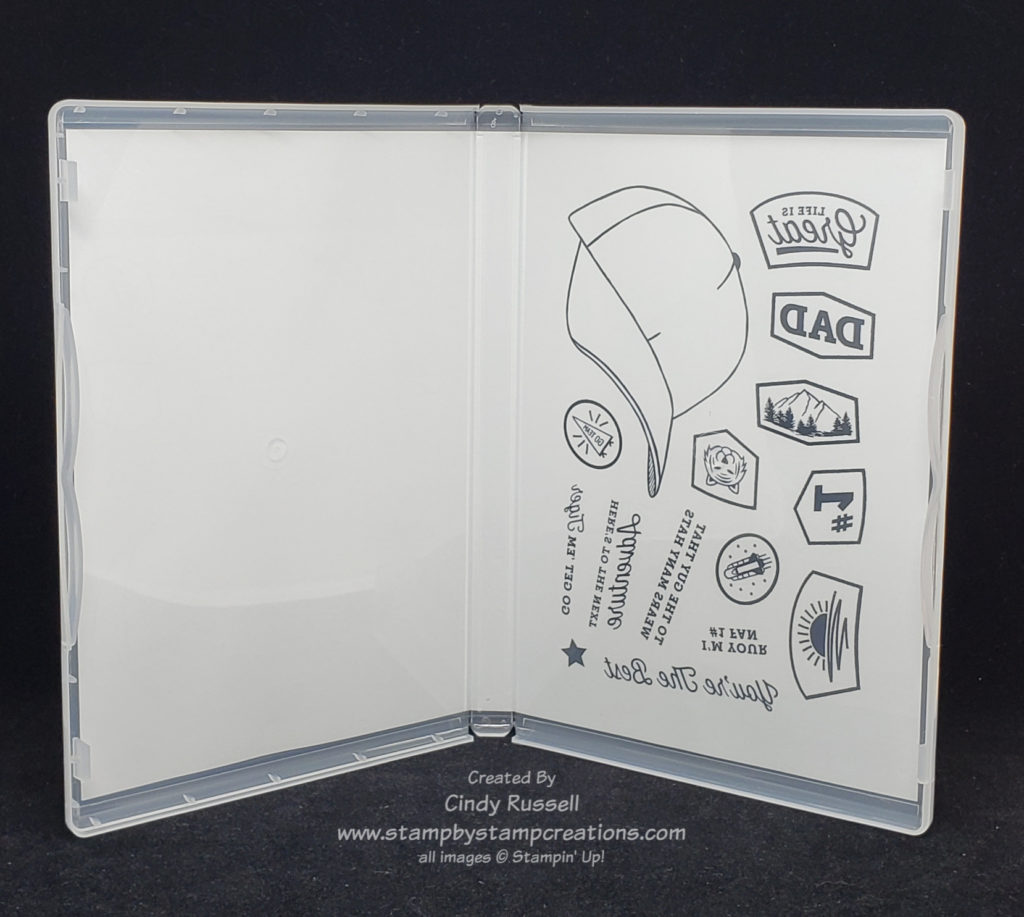
In the photo above you can see that Stampin’ Up!’s photopolymer stamps come sandwiched between two sheets of plastic. Older stamp sets will have the images printed on the harder piece of plastic so you can make sure you get them all back in the case when you’re done with your project.
New stamp sets will have the images printed on the paper sleeve of the stamp case. This is nice because you can then get rid of those sheets of plastic.
I do love my photopolymer stamps. How about you? Leave a comment and let me know what you think of photopolymer stamps! Have a great day! Take care and Happy Stamping!
I hate to break it to you but none of us are perfect. Well, there are times I think I’m close but then it’s time for that darn reality check.
It happens. While making that over-the-top card or project you got adhesive where you don’t want it. How do you get rid of it so your card doesn’t stick in the envelope?
It’s time to get that adhesive eraser out! This little square of rubber is a crafters best friend. Like many of the smaller tools that a crafter uses I have more than one laying around at any time. This little gem of a tool not only works on double-sided tape, it can also remove a residue made by liquid glue. I know this for a fact….
Then there’s the time that you’re almost done with your card and you manage to put a layer on crooked. How many times has this happened to you? Me? Too many times to count. Now it’s time for the big gun: liquid adhesive remover. There are a couple of brand names like Un-Do or Goo Gone. These are amazing! I like the Un-Do best because it has a little scraper attached to the bottle that you slip between the layers of your project while squirting out the liquid. There’s a bottle of adhesive remover sitting front and center on my desk! This stuff dries quickly too so you don’t have to wait to long to put your project together the right way! Ha!
My one disclaimer is that the liquid adhesive removers won’t get your layers apart if you’ve used liquid glue. They work best with the tape type of adhesives.
You can find adhesive erasers and adhesive removers at most craft stores and if they don’t have it the online store that carries everything has them. Stampin’ Up! used to carry the adhesive erasers but not anymore. Darn!
If you’re like me these items are a must for your craft room! Have a great day! Take care and Happy Stamping!
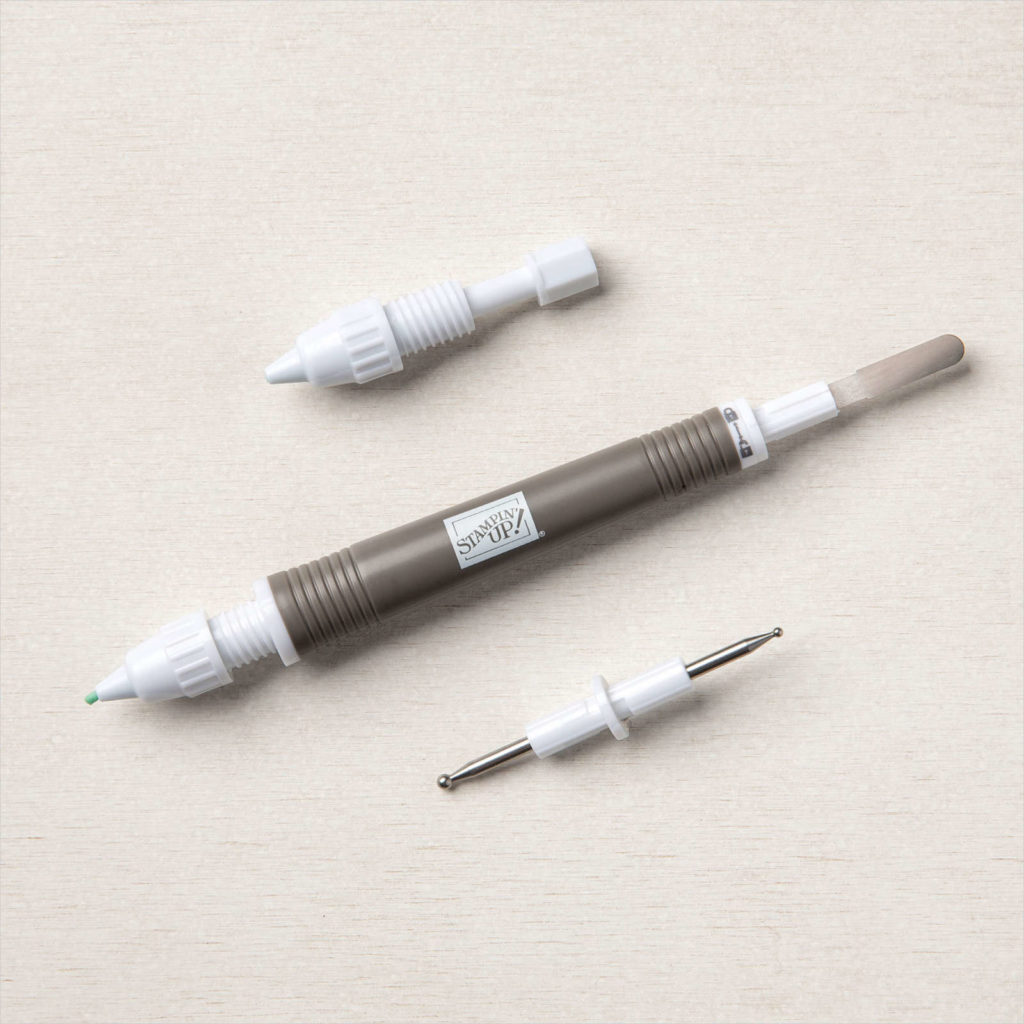
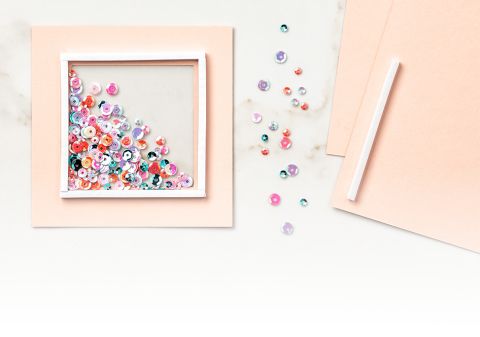
If you’re looking for an all-around useful tool for your craft room, Stampin’ Up!’s Take Your Pick Tool is the one for you!
Here’s what Stampin’ Up! has to say about this tool:
“Multipurpose pickup and precision tool simplifies meticulous task. Includes 2 changeable, double-ended tips with paper piercer, mini spatula, small stylus, large stylus, and a tacky putty tip that easily picks up sequins, paper accents, and other small objects. Includes protective end caps.”
Wow! That’s a lot of versatility packed in to a 6 1/2″ long tool! I use a paper piercing tool all the time to pick up jewels (and their adhesive backing) for my projects. The putty tip is perfect for picking up sequins and other loose accents. You can even purchase a putty refill tip!
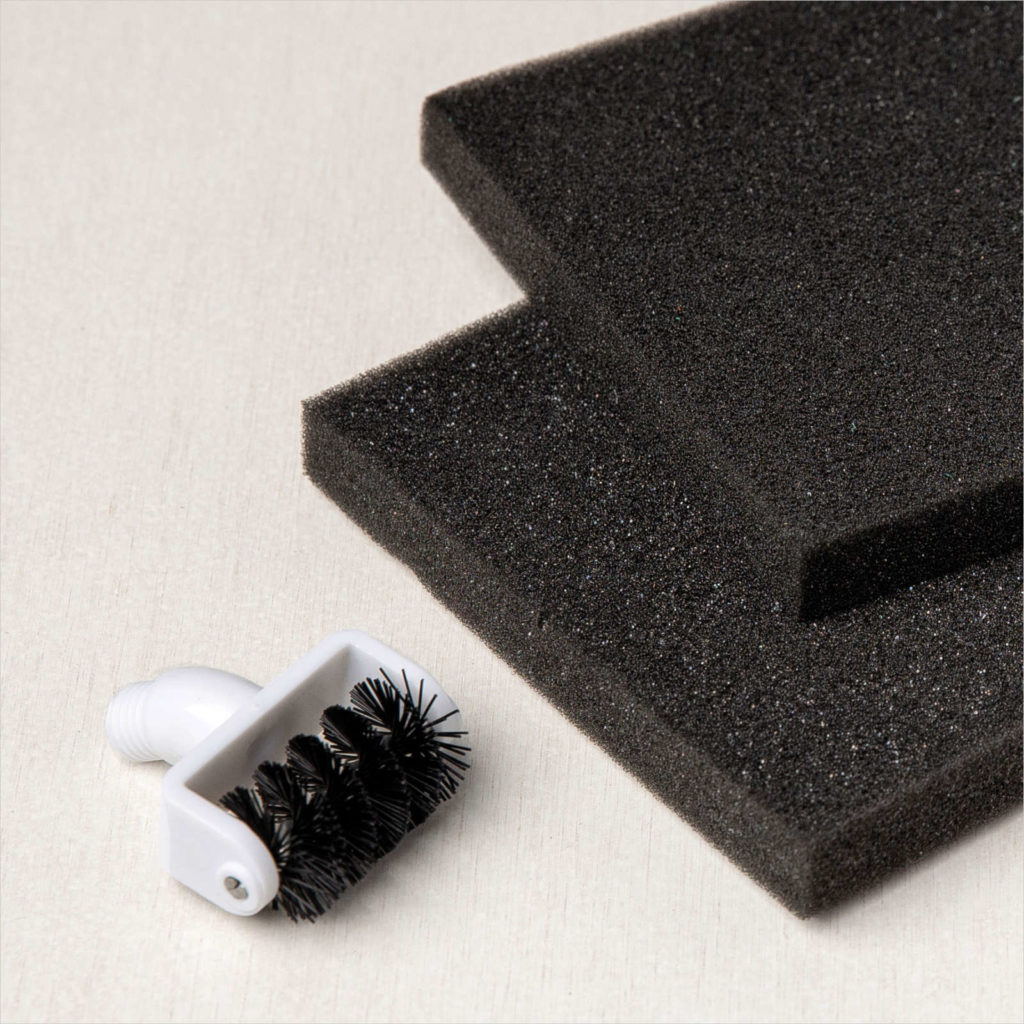
Die Brush Tip and Foam Mats for Stampin’ Up!’s Take Your Pick Tool
There is also a Die Brush Tip for the Take Your Pick Tool that comes with two foam mats! Die brushes are so useful when you are working with intricate dies.
Yes, you can probably find all of these tools separately at a craft store but why clutter your craft room with all those tools when you can find everything you need in one little tool!
As I mentioned before, this tool is a must-have for any craft room! Have a great day! Take care and Happy Stamping!
In the past few weeks in my Tools of the Trade posts I’ve introduced you to Stampin’ Up!’s stamp positioning tool, the Stamparatus.
This tool is a must-have for any craft room. Today I am sharing a video that will show you three different ways of using this stamp positioning tool as well as a few little tips.
You will learn the basics of using the Stamparatus, how to hinge stamp as well as how to use the Stamparatus for perfectly die cutting or punching out a stamped image. Check out the video below and let me know if you have any questions.
Using the Stamparatus stamp positioning tool
The video is a little longer than most of my videos but I think you’ll learn a lot! Have a great day! Take care and Happy Stamping!
Last week I introduced you to Stampin’ Up!’s stamp positioning tool, the Stamparatus. I gave you a brief overview of this amazing tool.
Today I want to share a quick video with you showing you the actual tool as well as what comes with it and additional accessories that you can purchase with it.
Next week I’ll get down to the Nitty Gritty and start showing you how to use this useful too.
https://youtu.be/rHfmZ16gu2Y
You can view the Stamparatus and it’s accessories in my online store by searching for “stamparatus”.
If you are a “particular” stamper and like everything lined up perfectly you definitely need a stamp positioning tool. Back in the day, Stampin’ Up! carried a tool called the Stamp-a-ma-jig which I loved and used often. It was retired many years ago and now they have a new fantastic stamp positioning tool called the Stamparatus. There are many tools similar to the Stamparatus but I love this one. It is an amazing tool and comes in so handy, especially of you’re making multiples of the same project.
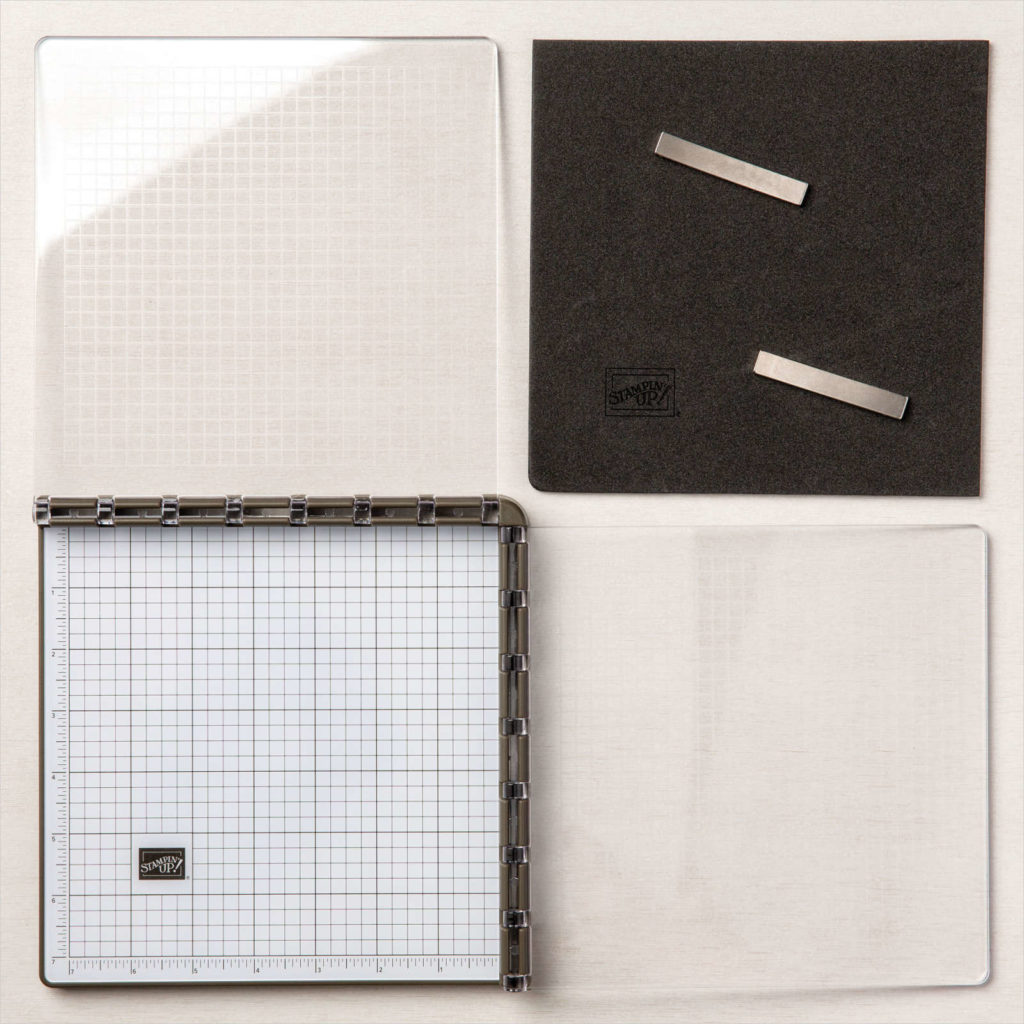
Here’s how Stampin’ Up! describes the Stamparatus: “The Stamparatus stamp positioning tool helps you stamp perfect, crisp impressions every time. You can easily align stamp images, including Two-step Stampin’ Stamps; get complete ink coverage even on large stamps; and stamp multiples of the same project without using multiple blocks.”
This tool is a must for every craft room. The Stamparatus was created by stampers for stampers, so it has all the features you want.
* Compatible with red rubber cling and photopolymer stamps
* 2 magnets to hold the paper in place
* Rulers on 2 sides for quick measuring
* 2 open sides so you can use larger paper
* Multiple hinges for more placement options
* 2 reversible plates for 4 sides to work with
* 1 foam mat for use with photopolymer stamps
* 1 base with grid
* Magnet storage areas built in underneath the base
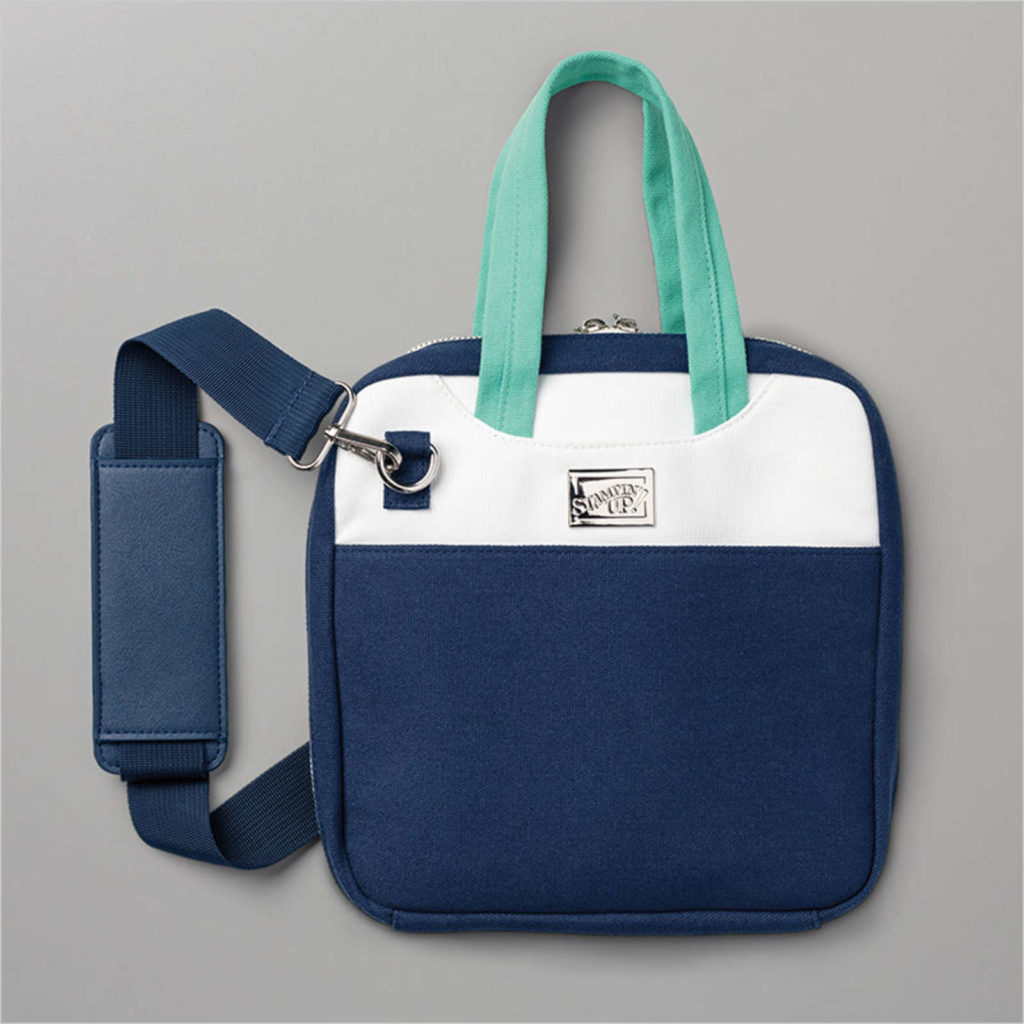
Craft & Carry Stamparatus Bag
The Stamparatus measures 8” x 8” x 7/8” so it’s a small but mighty tool. It doesn’t take up a lot of room and is easy to transport. Did you know that in Stampin’ Up!’s current Annual Catalog you can purchase the Craft & Carry Stamparatus Bag which is perfect for storing and transporting the tool. If you think this bag is a must-have for you then you need to purchase it today because it will be gone after May 3rd, 2021. Guess what? This bag is now only $11.60 while supplies last!
This post has given you a basic overview of the fantastic tool. Over the next few weeks I will be sharing tips on using your Stamparatus. Stay tuned!
I have to admit that when it comes to cleaning off my stamps while I’m creating I’m usually a “wipes” kind of gal. They’re quick to grab and easy to use. I had a brand of wipes that I loved. They were smooth so they didn’t leave fibers on my stamps. Of course, the manufacturer doesn’t make them any more and I can’t seem to find a decent replacement.
I don’t want my wipes scented and I don’t want them textured. That pretty much leaves out baby wipes. I also don’t want them to antibacterial as I don’t want the alcohol on my stamps. Seeing as I’m so picky and I can’t find wipes that meet my specifications I dug out my Simply Shammy.
I had actually been using my Simply Shammy during classes when I had them in person pre-Covid. Now that I’ve been using it again I’m not sure why I wasn’t. Hmm…..
Here’s Stampin’ Up!’s catalog description of the Simply Shammy: “This reusable stamp cleaning cloth makes stamp cleaning effortless. Just add water, then wipe stamps on the shammy. Durable, thick shammy easily cleans ink from narrow grooves. No lint, no chemicals—just clean! (Ink will stain shammy but won’t transfer to your fingers or other stamps.) With its portable 5″ x 7″ (12.7 x 17.8 cm) size it fits neatly in a stamp case.”
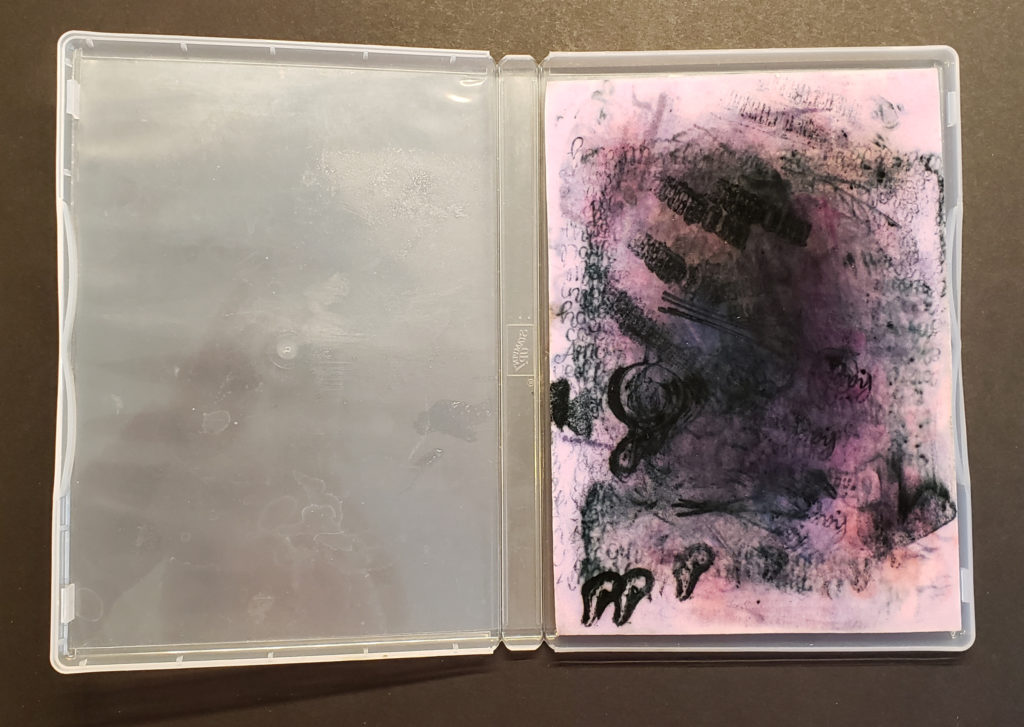
Used Simply Shammy in Stamp Case
As mentioned above, ink will stain your Simply Shammy. I have two of them and they both look like this. The great thing though is that the ink stays in/on the shammy!
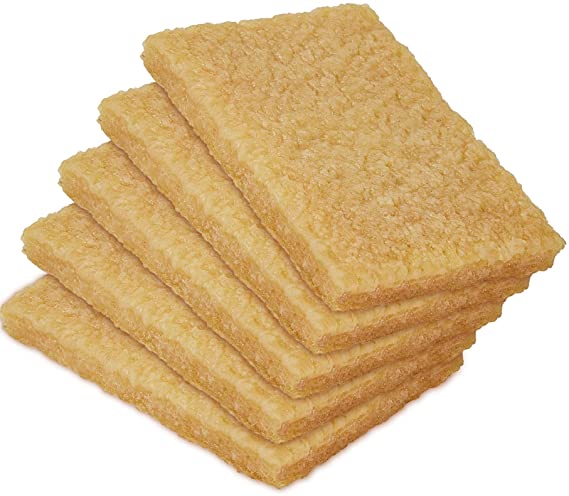
I used to use the Stampin’ Scrub pads for cleaning stamps during my in-person classes. The problem with the Stampin’ Scrub was that if you got them too wet and if you cleaned your stamp a little too vigorously, the watery ink could spray on to nearby surfaces. It was a neat, kind of speckled look but if you didn’t want speckles on your just finished project you wouldn’t be happy. This is why I like the Simply Shammy. No mess! You don’t really have to clean them either. Once in a while I will rinse them and gently ring them out but that’s about it.
You can see in my second photo that I keep my Simply Shammy in a stamp case (#119105). The stamp case fits the Simply Shammy perfectly and keeps it moist. The shammy will dry out eventually but just add more water!
A Simply Shammy is the perfect choice for cleaning your stamps. I was a “wipes” gal before but with the shammy I don’t have anything to throw away. I don’t have to clean it and it’s easy to use.
What do you use to clean your stamps? Leave a comment and let me know!
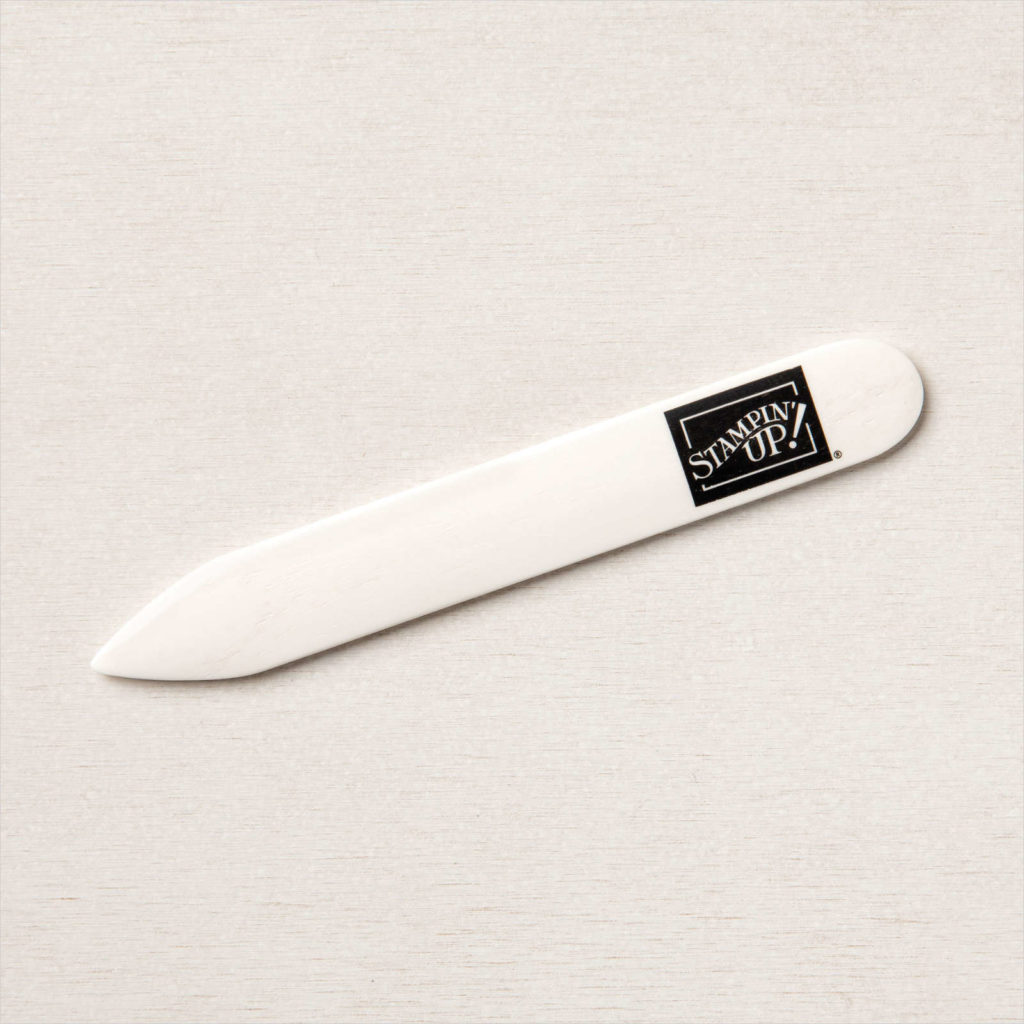
A bone folder is used to score, crease, and smooth paper. I use my Bone Folder all the time. As a matter of fact I own at least five of them and there are probably 2 or 3 on my desk at any one time when I’m creating.
The most popular use for Bone Folders, at least for us paper crafters, is to crease a fold. We will either simply fold a piece of cardstock in half to form our cards and then crease the fold well with our Bone Folder or we will make a score line using another tool (Simply Scored or Paper Trimmer) and then crease that well with the Bone Folder.
You can also use your Bone Folder to score your paper. Butt it up against a straightedge, like a ruler, and then draw your score mark along the straightedge. This is especially helpful when you are working on 3D projects and need and angled score mark.
A Bone Folder is also helpful when you want to break down the fibers in your paper. I do this when I want to give my paper a little curl. Do you ever curl ribbon with your scissors or another tool? This is the same idea. I especially like to do this with flowers like those you’d make with the Daisy Punches. It helps give your die-cut or punched shape a little dimension.
If you don’t own a Bone Folder (or two or three), you should. They are relatively inexpensive and SO useful! Have a great day! Take care and Happy Stamping!
It’s the last week of talking about adhesives. This is the post that will talk about all of Stampin’ Up!’s Adhesives that don’t fit our previous categories of Glues, Tapes or Foam Adhesives.
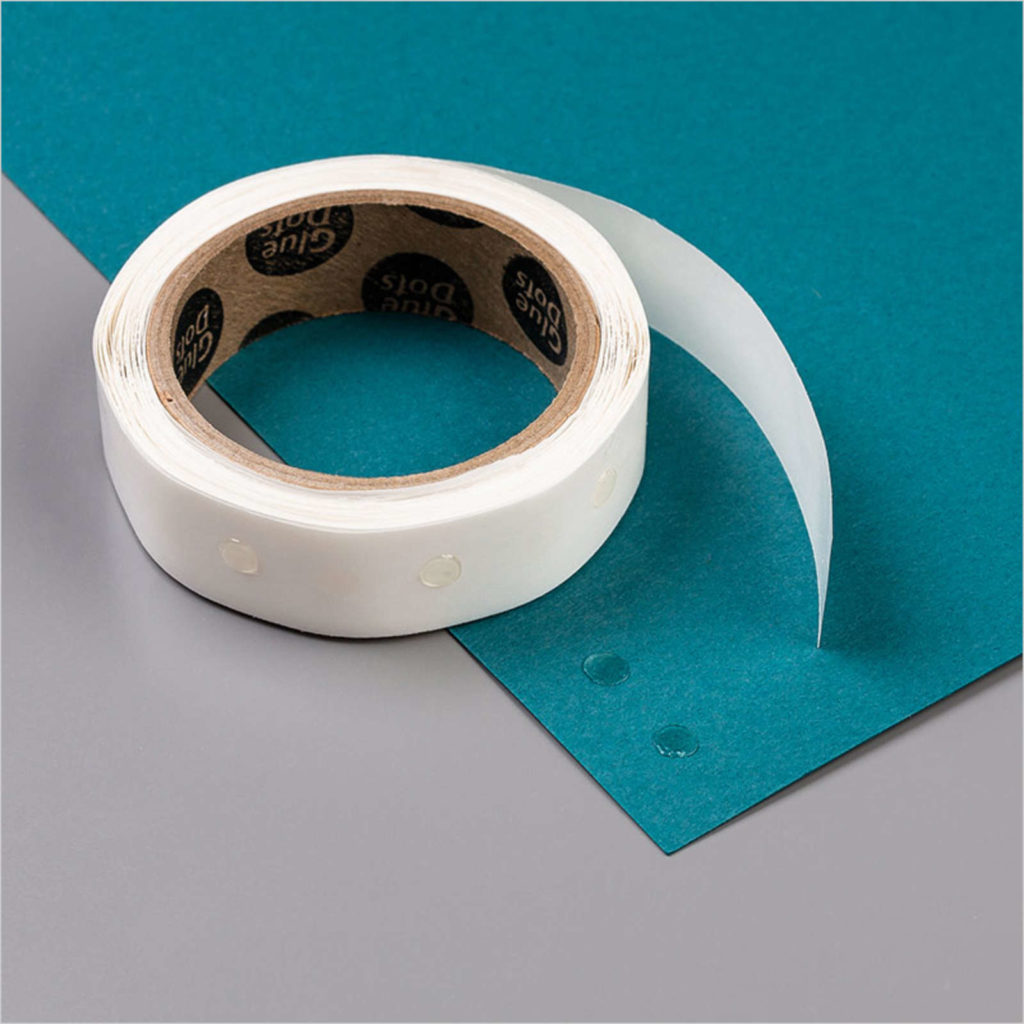
Let’s talk about Mini Glue Dots. These little dots of glue have so many uses. In Stampin’ Up!’s Online Store they list Mini Glue Dots as an adhesive for embellishments. In their catalog they say that Mini Glue Dots will “hold heavier embellishments, ribbon cardstock and detailed die cuts.
When I’m layering die cuts or cut out items on my project I like to use Stampin’ Dimensionals for the layer I want popped up the most, glue or Stampin’ Seal for the layer I want right on my card and Mini Glue Dots to raise a layer just a little bit. I also like to use Mini Glue Dots to adhere bows to my projects.
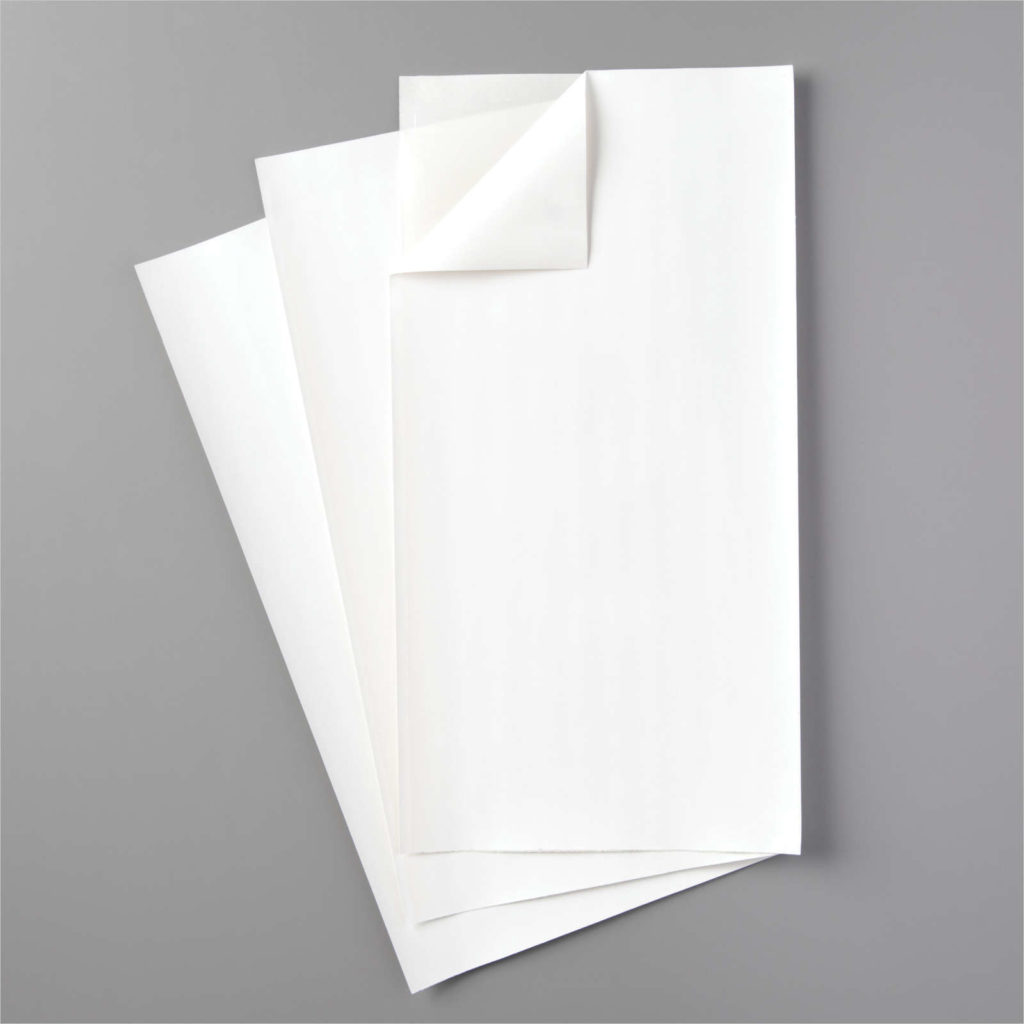
Adhesive Sheets
If you own a die-cutting machine you definitely need adhesive sheets! They are the perfect adhesive for adhering die cut images to any project. They make adhering small/intricate die-cut images so easy!
Adhesive Sheets are 6″ x 12″ and there are 12 sheets in a package. Each Adhesive Sheet is double-sided. To use adhesive sheets first start with the piece of paper that you’re going to die cut. Now cut a piece of Adhesive Sheet slightly smaller than your paper. Remove the backing of the Adhesive Sheet and adhere it to your paper. Die cut your image. You may have to run the die through a couple of times to make sure that you cut through the paper and the adhesive sheet, especially if you’re die cutting an intricate design. Once you’re done die cutting, remove the backing on the adhesive sheet and adhere the die to your project.
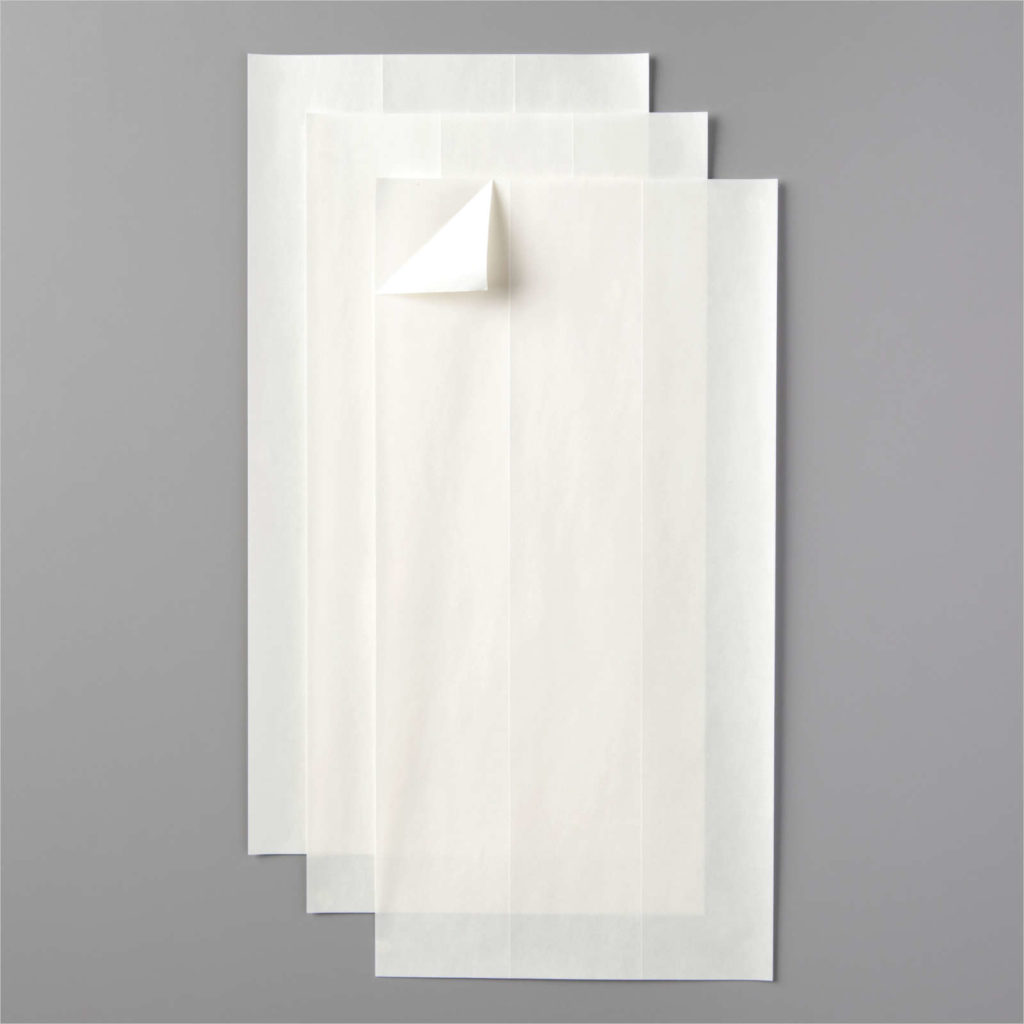
Cling Adhesive
Cling Adhesive is very similar to Adhesive Sheets but it has a totally different use. Cling Adhesive is designed to make your old red rubber stamps into Cling Stamps. Cling Adhesive is just like the label sheets that come with Cling Stamps and is used in the same way.
One side of a Cling Adhesive sheet is sectioned into rectangles. Peel the paper backing off one of the sections, place your stamp over the section of adhesive with the rubber facing up, press down to adhere the adhesive to the stamp and lift! Easy Peasy. There are even instructions on the back of the cardboard insert that tells you exactly how to use the Cling Adhesive!
This completes my overview of Stampin’ Up! Adhesives. I hope I’ve given you some new information that you may not have know. Next week I’ll move on to a new type of Tool of the Trade. Have a great day! Take care and Happy Stamping!
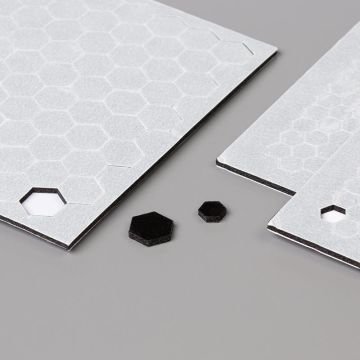
Do you love adding some dimension to your craft projects? I definitely do. Foam adhesives are the way we papercrafters add dimension to our projects. Stampin’ Up! carries five different foam adhesives: Stampin’ Dimensionals, Mini Stampin’ Dimensionals, Black Stampin’ Dimensionals, Foam Adhesive Strips and Foam Adhesive Sheets.
All of these foam adhesives are double sided. To use them you peel them off the waxy sheet they come on, adhere them to the piece you want to pop-up on your project, remove the backing and adhere to your project.
Stampin’ Dimensionals
Stampin’ Dimensionals are the hexagon-shaped disks of foam that you are probably most familiar with. They come in white and black as well as regular size and mini. The regular sized Stampin’ Dimensionals (both white and black) are about 3/8” wide and about 1/16” thick. The Mini Stampin’ Dimensionals (both white and black) are a little less than ¼” wide and the same thickness.
Foam Adhesive Sheets are 4 ½” x 4 5/16” pieces of foam that are about 1/16” thick. Adhesive sheets can be cut with scissors or die cut with open dies (dies that outline something). They don’t work with intricate dies (I’ve tried…).
Foam Adhesive Strips
Foam Adhesive Strips are perfect for making shaker cards. These strips are 9” long, 1/8” wide and have a thickness of 1/8”. They also work well when making cards/projects that have pieces that slide.
You shouldn’t have a problem adding dimension to any of your projects with all of these different choices of foam adhesives.
The important thing to remember is this: you are not a true crafter until you find the backing pieces from Stampin’ Dimensionals all over your home in the most unusual places. Sometimes I just need to start laughing! Once I found one on my Pilates mat AT the studio. It must have been stuck to my sock or pants. Another time I found one at our family cabin in Canada when I didn’t have any crafting supplies with me! Crazy! Where is the oddest place that you’ve found the backing to a Stampin’ Dimensional? I’d love to know!
There are so many different types of tape and many different uses for tape. Today we’re going to talk about double-sided tape, especially those that Stampin’ Up! carries.
As paper crafters we are most familiar with and mostly use double-sided tape. We use it to adhere the different layers of our projects together. Stampin’ Up! carries three different types of double-sided adhesives. Stampin’ Seal, Stampin’ Seal +, and Tear & Tape.
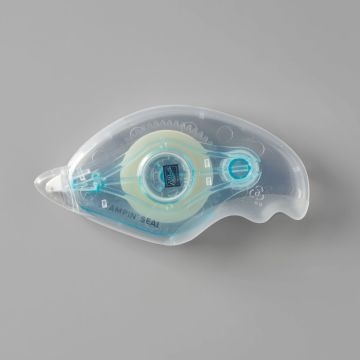
Stampin’ Up!’s Stampin’ Seal Tape Adhesive
Stampin’ Seal is the new basic tape adhesive that replaces SNAIL adheisive. Stampin’ Seal is a double-sided tape that comes on a cartridge in it’s own dispenser. When the tape runs out you can replace the cartridge simply by opening the dispenser and dropping in the new cartridge. The catalog description of Stampin’ Seal says that it’s an instant-bond, permanent adhesive.
I like using Stampin’ Seal. I have to disagree with the “instant-bond” part of the description though. When I’m adhering two things together and haven’t got them quite straight I’ve found that as long as I haven’t pressed the two things together real hard I can carefully separate them and realign them. I find this to work at least 80% of the time. It’s one of my favorite things about this adhesive!
Stampin’ Seal is also easy to use. You just place the end of the dispenser on to your paper, pull to adhere the tape and then lift up. Once in a awhile when you pull to adhere the tape it won’t work but then you just move the wheel on the end of the dispenser with your finger until you feel the adhesive. If you’re in the middle of placing the tape on the paper and it stops you can also just place the end of the dispenser on a section that already has tape on it and start from there. This get the adhesive rolling on the wheel again.
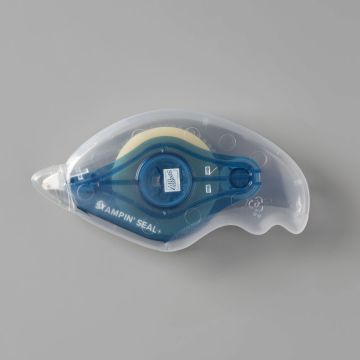
Stampin’ Up!’s Stampin’ Seal +
There is also a Stampin’ Seal + adhesive. Stampin’ Seal + adhesive has a stronger bond than regular Stampin’ Seal adhesive. You would use it on 3D projects or on heavier layers such as Foil Sheets or Glimmer Paper.
Stampin’ Seal + is similar to Stampin’ Seal in that it comes on a replaceable cartridge in it’s own dispenser. The dispensers for both of the adhesives are exactly the same. The cartridges of the two adhesives are the same size but different colors. The Stampin’ Seal + cartridge is a dark blue while the cartridge for the Stampin’ Seal is a light blue. This makes it easy to distinguish between the two.
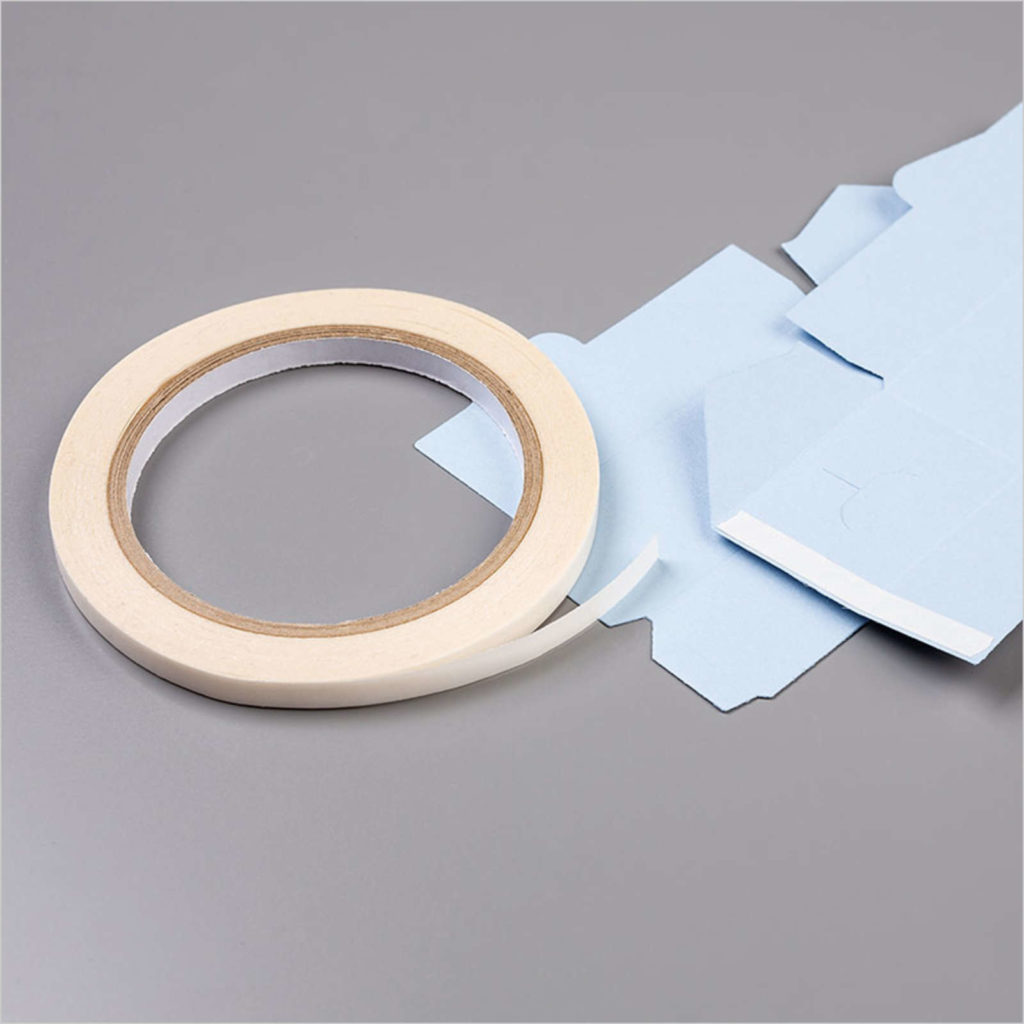
Stampin’ Up!’s Tear & Tape
The last type of tape that Stampin’ Up! carries is Tear & Tape. This used to be the only strong tape adhesive that Stampin’ Up! carried. You would use Tear & Tape in the same situations that you would use Stampin’ Seal +. Tear & Tape is “a strong adhesive with tearable paper backing for easy sticking”.
To use, you tear a length of Tear & Tape off the roll, adhere it to your paper, remove the backing and adhere the paper where you want it.
Each type of tape has it’s own uses. Of course I have all three in my craft room. Do you?
Adhesives are definitely a must-have tool for any craft room. How else are we going to stick our projects together? There are so many adhesives for crafters to choose from. How do you decide which one to use?
Over the next few weeks I’m going to talk about adhesives. I’ll cover the different types and when to use them. The type of adhesive you use is definitely a personal choice. I’ll be talking about the adhesives that Stampin’ Up! carries.
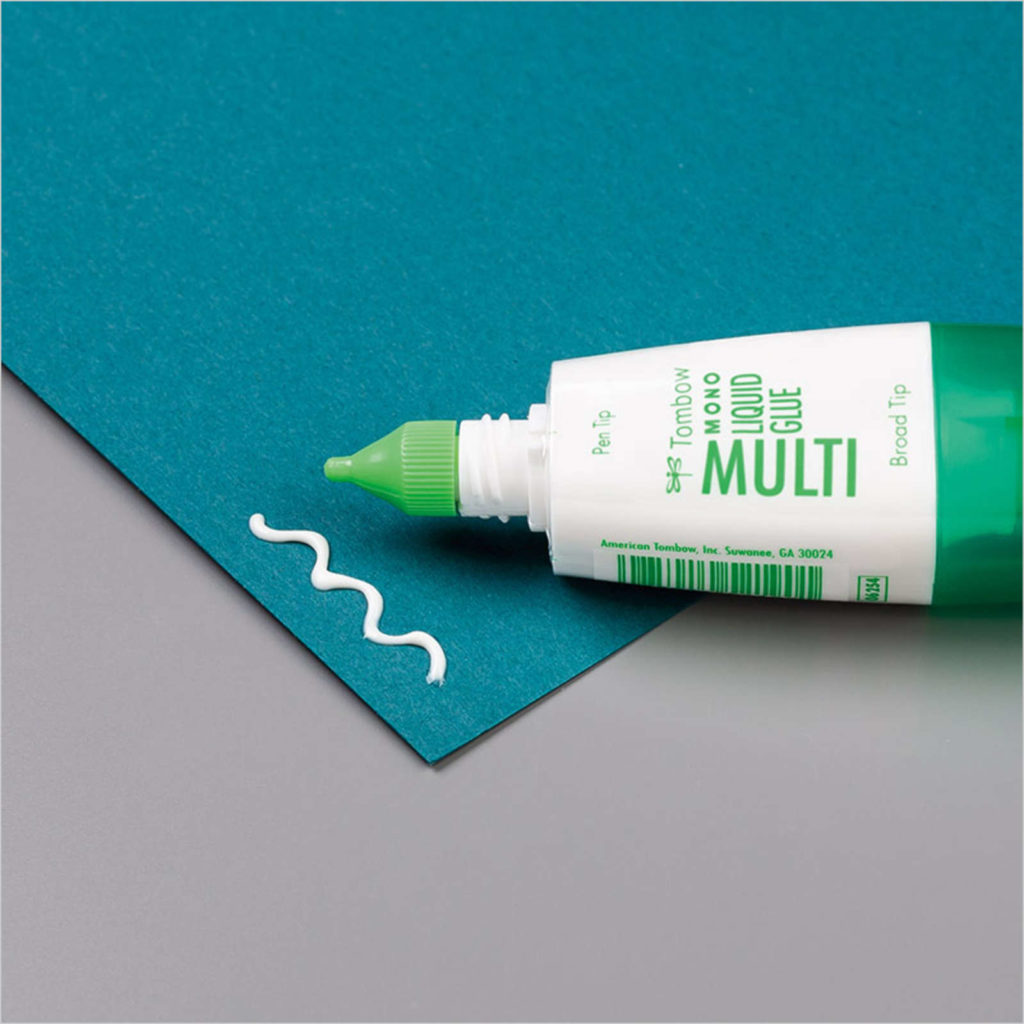
Multipurpose Liquid Glue
The first type of adhesive we’re going to talk about is liquid glue. Liquid glue goes on wet and dries clear. Liquid glue works well to adhere paper to paper as well as embellishment to paper. I actually use a little drop of liquid glue when adhering any small embellishment to my project, even when they’re self-adhesive. Better to be safe than sorry. Liquid glue works well on cards and smaller 3D projects. I don’t think it’s a good adhesive for scrapbooks though. You’d hate to ruin your photos. Stampin’ Up! carries two different types of liquid glue: Mulitpurpose Liquid Glue and the Fine-Tip Glue Pen.
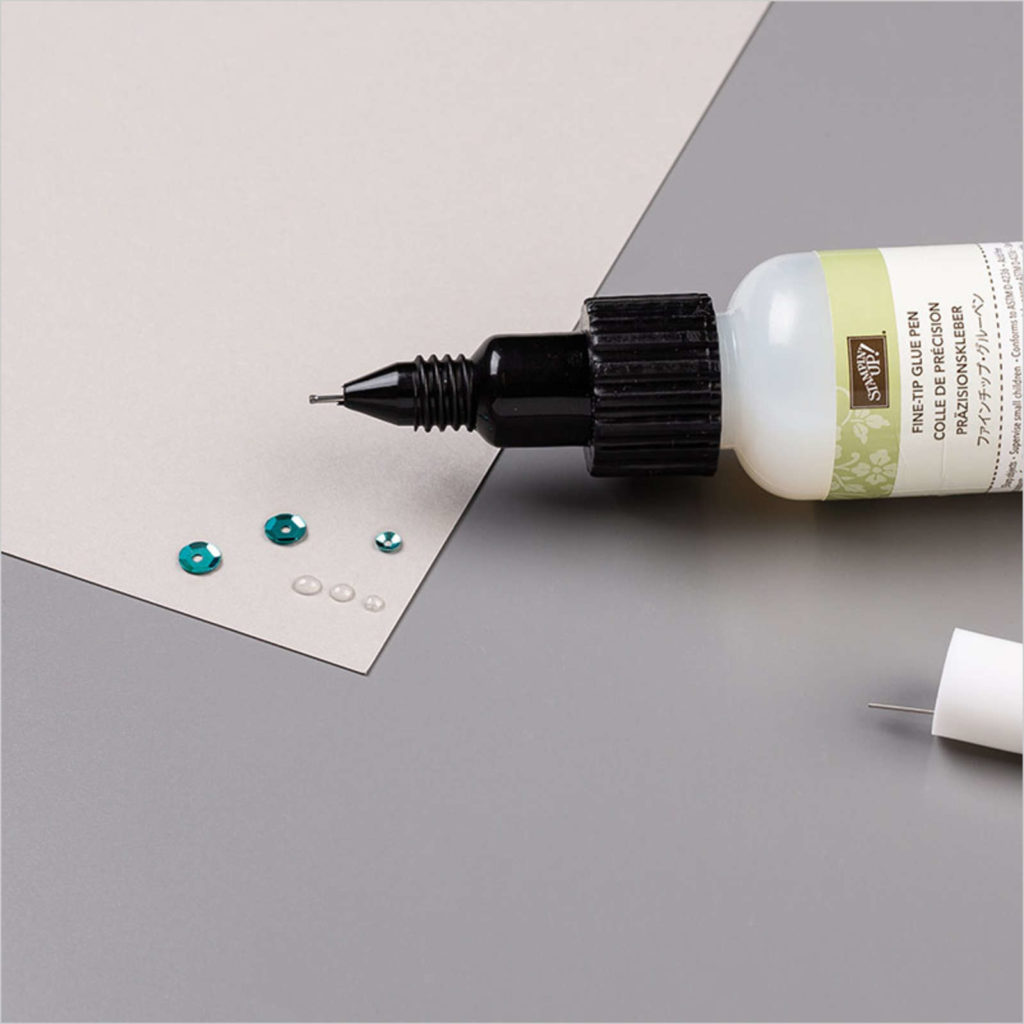
Stampin’ Up!’s Fine-Tip Glue Pen
In the past I didn’t use liquid glue much. Yes, it has it’s purpose but I found it to be a little messy. I was always getting it in places it shouldn’t be, including my fingers. (Ok…it may have been operator error…) I have started using liquid glue more though. I like the fact that it needs a little time to dry so you’re able to wiggle things around a bit if they’re not straight. If you’re careful, liquid glue is perfect for adhering small intricate designs. The Fine-Tip Glue Pen is especially great for intricate designs and small areas.
If the die pieces are especially small and you don’t want to use the Fine-Tip Glue Pen there is an easy way to use the Multipurpose Liquid Glue without putting little dots of glue all over the back. Simply squirt a little glue on to your Silicone Mat or a paper plate. Then dab your Stampin’ Sponge in the glue making sure not to get too much glue on the sponge. Once you have some glue on the sponge lightly dab the glue onto the back of the die. This puts a light coat of glue on the whole die.
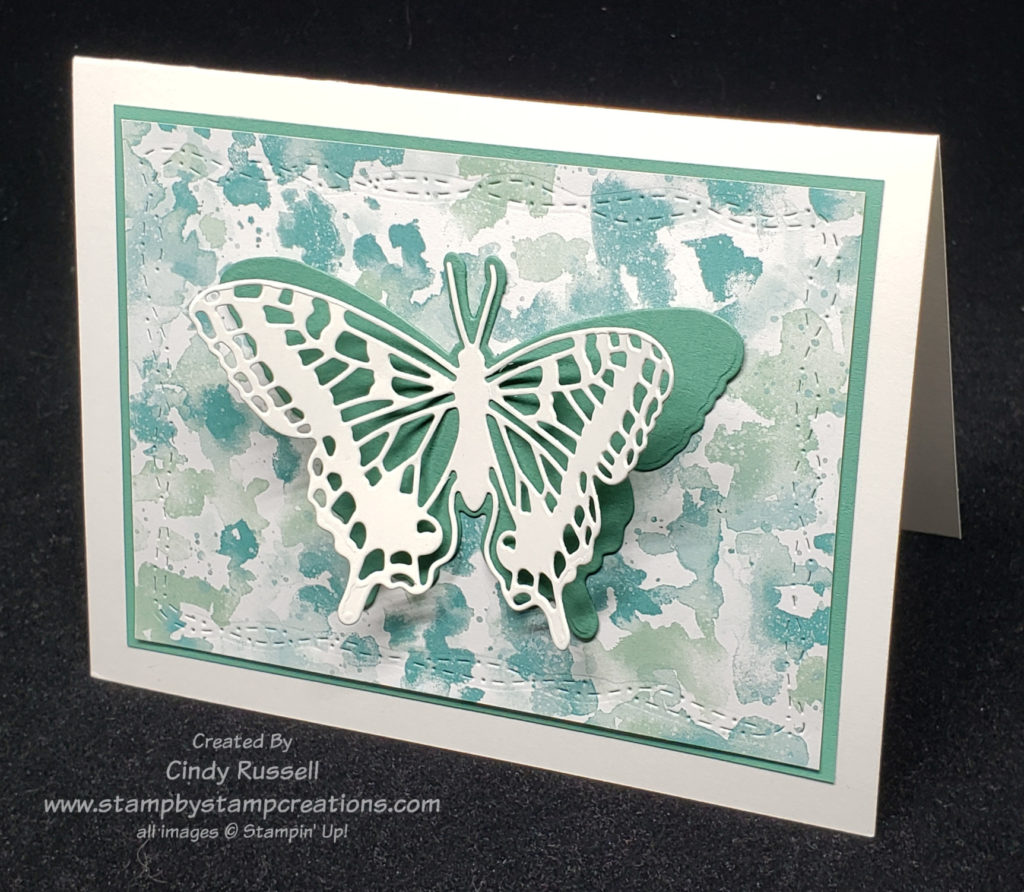
Did you get my weekly email on Tuesday? (If not, enter your information in the box at the right.) In my email I shared this card with you. To adhere the more intricate butterfly I used liquid glue only on the butterfly’s body and then I bent the wings up a little to give it some dimension. This would have been a little harder to do with a tape type of adhesive.
As the name says, multipurpose liquid glue is….multipurpose! It’s a great option for all sorts of projects and situations. It’s not the go-to adhesive in my craft room but it does have it’s purposes and I’ve been using it more and more. Face it…it’s hard to make craft projects without adhesive!
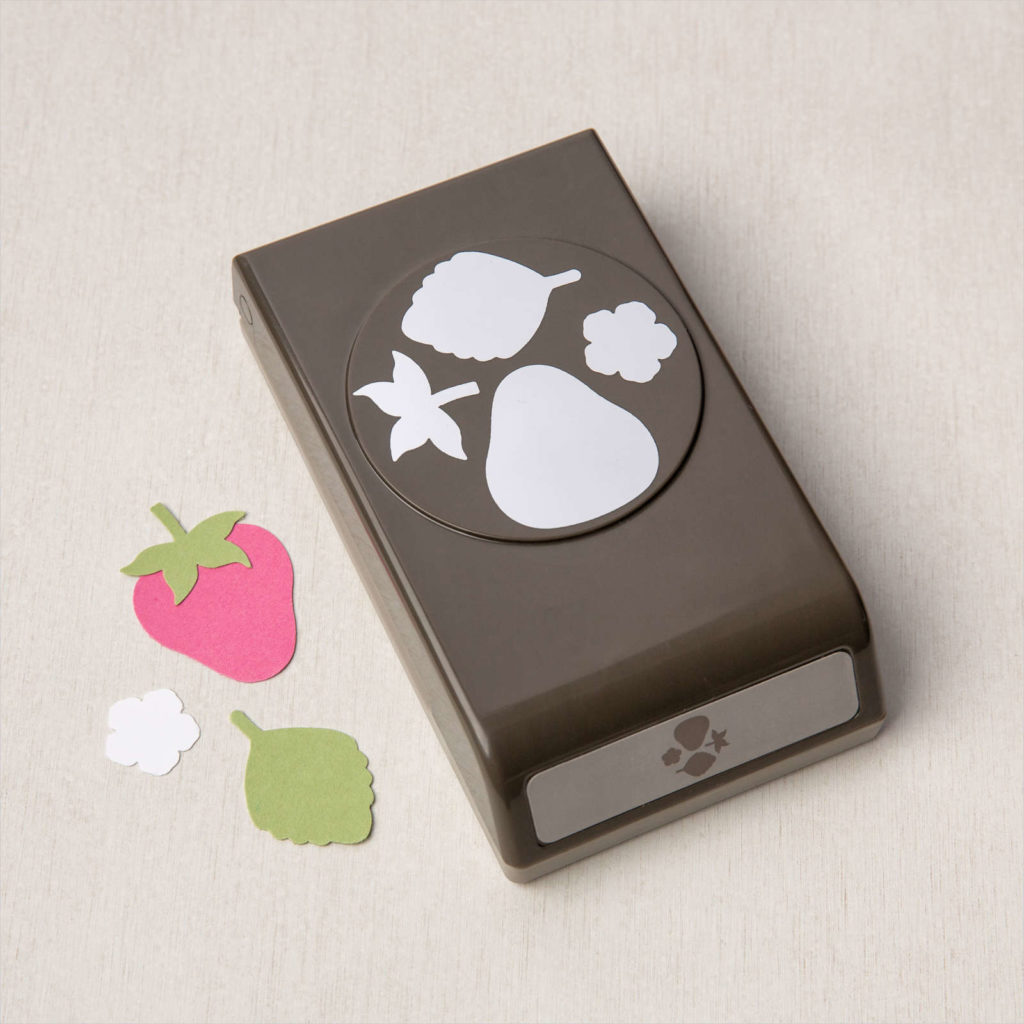
Last week in my Tools of the Trade post I talked about punches but I didn’t talk about Builder Punches. Builder Punches are a type of punch which can punch out multiple shapes that will “build” an image.
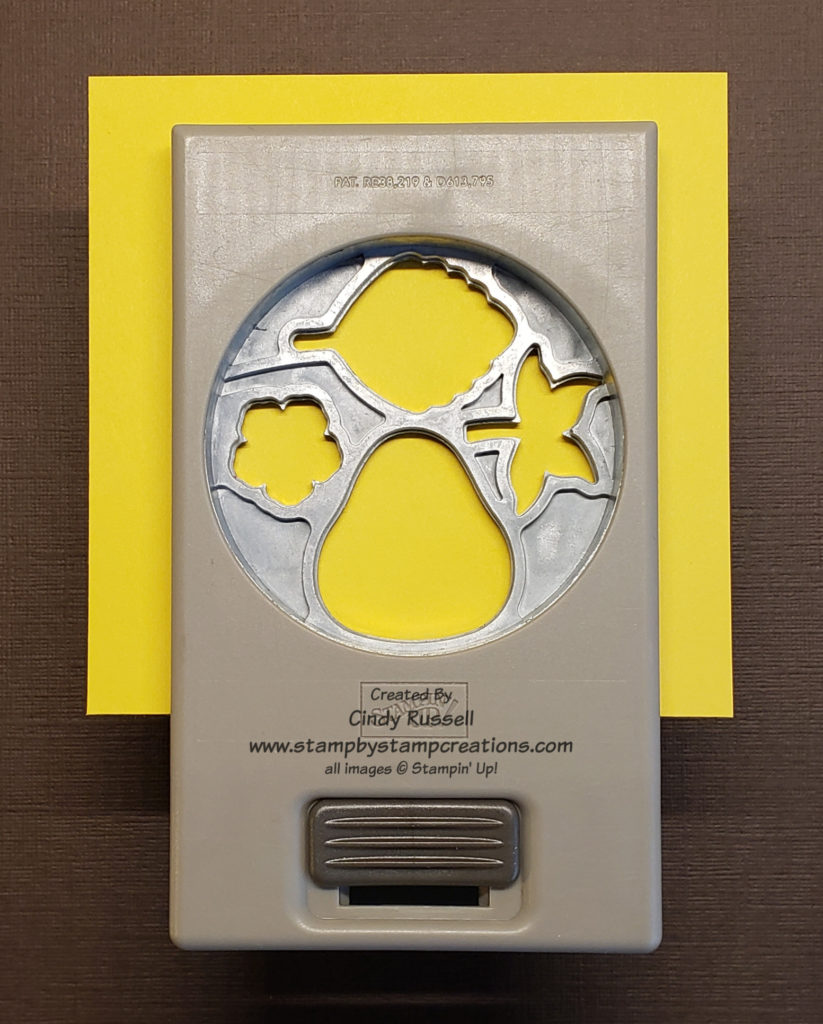
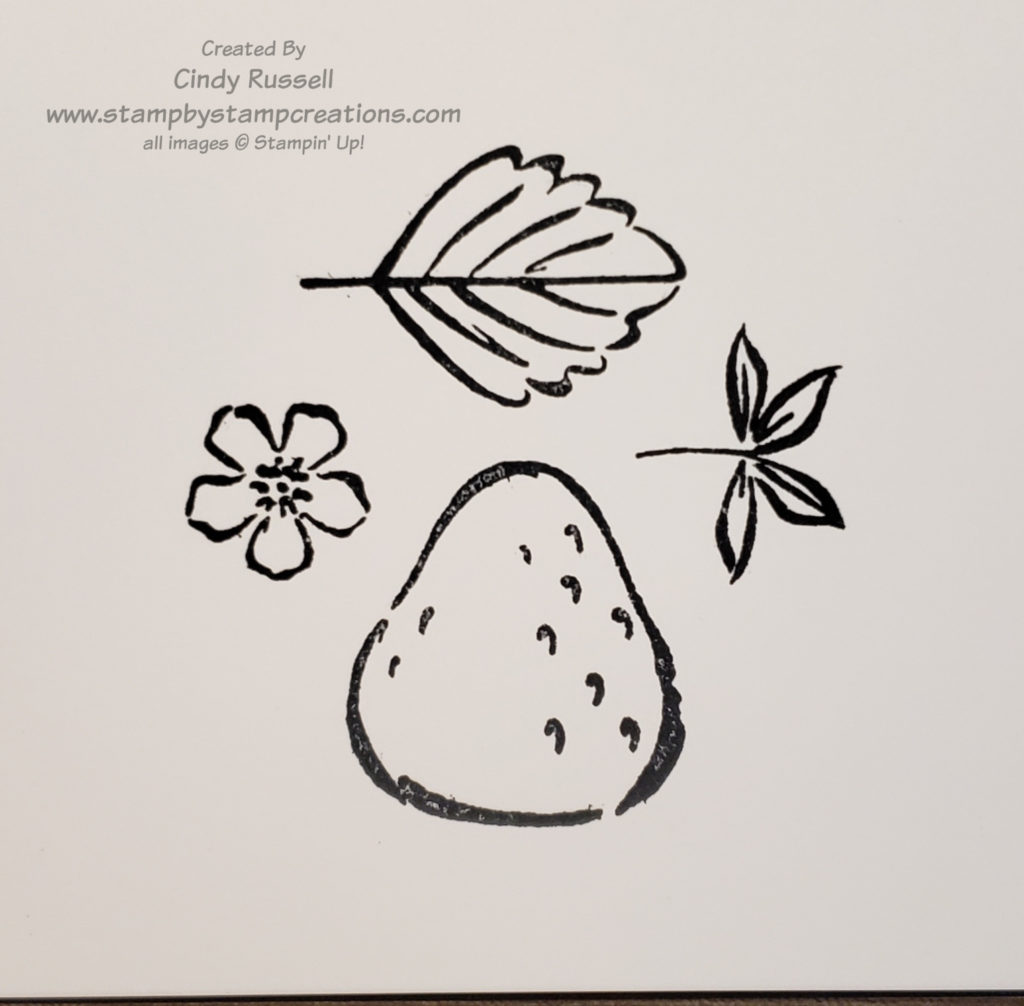
In the photo to the left is Stampin’ Up!’s Strawberry Builder Punch. As you can see, it will punch out the strawberry, the top, a leaf and a flower.
If you are simply punching the shapes out of cardstock you may not want to punch them all out at the same time but if you have stamped and colored the images you can easily punch them out at the same time. Of course, there’s a trick…
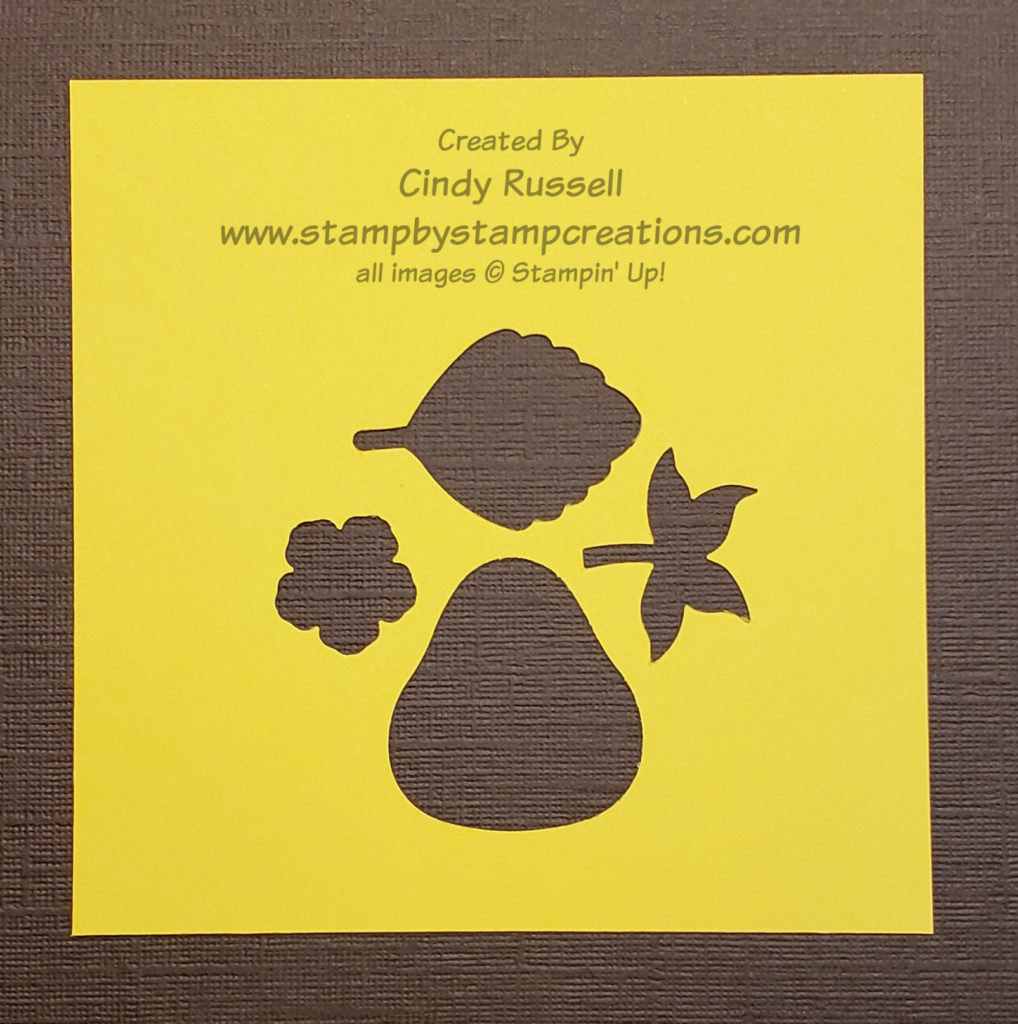
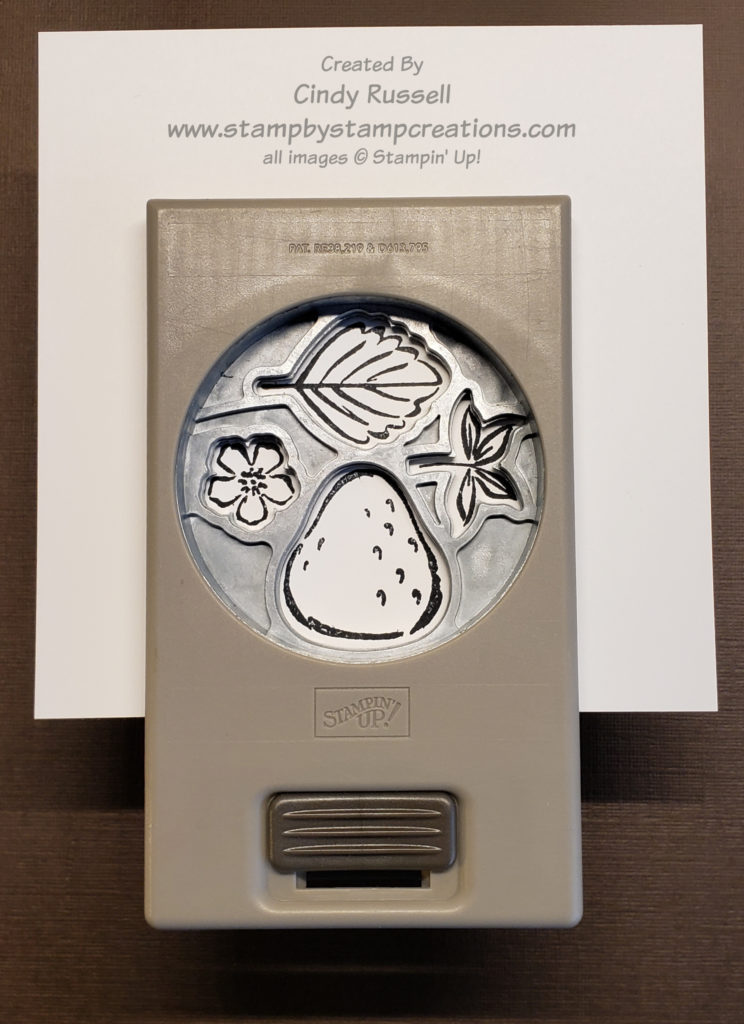
1. Turn your punch over and punch a template
Builder Punch Template
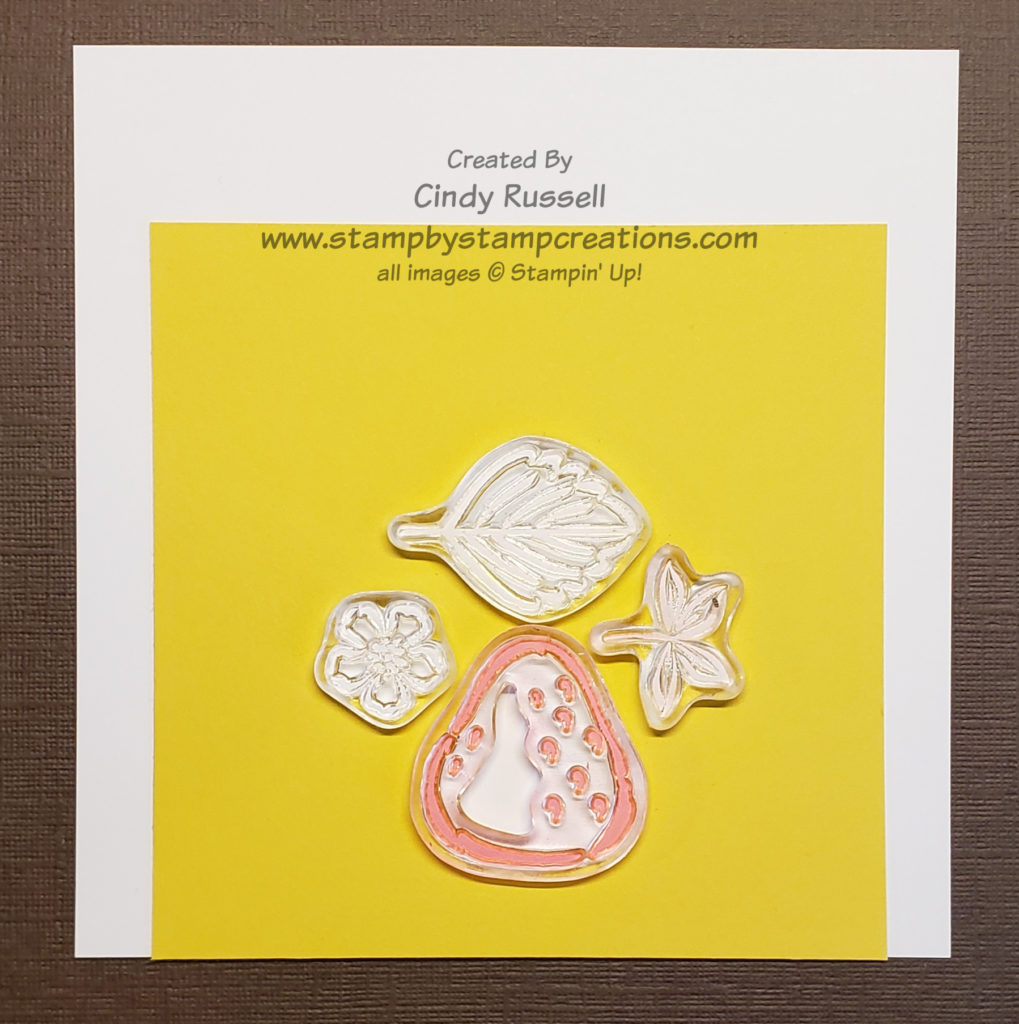
2. Place the individual stamps in the template with the side that you stamp with down.
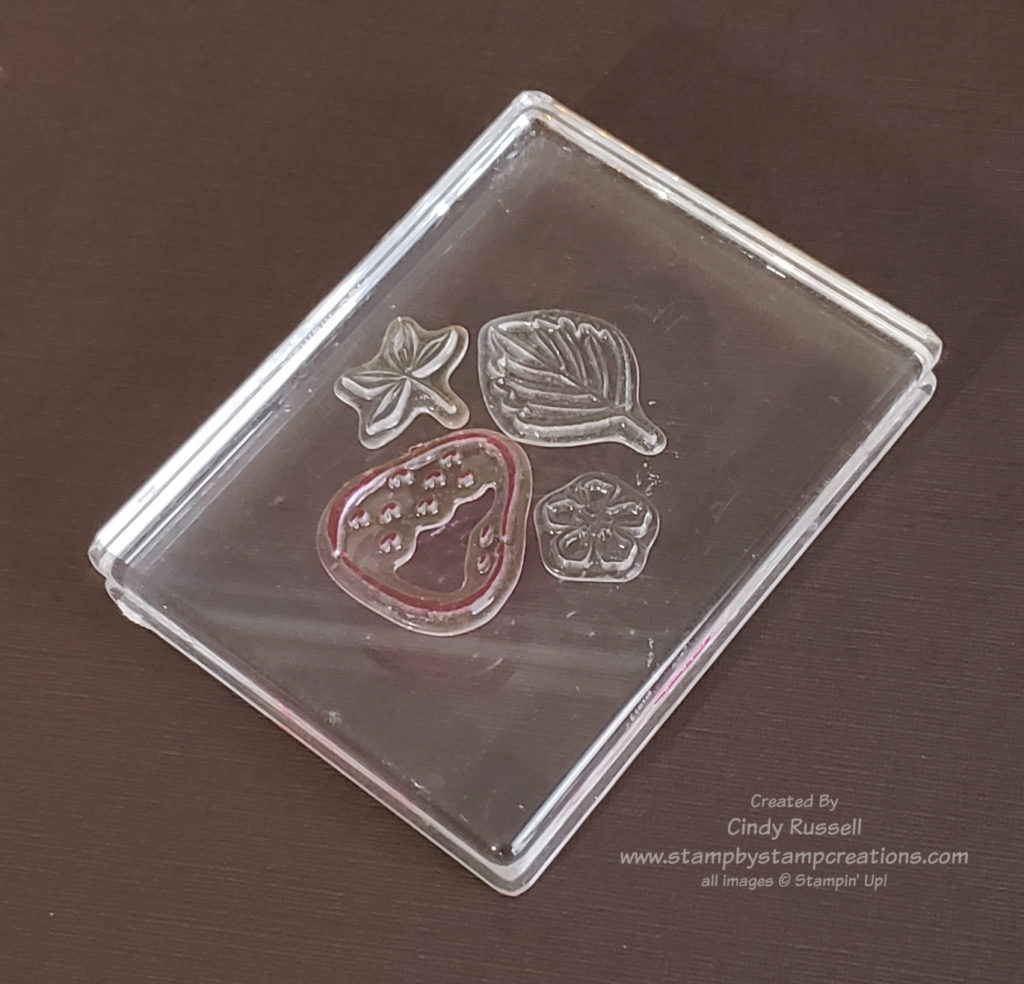
3. Press a clear block on the stamps so that they will stick to the block.
4. Stamp (and color) your images.
5. Line up the images in the punch and punch out your shapes.
Using a template makes it very easy to punch out all of the stamped images at the same time when using a Builder Punch. Stampin’ Up! currently offers 9 Builder Punches including two in the January – June Mini Catalog.
Paper Punches are great tools for any craft room. I like punches because you can just grab them and punch out your image. You don’t have to find the dies, get out your die-cutting machine and die cut the image. Punches are nice and easy to use in a class setting too.
Stampin’ Up! carries a variety of different types of punches. You can view all of their punches here in my online store or on pages 165-169 in the Annual Catalog and page 86 of the January – June Mini Catalog.
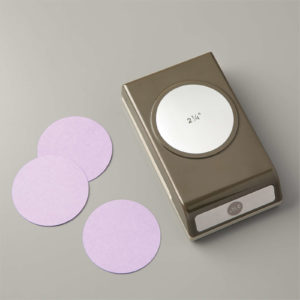
There are the basic punches that have just one or two simple shapes on them like a circle punch or the Double Oval Punch. These are they type of punches we are most used to seeing and using.
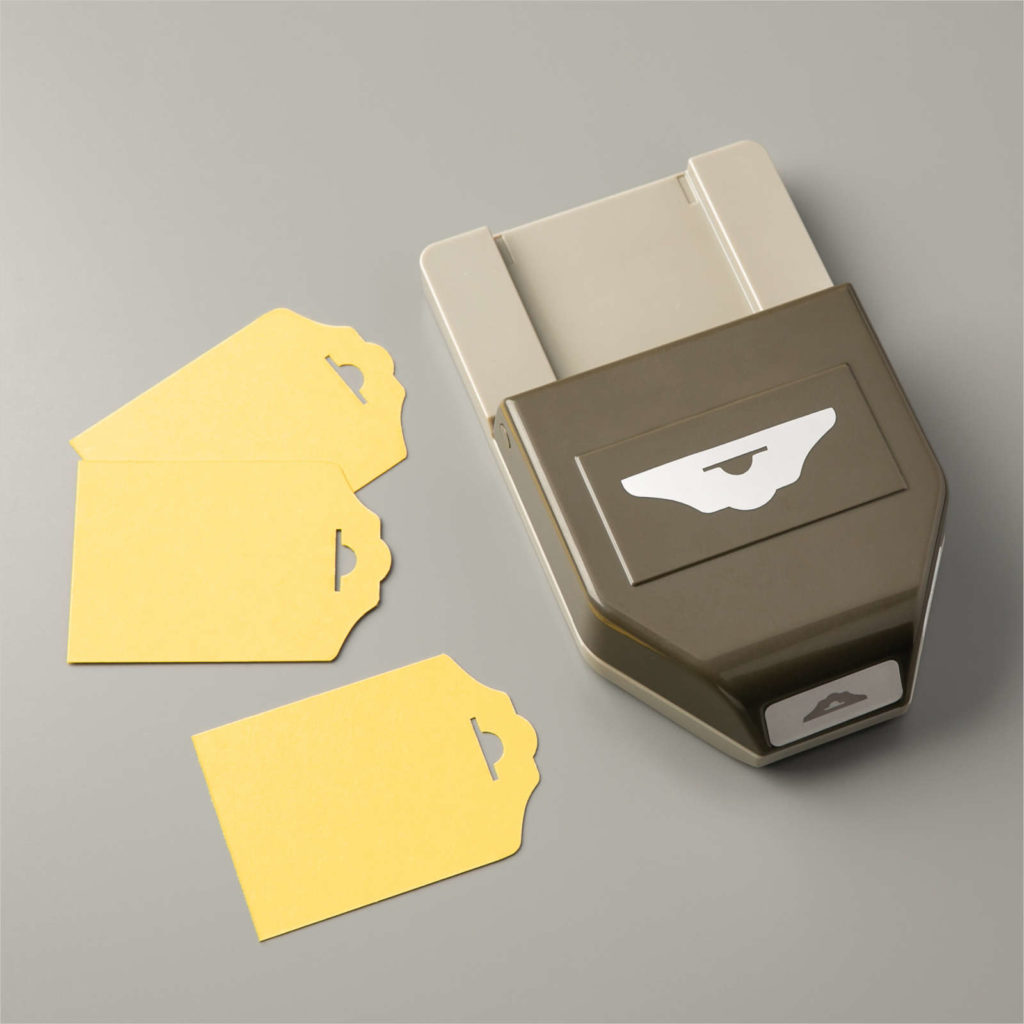
Stampin’ Up!’s Fancy Tag Topper Punch
Tag Topper Punches are exactly what’s in the name. They are punches that only cut the top of the punch along with a small opening for ribbon or twine.
Tag Topper Punches aren’t just for tags though. You can make fun 3D items with them. Here’s an example that I found on pinterest:
Stampin’ Up!’s Lovely Labels Punch
Another type of punch is the Pick A Punch. These are probably the most versatile of the punches. They have slots that fit 3 different widths of cardstock and some of them have two different punches on them! These punches are perfect for sentiments or just to add a decorative edge to a strip of cardstock. With the three different width’s they can accommodate they can fit lots of different types of sentiments.
Stampin’ Up! currently has different punches similar to the one in the photo but they also have a Banner Triple Punch that also can accommodate the three different widths of cardstock.
Next week in my Tools of the Trade post I will share Builder Punches with you along with some tips on using them.