Fun Fold: Corner Flip Card

Snailed It Corner Flip Card

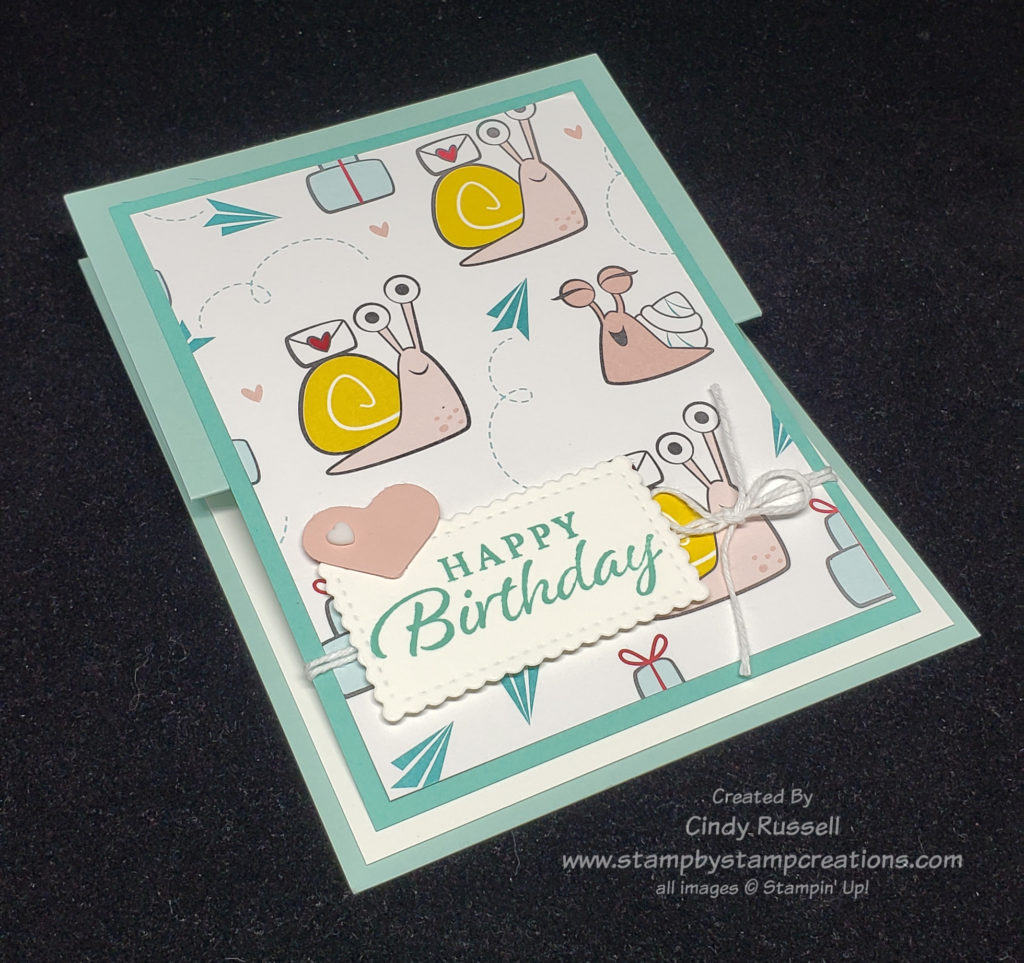
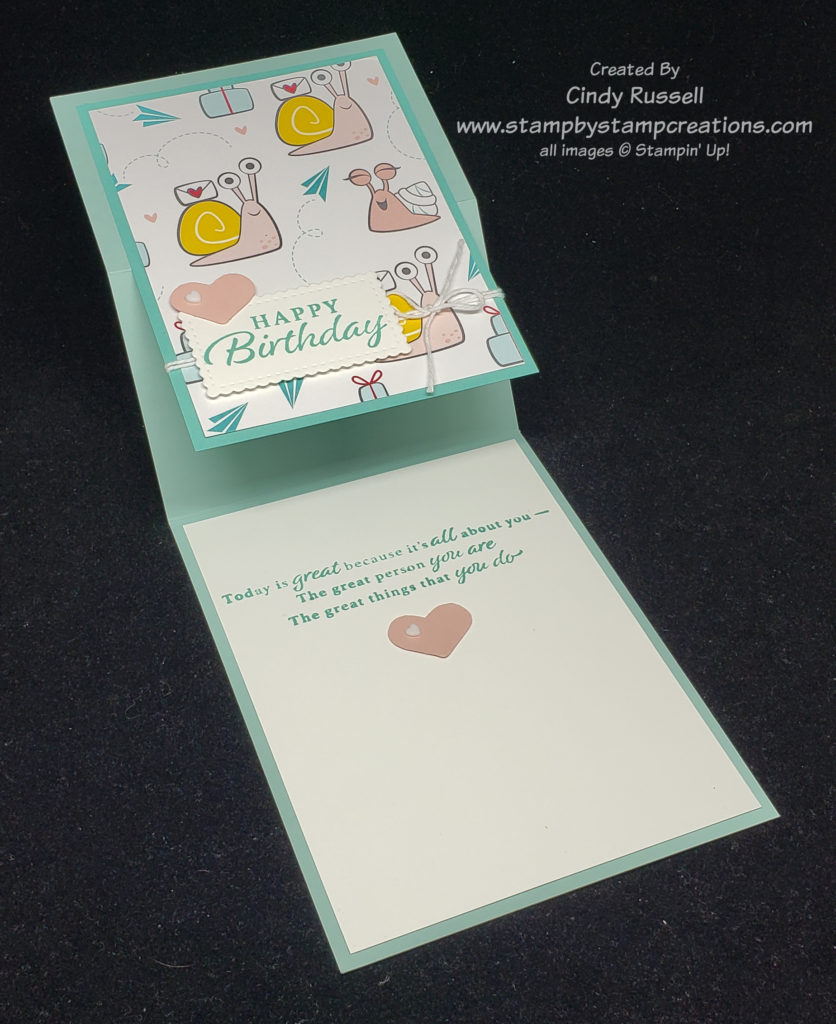
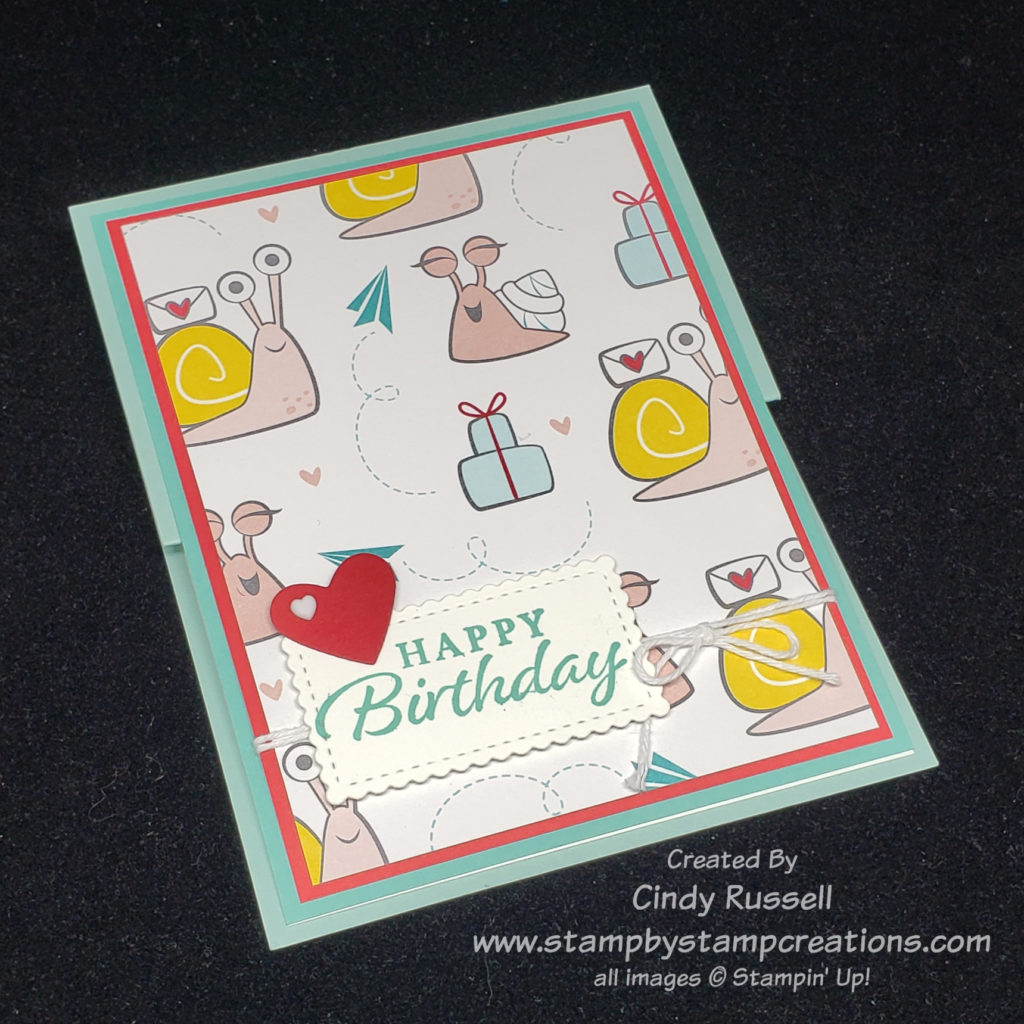
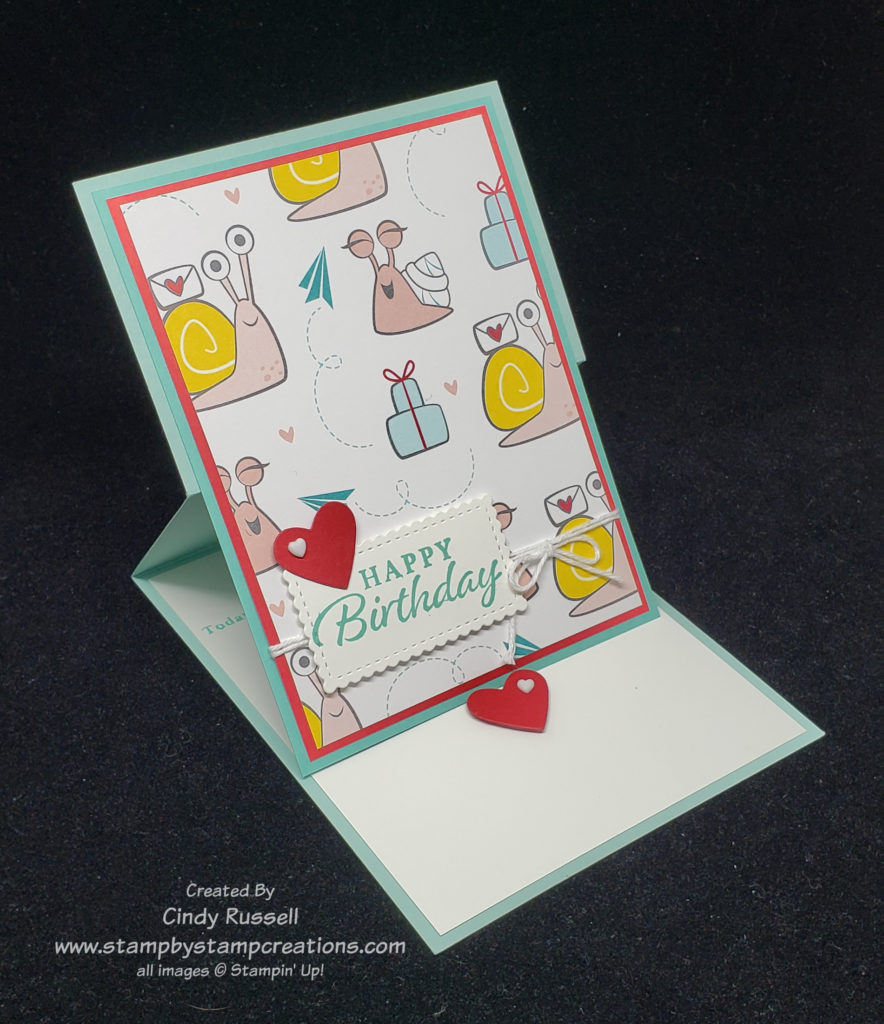
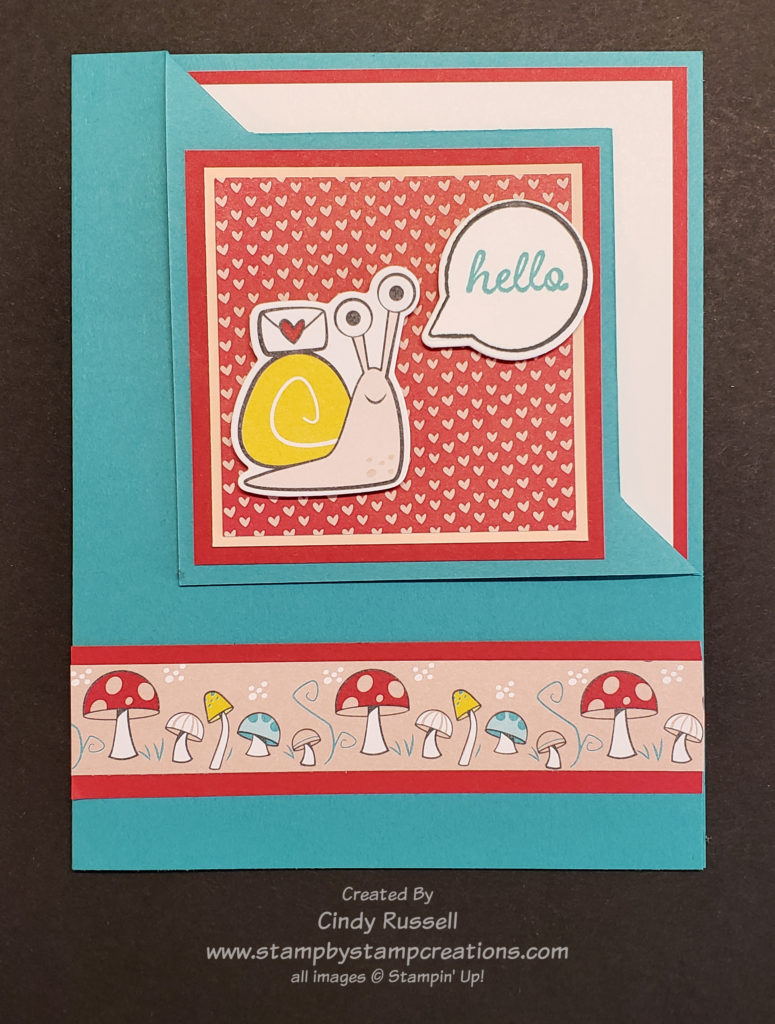
Today’s Fun Fold is the Corner Flip Card.  It’s called this because….you make a couple of cuts, a couple of score marks and flip the corner!  Ha!

I used the Snailed It Bundle and the Snail Mail designer paper on my card.  Too cute!  The little snail is die cut right from the designer paper.  No stamping, no coloring and no fussy cutting! The only stamping I did on the whole card was the “hello” and the outline on the word bubble!

I’ve made a short video to show you how easy this Fun Fold is to make.  You can view it below.  After the video you will also find the template with instructions that I mention in the video.  In the video I also mention that the important thing to remember is that you do the cutting with the card base upside down.

Corner Flip Card Template

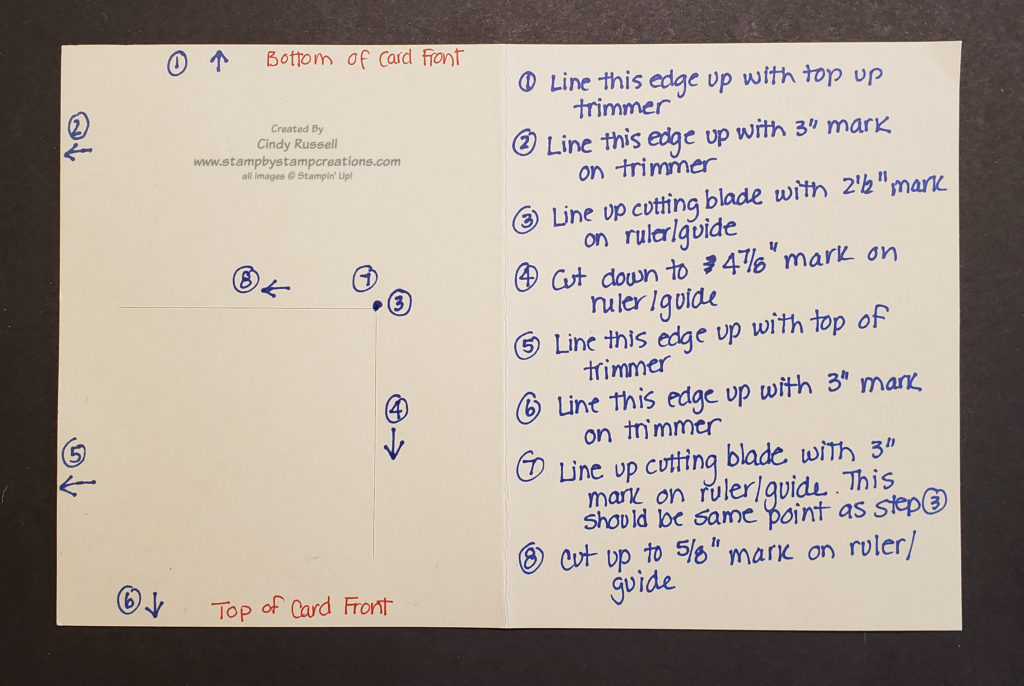
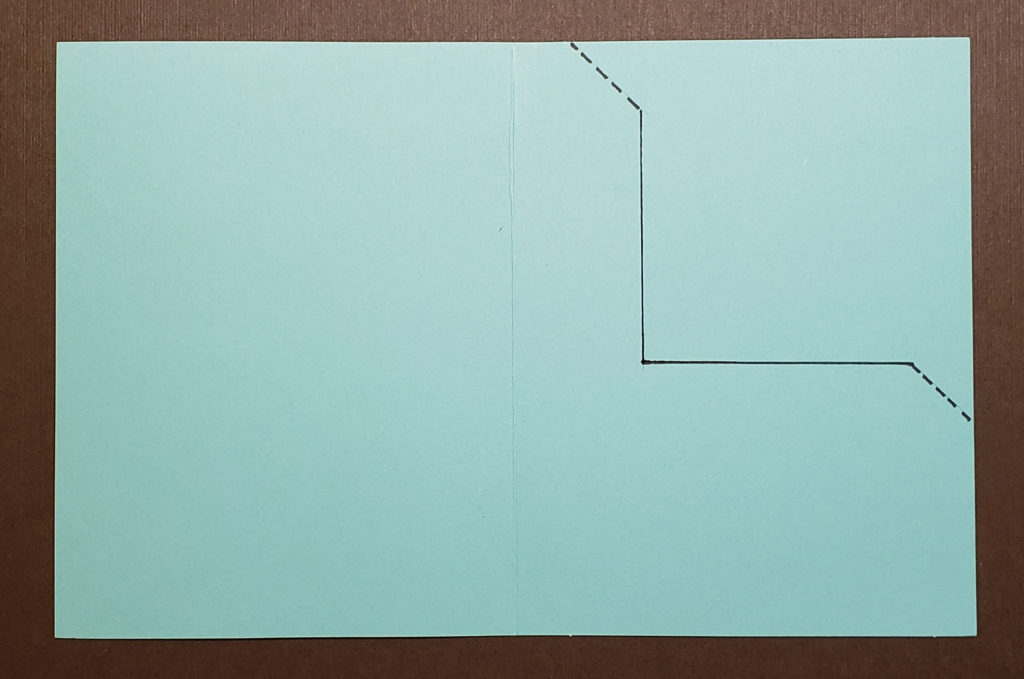
In this photo I’ve oriented the card the right way and I show you the lines I’ve cut and how I’ve scored. The solid lines are where I cut according to my template and the dotted lines are where I scored.

To make the angled score marks I lined up my ruler with the top of the vertical cut and the right end of the horizontal cut. Then I used my bone folder to score from each of those marks to the edges of the card.

To make the flip you then want to take the upper right corner of the card and fold it along the score marks towards the meeting point of the cutting lines. Easy Peasy! Now you’re ready to decorate your card.

I hope you’ve enjoyed the Corner Flip Fun Fold card! Have a great day! Take care and Happy Stamping!

Make-It-Mine Monday: Snailed It!

Snailed It Fun Fold

Oh, my gosh! These snails are so stinkin’ cute! I only have the designer paper right now but I am ordering the stamp set and dies on my next order. I can’t wait!

I usually don’t go for the cutesy stamp sets and dies. I stick with the more traditional ones. However….the more I see of these little snails the more excited I am to have them in my stamp room!

Recently I took a training from another demonstrator which included cards we could make. The adorable card here is one of the cards we were able to make with our kit. I love new ideas!

Hopefully you can see in the photos this is a Z-fold card like the strawberry card I shared with you in this post. The only difference is that the strawberry card had a horizontal layout and this card is vertical.

This card turned out very cute but as I was making it I thought about how I could make it into an Easel Z-fold card like the one I shared with you here.

Of course, simply turning it into an Easel Z-Fold wasn’t the only change to be made by me. Hello….can you say “more layers please”? Ha! Actually, believe it or not, adding one layer and changing the color of the hearts were the only changes I made.

Snailed It Easel Z-Fold Card

I think adding the red layer and changing the heart to red make things pop a little more on the card. The little resin hearts (that are on both cards) are really fun to add to cards. They come in red and in white. I do have to admit that I didn’t have the Kiss Punch which is where the pink heart came from on the first card. I had to dig through my retired stash of dies to find a heart that was about the right size for my version. This is why I hardly ever get rid of things! Ha!

Have a great day! Take care and Happy Stamping!