Make It Mine Monday: More Love of Leaves

Well….someone apparently forgot to actually publish this blog post yesterday…..so even thought it’s Tuesday, here you go. Sorry about that!

Stamped Love of Leaves

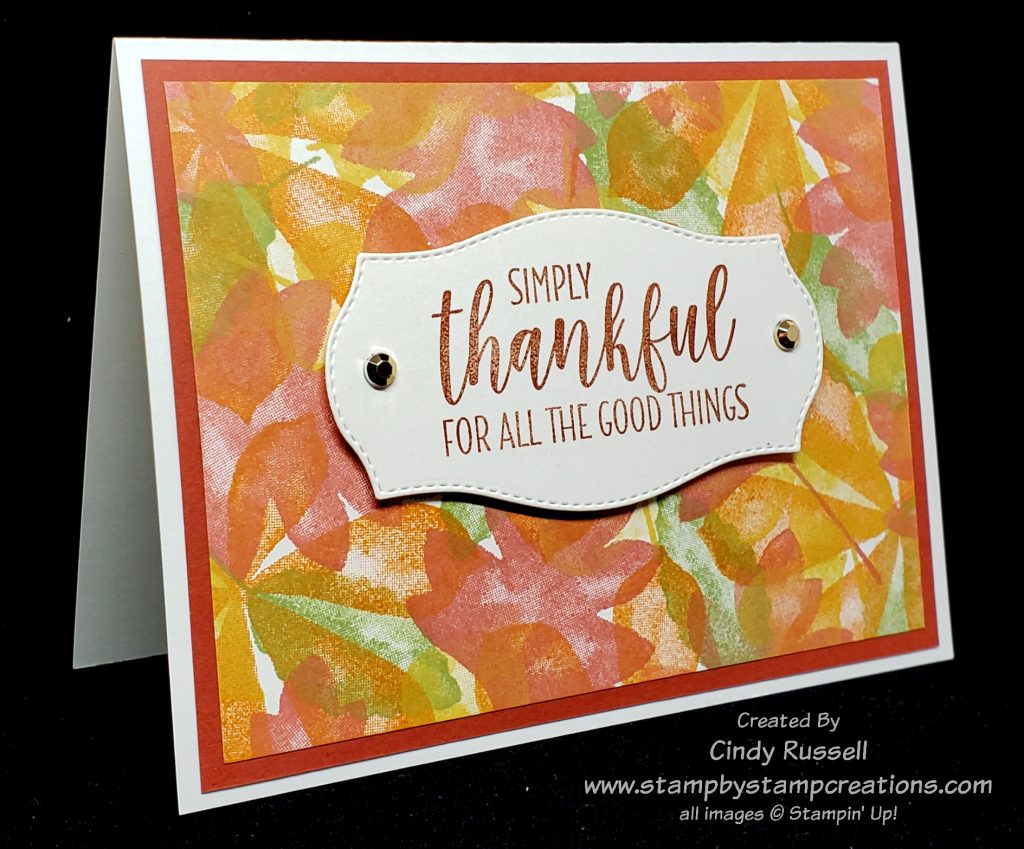
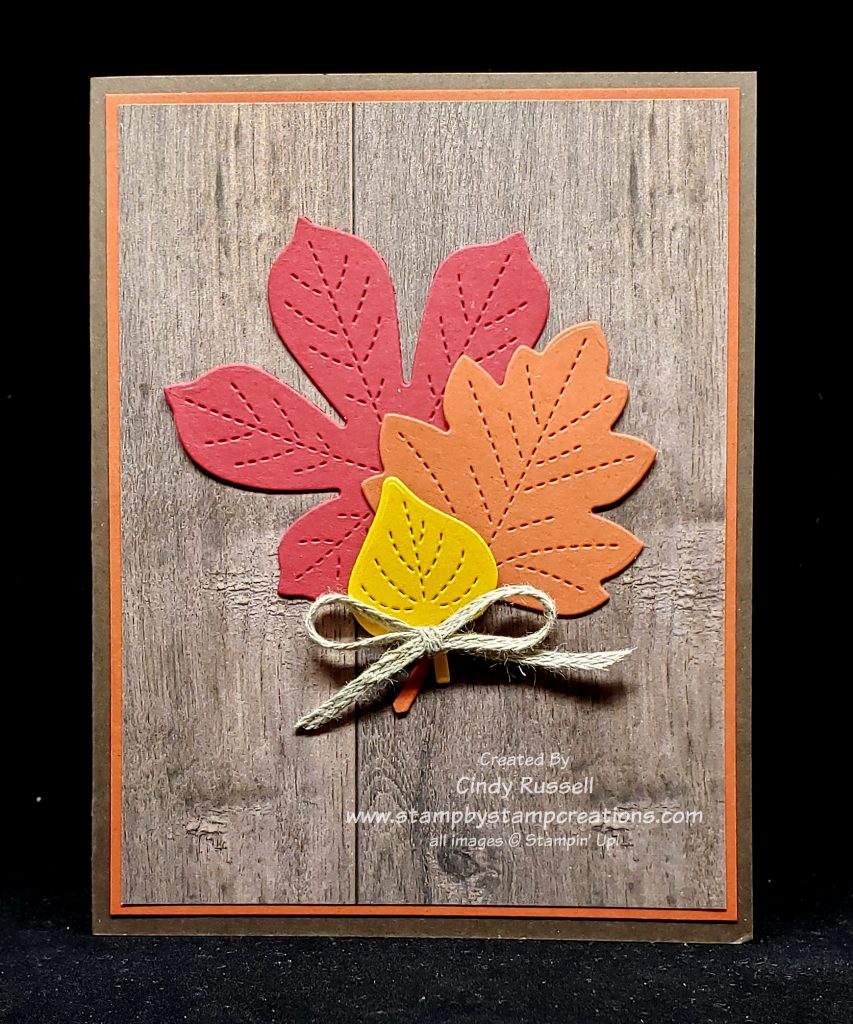
I do love fall and colored leaves. This card was made with the Love of Leaves stamp set (which coordinates with the fabulous Stitched Leaves Dies!). Instead of using the stamped leaves as the focal point of my card I used them as the background. I used four of the five leaves from the stamp set and chose four colors of ink. The inks I used were Pumpkin Pie, Terracotta Tile, Bumblebee and Pear Pizzazz. I tried using the Old Olive ink but it was just a little dark.

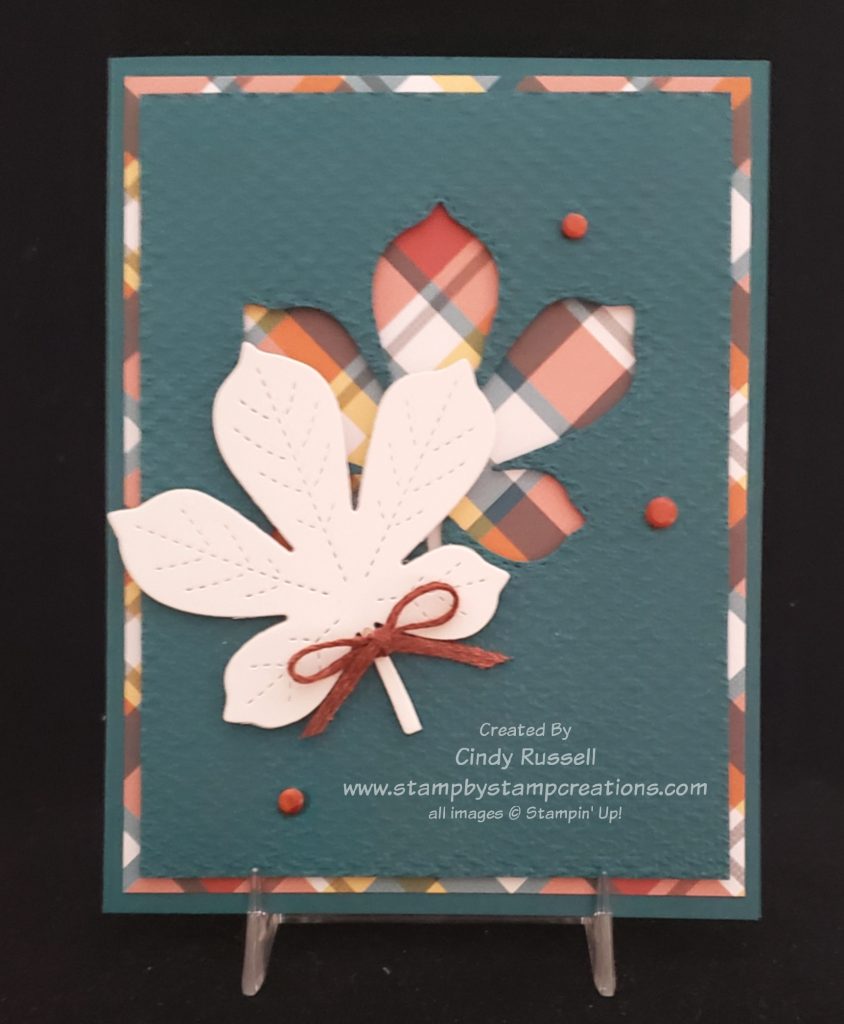
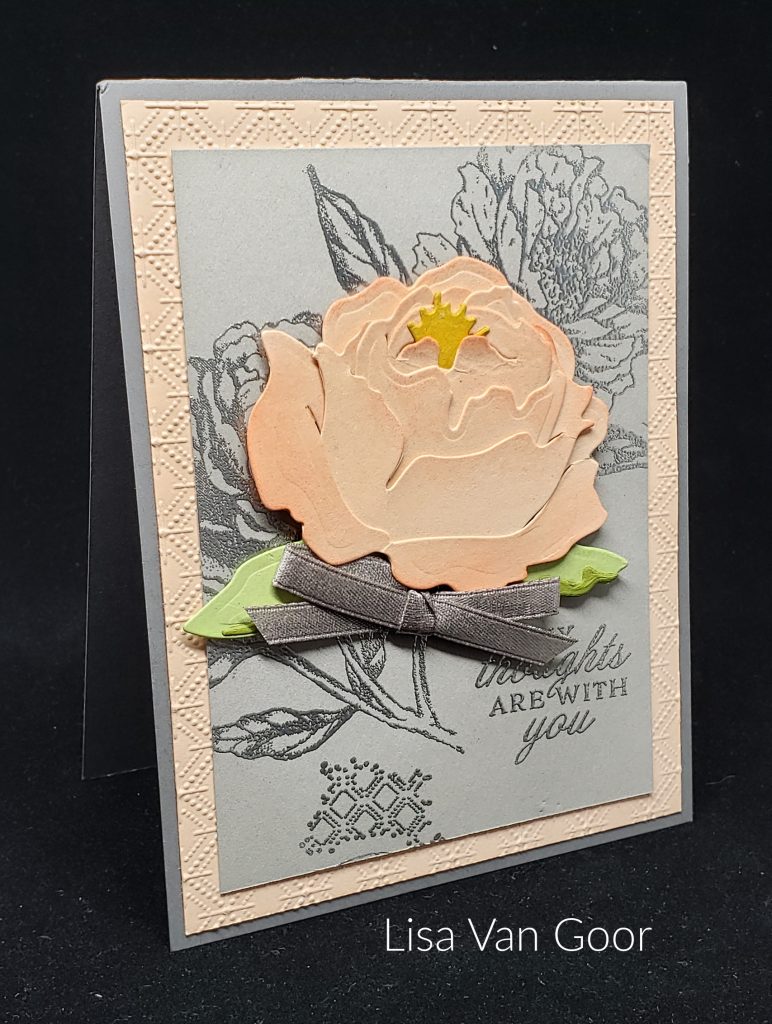
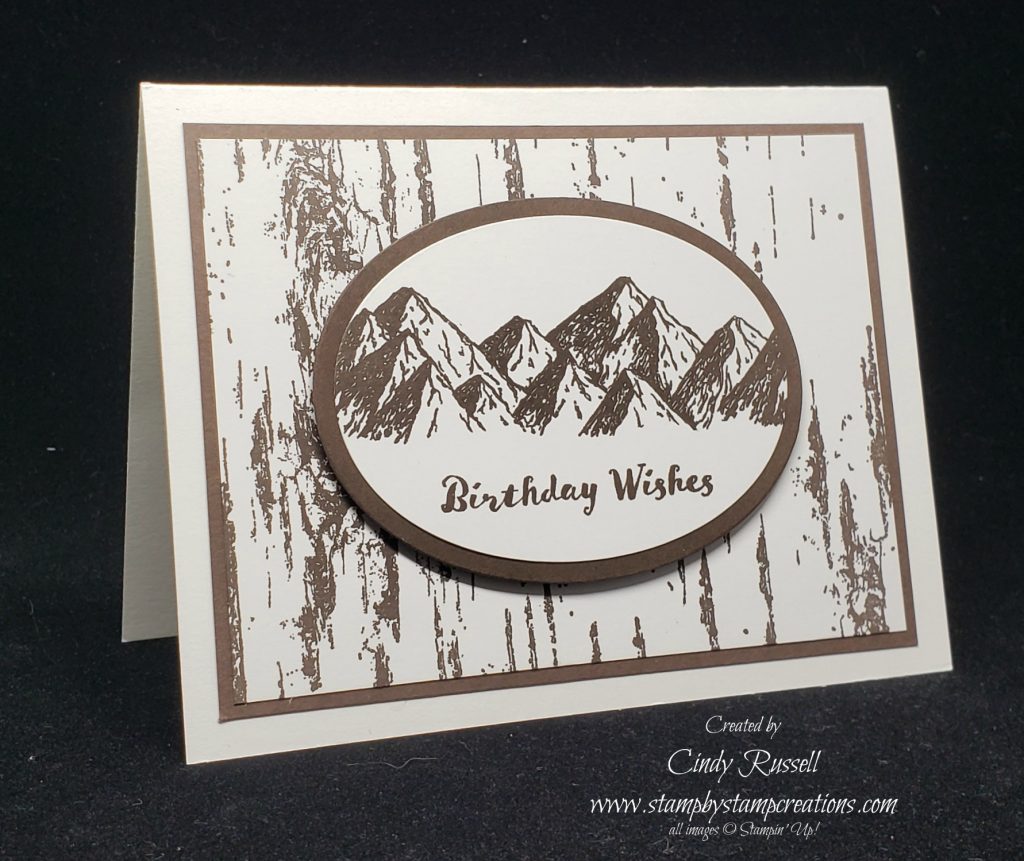
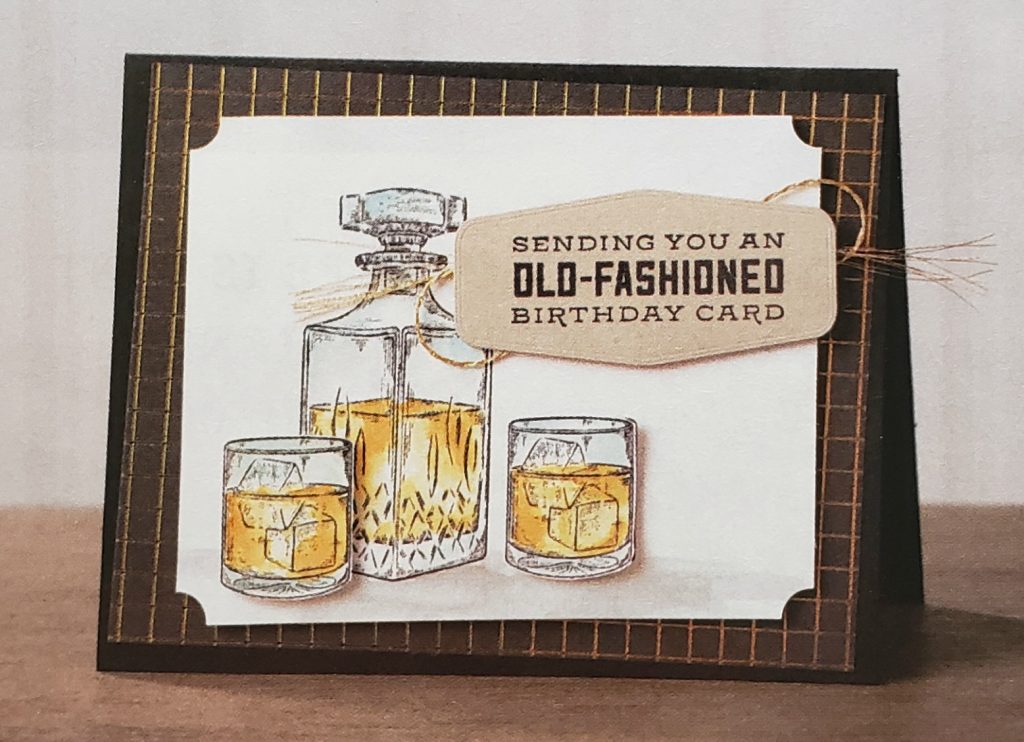
It’s Make It Mine Monday so that means that my inspiration came from someone else. This week I CASEd Brian King. I love Brian’s clean and simple style.

Love of Leaves – Brian King

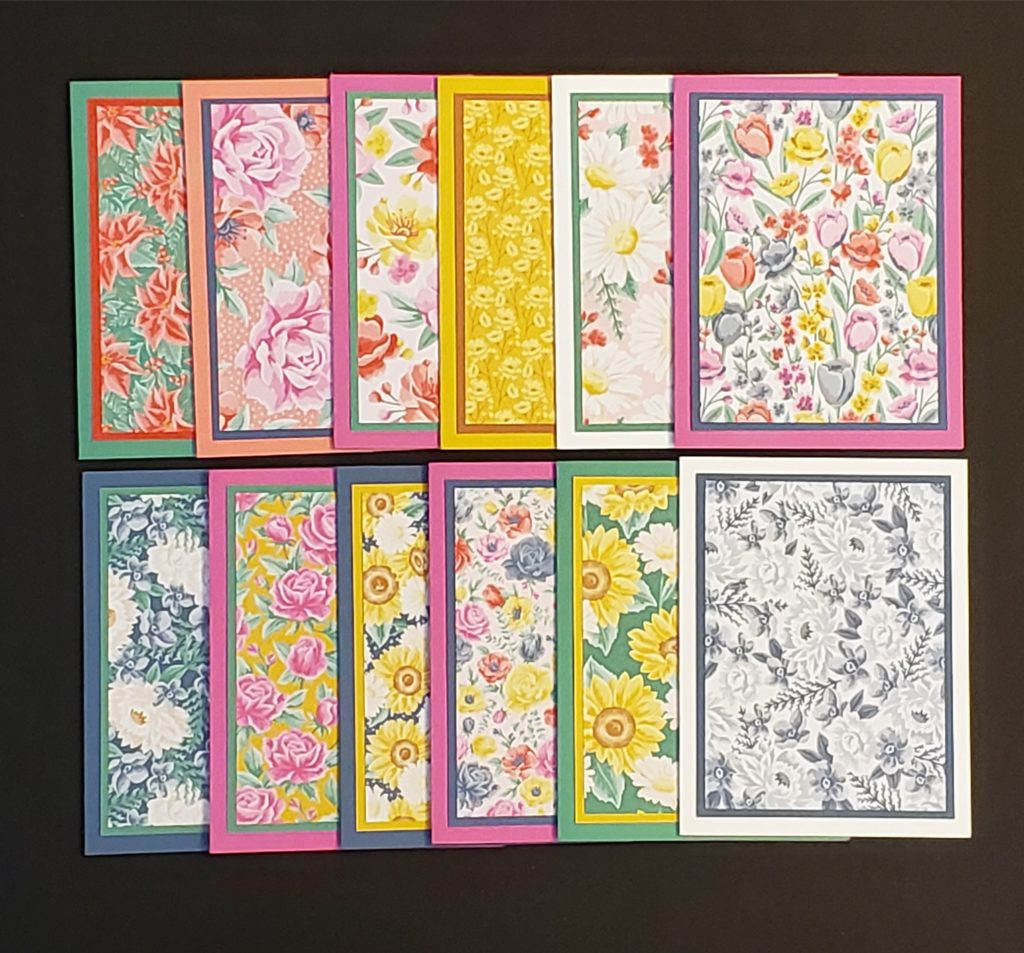
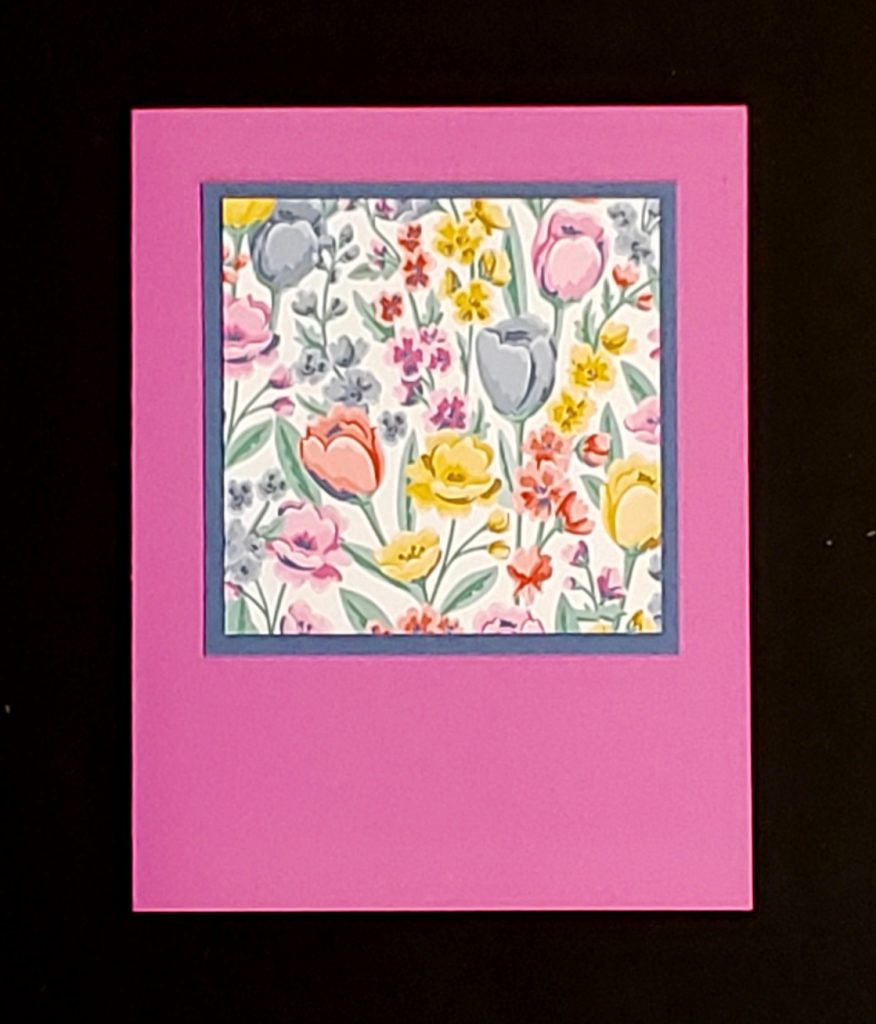
As you can see, I kept fairly close to Brian’s original design. You may know that I have trouble with random stamping but I think I did okay with this card. The nice thing was that I could stamp over the other images and it didn’t matter. The sentiment for the card came from the Country Home stamp set which can be found in the Annual Catalog (page 89). I used one of the dies from the Tasteful Labels die set. This set of dies is great as it has 10 dies of different shapes and sizes. I love versatility!

Have you tried any Make It Mine projects? I challenge you to find a card that you like and make it your own. I’d love to see what you come up with. Have a great day! Take care and Happy Stamping!

Make It Mine Monday: Love of Leaves

As soon as September hits I’m ready for the leaves to change color. Of course, it’s in the upper 90’s still here in Colorado. Yikes! I can still dream of those days later this month though when the leaves finally do change color.

Make it Mine Monday: Love of Leaves

Have you seen any of my Make It Mine Monday posts? This is when I share a card that I’ve copied from someone else and put my own twist on it. The card above is the one I created. It was one of the cards that I created to possibly be used in my Stitched Leaves Card Class (To Go!). It didn’t make the cut. If you click on the link you can find out all about my newest Card Class (To Go!) and see the other projects I made using the Stitched Leaves Dies.

Love of Leaves.stampinpretty

Above you can see the card that I got my inspiration from. Ok….I basically copied it. I tried making my card using the Pretty Peacock leaf that I die cut but I just didn’t like the look so I die cut a white leaf. I also had white decorative dots on the card but again, I didn’t like the way they looked so I took my Dark Cajun Craze Stampin’ Blend Marker and colored them. I love that you can do that!

Now that I’m scrutinizing my card as I’m writing this post I think I should have at least tried to see how coloring my Braided Linen Trim with the Dark Cajun Craze Stampin’ Blend Marker would have looked. I bet it would have looked really nice. Hmmm….

Make It Mine Monday: Love of Leaves Take 2

Here are my words of wisdom for the day…..don’t be afraid to second guess yourself. Once I started wondering about the colored Braided Linen Trim I had to get up and and try it. Below you can see how the card just “came together” once I added the colored trim. I liked the card before but now it’s “complete”. The natural colored trim on my original card just looked washed out. Thanks for giving me the idea to color it. 😀

Have a great day! Take care and Happy Stamping!

It Feels Like Fall!

The days can still get pretty warm here in Colorado but the nights are wonderful and they feel like fall! Last night in got down into the lower 50’s! Great sleeping weather for sure! Fall is my favorite season and I’ve been having a blast creating cards with the Stitched Leaves Dies.

Stitched Leaves Card

I’ve been having so much fun because I’ve been creating a new Card Class (To Go!)! The Stitched Leaves Card Class (To Go!) is here and I think you’re going to love it! Check out the details below.

Stitched Leaves Card Class (To Go!)

Stitched Leaves Card Class (To Go!)
$20

4 cards

No stamping involved.

You will receive everything you need to make the cards except for adhesive, scissors and bonefolder.

All pieces for the cards will be cut, scored, die-cut and embossed for you.

You will receive step-by-step instructions with photos.

Supplies you will want to have on hand to complete the cards:

Stampin’ Dimensionals
Mini Glue Dots

The cost for the Stitched Leaves Card Class (To Go!) is $20. The deadline to register for this class is Thursday, September 10th. Kits will be ready for pickup/delivery/mailing no later than September 17th (mailing fee is extra).

To purchase your class please email me and let me know that you’d like to purchase the Stitched Leaves Card Class (To Go!). I will also need to know how you’d you prefer to pay and if you need your kit mailed. I can accept payment through Paypal, Venmo or cash/check. If there is interest, I will schedule a Zoom class where we can make our cards together.

Have a great day! Take care and Happy Stamping!

Creating is a Process

Creating a project (of any sort) is a process. Let’s face it, you don’t always get it right the first time. I know this for a fact. It happened to me while I was designing cards for my Sunflower Card Class (To Go!). Check out the card below…

Sunflower card….first attempt

This card is very nice and I’m sure someone would be pleased to receive it (if I ever remembered to send out a card…). The flower coordinates with the designer paper as does the ribbon and the card stock. It just wasn’t quite what I had envisioned in my mind.

The next step was to figure out what I could change on the card. Hmmm….. I liked the idea of using the designer paper as the base of both the flower and the leaves so that wasn’t it. Looking at the flower itself though, I figured out that I didn’t like the center of it. I felt that the center was too small. Ok…that was the first thing I could change in the next step of my creative process.

What else could I change though? Cinnamon Cider is a pretty brown and Stampin’ Up! definitely needed a lighter brown in their color spectrum but I just wasn’t feeling it on this card. That was the second thing I could change. The Cinnamon Cider had to go and I needed to come up with something to replace it with. Just Jade was definitely the answer.

Sunflower card…second attempt

I think those few small changes took my card from nice to really nice. Adding texture and another layer to center of the card really helped and changing the Cinnamon Cider cardstock and ribbon to Just Jade took the card to the next level.

Don’t be afraid to make that first attempt in the creative process. If it’s not quite what you were envisioning try, try again. Have a great day. Take care and Happy Stamping!

P.S. Today is the last day to purchase my Sunflower Card Class (To Go!). Don’t miss out on making some fun cards. No stamping involved!

Introducing…..

Stamp Club (To Go!)

Today I am introducing another virtual experience for you crafters!  With this pandemic and social distancing I’ve had to step outside my comfort zone to start bringing new crafting experiences to you.  It started with Simple Card Kits To Go.  Then I added the Card Class (To Go!).  My Sassy Stampers & Friends group is offering Stamp Camp (To Go!) and now I am offering Stamp Club (To Go!).

What is Stamp Club (To Go!)?  Simply, Stamp Club (To Go!) is like attending one of my in-person classes and getting the class for free with an order!  The best part is that you get a few more perks in Stamp Club than you would have with an in-person class with purchase!

Here are some of the highlights of Stamp Club (To Go!)

  • Stamp Club (To Go!) is a 6 month commitment by you to purchase $25 or more in Stampin’ Up! Merchandise each month.
  • During one of the six month’s you will be chosen as the “hostess” and receive $15 in Stampin’ Rewards (free product).
  • During your hostess month you will also receive 20% off of your entire purchase.
  • Each month I will design 3 exclusive projects with instructions for Stamp Club (To Go!) members.   All three projects will be made using one stamp set/bundle.  I will mail you out all of the pieces and parts you need to make these 3 projects.  You will need to supply your own stamps and ink to complete the projects (which you may choose to purchase on your order that month).
  • Each month we will do a Zoom meeting or I will do a Facebook Live showing how to make the projects and we can make them together.
  • As a thank you for signing up for Stamp Club (To Go!) you get to choose any color of Stampin’ Up! ink pad that you’d like.
  • (**New Perk!) As a Stamp Club member, each month you will get to purchase one of my Card Classes (To Go!) for only $16!

Each month will run the same.  Here is a general outline of the month for Stamp Club:

  • The 4th of the month is the deadline date for new members to sign up for Stamp Club.
  • On the 5th of the month I will let Club members know what stamp set/bundle I will be using on the projects that month in case you’d like to add it to your monthly order.  I will also give you the Hostess Code to use on your online orders to make sure they get credited to Stamp Club.  If you live close enough to me for porch pick-up or delivery, I can place your order for you but I would need payment before placing the order.
  • Stamp Club (To Go!) orders must be completed by the 14th of the month.
  • On the 15th of the month I will start mailing out/delivering the project kits to members so that you will have them before our virtual meeting at the end of the month.
  • Some time near the end of the month (I have quite figured out a set time/date for this) we will have our Zoom meeting to make our cards.  This will be recorded so if you can’t join us you can still see how the cards were made.

There is no limit on the number of people that can participate in Stamp Club (To Go!) and you can join anytime.  Invite a friend!

Stamp Club (To Go!) will start in September.  If you sign up to begin Stamp Club (To Go!) in this first month you will also receive a FREE ink refill to go with the ink pad that you choose!

I’m pretty excited about this new (To Go!) offering for you.  I hope you are too.  Please contact me with any questions you may have on Stamp Club (To Go!).  Have a great day!  Take care and Happy Stamping!

Sunflower Card Class (To Go!)

My Sunflower Card Class (To Go!) is my newest Card Class (To Go!) and it’s all about the fun Sunflower! This Card Class (To Go!) will be made using products from the Flowers For Every Season Suite found on pages 10-13 in Stampin’ Up!’s Annual Catalog.  I have designed 3 beautiful cards for you to make plus a Bonus Card that I’ve shared previously.

Sunflower Card Class (To Go!)

  •  3 detailed cards + 1 bonus card.
  • No stamping involved.
  • You will receive everything you need to make the cards except for adhesive, scissors and bonefolder.
  • All pieces for the cards will be cut, scored, die-cut and embossed for you.
  • You will receive step-by-step instructions with photos via e-mail.

Supplies you will want to have on hand to complete the cards:

  •   Stampin’ Dimensionals
  •  Mini Glue Dots

The cost for the Sunflower Card Class (To Go!) is $20.  The deadline to register for this class is Monday, August 24th.   Kits will be ready for pickup/delivery/mailing no later than August 31st (mailing fee is extra).

To register, please email me and let me know that you’d like to purchase the Sunflower Card Class (To Go!).  I will also need to know how you’d you prefer to pay.  I can accept payment through Paypal, Venmo or cash/check(if local).  If there is interest, I will schedule a Zoom class where we can make our cards together.

I’m excited about my Sunflower Card Class (To Go!).  I hope you are too! Have a great day!  Take care and Happy Stamping.

New Mini Catalog is Here!

Stampin’ Up!’s August-December 2020 (Holiday) Mini Catalog

Stampin’ Up!’s new August-December 2020 (Holiday) Mini Catalog is here! Woo Hoo! This catalog is filled with fabulous new products that you will definitely want to check out! You can view the catalog here or just click on the photo of the catalog on the right.

One of the great things about this catalog is that it is available a whole month earlier than usual! We now have an extra month to create all of our holiday projects! Can I hear another Woo Hoo?! 😀

This catalog covers all of the major holidays coming up. Halloween, Thanksgiving and Christmas. Of course Fall is covered and there are a few Valentine things. Plenty of fun to choose from!

When you head to my online store to purchase all of these fun products you will notice that there is a whole new look and feel to it. It should be much easier to navigate and use. If you’ve shopped in my online store before you will have to enter your user name and password instead of depending on your browser as it’s a whole new site. Please check out the top bar of the website to see that it is showing that you are shopping with me. I’d much appreciate it.

Be sure to let me know if you have any questions on the new Mini Catalog or the new Online Store. I’m here to help. Have a great day! Take care and Happy Stamping!

Prized Peony

I told myself that I didn’t need any more flower stamp sets or bundles. Then I started seeing absolutely gorgeous cards made with the Prized Peony Bundle and all my will power went out the window. I had to get the Prized Peony Bundle….actually, I purchased the entire Peony Garden Suite. BEAUTIFUL!

Yesterday I shared a gorgeous birthday card with my mailing list that was made using this suite of products. If you aren’t on my mailing list I’m sorry you missed it. You really should sign up to be on my mailing list because the projects I share with my mailing list I don’t share anywhere else. Just fill out the box at the top of the left column here on my blog to sign up for exclusive projects and tips.

Peony Garden Lisa Van Goor

The card above was made by fellow demonstrator Lisa Van Goor. Lisa made this card for a swap that I host. All of the participants designed a card and then made one for all of the other participants. Participating in a swap is a great way to get project ideas!

This 3D die-cut flower is so easy to put together! There are 4 pieces of the actual flower and you just slip them into each other. Amazing! On Lisa’s card you can see how she brushed a little extra color on the cardstock to give the pieces a little dimension. You can also place Stampin’ Dimensionals between some of the layers to really make the flower pop.

So pretty! I am really glad I purchased this suite of products. You should too! The entire suite is gorgeous. You can see all of the products included in the suite here.

Have a great day! Take care and Happy Stamping!

New Simple Card Classes To Go!

I have some new, gorgeous Simple Card Classes To Go for you!  New designs and new papers.  Check out the classes below and email me with the items you’d like to order.  We need to get back to stamping! 

The deadline to order these kits is Monday, July 20th.

Peony Garden #1 Simple Card Class To Go

The Peony Garden designer paper is so lovely in these shades of pink and grey.  In Peony Garden Design #1 you will get all of the cut papers to make 5 cards for a cost of $10.

Peony Garden #2 Simple Card Class To Go

Peony Garden – Design #2.  5 cards for $10

Peony Gardern #3 Simple Card Class To Go

Peony Garden – Design #3.  5 cards for $10

Flowers for Every Season #1 Simple Card Class To Go

Flowers for Every Season #1 Simple Card Class To Go. 12 cards for $20

Flowers for Every Season #2 Simple Card Class To Go

Flowers for Every Season #2 Simple Card Class To Go. 12 cards for $20

Flowers for Every Season #2 Simple Card Class To Go

Flowers For Every Season – Design #3 12 Cards for $20 When you order this design you will receive all of the different patterns/colors of cards as shown above.

If you would like to order any of these kits please contact me at cindy@stampbystampcreations.com.

Color, Color Everywhere!

Add title

Stampin’ Up! is all about color. They’ve got their core colors that work so well together and they also have the In-Colors that they change up every year to stay current.

How many colors does Stampin’ Up! have in any one year, including the In-Colors? If you said 50 you are correct. There are 4 color families with 10 colors in each family and then there are 10 In-Colors. This does not include Basic Black and Whisper White.

With so many Stampin’ Up! colors to choose from at any one time do you have a favorite? I do! But I’m not going to tell you what it is until the end of them month!

I’m not going to tell you because July is my birthday month and throughout the month we’re playing “How Well Do You Know the Birthday Gal?” On my blog here and on my Facebook Page I’ll randomly be posting questions about me! If you know the answer or would like to make a guess just leave a comment with your answer/guess. A points will given for leaving a comment and 3 points will be given for the correct answer! Of course there will be a prize at the end of the game!

My question today is actually 2-part…

  1. What is my favorite color? (generically)
  2. What is my favorite current Stampin’ Up! color?

And yes, points will be given for both questions. 😀

Leave a comment now and answer the questions for you chance at a prize I think you’ll enjoy. Have a great day! Take care and Happy Stamping!

Golden Birthday Card

It’s Throwback Thursday AND it’s my birthday month so I definitely had to find an old birthday card to share with you!

This fun card is from 2 1/2 years ago! January 2018! Can you believe it? I love all of the gold on the card from the designer paper and gold foil sheet to the embossed image and edging on the ribbon. Too fun!

You can check out the original post here to find out how I made this card and where I got the original inspiration. The stamp set used on the card was called Celebration time and of course had coordinating dies. I should have hung on to this bundle I’m really short on birthday stamp sets for some reason. I guess I’ll need grab my catalog and do a little shopping. 😀

What birthday stamp sets do you have on your stamp shelf? I’d love to hear so please leave a comment.

Have a great day! Take care and Happy Stamping!

Step Up Your Projects!

It’s time for another Cruise the Catalog tip! With the “Step It Up” features in Stampin’ Up!’s new annual catalog you can see how to “step up” your projects. You will find a number of these features throughout the catalog showing you how to make a lovely basic card. Add a little more detail on the second card and go for the WOW factor on the third card.

Step It Up

As you can see in the photo above, all three cards have the same design. Different elements were just added to the second and third cards to take them to the next level.

This is a great feature to help you step outside your box and maybe try a little something different on your next card. I do this a lot when I’m designing. I will make a perfectly lovely card but want to add just a little something-something to it as it’s not quite what I envisioned originally. In the first card below you can see the first card I had designed for my dad’s birthday. Nice card and it would have worked fine. It just wasn’t quite what I was going for.

Mountain Air 1

I liked the basic layout of the card with the Birch background and the oval of mountains. I guess I was looking for a little more color so I switched a few things around a came up with this second card.

Mountain Air 2

As you can see, the second card isn’t all that much different from the first card. I kept the exact same layout with the Birch background and the oval of mountains. I just switched the card base color and added the same green to the oval of mountains. I then moved the sentiment to the inside of the card. Same card…just a little stepped up with a little more pop.

Give this a try next time you’re making a card….unless of course that first card is exactly what you envisioned. 🙂

Check out the Step It Up features in Stampin’ Up!’s catalog and see how just a few little additions can change up the card. The Step It Up feature that I showed you at the beginning of this post can be found on page 75 in the catalog. Leave a comment and let me know how many others you find.

Make It Mine Monday: Whiskey Business

Whiskey Business

My husband is a whiskey fan so when I saw the Whiskey Business stamp set in Stampin’ Up!’s new annual catalog I just knew I had to get it! It was the perfect card for a Father’s Day card!

My Whiskey Business

It’s Make It Mine Monday and that means that I got my inspiration for this card from somewhere else. I knew this stamp set would make the perfect Father’s Day card for my husband but I didn’t know where to start. It was time to head to Pinterest and the Demonstrator Planning Place Facebook Page (yes, there’s a whole FB page where we demonstrators share ideas….it’s great!). However, I didn’t find any inspiration. Then I headed to the place I should have started with….Stampin’ Up!’s Annual Catalog! Duh! The catalog is filled with ideas and inspiration and all I had to do was look up the stamp set name in the back of the catalog and head to page 33. There it was. The inspiration I was looking for.

Whiskey Business – Stampin’ Up!

I liked how the artist of Stampin’ Up!’s card placed the decanter and glasses. I did try out the designer paper but decided I wanted a cleaner look. Then of course I didn’t use the label for the sentiment because I didn’t have that die set (Tasteful Labels #152886 $31). Of course now I’m thinking I need this die set because there are so many interesting label shapes in it! Ha! I used the “straight up you’re the best” sentiment on the inside of my card along with a glass.

The images were stamped on the Fluid 100 Watercolor Paper with StazOn ink and then I watercolored the whiskey. I used a combination of Cinnamon Cider and Bumble Bee ink refills for my whiskey. I think it lighted a little more than I thought it would so I could probably have used a little more of the Cinnamon Cider ink on it.

The decanter was stamped directly on my focal point. The glasses were stamped and colored on scrap pieces of the watercolor paper and then cut out. I adhered one of them with Stampin’ Dimensionals to make it pop a little and the other with Mini Glue Dots. I used the new Brass Foil Sheets on my border layer. It’s a real nice color between the Copper and the Gold.

This was a pretty easy card once I had it designed. The hardest part was figuring out how to watercolor the whiskey.

Have a great day! Take care and Happy Stamping!

How Sweet It Is!

Stampin’ Up!’s Simply Citrus All-Inclusive Card Kit is SWEET! The images are fun and the kit is so easy to make! In this kit you get everything you need to make the 15 cards (3 each of 5 different designs) except for scissors and a ruler. I enjoyed making the cards in this kit so much that I want to share it with you. Yes….there’s that whole Covid thing and social distancing so we’re going to have a virtual card class! An on-line class on Zoom!

I am so excited about this class!  If you’ve not heard of Zoom or aren’t sure how it works just let me know and I can fill you in.  It’s quite easy to participate and the best things about it is that there is no limit to the number of participants and you can join the class even if you’re not local! 

Here’s how it all will work: 
* we will all purchase our own Simply Citrus Card Kit
* we will all meet on Zoom 
* we will all make are own cards 

During the class we will make one of each of the five cards and I will supply tips and tricks for each card along the way as well as sharing alternatives for the cards. Once you are registered for the class and have purchased your Simply Citrus Card Kit I will be emailing you a document with step by step directions with photos for each card as sometimes the directions provided with the kit aren’t quite clear. 

There is no fee for the class itself.  You just need to purchase the kit.  You are welcome to purchase the kit and receive the step-by-step instructions even if you don’t want to (or can’t) attend the virtual class. The class will be recorded so if you can’t make the class or would rather not participate at the time you will have access to the recording. 

Details: 
Simply Citrus Virtual Zoom Card Kit Class Tuesday June 30th  6:30 pm 

Registering for the class: 
Please contact me by email if you would like to sign up for the Simply Citrus Card Kit Class.  The deadline to sign up is Sunday, June 21st. 

Purchasing the Card Kit:    
You are welcome to place your own order from my online store to purchase the card kit along with whatever other items you want to purchase.  If you do place the order yourself please place your order within the next few days as shipping from Stampin’ Up! is taking a lot longer than usual.  If you place your own order I can’t guarantee that you will receive your kit prior to the class.    

If you are local, I will be placing an expedited order on Monday, June 22nd.  I should have this order on Wednesday.  I can deliver the kits or you can pick them up from me.  If I am ordering the kit for you I must have payment from you by June 21st.  The cost for kits ordered by me will be $32 + shipping and handling. 

The Simply Citrus Card Kit is fun and easy to make.  Be sure to contact me prior to June 21st if you’d like to participate!  Have a great day!  Take care and Happy Stamping!

So Sentimental Get Well Card

I love the So Sentimental stamp set and the coordinating Stitched So Sweetly dies. This is one of my favorite bundles from the most recent Occasions Catalog. Guess what? You can still get these items as a bundle in the new Annual Catalog! You should really check it out.

So Sentimenal

I really like this sentiment. It’s hard to find a sentiment for healing instead of get well. To me, “get well” is for a sickness, not healing. This saying as well as the other ones in the stamp set fit perfectly in the label dies from the die set. Then, there are the fabulous stitched, scalloped, rectangle dies in the set. Wow! This set of dies is amazing….a definite must have!

This bundle pairs really well with Stampin’ Up!’s gorgeous designer series papers. I made this lovely card for my cousin who just had knee surgery. So easy! Designer paper, a layer and a double label! That’s it! Of course don’t forget the designer paper on the inside of the card!

Don’t you love this designer series paper? This design is from the Forever Greenery Designer Series Paper in Stampin’ Up!’s Annual Catalog. Aren’t the colors great? Of course I love it because one of my favorite Stampin’ Up! colors is Pretty Peacock which I used on this card.

The little jewels definitely finish off the card. They are the Elegant Faceted Gems. In the package you get this pearlescent white, petal pink and clear faceted gems. They’re very pretty. They are part of the Peony Garden Suite (which I can’t wait to share with you!).

I hope you enjoy this fun and simple card. You can make it with any designer series paper. Have a great day! Take care and Happy Stamping!