
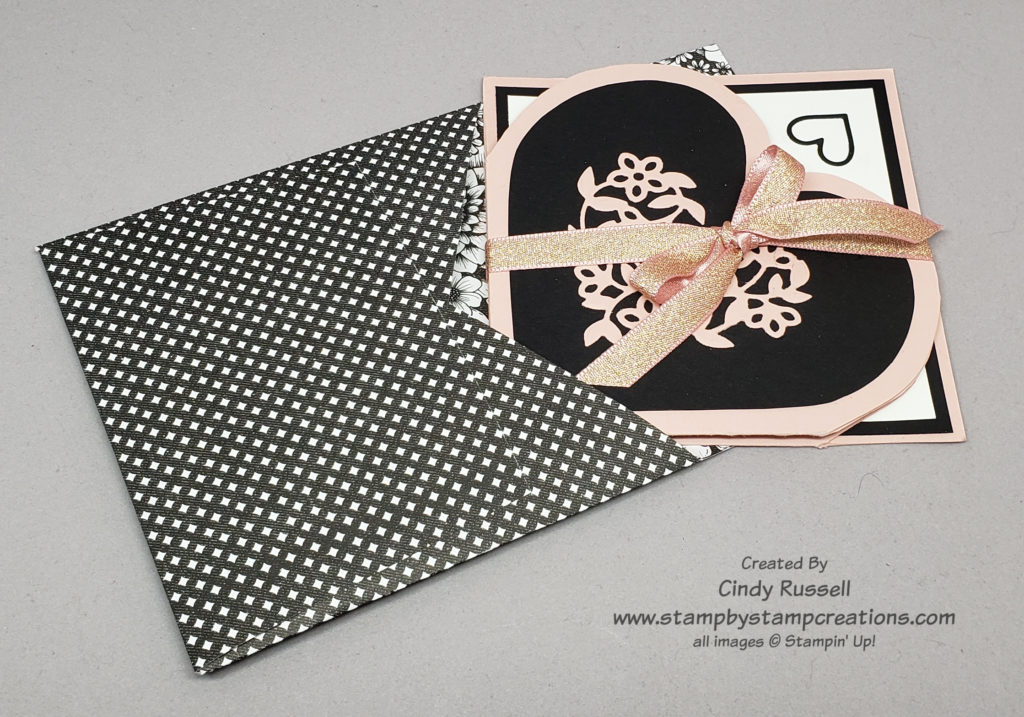
Did you know that it’s pretty easy to make your own envelope? Figure it out once and you’ll have it down pat! In last week’s Fun Fold post I shared with you the fun Squashed Heart Card. The card was 4 1/4″ x 4 1/4″. You can fit it in a regular card-size envelope but what to do if you want a square envelope that fits the card perfectly? Well then, it’s time to make your own!
Base of the Envelope. When making your own envelope you have to do a little bit of math so don’t get scared off. To figure out what size to make your envelope you need to first figure out the size of your card and add a little bit to each measurement. My card is 4 1/4″ x 4 1/4″ so I started with a measurement of 4 1/2″ x 4 1/2″. This will be the size of my finished envelope when closed. I was generous with my measurement because my card is so thick. If my card wasn’t so thick when closed I may have gone with 4 3/8″ x 4 3/8″.
Side Flaps of the Envelope. Now we need to figure out how wide to make the sides of our envelope. The sides will fold in towards the center and overlap. This means that they need to be slightly wider than half the width of the envelope. Since my envelope is 4 1/2″ wide each of my flaps will need to be 2 1/2″ wide. (Half of 4 1/2″ is 2 1/4″ so I added another 1/4″ to the measurement.)
Top and Bottom Flaps of the Envelope. The bottom flap will be the largest. You want it to cover about 2/3rds of the base when you fold it up. You want to make sure it will cover the point where the two sides come together when folded in. For my 4 1/4″ envelope base I made the bottom flap 3″. The top flap will need to cover at least 1/2″ of the bottom flap when they are both folded in. My top flap is 2 1/2″ and actually covers an inch of the bottom flap.
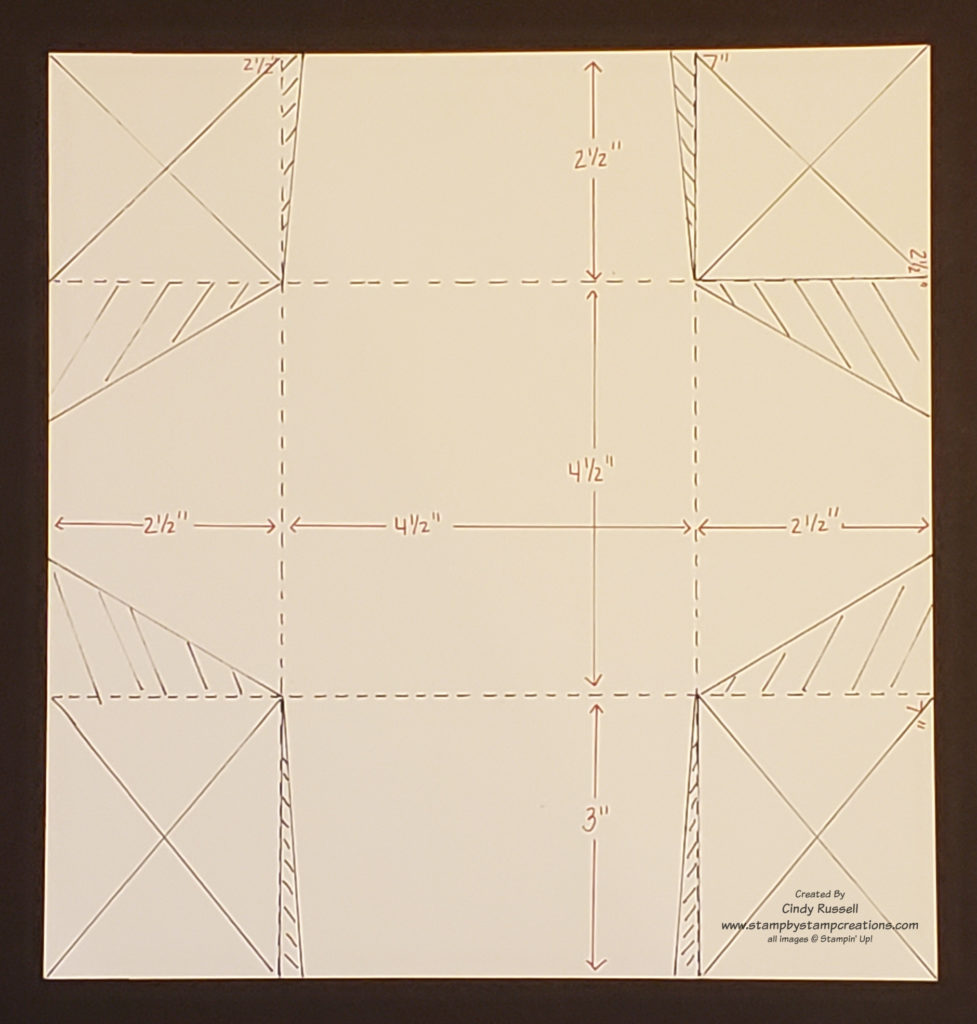
Above you can see the template for my envelope. To figure out how large my paper had to be I did a little more math:
- Width of Paper = width of left side flap + width of envelope base + width of right side flap (2 1/2″ + 4 1/2″ + 2 1/2″ = 9 1/2″)
- Height of Paper = height of top flap = height of envelope base + height of bottom flap (2 1/2″ + 4 1/2″ +3 = 10″)
Now I need to score my paper. As you can see in the photo, with the 9 1/2″ side at the top, I scored in 2 1/2″ from each side of the paper, or at 2 1/2″ and 7″ (dotted lines are score lines) for my side flaps. Then I turned my paper 90 degrees and scored at 2 1/2″ and 7″ again. Since this side is 1/2″ longer I have the 3″ area for my bottom flap.
It’s time to do a little trimming to get rid of the areas we don’t need. I started by cutting out the four corners of the paper (those areas with an X in them). I could be done here but I want to do a little more trimming so the envelope will close nicely and look good.
Trimming of Side Flaps. To trim my side flaps I measured in 1 1/2″ from both edges of both flaps and drew a line to the corner. These are the larger sections with the angled lines through them. Trim them off to get rid of excess bulk.
Trimming of Top and Bottom Flaps. For the top and bottom flaps I did the same thing as on the side flaps except I only measured in a mere 1/4″. Trimming of the top and bottom flaps is mostly to make your envelope back look nice.
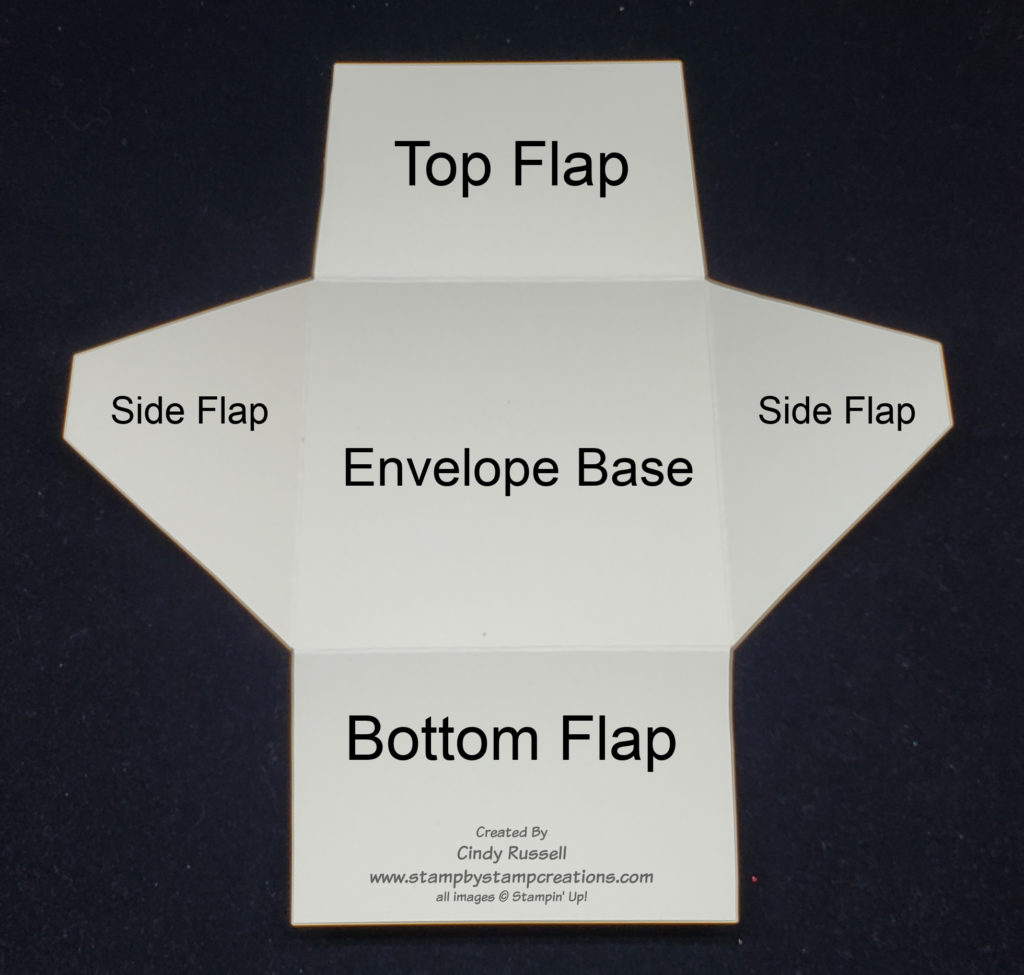
That’s it! You’re ready to adhere the envelope together! Fold the sides in first, adhering one over the other. Fold the bottom flap up and adhere to side flaps. Place your card in the envelope, fold the top flap down and adhere! You’re done!
Now you can make your own envelopes of any size! Have a great day! Take care and Happy Stamping!