Fun Fold: Origami Window Fold

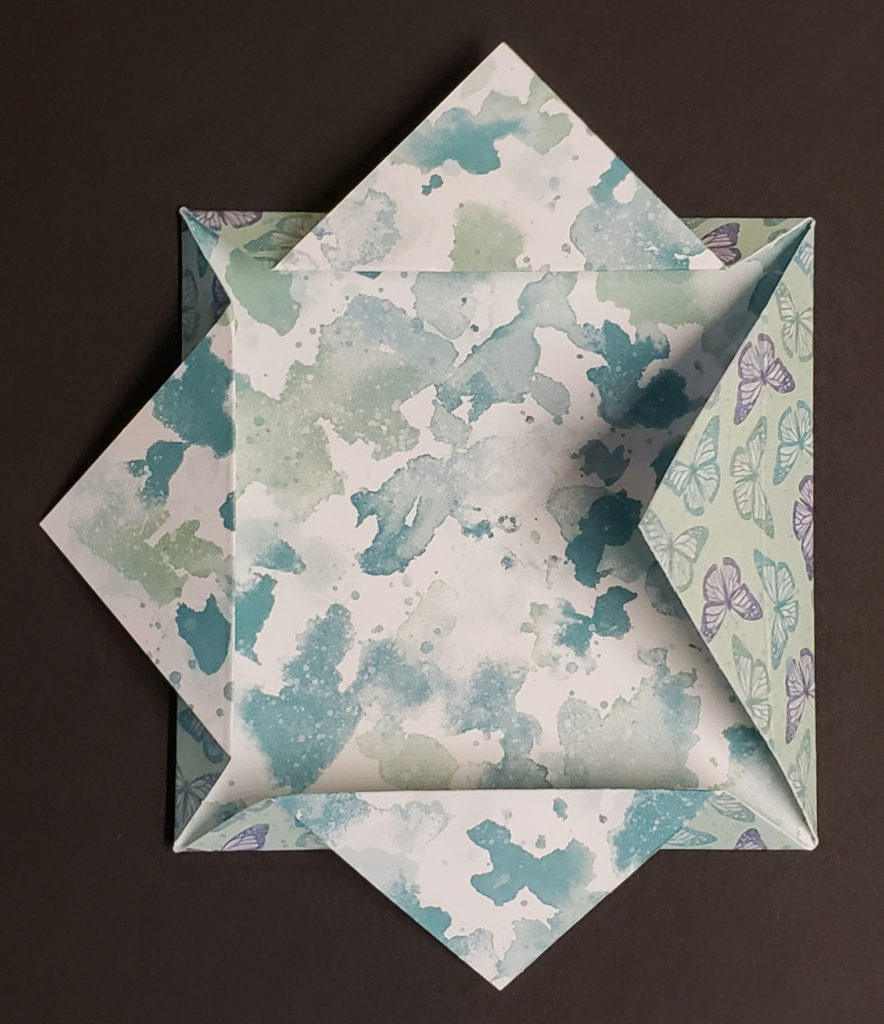
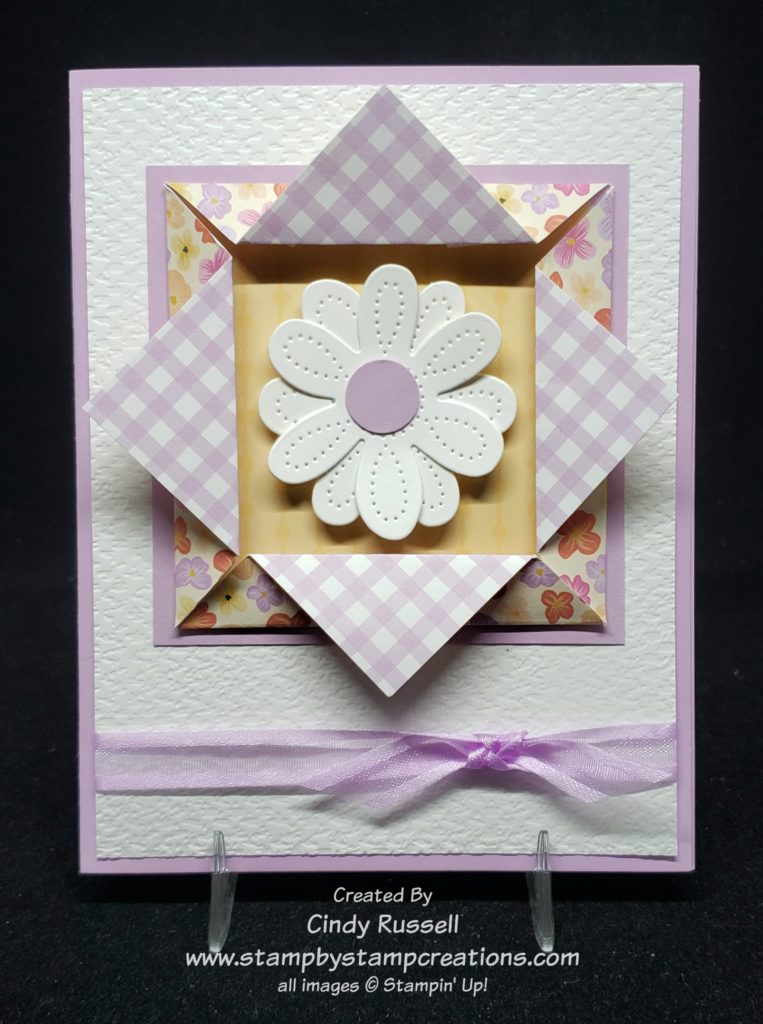
On Tuesday in my newsletter I shared a gorgeous origami frame with you that another talented demonstrator made.  As I was searching around the web trying to find out how to make it (I’m still searching), I came across this fun and easy Origami Window Fold.  The card itself isn’t a fun fold but you use this Origami Window Fold as the focal point of the card.

When you first look at this fold it’s a bit intimidating but once you have the measurements it’s quite easy.  Start with a square piece of designer paper that is 4 ¼” x 4 ¼”.  As with most origami folds you want the two sides of your paper to coordinate.  I tried starting with a couple of squares that were a bit smaller but I couldn’t get the other measurements to quite work out.  I’ll let you know if I get that figured out.
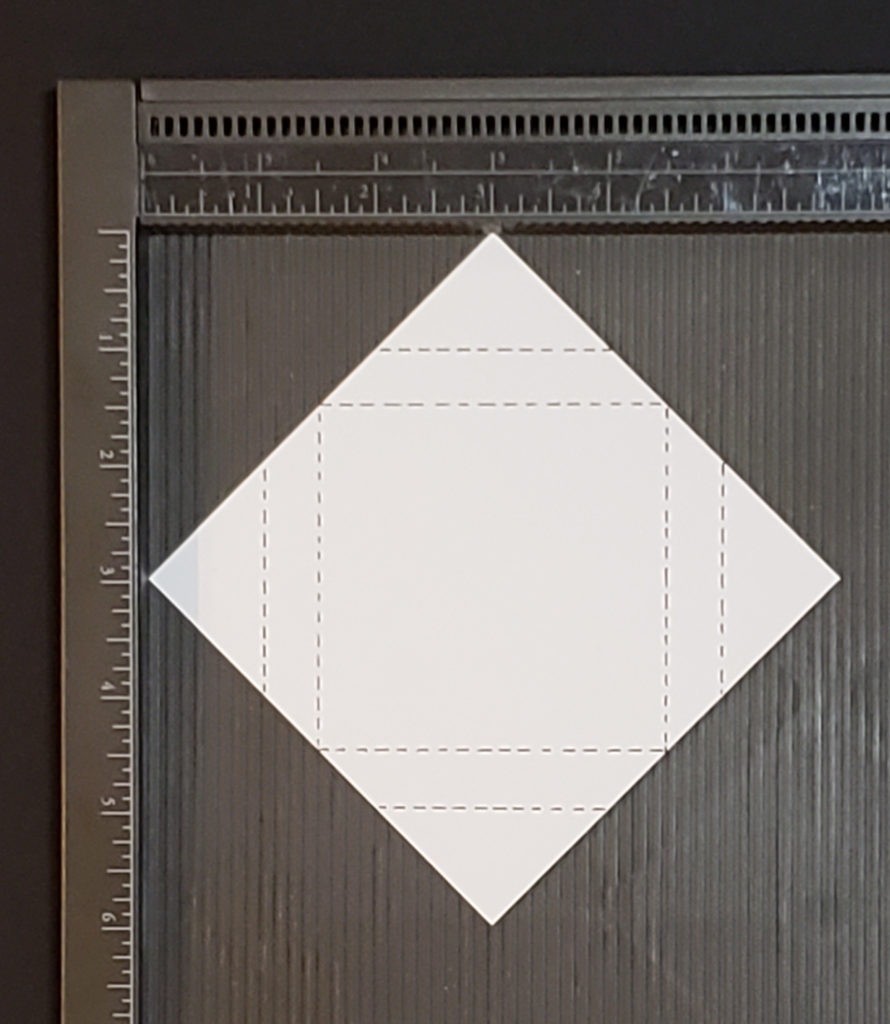
Lay your square of paper diagonally on the Simply Scored scoring board with the top and bottom points lined up on the 3” mark.  Now score along the 1” and the 1 ½” marks.  Turn the paper 90 degrees and repeat.  Continue until you have four sets of score marks.

If you don’t have a Simply Scored to make your score lines and want to use your Paper Trimmer you line things up a bit differently.  You still start by placing the paper diagonally on the Paper Trimmer.  You will line up the top and bottom points at the 2” mark and score.  Then slide the points over to line up on the 1 ½” mark and score.   Turn paper and repeat three more times.  Fold along the inside marks toward the center and them fold the other score marks to the outside.
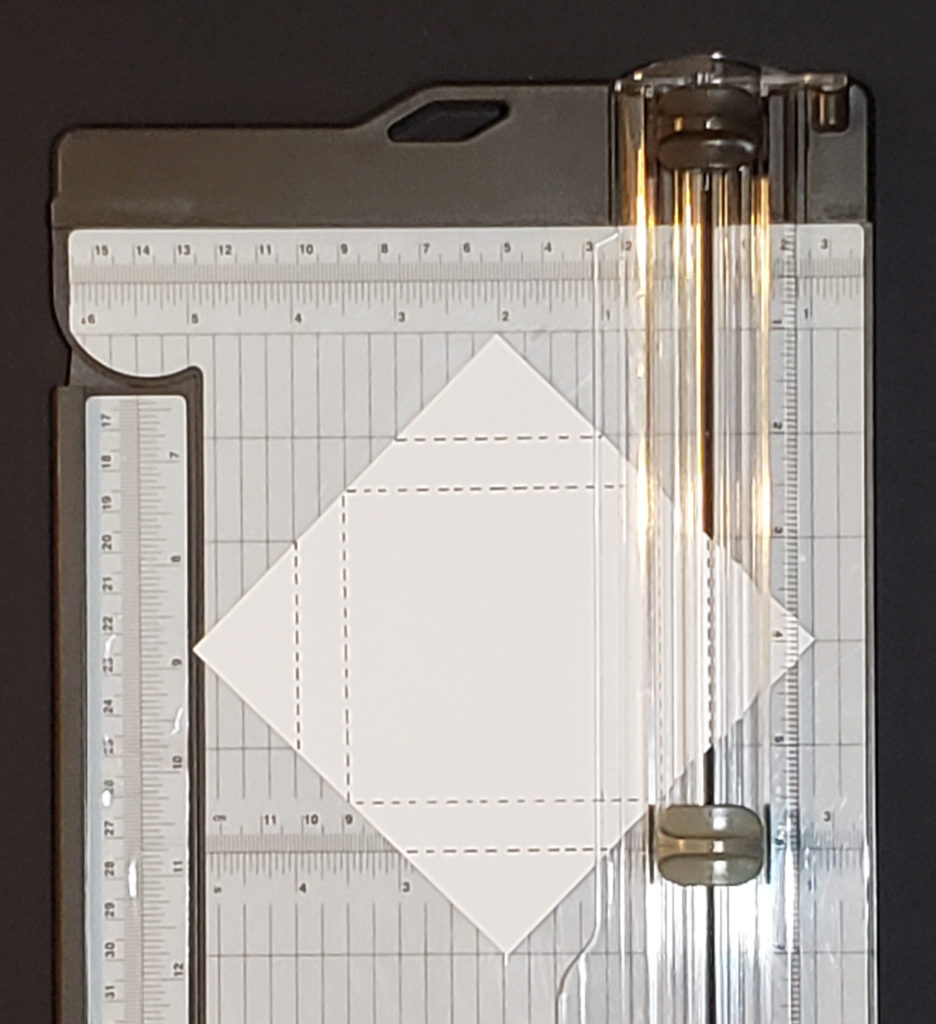
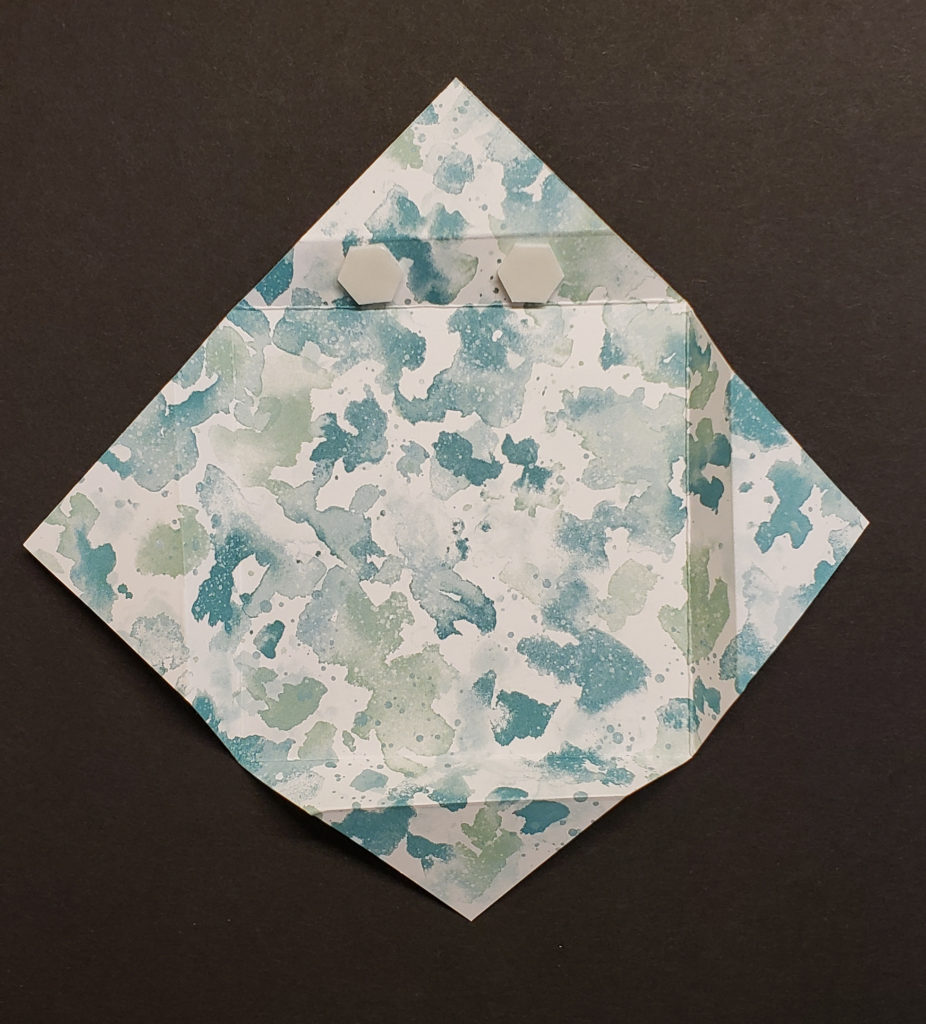
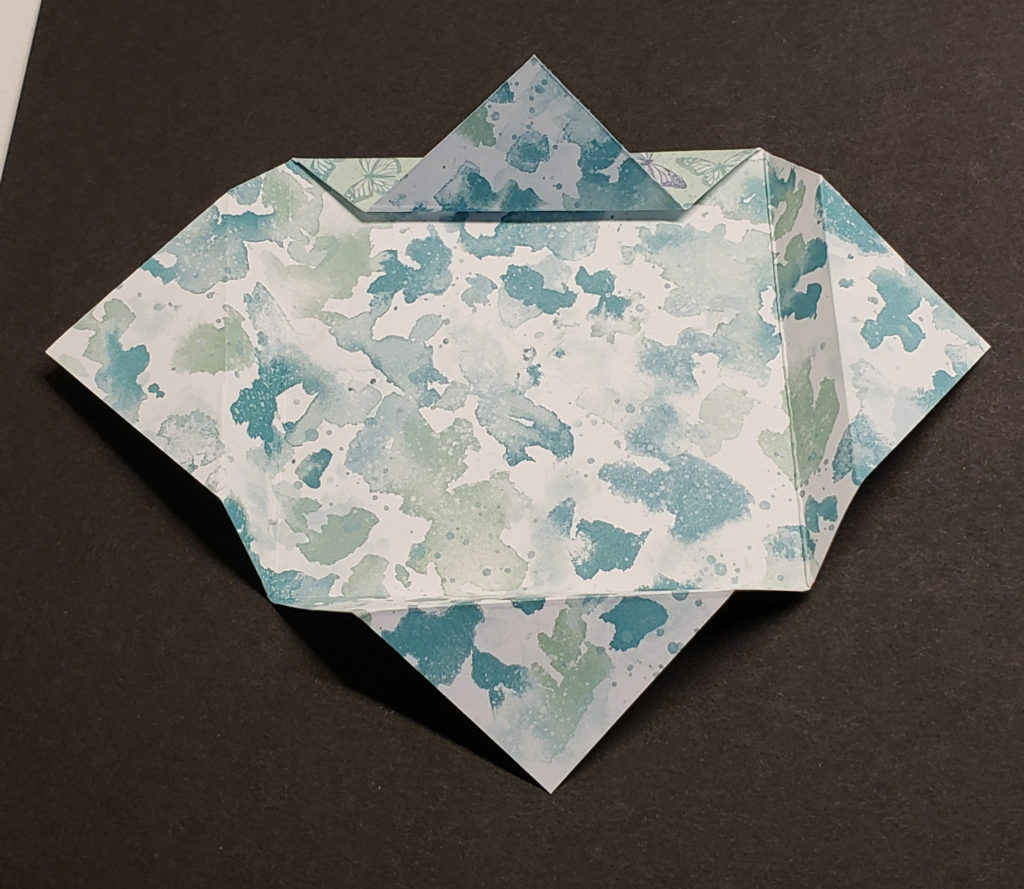
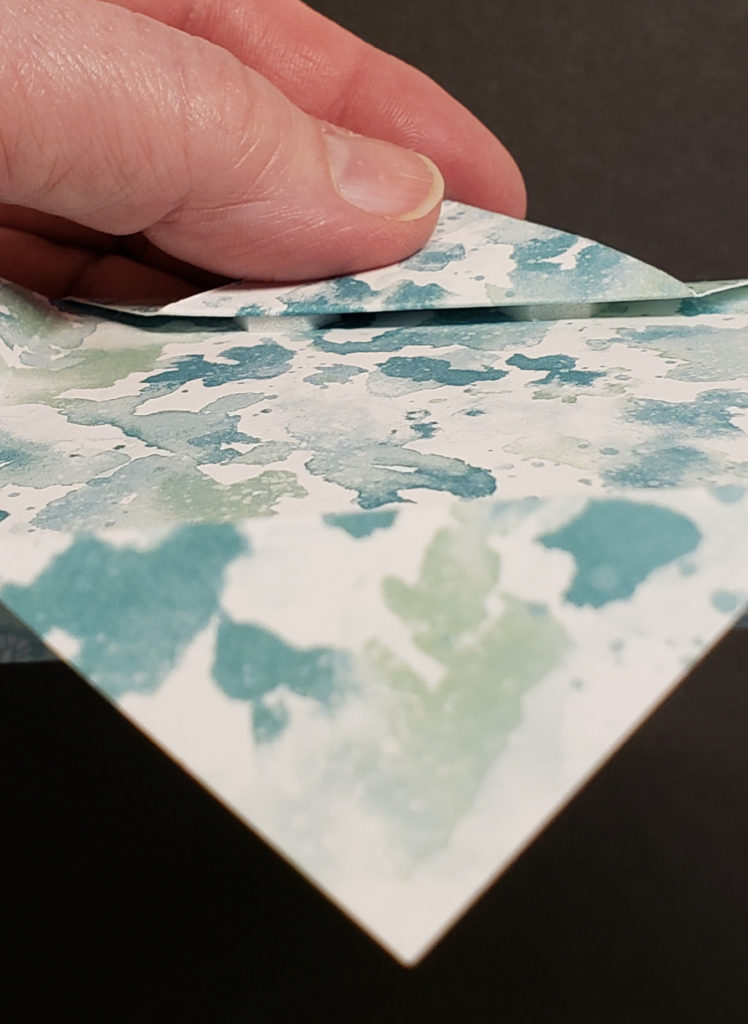
Fold along the inside score marks towards the center of the paper.  They should all meet in the center.  Then fold the other score marks back towards the outside.

To complete the fold and give it a little dimension you want to add a couple of Stampin’ Dimensionals to the inside of each side of the frame.  See the photo to the left to see where I placed them.
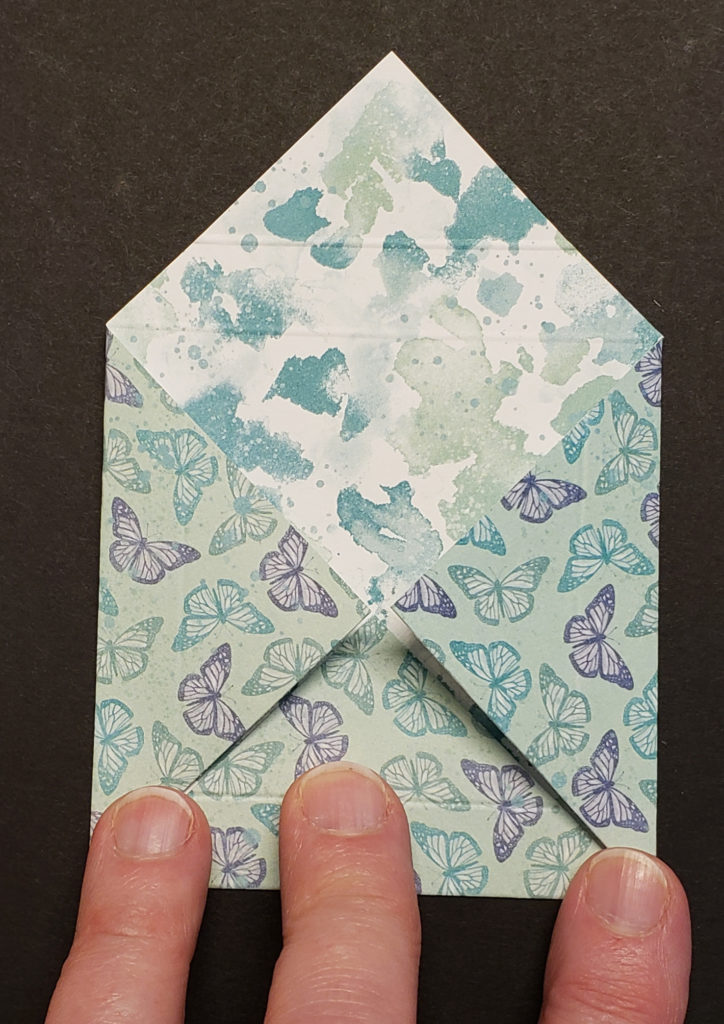
The Origami Window Fold is done.  Now it’s time to decorate.  I chose to mount my Origami Window Fold on another piece of cardstock (3 ¼” x 3 ¼”)  before adhering it to the card.  I also lined the inside of my frame with a coordinating piece of designer paper (2 7/8” x 2 7/8”) to make my flower pop.  If I hadn’t, the inside of my frame would have been the gingham checked print like the folded out flaps. 

This was a fun and easy fold to make that adds a lot of “wow” to my card.  Give it a try.  I think you’ll like the results!  Have a great day!  Take care and Happy Stamping!

Fun Fold: Acordion Fold

Accordion Fun Fold
Accordion Fun Fold

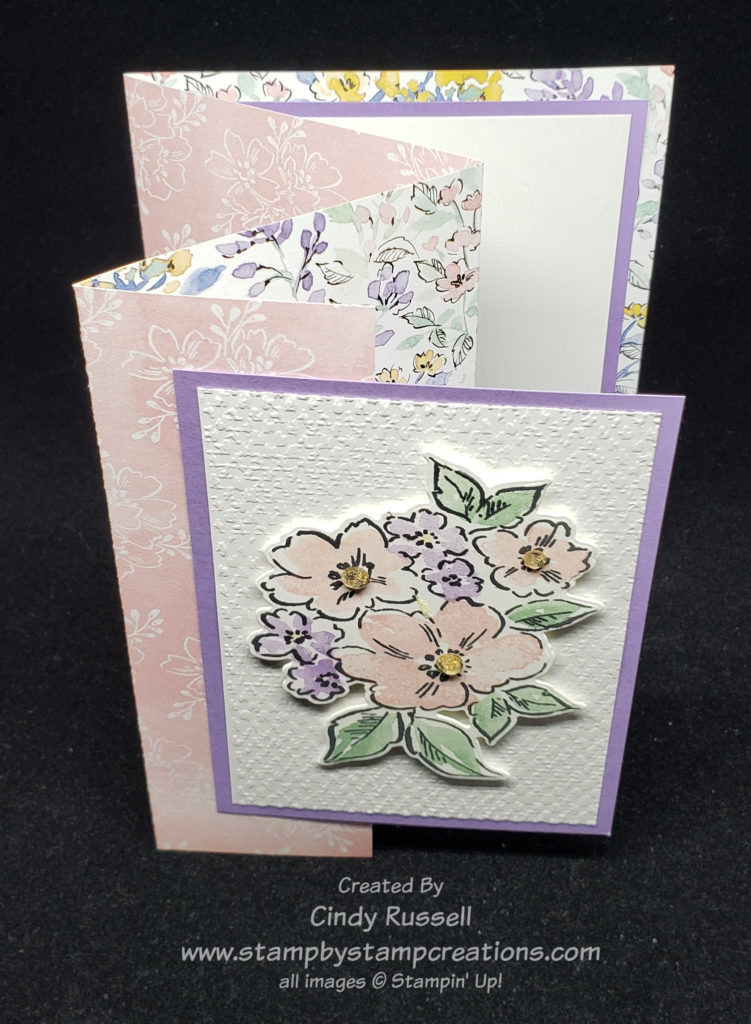
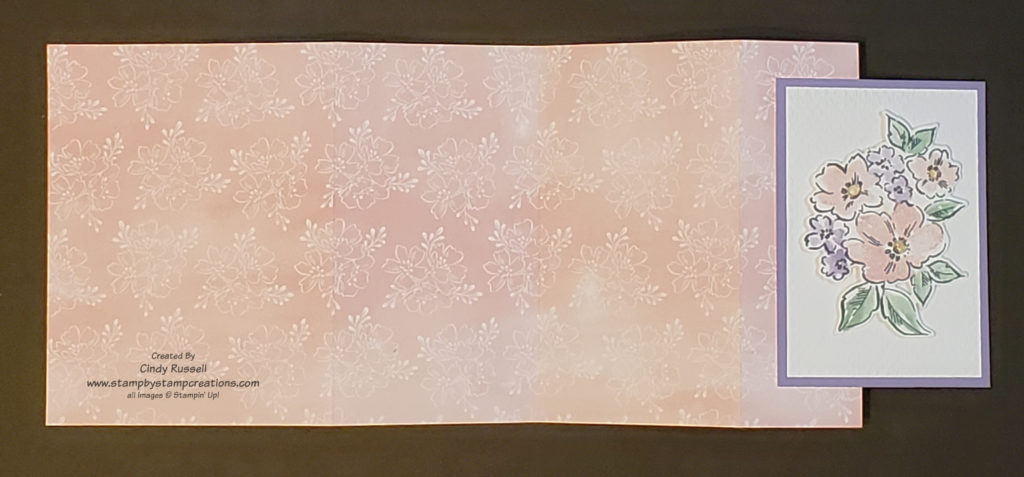
This fun fold card is both gorgeous and easy.  The key is to get all of your score lines straight so that everything lines up.  I’ve seen this Accordian Fun Fold card around but had never tried it.  When I saw Stampin’ Up!’s package of Hand-Penned Designer Series Paper I knew I found the perfect paper for this card.

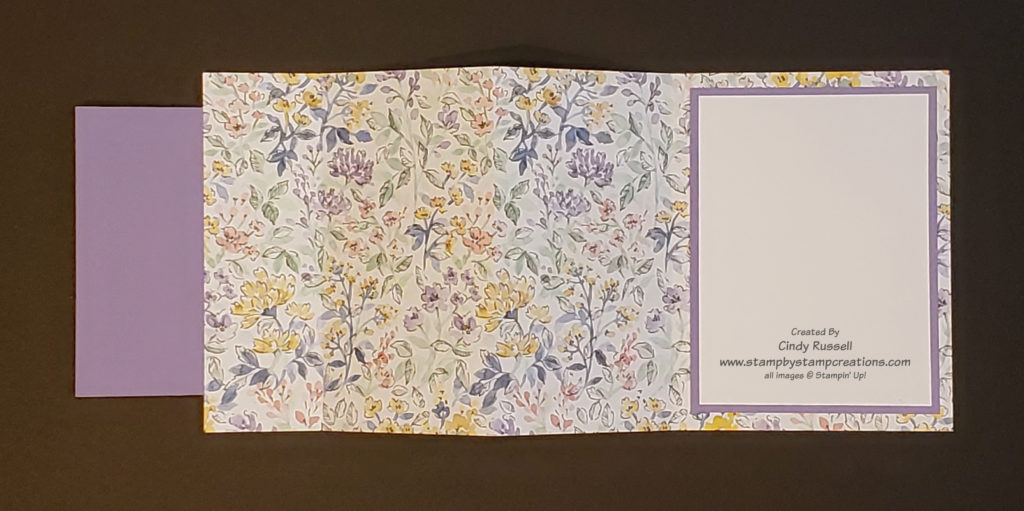
The base of this card is made from half a sheet of 12” x 12” designer series paper.  As you can see from the photo, you can see both sides of the paper at the same time so when you choose your paper for your card you want to make sure that both sides coordinate.  I made this card for a swap I participated in and I have to tell you, I was able to use all six patterns of this paper to make this card!  You don’t always see that in the paper packages.

You are going to start with a 5 ½” x 12” piece of designer paper.  Score the paper at 1 ½”, 4 ½” and 6 ¾”.  That’s it!  The 1 ½” and the 6 ¾” score marks will be valley folds and the 4 ½” score mark will be a mountain fold.  Once you’ve creased the score marks your card base is done!  All’s that’s left is to decorate your card.   If you’re using Stampin’ Up!’s Designer Series Paper decorating is easy.  There is usually a stamp set or bundle that coordinate with the paper.  That’s what I did on my card.  I used the Hand-Penned Petals and Penned Flowering Dies for the focal point on my card.  Easy Peasy!

Dimensions for Card:

Designer Paper:  5 ½” x 12” scored at 1 ½”, 4 ½” and 6 ¾”

Colored cardstock:  5” x 3 ¾”, 4 3/8” x 3 1/8”

White cardstock:  4 ¾” x 3 ½”, 4 1/8” x 2 7/8”

This was a fun and easy card to make. I hope you try it! Have a great day! Take care and Happy Stamping!
Fun Fold: Diamond Gatefold Card

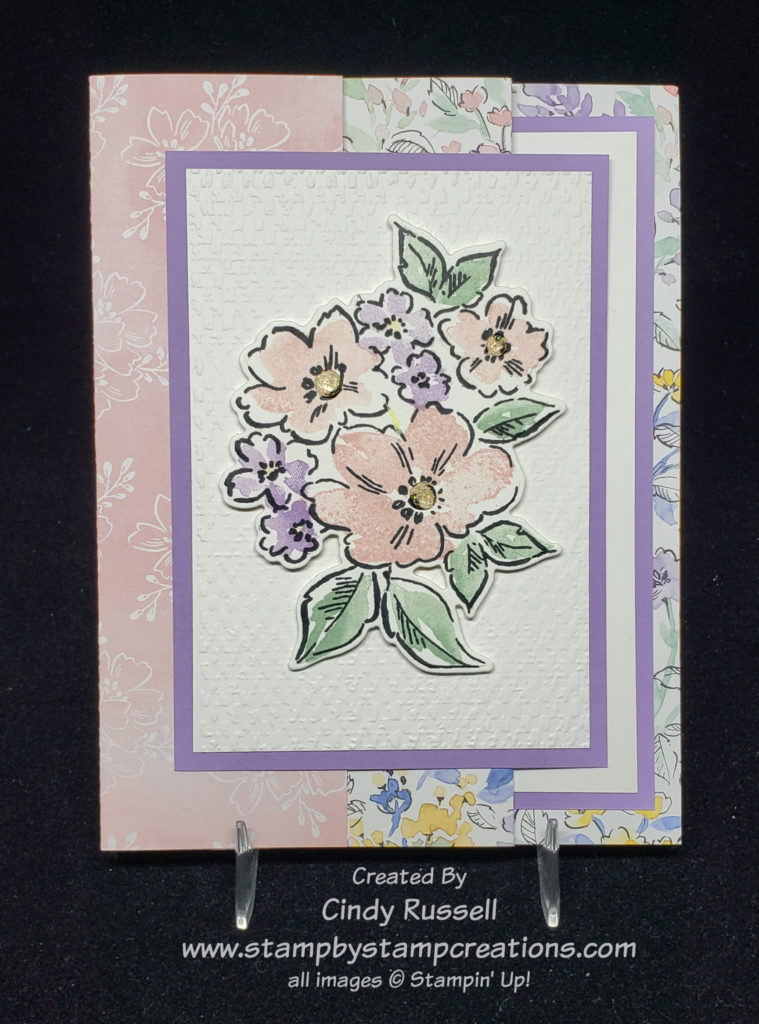
Artistically Inked Diamond Gatefold Card

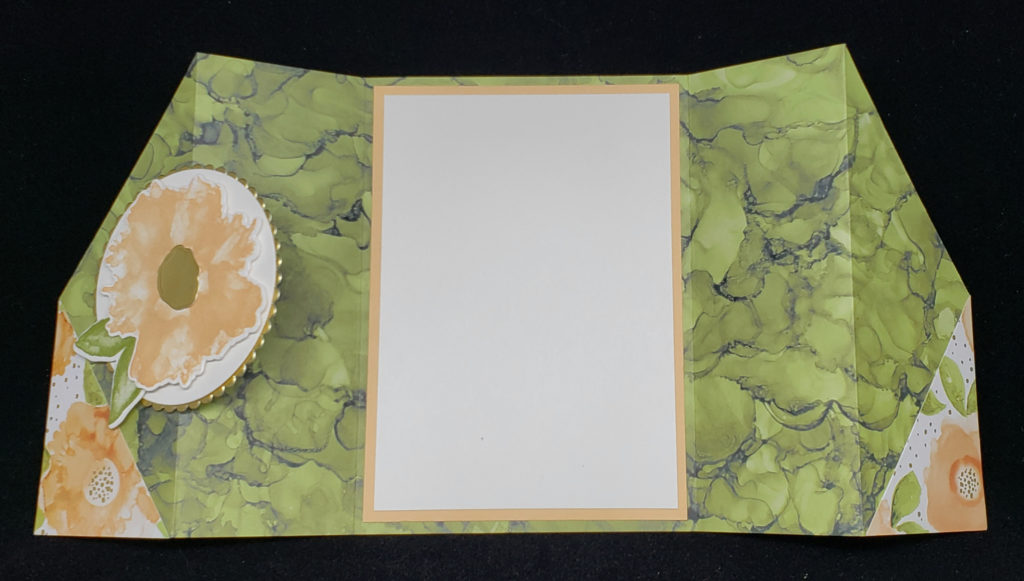
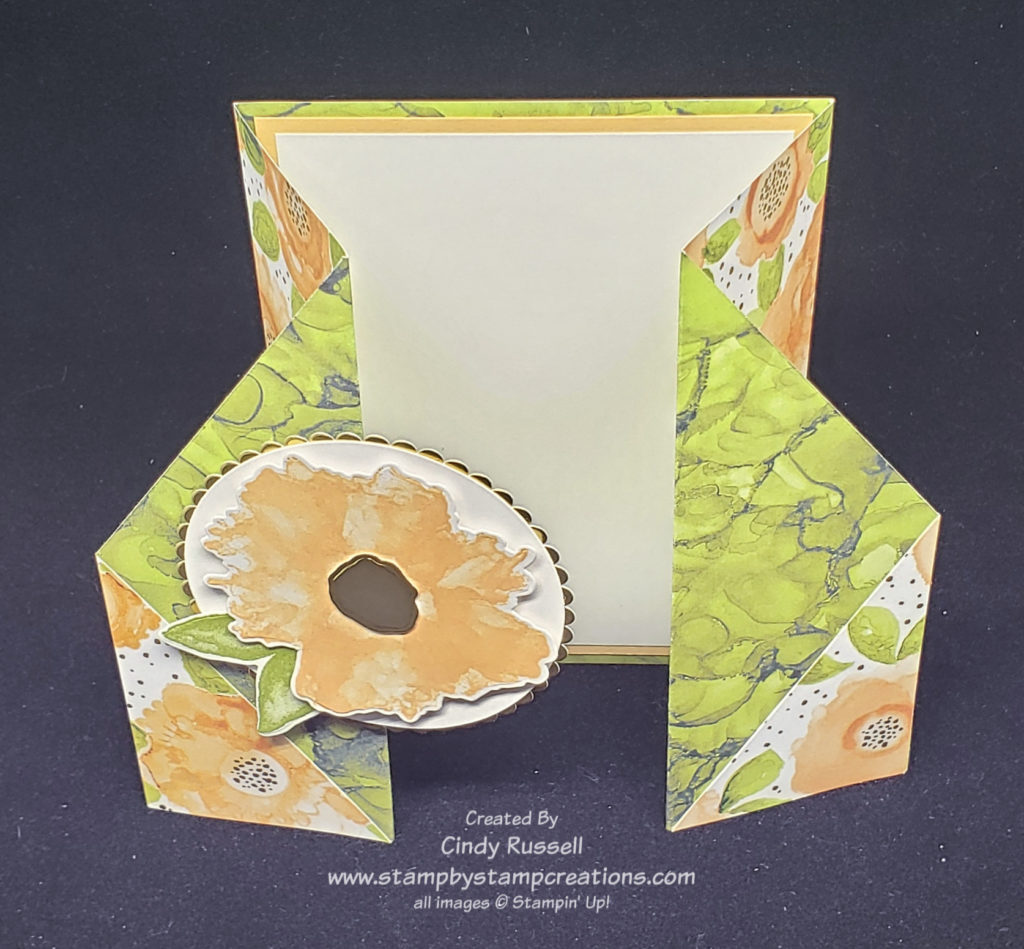
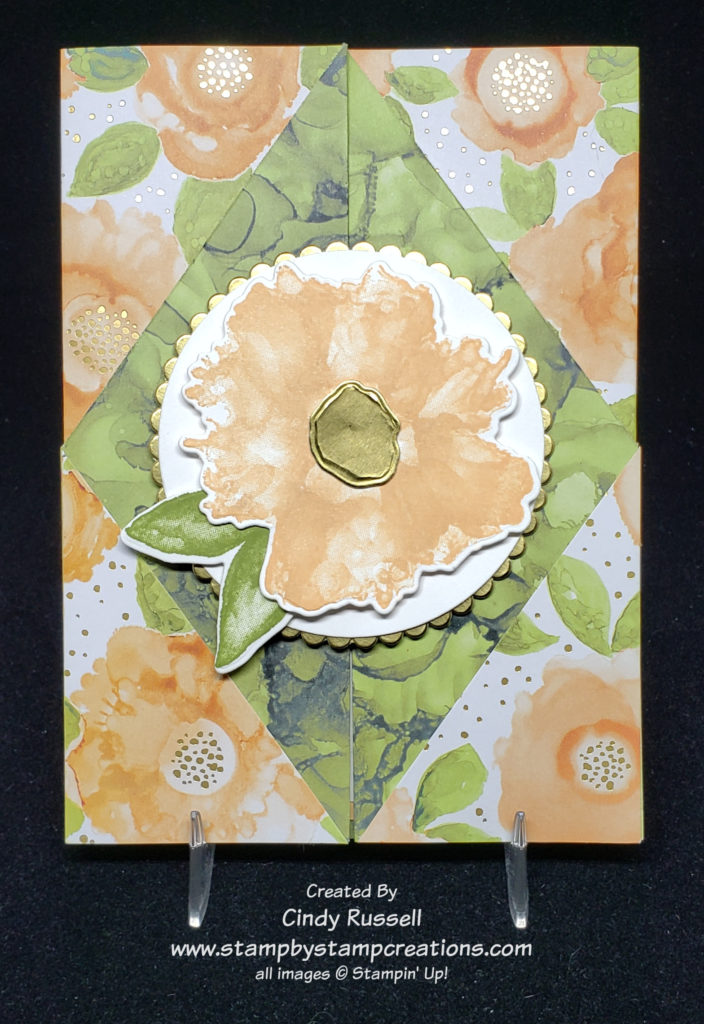
This card definitely looks like a WOW but is actually quite easy to make.  Four score lines and two cuts.  Once you have those done your card base is ready.  Add a focal point and some cardstock to the inside of the card to write your message and your card is done!  I used the Artistically Inked stamp set and the Expressions in Ink designer series paper. Aren’t they gorgeous?

Before I get into the basics of making this fun fold I want to share a little tip. In my opinion, when I stamped the flower with the Pale Papaya ink it was a little too bright. The flowers in the designer paper seemed a little darker in color and I wanted my die-cut flower and my paper to match better. What I did was I first inked up the flower in Crumb Cake ink and then I stamped off on my scrap paper 2-3 times leaving just a bit of the Crumb Cake ink on the stamp. After stamping the flower on my cardstock I cleaned off the stamp, inked it in the Pale Papaya ink and stamped directly on top of the Crumb Cake flower. It turned out exactly how I wanted!

Now on to the basics for creating this fun fold! You can find a complete tutorial for this fun fold here.  Below you will find some tips on making the card.

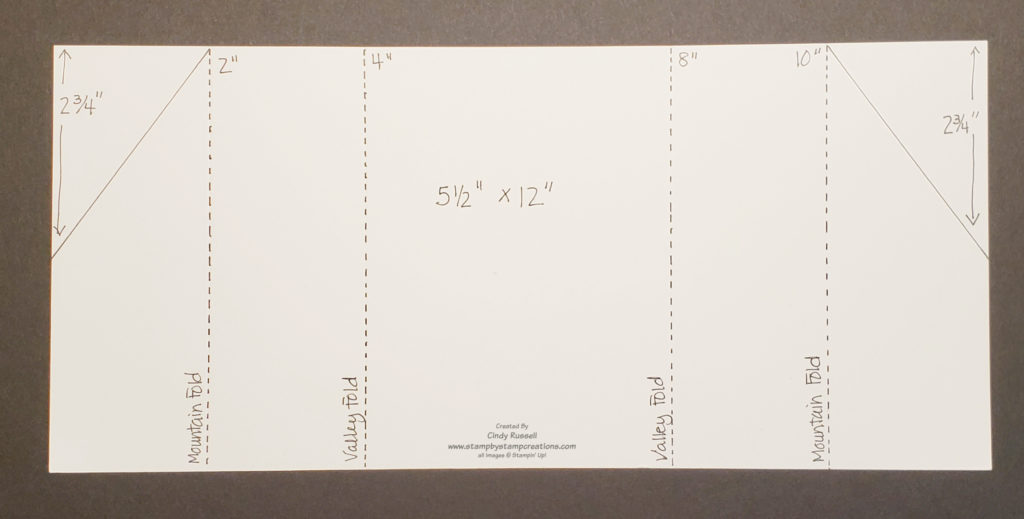
Template for Diamond Gatefold Card

Above you can see the basic template for your card.  Start with a 5 ½” x 12” piece of designer paper.  The key here is to make sure both sides of the cardstock coordinate well together.  Only one side of your designer paper can be directional.  This would be things like trees or flowers with a stem that might not look good upside down.  If you do use a directional pattern on one of the sides of your paper you want to make sure this is the side that is on the “inside” of the card.  When scoring and cutting your paper you want this side facing up.

Once you’ve decided which side of the designer paper should be on the inside of your card place this side up on your Simply Scored tool and score at 2”, 4”, 8” and 10”.  The next step is to trim off the corners according to the template.  Make sure you know which corner was cut from which side.  Take the corner you cut from the left side, flip it over and adhere it to the lower left corner of the paper.  Repeat with the right side.  Now decorate your card!

Diamond Gatefold Card Open

Have a great day! Take care and Happy Stamping!
Fun Fold: Twisted Gate Fold Card

Twisted Gate Fold Card

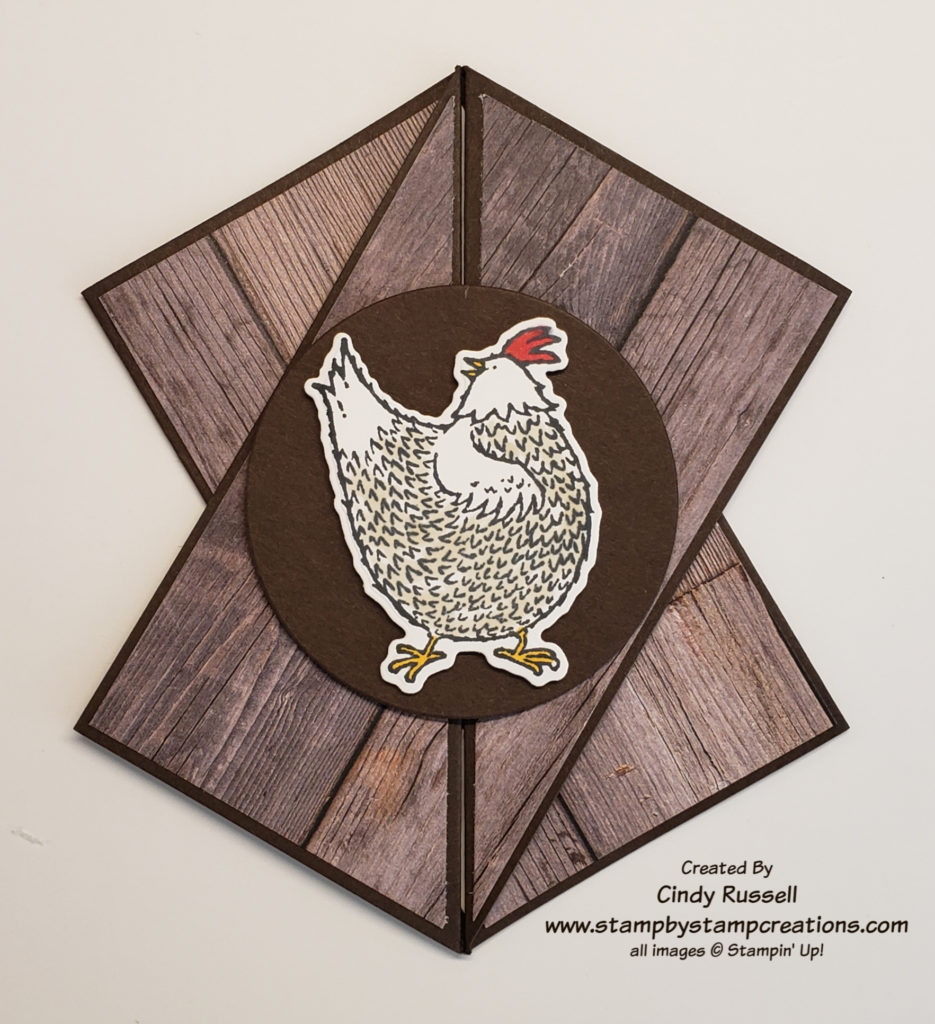
Today’s Fun Fold is the Twisted Gate Fold or Diagonal Gate Fold card.  This unique fold is a lot easier to make than it looks.  I would almost call it the Twisted Double-Flap Gate Fold because like the regular Double-Flap Gate Fold card that I showed you a few weeks ago, you fold the front panels back on themselves. In this fun fold though you fold the front panels back on the diagonal.

I just had to use the Hey Chick stamp set again before it is gone for good. It’s only available until June 30th or until supplies last and that goes for the fabulous coordinating dies. If you love them as much as I do be sure to get them while you can!

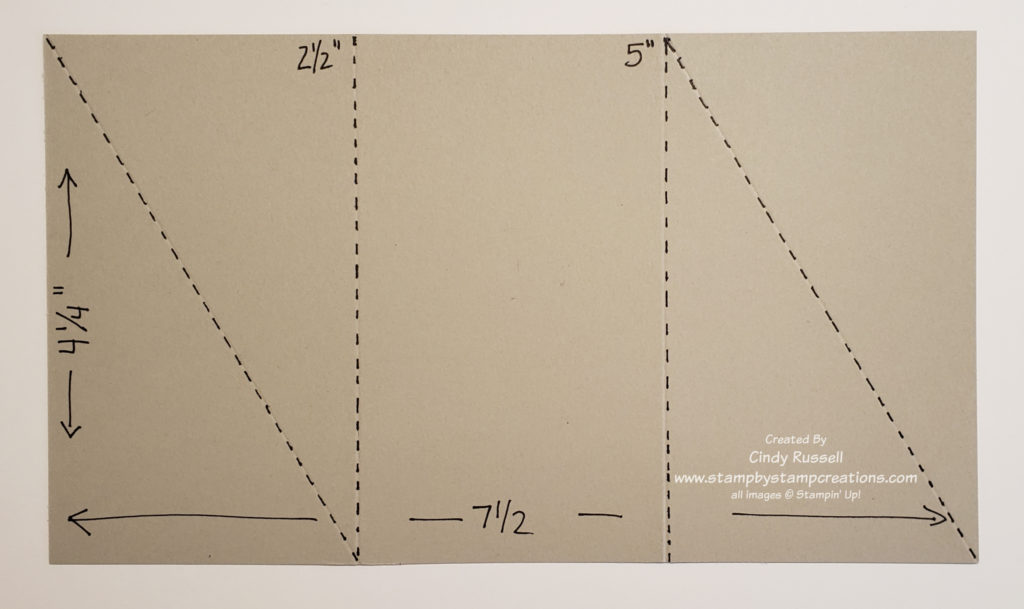
Here is the template for the base of the card. The dimensions are 7 1/2″ x 4 1/4″. Score along the long side at 2 1/2″ and 5″. Then score diagonally as shown on the template.

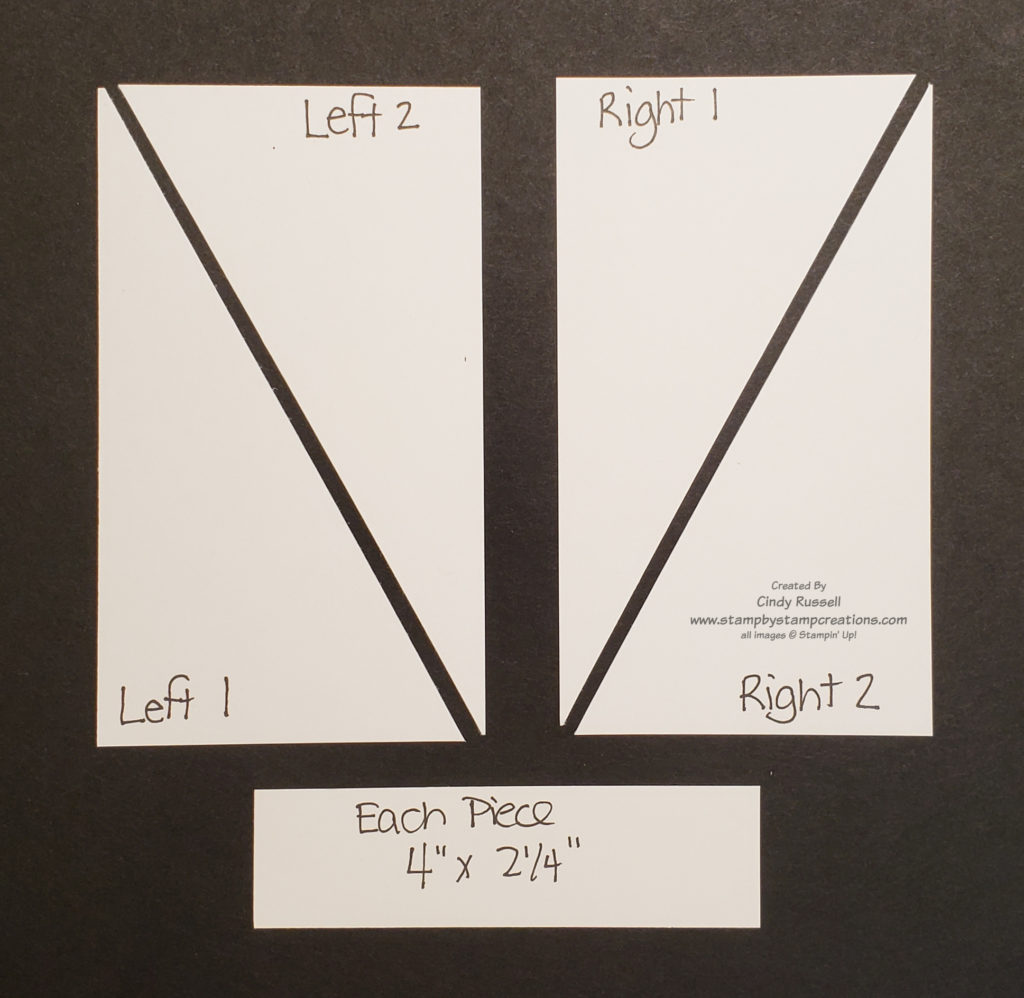
These are the two decorative pieces of designer paper. They both measure 4″ x 2 1/4 and are cut on the diagonal but one is cut from the upper left to the lower right and the other is cut from the upper right to the lower left.

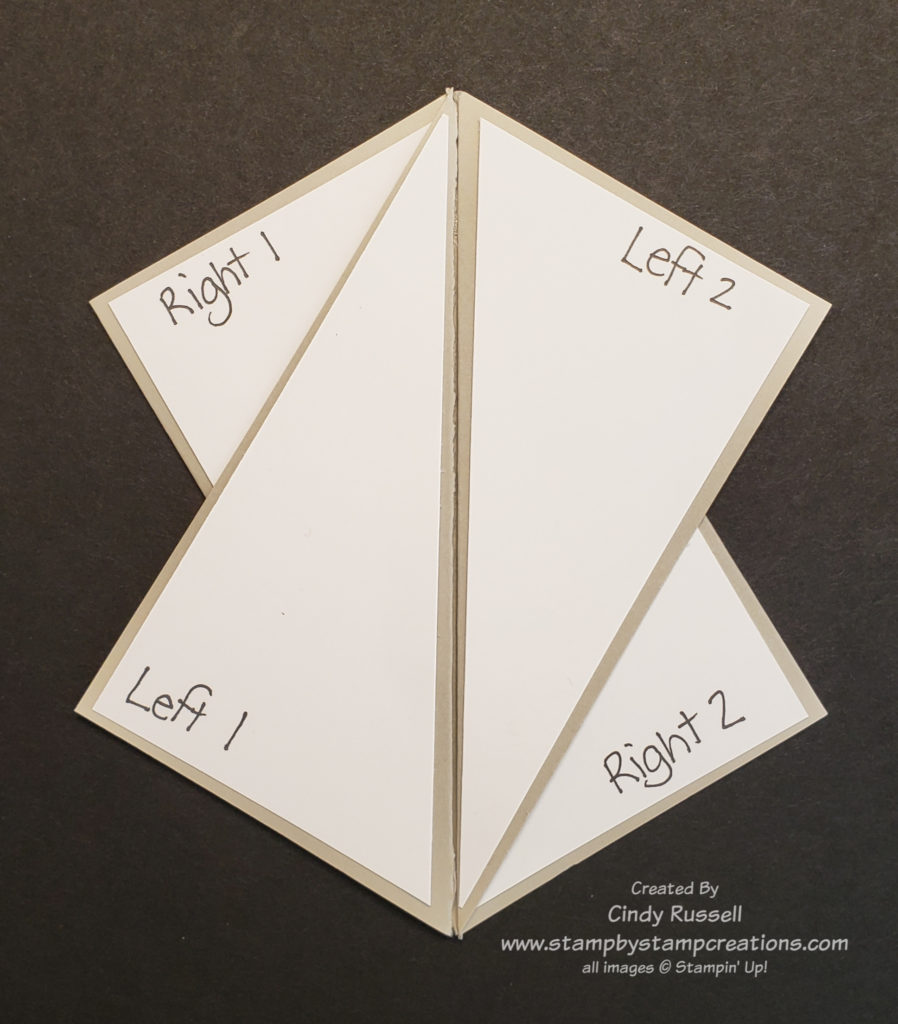
The four triangles are labeled for you in this photo and the photo below shows where to adhere them on the card. I found it was easier to figure out where to place them while I had the card closed. I’ve labeled the pieces here so you can see where I placed them on the card below.

Honestly, figuring out where to put these four decorative pieces was the hardest part of making the card. When you are adhering your focal point to the front of the card you need to make sure you only adhere it to the L1 piece or you won’t be able to open the card.

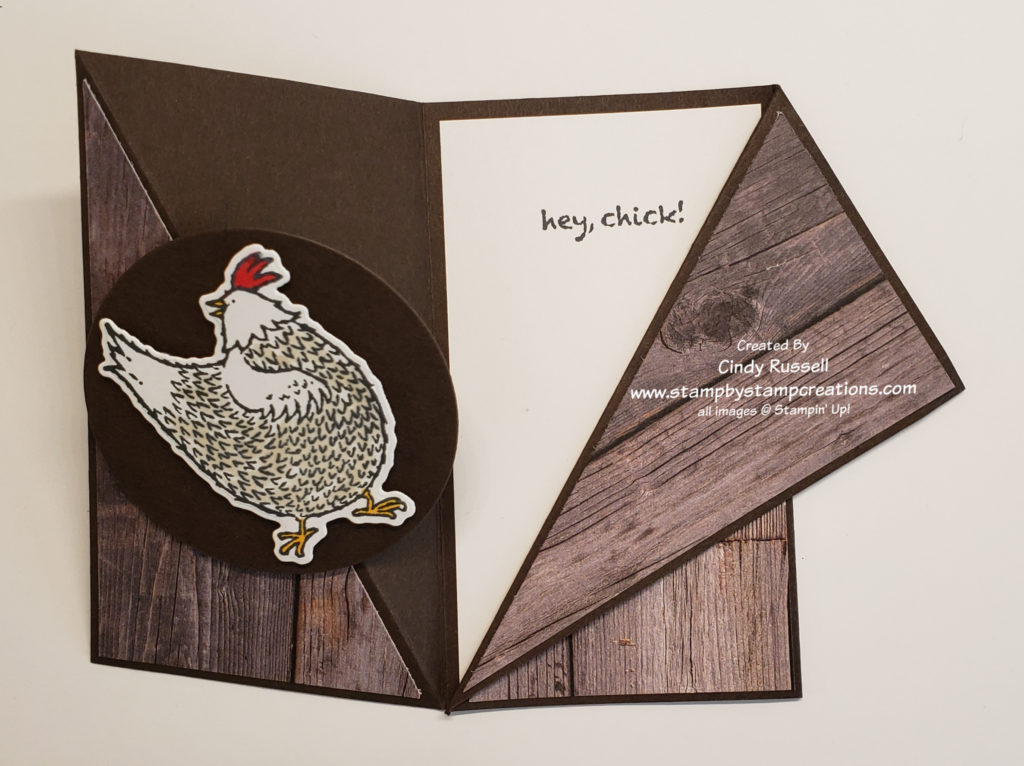
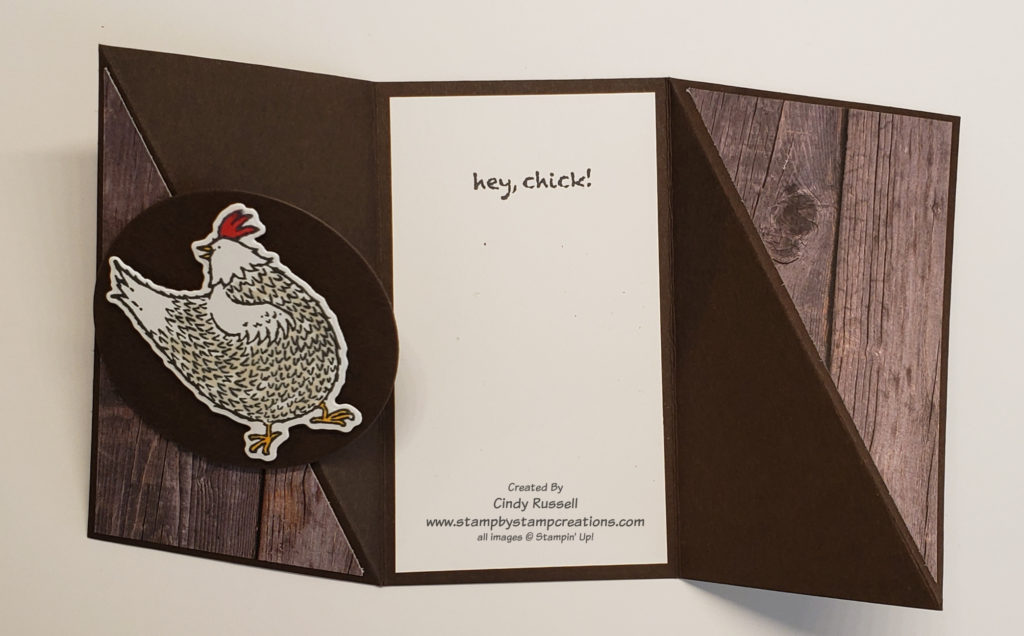
I’ve attached a couple more photos of the card below so you can see it both fully open and partially open. It really is a fun fold and it will fit into a regular-sized envelope.

Have a great day! Take care and Happy Stamping

Fun Folds: Gate Fold Card

Gatefold Card

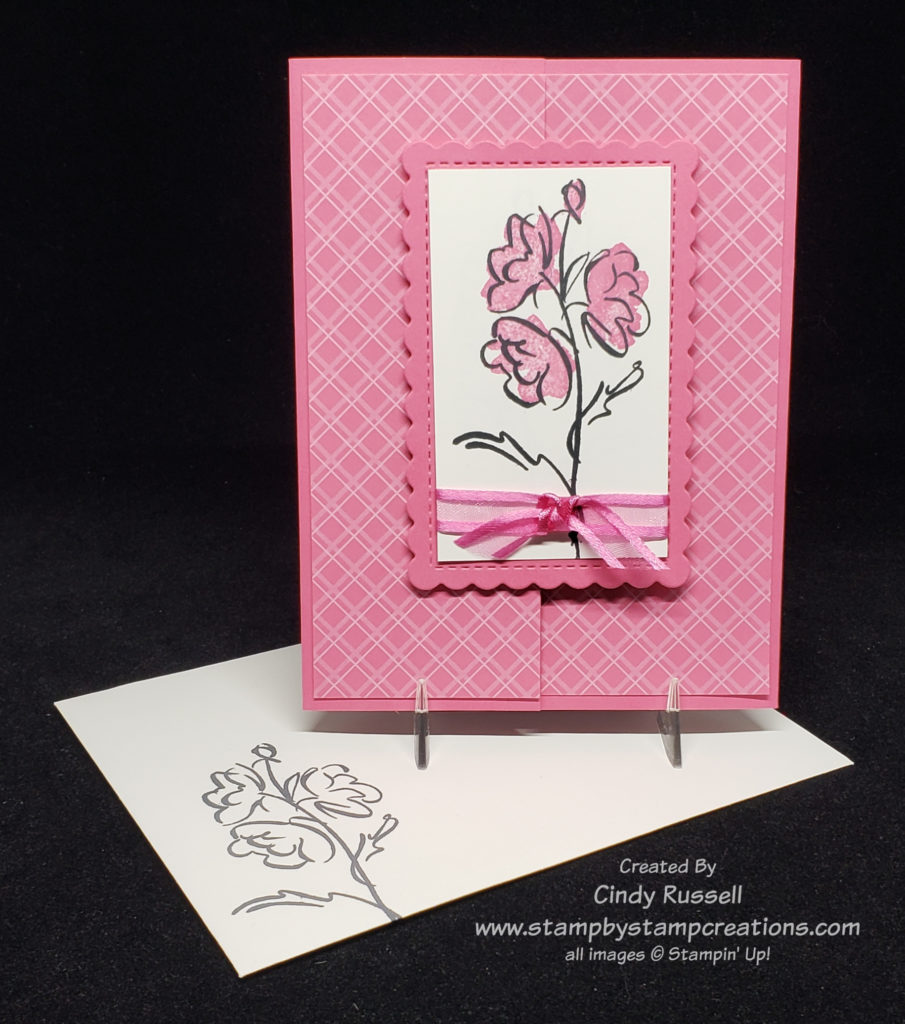
The Gate Fold Fun Fold is quick and easy. At first glance it looks like a normal, folded in half, card. If you look closely though you can see the seam down the center of the card front.

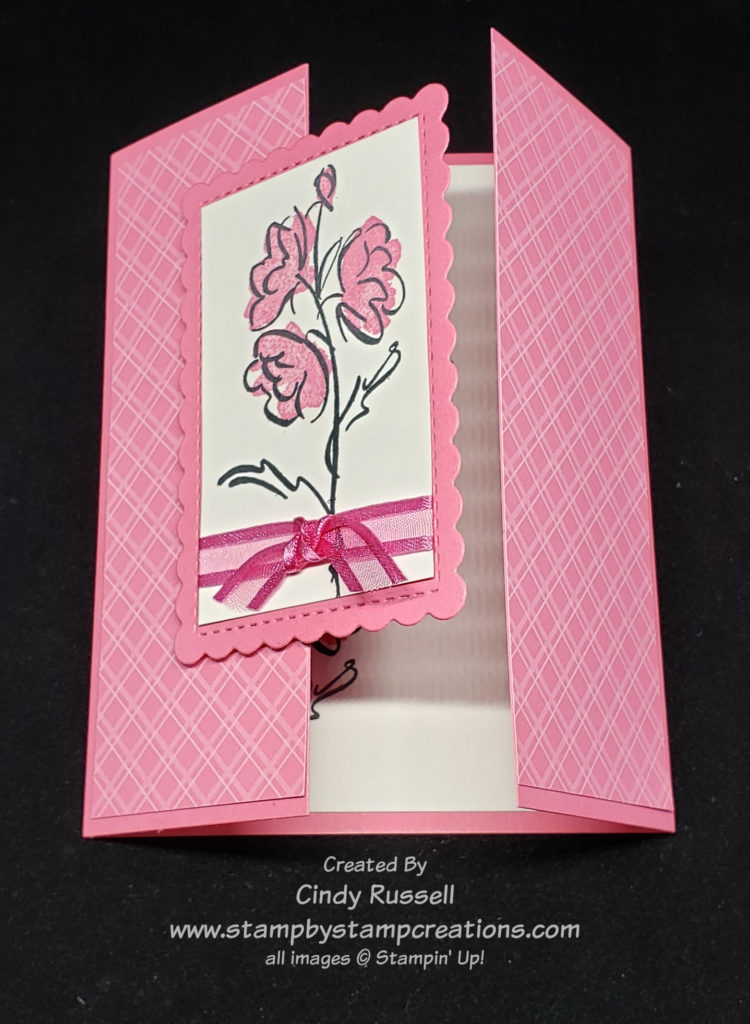
The front section of the Gate Fold Card is actually two pieces that open outward like….a gate. 🙂

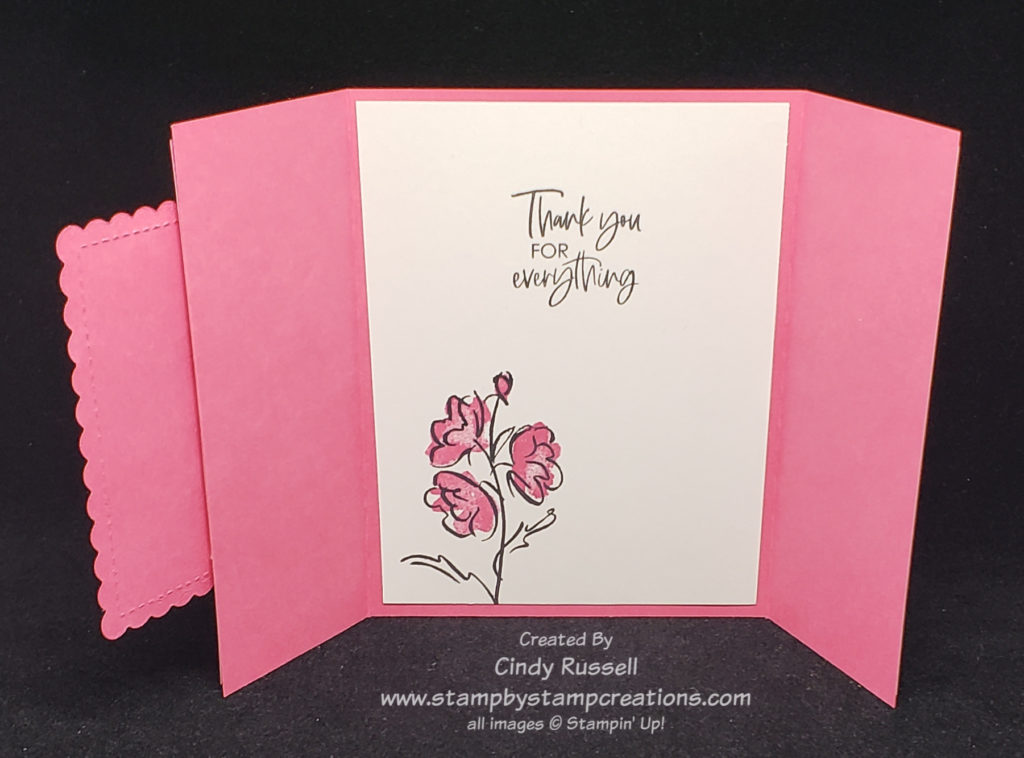
To make a gatefold card you start with the same size piece of cardstock that you would for a regular card. 5 1/2″ x 8 1/2″. Instead of scoring it at 4 1/4″ you score it at 2 1/8″ from each side. The short edges should meet up perfectly when you fold along your score lines.

In this photo you can see how the card opens. The photo also shows you how you attach the focal point of the card. You want to make sure you only attach it to the left side of the card so that you’ll be able to open the card.

It must be Polished Pink Week here at Stamp by Stamp Creations. On Monday I shared a card with you that I made with Polished Pink. In Tuesday’s newsletter that I emailed out I also used Polished Pink and today I’m using it again.

The designer paper that I used on the front of the card is one of the new patterns in the In-Color Paper stack. You’ll be able to find this pattern along with three others in all of the color family paper stacks in Stampin’ Up!’s new Annual Catalog. I used the Color & Contour stamp set on my card. The scalloped rectangle die comes from the coordinating Scalloped Contour Dies.

This last photo shows the inside of the card and is a good overall view of how it works.

As I mentioned, this is a fun and easy fold to make. Give it a try!

Have a great day! Take care and Happy Stamping!
Fun Folds: Angled Z-Fold Card

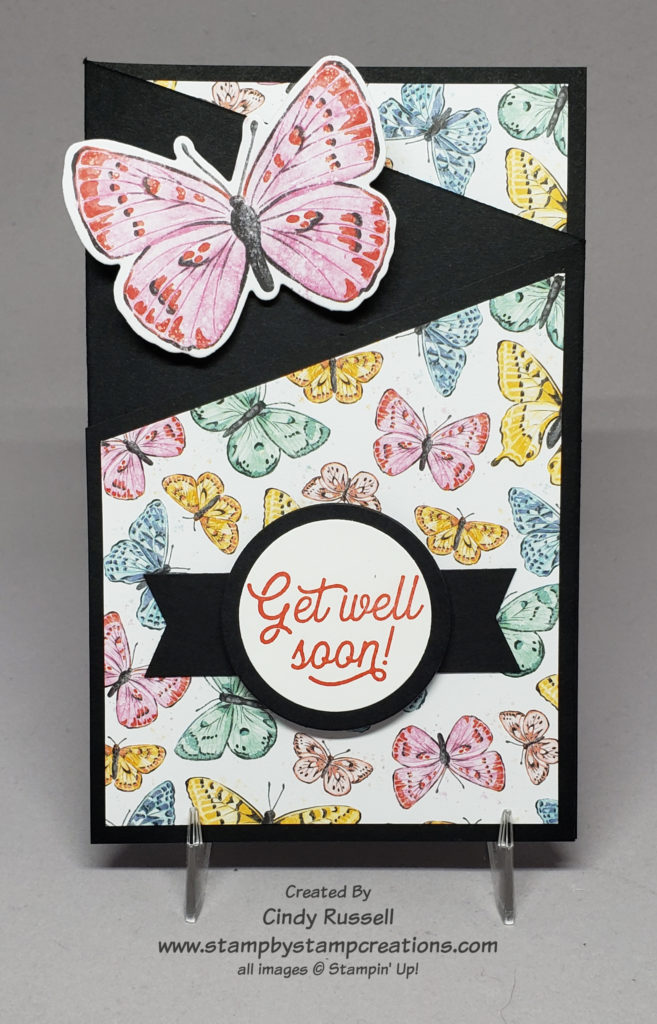
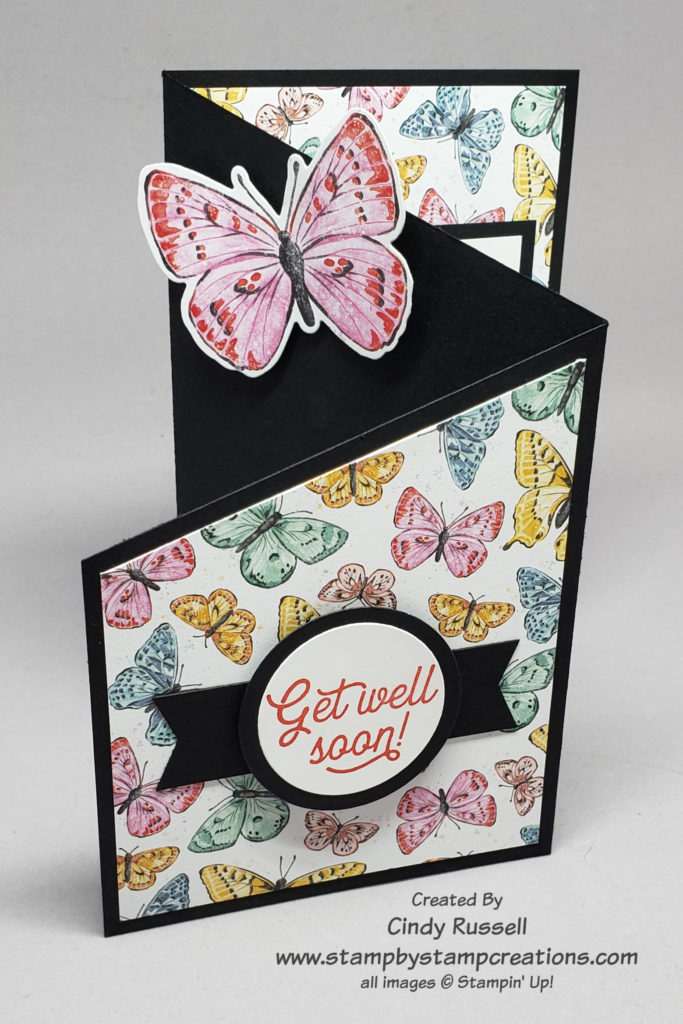
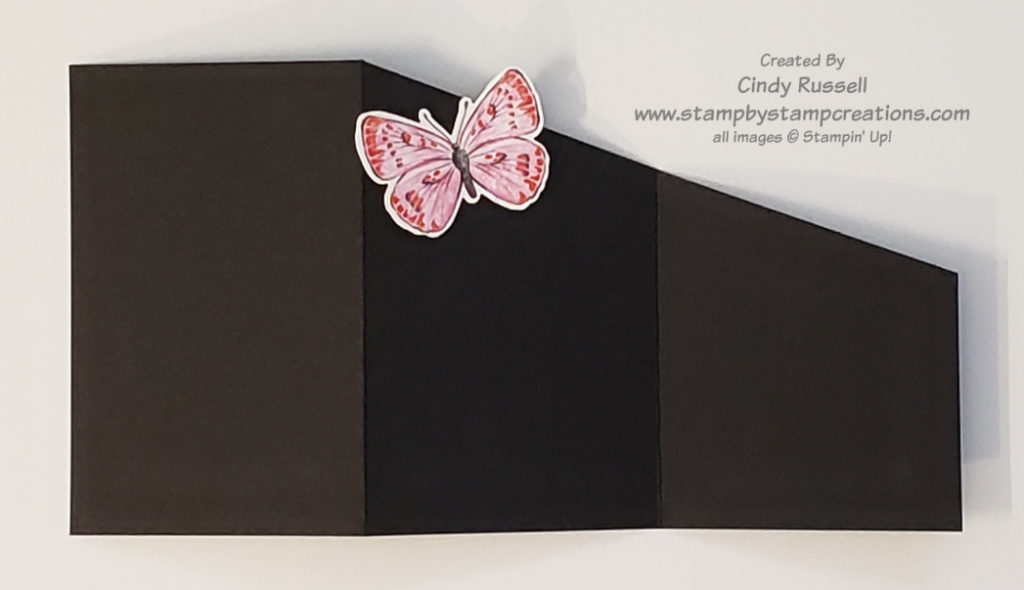
Lately we’ve been talking about many different types of Z-Fold cards and today is no different.  Today I want to introduce you to the Angled Z-Fold cord or Angled Tri-Fold card.  I think most people call it Angled Tri-Fold but you fold the three panels into a Z so to me it’s an Angled Z-fold!

Butterfly Bouquet Angled Z-Fold Card
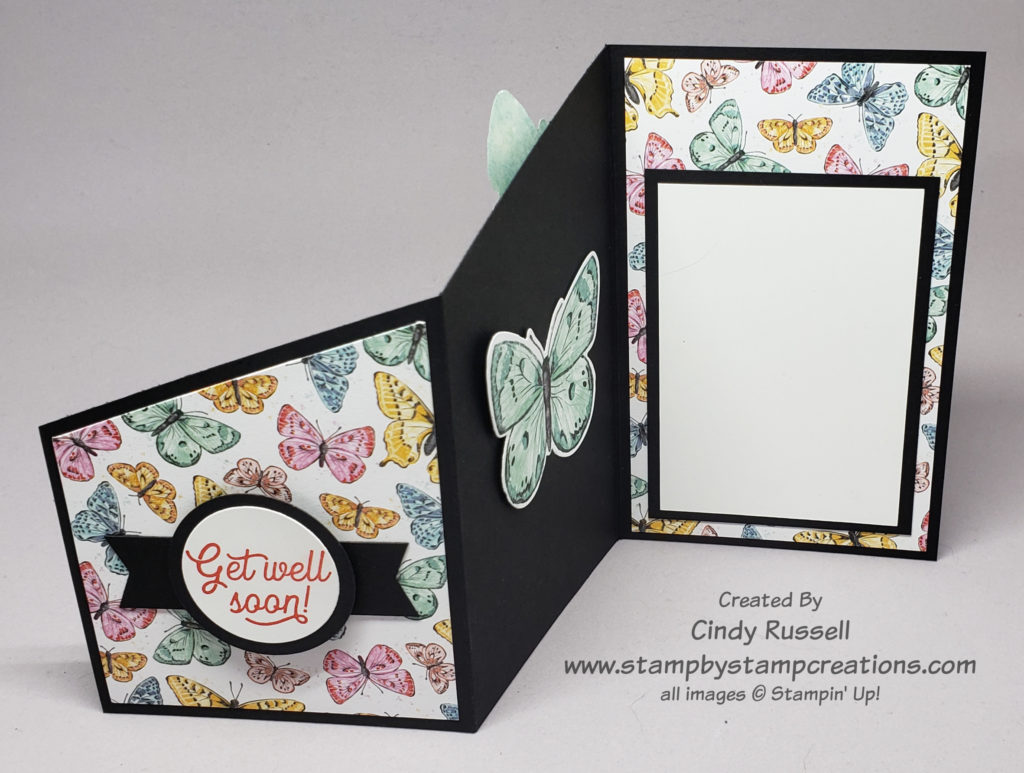
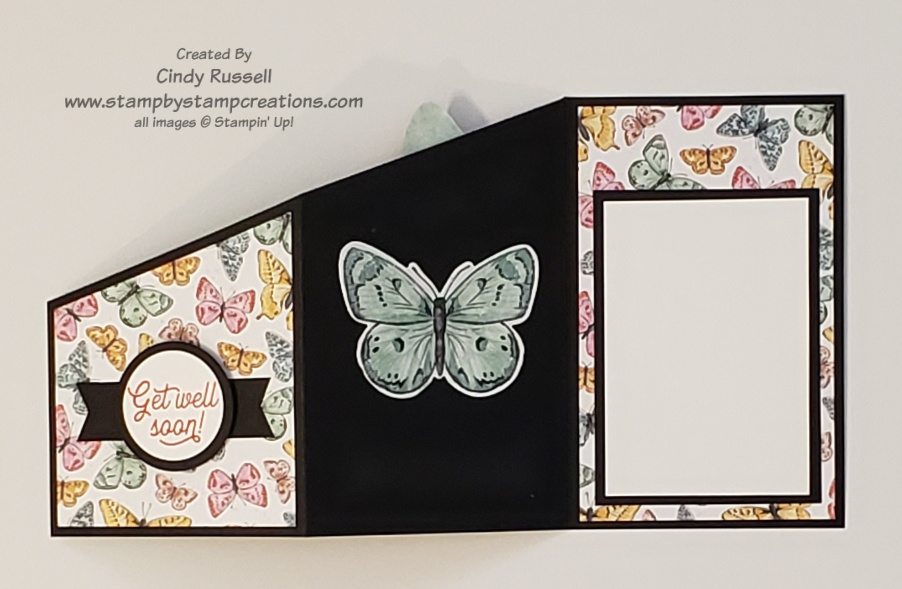
Butterfly Bouquet Angled Z-Fold Card open

When you look at the card in it’s closed position you can see that there is going to be some type of special fold to it.  You see the front panel with the designer paper and you can see a little bit of the designer paper on the “inside” or back panel.  As you open the card it’s easy to see the angled top edge.

I used the exciting new Butterfly Bouquet products on my card.  Gotta love those butterflies!  The large pink butterfly is die-cut from the designer paper!  You can view all of the products in this collection here. The stamp set and the dies from this collection are actually sneak previews from Stampin’ Up!’s upcoming 2021-2022 Annual Catalog. How fun is that?!

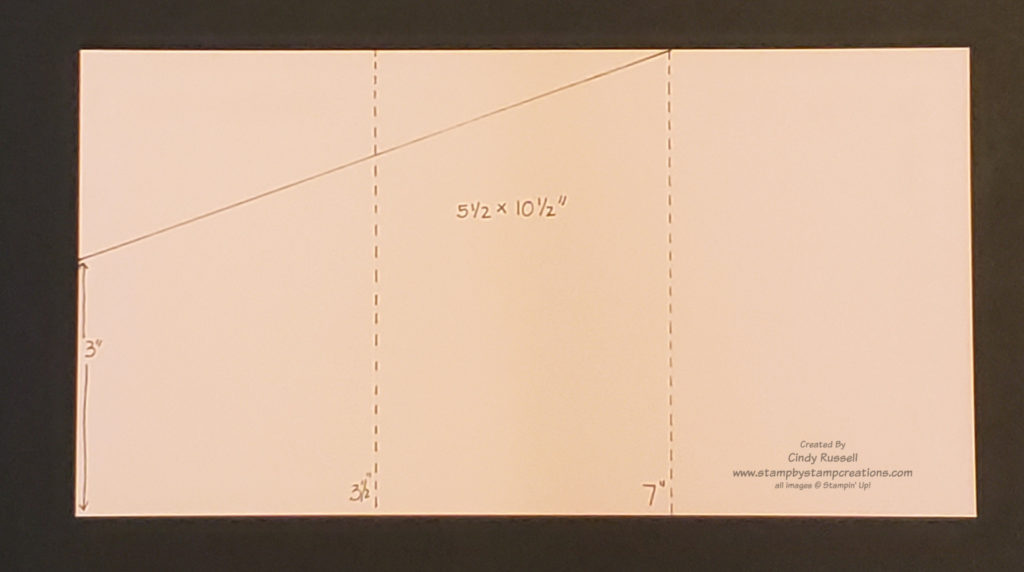
Template for Angled Z-Fold Card

My card is made from 5 ½” x 10 ½” piece of cardstock and will fit in a standard Stampin’ Up! envelope.  When closed, the card measures 3 ½” x 5 ½”.   Score the 5 1/2″ x 10 1/2″ piece of cardstock along the long side at 3 ½” and 7” to form your panels.  To get the angled edge you will then measure 3” up from the bottom on the left short side.  Make a light pencil mark.  Then draw a light line from the pencil mark to the top of the 7” score mark and then cut along this line.  The base of the card is now done and you just need to decorate!

The angled piece of designer paper on my card is 3 ¼” across.  The short side measures 2 ¾” and the long side measures 3 7/8”.   The larger piece of designer paper on the back panel measures 5 1/4″ x 3 1/4″.

You can make an Angled Z-fold card in many different sizes. The key is to make sure that you can evenly divide the long edge of your cardstock by 3 so that your panels are all the same size. The starting point for you angled edge can be anywhere on the left edge and you can either end your angle at the second score mark like I did or you can take the angle all the way to the upper right corner of the cardstock.

I hope you like this fun and easy Fun Fold! Have a great day! Take care and Happy Stamping!
Fun Folds: Make Your Own Envelope!

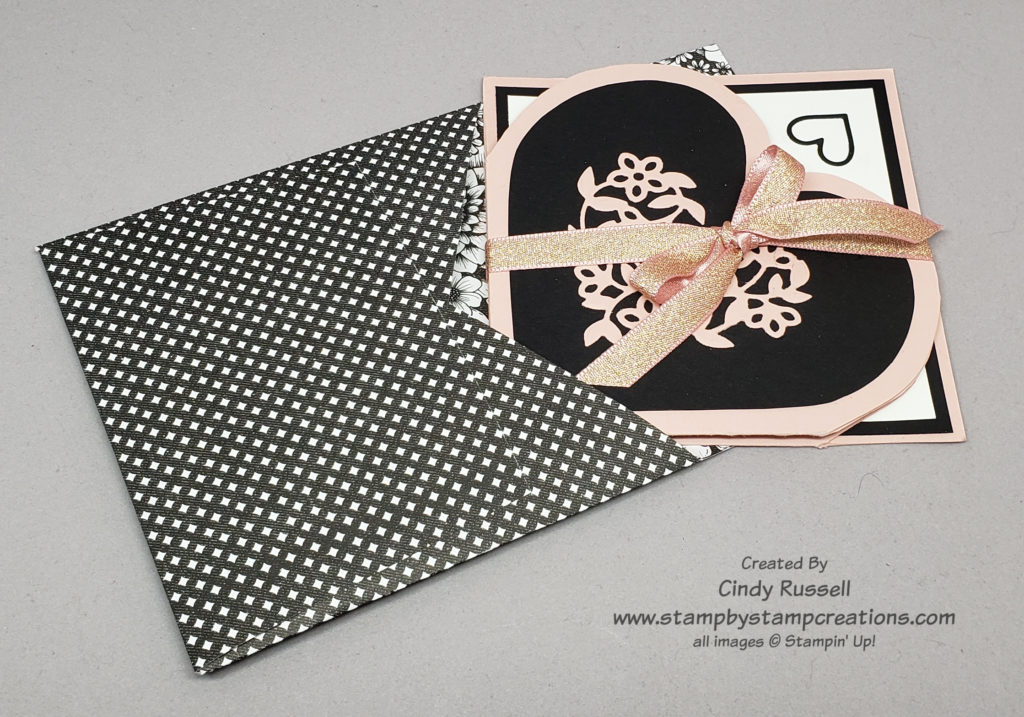
Did you know that it’s pretty easy to make your own envelope? Figure it out once and you’ll have it down pat! In last week’s Fun Fold post I shared with you the fun Squashed Heart Card. The card was 4 1/4″ x 4 1/4″. You can fit it in a regular card-size envelope but what to do if you want a square envelope that fits the card perfectly? Well then, it’s time to make your own!

Make your own square envelope!

Base of the Envelope. When making your own envelope you have to do a little bit of math so don’t get scared off. To figure out what size to make your envelope you need to first figure out the size of your card and add a little bit to each measurement. My card is 4 1/4″ x 4 1/4″ so I started with a measurement of 4 1/2″ x 4 1/2″. This will be the size of my finished envelope when closed. I was generous with my measurement because my card is so thick. If my card wasn’t so thick when closed I may have gone with 4 3/8″ x 4 3/8″.

Side Flaps of the Envelope. Now we need to figure out how wide to make the sides of our envelope. The sides will fold in towards the center and overlap. This means that they need to be slightly wider than half the width of the envelope. Since my envelope is 4 1/2″ wide each of my flaps will need to be 2 1/2″ wide. (Half of 4 1/2″ is 2 1/4″ so I added another 1/4″ to the measurement.)

Top and Bottom Flaps of the Envelope. The bottom flap will be the largest. You want it to cover about 2/3rds of the base when you fold it up. You want to make sure it will cover the point where the two sides come together when folded in. For my 4 1/4″ envelope base I made the bottom flap 3″. The top flap will need to cover at least 1/2″ of the bottom flap when they are both folded in. My top flap is 2 1/2″ and actually covers an inch of the bottom flap.

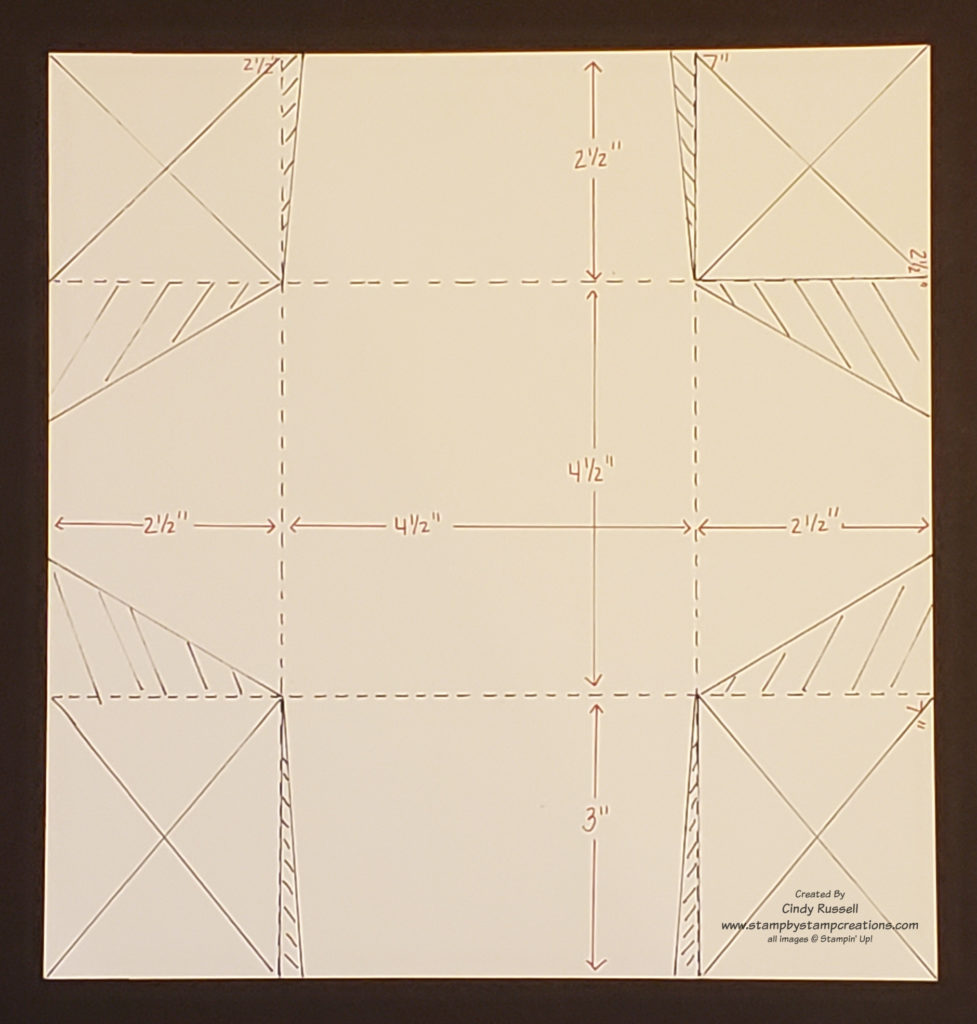
4 1/2″ x 4 1/2″ Envelope Template

Above you can see the template for my envelope. To figure out how large my paper had to be I did a little more math:

  • Width of Paper = width of left side flap + width of envelope base + width of right side flap (2 1/2″ + 4 1/2″ + 2 1/2″ = 9 1/2″)
  • Height of Paper = height of top flap = height of envelope base + height of bottom flap (2 1/2″ + 4 1/2″ +3 = 10″)

Now I need to score my paper. As you can see in the photo, with the 9 1/2″ side at the top, I scored in 2 1/2″ from each side of the paper, or at 2 1/2″ and 7″ (dotted lines are score lines) for my side flaps. Then I turned my paper 90 degrees and scored at 2 1/2″ and 7″ again. Since this side is 1/2″ longer I have the 3″ area for my bottom flap.

It’s time to do a little trimming to get rid of the areas we don’t need. I started by cutting out the four corners of the paper (those areas with an X in them). I could be done here but I want to do a little more trimming so the envelope will close nicely and look good.

Trimming of Side Flaps. To trim my side flaps I measured in 1 1/2″ from both edges of both flaps and drew a line to the corner. These are the larger sections with the angled lines through them. Trim them off to get rid of excess bulk.

Trimming of Top and Bottom Flaps. For the top and bottom flaps I did the same thing as on the side flaps except I only measured in a mere 1/4″. Trimming of the top and bottom flaps is mostly to make your envelope back look nice.

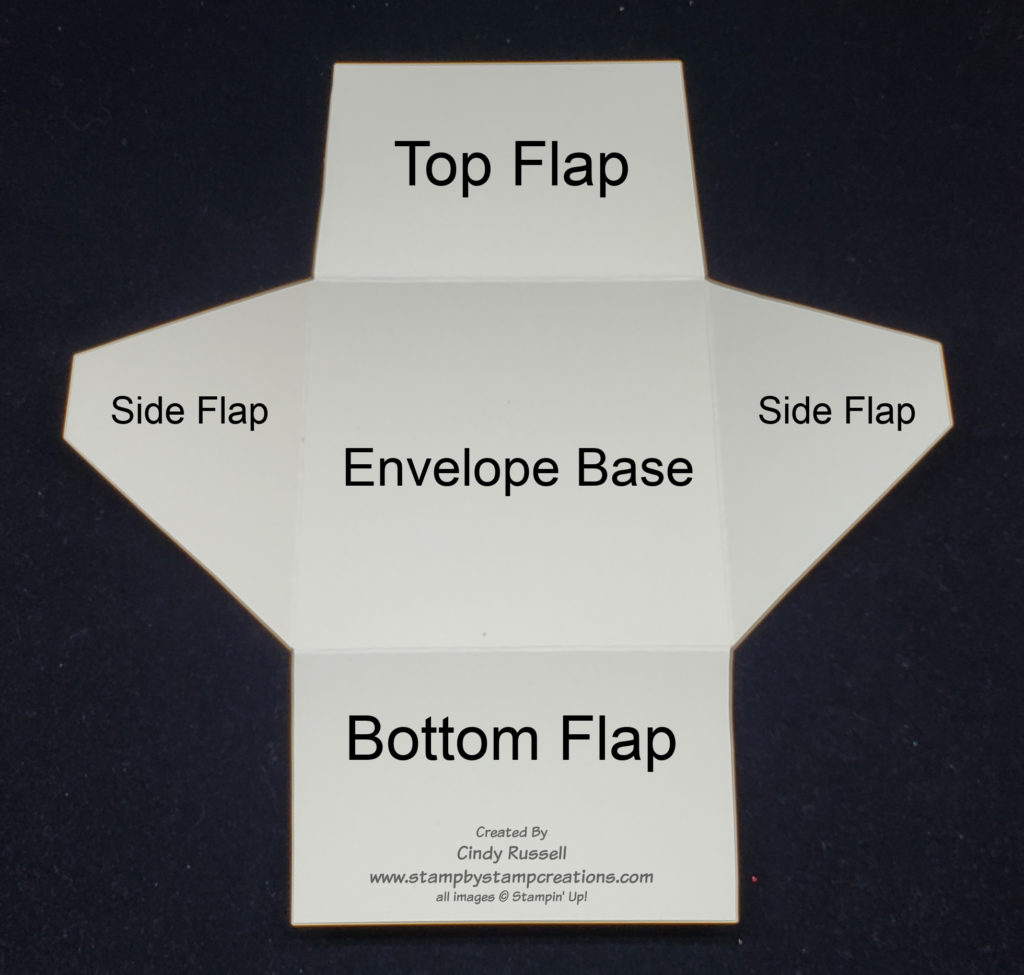
DIY Envelope after scoring and trimming

That’s it! You’re ready to adhere the envelope together! Fold the sides in first, adhering one over the other. Fold the bottom flap up and adhere to side flaps. Place your card in the envelope, fold the top flap down and adhere! You’re done!

Now you can make your own envelopes of any size! Have a great day! Take care and Happy Stamping!
Fun Folds: Squashed Heart Card

It’s time for another Fun Fold post! Last week, with my first Fun Fold post, we went back to the beginning. I talked about the different ways to cut your cardstock and the different orientations you can have your cards when starting with an 8 1/2″ x 11″ piece of cardstock.

This week I was going to share a simple and popular fun fold but when I was hopping around the internet looking for ideas I came upon this fun design! With Valentines Day coming up soon I knew I had to share this fun Squashed Heart Fun Fold Card with you.

Fun Fold: Squashed Heart Card

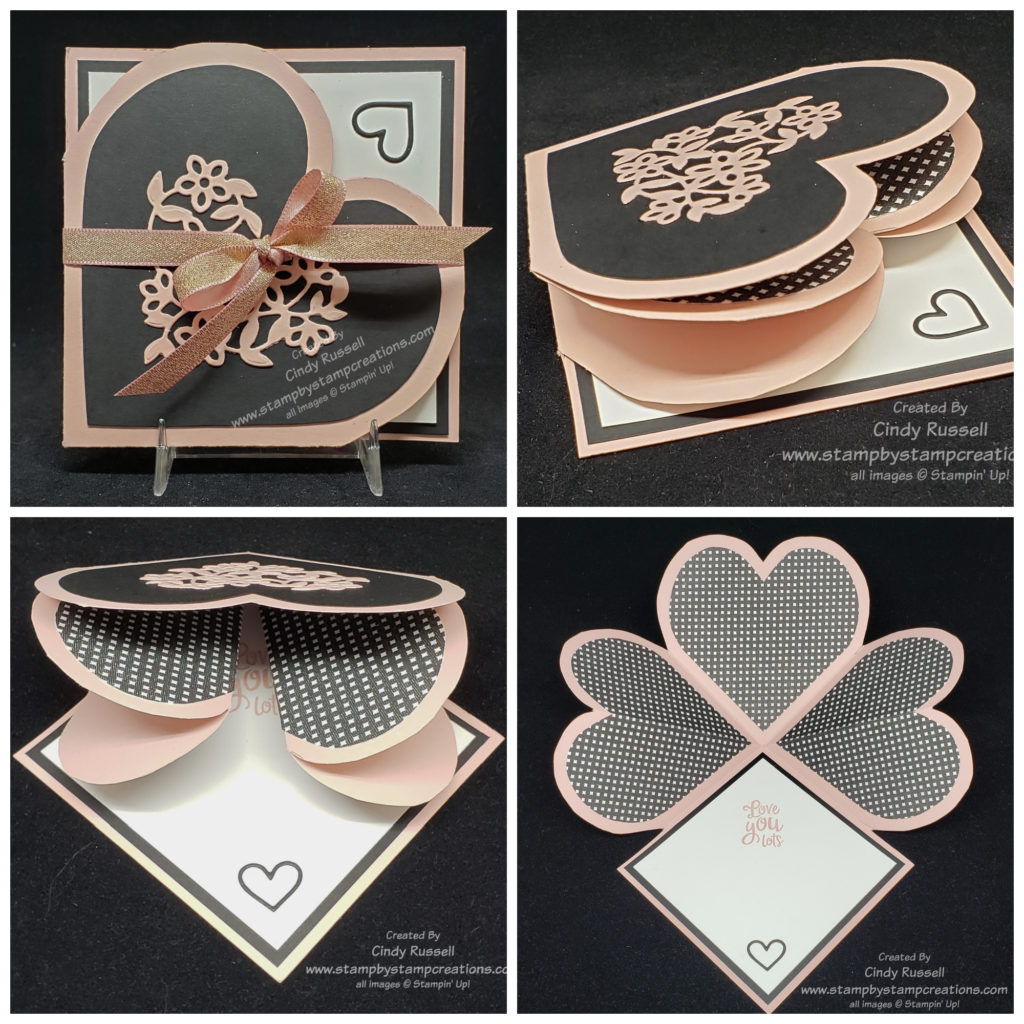
This card might look like it’s complicated to make but it really is pretty easy. The hardest part in making it was coming up with the right size heart. Don’t worry. If you’re hoping to recreate this card design I’ve included a template for the heart at the end of this post. 🙂

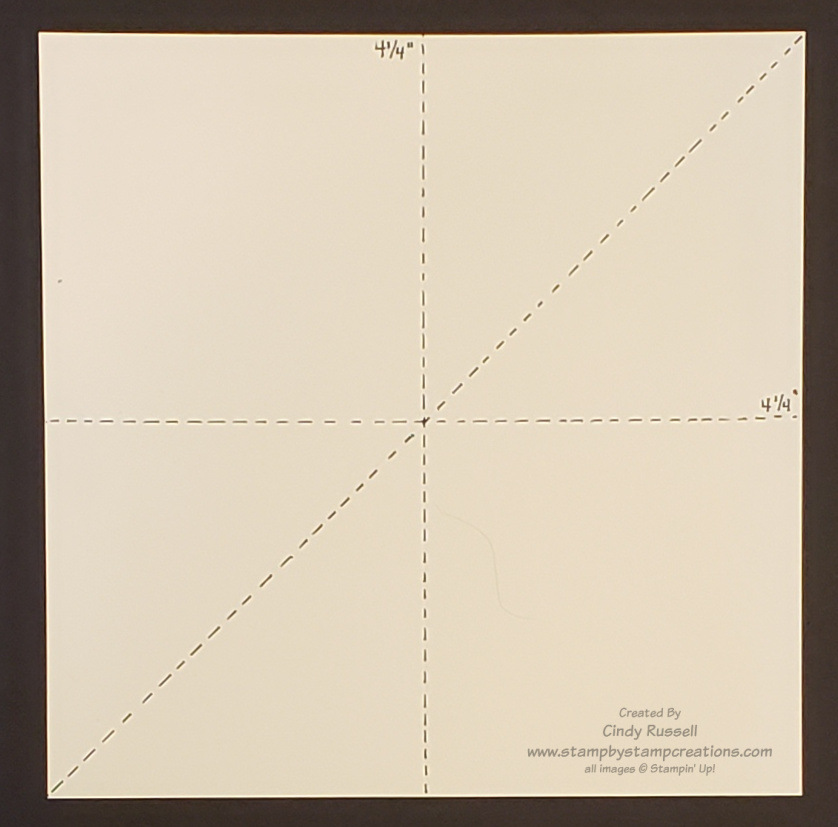
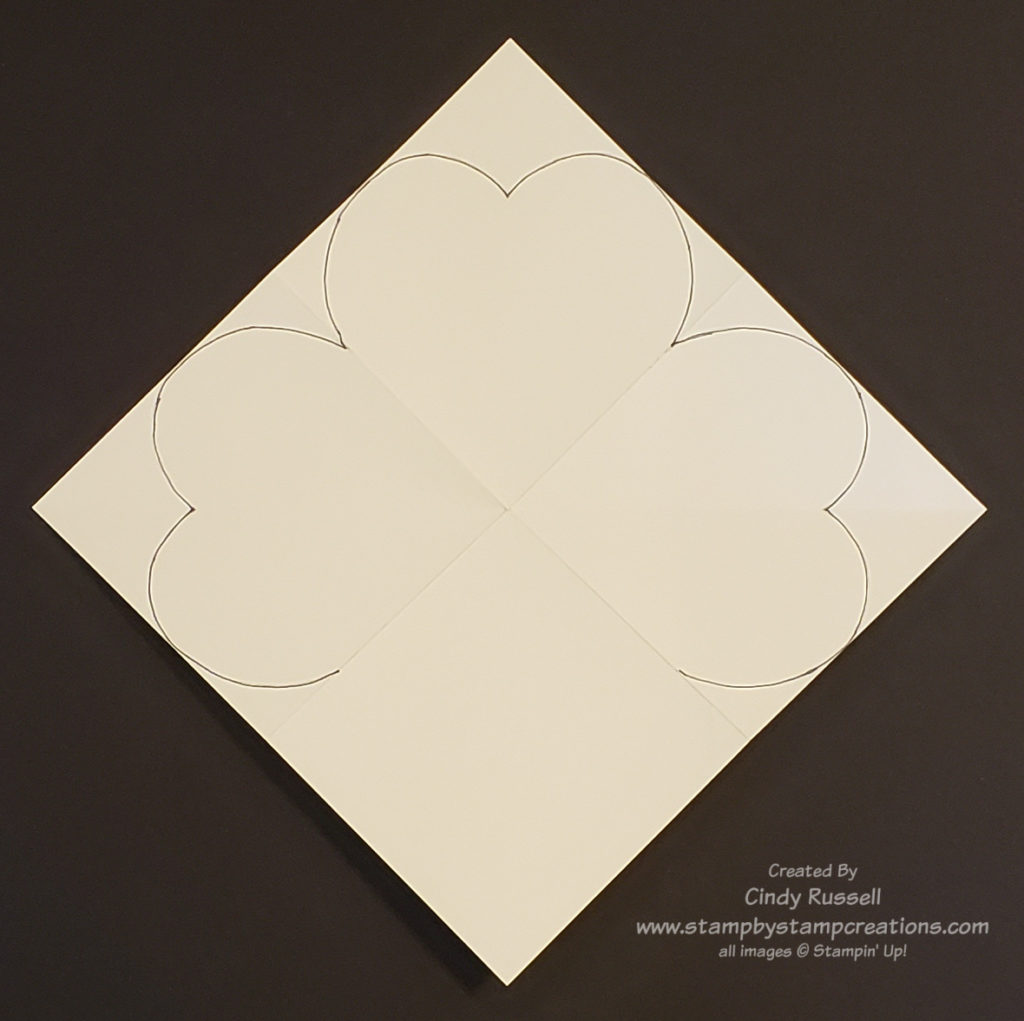
Start this project with a piece of cardstock that is 8 1/2″ x 8 1/2″ square. Score one side at 4 1/4″. Turn the cardstock 90 degrees and score again at 4 1/4″. You should now have four equal squares. Now score from one corner to the opposite corner. It doesn’t matter which corner you start in.

Squashed Heart Card

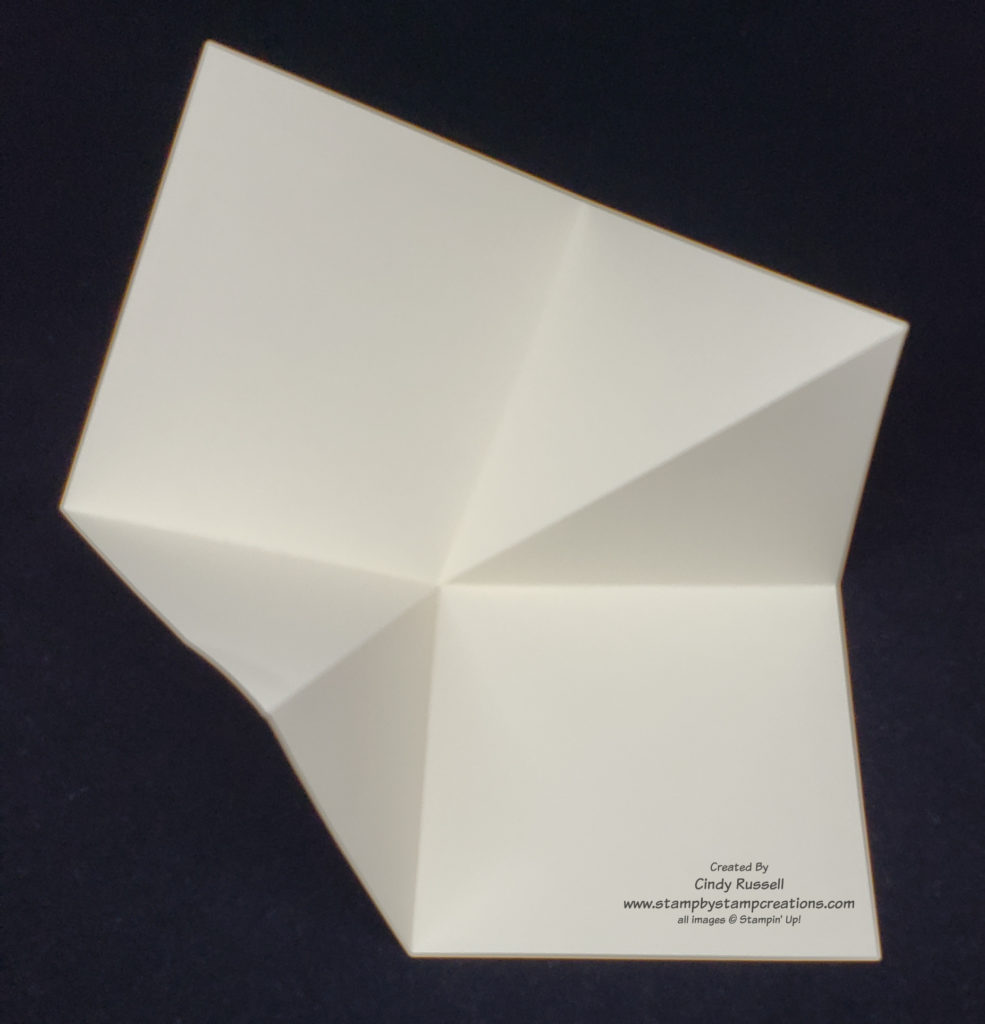
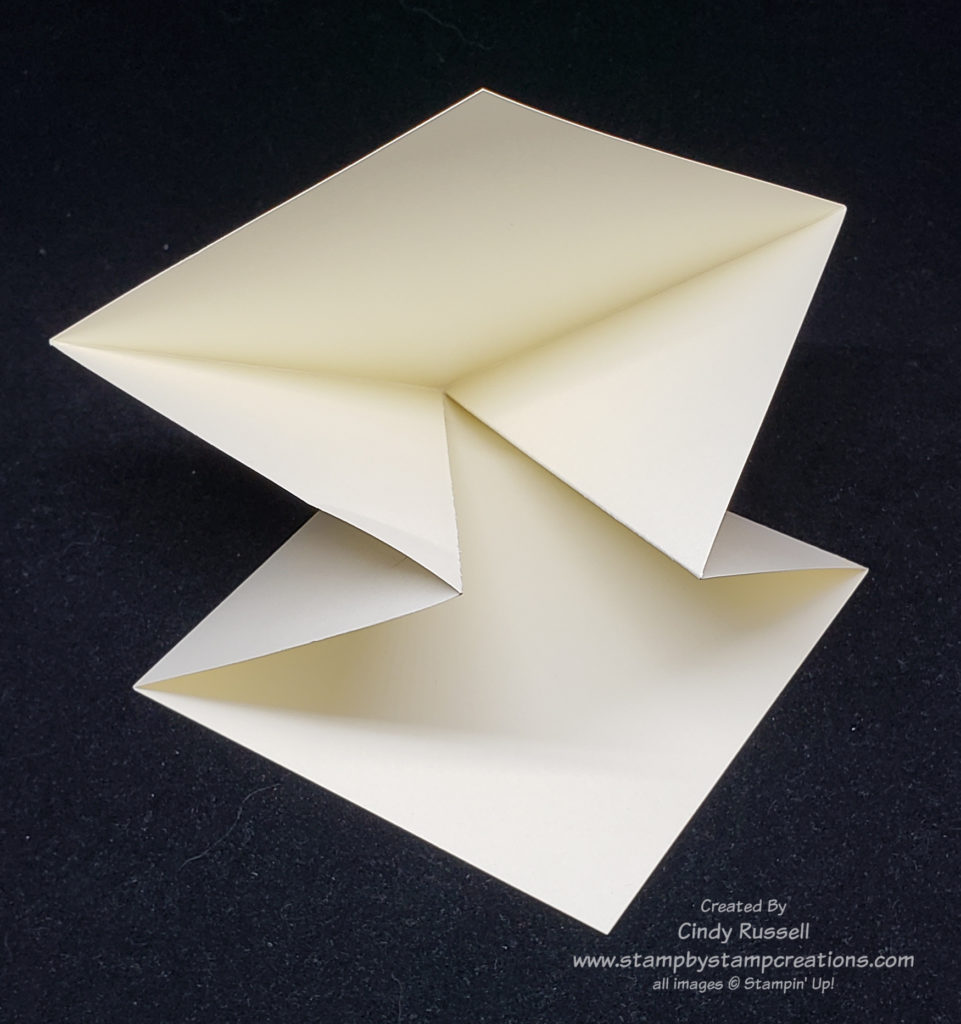
Fold and crease all score lines well. The key to this design is folding the diagonal line in the opposite direction that you folded the other two lines. Fold the square lines in valley folds and the the diagonal fold in a mountain fold.

As you can see in the first picture above, the diagonal line is folded in the opposite direction of the other two lines. In the second picture you can see how to fold, or squash, the card. Push in on the two diagonal folds and your folded card will become a square.

Now we need to make the hearts. In the video that I watched on making this card the gal simply took her scissors and cut the hearts. I knew that wouldn’t work for me. After many failed trials I finally came up with a heart that fit perfectly.

Once you have your template, you want to draw it on the two squares with diagonals and one of the flat squares.

It’s hard to tell in my photo above but the two side hearts are the ones with the diagonal score marks through them. Cut along the drawn lines to form the tops of your hearts. With the two side hearts you will need to cut from the edge of the paper to where the heart outline begins. If you look at the collage photo of the card at the beginning of the post you can see what I mean in the last photo.

You can find the template for the heart here. Are you wondering how you can mail or even present this card? What size envelope would work? The finished, closed card is 4 1/4″ x 4 1/4″ so it will fit in a normal Stampin’ Up! envelope that is about 5 3/4″ x 4 3/8″ with a little extra room in one direction. However…..next session I will share with you how to create your own envelope which is perfectly sized for this card along with tips on making any size envelope. So stay tuned!

I hope you’ve enjoyed viewing this fun card. Please leave a comment if you did. Be sure to contact me with any questions you may have either in the comments or by email (cindy@stampbystampcreations.com).

Have a great day! Take care and Happy Stamping!
Fun Folds: The Beginning

Welcome to another new series of posts! In this series we’ll be talking Fun Folds! These post will encompass folds for cards as well as folds for 3D items.
I love finding different folds for my cards and many of you do too. Before we jump in though, we’re going to start at the beginning.

Ok, now I’m singing the song from the Sound of Music…Let’s start at the very beginning, a very good place to start…. Do any of you get reminded of song lyrics after you say something and then start singing? I do it all the time.

Enough of that! Let’s get back to Fun Folds!

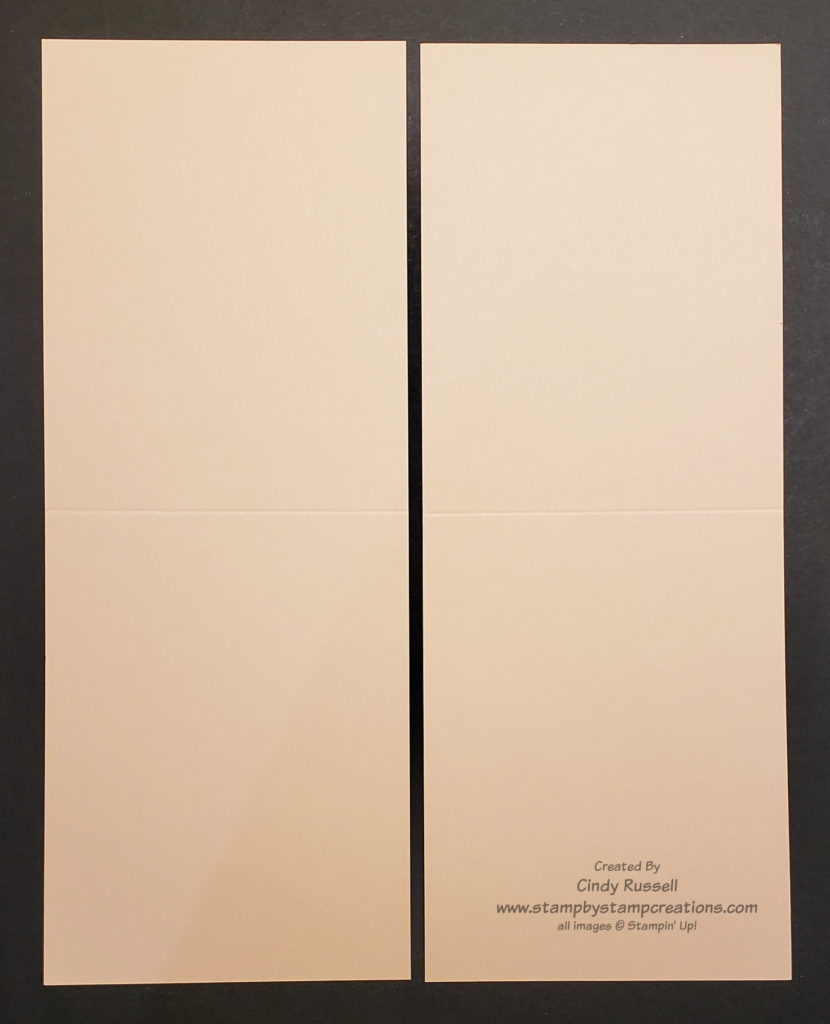
If we’re starting at the beginning we need to go over the ways we usually cut our 8 1/2″ x 11″ cardstock to make our basic cards. In both ways we are simply cutting the cardstock in half. Either on the long edge or the short edge.

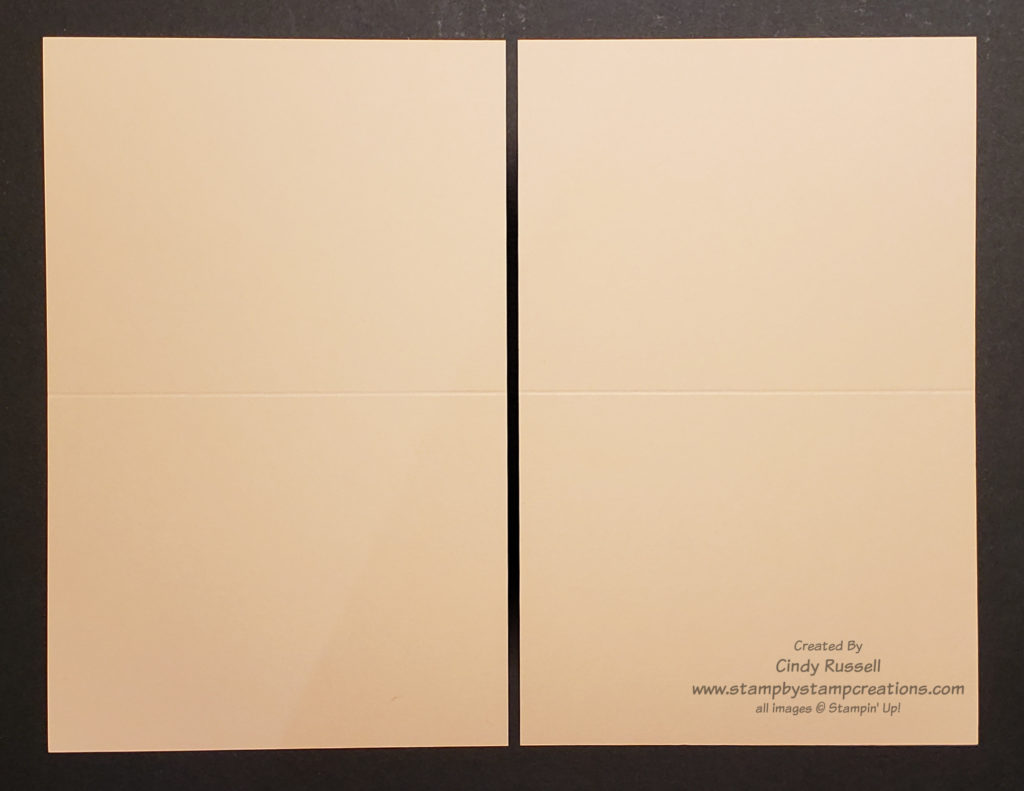
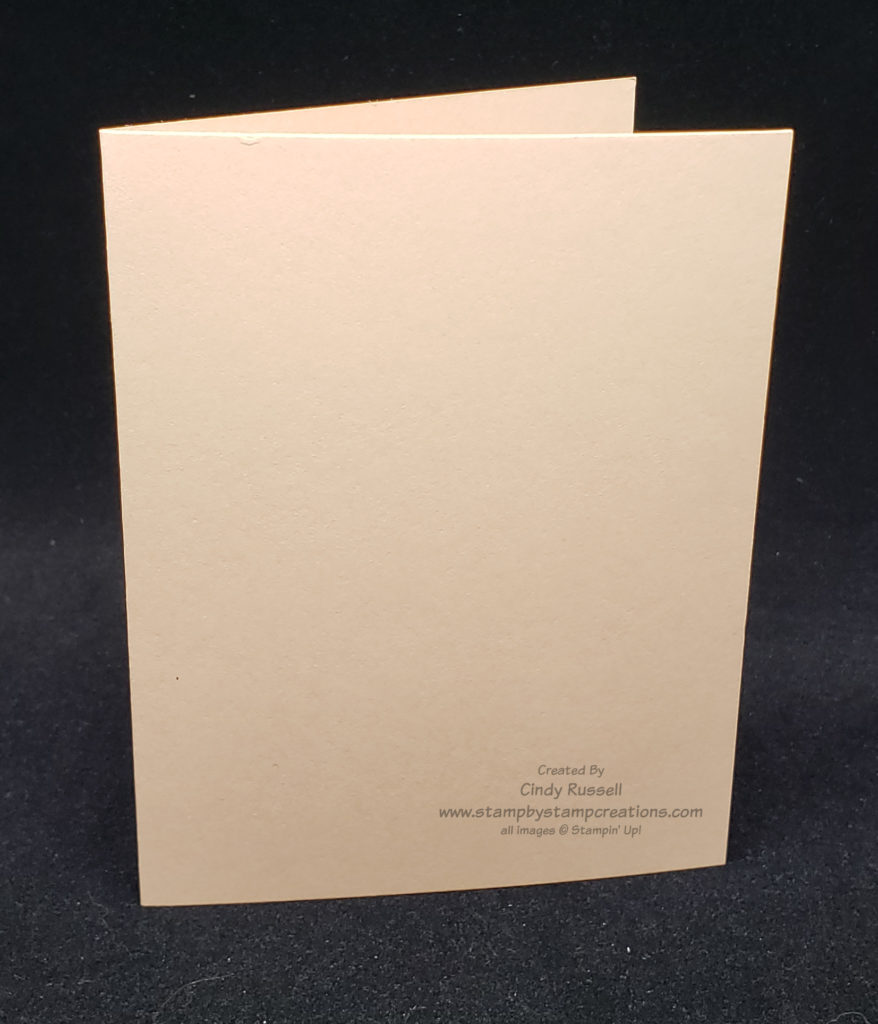
When you cut your cardstock along the long edge you get two pieces of cardstock that are 5 1/2″ x 8 1/2″. If you’re going to score this piece to form your card you will score it at 4 1/4″.

I will be the first to admit that this is the way I usually cut my cardstock this way to make my cards.

5 1/2″ x 8 1/2″ Vertical Card

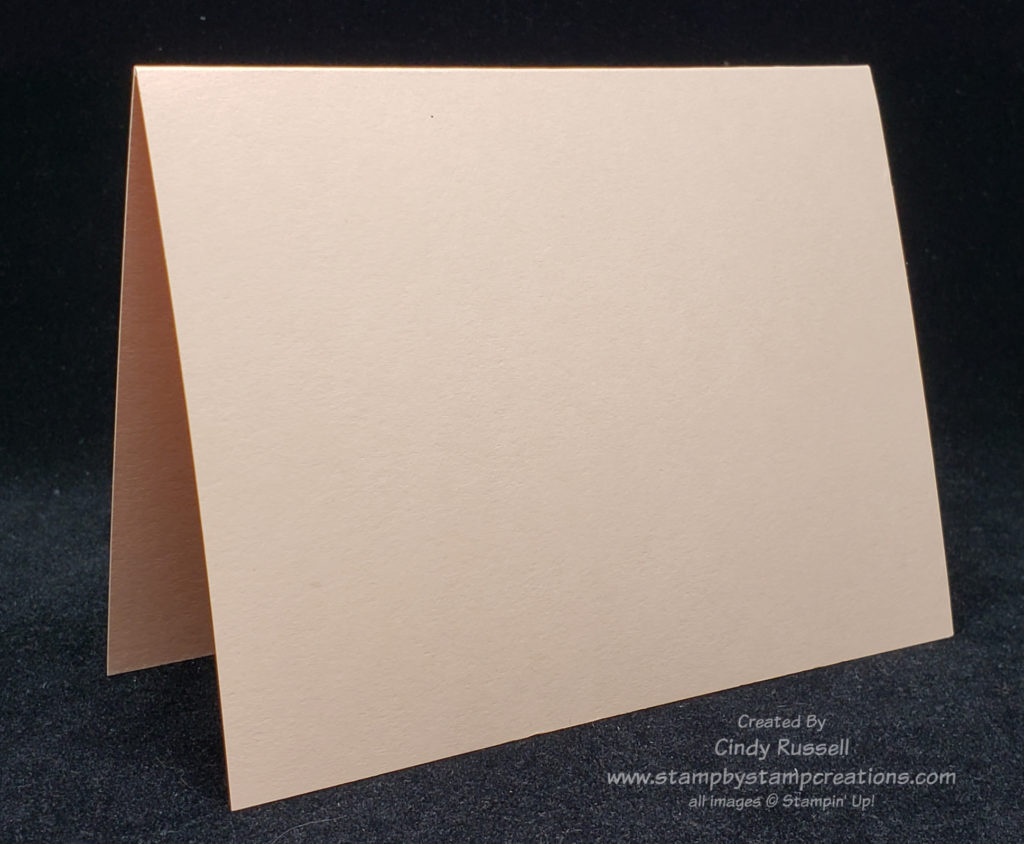
When you cut your cardstock along the short edge you get two pieces of cardstock that are 4 1/4″ x 11″. To form your card you will score at 5 1/2″. I don’t make a lot of cards with this configuration. I’m not sure why. Cutting your cardstock this way changes up your card a little bit. Sure, the card front and the inside will be the same but it’s a fun little change to opening up the card.

4 1/4″ x 11″ Vertical Card
4 1/4″ x 11 Horizontal Card

We’re done with the beginning. You now know the basic ways to cut and fold your cardstock and how they will look in vertical or horizontal orientations. Leave a comment and let me know your go-to way of cutting the cardstock and which orientation you prefer.

Have a great day! Take care and Happy Stamping!