
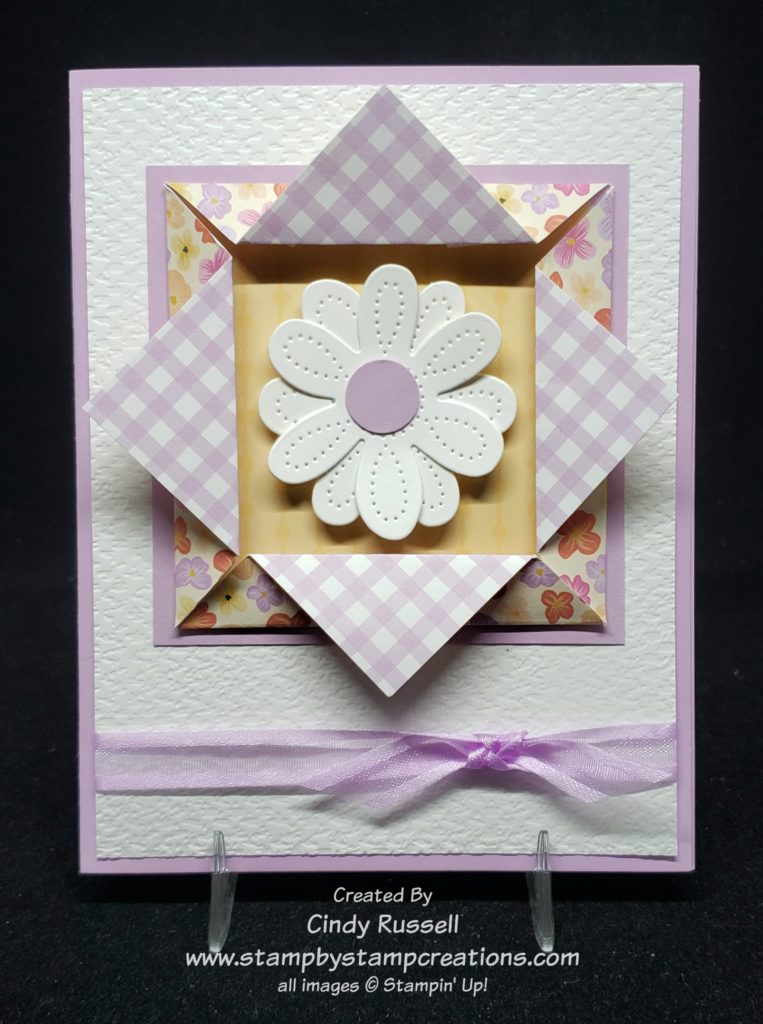
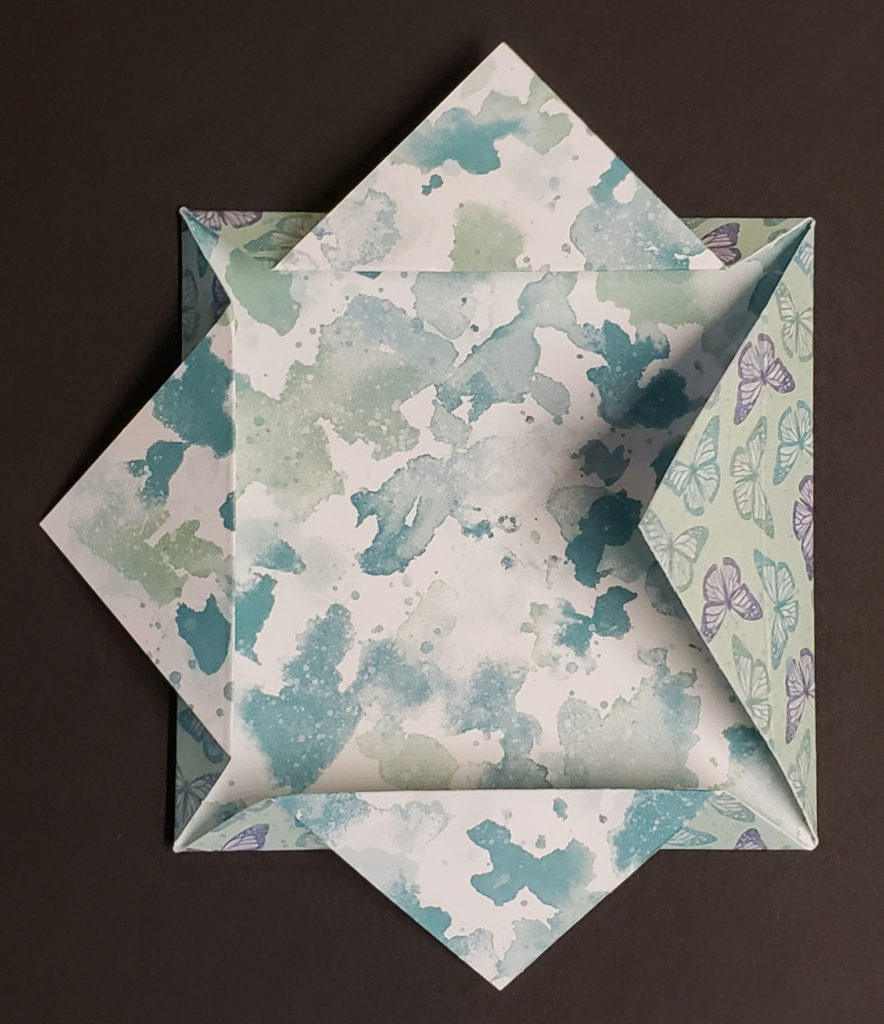
On Tuesday in my newsletter I shared a gorgeous origami frame with you that another talented demonstrator made. As I was searching around the web trying to find out how to make it (I’m still searching), I came across this fun and easy Origami Window Fold. The card itself isn’t a fun fold but you use this Origami Window Fold as the focal point of the card.
When you first look at this fold it’s a bit intimidating but once you have the measurements it’s quite easy. Start with a square piece of designer paper that is 4 ¼” x 4 ¼”. As with most origami folds you want the two sides of your paper to coordinate. I tried starting with a couple of squares that were a bit smaller but I couldn’t get the other measurements to quite work out. I’ll let you know if I get that figured out.
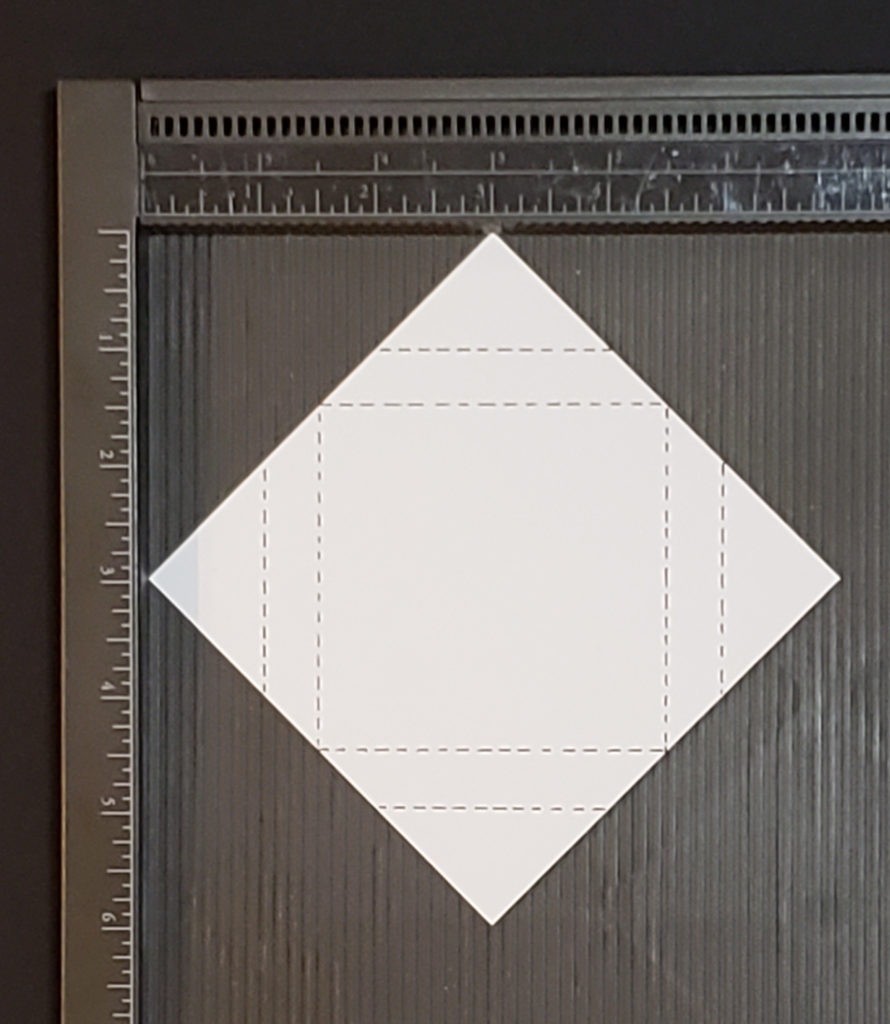
Lay your square of paper diagonally on the Simply Scored scoring board with the top and bottom points lined up on the 3” mark. Now score along the 1” and the 1 ½” marks. Turn the paper 90 degrees and repeat. Continue until you have four sets of score marks.
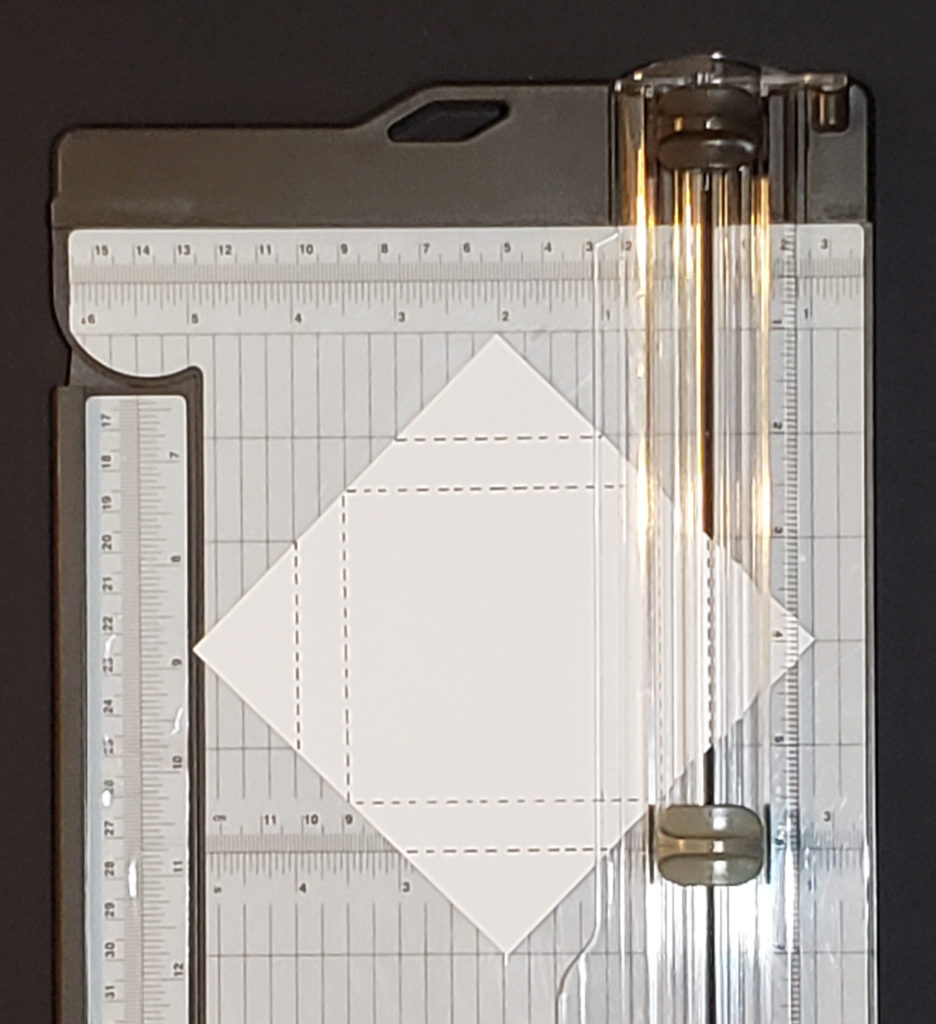
If you don’t have a Simply Scored to make your score lines and want to use your Paper Trimmer you line things up a bit differently. You still start by placing the paper diagonally on the Paper Trimmer. You will line up the top and bottom points at the 2” mark and score. Then slide the points over to line up on the 1 ½” mark and score. Turn paper and repeat three more times. Fold along the inside marks toward the center and them fold the other score marks to the outside.
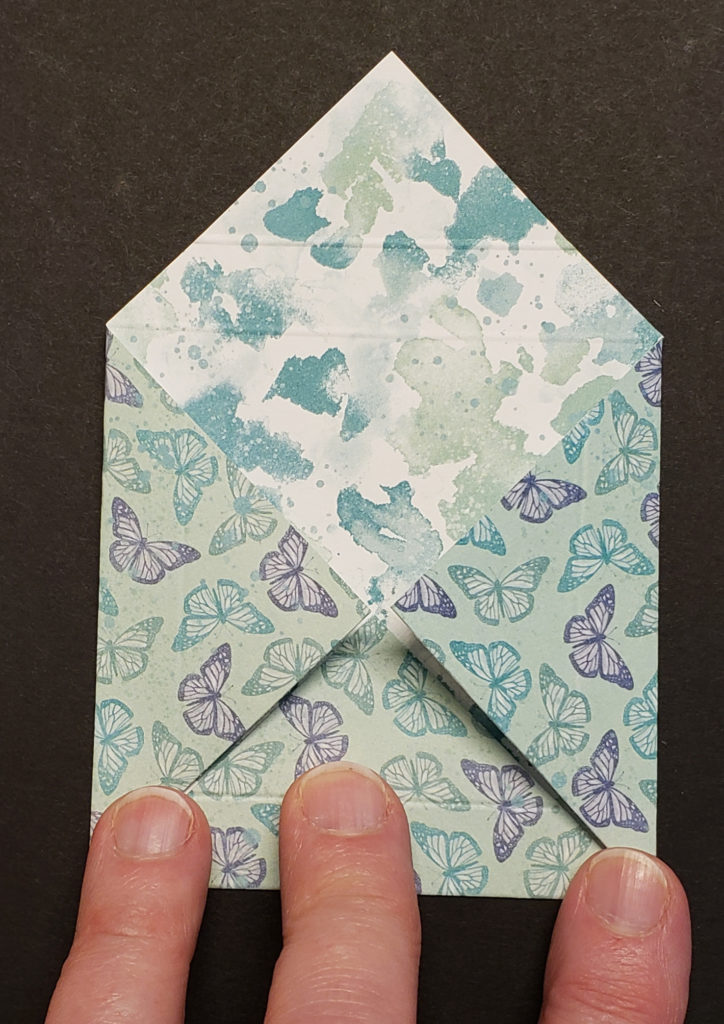
Fold along the inside score marks towards the center of the paper. They should all meet in the center. Then fold the other score marks back towards the outside.
To complete the fold and give it a little dimension you want to add a couple of Stampin’ Dimensionals to the inside of each side of the frame. See the photo to the left to see where I placed them.
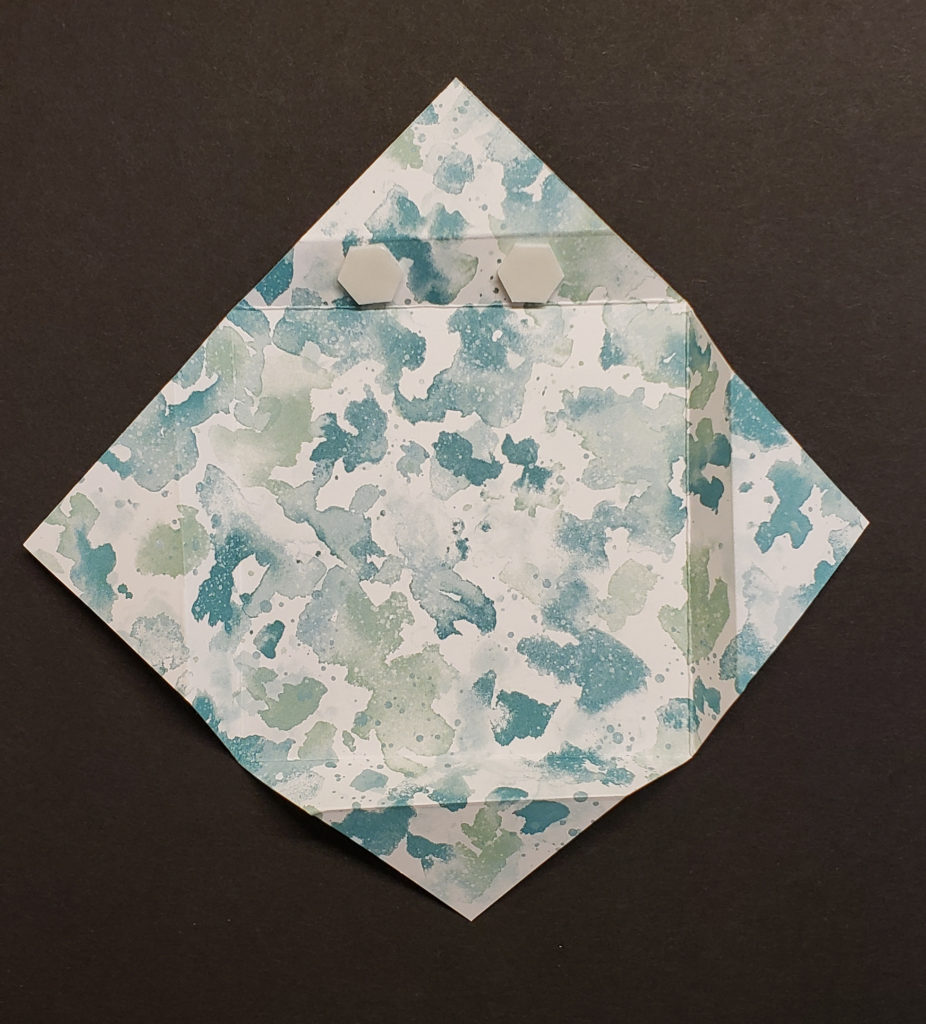
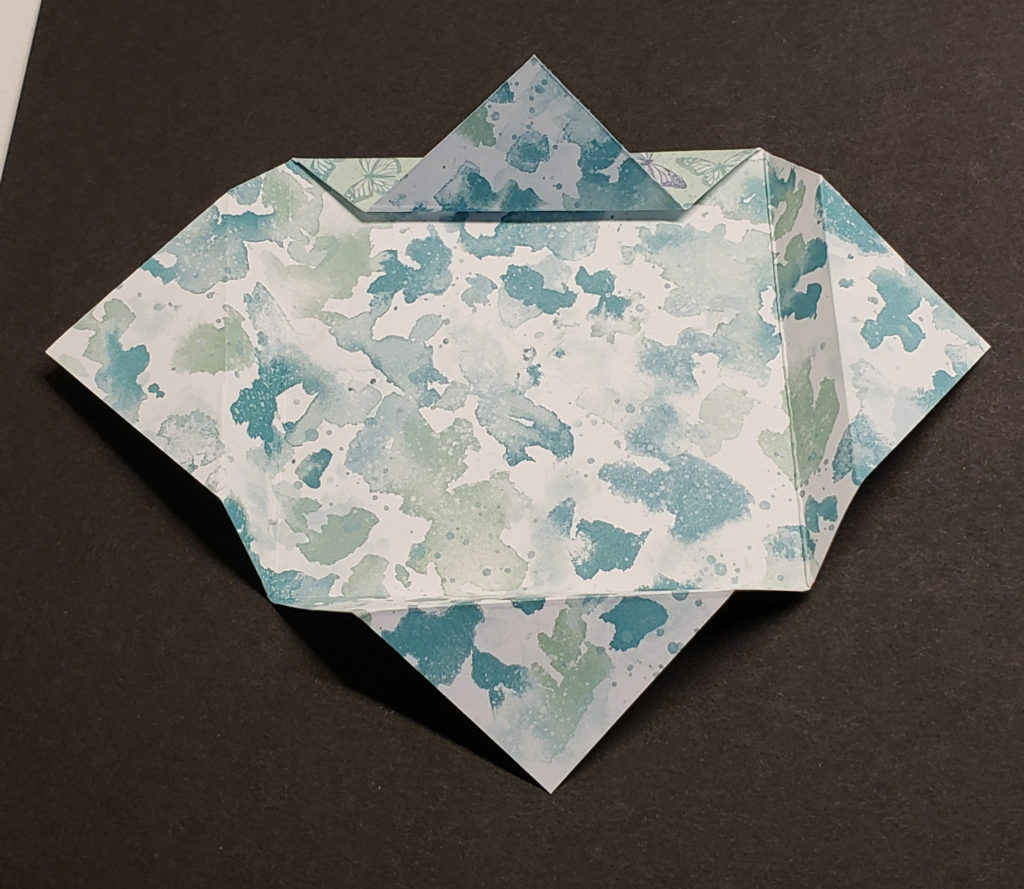

The Origami Window Fold is done. Now it’s time to decorate. I chose to mount my Origami Window Fold on another piece of cardstock (3 ¼” x 3 ¼”) before adhering it to the card. I also lined the inside of my frame with a coordinating piece of designer paper (2 7/8” x 2 7/8”) to make my flower pop. If I hadn’t, the inside of my frame would have been the gingham checked print like the folded out flaps.
This was a fun and easy fold to make that adds a lot of “wow” to my card. Give it a try. I think you’ll like the results! Have a great day! Take care and Happy Stamping!