Fun Fold: Window Z-Fold Card

Whale Done Window Z-Fold Card

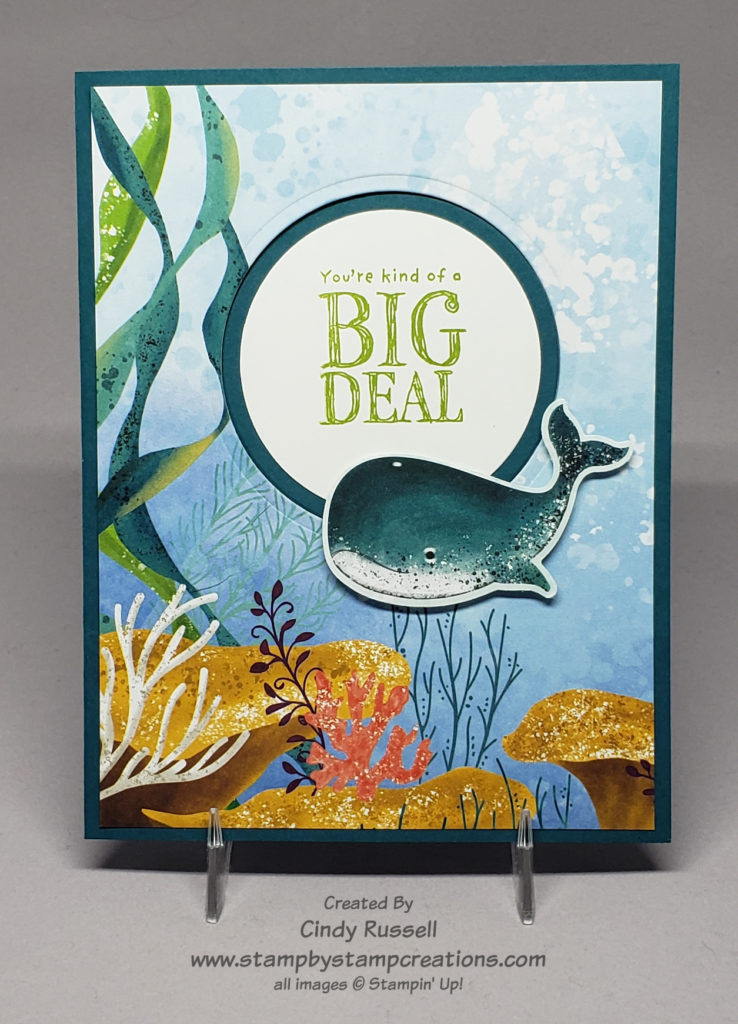
I’m so excited that I’ve finally used my Whale of a Time Suite products! These products were some of the first on my radar when the Annual Catalog came out last June but I held off buying them. I finally took the plunge and purchased them but then they sat on my shelf. Well, the time finally came with the fun fold card I have for you today.

Isn’t this Whale of a Time Designer Paper gorgeous? You’re just seeing one of the sheets. This paper pack is 6″ x 6″ with all sorts of sea life images.

I did copy this card from Pinterest (thank you Lisa Ann Bernard!). The only thing I switched out was the designer paper. Lisa used a more neutral paper on her card but I wanted to use one of the fun sea life patterns.

Whale Done Window Z-Fold Card – Inside

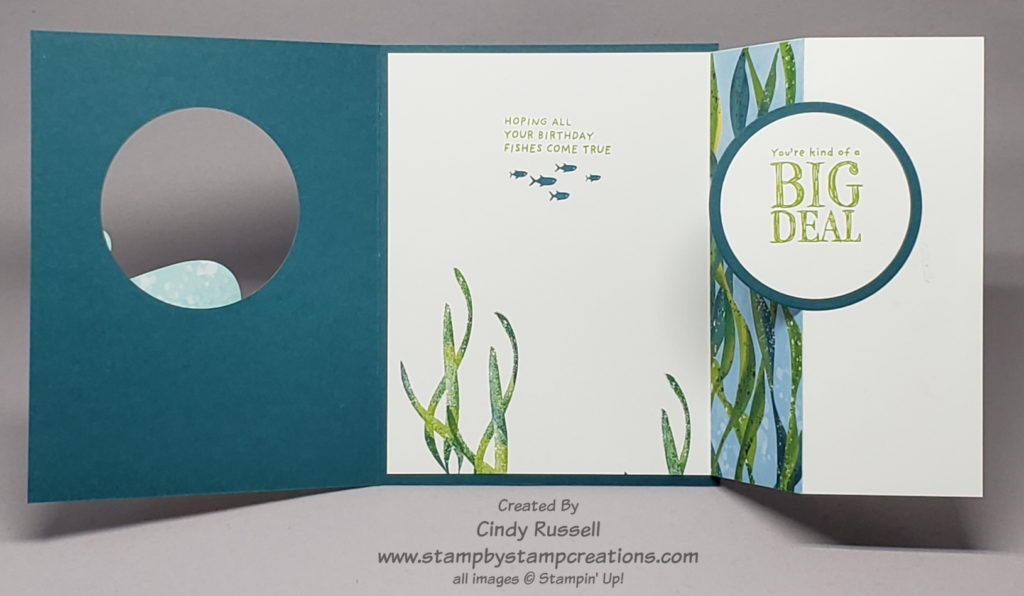
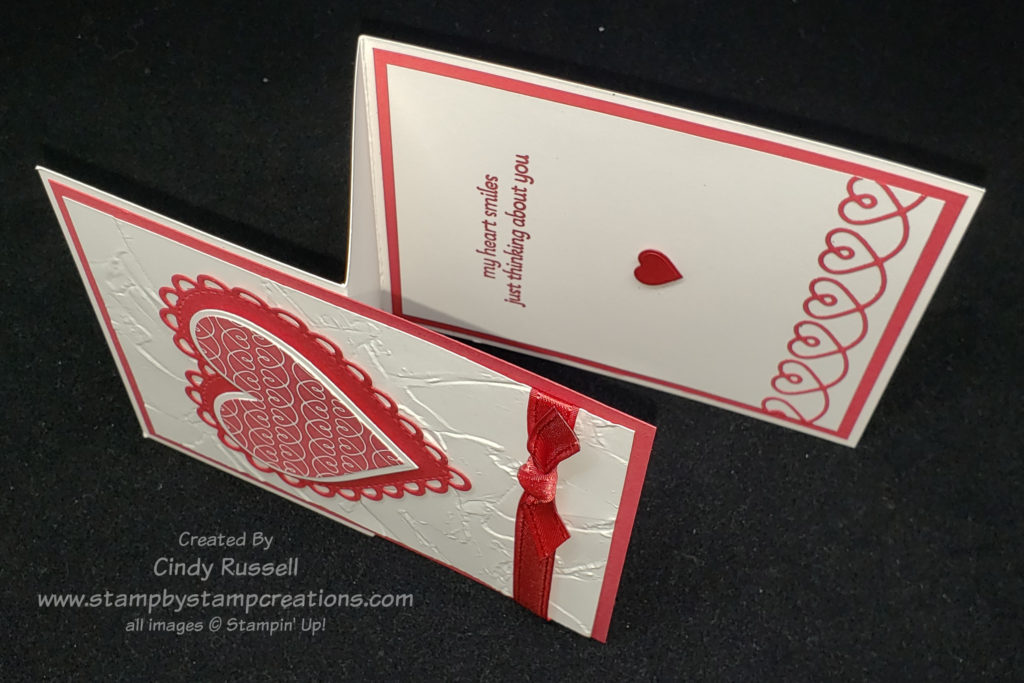
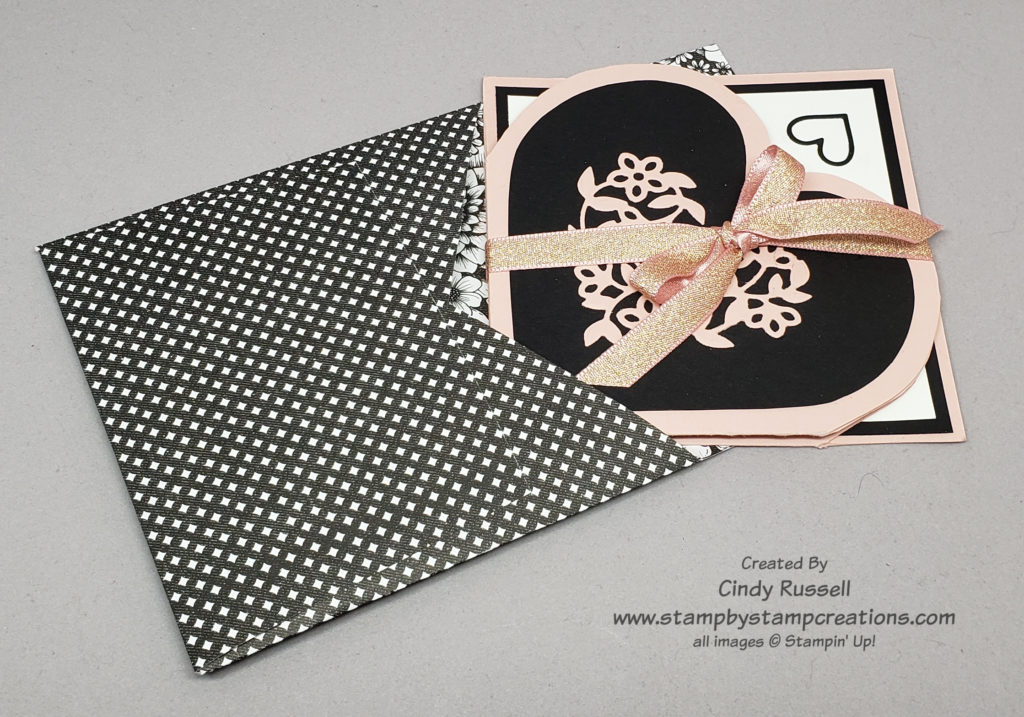
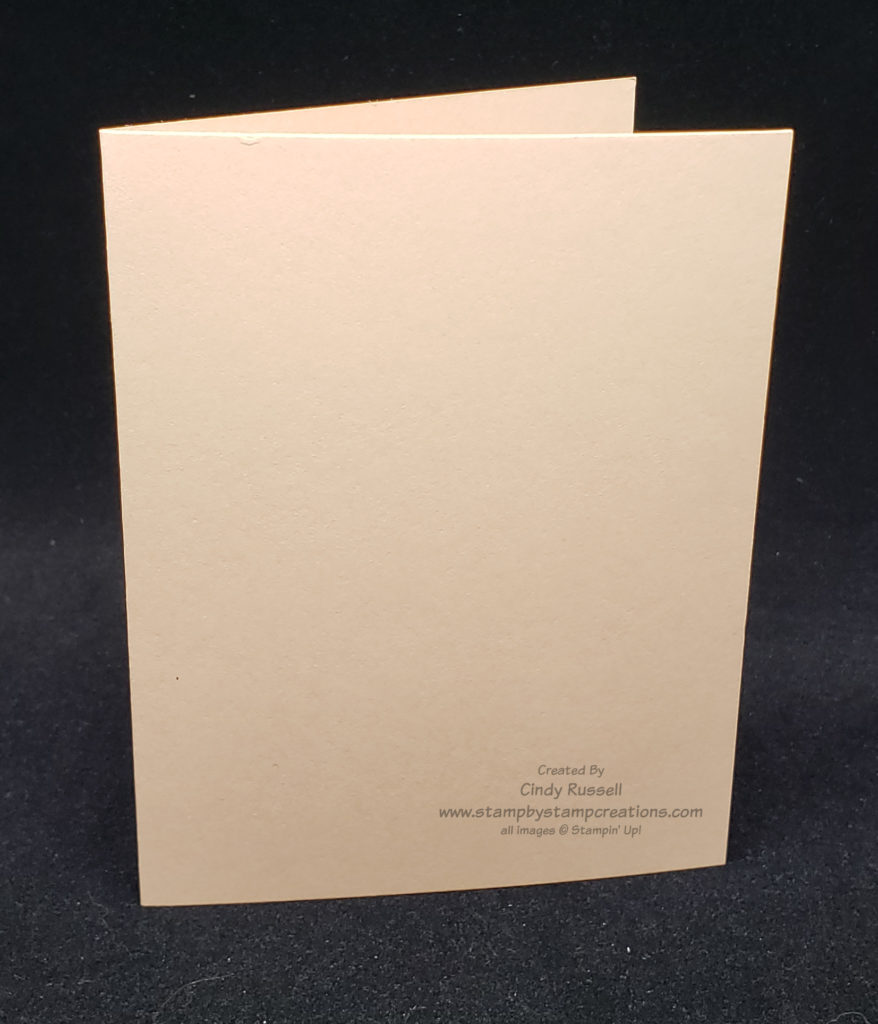
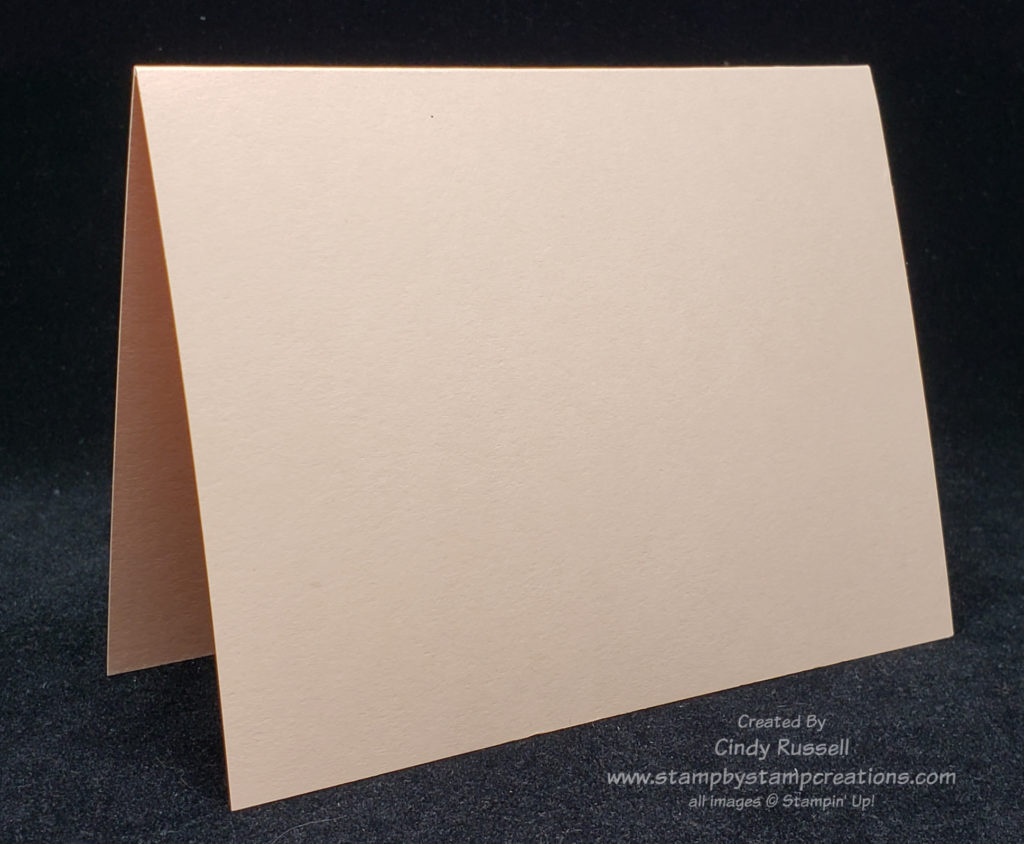
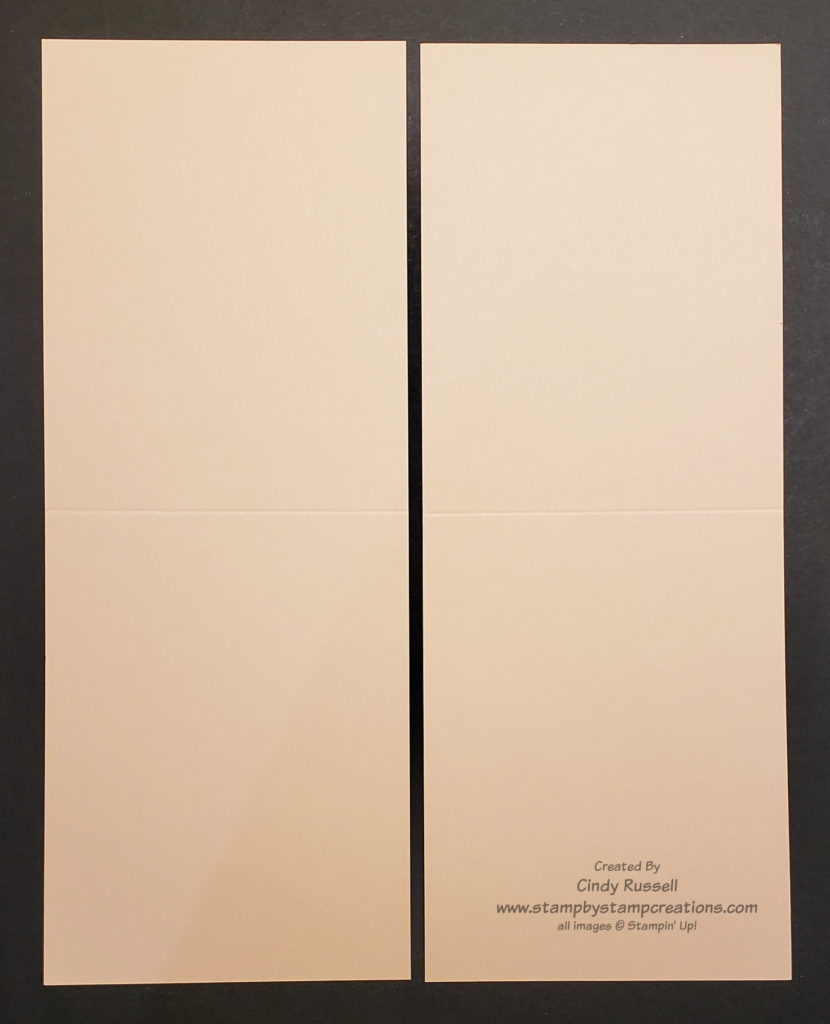
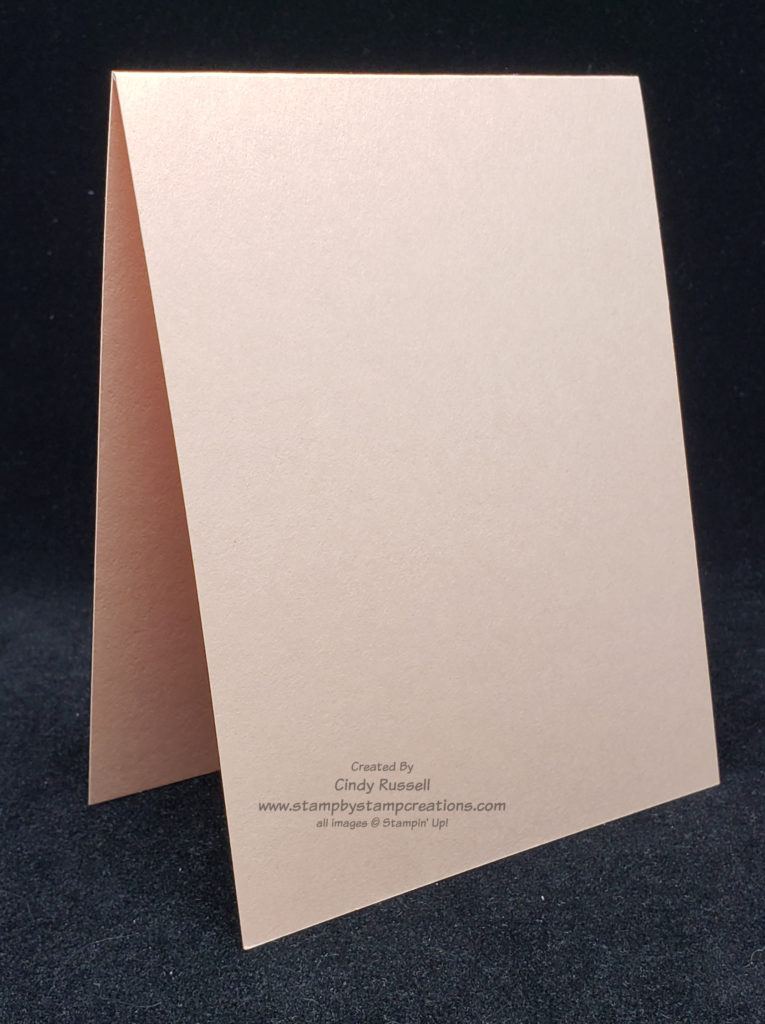
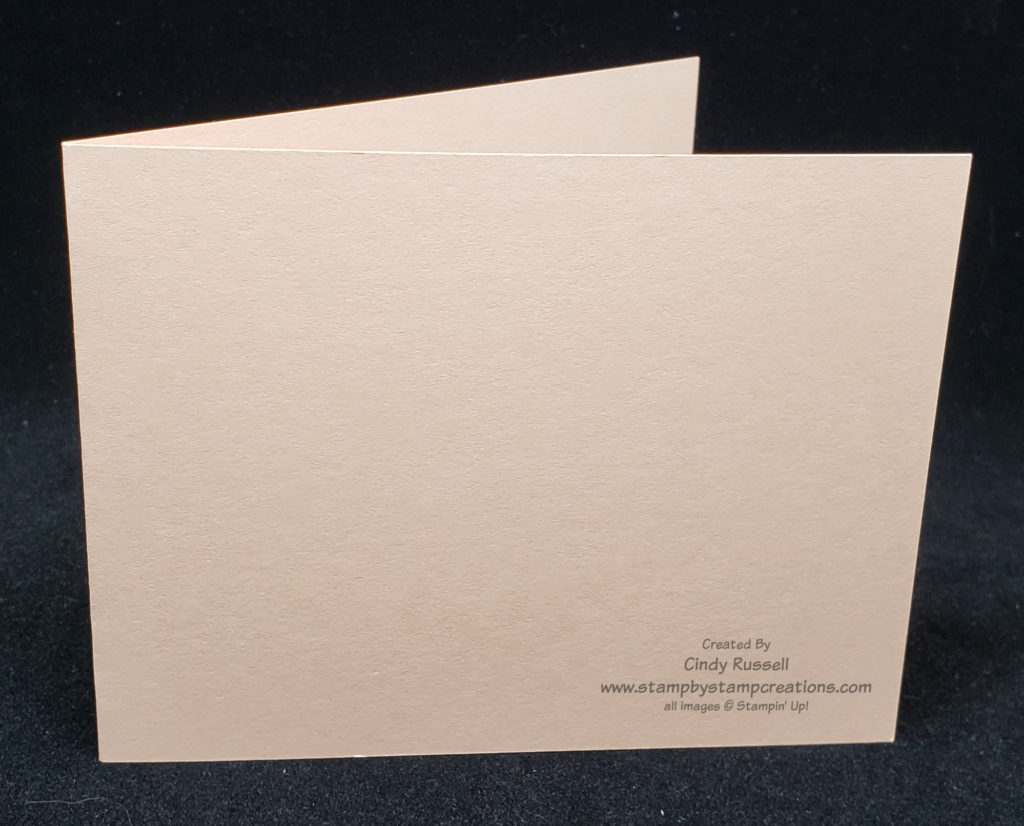
You can’t really tell from the outside of the card that it’s a fun fold but once you open the card you can see where the name comes from.

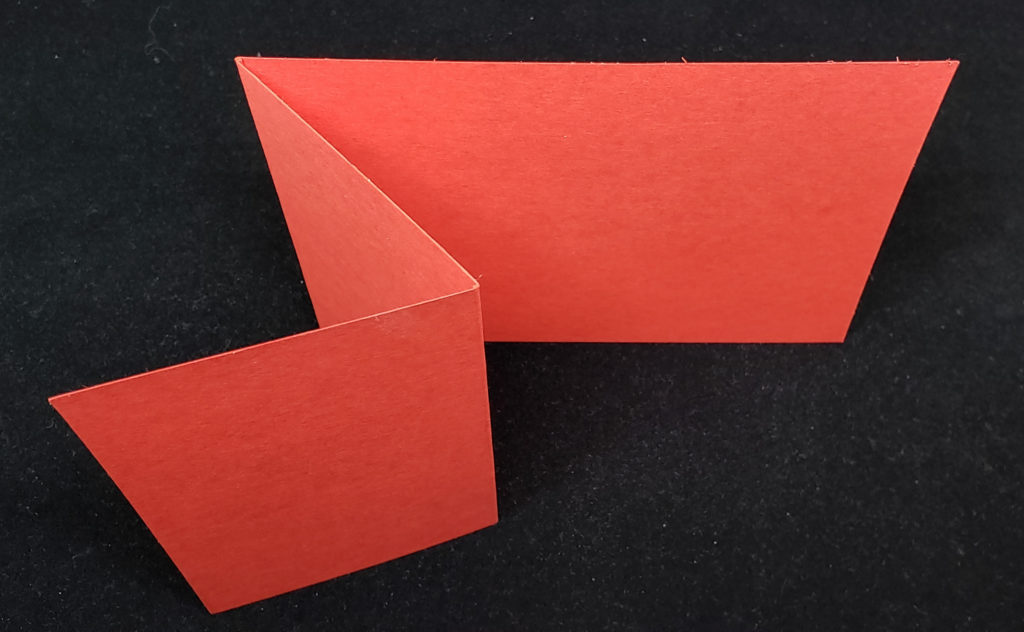
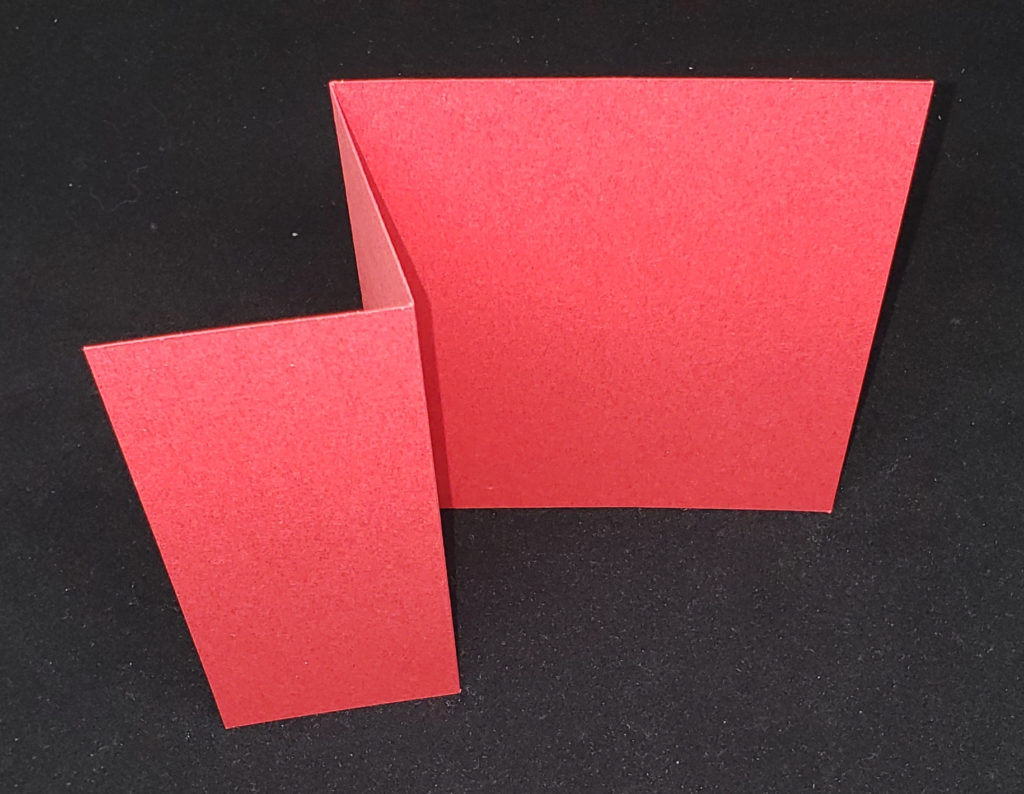
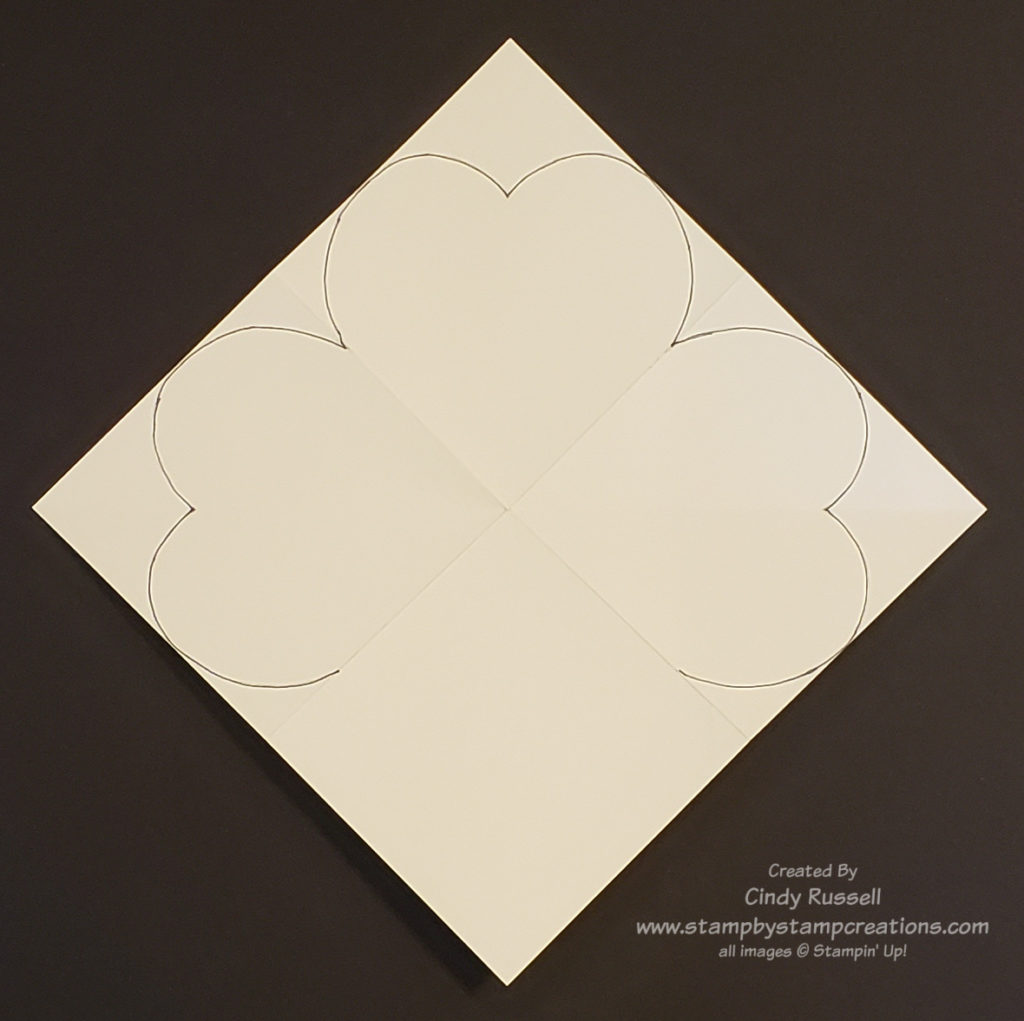
Lisa, the original designer, called this a Peek-a-boo Swing Card but to me Window Z-fold describes it a bit better. From the picture above you can see the window opening in the front of the card and you can also see the Z-fold of the white piece.

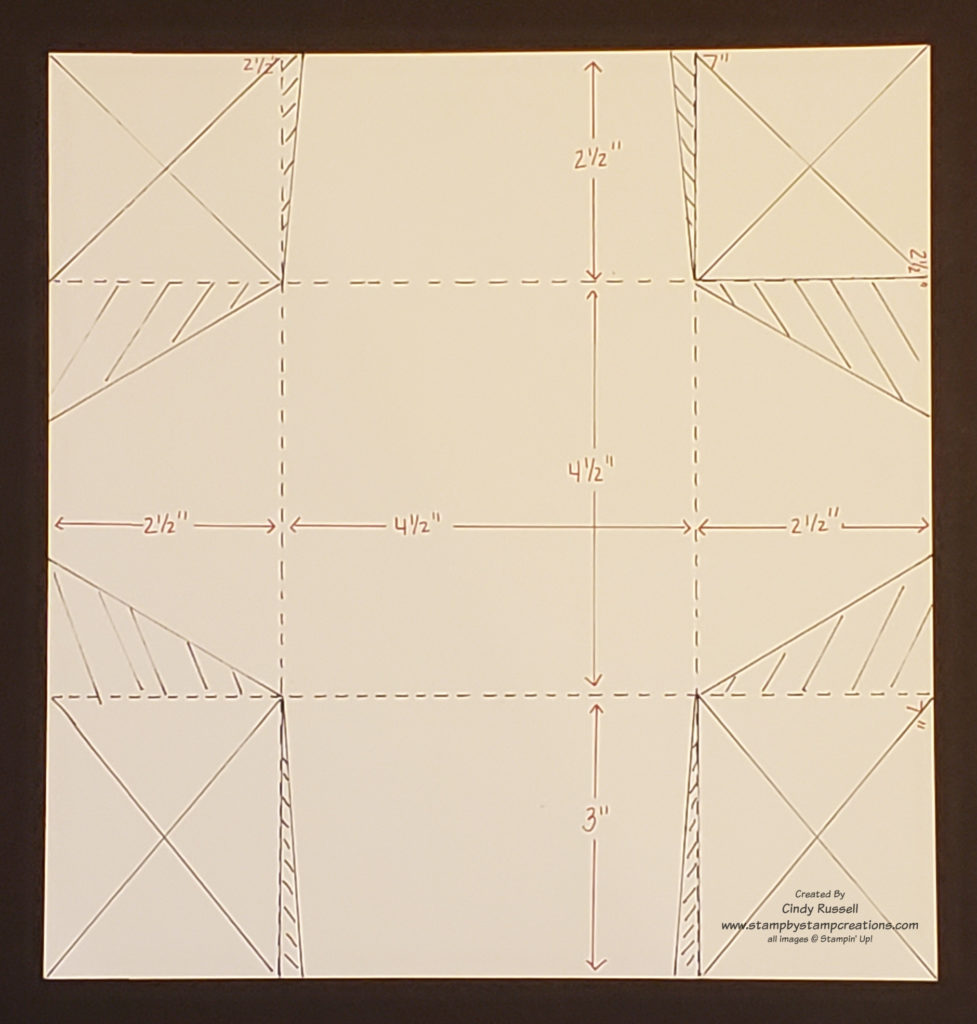
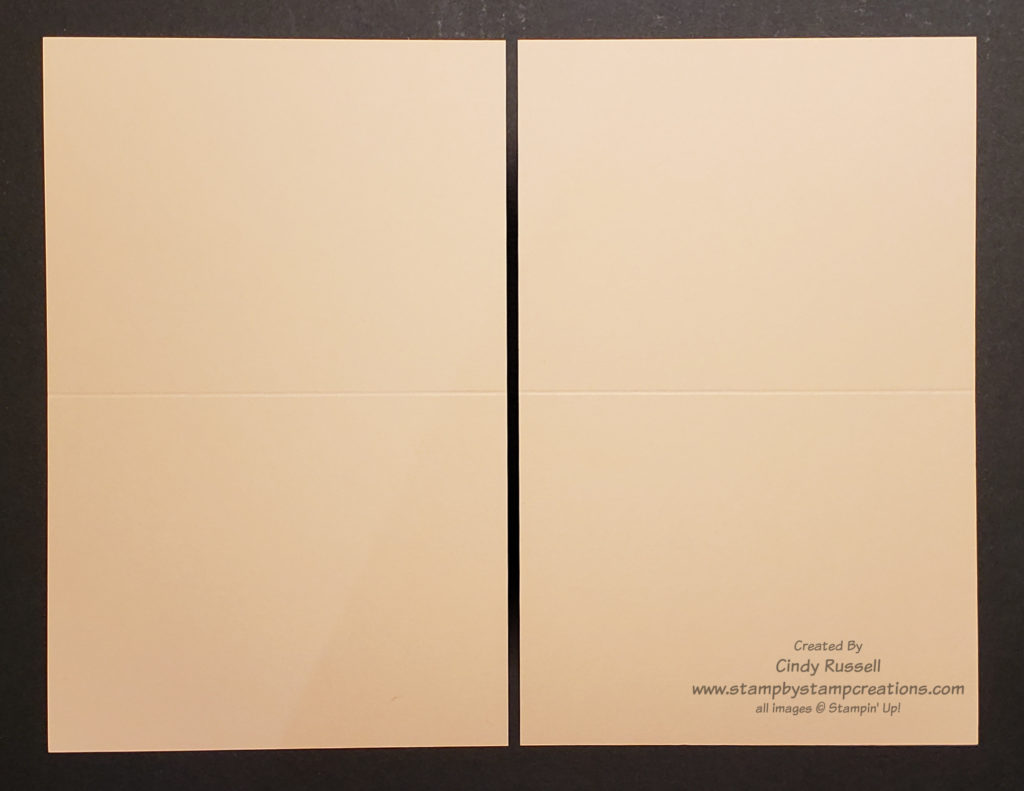
I was going to give you details on how to make this fun fold here on my blog post but it seemed a lot easier to simply write up the instructions and save it as a pdf for you. So here you go….step by step instructions with all of the supplies used and the measurements!

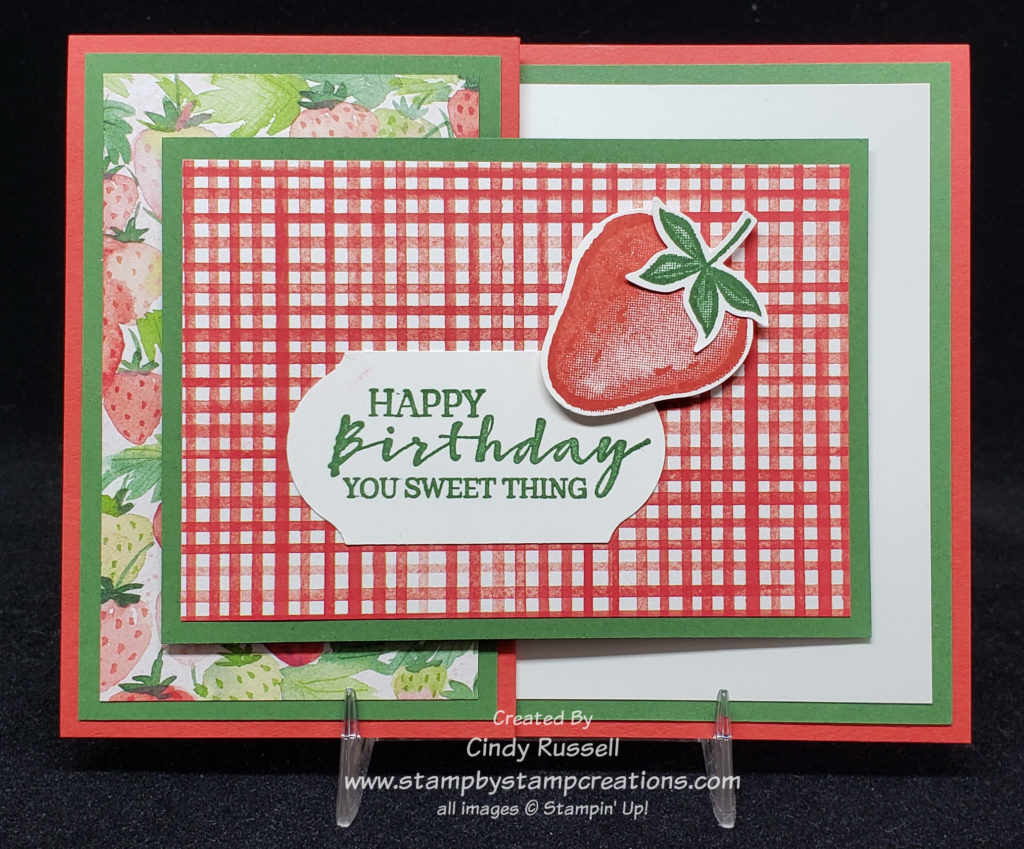
Of course as I finished writing up the instructions and looked at the photo of the inside of the card I decided that maybe I should have stamped some seaweed on that section too. Hmmm….next time! Yes, there will be a next time because I really like this card! 🙂

Leave a comment and let me know what you think of this fun fold. Have a great day!

Make-It-Mine Monday: Snailed It!

Snailed It Fun Fold

Oh, my gosh! These snails are so stinkin’ cute! I only have the designer paper right now but I am ordering the stamp set and dies on my next order. I can’t wait!

I usually don’t go for the cutesy stamp sets and dies. I stick with the more traditional ones. However….the more I see of these little snails the more excited I am to have them in my stamp room!

Recently I took a training from another demonstrator which included cards we could make. The adorable card here is one of the cards we were able to make with our kit. I love new ideas!

Hopefully you can see in the photos this is a Z-fold card like the strawberry card I shared with you in this post. The only difference is that the strawberry card had a horizontal layout and this card is vertical.

This card turned out very cute but as I was making it I thought about how I could make it into an Easel Z-fold card like the one I shared with you here.

Of course, simply turning it into an Easel Z-Fold wasn’t the only change to be made by me. Hello….can you say “more layers please”? Ha! Actually, believe it or not, adding one layer and changing the color of the hearts were the only changes I made.

Snailed It Easel Z-Fold Card

I think adding the red layer and changing the heart to red make things pop a little more on the card. The little resin hearts (that are on both cards) are really fun to add to cards. They come in red and in white. I do have to admit that I didn’t have the Kiss Punch which is where the pink heart came from on the first card. I had to dig through my retired stash of dies to find a heart that was about the right size for my version. This is why I hardly ever get rid of things! Ha!

Have a great day! Take care and Happy Stamping!

Fun Folds: Easel Z-Fold Card

I’m changing things up a little this week! I know it’s Monday and I usually do a Make-It-Mine Monday post but I couldn’t wait to share today’s card with you so you’re getting another Fun Fold card. Valentine’s Day is less than a week away so this week will be all about Valentine cards.

I love the Lots of Heart Bundle from Stampin’ Up!’s January – June Mini Catalog. So many hearts to choose from!

In December, I participated in a swap where I had to make about 20 of the same card, send them in and then get 20 different cards back. Swaps are fun to do because you get so many new ideas.

I tend to get carried away when I participate in swaps. I usually try to do a fairly fancy card and this swap was no exception. I knew I wanted to use the fabulous stamp set. There is a checked heart in the stamp set that I started my design with but when you look through the other photos in this post you’ll see why I changed things up.

Last Friday, I shared with you the Basic Z-Fold card. I told you that after you make your card base into a Z you usually add a smaller panel to the front piece as your focal point. With this Easel Z-Fold card, instead of adding a smaller panel I added a large panel that was almost the size of the regular card. This larger piece actually forms the “easel” portion of my card. To help the easel stand up I popped up a small heart on the inside of the card. This little popped up heart then holds the easel open.

Can you see why I didn’t use the checked heart on my card and used the swirly heart stamp? I just had to use the swirly heart dies at the bottom of my card and there just happened to be a swirly heart stamp that worked perfectly on the front! Can you say “coordination”?

The key to this design was the large pieces of Real Red cardstock. I first adhered the inside piece to the inside of the card base. I then closed the card and lined up the front piece of Real Red cardstock directly over the inside piece of red cardstock. This way you can’t see the inside portion of the card until you open it.

I didn’t get a great picture of the inside of the card but the sentiment says “my heart smiles just thinking about you”. I love that it’s not your typical Valentine sentiment which makes this stamp set perfect for any occasion.

Have a great day! Take care and Happy Stamping!

Fun Folds: Basic Z-Fold Card

The basic Z-Fold card is fun and pretty easy to make. It’s called Z-fold because….it looks like a Z when folded!

When making a Z-fold card you can start with a 4 1/4″ x 11″ piece of cardstock like I did in the adjacent picture or you can start with a 5 1/2″ x 8 1/2″ piece of cardstock. Whichever size of cardstock you start with you’re going to make your Z-fold card the same.

First of all you want to score and fold your card base in half. In the photo above I scored my 4 1/4″ x 11″ piece of cardstock at 5 1/2″. To make the Z I then scored the front of the card in half again at 2 3/4″ and folded it towards the fold. Easy Peasy.

In the photo to the left I started with a 5 1/2″ x 8 1/2″ piece of cardstock. I first scored it in half at 4 1/4″ then the second score mark and fold were at 2 1/8″.

Once you have the Z-fold card base formed you need to decorate and embellish your card. You will usually adhere a panel to the smaller, folded over front panel that will overlap the back base of the card.

Strawberry Z-Fold Card – Front

Back on January 18th I shared a card with you that looked a lot like the card you see on the left. It was a regular card made with The Sweet Strawberry stamp set. Once I had completed that card I realized how cute it would be as a Z-Fold card which brings us to today’s project.

In the photo you can see how the “front of the card” in Real Red is only have the size of the Real Red base. This is because I folded over half of the front to form my Z-fold. The checked designer paper with the strawberry on it is the decorative panel that completes the card.

Strawberry Z-Fold Card – view 2

In this second picture you can see the “Z” and how the card is actually put together. I used Stampin’ Dimensionals on the left, back side of the piece with the checked background and strawberry. It’s important to remember to only put Stampin’ Dimensionals on the portion of the paper that will actually get attached to that front side or you won’t be able to open your card. Oops! (Not that I’ve ever done that. Ha!)

Strawberry Z-Fold Card – open

You can see how the card looks when it’s open in the photo above. Z-Fold cards are fun to make. They’re pretty much my go-to fun fold when I want to add a little more pizzazz to card.

Give the Z-fold Fun Fold card a try. I’d love to see your samples! Have a great day! Take care and Happy Stamping!

Fun Folds: Make Your Own Envelope!

Did you know that it’s pretty easy to make your own envelope? Figure it out once and you’ll have it down pat! In last week’s Fun Fold post I shared with you the fun Squashed Heart Card. The card was 4 1/4″ x 4 1/4″. You can fit it in a regular card-size envelope but what to do if you want a square envelope that fits the card perfectly? Well then, it’s time to make your own!

Make your own square envelope!

Base of the Envelope. When making your own envelope you have to do a little bit of math so don’t get scared off. To figure out what size to make your envelope you need to first figure out the size of your card and add a little bit to each measurement. My card is 4 1/4″ x 4 1/4″ so I started with a measurement of 4 1/2″ x 4 1/2″. This will be the size of my finished envelope when closed. I was generous with my measurement because my card is so thick. If my card wasn’t so thick when closed I may have gone with 4 3/8″ x 4 3/8″.

Side Flaps of the Envelope. Now we need to figure out how wide to make the sides of our envelope. The sides will fold in towards the center and overlap. This means that they need to be slightly wider than half the width of the envelope. Since my envelope is 4 1/2″ wide each of my flaps will need to be 2 1/2″ wide. (Half of 4 1/2″ is 2 1/4″ so I added another 1/4″ to the measurement.)

Top and Bottom Flaps of the Envelope. The bottom flap will be the largest. You want it to cover about 2/3rds of the base when you fold it up. You want to make sure it will cover the point where the two sides come together when folded in. For my 4 1/4″ envelope base I made the bottom flap 3″. The top flap will need to cover at least 1/2″ of the bottom flap when they are both folded in. My top flap is 2 1/2″ and actually covers an inch of the bottom flap.

4 1/2″ x 4 1/2″ Envelope Template

Above you can see the template for my envelope. To figure out how large my paper had to be I did a little more math:

  • Width of Paper = width of left side flap + width of envelope base + width of right side flap (2 1/2″ + 4 1/2″ + 2 1/2″ = 9 1/2″)
  • Height of Paper = height of top flap = height of envelope base + height of bottom flap (2 1/2″ + 4 1/2″ +3 = 10″)

Now I need to score my paper. As you can see in the photo, with the 9 1/2″ side at the top, I scored in 2 1/2″ from each side of the paper, or at 2 1/2″ and 7″ (dotted lines are score lines) for my side flaps. Then I turned my paper 90 degrees and scored at 2 1/2″ and 7″ again. Since this side is 1/2″ longer I have the 3″ area for my bottom flap.

It’s time to do a little trimming to get rid of the areas we don’t need. I started by cutting out the four corners of the paper (those areas with an X in them). I could be done here but I want to do a little more trimming so the envelope will close nicely and look good.

Trimming of Side Flaps. To trim my side flaps I measured in 1 1/2″ from both edges of both flaps and drew a line to the corner. These are the larger sections with the angled lines through them. Trim them off to get rid of excess bulk.

Trimming of Top and Bottom Flaps. For the top and bottom flaps I did the same thing as on the side flaps except I only measured in a mere 1/4″. Trimming of the top and bottom flaps is mostly to make your envelope back look nice.

DIY Envelope after scoring and trimming

That’s it! You’re ready to adhere the envelope together! Fold the sides in first, adhering one over the other. Fold the bottom flap up and adhere to side flaps. Place your card in the envelope, fold the top flap down and adhere! You’re done!

Now you can make your own envelopes of any size! Have a great day! Take care and Happy Stamping!

Fun Folds: Squashed Heart Card

It’s time for another Fun Fold post! Last week, with my first Fun Fold post, we went back to the beginning. I talked about the different ways to cut your cardstock and the different orientations you can have your cards when starting with an 8 1/2″ x 11″ piece of cardstock.

This week I was going to share a simple and popular fun fold but when I was hopping around the internet looking for ideas I came upon this fun design! With Valentines Day coming up soon I knew I had to share this fun Squashed Heart Fun Fold Card with you.

Fun Fold: Squashed Heart Card

This card might look like it’s complicated to make but it really is pretty easy. The hardest part in making it was coming up with the right size heart. Don’t worry. If you’re hoping to recreate this card design I’ve included a template for the heart at the end of this post. 🙂

Start this project with a piece of cardstock that is 8 1/2″ x 8 1/2″ square. Score one side at 4 1/4″. Turn the cardstock 90 degrees and score again at 4 1/4″. You should now have four equal squares. Now score from one corner to the opposite corner. It doesn’t matter which corner you start in.

Squashed Heart Card

Fold and crease all score lines well. The key to this design is folding the diagonal line in the opposite direction that you folded the other two lines. Fold the square lines in valley folds and the the diagonal fold in a mountain fold.

As you can see in the first picture above, the diagonal line is folded in the opposite direction of the other two lines. In the second picture you can see how to fold, or squash, the card. Push in on the two diagonal folds and your folded card will become a square.

Now we need to make the hearts. In the video that I watched on making this card the gal simply took her scissors and cut the hearts. I knew that wouldn’t work for me. After many failed trials I finally came up with a heart that fit perfectly.

Once you have your template, you want to draw it on the two squares with diagonals and one of the flat squares.

It’s hard to tell in my photo above but the two side hearts are the ones with the diagonal score marks through them. Cut along the drawn lines to form the tops of your hearts. With the two side hearts you will need to cut from the edge of the paper to where the heart outline begins. If you look at the collage photo of the card at the beginning of the post you can see what I mean in the last photo.

You can find the template for the heart here. Are you wondering how you can mail or even present this card? What size envelope would work? The finished, closed card is 4 1/4″ x 4 1/4″ so it will fit in a normal Stampin’ Up! envelope that is about 5 3/4″ x 4 3/8″ with a little extra room in one direction. However…..next session I will share with you how to create your own envelope which is perfectly sized for this card along with tips on making any size envelope. So stay tuned!

I hope you’ve enjoyed viewing this fun card. Please leave a comment if you did. Be sure to contact me with any questions you may have either in the comments or by email (cindy@stampbystampcreations.com).

Have a great day! Take care and Happy Stamping!

Fun Folds: The Beginning

Welcome to another new series of posts! In this series we’ll be talking Fun Folds! These post will encompass folds for cards as well as folds for 3D items.

I love finding different folds for my cards and many of you do too. Before we jump in though, we’re going to start at the beginning.

Ok, now I’m singing the song from the Sound of Music…Let’s start at the very beginning, a very good place to start…. Do any of you get reminded of song lyrics after you say something and then start singing? I do it all the time.

Enough of that! Let’s get back to Fun Folds!

If we’re starting at the beginning we need to go over the ways we usually cut our 8 1/2″ x 11″ cardstock to make our basic cards. In both ways we are simply cutting the cardstock in half. Either on the long edge or the short edge.

When you cut your cardstock along the long edge you get two pieces of cardstock that are 5 1/2″ x 8 1/2″. If you’re going to score this piece to form your card you will score it at 4 1/4″.

I will be the first to admit that this is the way I usually cut my cardstock this way to make my cards.

5 1/2″ x 8 1/2″ Vertical Card

When you cut your cardstock along the short edge you get two pieces of cardstock that are 4 1/4″ x 11″. To form your card you will score at 5 1/2″. I don’t make a lot of cards with this configuration. I’m not sure why. Cutting your cardstock this way changes up your card a little bit. Sure, the card front and the inside will be the same but it’s a fun little change to opening up the card.

4 1/4″ x 11″ Vertical Card
4 1/4″ x 11 Horizontal Card

We’re done with the beginning. You now know the basic ways to cut and fold your cardstock and how they will look in vertical or horizontal orientations. Leave a comment and let me know your go-to way of cutting the cardstock and which orientation you prefer.

Have a great day! Take care and Happy Stamping!

How Sweet It Is!

Sweet Treat CupCandy!  Sweets!  Sugar Treats!  Many of us have a sweet tooth and at Saturday’s Stamp Camp we had our Treat Bar with lots of different sweets.  You can check out yesterday’s post to see our Treat Bar.  In the How Sweet It Is suite in the Occasions Catalog you can find little Sweet Cups which we used for some of our treats.

These Sweet Cups are perfect for all sorts of treats.  They are about 2 1/8″ high and about 3 1/2″ across at the lid.   The lid is solid but for our camp we punched a hole in the lid, filled a cello bag with candy and poked the top of the bag through the hole.  This added a little dimension to the cup and made the perfect spot to tie our ribbon.

We used the fun How Sweet It Is designer series paper to decorate our Sweet Cups.  This paper is too fun with all of it’s bright colors and happy designs.  The label and the pin are also part of the How Sweet It Is suite.  You get 24 tags and 24 pins in a package.  That’s a lot of decorating for only $5!

Sweetest ThingOne of the cards at Stamp Camp went perfectly with our sweet treat theme.  Tena’s card used the Sweetest Thing Bundle along with the How Sweet It Is designer paper.  What is fun about this card is that the little candy jars (with the candy in them) were die cut from the designer series paper!  Stampin’ Up! is starting to do this more and more where you can use the coordinating framelits to die cut the designer paper.  Love it!

This fun fold is called a Bridge Card because of the long strip on the front the “bridges” the two sides together.  I’ve not made on before but I’m anxious to give it a try.

I hope you have a sweet day!  If you live in the Midwest….STAY WARM!  Have a great day!  Take care and Happy Stamping!

Mixed Drinks Z-Fold Card

Mixed Drinks.0816It’s Happy Hour! OK…maybe it’s a little early as I’m writing this but as the saying goes “It’s 5 o’clock somewhere”!  I’ve had the fun Mixed Drinks stamp set for a while and decided it was finally time to open it up.  Of course once I did I needed to figure out what to make with it.  There are a lot of cute ideas out there on the internet but I decided to go with a fun fold…a Z card!

Once again I got the basic idea for the card from someone else out there and changed up just a little thing or two.  Really, why reinvent the wheel?  Thank you Claudia from Germany!Mixed Drinks.0816.1

A Z-fold card is pretty simple.  Start with a piece of card stock 4 1/4″ x 11.  Score at 5 1/2″ and then at 2 3/4″.  You’ll fold the card in half at the 5 1/2″ mark and then you flip back the top of the front piece at the 2 3/4″ mark.  When you add the focal point to the front of the card just be sure to only adhere it the 2 3/4″ section or you won’t be able to open your card.  Ha!  You also want to be sure to stamp your sentiment in the area that will be hidden by your front focal point when the card is closed.  Those are the only little tricks that you need to know to make a Z-fold card.

I’d love to see examples of Z-fold cards that you create.  Send me a photo!  I’d love to see what you come up with!  Have a great day!  Take care and Happy Stamping!