Father’s Day Polo Shirt Easel Card

Hello! I’m back from the MN Homeland where I helped put on a bridal shower for my niece. This photo is my mom, my sisters and myself. The shower was lovely and it was great to see family again. We haven’t seen them since last October.

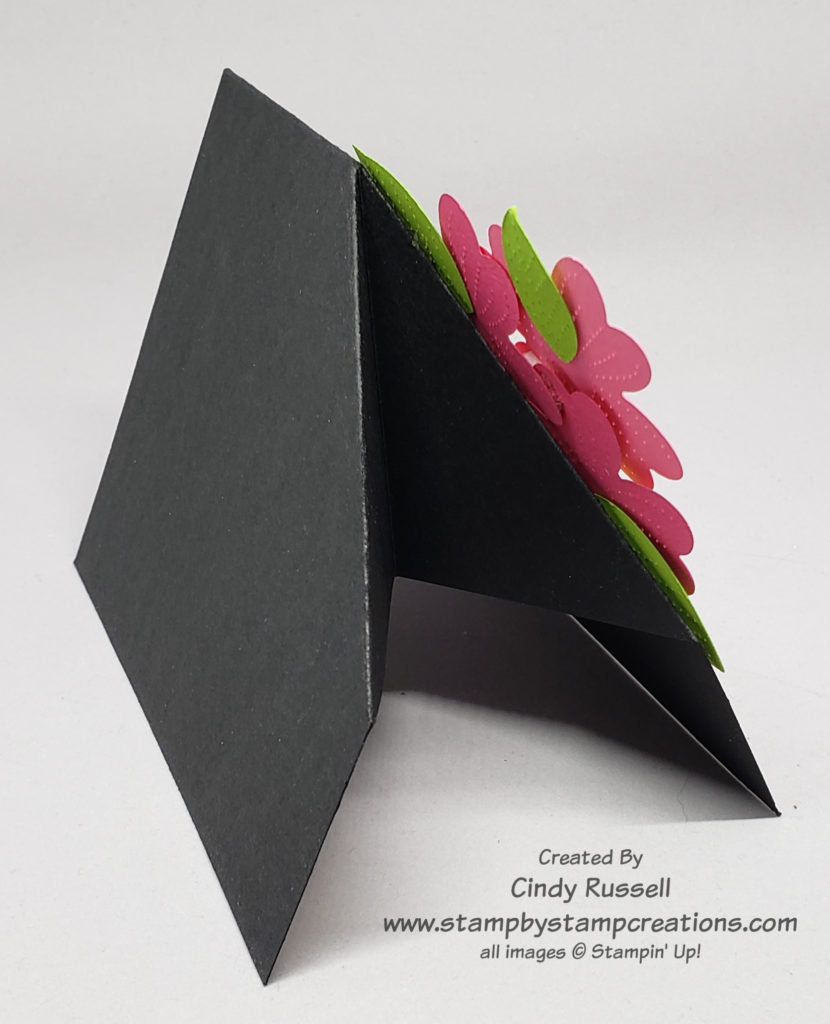
I apologize for not getting any posts ready for you while I was gone. I hope you didn’t miss me too much! Ha! This week will be a little mixed up because I just had to share this Fun Fold with you today so that you could maybe duplicate this week for Father’s Day.

Polo Shirt Easel Card

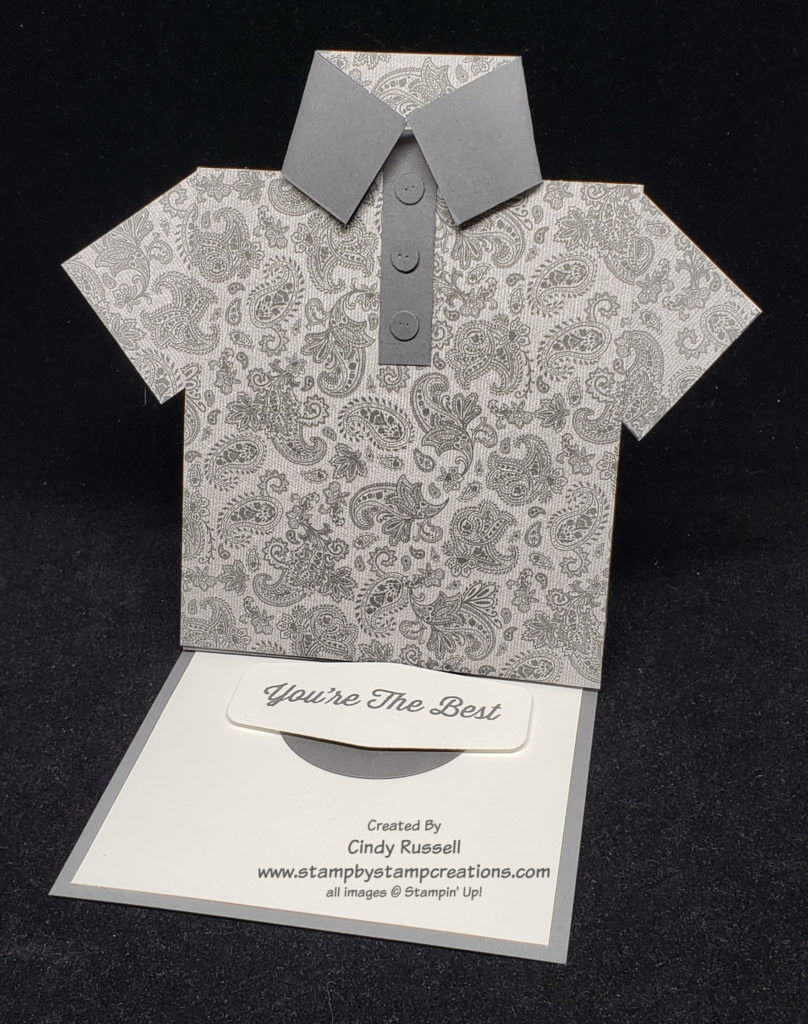
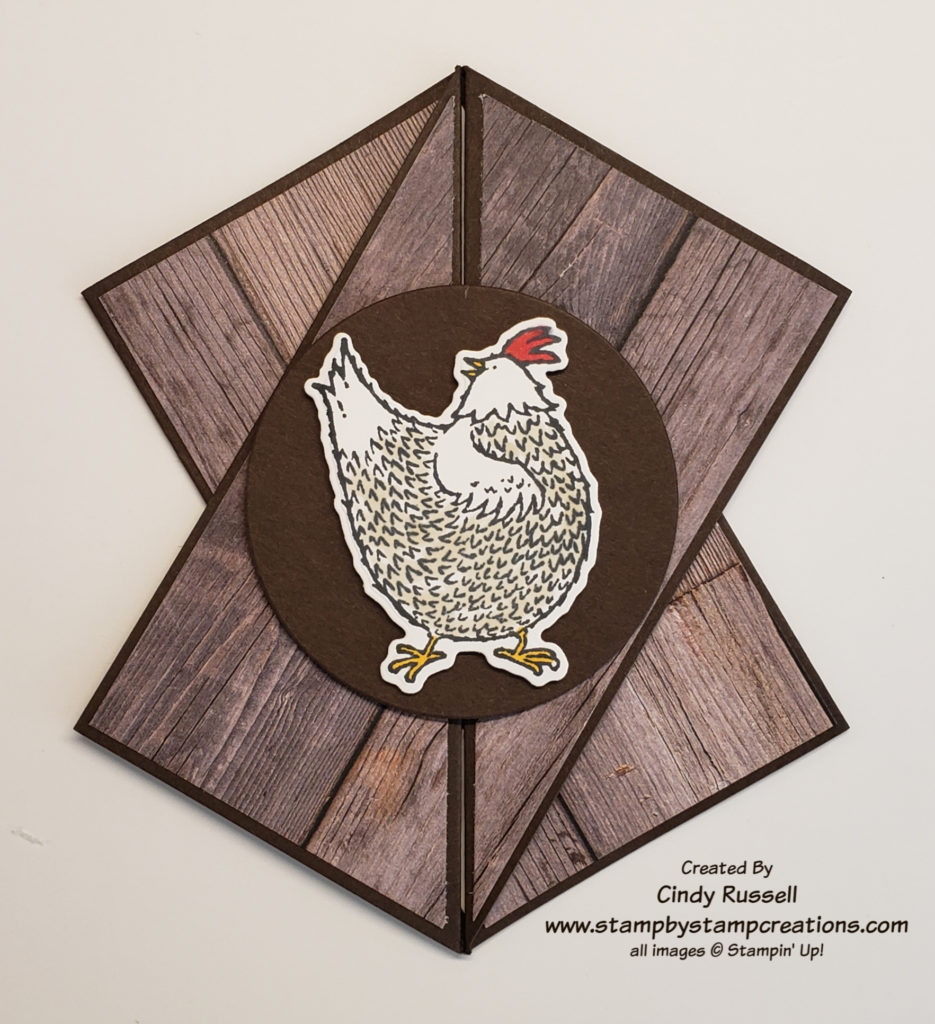
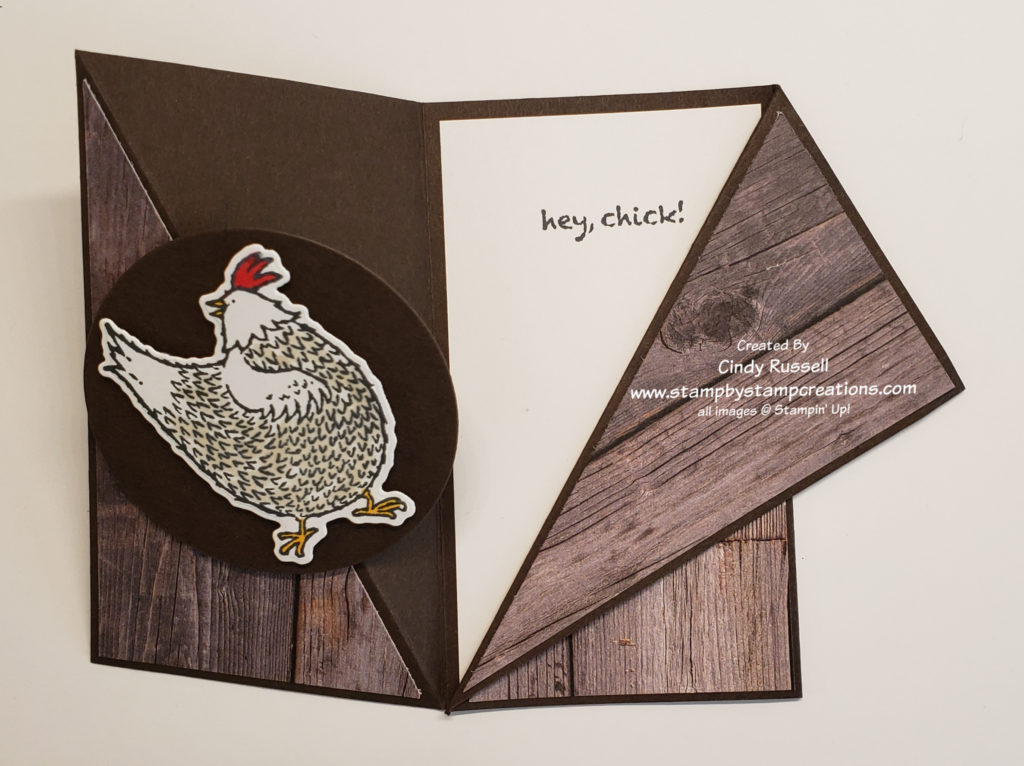
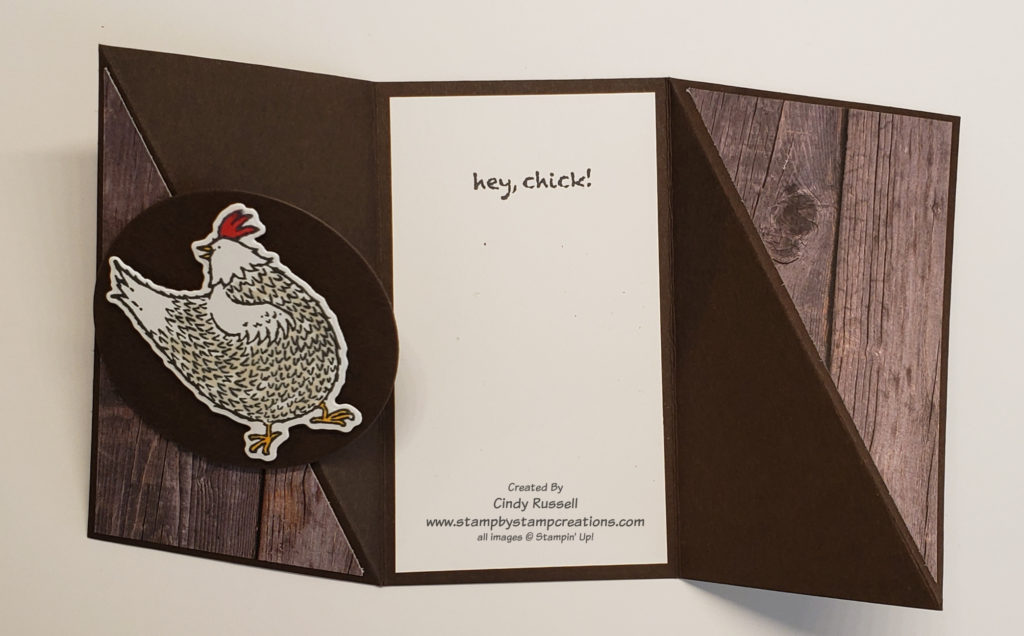
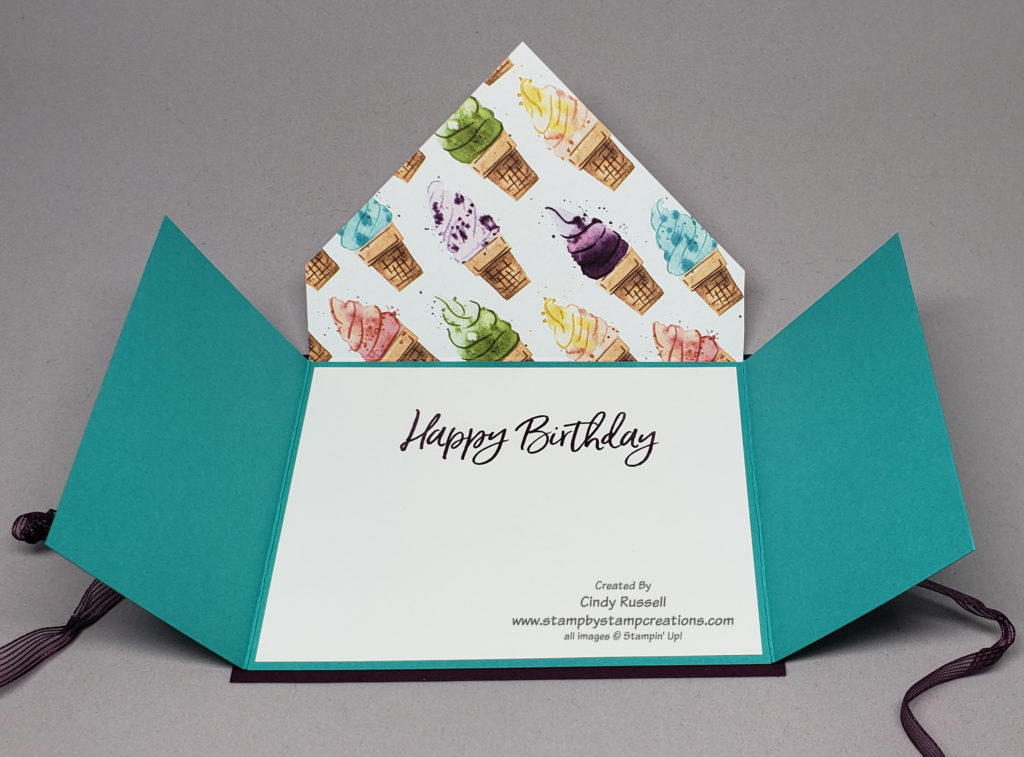
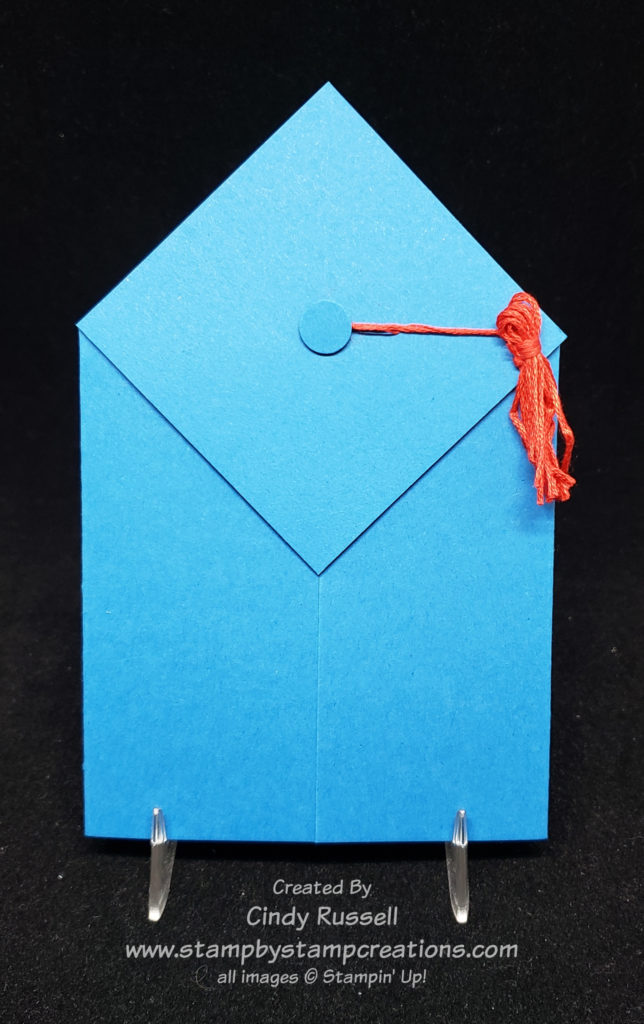
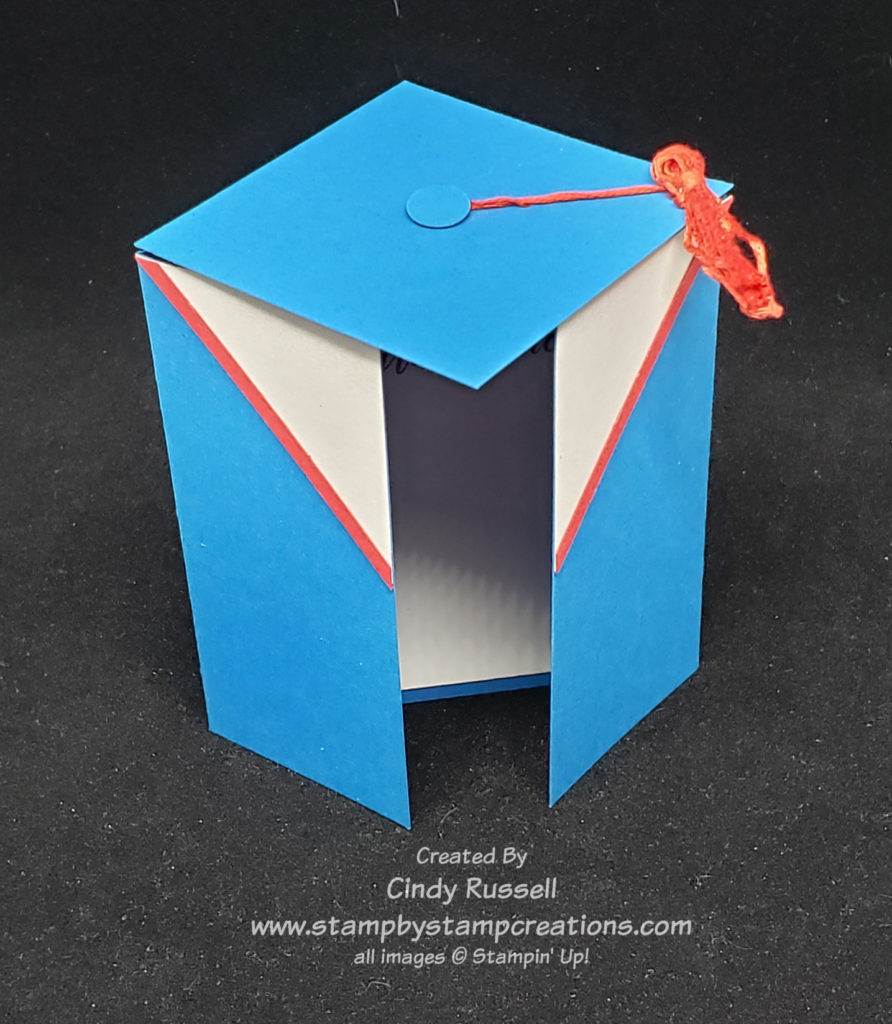
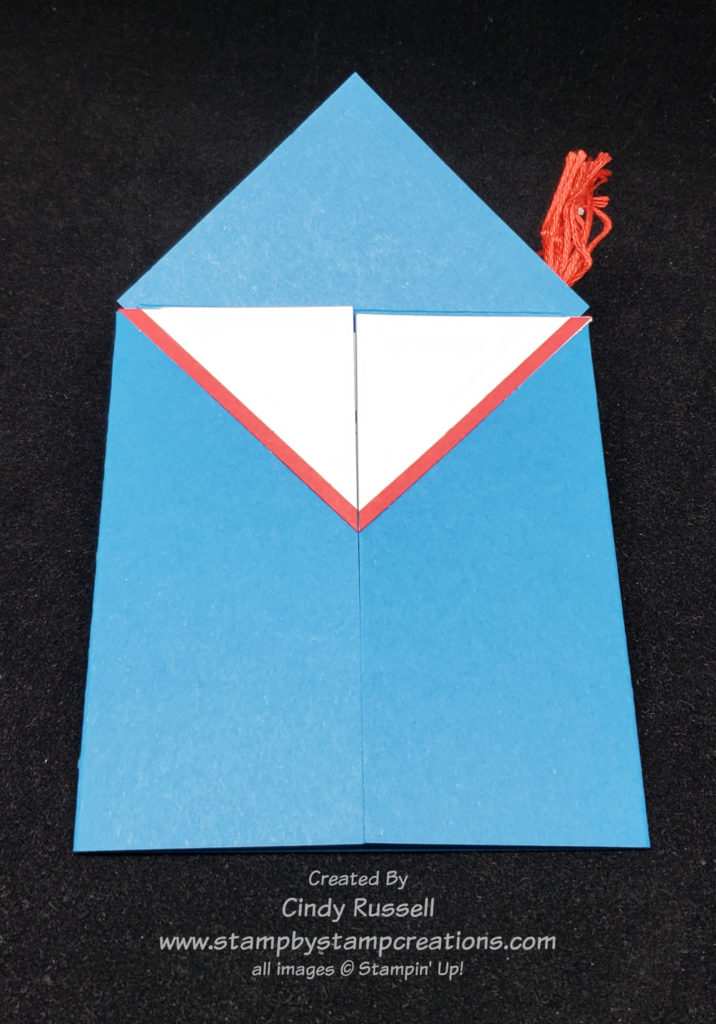
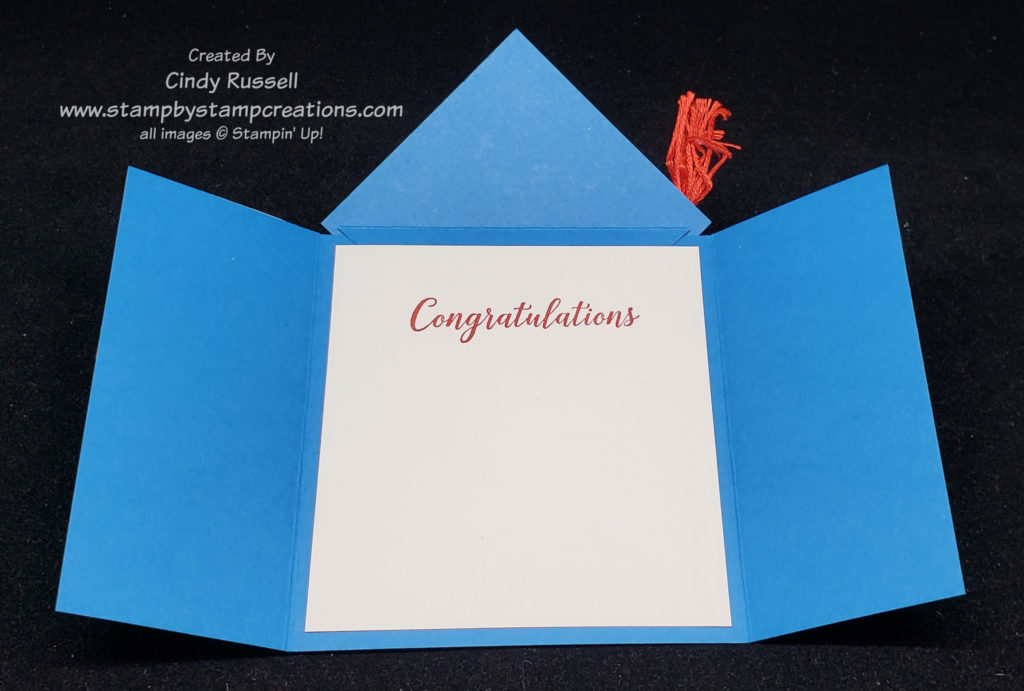
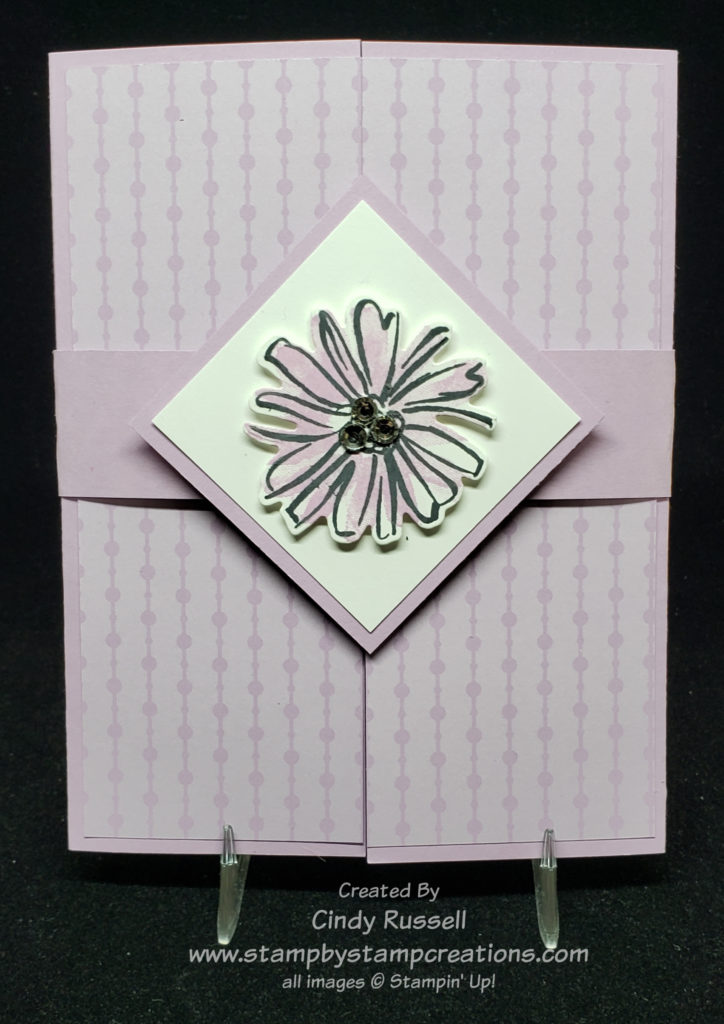
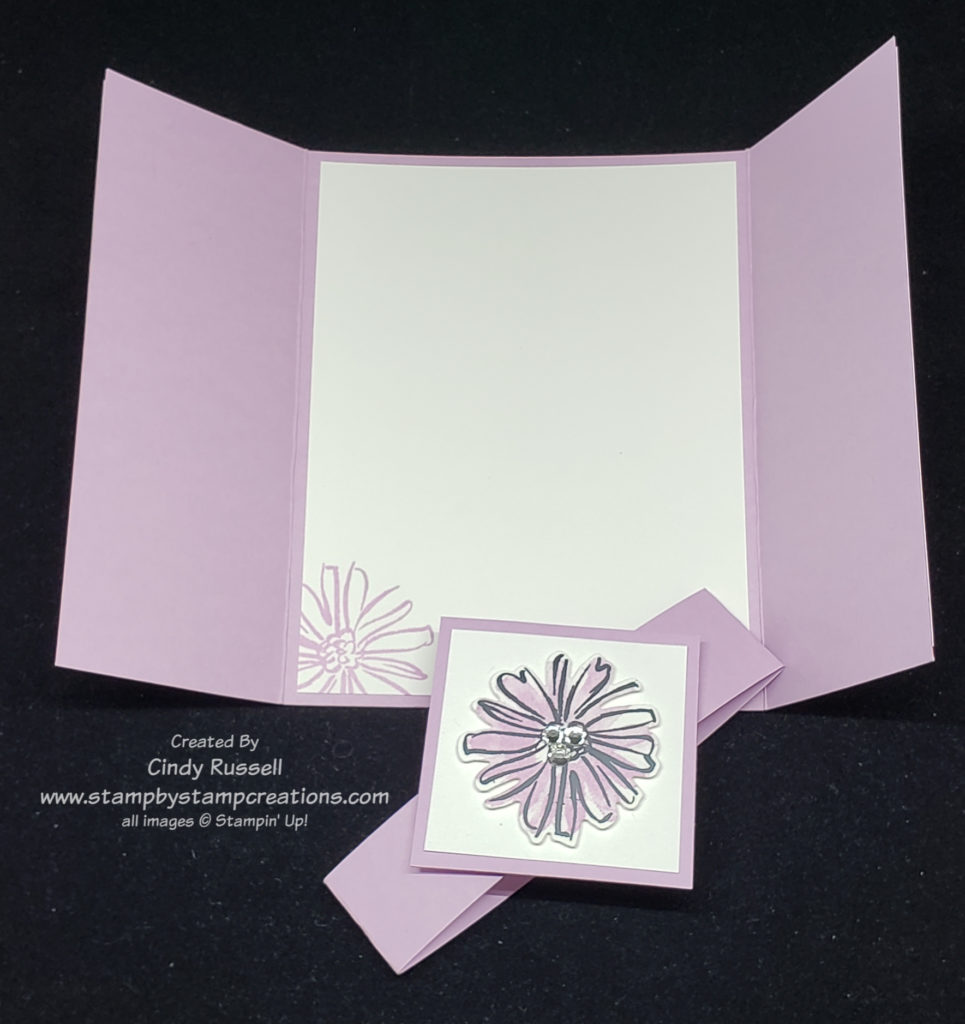
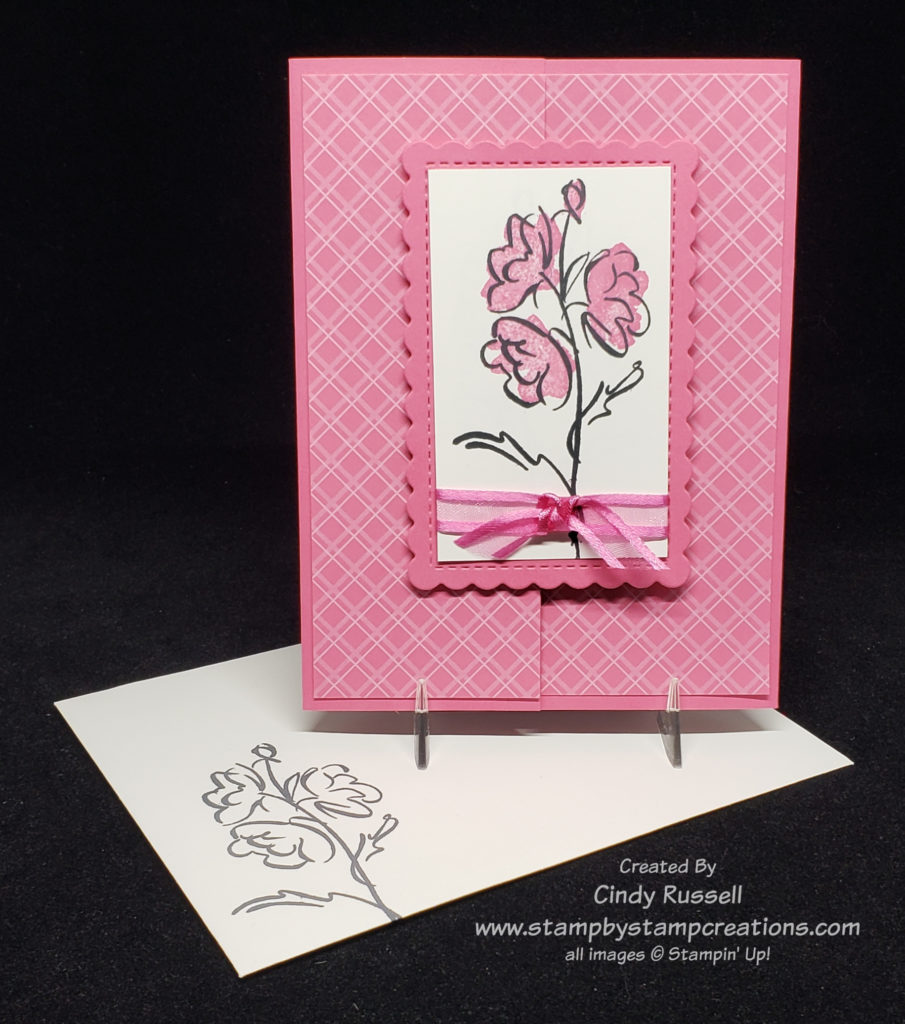
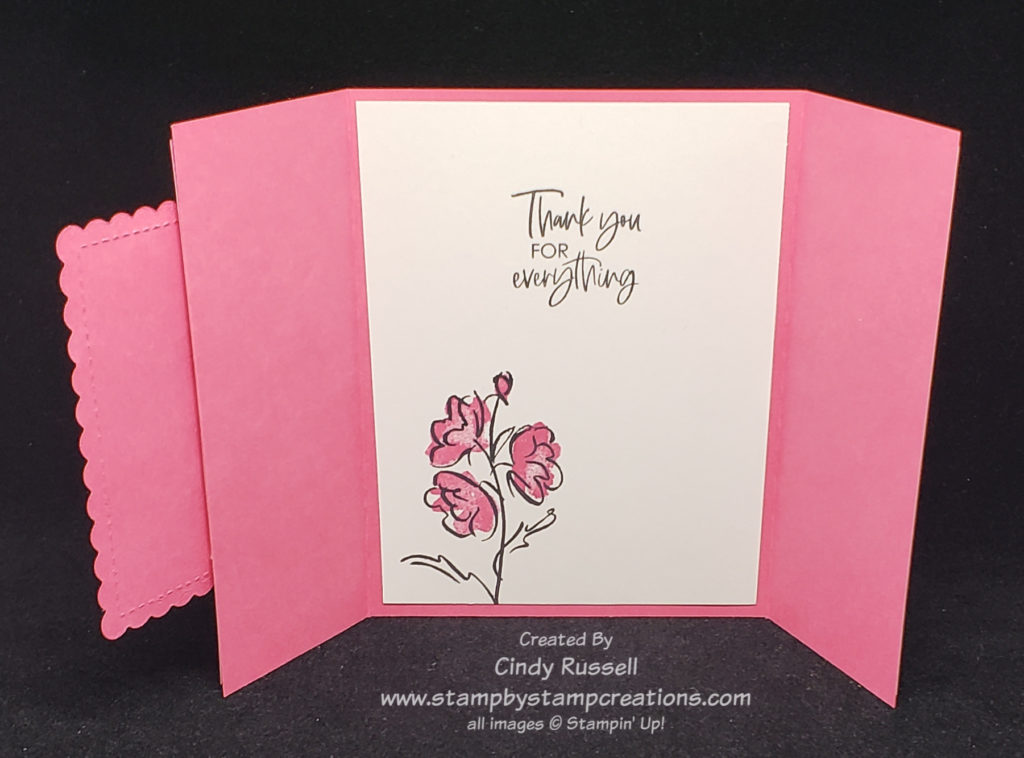
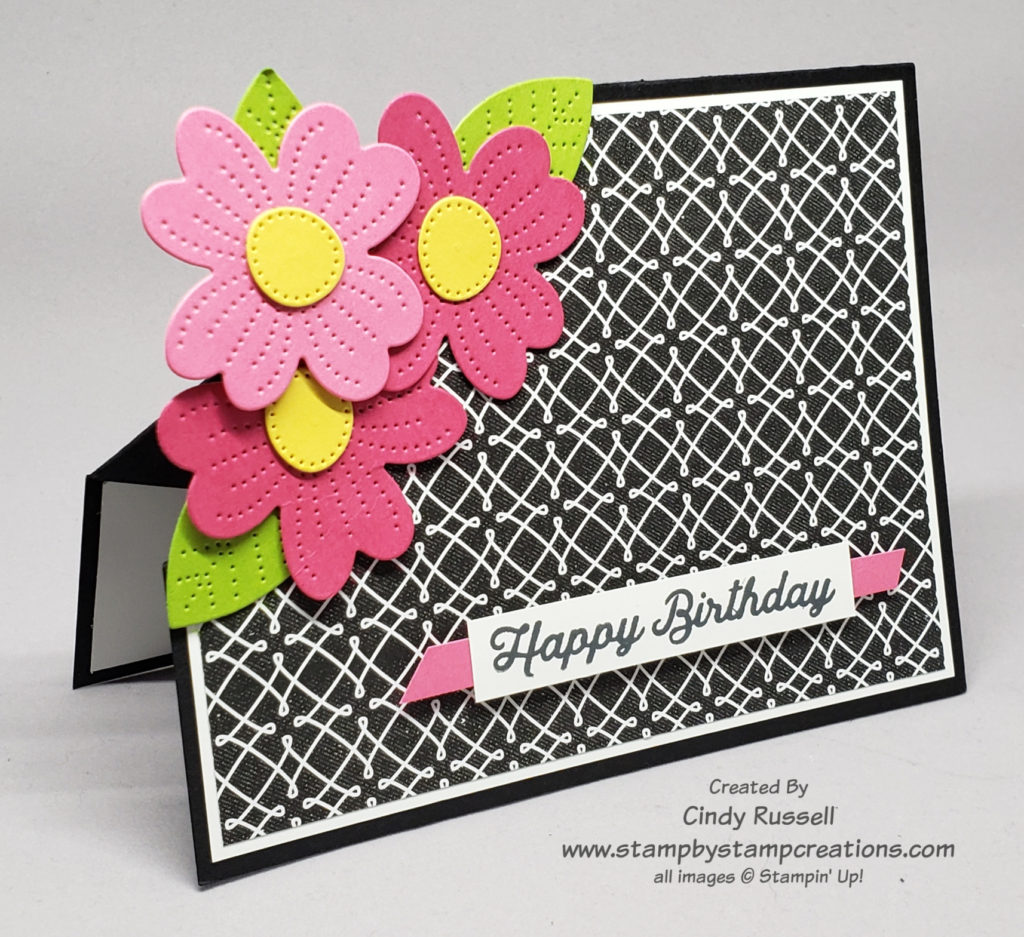
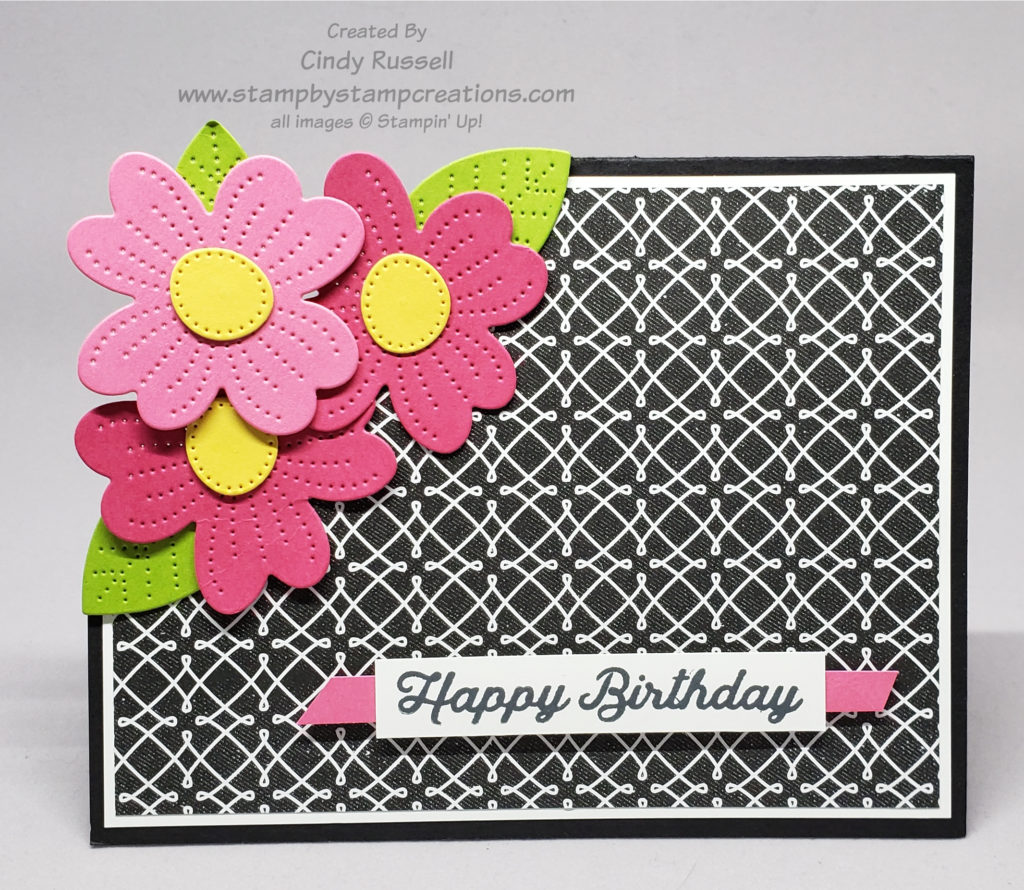
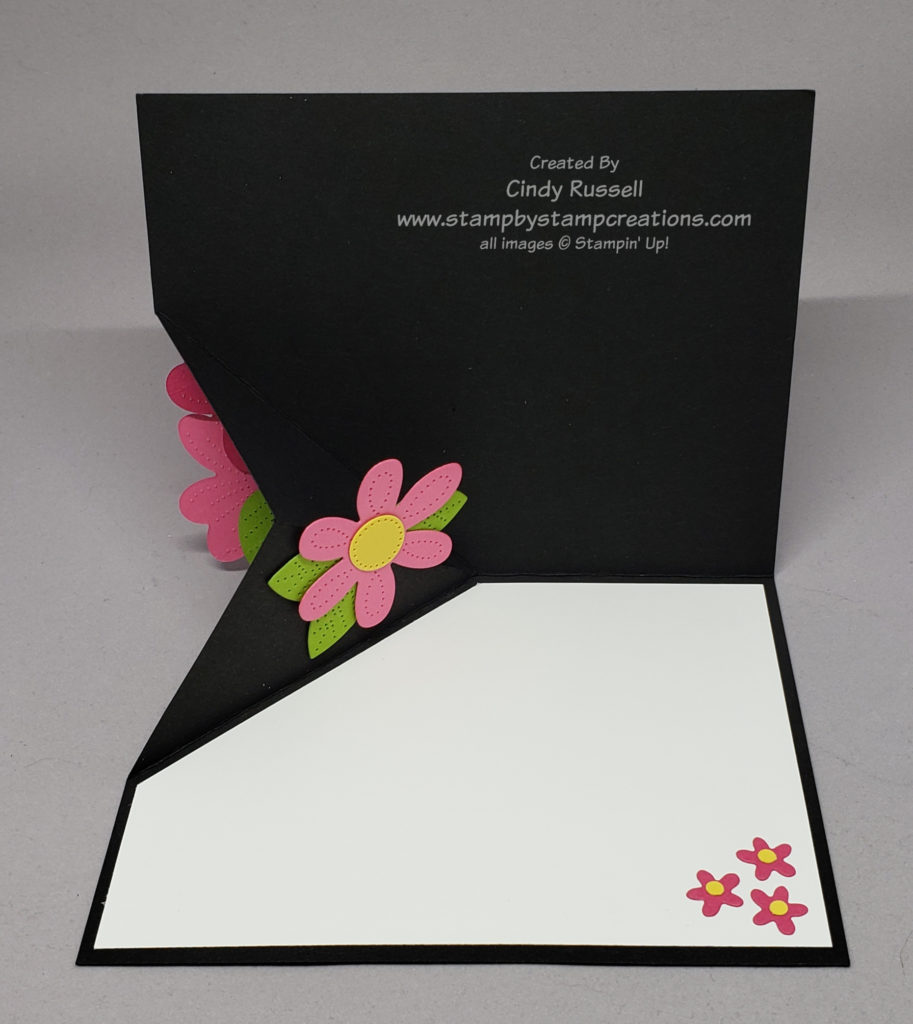
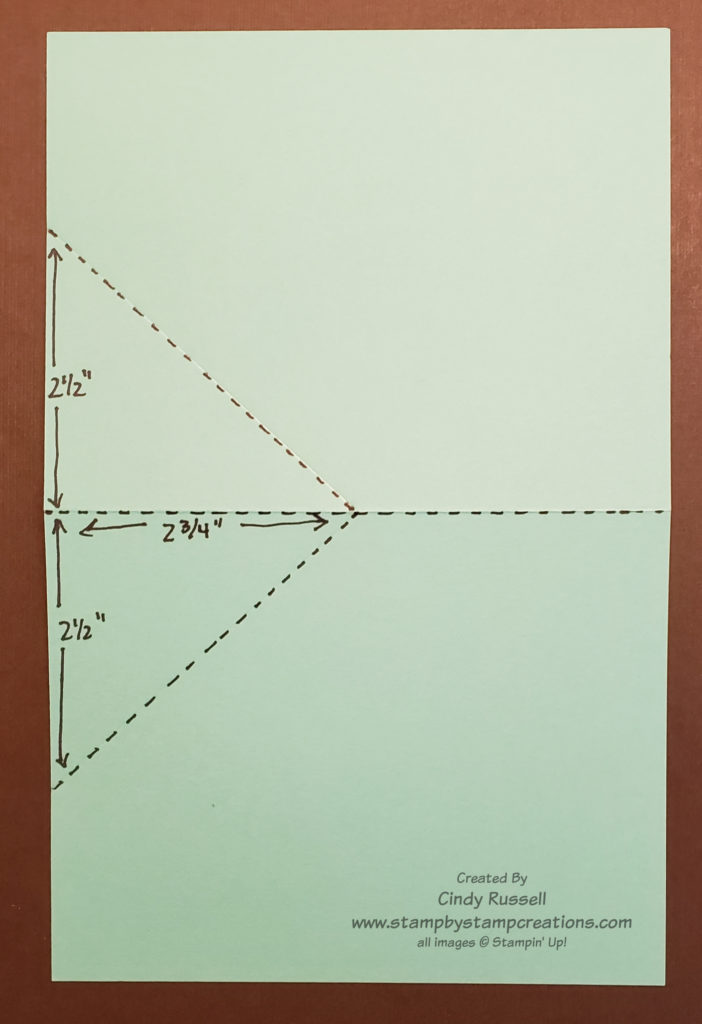
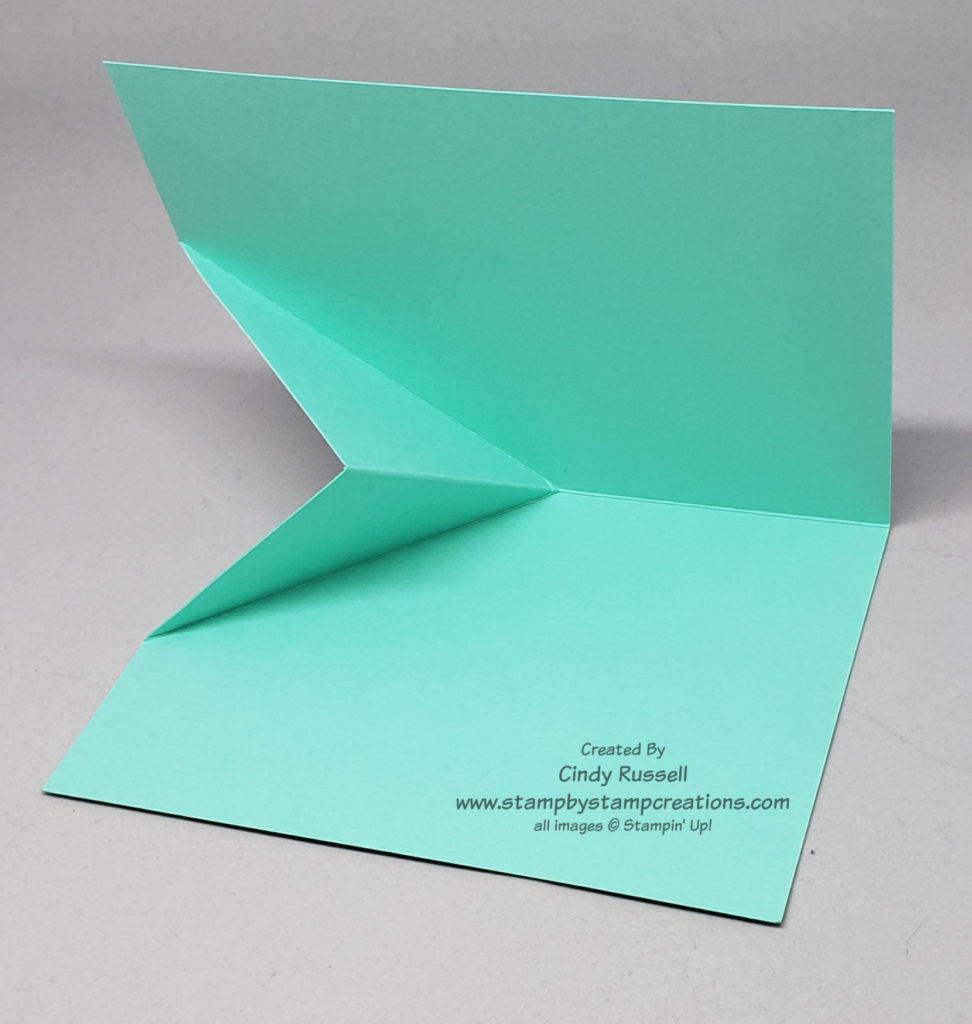
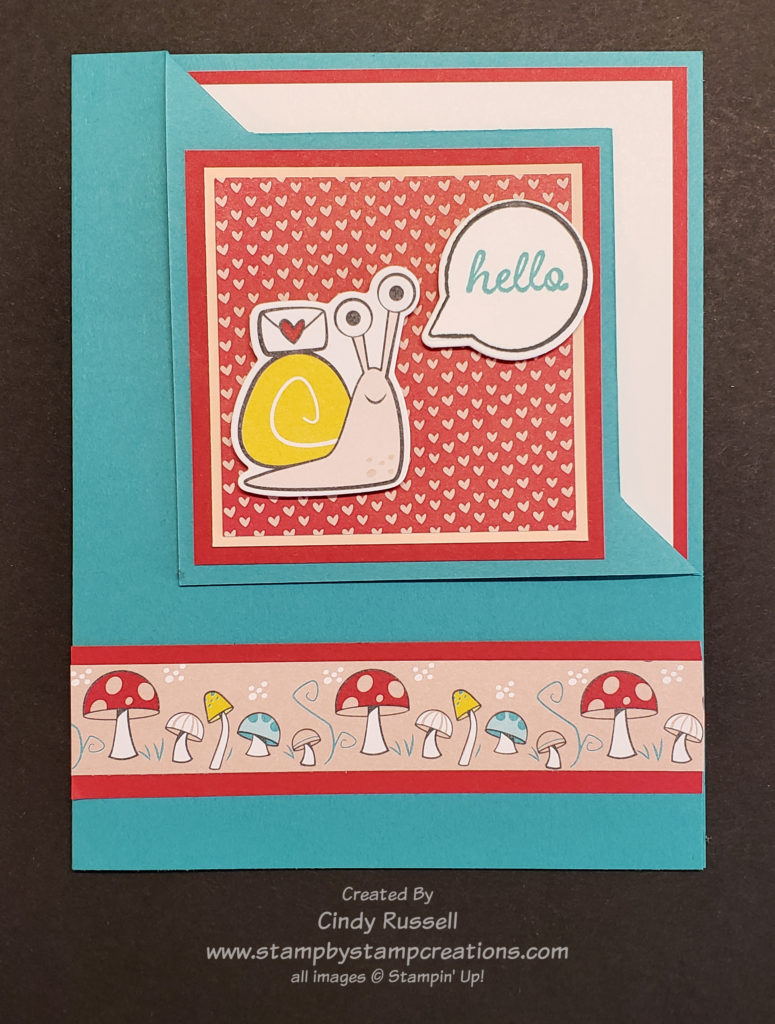
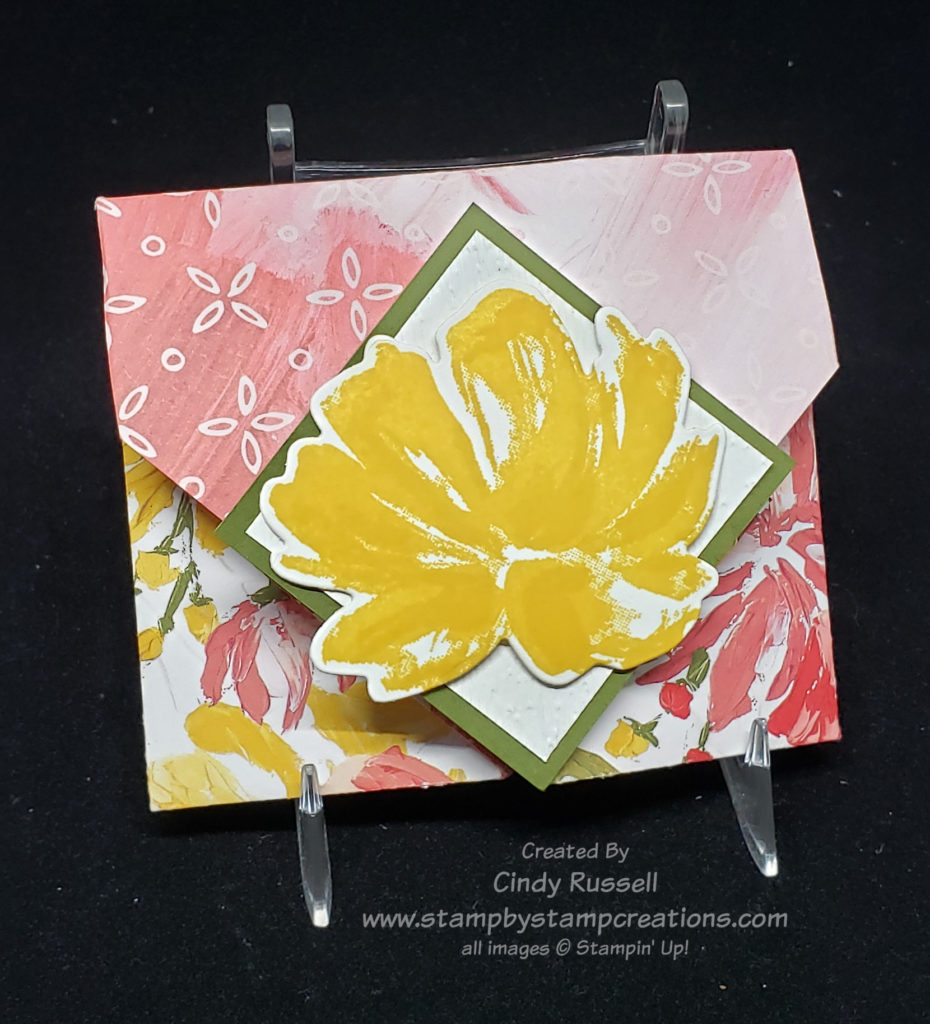
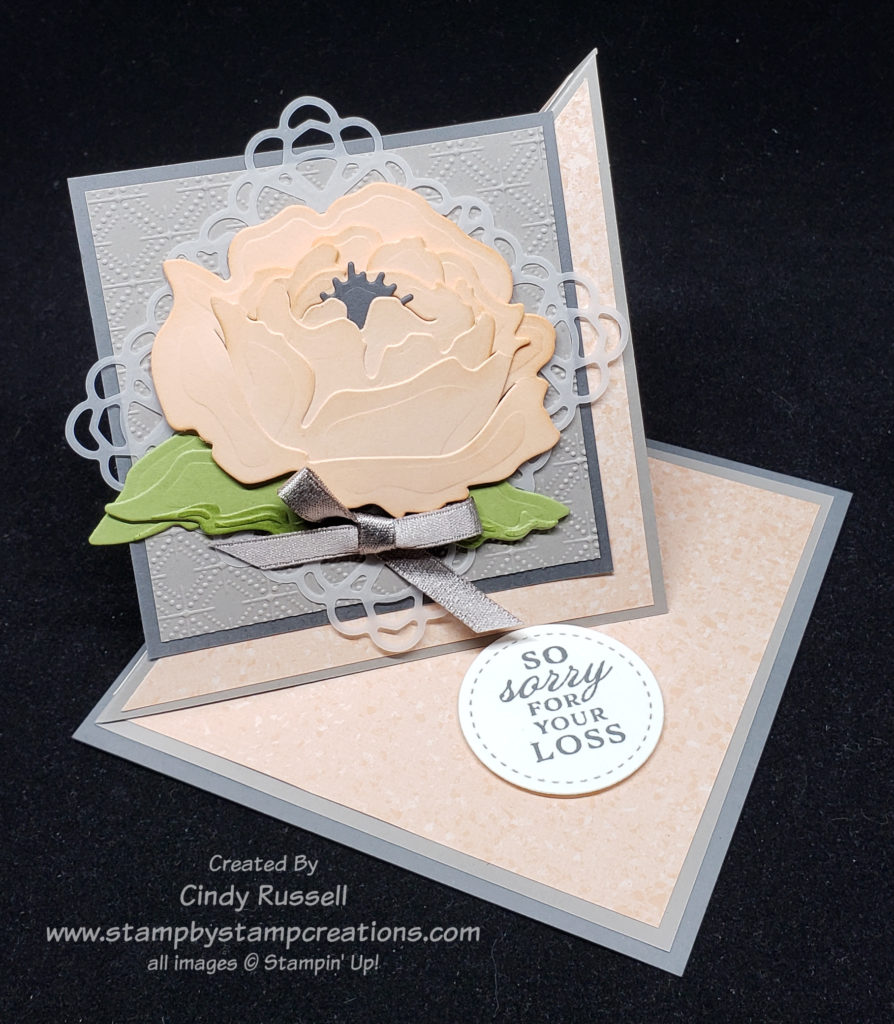
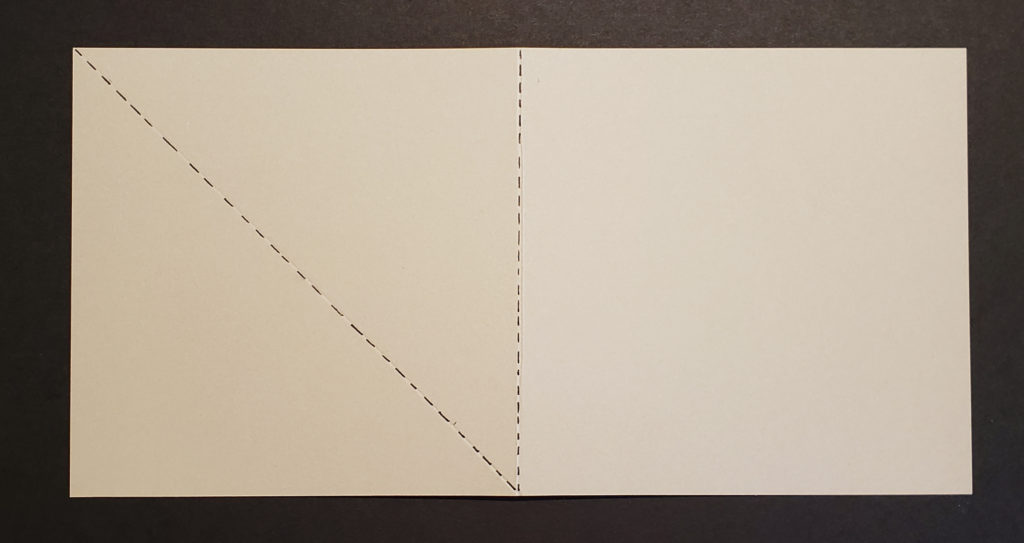
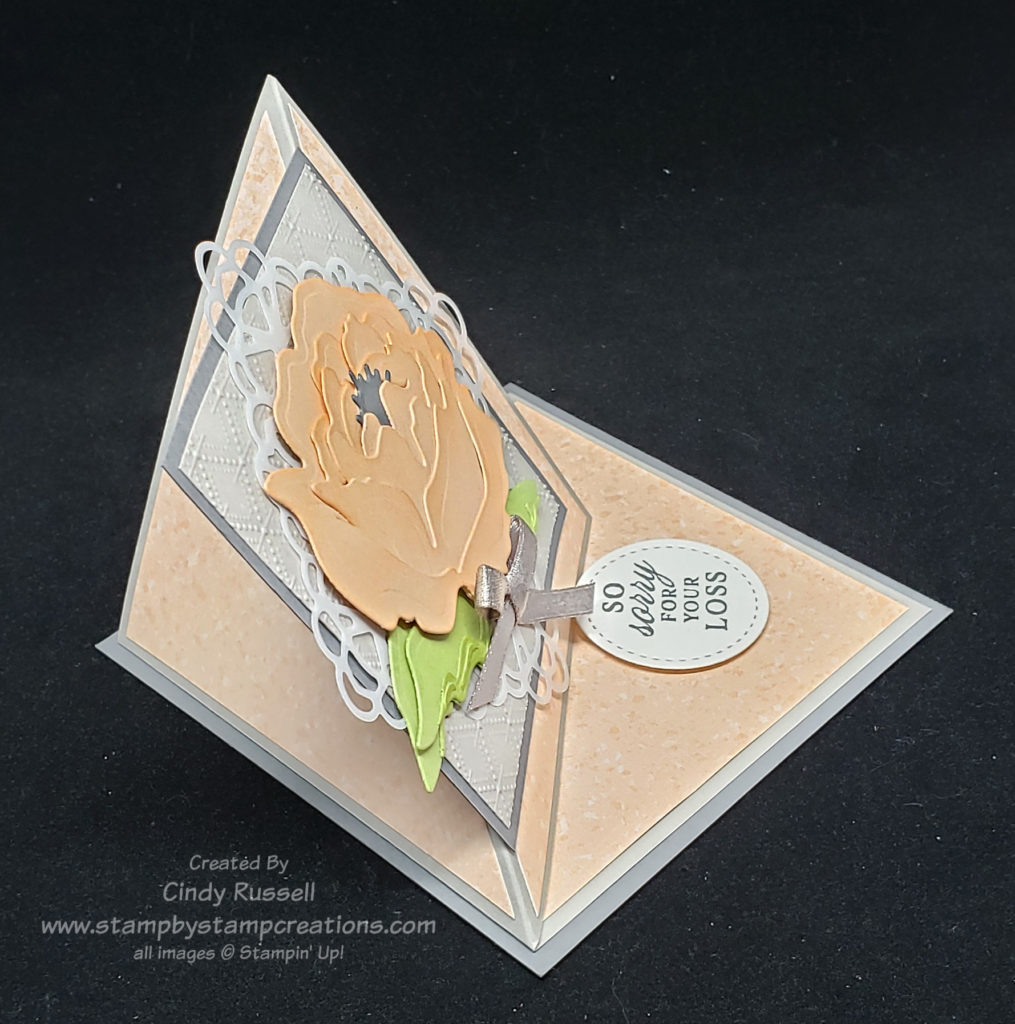
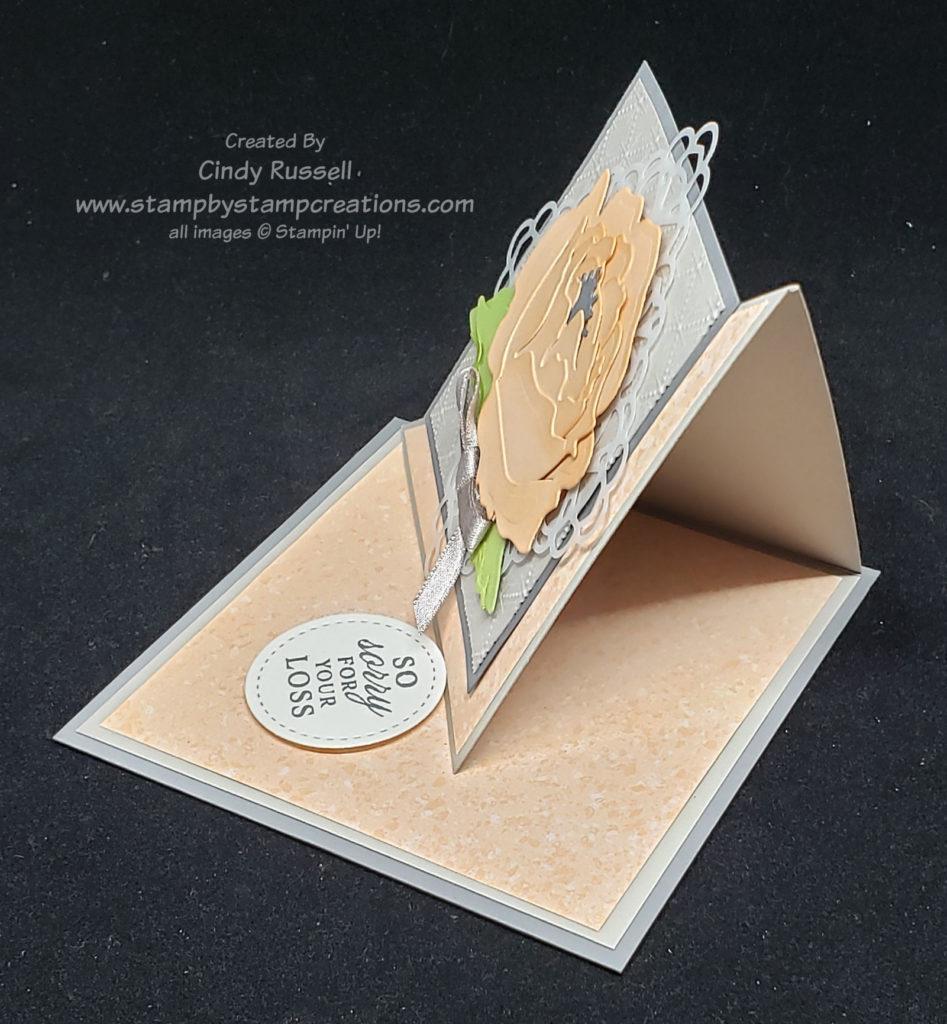
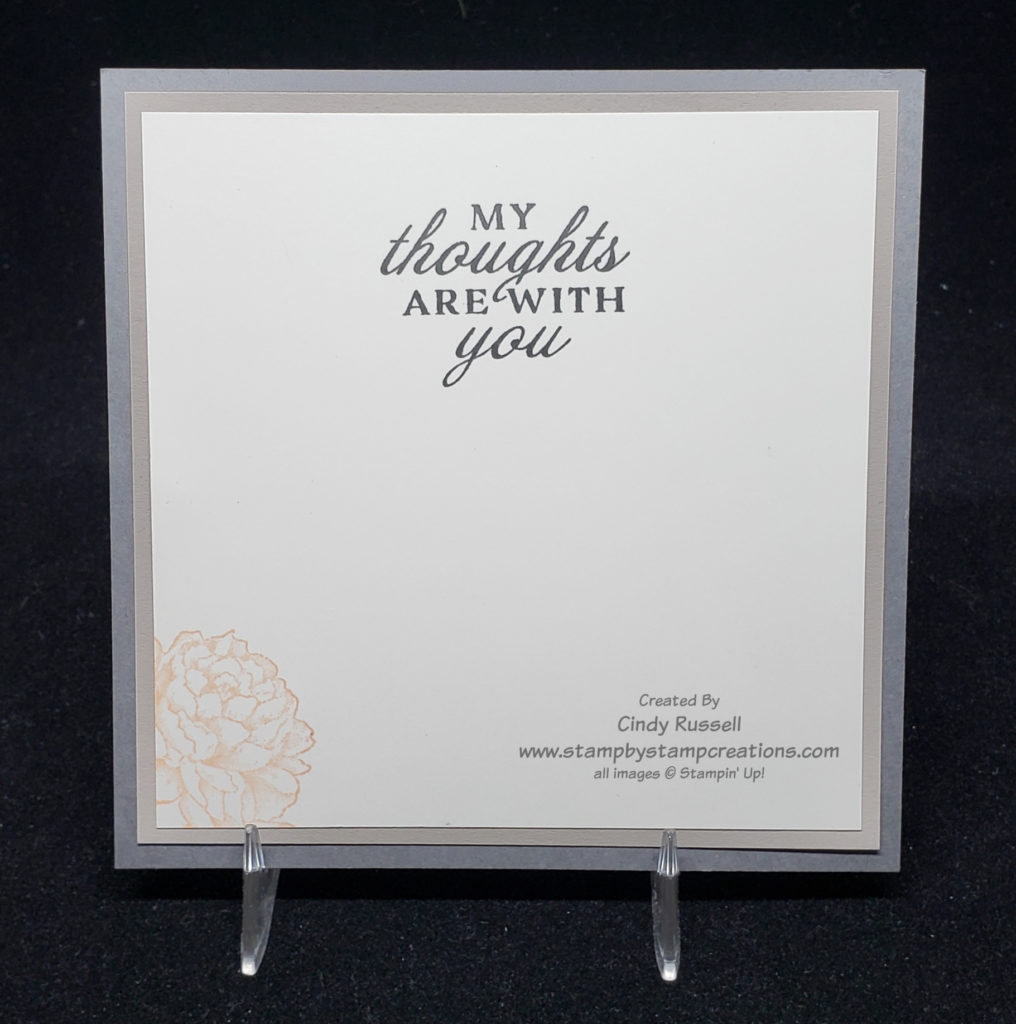
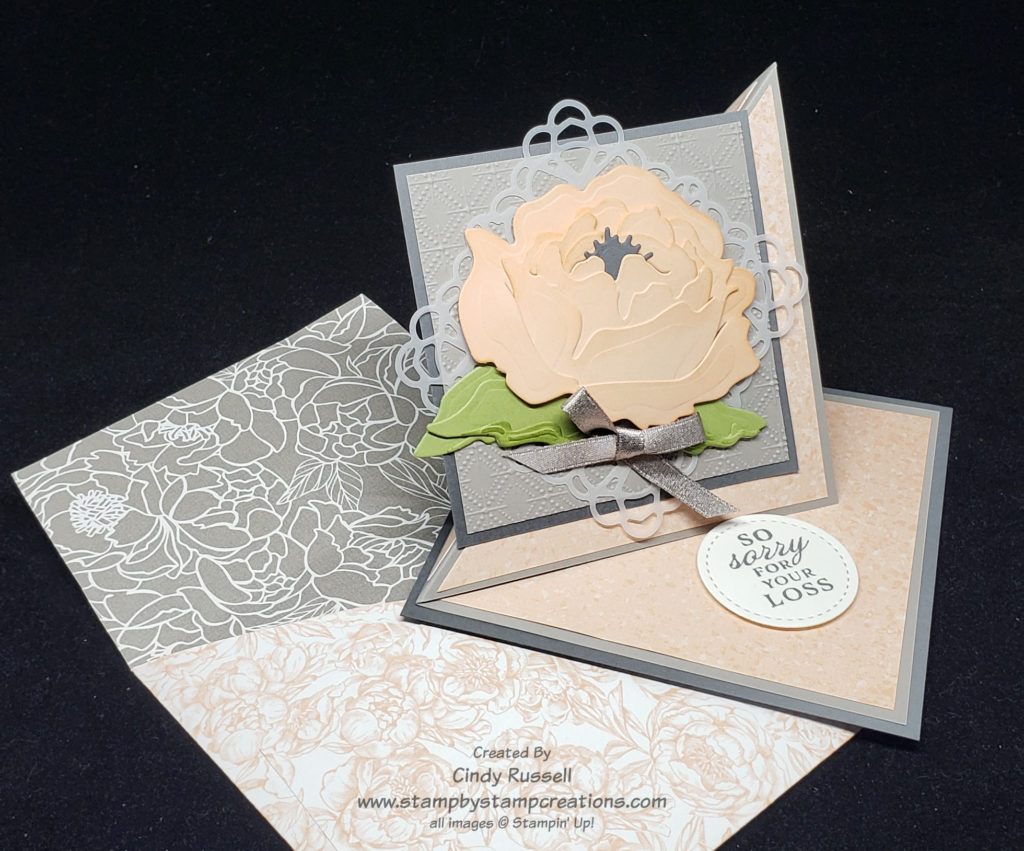
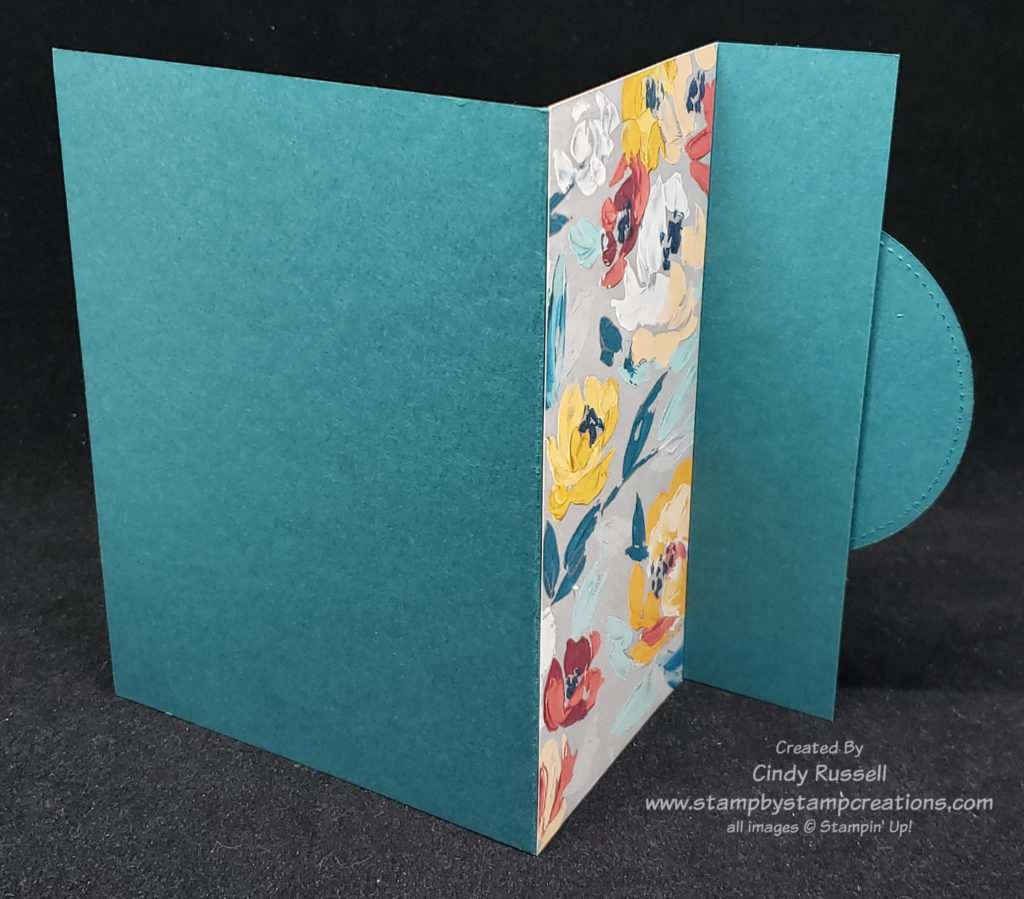
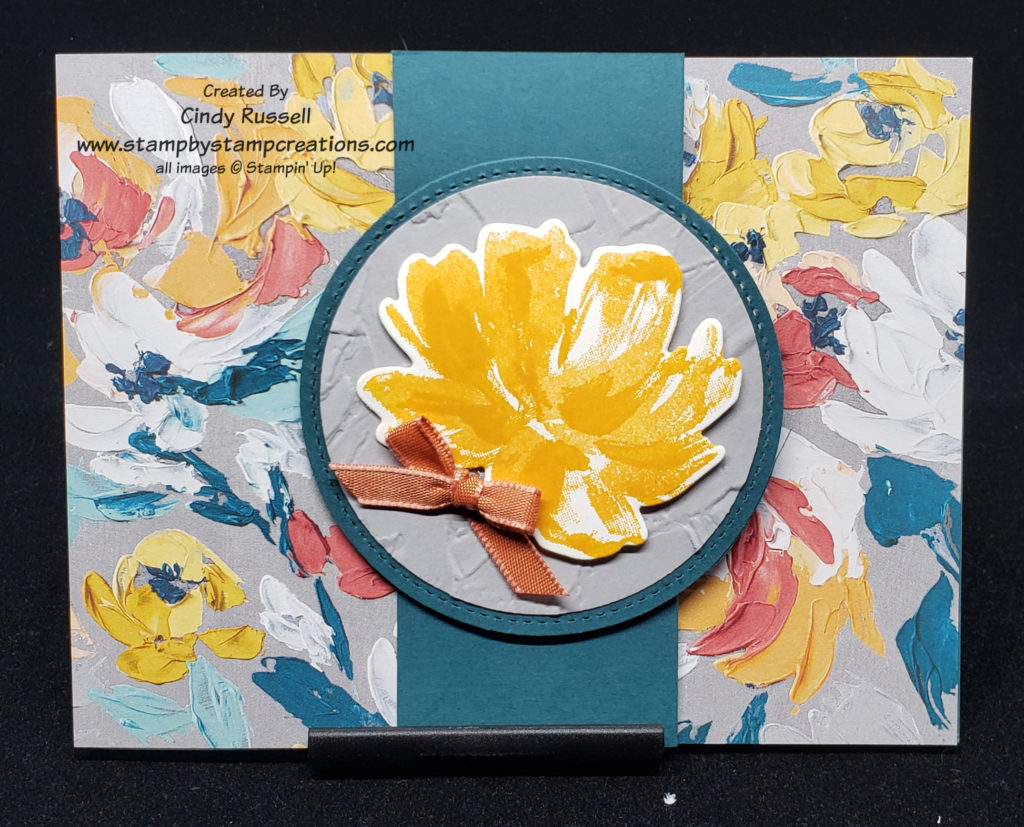
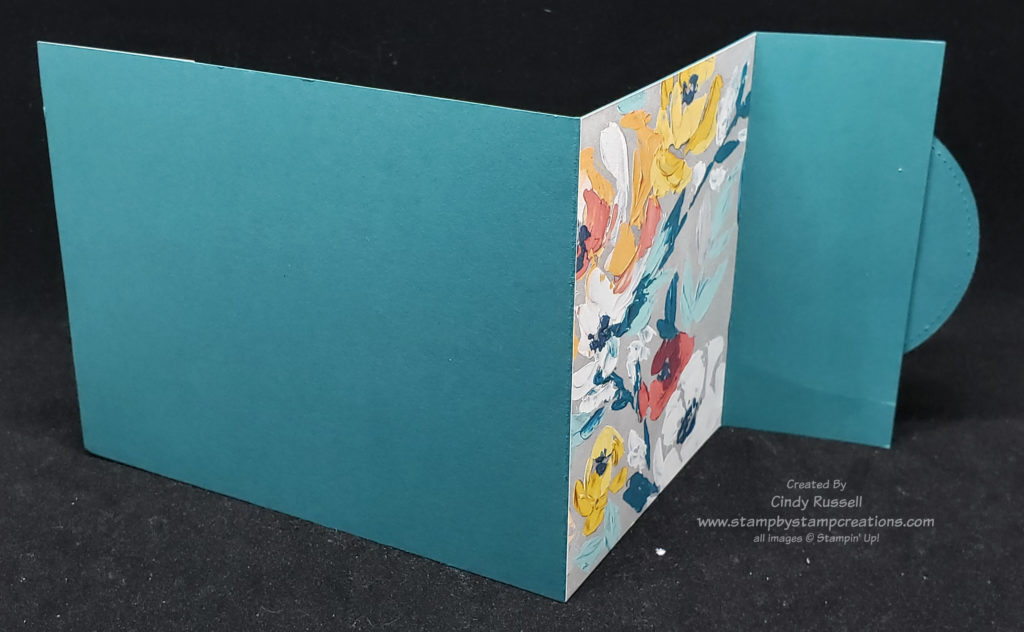
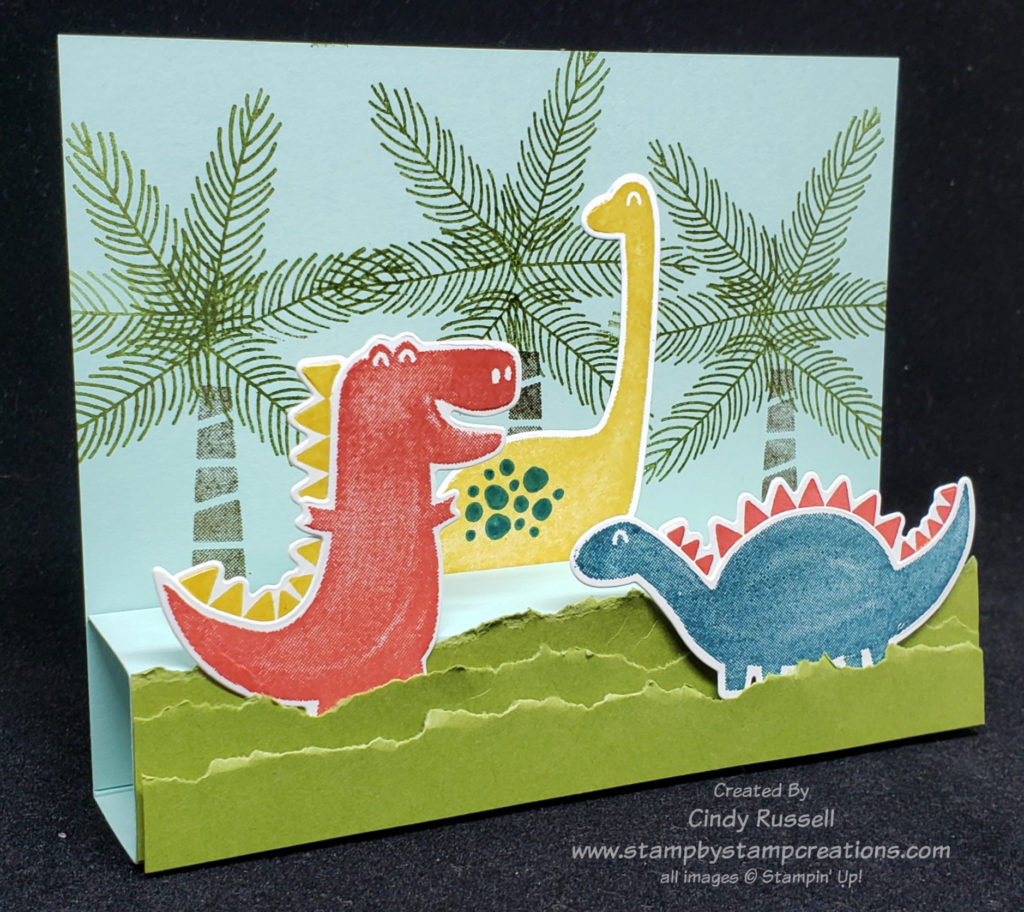
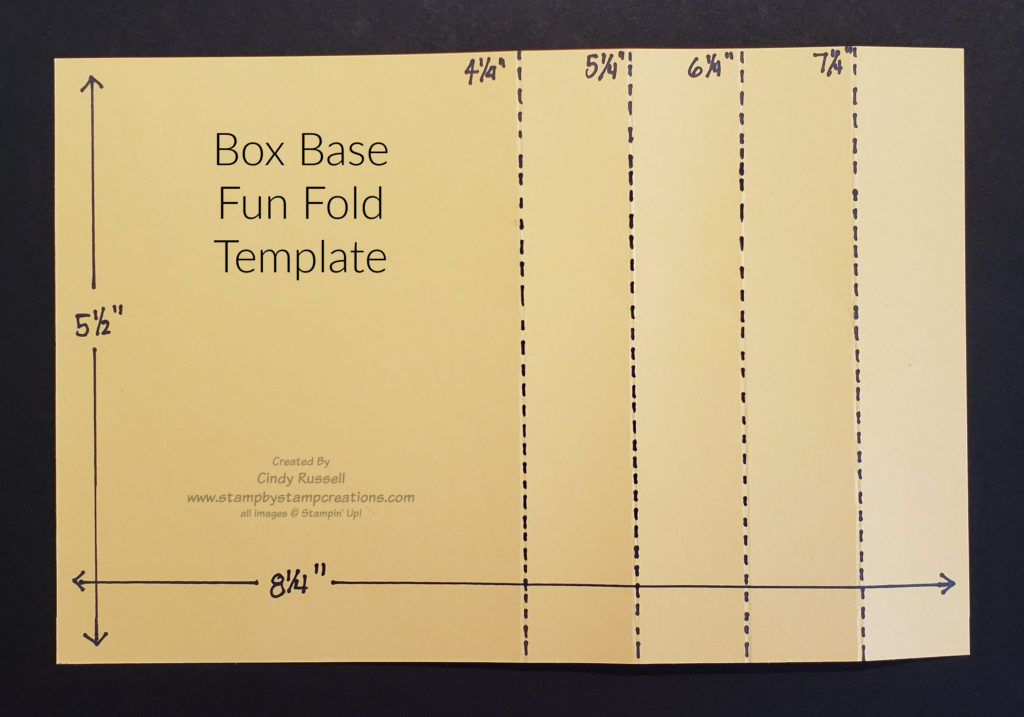
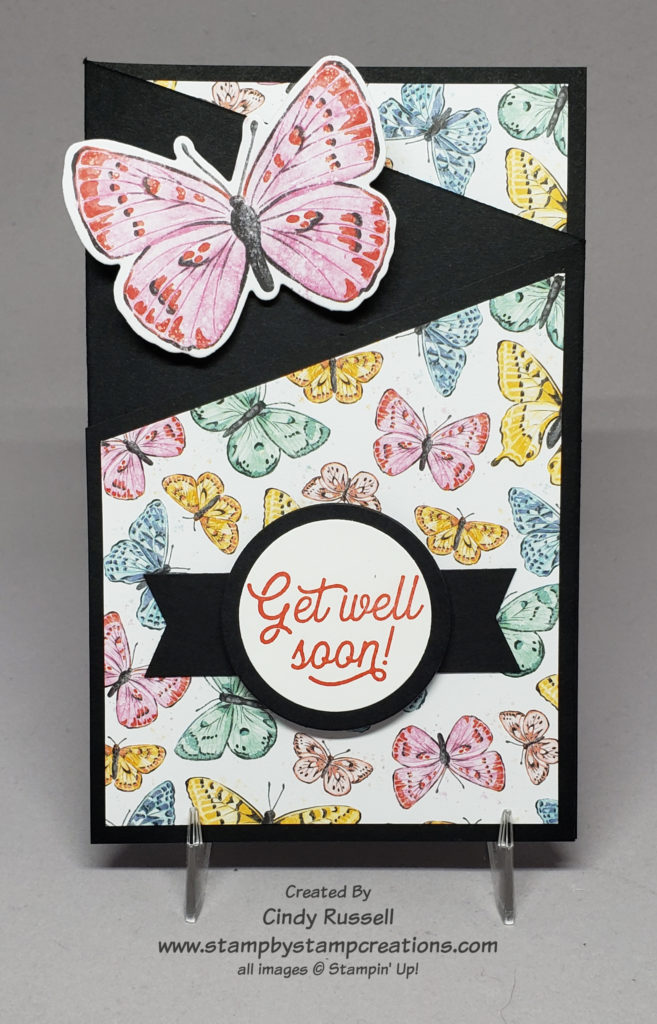
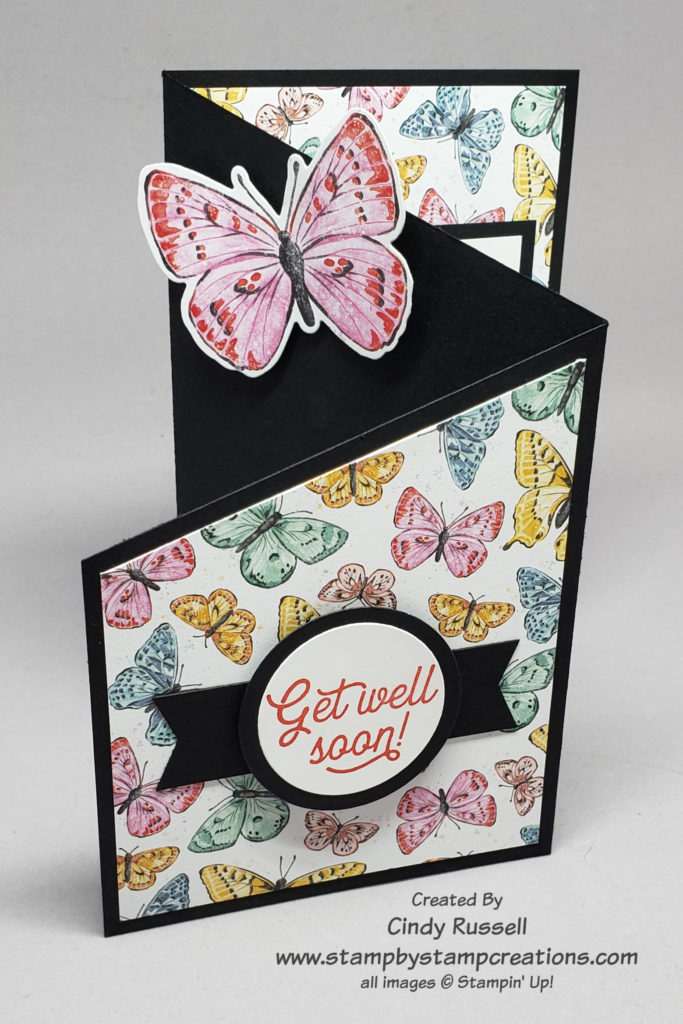
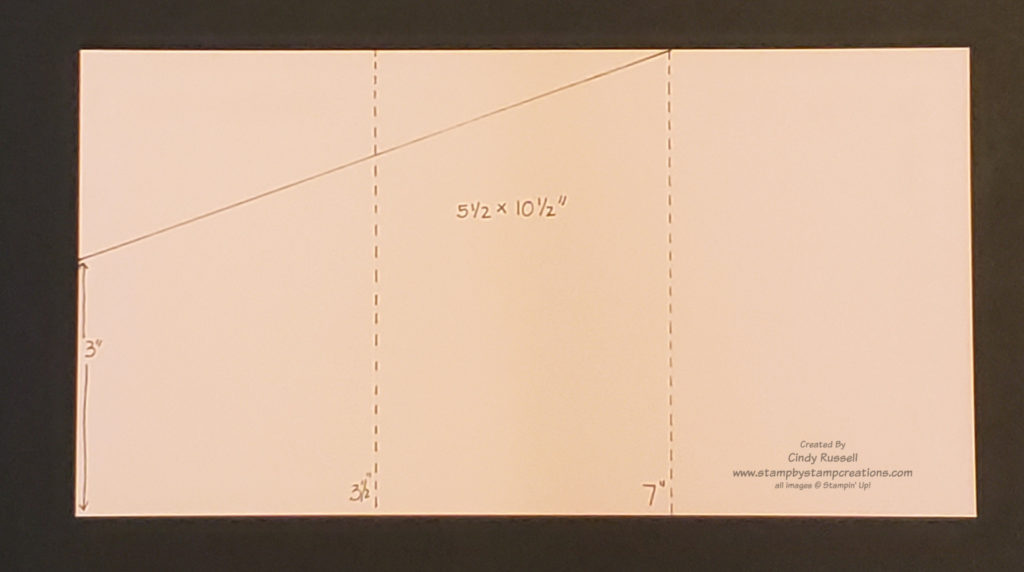
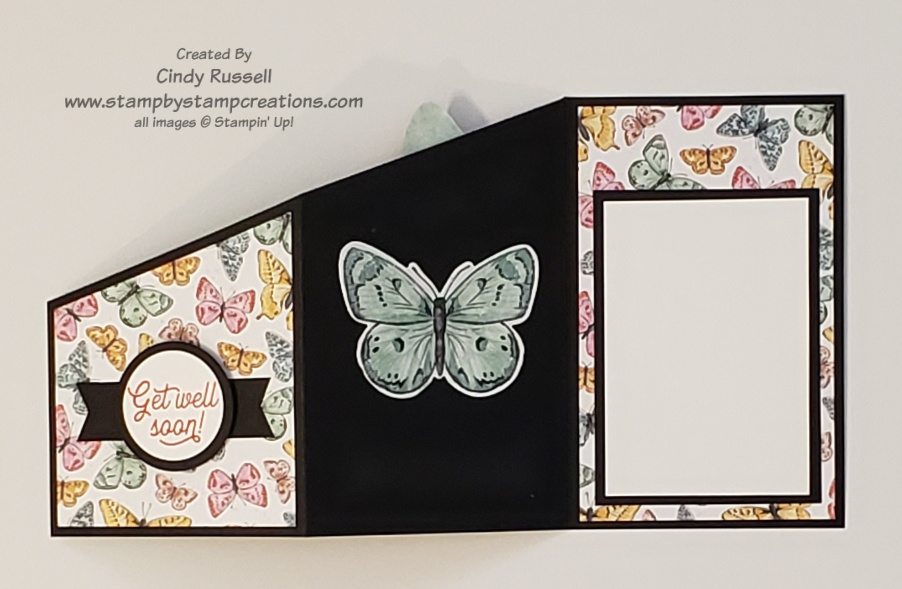
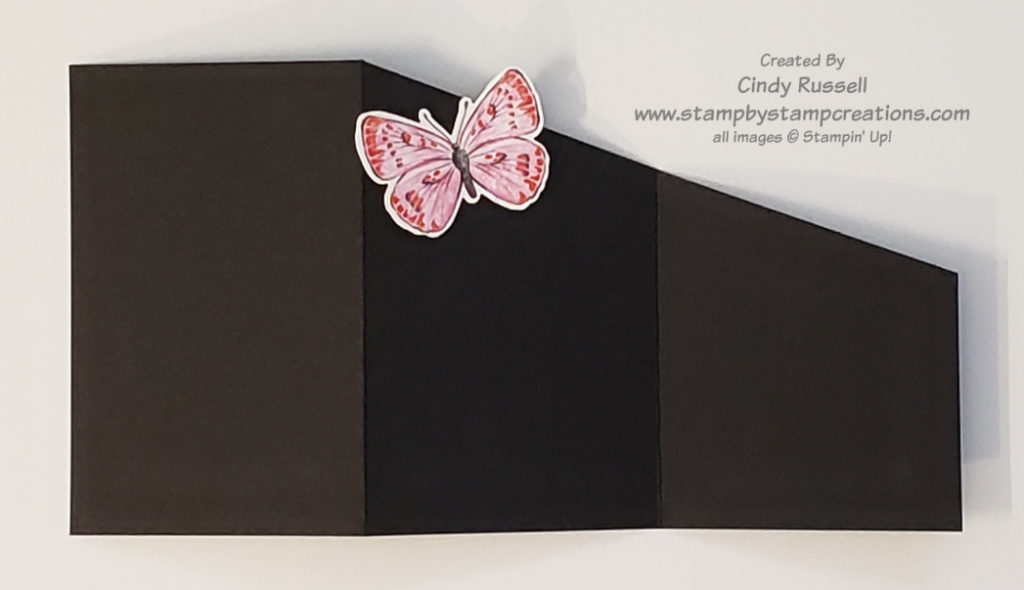
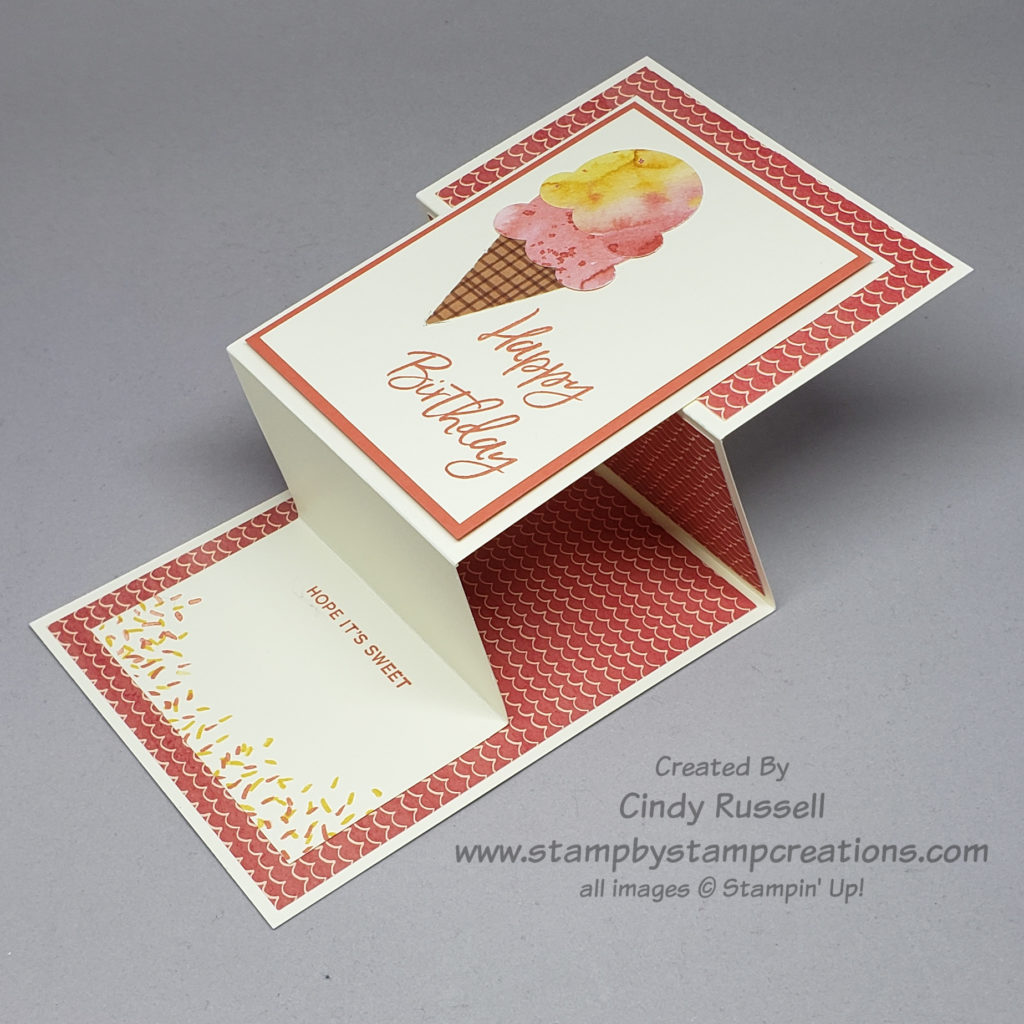
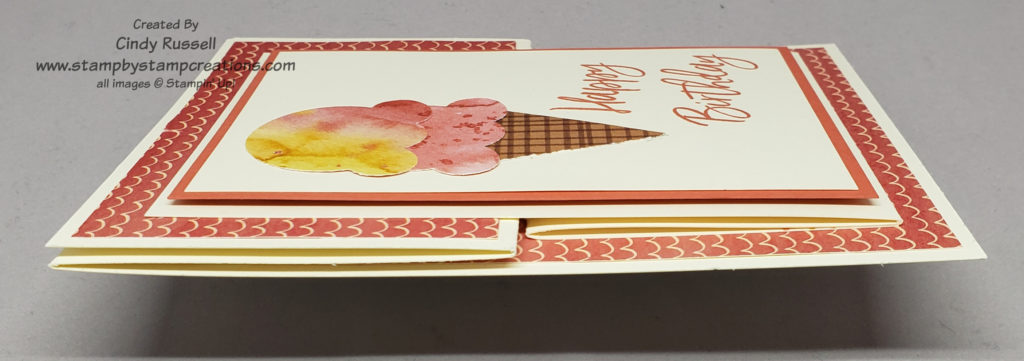
We’re always looking for masculine cards, right? Today you hit the jackpot. This fun card can be used for any occasion. I originally saw it online and knew I had to try making it myself. The card I saw was actually larger so I had to adjust the measurement so that the card would fit into Stampin’ Up!’s regular size envelope.

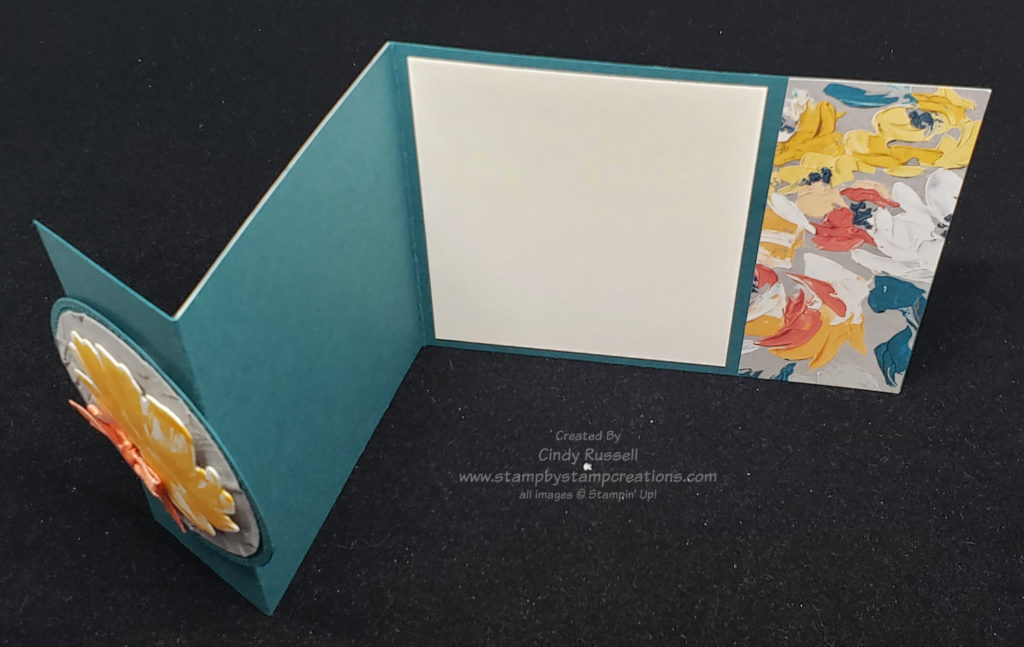
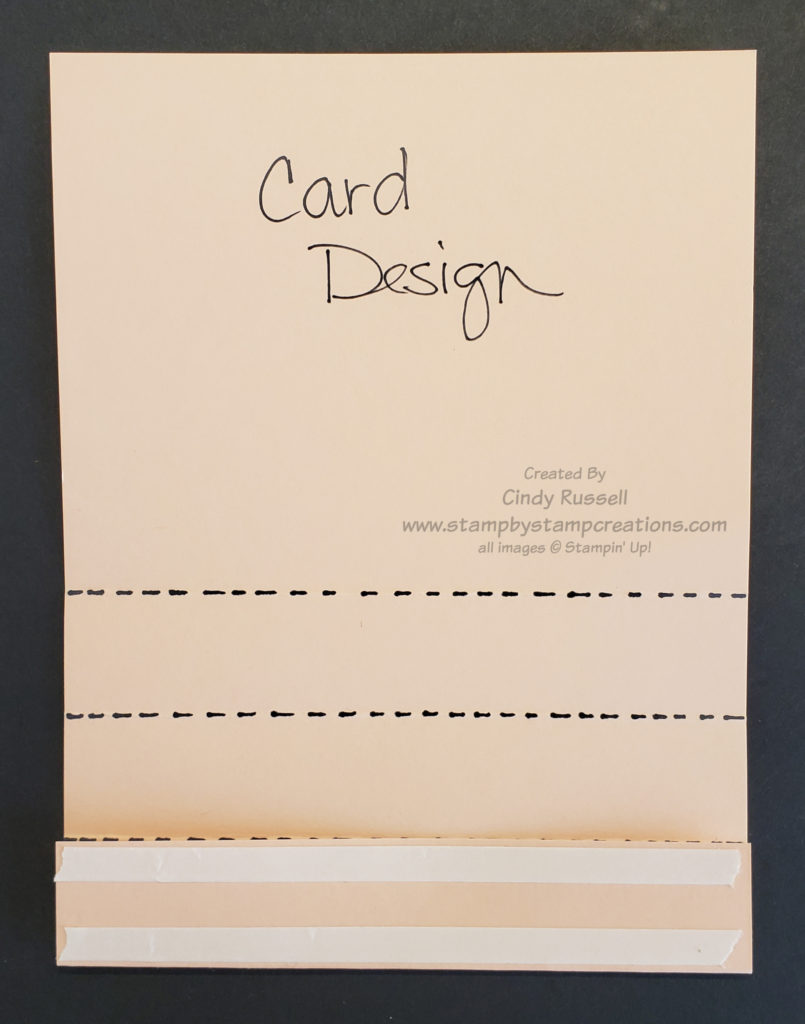
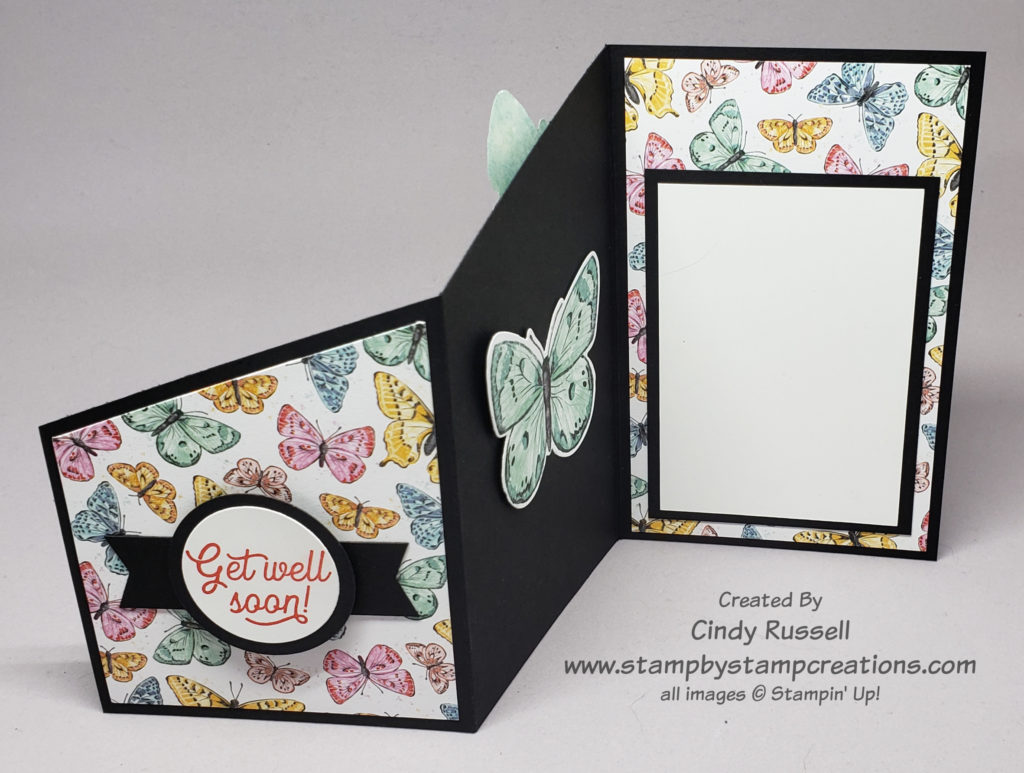
The card isn’t too difficult to make and you can add a pocket on the back for a gift card! That’s what I’ll be doing for my dad’s Father’s Day card.

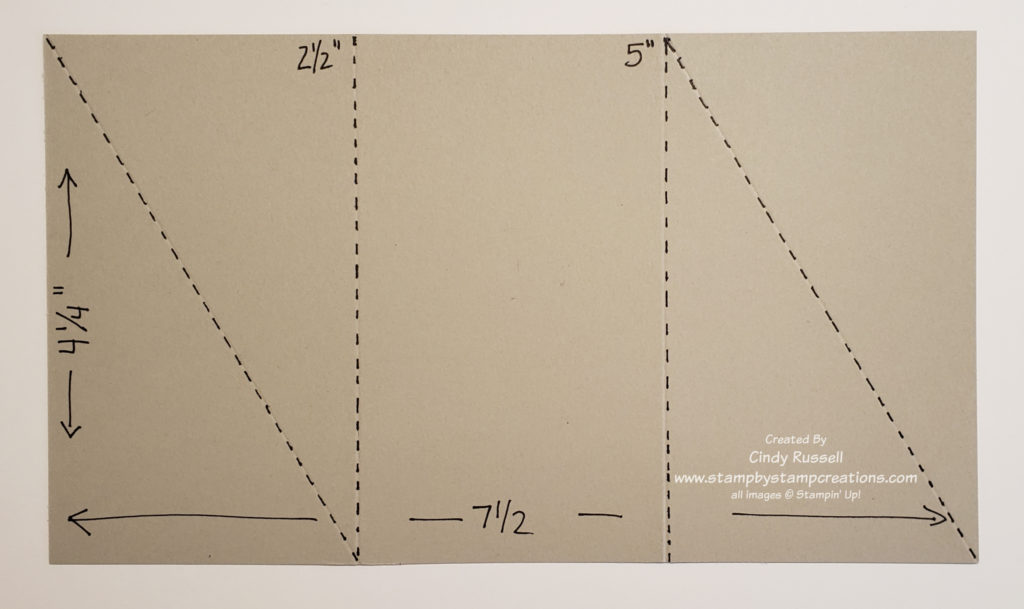
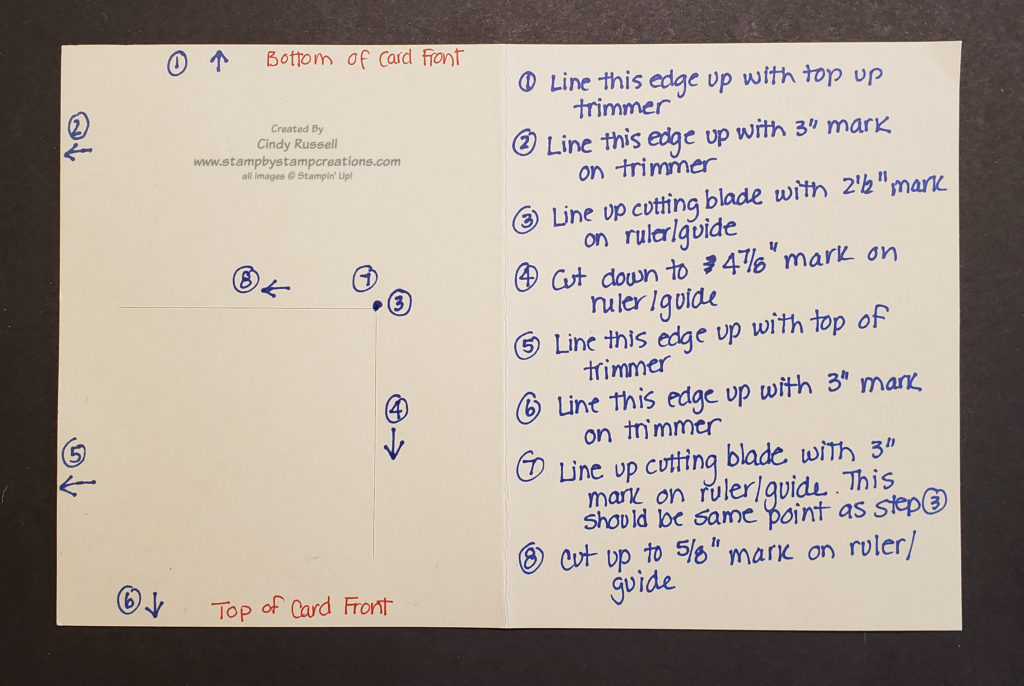
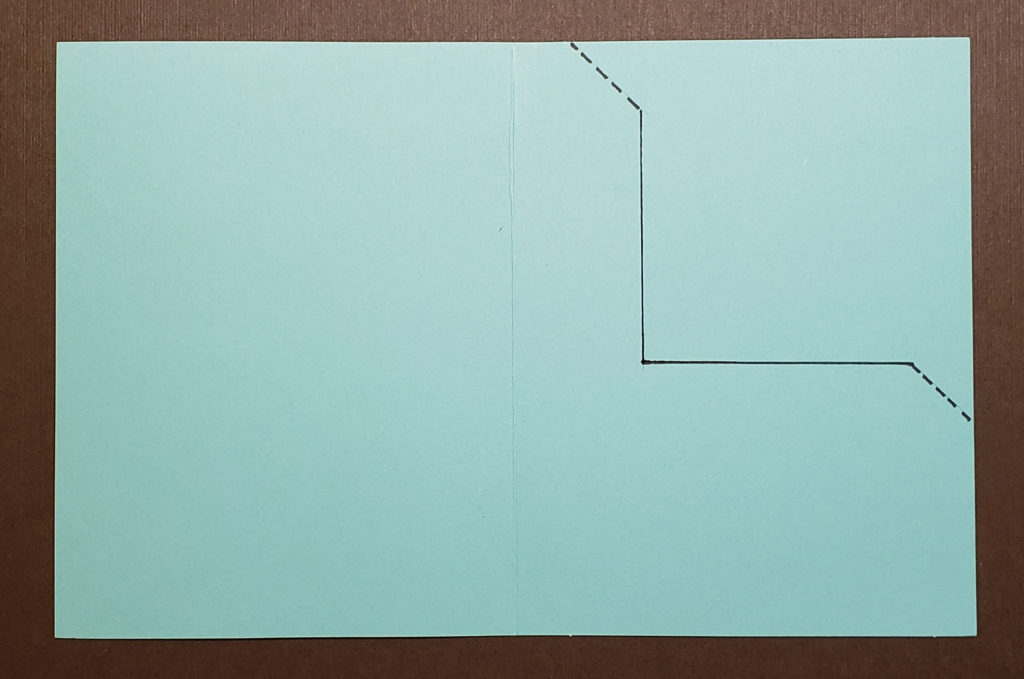
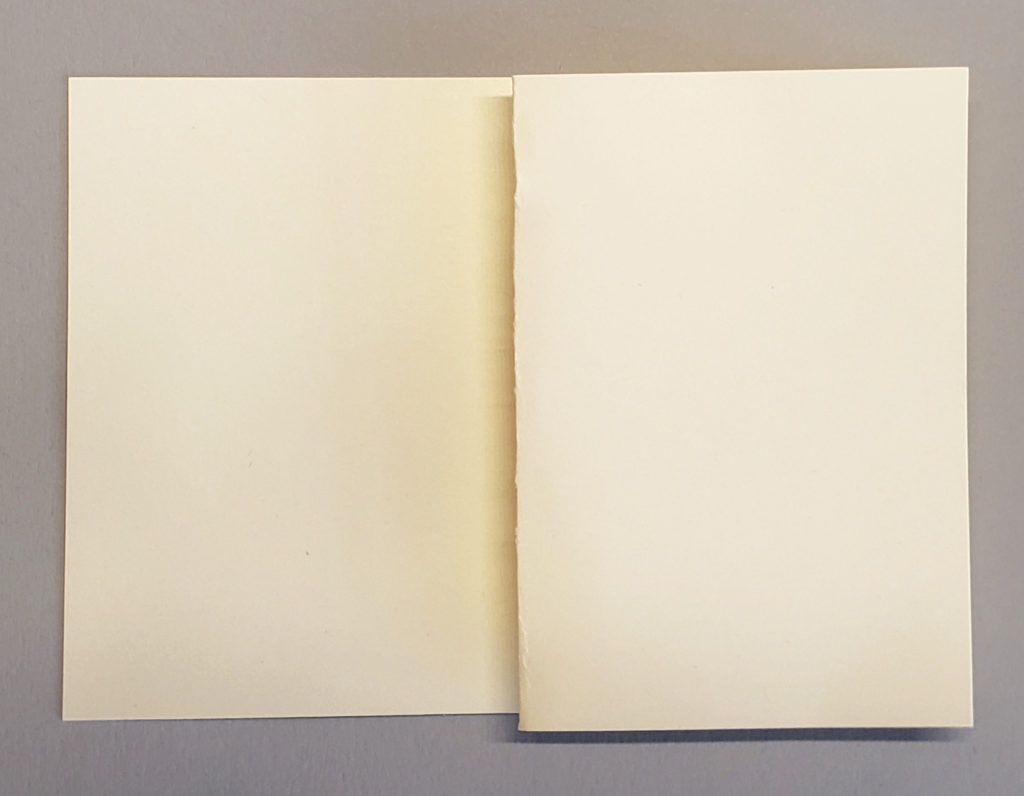
To see exactly how I made this card please view the video below.

If you like written instructions I’ve got you covered you can view the pdf with step by step instructions and photos here.

I hope you liked the video. My videos are a little rough but I think I’ve covered everything. If you like this project please leave a comment below. If you liked the video I’d appreciate it if you could head on over to my YouTube channel and subscribe. Thanks!

Have a great day! Take care and Happy Stamping!

Fun Fold: Twisted Gate Fold Card

Twisted Gate Fold Card

Today’s Fun Fold is the Twisted Gate Fold or Diagonal Gate Fold card.  This unique fold is a lot easier to make than it looks.  I would almost call it the Twisted Double-Flap Gate Fold because like the regular Double-Flap Gate Fold card that I showed you a few weeks ago, you fold the front panels back on themselves. In this fun fold though you fold the front panels back on the diagonal.

I just had to use the Hey Chick stamp set again before it is gone for good. It’s only available until June 30th or until supplies last and that goes for the fabulous coordinating dies. If you love them as much as I do be sure to get them while you can!

Here is the template for the base of the card. The dimensions are 7 1/2″ x 4 1/4″. Score along the long side at 2 1/2″ and 5″. Then score diagonally as shown on the template.

These are the two decorative pieces of designer paper. They both measure 4″ x 2 1/4 and are cut on the diagonal but one is cut from the upper left to the lower right and the other is cut from the upper right to the lower left.

The four triangles are labeled for you in this photo and the photo below shows where to adhere them on the card. I found it was easier to figure out where to place them while I had the card closed. I’ve labeled the pieces here so you can see where I placed them on the card below.

Honestly, figuring out where to put these four decorative pieces was the hardest part of making the card. When you are adhering your focal point to the front of the card you need to make sure you only adhere it to the L1 piece or you won’t be able to open the card.

I’ve attached a couple more photos of the card below so you can see it both fully open and partially open. It really is a fun fold and it will fit into a regular-sized envelope.

Have a great day! Take care and Happy Stamping

Fun Fold: Envelope Flap Gate Fold

Envelope Flap Gate Fold Card

Last week I shared with the Graduation Cap & Gown Gate Fold Card and this week’s card is very similar.  Today I want to share with you the Envelope Flap Gatefold Card.  So fun and not too difficult. I used the Ice Cream Corner Suite of products on my card. 

Before I go into detail, I want to mention that if you like these products many of them will be retiring starting on June 1st so you may want to snap them up now before they’re gone.  The only items from the suite that are in the new 2021-2022 Annual Catalog are the Sweet Ice Cream stamp set and the Ice Cream Cone Builder Punch.

This card was fun to make and I do want to thank Debbie Crowley for her wonderful tutorial on this fun fold.  I was going to describe in detail how to make this card here on my blog but decided it was easier to write up my own tutorial with photos. Be sure to check it out for all of the dimensions and instructions on how to make the card.

Below you can see a few more photos of the card.  Can you see how similar it is to the graduation card I made last week.  The main differences is that the gate fold portion of this card is adhered to a base.  I also added ribbon to help keep the card closed.

Isn’t this a fun card? I hope you like it. There are so many different types of gate fold cards. I may have to see if I can find another one for next week’s post! Have a great day. Take care and Happy Stamping!

Fun Fold: Cap & Gown Gatefold

It’s Monday. I know I should be writing a Make It Mine post but I absolutely just HAD to share this fun fold with you today. It’s graduation season and you might be needing to make a card or two.

If you really want to get picky about today’s post you could say that it is a Make it Mine card as well as a fun fold. The original card that I saw online was larger and fit into a Memories & More envelope sized for a 6 1/4″ x 4 1/4″ card (closed). My card that you see here fits in a regular envelope sized for 5 1/2″ x 4 1/4″ card (closed). I had to do a lot of math to figure this out but to be honest, I kind of enjoy that. 🙂

When closed all of the way this card looks a little boring but wait until you open it. You really get the full effect.

When the card is open like it is in the picture to the left you have the cap sitting on the gown. Too fun!

The first thing you have to do to make this fun card is to figure out your colors. When you choose the secondary color for the trim on the collar you need to make sure you have something the same color to make the tassel from. I went to my local craft store and purchased embroidery floss because I couldn’t find the right color in the thousands of skeins I already owned! Sheesh! If you don’t know how to make a tassel don’t worry. I’ve included that in the video below.

Here’s a couple of more pictures of the card so you can see how it looks:

As you can see, the card has a simple gatefold base and then you add the cap. I’ve cut a piece of cardstock slightly smaller than the cap and scored it diagonally. the bottom portion of this piece is adhered to the card base and the top portion is adhered to the cap. Most of the bottom portion is hidden by the white insert.

Dimensions for 3 ½” x 5 ½” Card
Base:  3 ¾” x 7”  score at 1 ¾” from each short side
Cap:  2 ½” x 2 ½”
Smaller Square to attach cap to card:  2 ¼” x 2 ¼”  score diagonally
Collar:  1 ¾” x 1 ¾” cut diagonally
Collar Edging:  2 strips 1/8” x 3”
Card Insert:  3 ¼” x 3 ½”
Cardstock to wrap tassel around:  1 ½” x 2”
Embroidery Floss or Baker’s Twine for tassel:  about 36” or more
Dimensions for 4 ¼” x 6 ¼” Card
Base:  4 1/8” x 8 ½”  score at 2 1/8” from each short side
Cap:  3” x 3”
Smaller Square to attach cap to card:  2 ¾” x 2 ¾”  score diagonally
Collar:  2 1/8” x 2 1/8” cut diagonally
Collar Edging:  2 strips 1/8” x 3 ½”
Card Insert:  4” x 4 7/8”
Cardstock to wrap tassel around:  1 ½” x 2 ¼”
Embroidery Floss or Baker’s Twine for tassel:  about 38” or more

Now that you know how to make these fun cards the question is this….what colors will you make your cards? Leave me a comment and let me know! Have a great day! Take care and Happy Stamping!

Fun Fold: Double-Flap Gatefold Card

Double-Flap Gatefold Card

It’s time for another fun fold and this week’s fun fold is another Gatefold card. It’s the Double-Flap Gatefold. As you can see from the photo, a little flap of the card front is folded back on itself. This card also has a bellyband like last week.

Do you ever finish making a card and just have to stop and smile? That’s what happened when I finished this card. It turned out even better than I imagined!

I used the gorgeous Hydrangea Hill designer paper to layer on the card base. After I made my bellyband I was stuck. I didn’t know what to use as the focal point on my bellyband. I couldn’t use anything from the Hydrangea Haven bundle because I didn’t have it! It was at this point that I regretted not owning it. But then, I noticed the Butterfly Brilliance stamp set on my shelf and thought “buttefly die!”. Of course then I had to figure out what to die-cut it from. Back to my package of designer paper and I found the perfect pattern that coordinated with the front of my card!

Now for the details on how to make this fun fold. You need to start with a piece of cardstock that is larger than your regular card base. You want a piece that is 5 1/2″ x 10 1/2″. I’ll give you a hint though. It works best if you measure just short of the 10 1/2″ mark on your cutter.

Lay your cardstock on your Simply Scored scoring tool with the long edge at the top. Score at 1″ and 3 1/8″. Now turn it over so that the other long edge is at the top and score at 1″ and 3 1/8″ again. The inside score marks will be valley folds and the outside score marks will be mountain folds.

The larger pieces of designer paper are 1 7/8″ x 5 1/4″. The smaller ones are 3/4″ x 5 1/4″. You can see how to make the bellyband on last week’s post. Before I die cut the butterfly I adhered a piece of designer paper to a piece of cardstock to give it a little more support. Instead of adhering the butterfly directly to the bellyband I die cut a small circle to adhere it to.

In the second photo you can see that I added another die-cut butterfly to the inside of the card as well as adding a layer behind the Basic White. Don’t forget to decorate the inside of your card too!

I liked this card so much I had to make two more for Mother’s Day. One for my mom and one for my mother-in-law! I hope you liked it too.

Have a great day! Take care and Happy Stamping!

Fun Folds: Bellyband Gatefold Card

Last week I introduced you to the Gatefold Card. It was a fun and easy card to make.

Today I want to share the Bellyband Gatefold Card to you. The base of the card is made the same way as you make the basic Gatefold card base. Start with a piece of cardstock that is 5 1/2″ x 8 1/2″. With the long edge at the top of your Simply Scored or Paper Trimmer score 2 1/8″ from each end.

The difference on the two types of cards comes with the focal point. On the original Gatefold Card you design a focal point that you adhere directly to the left side of the card base.

On the Bellyband Gatefold Card you design a Bellyband that holds the card closed. My bellyband is 9 1/2″ x 1″. This gave me enough overlap to adhere the two ends of the bellyband together. 9 1/2″ – 9 3/4″ should be good for a card that’s 4 1/4″ wide. If your card is the same size but in landscape orientation instead of portrait you will need to start with a bellyband that is 12″ long. I didn’t score my bellyband. Instead, I held one end of the band just over the halfway point of the card and then I loosely wrapped it around the card. You don’t want your bellyband too loose or it will fall of the card. Then again, you don’t want it too tight or you won’t get it off of the card. You do want to use a stronger adhesive like liquid glue or Stampin’ Seal + to adhere the ends of your bellyband together.

Once you have the bellyband itself made you just need to add your focal point. I decided to go simple on this card. I stamped the flower and added rhinestones. I was going to adhere the flower focal point square on the card but then it dawned on me that the diamond shape might be just a bit more interesting.

Here is a phot of the inside of the card along with the bellyband. You can see how the bellyband looks when it’s not on the card.

If you like fun fold cards but don’t want to get too carried away the Gatefold Fun Fold Card and the Bellyband Fun Fold Card are great choices. They are both fairly easy to make. The hardest part is figuring out your colors and design!

Have a great day! Take care and Happy Stamping!

Fun Folds: Gate Fold Card

Gatefold Card

The Gate Fold Fun Fold is quick and easy. At first glance it looks like a normal, folded in half, card. If you look closely though you can see the seam down the center of the card front.

The front section of the Gate Fold Card is actually two pieces that open outward like….a gate. 🙂

To make a gatefold card you start with the same size piece of cardstock that you would for a regular card. 5 1/2″ x 8 1/2″. Instead of scoring it at 4 1/4″ you score it at 2 1/8″ from each side. The short edges should meet up perfectly when you fold along your score lines.

In this photo you can see how the card opens. The photo also shows you how you attach the focal point of the card. You want to make sure you only attach it to the left side of the card so that you’ll be able to open the card.

It must be Polished Pink Week here at Stamp by Stamp Creations. On Monday I shared a card with you that I made with Polished Pink. In Tuesday’s newsletter that I emailed out I also used Polished Pink and today I’m using it again.

The designer paper that I used on the front of the card is one of the new patterns in the In-Color Paper stack. You’ll be able to find this pattern along with three others in all of the color family paper stacks in Stampin’ Up!’s new Annual Catalog. I used the Color & Contour stamp set on my card. The scalloped rectangle die comes from the coordinating Scalloped Contour Dies.

This last photo shows the inside of the card and is a good overall view of how it works.

As I mentioned, this is a fun and easy fold to make. Give it a try!

Have a great day! Take care and Happy Stamping!

Fun Fold: Angled Corner

Angled Corner Fun Fold Card
Angled Corner Fun Fold Card – back

The Angled Corner Fun Fold card is fun and easy to make. The upper left corner of the card isn’t cut off, it’s folded in on itself. You then use die-cut or punched images to fill in the area that is “missing” on the card.

When you are decorating the card and filling in this “missing” area you want to be sure to stay within the 5 1/2″ x 4 1/4″ card front area so that you card will fit in the envelope.

Below you can see some photos of the inside of the card as well as the side where the angled fold is.

The nice thing about this fun fold is that it’s easy to alter. You can increase or decrease the size of your angled fold depending on the size of dies/punches that you use to cover the “missing” corner.

You also want to add a die-cut or punched image on the fold on the inside of your card to show it off. In the picture to the left you can see how adhered the single die-cut flower to the inside fold.

The fold itself is made up of only 3 scored lines and one of those scored lines is the one you made at the halfway point (4 1/4″) to form your card. Below you can see the template I used for my card.

The cardstock measures 8 1/2″ x 5 1/2″ which is a standard card size. I scored it along the long edge at 4 1/4″ which will be the center fold of my card.

Along this center fold score line I measured in 2 3/4″ and made a light pencil mark.

I also measured up 2 1/2″ from this center fold score line and down 2 1/2″ making light pencil marks at these points.

You can’t really use the Simply Scored tool or your Paper Trimmer to score these angled lines so you need to get out your trusty Bone Folder and a regular old ruler or any type of tool with a straight edge. Line up one of the points on the side with the point on the horizontal score mark and run your Bone Folder along the straight edge.

After you’ve made all three score lines fold the card in half like you usually would. Open it up again and crease the angled score lines in the same direction. They will be “mountain fold”.

This fun fold is very easy to make. The hardest part is figuring out how to decorate it! Be sure to contact me if you have any questions on it. I’ll be happy to help you out!

Have a great day! Take care and Happy Stamping!

Fun Fold: Corner Flip Card

Snailed It Corner Flip Card

Today’s Fun Fold is the Corner Flip Card.  It’s called this because….you make a couple of cuts, a couple of score marks and flip the corner!  Ha!

I used the Snailed It Bundle and the Snail Mail designer paper on my card.  Too cute!  The little snail is die cut right from the designer paper.  No stamping, no coloring and no fussy cutting! The only stamping I did on the whole card was the “hello” and the outline on the word bubble!

I’ve made a short video to show you how easy this Fun Fold is to make.  You can view it below.  After the video you will also find the template with instructions that I mention in the video.  In the video I also mention that the important thing to remember is that you do the cutting with the card base upside down.

Corner Flip Card Template

In this photo I’ve oriented the card the right way and I show you the lines I’ve cut and how I’ve scored. The solid lines are where I cut according to my template and the dotted lines are where I scored.

To make the angled score marks I lined up my ruler with the top of the vertical cut and the right end of the horizontal cut. Then I used my bone folder to score from each of those marks to the edges of the card.

To make the flip you then want to take the upper right corner of the card and fold it along the score marks towards the meeting point of the cutting lines. Easy Peasy! Now you’re ready to decorate your card.

I hope you’ve enjoyed the Corner Flip Fun Fold card! Have a great day! Take care and Happy Stamping!

Fun Fold: Origami Treat Holder

Origami Treat Holder

I wanted to share a Fun Fold Origami Treat Holder with you in time for Easter so I’m changing things up this week.   A Ghirardelli chocolate square fits in it perfectly.  I’m actually going to make these for my Easter table and put a couple of their little Easter chocolates in it.  So fun!

No adhesive is needed to make the treat holder itself.  The only adhesive you may need would be for your focal point on the front.  I’ve made a short video showing you how to make the treat holder.

Here are the important measurements for you:

8 ½” x 8 ½” piece of designer paper

After folding designer paper in half diagonally, score along the long folded edge at 2 ½”, 4 ¼”, 7 ¾” and 9 ½”

Once you’ve made one or two of these they go pretty easily.  You can leave the treat holder plain or you can add a focal point if you’d like. 

Have a great day!  Take care and Happy Stamping!

Fun Folds: Twisted Easel Card

Twisted Easel Card

Last month I shared with you a Z-Fold Easel card. Today I want to share with you the Twisted Easel Card. The base of this card is easy to make. You can either start with a 4 1/4″ x 11″ card base or a 4 1/4″ x 8 1/2″ card base.

Of course if you want to change things up like I did on my card you can start with a 4″ x 8″ card base. I then added the bottom/back of the card to a 4 1/4″ x 4 1/4″ piece of cardstock.

No matter the size of the card base that you start with you are going to make the easel part the same. You first want to score your card base in half. Then you will make a score mark from the upper left corner down to the bottom of the score mark you made at the half way point.

Twisted Easel Card Template

The template above is for a square card but you will make your score marks the same if your completed, closed card is 5 1/2″ x 4 1/4″. The triangles you make with the angled score mark will just longer and skinnier.

In the photos above you can see a couple of different views of the easel card. The second photo is especially helpful because it shows you how the front of the card folds and forms the easel. Both photos show how the sentiment is the “stop” for the easel to stand. It’s helpful to use Stampin’ Dimensionals on the piece for the “stop”.

As you are looking at the photos above you may be wondering where you’re going to sign the card or write a little message. I decided to add a piece of Basic White cardstock to the back for my message. It worked perfectly!

I made this card for a friend whose mother passed away last week. I could have sent it in a regular sized envelope which would have had a little extra space in it but I decided a card this fancy needed it’s own envelope. Lucky for me I taught you all how to make your own envelope not too long ago!

Twisted Easel Card & Matching Envelope
Twisted Easel Card Closed

In the photo of the closed card you can see the angled score mark where the card will fold. Just make sure when you are adhering the focal point on the front of the card that you only adhere the bottom right portion! Otherwise you won’t be able to make the easel. I had fun making this card. Give it a try!

Have a great day! Take care and Happy Stamping!

Fun Folds: Modified Z-Fold Card

Modified Z-Fold Card

I’ve been talking a lot about Z-fold cards recently.  There’s just so many different types.  Today I have another one to share with you.  It’s the Modified Z-Fold.  Yes, it’s a name that I made up but it works.  On the Z-fold cards I’ve share with you in the past the front section is usually divided perfectly in half so that the first two section of your “Z” are equal widths.  With the Modified Z-Fold card you only fold over a small portion of the front.  The first section of the “Z” is much smaller than the second section.

 On my card, when the card was closed, I tried to make the three areas that you can see approximately the same size.  To do this I made my first section of the “Z” (the solid colored section) 1 3/8” wide.  This is the section that I adhered my focal point (the flower) to.  This means that I scored my card base at 1 3/8” and 4 ¼” to make my “Z”. 

I then added a piece of designer paper to the part of the second section of the “Z” that would show when my card was closed.  This measured 5 ½” x 2 7/8”.  I also added a piece of designer paper to the inside of the card that would show when my card was closed.  This meant I had to make the piece of white cardstock that I write on a little smaller than usually.  The inside piece of designer paper is 5 ½” x 1 ½”.  The piece of white cardstock on the inside of the card is 5 ¼” x 2 ½”.

Horizontal Modified Z-Fold Card

This card was the first time I’d made this type of Modified Z-Fold and I like it.  It’s a great way to showcase your designer paper.  When I finished this card I got to thinking about the tip I gave in this week’s newsletter.  In my newsletter I mentioned that you should try changing the orientation on your cards sometimes….so I did.  I made the exact same card in a horizontal format.  On this card the solid section is 1 ¾” wide. 

On both of my cards the stamped flower is from the Art Gallery stamp set.  It’s a two-step stamping set.  I found that it worked best if I stamped off the larger first stamp before stamping on my card and then stamped the smaller, more detailed stamp full strength.  If I had stamped them both full strength you wouldn’t see as much detail on the flower.

Another Fun Fold card completed.  I’m really enjoying finding fun folds to share with you.  Are you enjoying them?  Please leave a comment and let me know.

Have a great day!  Take care and Happy Stamping!

Fun Folds: Box Base Card

Box Base Fun Fold Card

I have no idea what this type of card is actually called but I’m calling it a Box Base Card.  The base is a box and the card is attached to it.  Sometimes you just need to go with those descriptive words.  😊

A week or so ago a friend of mine texted me wondering if I had any dinosaur cards for her grandson’s upcoming birthday.  Naturally I didn’t but figured it was a good time to get out my Dino Days stamp set and the coordinating Dino Dies.  I then did what every good crafter does when they can’t figure out where to start and I hopped on Pinterest. 

Box Base Fun Fold Card Template

I’ll be honest, I pretty much copied the card I found on Pinterest.  I fell in love with this fun fold because it’s so EASY!  You start with a piece of cardstock that’s 8 ¼” x 5 ½”.  This is a quarter inch shorter than a regular card base.  You then score it along on the long edge at 4 ¼, 5 ¼”, 6 ¼” and 7 ¼”.  Crease all score marks well.  Once you’ve creased the score lines you can see how the card will be put together.

On my card I needed to make sure that I decorated legs of the yellow dinosaur and the bottoms of the trees are covered by the “box” portion of my card.  Even if part of the design isn’t going to be covered by the “box” it will probably be easier to decorate the card front before adhering the “box”.

To form the “box” you want to lay the card base in front of you with the card design facing up.  Fold over the bottom section of the “box”.  This is where you will place your adhesive.  Now fold up the other sections.  The edge of the bottom section will meet up with top score line and adhere to the bottom portion of the card design area.

When you’ve got the card put together you just need to finish decorating it by possibly adding decoration to the “box” portion of the card.  You can also add a piece of cardstock to the back of the card so you have a place to write your message.

This Box Base Fun Fold card was fun and easy to make.  Give it a try!  Have a great day!  Take care and Happy Stamping!

Fun Folds: Angled Z-Fold Card

Lately we’ve been talking about many different types of Z-Fold cards and today is no different.  Today I want to introduce you to the Angled Z-Fold cord or Angled Tri-Fold card.  I think most people call it Angled Tri-Fold but you fold the three panels into a Z so to me it’s an Angled Z-fold!

Butterfly Bouquet Angled Z-Fold Card
Butterfly Bouquet Angled Z-Fold Card open

When you look at the card in it’s closed position you can see that there is going to be some type of special fold to it.  You see the front panel with the designer paper and you can see a little bit of the designer paper on the “inside” or back panel.  As you open the card it’s easy to see the angled top edge.

I used the exciting new Butterfly Bouquet products on my card.  Gotta love those butterflies!  The large pink butterfly is die-cut from the designer paper!  You can view all of the products in this collection here. The stamp set and the dies from this collection are actually sneak previews from Stampin’ Up!’s upcoming 2021-2022 Annual Catalog. How fun is that?!

Template for Angled Z-Fold Card

My card is made from 5 ½” x 10 ½” piece of cardstock and will fit in a standard Stampin’ Up! envelope.  When closed, the card measures 3 ½” x 5 ½”.   Score the 5 1/2″ x 10 1/2″ piece of cardstock along the long side at 3 ½” and 7” to form your panels.  To get the angled edge you will then measure 3” up from the bottom on the left short side.  Make a light pencil mark.  Then draw a light line from the pencil mark to the top of the 7” score mark and then cut along this line.  The base of the card is now done and you just need to decorate!

The angled piece of designer paper on my card is 3 ¼” across.  The short side measures 2 ¾” and the long side measures 3 7/8”.   The larger piece of designer paper on the back panel measures 5 1/4″ x 3 1/4″.

You can make an Angled Z-fold card in many different sizes. The key is to make sure that you can evenly divide the long edge of your cardstock by 3 so that your panels are all the same size. The starting point for you angled edge can be anywhere on the left edge and you can either end your angle at the second score mark like I did or you can take the angle all the way to the upper right corner of the cardstock.

I hope you like this fun and easy Fun Fold! Have a great day! Take care and Happy Stamping!

Fun Folds: Double Z-Fold Card

Sweet Ice Cream – Horizontal Double Z-Fold

Today I have another variation of the basic Z-Fold card for you….the Double Z-Fold!

The Double Z-Fold card is just what the name suggests. It’s two Z’s put together. My sample is made with the fun Ice Cream Corner Suite.

Included in this fun suite of products are the Sweet Ice Cream stamp stamp that can be bundled with the Ice Cream Cone Builder Punch, Blackberry Bliss Striped Ribbon, Ice Cream Corner Sprinkles, and the Ice Cream Corner Designer Series Paper. Of course they all coordinate perfectly together!

Sweet Ice Cream – Horizontal Double Z-Fold opened.

But back to the fun fold! In this picture you can see the 2 Z’s that for the the Double Z Fun Fold. The larger one is the card base and the smaller one is where the sentiments and the images are.

On both the large and the small pieces that form Z’s you will first score/fold your cardstock in half and then one of the sections will be scored/folded again just as you do on a regular Z-Fold card. Opposites attract. If you can remember this, you can figure out how to make the Double Z-Fold. The large section of the small piece of cardstock gets attached to the small section of the large piece of cardstock and the small section of the small piece of cardstock gets attached to the large section of the large piece of cardstock. Large to small and small to large.

Sweet Ice Cream – Vertical Double Z-Fold open

The card above is in a horizontal orientation but it can easily be made into a vertical orientation. The only thing you’re going to change when making the vertical orientation is the direction that your images and sentiments are placed.

You will make your vertical card the same way: large to small and small to large. As I mentioned before, this is the key.

To make sure that everything gets lined up perfectly when I adhere the small Z to the large Z I first close up the small Z so that the small section is folded up behind the large Z.

Back of small Z-fold

Place your adhesive on both of these sections. To correctly place this section on the large Z card base make sure the card base is closed . Then you will butt the center folds of the large piece and the small piece together and adhere.

You can see this in the side view picture below. When the card is all closed up the small sections butt up to each other.

Double Z-Fold Side View
Sweet Ice Cream – Vertical Double Z-Fold

One final thing to note about the Double Z-Fold Fun Fold card is that it won’t open to lay flat. You can kind of see this in both of the pictures of the open cards.

To left is a photo of the Vertical Double Z-Fold card in the closed position.

These cards are fun to make! Enjoy!

Have a great day. Take care and Happy Stamping!