Make It Mine Monday: Sweet Strawberry

Make-It-Mine Monday: Sweet Strawberry

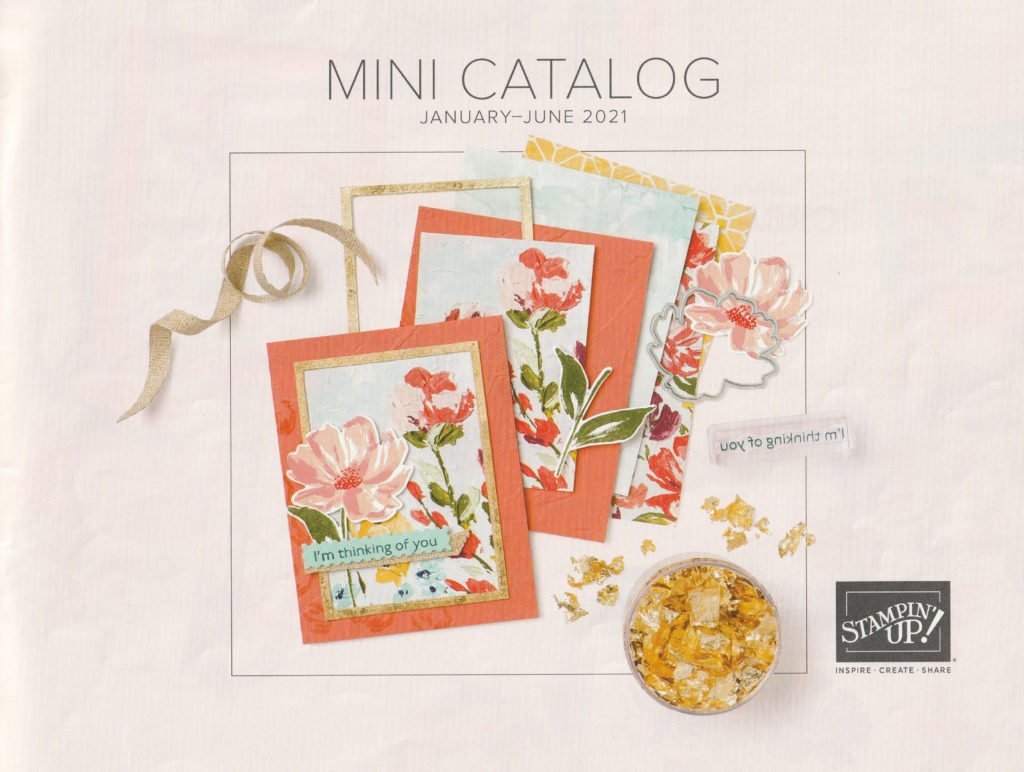
Make-It-Mine Mondays are so much fun! I like seeing what changes I can make to someone else’s card to make it my own. This week I (or should I say “we” since my card is pretty darn close to my inspiration!) used the Sweet Strawberry stamp set and punch from Stampin’ Up!’s January – June Mini Catalog.

The Sweet Strawberry stamp set just screams “SUMMER!” to me but I received my inspiration card in a swap and fell in love with the bright colors and knew I had to recreate it.

Sweet Strawberry card by Mary Knabe

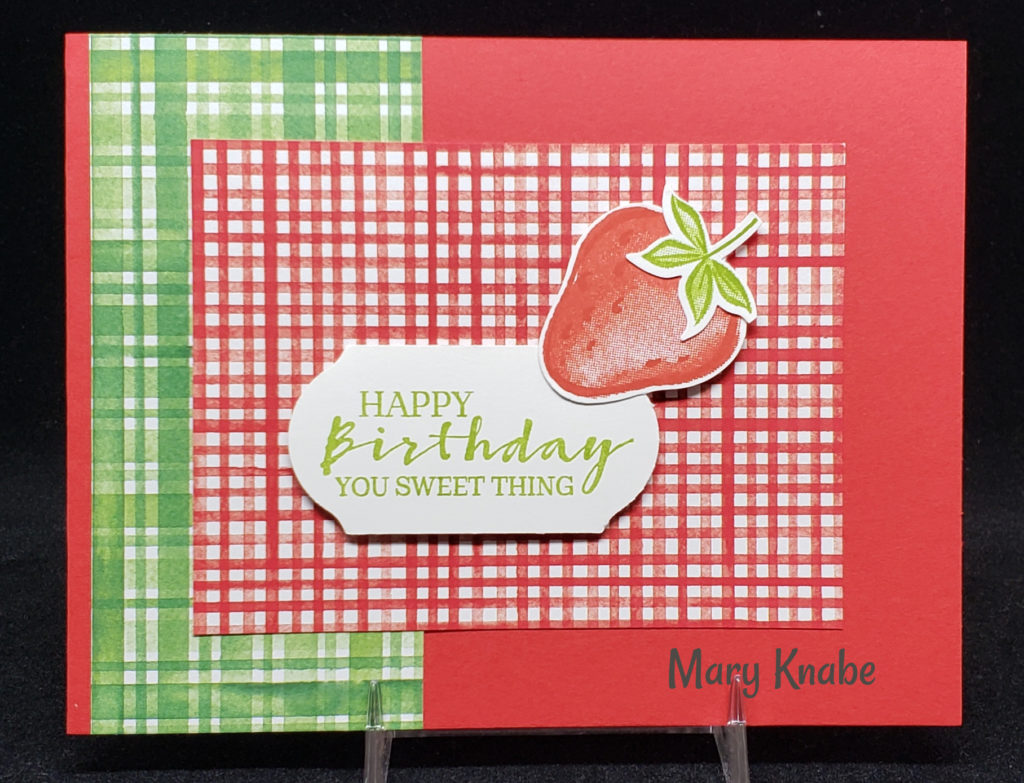
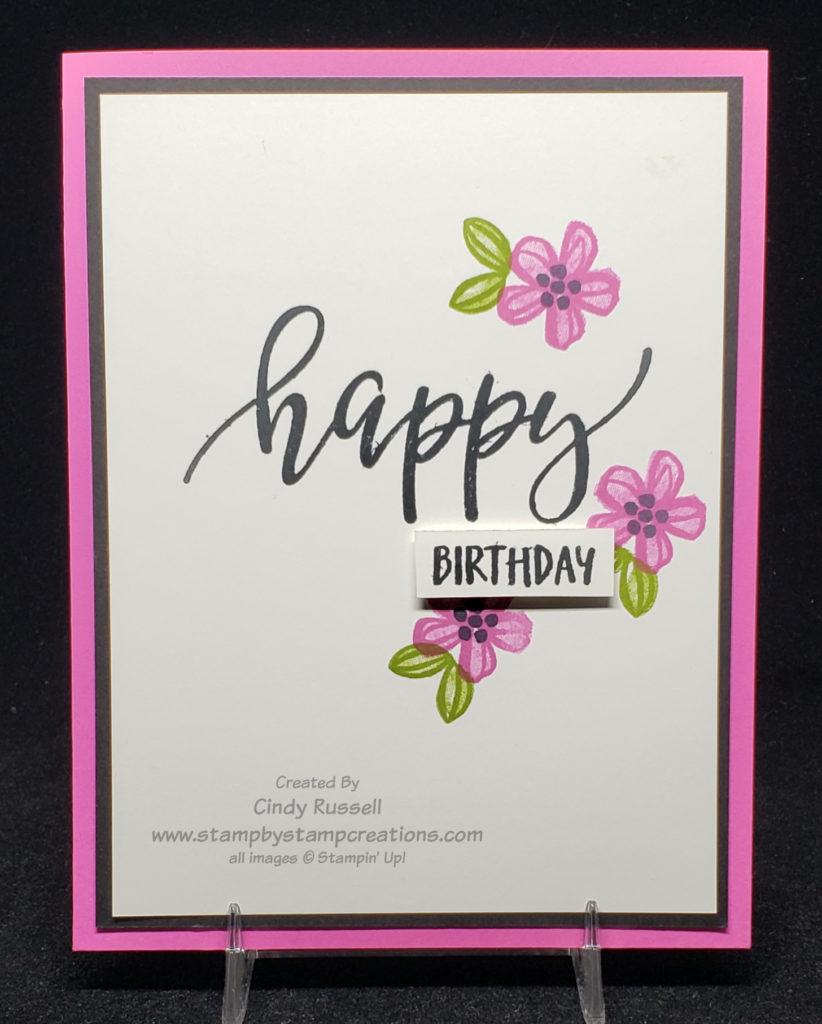
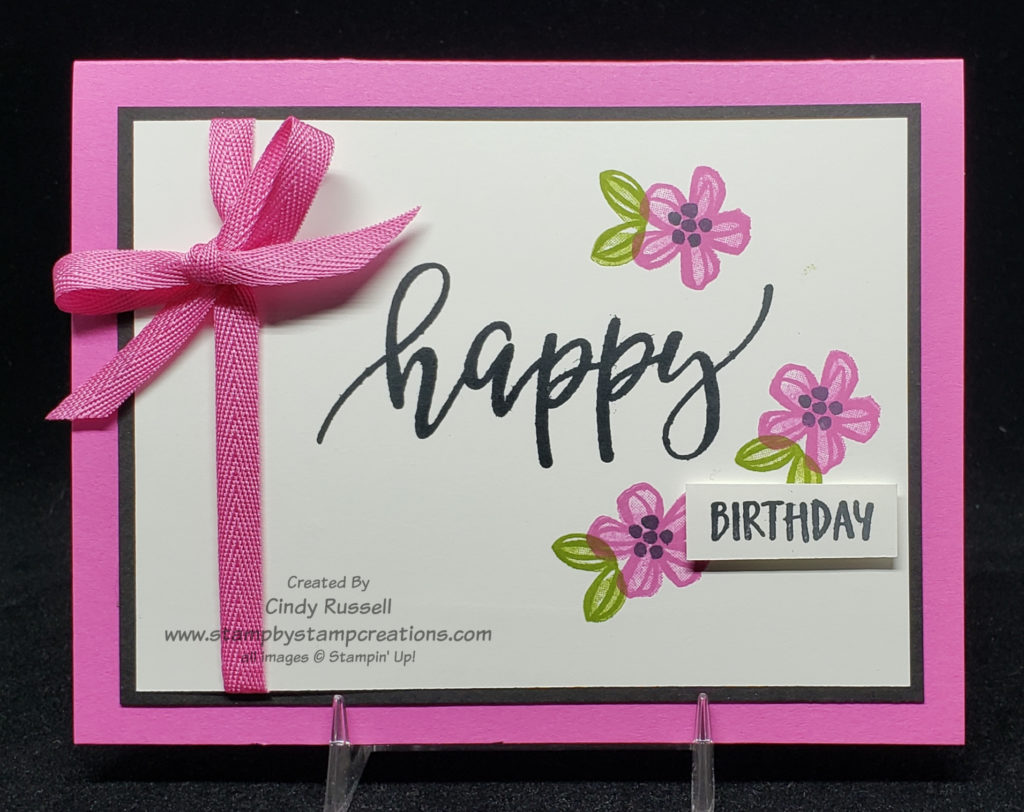
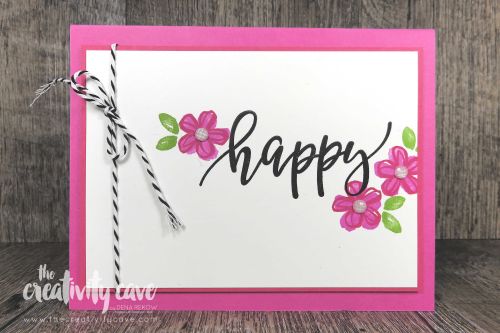
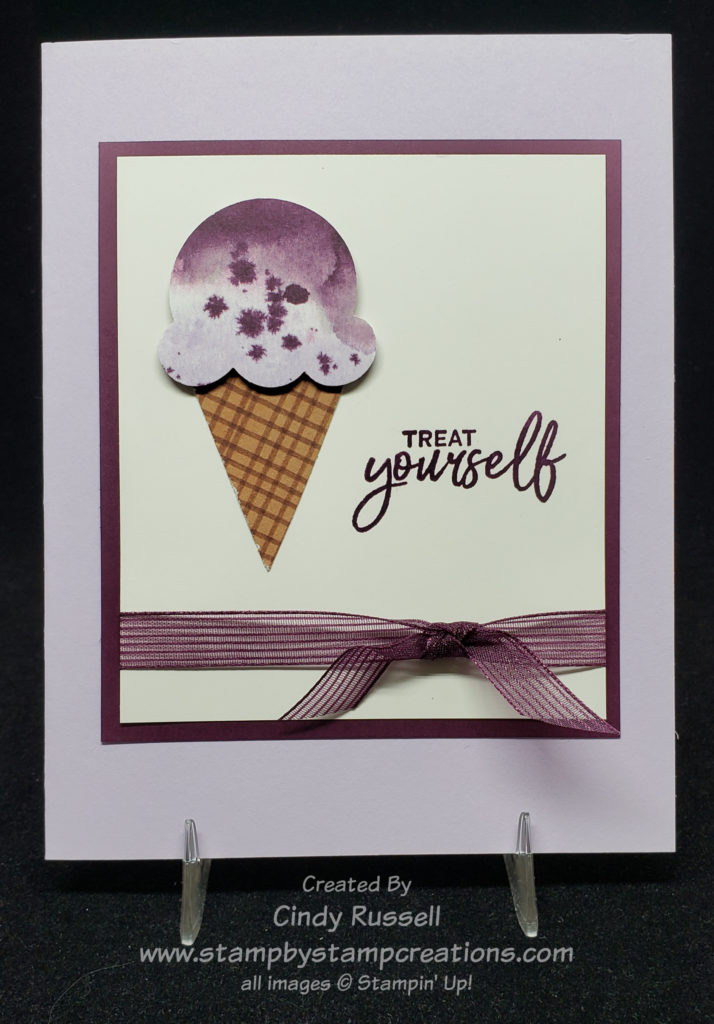
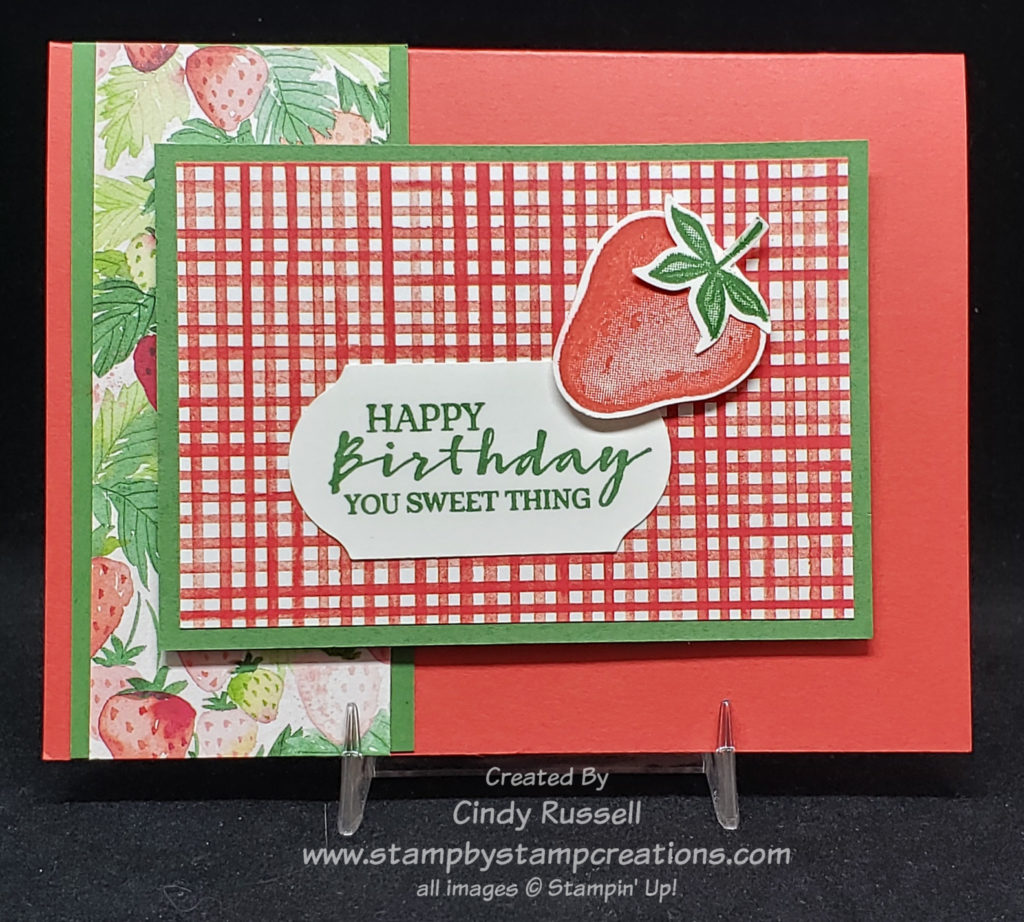
The card at the left is my inspiration. Bright and fun! You know me though….I had to add more layers. If a card doesn’t have about 10 layers it just doesn’t seem complete to me. Ha!

As you can tell by comparing the two cards I stuck pretty close to Mary’s original design. Other than adding a couple of layers, I just changed the ink color and one of the pieces of designer paper,

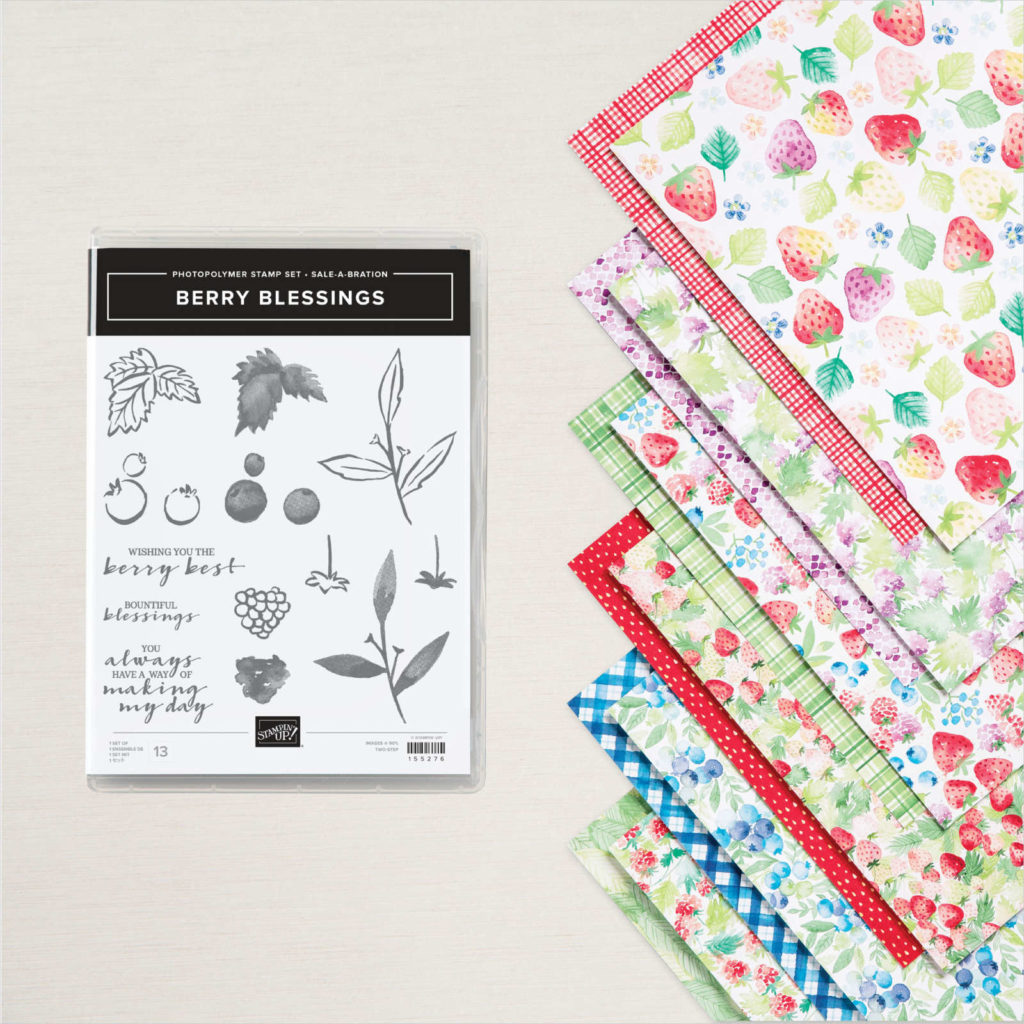
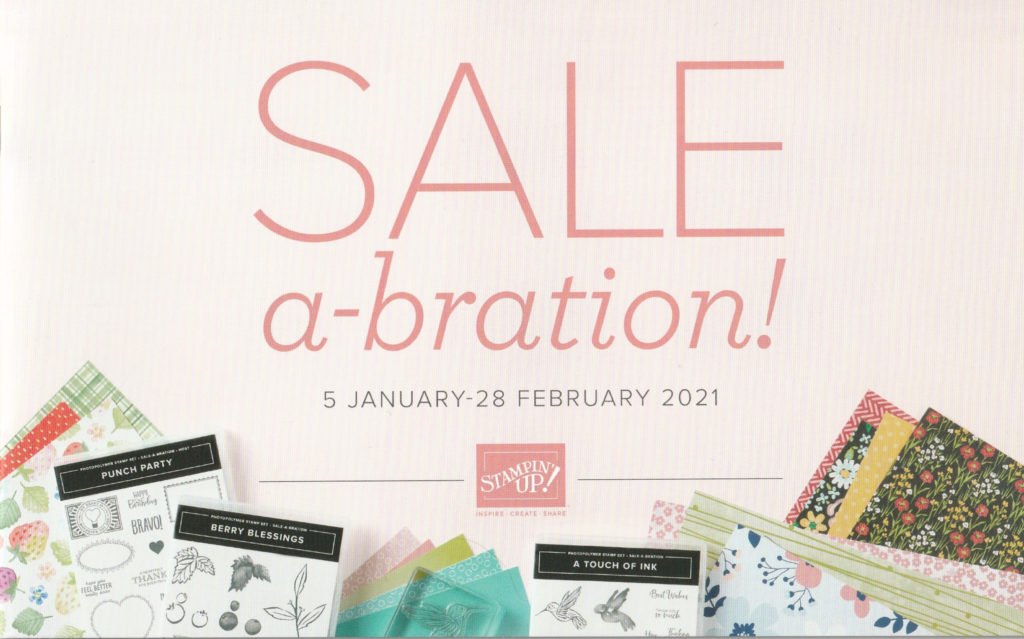
Speaking of the designer paper….where does it come from? It’s not in the January-June Mini Catalog. Hmmm….It’s in the Sale-a-bration Brochure! It’s part of a Level 2 Sale-a-bration offering meaning you need to purchase $100 in product to choose it. It’s called Berry Delightful Designer Series Paper and is bundled with the Berry Blessings stamp set. This stamp set has berries other than strawberries in it. I love how both the Berry Blessings stamp set and the Sweet Strawberry stamp set coordinate with the paper.

Have you played the “Make-It-Mine Monday” game? Where are you getting your inspiration from? I’d love to know. Feel free to share your card and your inspiration in the comments below!

Have a great day! Take care and Happy Stamping!

Fun Folds: Squashed Heart Card

It’s time for another Fun Fold post! Last week, with my first Fun Fold post, we went back to the beginning. I talked about the different ways to cut your cardstock and the different orientations you can have your cards when starting with an 8 1/2″ x 11″ piece of cardstock.

This week I was going to share a simple and popular fun fold but when I was hopping around the internet looking for ideas I came upon this fun design! With Valentines Day coming up soon I knew I had to share this fun Squashed Heart Fun Fold Card with you.

Fun Fold: Squashed Heart Card

This card might look like it’s complicated to make but it really is pretty easy. The hardest part in making it was coming up with the right size heart. Don’t worry. If you’re hoping to recreate this card design I’ve included a template for the heart at the end of this post. 🙂

Start this project with a piece of cardstock that is 8 1/2″ x 8 1/2″ square. Score one side at 4 1/4″. Turn the cardstock 90 degrees and score again at 4 1/4″. You should now have four equal squares. Now score from one corner to the opposite corner. It doesn’t matter which corner you start in.

Squashed Heart Card

Fold and crease all score lines well. The key to this design is folding the diagonal line in the opposite direction that you folded the other two lines. Fold the square lines in valley folds and the the diagonal fold in a mountain fold.

As you can see in the first picture above, the diagonal line is folded in the opposite direction of the other two lines. In the second picture you can see how to fold, or squash, the card. Push in on the two diagonal folds and your folded card will become a square.

Now we need to make the hearts. In the video that I watched on making this card the gal simply took her scissors and cut the hearts. I knew that wouldn’t work for me. After many failed trials I finally came up with a heart that fit perfectly.

Once you have your template, you want to draw it on the two squares with diagonals and one of the flat squares.

It’s hard to tell in my photo above but the two side hearts are the ones with the diagonal score marks through them. Cut along the drawn lines to form the tops of your hearts. With the two side hearts you will need to cut from the edge of the paper to where the heart outline begins. If you look at the collage photo of the card at the beginning of the post you can see what I mean in the last photo.

You can find the template for the heart here. Are you wondering how you can mail or even present this card? What size envelope would work? The finished, closed card is 4 1/4″ x 4 1/4″ so it will fit in a normal Stampin’ Up! envelope that is about 5 3/4″ x 4 3/8″ with a little extra room in one direction. However…..next session I will share with you how to create your own envelope which is perfectly sized for this card along with tips on making any size envelope. So stay tuned!

I hope you’ve enjoyed viewing this fun card. Please leave a comment if you did. Be sure to contact me with any questions you may have either in the comments or by email (cindy@stampbystampcreations.com).

Have a great day! Take care and Happy Stamping!

Make It Mine Monday: Pretty Perennials

Happy Monday!  I hope you all had a good weekend.  Besides the plugged-up kitchen sink, our weekend was quiet.  Luckily my husband is very handy and was able to fix it after working on it for almost two hours!  Hmm….now what should I do with all that money we just saved on a plumber?  Ha!

Have you seen the Pretty Perennials stamp set on page 31 in Stampin’ Up!’s new January – June Mini Catalog?  It’s a fun flower set that has a 22-piece coordinating die set!  You know how I feel about coordination….woo hoo!  I had fun playing with this stamp set about a week ago.  As I was searching the internet for samples I liked I came across this very simple one made by Helen Wigham.  Isn’t is lovely?

Make it Mine Monday: Pretty Perennials

You know me though, I have a really tough time making a card without layers.  If you’re going to add one layer, then you may as well add two, right?  That’s what I did.  The focal point of my card is pretty much exactly the same as Helen’s but I just framed it before putting it on a card base.  The only other thing I changed was the color of the word “happy”.

Pretty Perennials simple card

Why stop at one change though?  I was on a creative roll when I made this first card so I decided to keep going.  This time I switched the orientation of my card and added some ribbon which I think makes the card a little more flirty.  Did you notice that I actually used a real bow on my card?  I haven’t done that in a long time.  The card definitely needed it though to fill in that upper corner.  I like how it turned out so you may seeing more bows on my cards these days.

After writing most of this post I was looking at other samples made using the Pretty Perennials stamp set and I discovered that without realizing it, I had actually CASEd (copy and share everything) another card when I made my second one!  I guess my subconscious is working well!  Ha!  The second card I copied was actually made by Dena Rekow who designed the Pretty Perennial stamp set!

Pretty Perennials by Dena Rekow

I really had fun playing with this stamp set and can’t wait to play with it some more! Have a great day! Take care and Happy Stamping!

Tools of the Trade: Paper Cutter

Welcome to my new series of posts called Tools of the Trade. In this series I will be sharing with you must-have tools for your craft room. You’ll be able to find this series here on my blog as well as on Facebook.

The first tool I want to share with you is one that you can’t do without if you are a paper crafter. This must-have tool is a Paper Cutter or Trimmer. You can’t cut your card bases and layers without one. I guess you could use scissors but then your lines may not be too straight…..I know that would be my problem! 🙂

There are three main types of Paper Cutters on the market for paper crafters.

  • Rotating Blade Cutters have a small rotating blade that you slide along a track. They allow you to maneuver the paper in multiple positions. They are very light weight and usually have a grid pattern on them to help you line up your paper.
  • Sliding Blade Cutters are similar to the rotating blade cutters except instead of rotating blade you have a single blade that slides up and down the track. Most of these type of paper cutters also have a scoring blade.
  • Guillotine Cutters have one long blade that you slice down to cut the paper. These type of cutters are great for cutting multiple pieces of paper as well as thicker pieces of paper.

All three of these types of cutters work great for card making and paper crafting. The type you get is dependent on you. As a Stampin’ Up! Demonstrator I cut a LOT of cardstock so I prefer a durable cutter that can cut more than one piece of paper. Stampin’ Up! used to have a guillotine cutter that I love and still use today. I do have their sliding blade cutter which is perfect for smaller jobs and great for cutting smaller pieces of paper.

I like to use my sliding blade paper cutter when I have to cut and score things at an angle or when I am working with a small piece of paper.

Stampin’ Up!’s Paper Trimmer

If you’re a newbie to paper crafting or just looking for a new cutter I would definitely invest in Stampin’ Up!’s Paper Trimmer. At only $25 the price is right. It comes with both a cutting and scoring blade and has an arm that folds out so it can accommodate a 12″ x 12″ piece of paper. The best part is that you don’t lose any of the measurements on the top grid when you fold out the arm which happens on many paper cutters of this type! The ruler and the grid are covered by durable plastic so they don’t wear off.

I hope I’ve given you a little information on Paper Cutters/Trimmers. This item is a definite must for any paper crafter. Click here if you’d like a little more information on Stampin’ Up!’s Paper Trimmer.

Have a great day! Take care and Happy Stamping!

New Year. New Catalog!

It’s a new year and it’s time for new Stampin’ Up! catalogs! Not only has Sale-a-bration begun but it’s the start of the January – June Mini Catalog (formerly the Occasions Catalog).

Stampin’ Up!’s January – June Mini Catalog

The new mini catalog is full of all sorts of fabulous products that I know you’re going to want to check out. Click here to view the new mini catalog or click on the image in the right-hand column. There are 90 pages in this amazing publication! There are products ranging from love and valentines to a fabulous masculine suite. There are a number of whimsical products too that are definitely catching my eye!

If the Hey Birthday Chick stamp set on page 52 catches your eye you may want to wait until February or after to order because starting in February there will be dies available for this stamp set. If you love dies with your stamp sets you’ll love the fact that you’ll be able to order the two in a bundle at 10% off!

Stampin’ Up!’s Sale-a-bration Brochure

One of the best parts of today is that Stampin’ Up!’s Sale-a-bration begins! Who doesn’t love Sale-a-bration and the opportunity to choose FREE products with a qualifying order? Spend $50 on Stampin’ Up! merchandise and choose an item from the Sale-a-bration Brochure! Woo Hoo! FREE stuff! You can view the Sale-a-bration Brochure here.

So much fun happening in January! Don’t miss out! Check out these fabulous publications and make your wish list now!

Happy New Year! Have a great day! Take care and Happy Stamping.

Simple & Sweet

Hello! It’s Make It Mine Monday and I have something Simple and Sweet for you today! The card is simple and the bundle I used is sweet. Actually, the name of the bundle is Sweet Ice Cream. It’s a brand new bundle that you can find in Stampin’ Up!’s January – June Mini Catalog starting tomorrow (page 49).

The inspiration for my card came from Amy Koenders. You can see her card below.

Sweet Ice Cream

I love how simple Amy’s card is but you know me….I need layers and possibly ribbon on my card. So that’s what I did.

Sweet Ice Cream: Make It Mine Monday

This card was so easy to make because the only stamping on the card was the sentiment! The ice cream and the cone were punched from the coordinating Ice Cream Corner Designer Series Paper with the Ice Cream Cone Builder Punch! How fun is that?!

Do you like Make It Mine Mondays? What would you have changed on Amy’s card to make it yours? I would love to hear what you’d do. Please leave a comment and let me know what you’d change (or not change). Better yet, post a picture of your card!

Have a great day! Take care and Happy Stamping!

The Twelve Weeks of Christmas – Week 12 – Star Ornament

Easy Star Ornament

Last but not least! It’s the last week and the last project of my 12 Weeks of Christmas. I hope you have enjoyed them. This week’s project is an ornament for your tree or to decorate a package with. It’s quite easy to make.

I’ve made my ornament with Gold Foil Sheets but you could use any type of paper that you’d like. You could use Silver or Copper Foil as well as designer paper or even a solid color paper. Whatever type of paper you use the directions will be the same.

The most important tool that you’ll need for this project is your Paper Trimmer with a scoring blade. You can probably use your Simply Scored board but I think things are easier to line up on your Paper Trimmer.

You can find the complete directions with photos here. Basically though, you need to die cut two stars and make 5 score lines on each star. Fold on the score lines, adhere the two stars together and add some thread or ribbon to hang your ornament.

These ornaments are very easy to make and turn out beautifully! You still have a few days until Christmas so head on up to your craft room and make a few more ornaments for that tree!

Merry Christmas!

New Mini Catalog Stamp Camp (To Go!)

SASSY STAMPERS & FRIENDS WINTER 2021 STAMP CAMP (TO GO!)

Hello!  Our first ever Stamp Camp (To Go!) was a success last fall and we are gearing up to bring you another fun contact-free event!

On January 5th the new January – June Mini Catalog comes out and it’s the start of the first of two 2021 Sale-a-bration events for Stampin’ Up!.  This time of the year will be filled with many fabulous new products and we want to share them with you! 

We will be using products from the new Mini Catalog and the Sale-a-bration brochure to create 9 fabulous projects for you to make in the comfort of your own home whenever it’s convenient for you!

With your registration fee for this stamp camp you will receive the Happy Thoughts stamp set which you can view on page 28 of the upcoming Mini Catalog.  This is a lovely stamp set of sentiments which you will be able to use on your Stamp Camp (To Go!) projects.

Here are the details of our Winter 2021 Stamp Camp (To Go!):

·       You will receive all the pieces and parts to make your projects along with detailed instructions.

·       You will need adhesive, Stampin’ Dimensionals, and scissors.  A bone folder would be handy too.

·      The only stamping involved on your projects will be made using the Happy Thoughts stamp set which is included with your registration fee. 

  • Ink will not be included in your kit.  You will need to use your own inks to add stamping to your projects. 

·       The number of kits available are limited.  Register & pay early!

·       Kits will be available mid-February.  Your demonstrator will contact you when your kit is ready.

·       Registration and payment will all be done electronically.  See details below.

Cost:  $50*  (* shipping is an additional $8)

Location:  Wherever you are!

Registration Deadline:  January 15th

Registration Information:

Registration and payment will be done electronically.  Click the link below to complete the registration form.  Once your registration form has been received you will be sent a Paypal invoice from Sassy Stampers & Friends.  You do not need a Paypal account to pay the invoice.  This invoice may be paid with a debit/credit card or with your Paypal account.    Your registration is not complete until payment has been received.

Registration Link:

https://forms.gle/tghNLvt6VyEBoDJL9

I hope you consider joining us! Contact me with any questions you may have!

The Twelve Weeks of Christmas – Week 9 – Slide-Out Gift Card Holder

Slide-Out Gift Card Holder

It’s already Week 9 of my Twelve Weeks of Christmas and I have a fun gift card holder for you. I think my favorite part of this week’s project is the fact that I finally used the adorable Gnome For The Holidays stamp set on it! 😀

These little gnomes are adorable and I’ve been dying to try them on a project. This week’s gift card holder was the perfect opportunity!

I got the idea for this slide-out gift card holder from another demonstrator but I tweaked it a little bit here and there. Here’s what the inside of the gift card holder looks like:

Inside of Slide-Out Gift Card Holder

From this second picture you can see the slide-out mechanism. When you open the gift card holder the section with the gift card in it slides out of the plaid pocket section. As you close the gift card holder the area with the small snowflake will tuck into the plaid pocket section.

You’ll find complete instructions for this project with tons of photos here.

This is a fun project that, like last week’s project, can be used for any occasion depending on how you decorate it. I hope you enjoy this project. Have a great day! Take care and Happy Stamping!

The Twelve Weeks of Christmas – Week 8 – Origami Gift Card Holder

It’s Week 8 of my Twelve Weeks of Christmas and I have a fun and easy gift card holder for you! It’s made with a piece of double-sided designer series paper. When choosing your designer series paper for the project you will want to make sure that both sides coordinate since you will see both sides of the paper when your gift card holder is open.

Origami Gift Card Holder – outside
Origami Gift Card Holder – inside

As you can see from the photos above, I used one side for the outside of my gift card holder and the opposite side for my belly band. Once you’ve made the gift card holder and the belly band you can decorate the belly band however you’d like.

You can find the complete written instructions with photos for this gift card holder here. Hopefully they will make sense. I’ve also recorded a video for you which you can find below:

Be sure to let me know if you have any questions on creating this fun little project. Have a great day, stay safe and Happy Stamping!

The Twelve Weeks of Christmas – Week 7 – Poinsettia Tin

It’s Week 7 already of my 12 Weeks of Christmas! Today I have a fun little Poinsettia Tin to share with you. Have you seen the tins in Stampin’ Up!’s Aug-Dec Mini Catalog? There are rectangular tins like the one I’m showing you today on page 55 and there are round tins with a clear lid on page 68. Be sure to check them out!

Poinsettia Tin

I was pretty excited with the way this tin turned out. Actually, I shouldn’t have been surprised because I copied the design from one of the cards I made for my Stamp Club this month. 🙂

November Stamp Club Project

As you can see, the elements are exactly the same on the card and the tin! On the card, I overlaid the Plush Poinsettia Paper on to a Silver Foil sheet and on the card I made a belly band and wrapped it around the silver tin.

The poinsettia on both projects was made using the fun Red Velvet Paper which coordinates perfectly with the Plush Poinsettia Paper! Both of these specialty papers are fun to use and give your projects great texture.

When making a belly band that wraps around something, you want to be sure not to get it too tight. It’s a fine line because you don’t want it too tight that you can’t get it off but you don’t want it too loose so that it falls off the project. When I make a belly band I like to to pull it nice and snug when I wrap it but then before I adhere the ends together I loosen it just a little bit. You can have the seam of the belly band either on the bottom of the tin or the top. If you have the seam on the top, you’ll want to make sure that you cover it with the poinsettia so that you can’t see it.

You can find out how to make this lovely little project right here along with a little tip on using foil sheets with dies that are a little smaller and detailed.

The Twelve Weeks of Christmas – Week 6 – Santa Treat

We’re already up to Week 6 of my Twelve Weeks of Christmas! That’s half way and it means there’s only 6 weeks left until Christmas. Yikes! Oh, well. It’ll come whether I’m ready or not and it’s sure to be a bit different this year. Let’s just roll with it!

For Week 6 I have another project that gets credited to my talented friend Jan. I’m so grateful that she doesn’t mind me sharing her projects with you. Today’s project is a pretty easy one but definitely a WOW!

Little Chocolate Santa Treat Holder

Isn’t this project adorable? Look at those little Santas! You can use any designer paper that you’d like for the background along with coordinating cardstock. The Real Red 3/8″ Sheer Ribbon works really well because you can still see the Santas underneath it.

The Pine Tree Punch is the perfect size for the little tree decoration. Jan stamped the trees with the Perfectly Plaid stamp set before punching them out but you could use plain trees if you really wanted to. The Perfectly Plaid stamp set and the coordinating Tree Punch are a couple of my favorite items from last year’s Holiday Mini Catalog that you can now find in this year’s Annual Catalog.

The little “believe” stamp is absolutely perfect for this project and is from the Itty Bitty Christmas stamp set. This stamp set has 18 different holiday sentiments for you to choose from!

You can find the directions for this fun and easy project here. Have a great day! Take care and Happy Stamping!

Make It Mine Monday: Curvy Christmas

Curvy Christmas Trees

I am in love with this row of little trees in the all new Curvy Christmas stamp set! They are so stinkin’ cute! What about the coordinating Classic Christmas designer paper? Both of these fun items are only available through January 4th.

It’s Make It Mine Monday and that means I got my inspiration for this card from someone else. The idea for this card came from Susie Wood and her card which you can see below.

Curvy Christmas – Susie Wood

I love how Susie combined the row of trees with the message underneath and included the designer paper too. I decided not to use any die cuts on my card so I colored a piece of Whisper White Crinkled Seam Binding with my Shaded Spruce Stampin’ Blends Marker and added that to my card. I also colored my trees in.

On this Make It Mine card I strayed pretty far from the original card but you can see that I copied a few of the elements. That’s the beauty of copying someone else’s project. It can simply be a source of inspiration like I did on today’s project or you can copy an idea exactly or almost exactly.

Where do you get your inspiration from? I get most of my inspiration on a Demonstrator only Facebook group or from Pinterest.

Have a great day! Take care and Happy Stamping!

The Twelve Weeks of Christmas – Snowflake Ornament Card

Apparently I’m all about the snowflakes this year. This is only Week 5 of my Twelve Weeks of Christmas and this is the third time I’ve used Stampin’ Up!’s Snowflake Splendor Suite on my project. I’m guessing it won’t be the last time either. I promise I’ll work on giving you a little more variety, but the snowflakes are so gorgeous!

Snowflake Ornament Card

Isn’t this card gorgeous? I have my friend Jan to thank for it. She had originally made this card for a swap we both participated in and I fell in love. I knew I had to share it with you. I did remake it for myself but the only thing I changed was the layering of the snowflakes.

The focal point of the card is the ornament. The circle with the large snowflake on it with the ribbon loop is the ornament. It is made from two large, stitched circles that are held together with a Foam Adhesive Strip which runs vertically from top to bottom. If you notice, the front two sections of the card don’t meet up. That’s because you slip the foam adhesive strip along this gap. The back part of the ornament goes on the inside of the card and the front part of the ornament is on the outside of the card.

How the ornament card works.

The small snowflake on the front of the card acts as a stop so that the ornament can’t slide all the way through the gap. Quite clever! I think if I sent this card to someone I might include directions with it so the recipient would know how to open the card. I’ll admit that I didn’t realize that the ornament focal point slid up until Jan showed me.

This is definitely a WOW project but it really wasn’t difficult to make. You can find instructions complete with photos here if you’d like to recreate it. Let me know if you have any questions on it.

Have a great day! Take care and Happy Stamping!

Make It Mine Monday: Ornamental Envelopes

A few weeks ago I shared with you the Ornamental Envelopes Bundle. I really had a fun time playing with this bundle. The card below is actually the first card I made using this bundle. It’s a fun fold card where just the middle section with the ornaments on it opens.

Ornamental Envelopes CASE

I stayed pretty true to the original card when CASEing (copy and share everything) it. Many times I change a lot on a card but this time I only changed a few things. I didn’t use a die on the Whisper White piece on the card front and I added a little more color and some jewels to my ornaments. The sentiment is also on the inside of my card instead of the front of the card.

Getting inspiration from fellow stampers is definitely easier than coming up with a totally original card. Thank you Jan Musselman for the inspiration I got from your card here. Don’t you love the way Jan added some of the designer paper to the flap of the envelope? Remember: No Naked Envelopes! 😀

Have a great day! Take care and Happy Stamping!