Make It With Vellum!

Vellum always adds a little something-something to a project. I wish I would remember to use it more often on my projects!

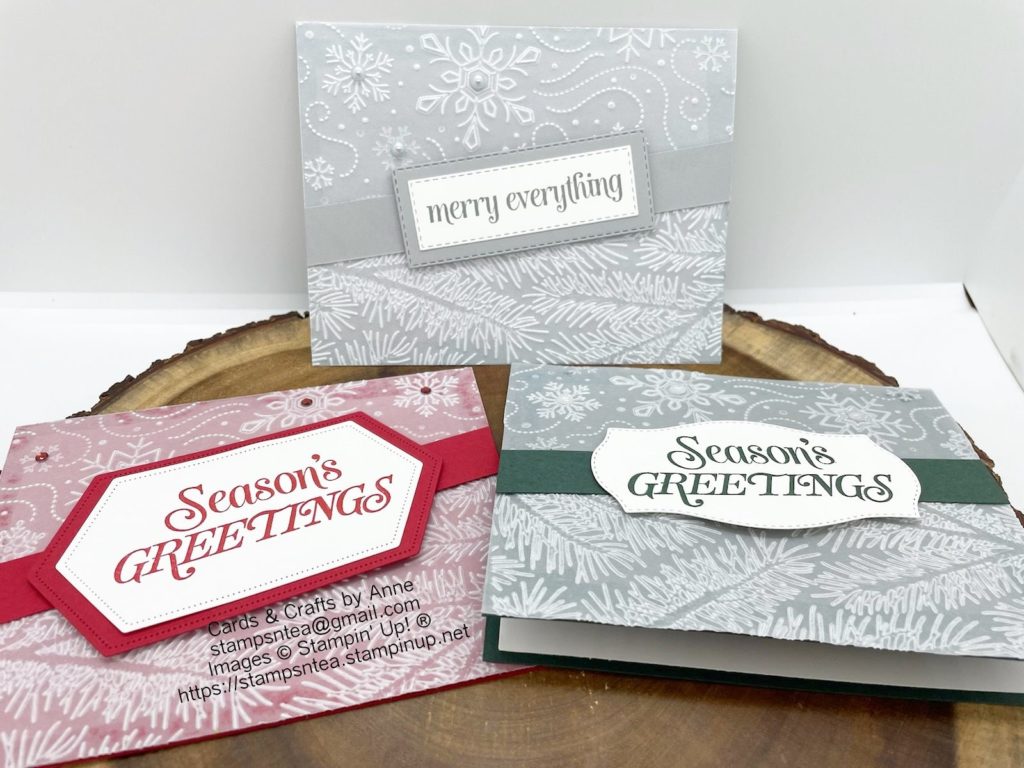
These projects by Anne were just the nudge I needed. They’re very simple but the embossed vellum makes the cards pop! I couldn’t wait to get my supplies out and start creating!

Anne used the Wintery 3D Embossing Folders from Stampin’ Up!’s Annual Catalog to make her cards. Both the snowflake folder and the pine bough folder come in a set together. These are smaller folders that fit perfectly in the Mini Stampin’ Cut & Emboss Machine. Of course they work just fine in the full size model too.

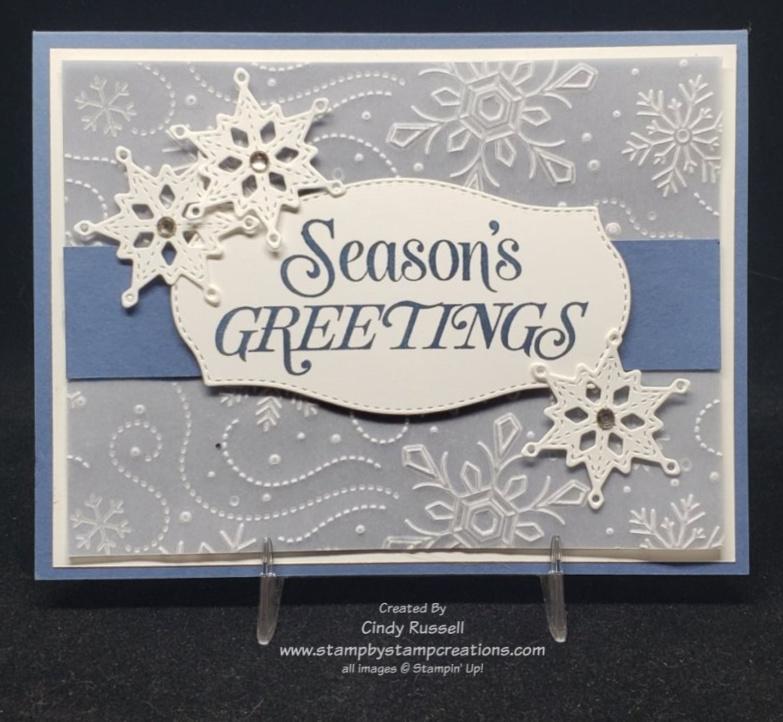
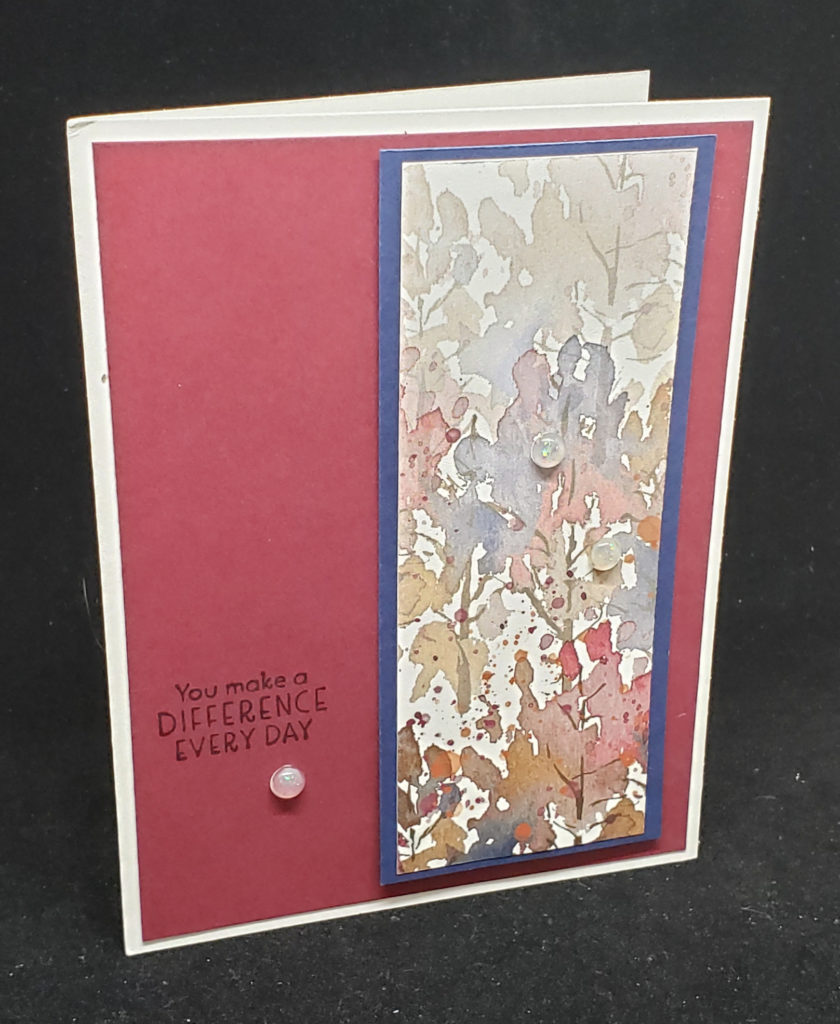
Here’s my take on Anne’s projects. I decided to only use the snowflake folder on my card and kept the snowflake theme by adding a few Stitched Snowflakes to the card. Naturally I had to add a few layers to my card too. Ha!

The issue when using vellum is adhering it so that the adhesive doesn’t show through. To adhere the vellum on my card I added a strip of adhesive to the edge of the vellum that would stick under the Misty Moonlight strip of cardstock.

The “Season’s Greeting” sentiment is from the Merry Everything stamp set. I also used one of the other sentiments from this stamp set on the inside of the card. I die-cut the sentiment using one of the labels from the Tasteful Labels Dies. This is definitely one of my go-to sets of dies. I love all the different sizes and shapes of labels it has.

This is a fun and easy card! I hope you like it. Have a great day. Take care and Happy Stamping!

A Non-Traditional Halloween Card for Make It Mine Monday

Nontraditional Halloween Card with Sparkle of the Season

Today I really changed things up with Make It Mine Monday!  Both cards are made using the fun and versatile Sparkle of the Season Bundle but after that…..well, you decide!  Ha!

There were two things on the original card that caught my eye and made me want to make it mine.  The first was my favorite checked ribbon and the second was the little bats on the card.  I love stamped, punched or die-cut bats but I’m pretty sure I’d be totally freaked out if I encountered a real bat.  After including the those two items on my card all bets were off and the card was my own.  I guess I did use the same pattern of the Cute Halloween designer paper.

The bundle used to create both the original card and my card is the Sparkle of the Season Bundle (page 58 in Stampin’ Up!’s Mini Catalog).  In the Seasonal Swirls dies that coordinate with the Sparkle of the Season stamp set there are three different swirled wreath dies.  One has Christmas greenery, one has leaves and the last one has stars.  On the card that inspired me the creator used the wreath with leaves and added pumpkins.  For a Halloween card I wanted to use the wreath with the stars and I wanted my stars to be yellow which is why my Halloween card is black and yellow instead of black and orange.  Now that I’m writing this I guess I could have used the traditional Halloween colors but…I didn’t.

Have a great day!  Take care and Happy Stamping!

Celebrate With Sunflowers: Make It Mine

This lovely card made with Stampin’ Up!’s Celebrate Sunflowers stamp set really caught my eye. My first thought was “nice card but sunflowers are yellow!”. Well, I had to look it up but apparently you can find sunflowers in colors other than yellow if they are crossbred. Who knew? I admire the creator of this card for stepping outside the box. I also admire them for doing such a nice job of coloring with their Stampin’ Blends Markers!

How do you switch up such a nice card? Well, you first make the sunflower yellow! Ha! I guess I’m a purist. Of course then I had to decide which of Stampin’ Up!’s yellows to use. As with many of the color decisions I make when creating a project I let my ribbon make the decision for me. After seeing the lovely original I knew that I wanted to add ribbon and thought that the Bumblebee Gingham Ribbon would work perfectly with a sunflower.

Celebrate Sunflowers

Lately, I’ve really been into using dies on my projects so that is what I chose to do with my sunflower. I’m not very good at coloring either.

I stamped both the flower image and the leaves before die-cutting the solid portions and then I die cut the intricate pieces after adding a piece of Adhesive Sheet to the back of the cardstock.

The more I thought about it, I guess I did change up quite a bit on the card. The only things that I didn’t change were the basic layout of the card and the stamp set I used. That’s the whole idea of Make It Mine Monday. Get inspired! Take a card that catches your eye and start from there.

Have a great day. Take care. Happy stamping. Be inspired!

Make It Mine With Daisy Garden

Daisy Garden

You may have missed the Daisy Garden stamp on your first, second and maybe even third time through Stampin’ Up!’s Annual Catalog. It’s a hidden gem on page 106. The colored samples on the page are what catch your eye and the image of the stamp is on the smaller size.

Daisy Garden is a single large stamp. It’s perfect for backgrounds but also works well as a focal point. Once I finally noticed it I knew I needed it on my stamp shelf. Who doesn’t like daisies? (wink, wink!)

When looking for a card to make with the fun Daisy Garden stamp I came across this striking black and white card. It’s simplicity caught my eye. There I go again with the simple cards. My tastes must be changing. Anyway, I liked this card so much I decided to Make It Mine.

The first thing I had to do was add another layer to the card. You know me and my layers. Then I decided it needed a little color so I added the layer of Bumblebee cardstock and colored the centers of the flowers with my Bumblebee Stampin’ Write Marker. Next was adding the Bumblebee Gingham Ribbon.

As you can see from the photo of my card I didn’t stop there. I liked the card but it looked a little flat. I had seen another card online where the creator had stamped the daisies a second time, cut out three of them and popped them on to the card with Stampin’ Dimensionals. So that’s what I did and it made the card just right! It gave the card a little dimension.

What you can’t see from the phot is that I also added a little Wink of Stella Glitter Brush to the centers of the flowers. Such a fun and summery card! I love the way it turned out!

Have a great day! Take care and Happy Stamping!

Make It Mine: Make It Simple!

Those of you who have followed me for a while know that simple and Cindy don’t usually go together.  I’m all about layers with ribbon.  Despite the fact that I don’t do simple there was something about this card by Sue Vine that caught my attention.  I loved it and knew I wanted to share it with you.  What better way to share it than change it up, right?

Well, if you look close at the two cards you will see that I didn’t change a whole lot about Sue’s card.  I did change the color of the card base as well as the color of one of the inks.  Sue used a white card base and I used a Bermuda Bay card base.  The only other thing I changed was the color of the lighter ink.  The original card has Coastal Cabana as the light ink and I used Pool Party.  The only reason I switched this color up was that my Coastal Cabana was stamping too dark and if I stamped it off first it stamped too light.  Pool Party to the rescue!  😊

Biggest Wish

Sue and I both used the Biggest Wish stamp set.  It’s really a fun set to use.  There are only five different words in the set but they all come in both a block font and a script font.  It makes it fun to combine them as you can see on our cards.

I do have to admit that I was itching to emboss the front of card but I resisted.  Keep it simple!  Simple stamping is difficult for me but I do need to try it more.  The results can be stunning.

Have a great day! Take care and Happy Stamping!

Make It Mine: Beauty of the Earth

Stampin’ Up! makes such beautiful paper that sometimes you just need to make it the focal point of your card.   The first card that I’m sharing here is the card that inspired me.  Simple, yet elegant.  I received this card in a swap and unfortunately there was no name on it so I don’t know who to credit.

The piece of designer paper used on this card is from the Beauty of the Earth package.  It is beautiful and layering it on Night of Navy cardstock makes it pop.  Those of you who have been around me for a while know that I have a hard time with “simple”.  I usually have to add layers and embellishments to my cards.  However it was the simplicity of this card that caught my eye and I knew I had to give it a try.

Beauty of the Earth Sympathy Card

If you look closely at my version of the card you will notice that this time I actually used one less layer!  What? I know, it’s pretty different for me.  I tried layering my version like the original but I felt that by just layering the designer paper and popping it up on the card base with Stampin’ Dimensionals kept the focus on the designer paper better.

On the original card the sentiment is stamped directly on to the Merry Merlot cardstock with Night of Navy ink.  I felt this was a little hard to read.  I didn’t want to stamp my sentiment on a label because I thought that that would fight with my designer paper focal point.  I thought I’d just try a strip of Basic White cardstock and tuck it under the focal point.  Guess what?  I LOVE it!  What do you think?  I am definitely going to have to try this little trick again.  It’s just enough to add a little something-something to the front of the card but not enough to detract from the focal point. 

Do you love designer paper as much as I do?  Don’t forget that Stampin’ Up! has 9 different packages of designer paper on sale this month.  Don’t miss out!  Check out what’s on sale right here