The Wonderful Snowflake accent is gorgeous! Shiny and iridescent on one side, white on the other. You’ll find them on page 25 of Stampin’ Up!’s July – December Mini Catalog with the Whimsy and Wonder Suite of products. But guess what? They go equally well with the Peaceful Place Designer Series Paper on page 37. Coordination is definitely the name of the game!
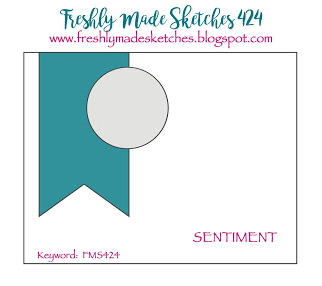
How did I do on today’s card sketch? When I first saw this sketch I knew that this snowflake was perfect for the focal point. Then I needed to find designer paper that had snowflakes on it. Yes, Stampin’ Up! has a number of patterns of designer paper with snowflakes but I went with this Peaceful Place design because it looked a little more elegant with the iridescent snowflake.
I adhered my snowflake directly to the front of the card. I think I’ve mentioned this before when I’ve used it but a Stampin’ Dimensional fits perfectly in the center of the snowflake. Quite convenient! 🙂
This card sketch was pretty easy. Give it a try! I’d love to see the results!
Have you checked out the Gingerbread & Peppermint Suite of products in Stampin’ Up!’s July-December Mini Catalog? So cute! So fun!
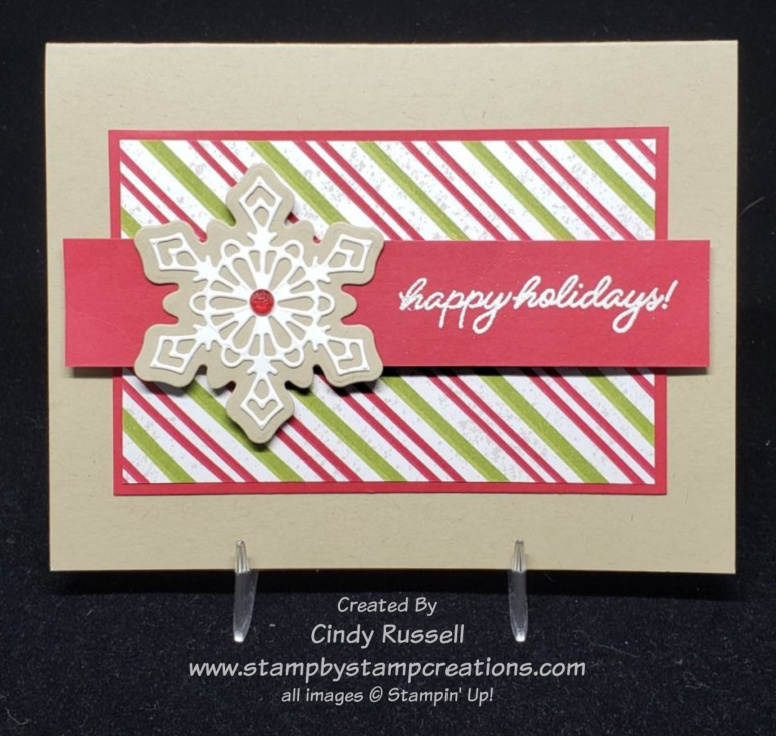
One of my favorite parts of the suite are the gingerbread cookies that you can die cut with the Gingerbread Dies. Not only can you cut out four different shapes of cookies but you can die cut the intricate frosting patterns too! So fun! Of course, one of the best features of these dies is that they will cut out designs from the Gingerbread & Peppermint Designer Series Paper too! Love that coordination!
I saw Amy’s card above and loved the way it featured the cookies as well as some of the fun patterns of the designer paper so naturally I had to see what I’d come up with from her design.
I actually kept pretty close to Amy’s design on my card. My card is a little simpler. Say what? My card is simpler? How did that happen! I’m always adding more! Ha!
This suite of products is perfect for all of your holiday projects. Did you notice that I used the Gingerbread Dies on myfun fold card last Friday? I told you I liked them!
The Red Rhinestone Basic Jewels from Stampin’ Up!’s Annual Catalog or the Wonderful Gems embellishments in the Mini Catalog make the perfect addition to your Gingerbread “cookies”. The cinnamon candies are the first decorations I like to put on Christmas cookies.
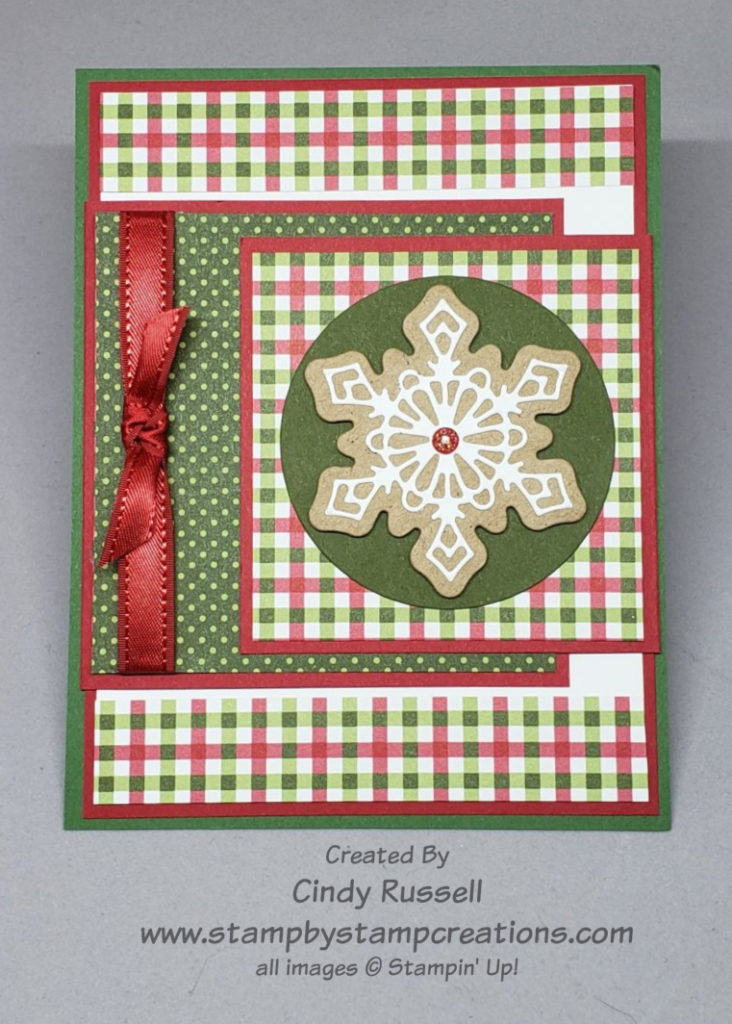
Today’s Fun Fold Card is the Overlapping Fun Fold. The person online where I first saw this fold just called it a “Fun Fold”. I like to be a little more descriptive with my titles as it makes it easier to go back and find. I couldn’t think of anything real creative so I just called it like it was. There are two side flaps on this card and they overlap each other. That’s as clever as I got with this one. Ha!
This fun fold isn’t difficult but it’s not as easy as some of the others I’ve been sharing with you either. The only “tricky” part of this fold is adhering the front flaps of the card so they don’t show on the back.
The fun part of making this card is deciding on your pattern(s) of designer paper. I said pattern or patterns because you could go from having all of the patterns of paper the same to having them all different! I used Stampin’ Up!’s Heartwarming Hugs Designer Series Paper which you can find in the July-December Mini Catalog on page 57. I was so glad to see these papers carry over from last year because they are fun patterns in your traditional Christmas colors.
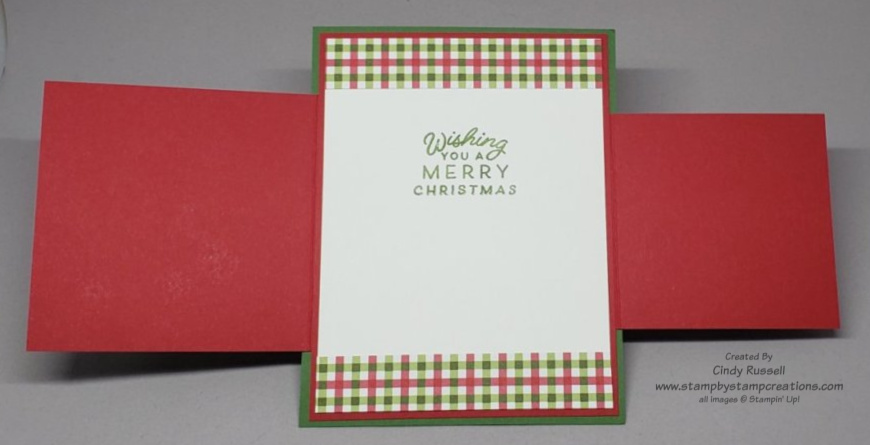
The key to getting everything lined up correctly on this card is to first adhere the small strips of designer paper to the top and bottom of the inside sheet of cardstock. You want to do this so that you can line up your flaps on them.
Below is a video that shows the basics on how to put this card together.
Here are the dimensions of the pieces you need for this card:
Garden Green (base): 5 1/2″ x 4 1/4″ Real Red Layer: 5 1/4″ x 4 Basic White: 5 1/8″ x 3 7/8″ Real Red Left Panel: 4″ x 3 1/2″ score 1/2″ on 4″ side Real Red Right Panel: 3 1/2″ x 3″ score 1/2″ on 3 1/2″ side Designer Paper: 3/4″ x 4″ (cut 2), 3 1/4″ x 3 1/4″, 2 3/4″ x 2 3/4″
I hope you enjoy this fun fold. Have a great day! Take care and Happy Stamping!
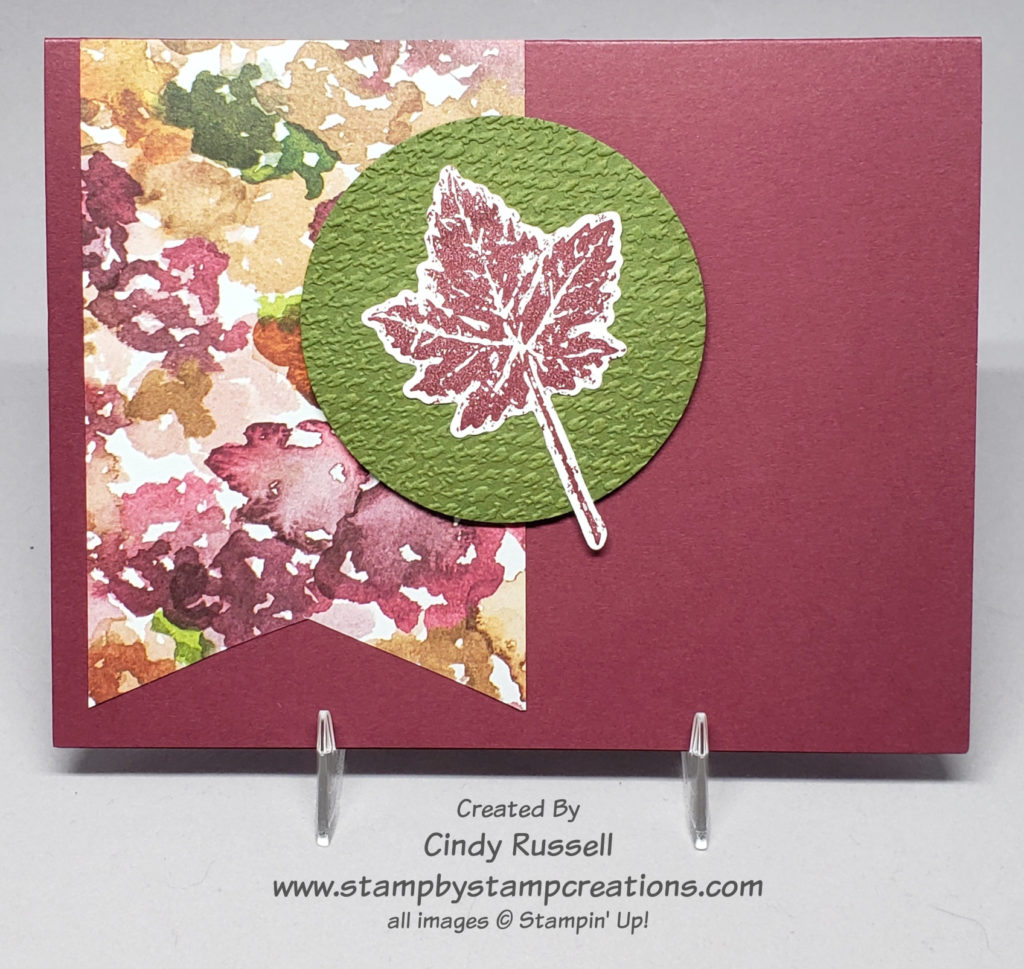
Woo hoo! It’s officially the second day of Fall so it makes sense that I post a Fall card for today’s card sketch.
Ok folks…take a good look at my card for today….now take a look at the card sketch. Are you impressed? I actually left something OFF with my rendition. Unbelievable!
The gorgeous Beauty of the Earth designer paper is so perfect for Fall. I love all of the rich colors. Golds, browns, reds and greens. So pretty! Do you recognize the color of my card base? I used Merry Merlot which is one of those colors that may get forgotten. I know I mostly think about using it in Fall and for Christmas cards. I stamped the leaf from the Gorgeous Leaves stamp set in Merry Merlot and die cut it with the Intricate Leaves Dies.
This was a fun and easy card sketch to make. I can’t wait to see what I’m going to post for next week’s sketch. Have a great day! Take care and Happy Stamping!
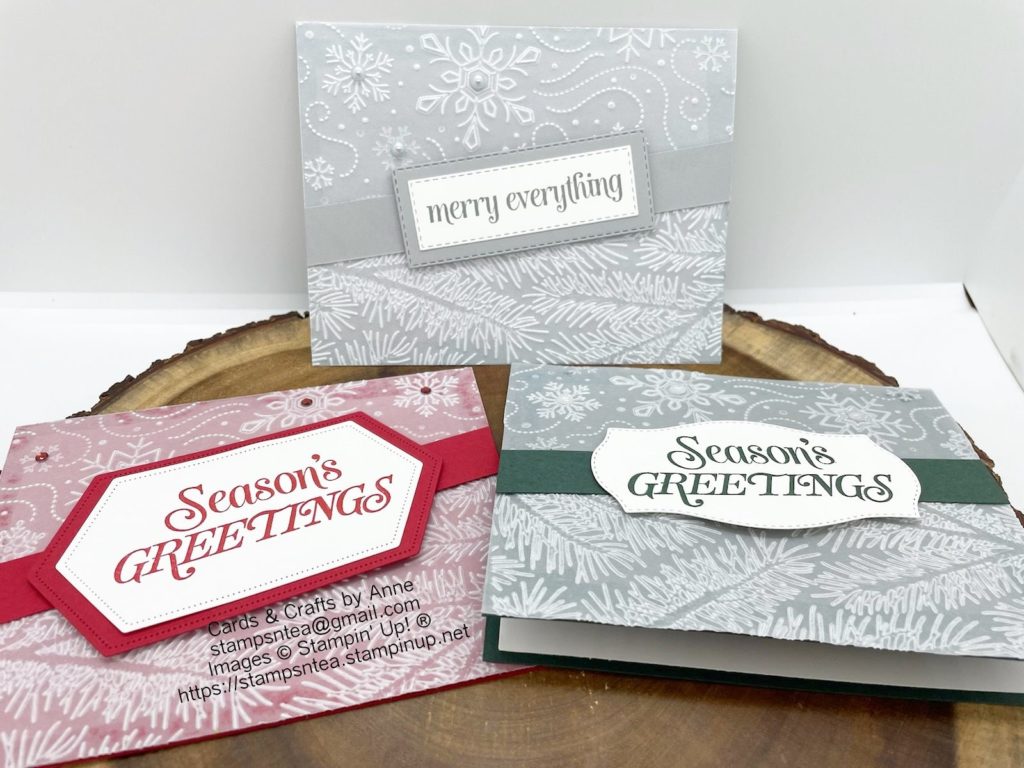
Vellum always adds a little something-something to a project. I wish I would remember to use it more often on my projects!
These projects by Anne were just the nudge I needed. They’re very simple but the embossed vellum makes the cards pop! I couldn’t wait to get my supplies out and start creating!
Anne used the Wintery 3D Embossing Folders from Stampin’ Up!’s Annual Catalog to make her cards. Both the snowflake folder and the pine bough folder come in a set together. These are smaller folders that fit perfectly in the Mini Stampin’ Cut & Emboss Machine. Of course they work just fine in the full size model too.
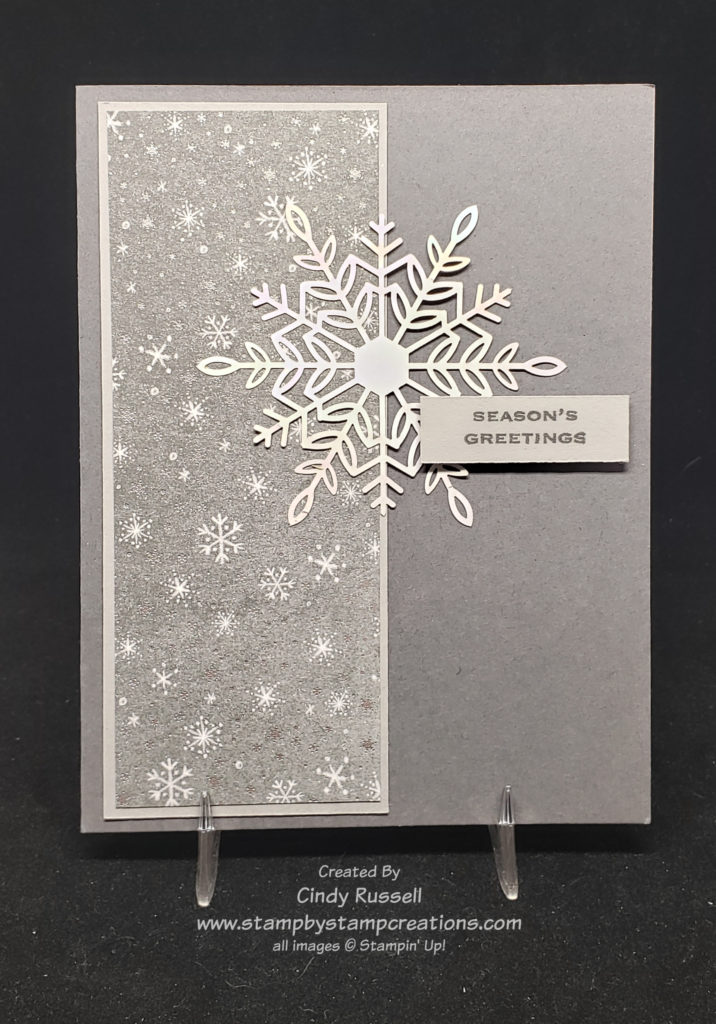
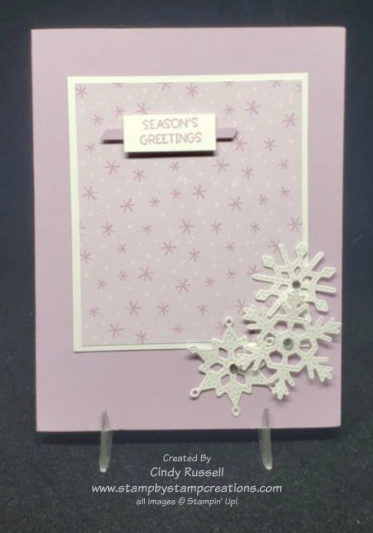
Here’s my take on Anne’s projects. I decided to only use the snowflake folder on my card and kept the snowflake theme by adding a few Stitched Snowflakes to the card. Naturally I had to add a few layers to my card too. Ha!
The issue when using vellum is adhering it so that the adhesive doesn’t show through. To adhere the vellum on my card I added a strip of adhesive to the edge of the vellum that would stick under the Misty Moonlight strip of cardstock.
The “Season’s Greeting” sentiment is from the Merry Everything stamp set. I also used one of the other sentiments from this stamp set on the inside of the card. I die-cut the sentiment using one of the labels from the Tasteful Labels Dies. This is definitely one of my go-to sets of dies. I love all the different sizes and shapes of labels it has.
This is a fun and easy card! I hope you like it. Have a great day. Take care and Happy Stamping!
You’re probably tired of hearing me say this but I’m ready for FALL!!!!! Give me that cool weather and those colored leaves.
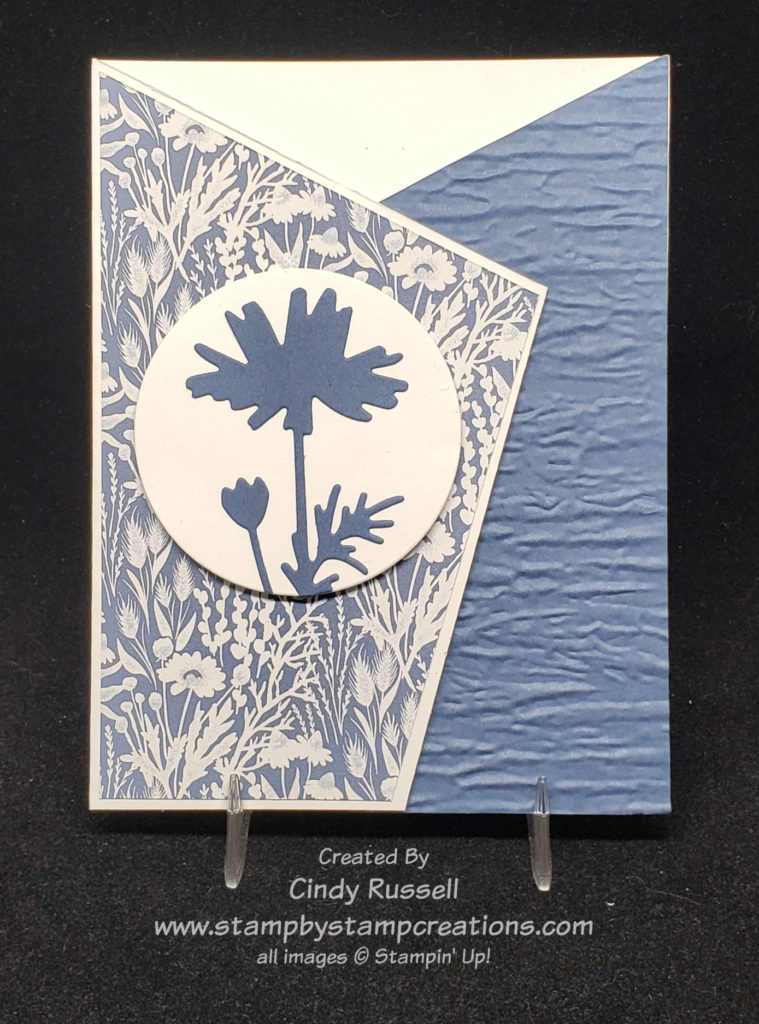
Since I’m so ready for those colored leaves I knew I wanted to use Stampin’ Up!’s gorgeous Beauty of the Earth Designer Paper on today’s fun fold. Don’t you love the color combination on this pattern? Night of Navy, Merry Merlot and Cinnamon Cider!
This fun fold is pretty easy to make. You only need two pieces of colored card stock, two pieces of designer paper, two pieces of Basic White cardstock and your embellishments/stamps. For tools you will need your Simply Scored or your Paper Trimmer with a scoring blade, your Stampin’ Cut & Emboss Machine and your Layering Circle Dies.
I used my favorite Stitched Leaves Dies to embellish the card. A stamped image would work well in the focal point circle also but I seem to be on a die kick. I’d rather find a die that works for my project than stamps and ink. Yes, it’s kind of weird. Hopefully this is just a phase I’m going through. Ha!
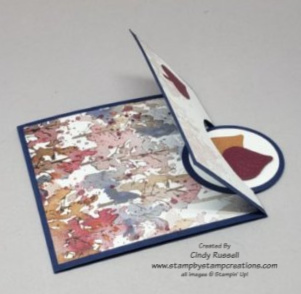
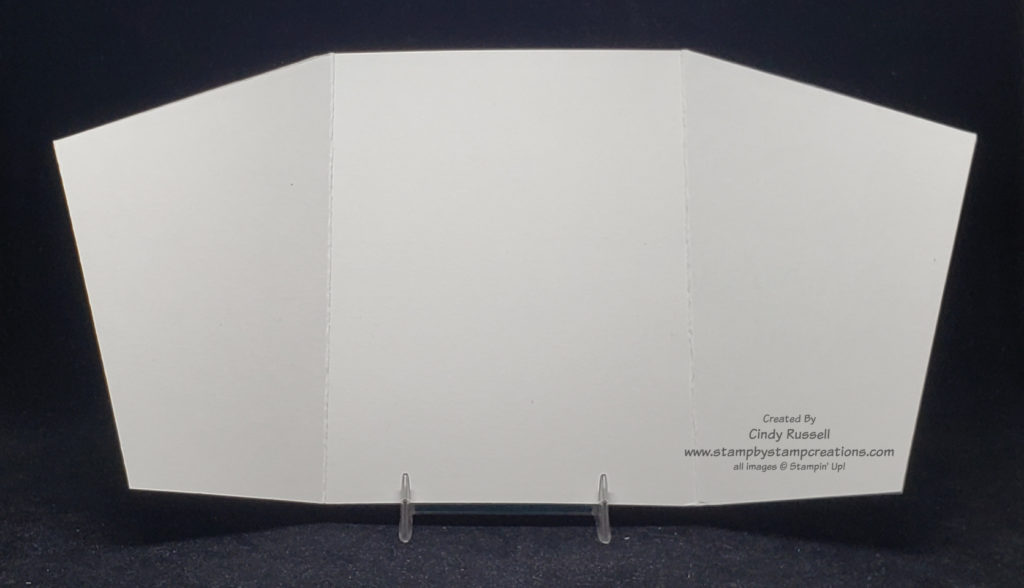
Here is another view of the card. You can see how the top flap opens up and that the circle is part of the base of the card. (You also can see more of that gorgeous designer paper!)
These two photos show you the two different sides of the card. The photo on the left shows the inside and the photo above shows the “outside”. These photos give you a good idea on how the card is put together.
I’ve posted a video below with some tips and tricks for putting this fun fold card together. The fun fold isn’t hard to make, it’s just easier with these tips and tricks.
Dimensions for the card:
Night of Navy cardstock: 4 1/4″ x 11″, 2 1/4″ x 2 1/4″ Basic White cardstock: 4″ x 4″, 2 1/4″ x 2 1/4″ Designer Paper: 4″ x 4″, 2 1/4″ x 4″ scraps for leaves
Here is a quick video to show you how to make the Tent Topper Fun Fold card along with some tips and tricks.
I hope you’ve enjoyed this fun and easy card. Have a great day! Take care and Happy Stamping!
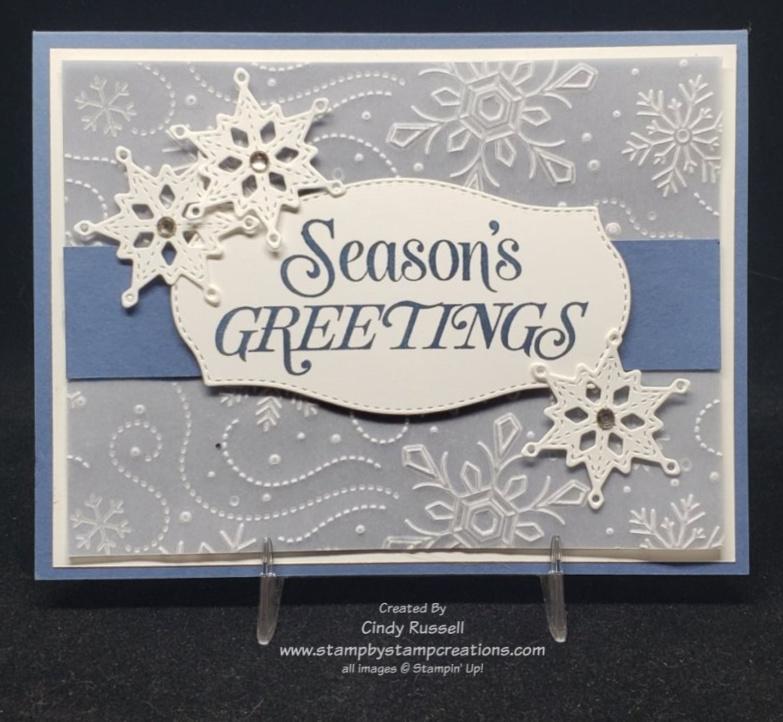
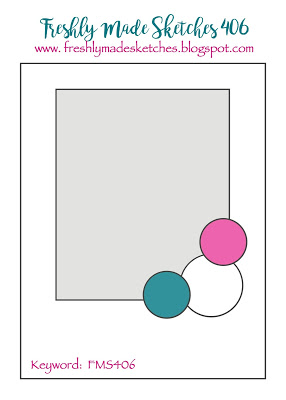
What a fun card sketch for today! The hardest part was figuring out what images to use down in the corner. Since I’ve been working on tons of Christmas card designs snowflakes won out!
Have you checked out the Stitched Snowflake dies that are bundled with and coordinate with the Merry Snowflakes stamp set on page 13 of Stampin’ Up!’s July – December (Holiday) Mini Catalog? I love these die because the stitching sets them off perfectly! You can see three of the snowflakes on my card. Of course, you don’t want a naked snowflake so I had to add a rhinestone to the center of them. Ha!
Once again I managed to create above and beyond the sketch. The extra layer was a given but I also added the little sentiment and the strip of cardstock to make it pop. Maybe if the designer paper was a little brighter and busier I could have got by without the sentiment but I think it finishes off my rendition perfectly.
The designer paper is the Penguin Playmates paper from the Sale-a-bration Brochure. It’s a package of designer paper that you can choose for FREE when placing a $50 order but only through September 30th. The sentiment is from the Penguin Place stamp set on page 33 of the July – December Mini Catalog and yes, the paper coordinates with the stamp set! Gotta love coordination!!!
What products would you use on a project if you were using this card sketch? I’d love to know! Leave a comment and let me know!
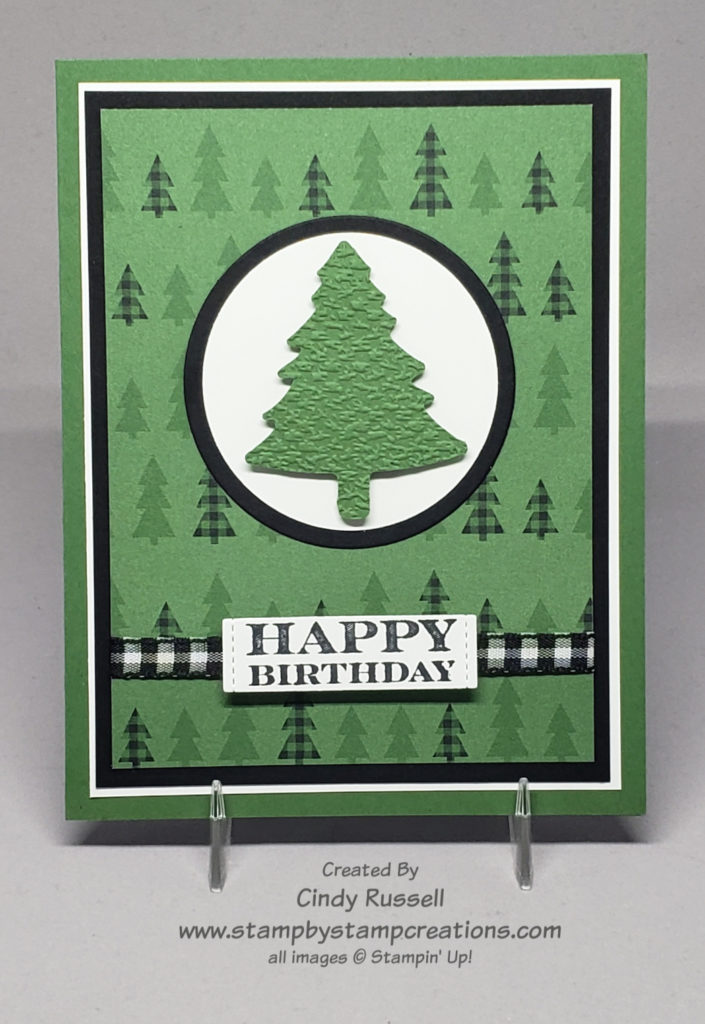
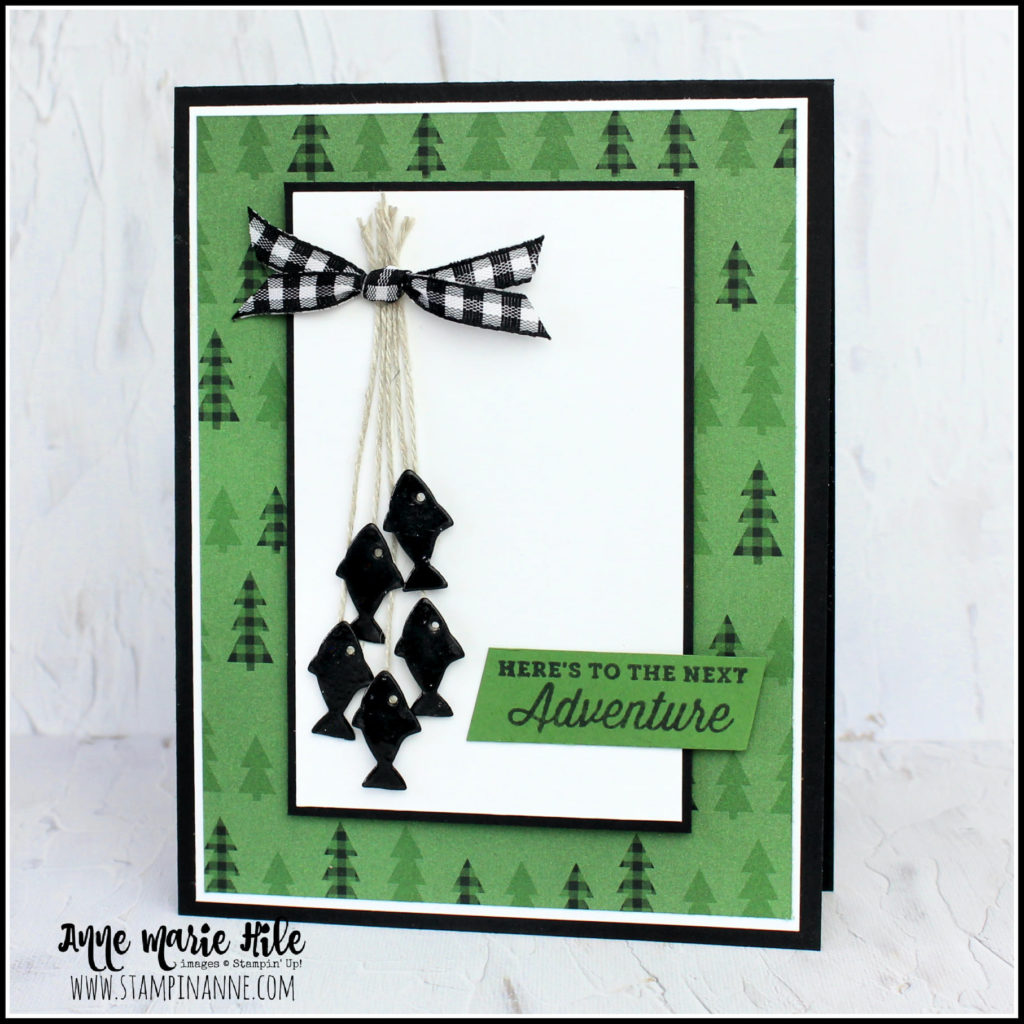
It’s all about the paper (ok…and the adorable little fish….) with this card. How can you go wrong with fun designer paper that has little pine trees all over it….and plaid pine trees at that?! Two of my favorite things! When I think of pine trees I think of the Minnesota Homeland and our family property in Canada. I can’t wait to get back there. Oh….as you read this I AM in the Minnesota Homeland hanging with my mom and dad. I’ll be here for a week before hubby joins me and we head up to the cabin. Woo Hoo! I’m excited to hopefully spend some time in the upper midwest!
This card really came together once I was inspired Anne Marie’s card. She hit the trifecta on her card. Plaid trees on the paper, plaid ribbon and the little fishies! The fish were what first caught my eye! They’re so cute!
I wanted to incorporate the fish on my card without completely copying Anne Marie’s card but I just couldn’t make it work so I decided to go with the Pine Tree Punch. Did you notice that I ran the punched tree through the Stampin’ Cut & Emboss Machine with the Tasteful Textile Embossing Folder? This really gave it a nice texture.
This color combination of black, white and Garden Green is very striking. I’m not sure I’ve used it before. Hope about you? Have you checked out the Peaceful Prints Designer Series Paper in the Sale-a-bration Brochure yet? So many fun designs! If you like it, you need to get it soon! Sale-a-bration is almost over! Only a few weeks left! With a $50 purchase you can choose this package of designer paper for FREE!!! Don’t miss out!
I’m pleased with the way my card turned out. Guess what? You could use it for lots of occasions including Christmas! Hmm….
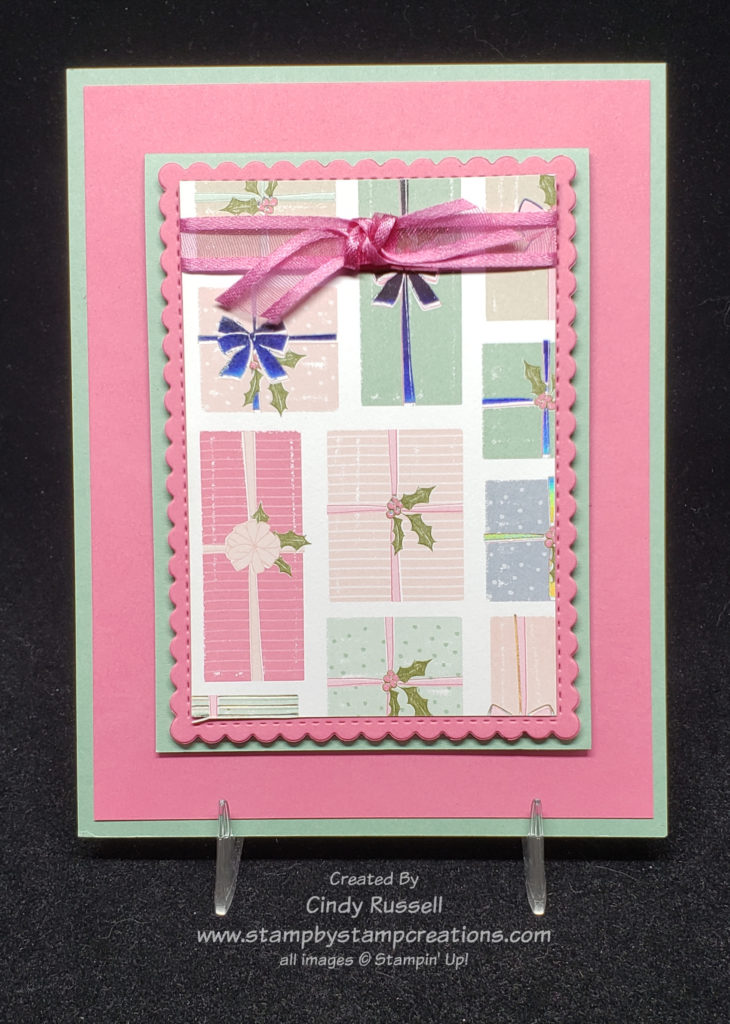
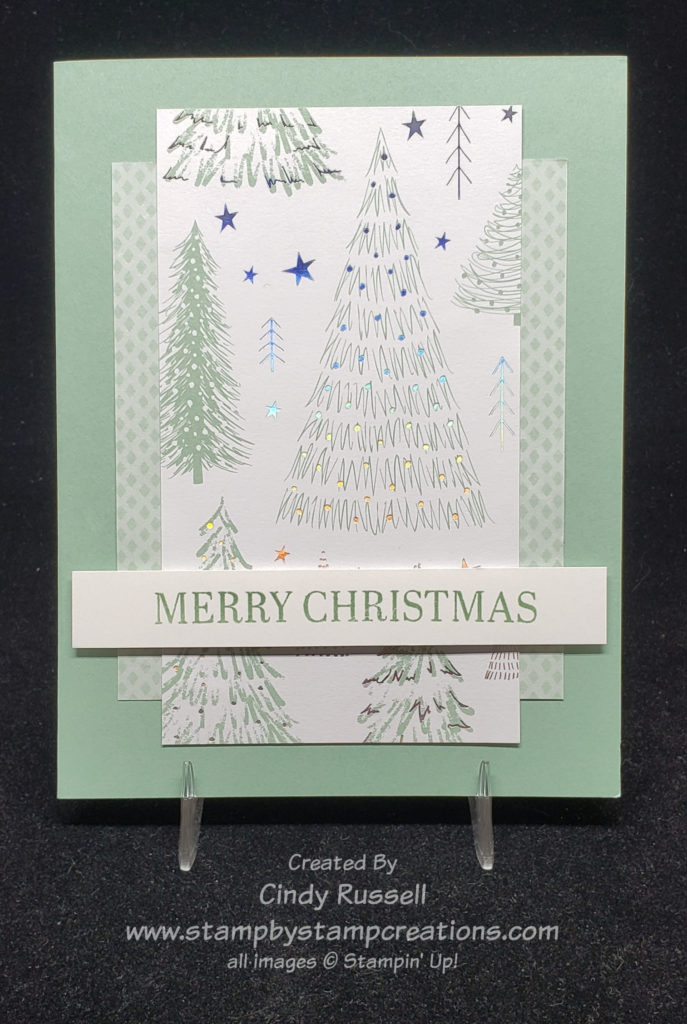
Here I go again using that designer paper that I didn’t like. Sheesh! Never say never, right? For not liking Stampin’ Up!’s Whimsy & Wonder Designer Series Paper I sure can’t get enough of it! It has definitely grown on me.
When I think of Christmas colors I definitely think red and green with blue and white coming in second. Even though I like this Whimsy & Wonder designer paper I do still have trouble thinking of pink as a Christmas color. What about you? Are the traditional Christmas colors your go-to colors for those holiday cards or are you more open minded and can think pink?
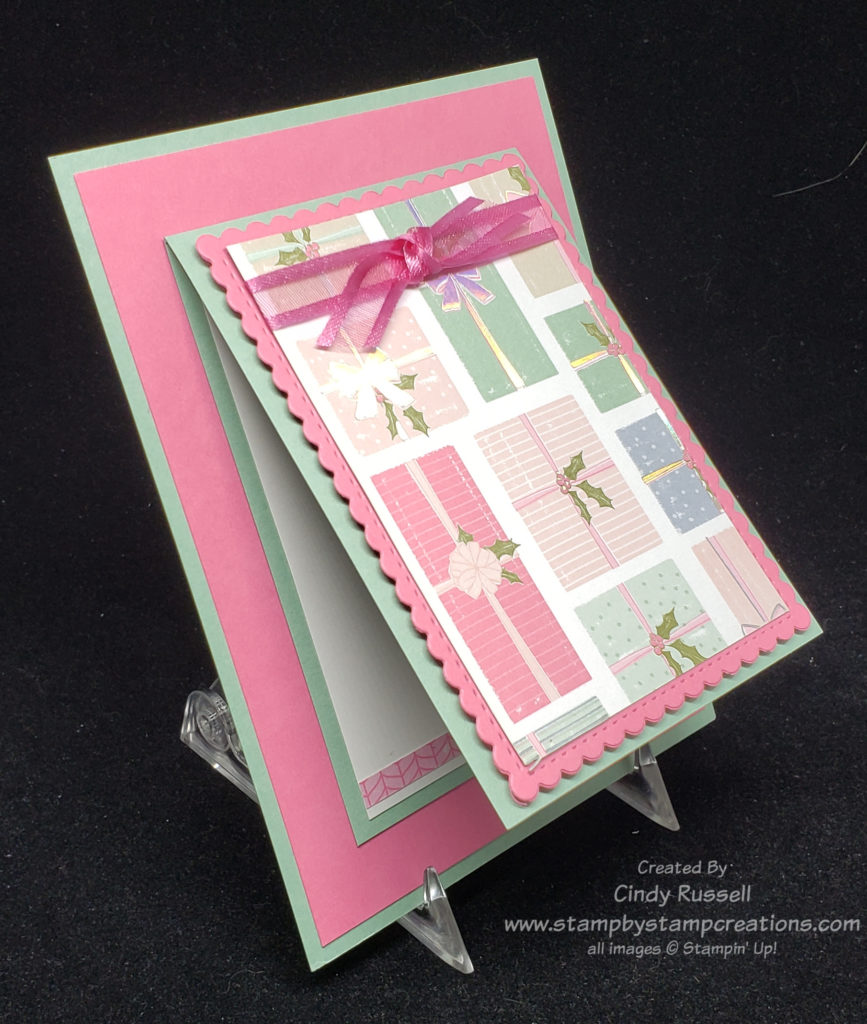
This card looks like a regular card that you open either from the side or the bottom. Well, it’s not! Check out this second picture and you can see where the fun fold comes from for this card.
Front Flap Fun Fold Card
The focal point of the card is the part that opens! Now, you could have just had the focal point as the focal point on a regular-styled card but where would the fun be in that?
The stitched scallop rectangle die that pretty much makes the card is from the Stitched So Sweetly Dies. This set of dies is one of my favorites with 6 different sized stitched rectangles and 4 different shaped stitched labels. Definitely a useful set of dies!
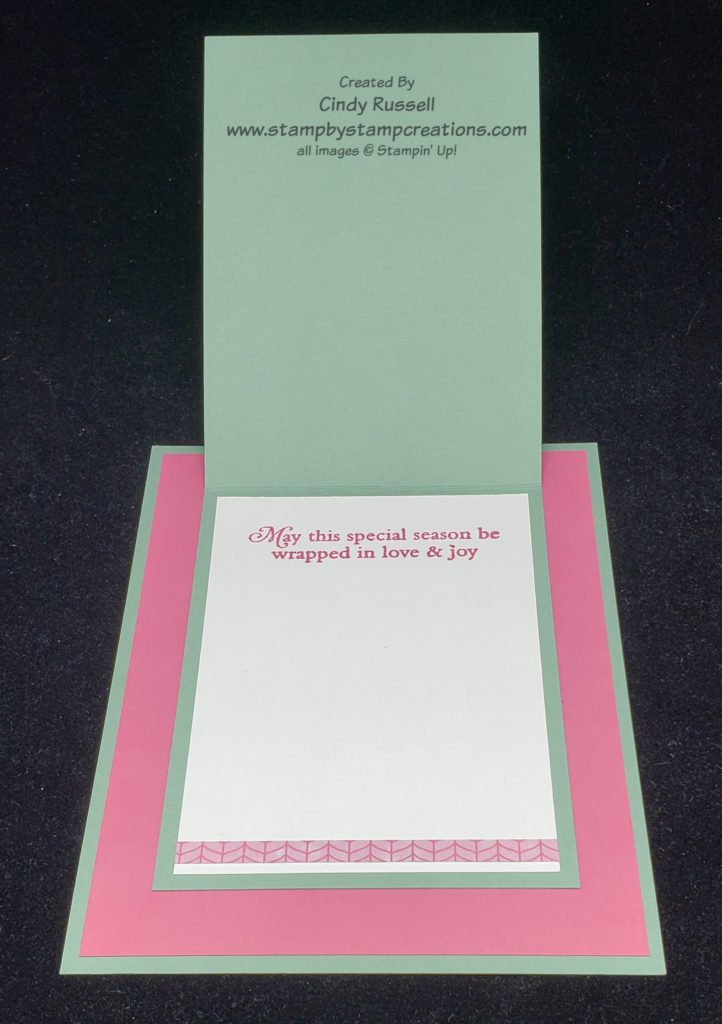
Don’t forget the inside of your card! As you can see, I added a thin strip of a different pattern of designer paper (from the Whimsy & Wonder pack). It’s just enough to draw your eye. Since I didn’t use a stamp set on the card itself I needed to find the perfect sentiment from my stash. And I did!
With the wrapped package design on the front of the card, this sentiment from the Perfectly Plaid stamp set was….perfect! Isn’t it fun when things come together so perfectly?
Here are a few dimensions for you:
Mint Macaron cardstock: 5 1/2″ x 4 1/4″, 8 1/2″ x 3 1/8, scored at 4 1/4″
Polished Pink cardstock: 5 1/4″ x 4″, 3 1/4″ x 4 1/2″ die cut with the largest scalloped rectangle die from the Stitched So Sweetly Dies.
Basic White cardstock: 2 7/8″ x 4″
Designer Paper: 3 3/4″ x 2 5/8″, 1/4″ x 2 7/8″
Despite this card not being made with “traditional” Christmas colors I just may have to make a few more to send out this year!
Have you started thinking about your Christmas cards for this year? It’s never too early!
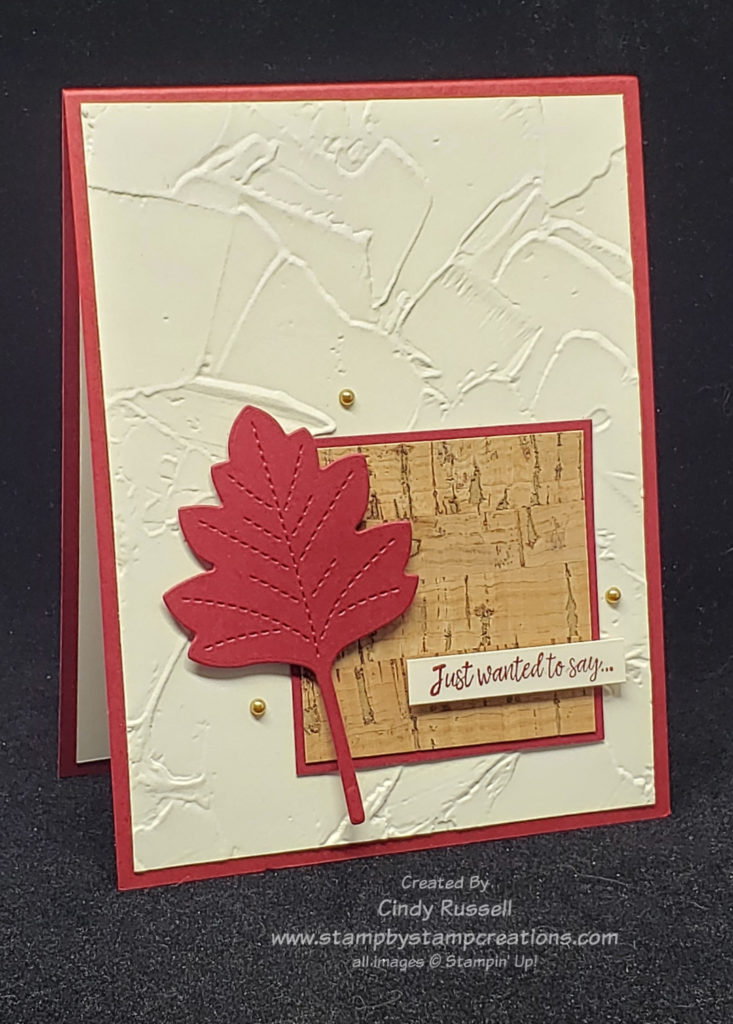
It’s September and, despite the continuing hot weather, my mind say’s it’s Fall. I love the changing colors of the leaves and I love making cards with leaves so when I saw this card sketch that already had a leaf on it I knew it was perfect for a fall card!
Stampin Up!’s Stitched Leaves Dies are so fun to work with and so easy to use on cards. These dies are a great size and I love the stitching on them! While figuring out what to use on this card I decided that the new Cork Specialty Paper would be just the right thing. This was my first time using it and I was pleasantly surprised at how easy it was to use. It’s extremely thin so you don’t have to worry about adding extra bulk to your card.
I stuck fairly close to this week’s Card Sketch. Only two extra layers and a few extra embellishments….oh, and I did emboss the background piece. Close, right?! I freely admit that I have a hard time with simple.
The sentiment is from the Many Messages stamp set. Have you checked this stamp set out? Actually, it’s a single stamp with nineteen different sentiments. It coordinates with a single die that will cut out the various sentiments in different shapes. Quite fun. These items are from a previous catalog and in the 2021-2022 Annual Catalog Stampin’ Up! came out with another stamp that works with the Messages Die. I don’t have the new one yet but it’s on my wish list.
Don’t forget to try working with a Card Sketch. Have a great day! Take care and Happy Stamping!
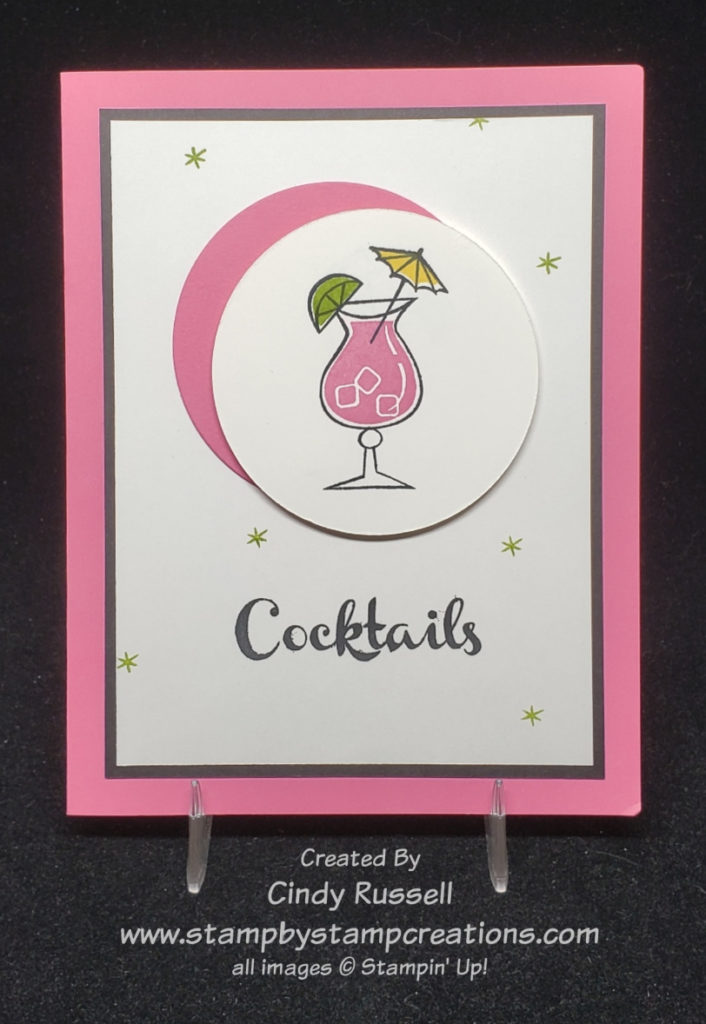
Nothing’s better than cocktails, right? Ok…not everyone drinks alcohol but Stampin’ Up!’s Nothings’ Better Than stamp set not only has cocktails, but it has chocolate, cookies and coffee too! You could easily switch this focal point and the corresponding sentiment on this card. This stamp set even has a coordinating die set called Love You More Than. So fun! When I’m crafting there is nothing better than a stamp set and dies that coordinate! This stamp set has some really fun sentiments in it and you can cut out the words cocktails, chocolate, cookies and coffe with the dies. Be sure to click the links above (name of stamp set or dies) and check them out. Too fun!
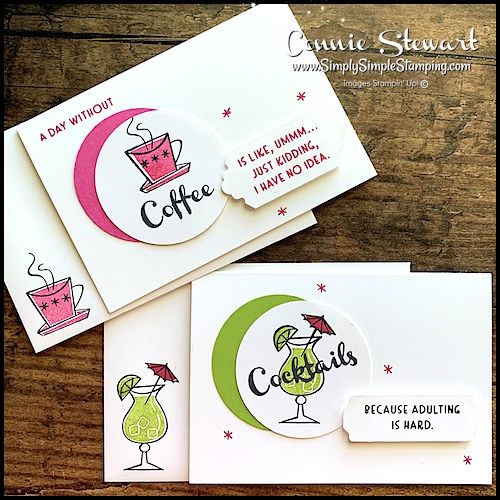
Connie Stewart, who designed these samples that inspired my card, helped design this stamp set! When a Stampin’ Up! Demonstrator reaches the $1,000,000 milestone in career sales they get to help design a stamp set! How fun is that?! And no….I’m not even close. Ha!
You can see Connie’s samples to the left. Her projects were made using the Basic White Notecards & Envelopes. I needed more layers and more PINK on my card so I went with a full size card. The double circles (and the cocktail glass!) are what initially caught my eye on Connie’s cards. So cute, fun and retro! I love the little stars. They just say “1960’s” to me.
On Connie’s cards you can see how easy it is to use the same template or card sketch and just change the images and sentiments.
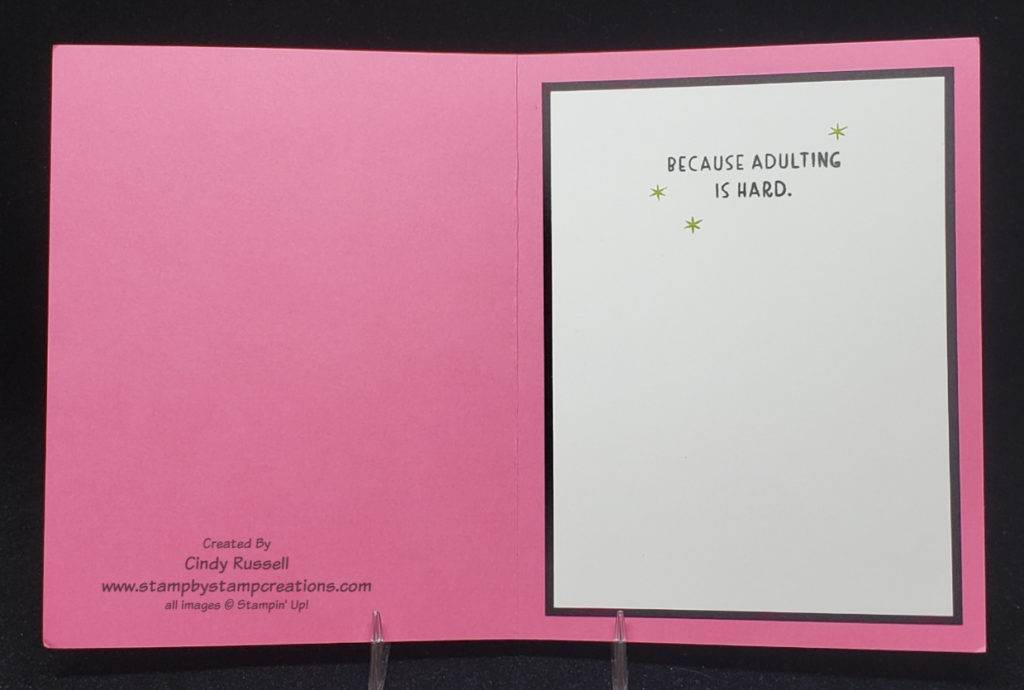
Here you can that I added my sentiment to the inside of the card instead of having it on the front. Just another one of those changes I made.
I was definitely inspired by these fun little samples but I didn’t stick very close to the original when making my card. That’s the fun of Make It Mine Mondays (or any other day)….you’re inspired and have that starting point for your project.
I hope you’re inspired. Have a great day! Take care and Happy Stamping!
As soon as I saw this Angled Gate Fold card I knew I had to give it a try. It’s so interesting with the different angles. You can have either the left flap or the right flap of the card be the one that has your focal point on it. The sample I saw had the focal point on the right side but wanted to change it up and have my focal point on the left. Personally, I like it better on the left.
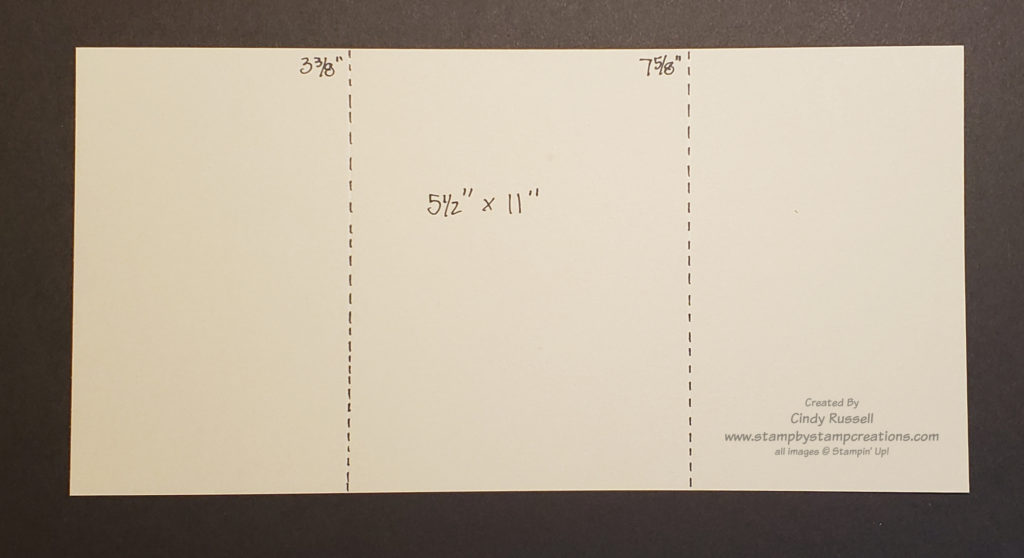
The card base for this card is pretty easy to make once you’ve figure out the little tricks to it. You are going to start with a 5 ½” x 11’ piece of cardstock. Score it along one the long sides at 3 3/8” and 7 5/8”.
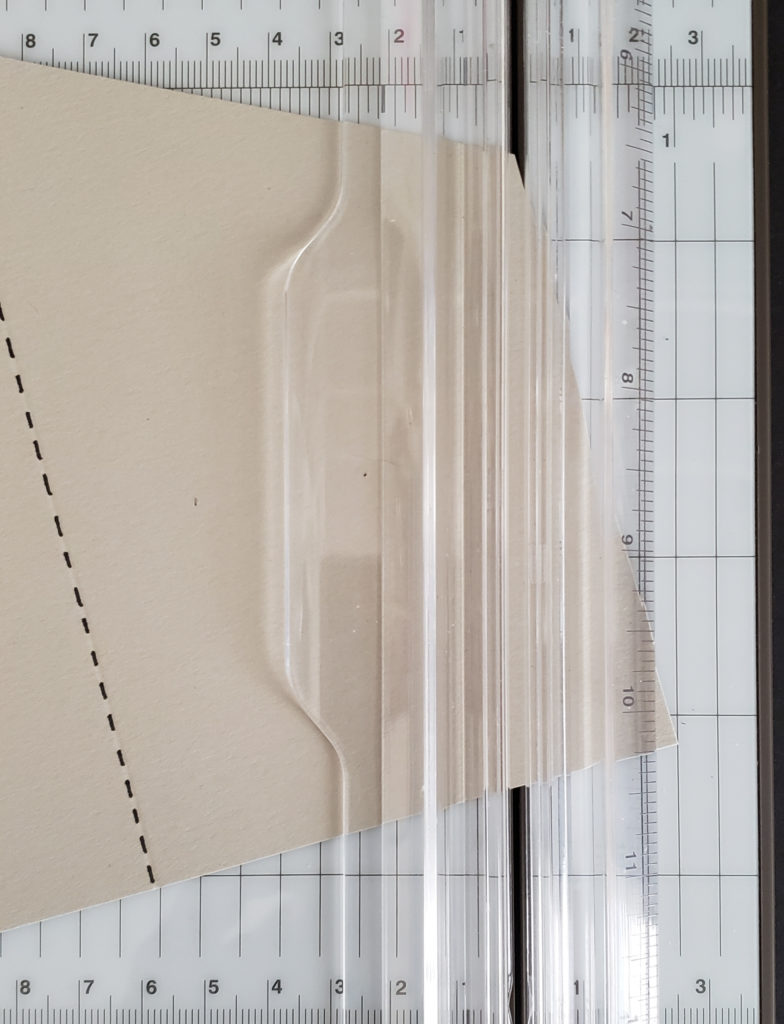
The easiest way to figure out how to cut the angles on the flaps of the card base is to watch the quick video below that I recorded. I’ve also posted a few photos below.
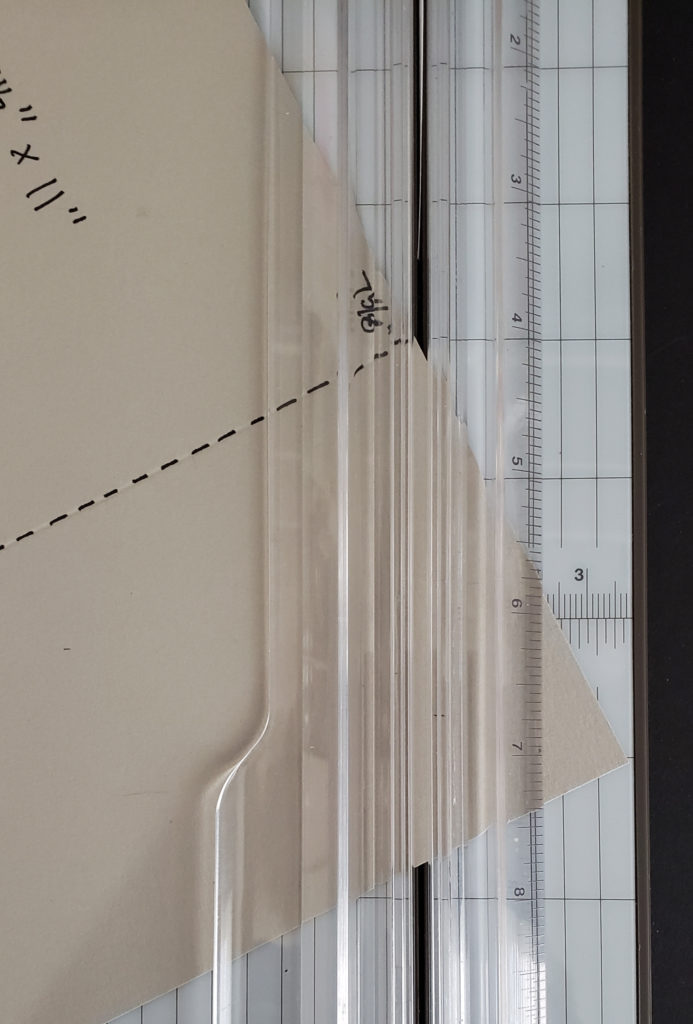
To make the top angle you want to line up the 7 5/8″ score mark in the cutting grove of your Stampin’ Up! Trimmer. Then line up the top corner of the card base at the right edge of the trimmer grid. This actually is at 1 1/2″. Then cut along the cutting grove.
The second or bottom angle of the flap is just as easy to make. This time you are going to line up the corner piece that you just cut in the cutting grove and then line up the bottom corner of the card base with the 1″ mark. You can view this in the photo below.
To cut the angles on the left flap of the card base I completely flipped my card base over and repeated the steps above.
It was easier to flip the card so that I could use the same measurement points on the right side of my Paper Trimmer.
To cut the designer paper and/or cardstock to layer on top of the card base flaps you will want to start with a piece which is 3 1/4″ x 5 3/8 . The important thing to remember when trimming these pieces is that it is not going to exactly match up to the flap. Your borders may not be exactly equal. If you are super particular about your crafting you may need to tweak things a bit.
You will trim the 3 1/4″ x 5 3/8″ pieces the exact same way that you trimmed the angles on the flaps. Instead of starting the first angle on the score mark you will start it at the left top corner of the paper.
Most of the samples I saw using this fun fold had the same pattern of designer paper on both the left flap and the right flap of the card. I tried that but with the pattern I was using and with the white card base it was just too much white. My card needed a little contrast so I decided to cover the right flap with Misty Moonlight cardstock which I embossed with the Bark 3D Embossing Folder. It was just what my card needed!
I hope you like this week’s fun fold. Give it a try and leave a comment with your project. I’d love to see it! Have a great day! Take care and Happy Stamping!
Here I go again using Stampin’ Up!’s Whimsy & Wonder Specialty Designer Series Paper thatI was sure I wouldn’t like. Who uses pink and light green on a Christmas card? The more I use this paper the more I like it. There are some really nice patterns even if they include pink! Ha!
I like having a starting point for my design when I use a card sketch. When I look at the sketch I try to envision different stamp sets and papers in the design and then go from there. Sometimes I just thumb through my designer papers to see which ones I think will work best with the design. As you know, the design of a project is usually the hardest part of creating.
What products would you use with this card sketch? Make a card and share your design in the comments section! Have a great day! Take care and Happy Stamping!
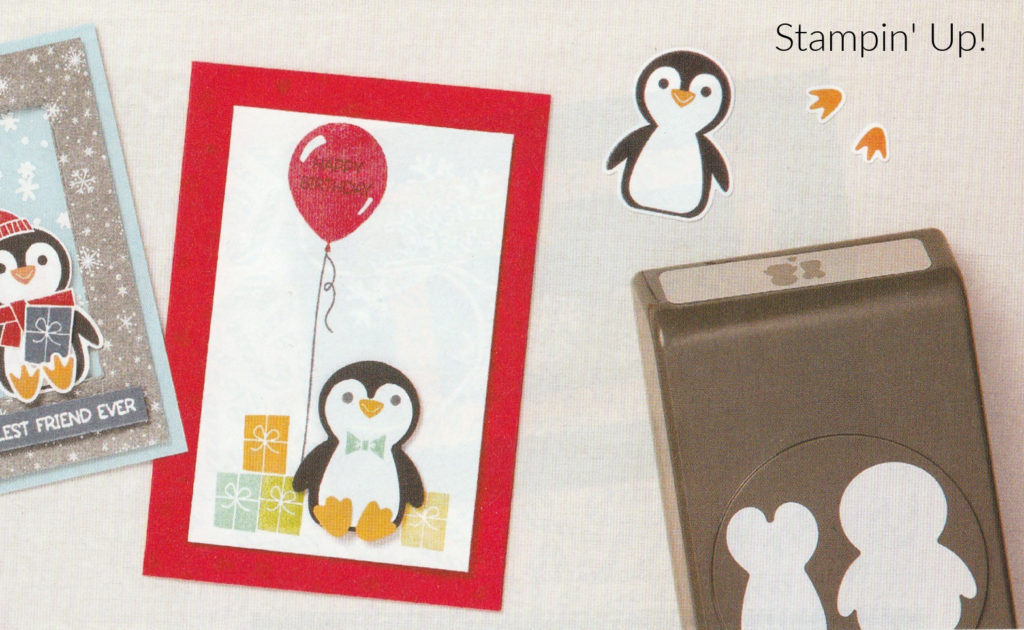
Guess what? My inspiration today didn’t come from the internet. It’s straight from Stampin’ Up!’s July – December (Holiday) Mini Catalog! You can find the adorable Penguin Place stamp set (and coordinating Penguin Builder Punch) on page 33 of this publication as well as the inspiration for today’s card.
I love all of the fabulous samples that Stampin’ Up! shares with us in their publications but a lot of times I don’t really look at them. I need to do more of that. This sample caught my eye because it’s not a holiday card. It’s a birthday card which is a great way to remind us that not all holiday stamp sets are just for the holidays. This Penguin Place stamp set has a number of sentiments in it that could be used year around or at least all winter long!
Penguin Place Card
I stuck fairly close to my inspiration on this card (unlike last week!) I added a layer (naturally!) and changed the colors of the gifts as well as not stamping the “happy birthday” on the balloon. As I was writing this up I realized that I also forgot the little bow tie on my penguin. Hmm….if I had remembered to add it I wonder what color I would have made it. How about you?
This penguin is so dang cute! I probably wouldn’t have purchased this stamp set and the coordinating punch if Stampin’ Up! hadn’t offered the fun Penguin Playmates Designer Paper in the Sale-a-bration Brochure. How could I resist? You know how much I love coordination.
The Penguin Place Bundle (stamp set and punch) are only $31.50 which means that when you purchase it you only have to add a few more items to reach $50 and be able to choose the Penguin Playmates Designer Paper as your free Sale-a-bration item. Only one month left of Sale-a-bration! Don’t miss out!
When I first saw the Whimsy & Wonder Suite in Stampin’ Up!’s July – December (Holiday) Catalog I had a hard time with it. To me Christmas items should be red and green with maybe some blue, silver or gold thrown in. Pink, although it’s my favorite color, does not say Christmas to me.
Then I started messing around with the Whimsy & Wonder Specialty Designer Series Paper. Too fun! I kind of got into the pink and other light colors of the paper. This card made rethink the whole “no pink for Christmas” thing. Ha!
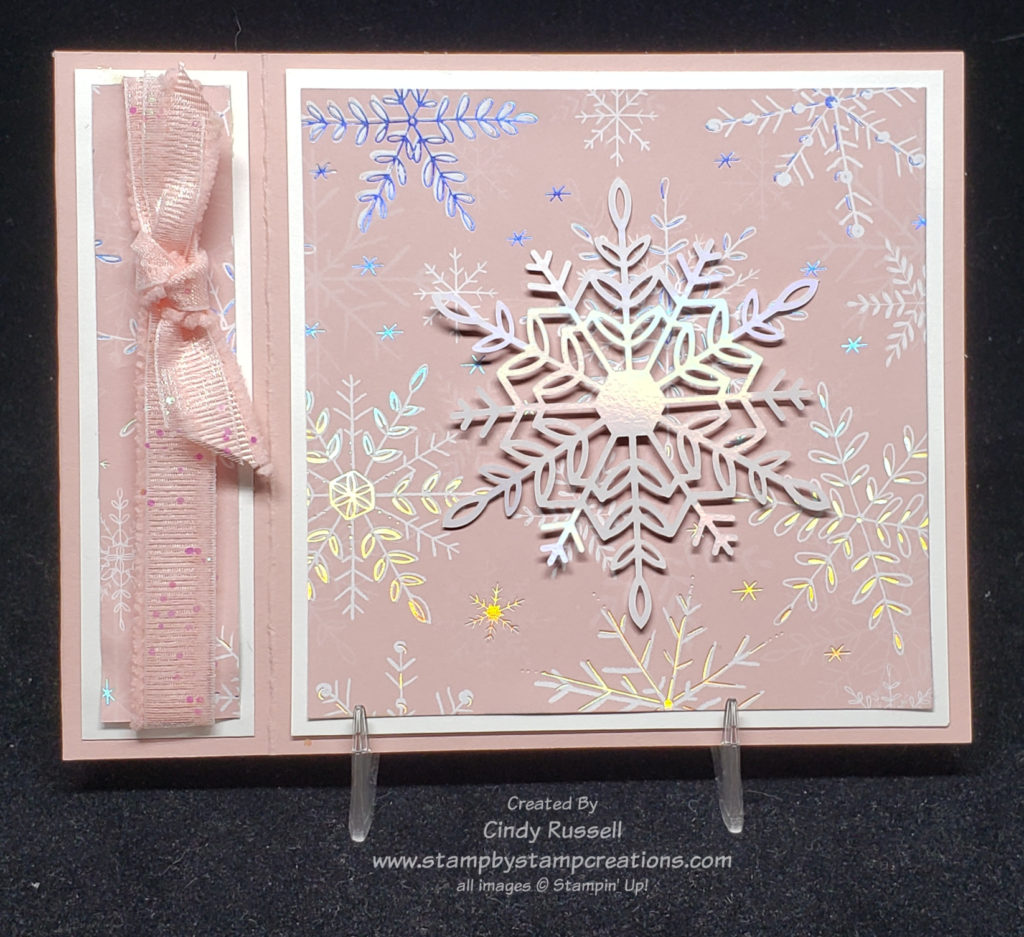
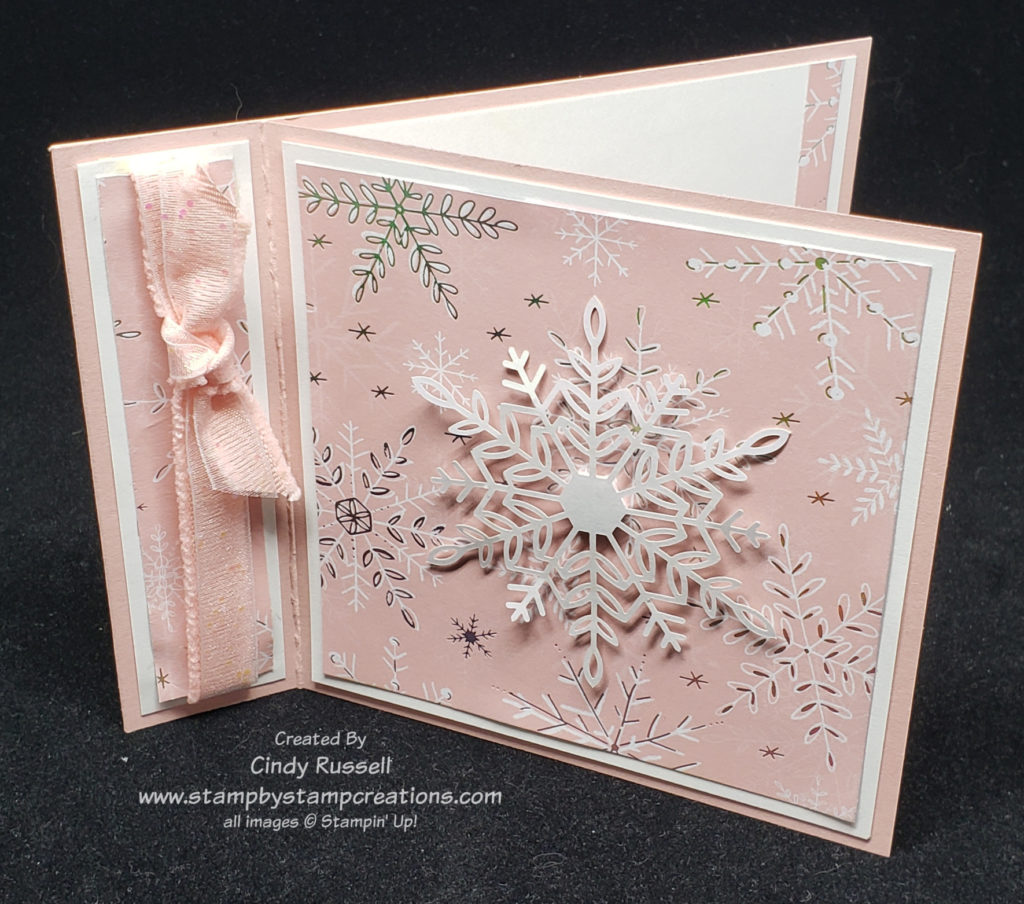
Book Binding Fun Fold – open
Today’s Fun Fold is the Book Binding Fun Fold and is SO easy! Start with an 11″ x 4 1/4″ piece of cardstock for the card base. Score at 4 1/4″ and 5 1/2″. Fold the score marks in opposite directions. Adhere the small section of the card front to the inside of the card base. This will leave you with a 4 1/4″ x 4 1/4″ section that opens for your card and a 4 1/4″ x 4 1/4″ section on the inside of your card. Then on to decorating!
I used all of the accessories/embellishments in the Whimsey and Wonder Suite of products on my card. The gorgeous paper, the iridescent foil snowflake and the fun Blushing Bride pink ribbon. The Basic White layers on my card are 4″ x 4″ and 1″ x 4″. The designer paper layers are 3 3/4″ x 3 3/4″ and 3/4″ x 3 3/4″. I adhered the snowflake to the front of the card with a Stampin’ Dimensional which fits perfectly in the center of the snowflake.
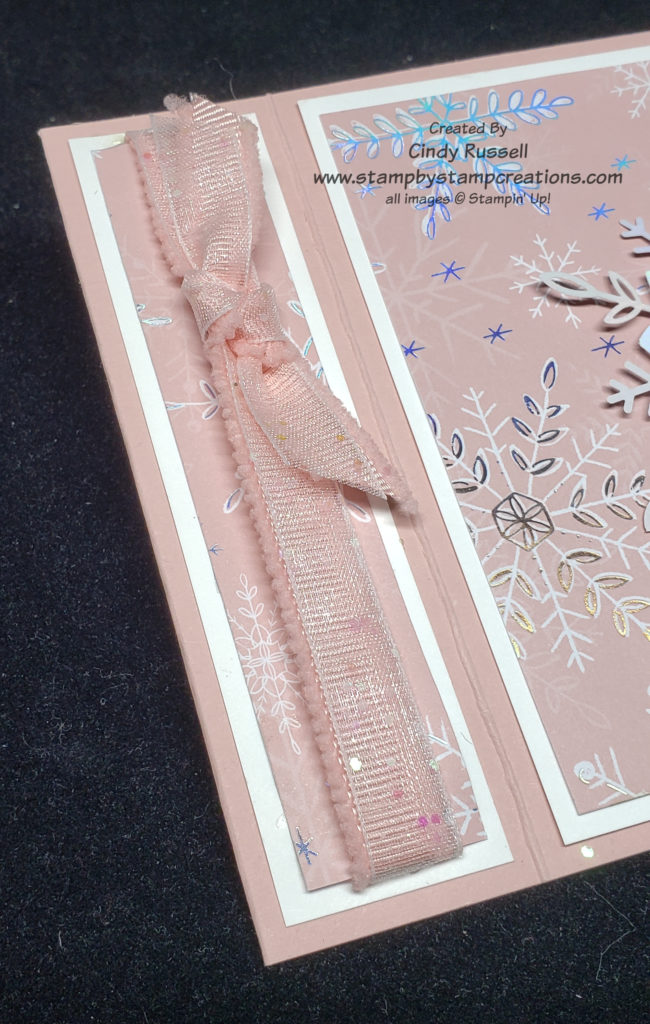
What you may not have noticed in the first two photos I shared of this card and which is still a little difficult to see in this photo is that I actually used two different ribbons layered together on my card.
The Blushing Bride 3/8″ Frayed Ribbon looked nice on the card but it seemed a little flat. That’s where the fun, new White 3/8″ Glittered Organdy Ribbon comes in. When layered with the pink, the glitter ribbon gives the last perfect, sparkly touch to the card!
That Rule of 3 came into play again on this card. The designer paper sparkles, the snowflake sparkles/shimmers and the ribbon sparkles. Three different items that make my card shine!
If you like the look of fun fold card but some seem a little involved for you be sure to give the Book Binding Fun Fold a try. It’s the perfect fun fold to get you started.