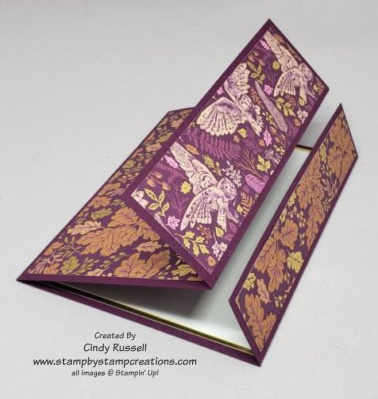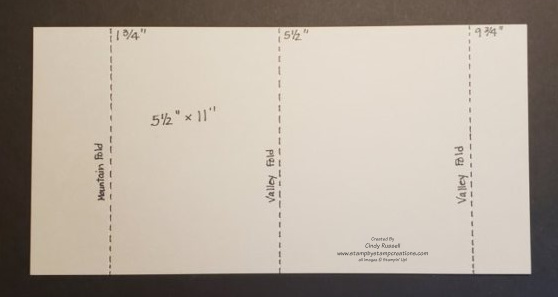
A Hybrid Fun Fold Card!

Horizontal Angled Gate Fold Card

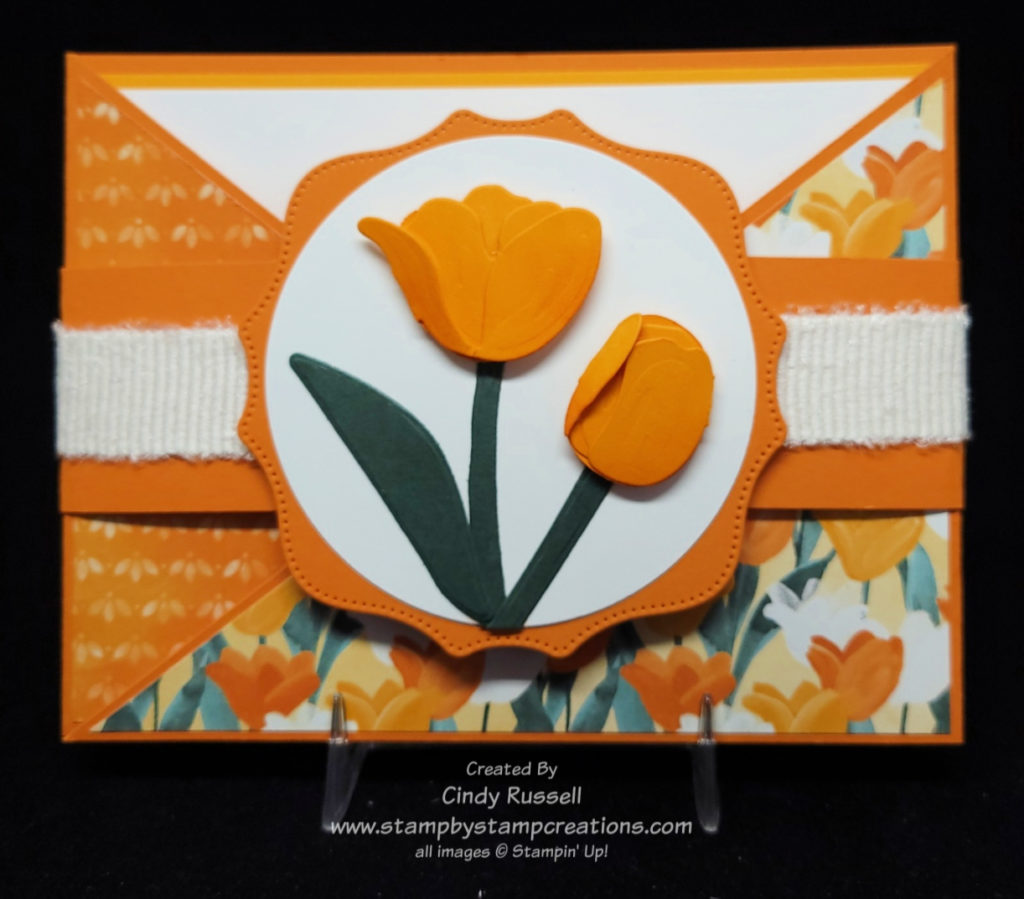
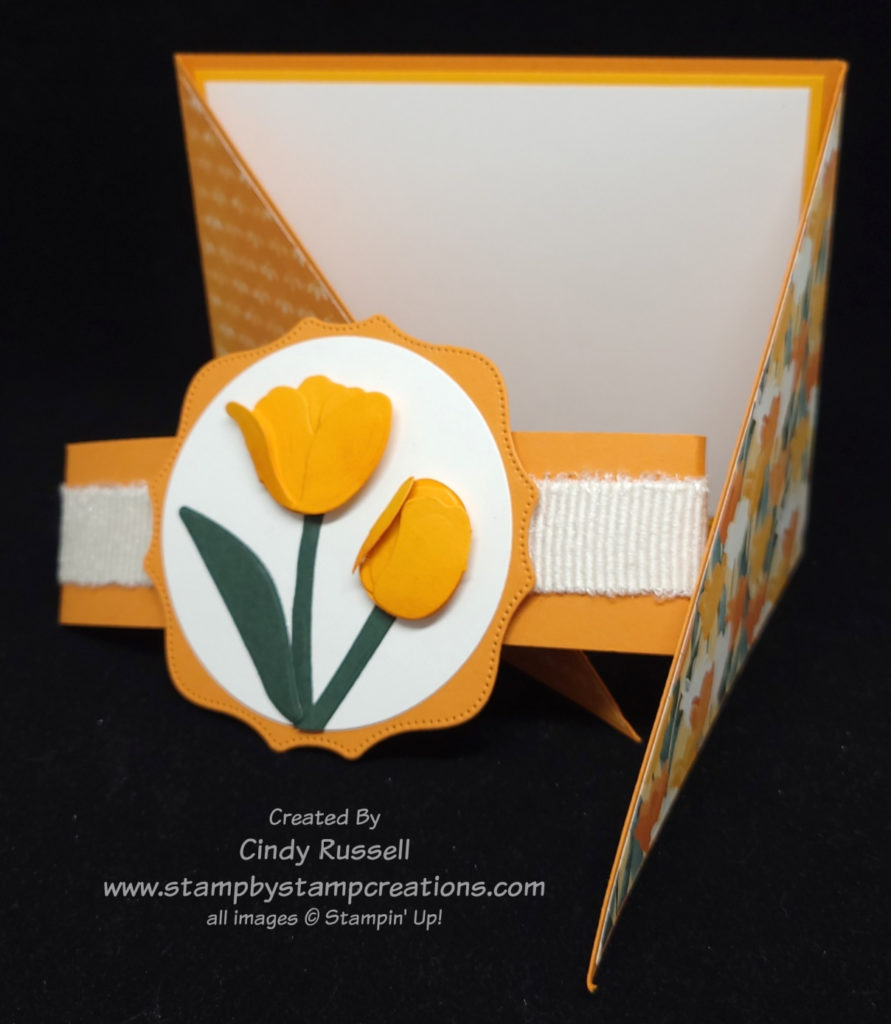
I’m calling today’s card a hybrid because it looks just like last week’s card but it doesn’t have a pocket and it’s a Gate Fold Card because the two sides fold in like a gate.  Here’s the link to last week’s Angled Pocket Card and here’s the link to a Belly Band Gate Fold Card that I made.  If we have to give this hybrid a name, let’s call it the Horizontal Angled Gate Fold.  I like to name the fun folds so that I can tell them apart.  😊
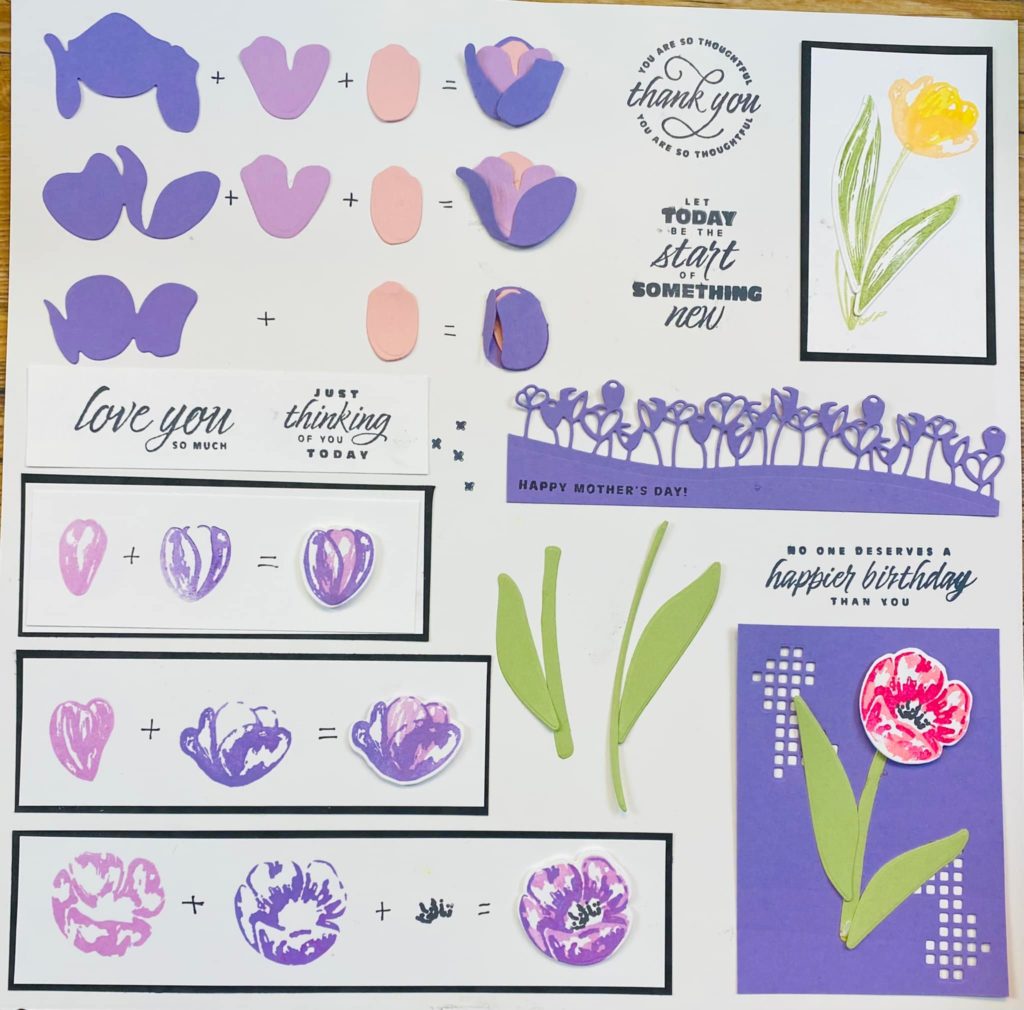
Tulips Dies Chart by Lisa Schmid

I love the way this card turned out.  It screams “Spring!”.  Just like on last week’s Angled Pocket Card (see link above), I wanted to find a piece of designer paper that I could use both sides.  Flowering Fields Designer Paper to the rescue!  Since I was using the tulip designer paper, I decided to try my hand with the Tulip Dies.  Instead of trying to figure out what dies I needed to use to make the different tulips I did a little search online and found a chart.  Thank you Lisa Schmid! 

The base of the card is made just like last week’s Angled Pocket Card.  The only difference is that you don’t make the pocket.  Stop before you reach that point.  Then you need to make a belly band and a focal point.

For the belly band I used 2 pieces of 6 ½” x 1 ½” pieces of Pumpkin Pie cardstock.  I adhered the pieces together by overlapping the pieces by about 1/2” or so.  With the card base closed and laying on top of the belly band (seam centered) I carefully wrapped the belly band around the card.  It should be snug but not too tight.  I then adhered the two ends together.  You should use a strong adhesive like SEAL + or Tear & Tape to make the belly band.

The focal point of my card started with a die from the Hippo & Friends Dies (which is retiring).  The tulips are added to the largest Layering Circles die.  So fun!

To add a little texture to my die-cut tulips I used a Blending Brush to add a little Pumpkin Pie ink to the Mango Melody pieces before assembling them.  I think this softened the Mango Melody cardstock a little.

The Flowering Tulips stamp set and the Tulips Dies are both continuing into the upcoming 2022-2023 Annual Catalog.  However, the Flowering Fields Designer Paper is not.  

I hope you enjoyed this lovely, springtime fun fold card!  Have a great day.  Take care and Happy Stamping!
Angled Pocket Fun Fold Card

Angled Pocket Fun Fold Card

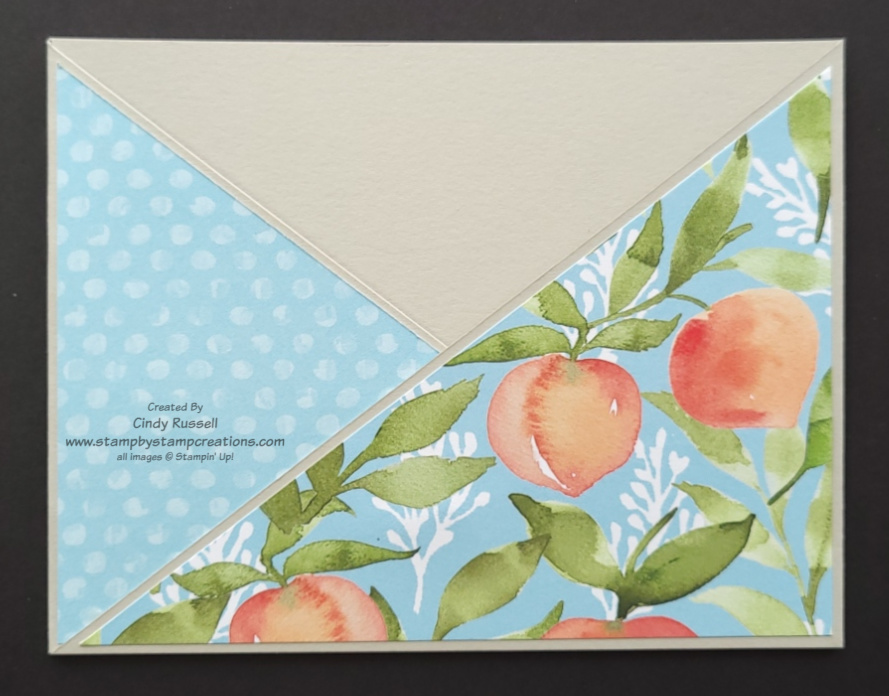
Today’s Fun Fold is an Angle Pocket Fun Fold.  So fun and easy if you follow the instructions.  Below you will find step-by-step instructions with photos on how to make it.  I do have a disclaimer…on my samples in the instructions the card stock base doesn’t really match the rest of the parts of the card but I wanted to make sure you could see the different steps.   

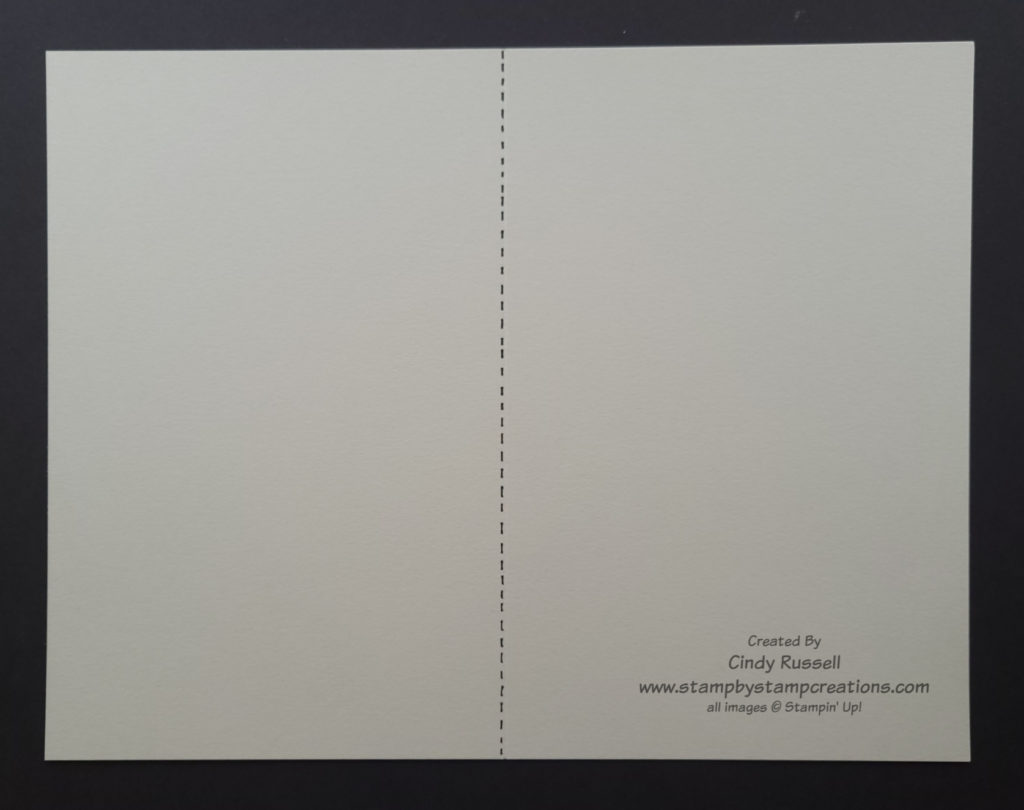
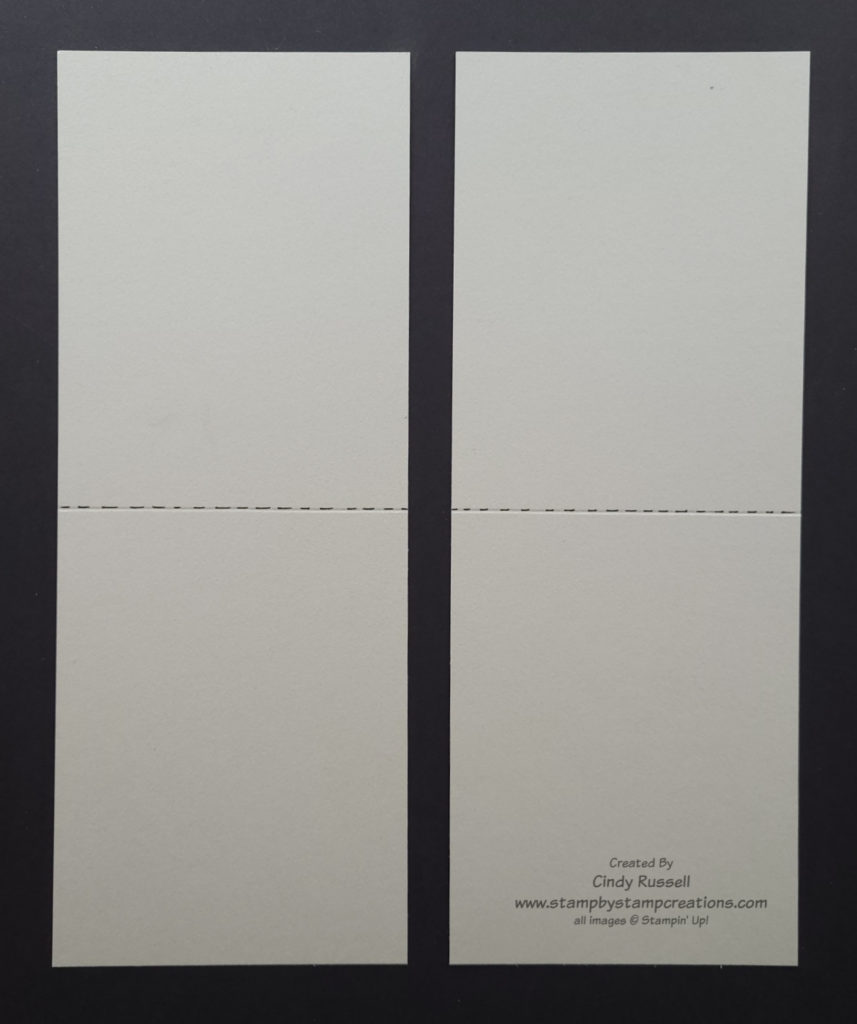
For the base of this card you need to start with a full sheet of cardstock.  With the long side of the cardstock at the top of your score board, score at 5 ½”.  The next step is to cut the card stock in half along the short side (at the 4 ¼” mark) so that you have two pieces of cardstock that are 4 ¼”x 11” and scored in half.  At this point you want to make sure that both pieces are the exact same size because they will overlap.

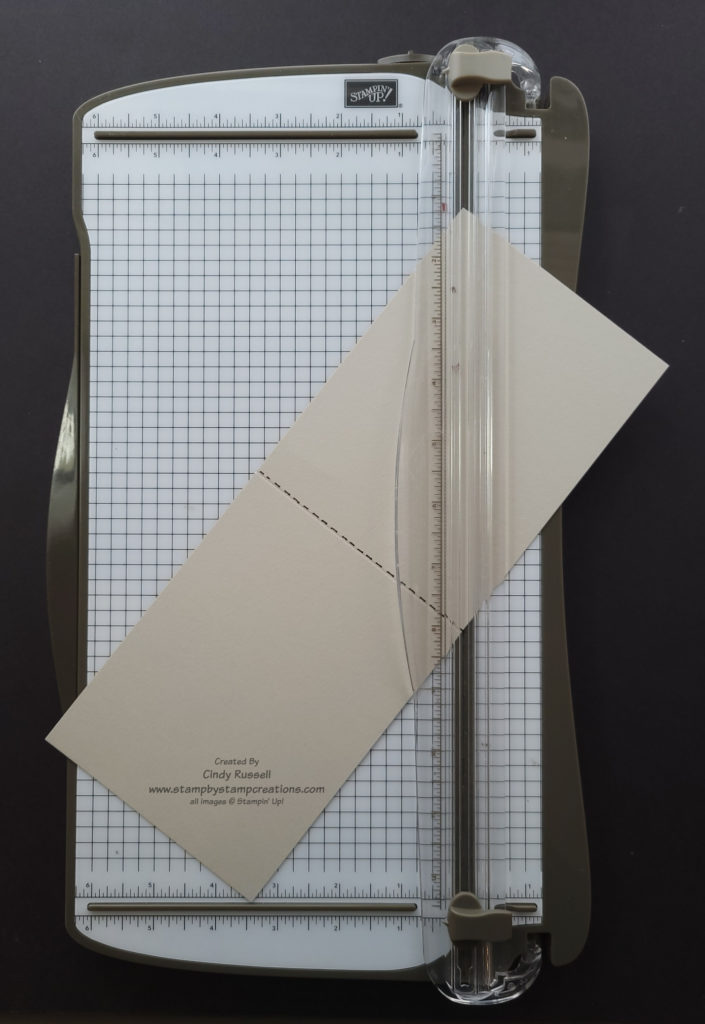
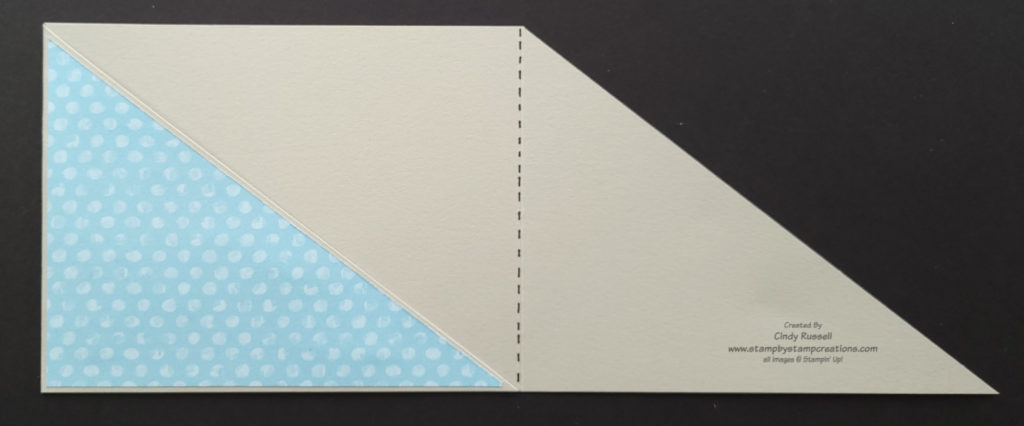
Place one of the 4 1/4″ x 11″ pieces of cardstock vertically on the Paper Trimmer (short side towards the top).  Start at the top left corner and cut diagonally to the right side of the score line.

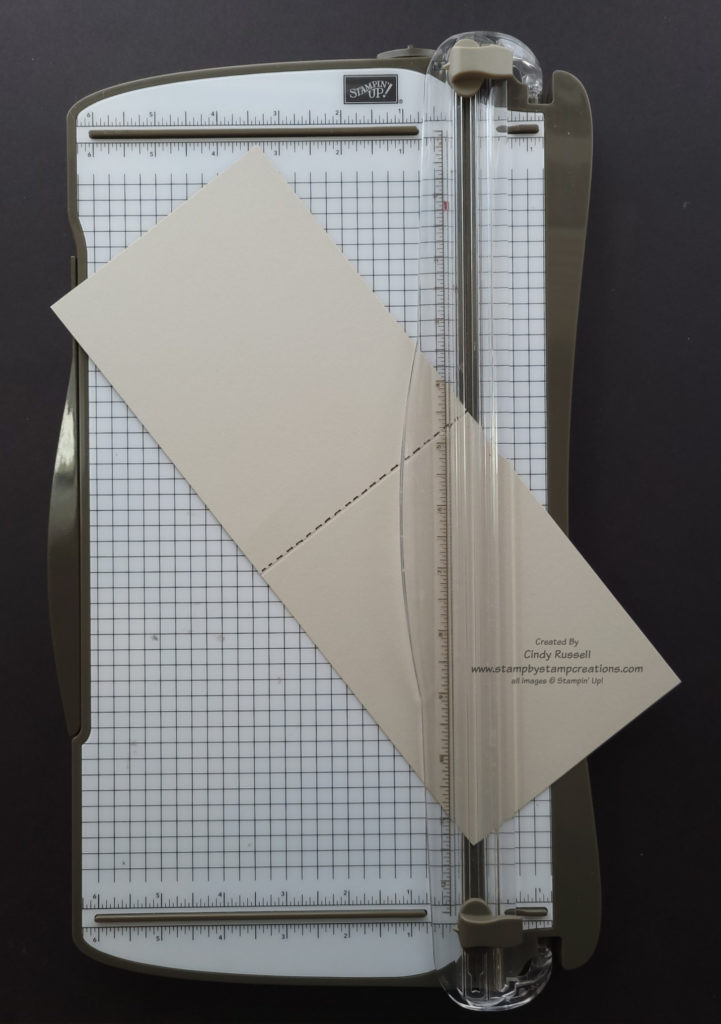
On the second piece of 4 1/4″ x 11″ cardstock start at the right side of the score mark and cut diagonally to the bottom left corner.

Fold both pieces along the score lines making sure that edges and points/corners line up straight.  Lay the two pieces horizontally with the angled pieces to the outside.  Adhere the two rectangular sections together, making sure all edges line up square.   

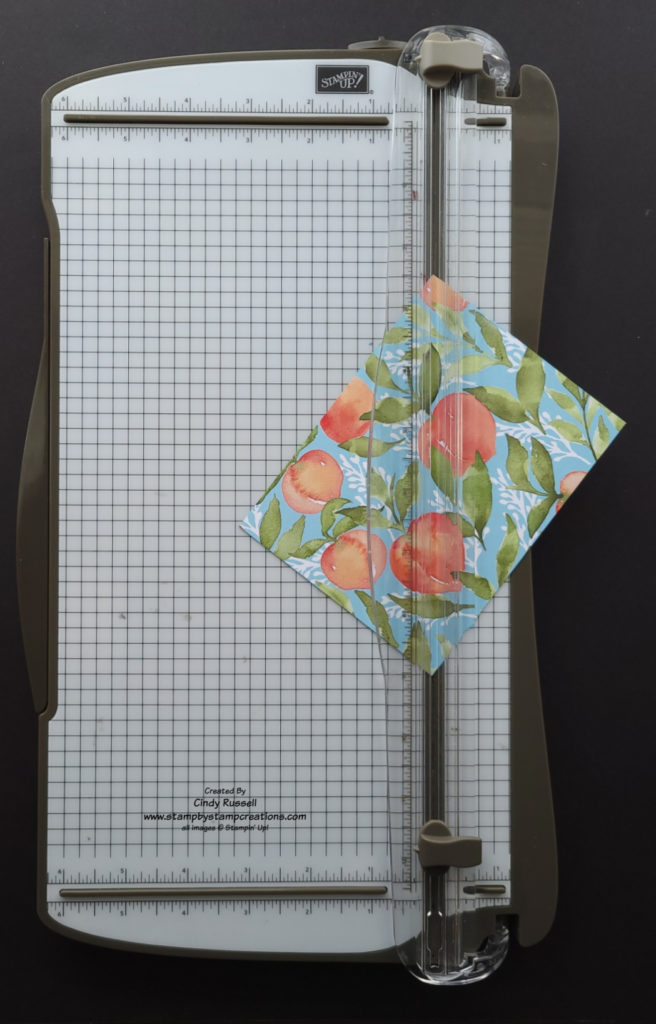
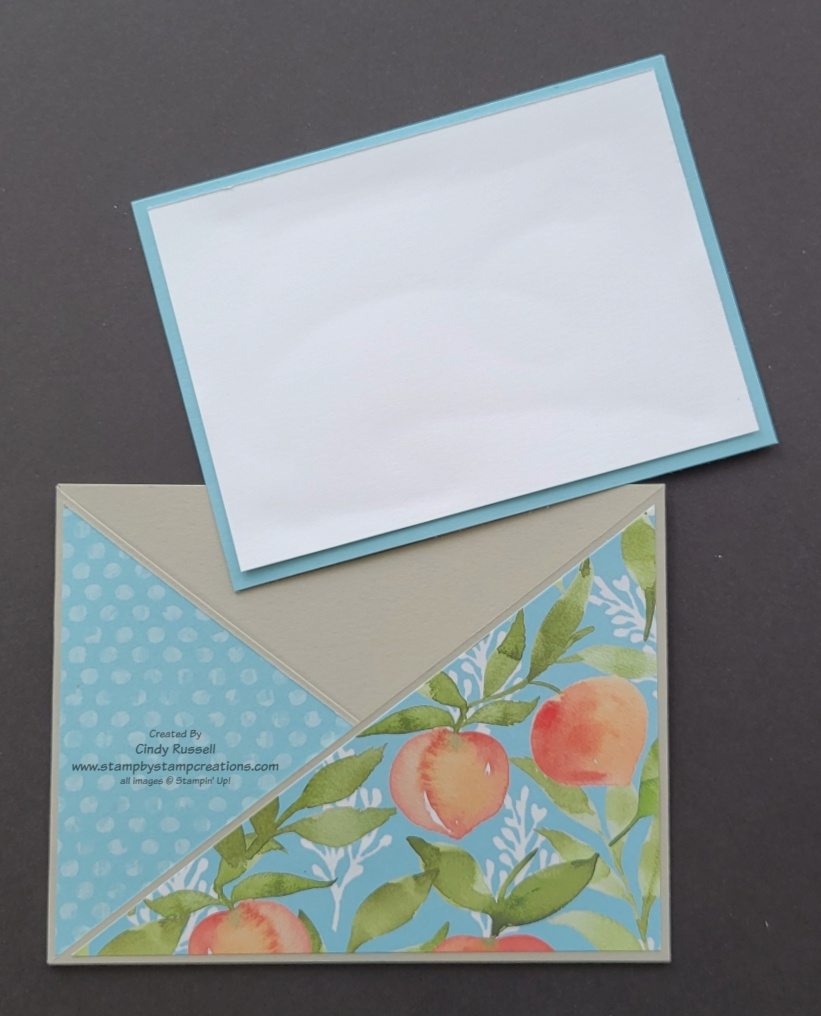
The angled sections of the card need to be decorated before you complete the pocket.  It’s easiest if you start with a piece of designer paper that you want to use both sides of.  Cut the designer paper to 5 ¼” x 4”.  If the patterns you want to use aren’t on the same sheet of designer paper, you will need to cut two different 5 ¼” x 4” pieces.  The side of the paper facing up will be adhered to the angled section on the right side of the card.  Cut the designer paper diagonally from the upper left corner to the lower right corner. If the designer paper has a pattern where it matters if something is upside down, be sure to take this into consideration before cutting the paper.  You will notice that on my card at the beginning of this post that the leaves are pointing down.  Lucky for me this doesn’t really matter with leaves. (I forgot to take my own advice! Ha!).  In the sample photo to the left you see that it will matter if the peaches are upside down so I had to take that into consideration.

Adhere the designer paper pieces to the angled sections of the card base.  Make sure you have the sections in the “closed” position so you don’t adhere the paper to the wrong side of the section.  I like to use liquid glue so that I have to a little room to slide the piece and make sure I get it in the correct position.

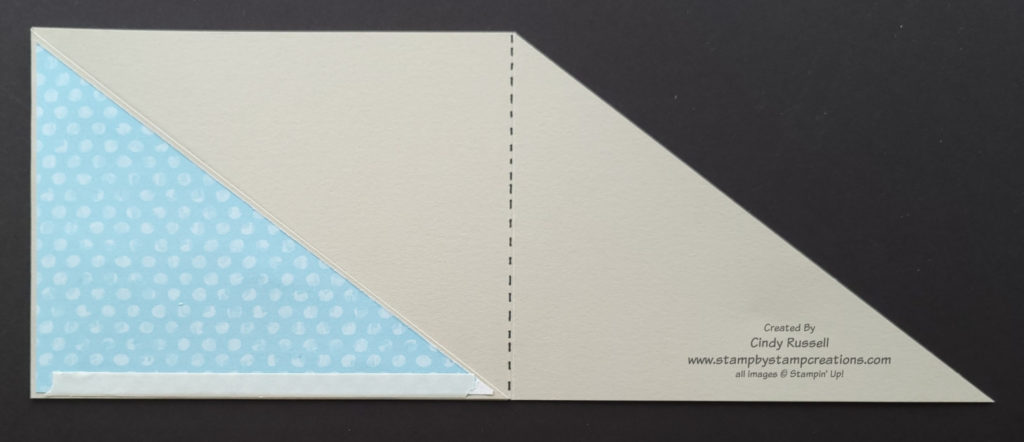
To make the pocket, place a strip of Tear & Tape adhesive as close to the bottom edge of one of the angle sections as possible .  You will want to adhere the adhesive to the angled section that will be “underneath” and will be covered by a portion of the other angled section.  In this example photo I placed my adhesive on the left angled section.  Remove the backing from the Tear & Tape, fold the section over towards the center and adhere.

To adhere the second angle section over the first, place a piece of Tear & Tape adhesive close to the bottom edge of the first angle section (which is already adhered to the center of the card).  Make sure not to get too close to the left side (in my example) so that the adhesive doesn’t show when the angled piece is adhered.

For the pocket insert cut the base piece 5 1/8” x 3 ¾”.  The Basic White piece which you will decorate/write on should be cut 4 7/8” x 3 ½”.

Despite my lengthy instructions and all of the photos, this card is pretty easy to make. Have fun recreating it!

Have a great day! Take care and Happy Stamping!

Easy & Elegant Pocket Fun Fold Card

Easy Pocket Fun Fold Card

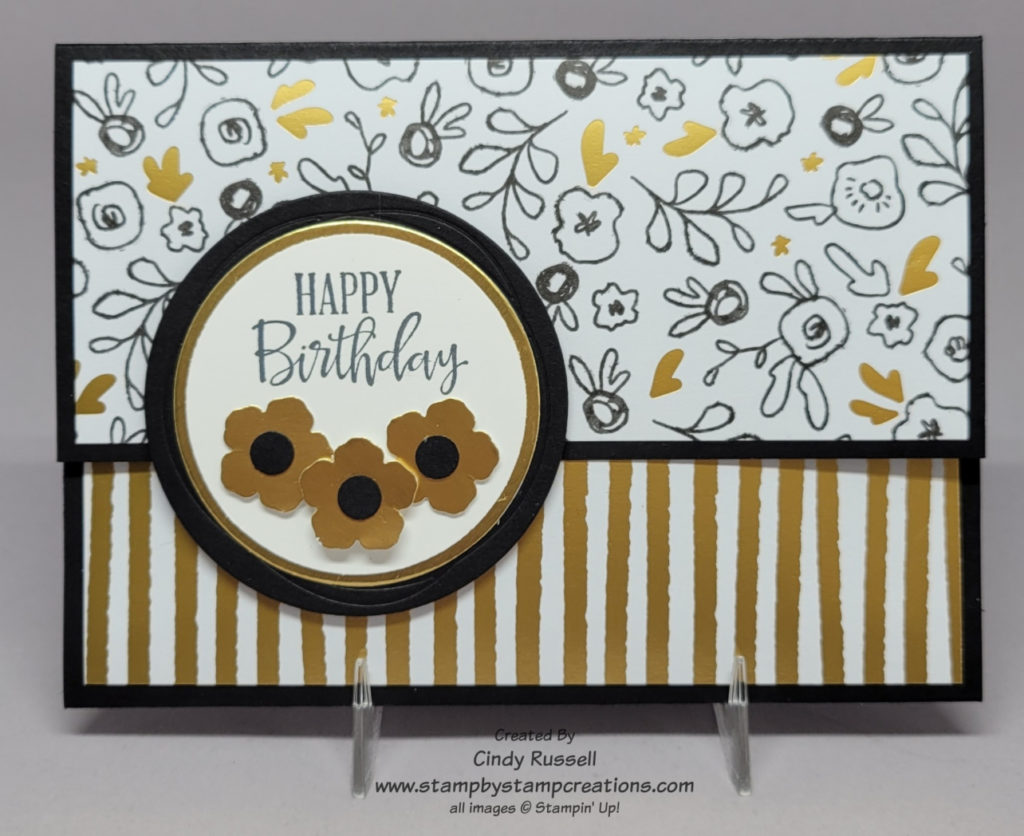
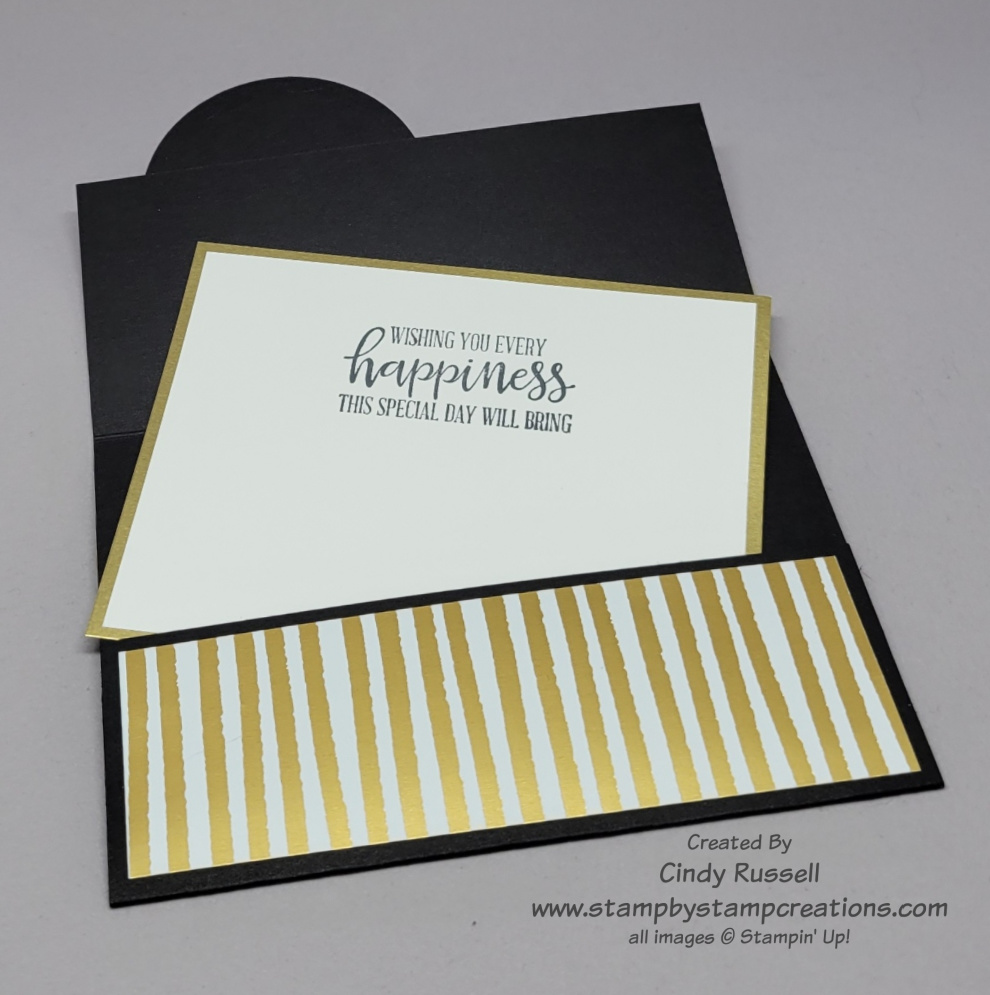
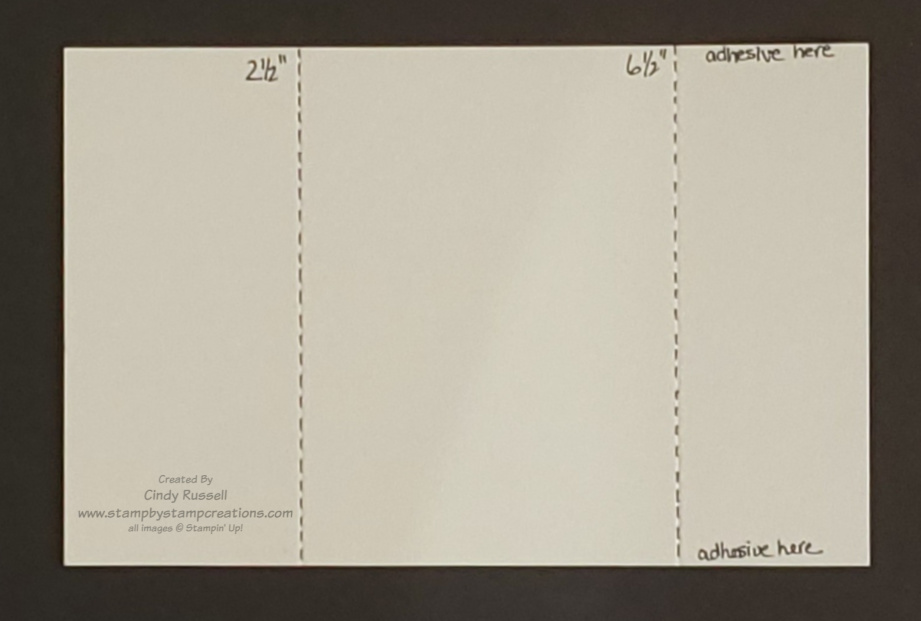
Today’s card is a Pocket Fun Fold and it’s easy!  The base of the card is one piece of 5 ½” x 8 ½” card stock scored at 2 ½” and 6 ½”.  That’s it!  Fold along both score lines to the center of the card.  The smaller 2” section will form the pocket of the card.  You will need to use a strong, narrow adhesive like Stampin’ Up!’s Tear & Tape close to the edges of the cardstock so that you have room for the card insert.  Once you have the card base formed you will notice that closed card is only 5 ½” x 4” instead of the usual 5 ½” x 4 ¼”.  This is because the larger flap overlaps the pocket portion of the card.

Easy Pocket Fun Fold Card

To decorate the card you need to pieces of coordinating designer paper.  The larger piece is 5 ¼” x 2 ¼”.  The smaller piece is 5 ¼” x 1 ¾”.  I used the Abstract Beauty Designer Series Paper on my card.  I love the black and gold together.  The flowers on my focal point were punched using the Strawberry Builder Punch.  The centers were punched with a ¼” Circle Punch (retired).

The gold foil portion of the card insert is 4 ¾” x 3 ¾”.  The Basic White portion of the insert is 4 ½”x 3 ½”.  Both sentiments that I used on my card are from the Peaceful Moments stamp set.

Fun and simple.  My kind of fun fold!  I hope you’ve enjoyed today’s card!  Have a great day.  Take care and Happy Stamping!

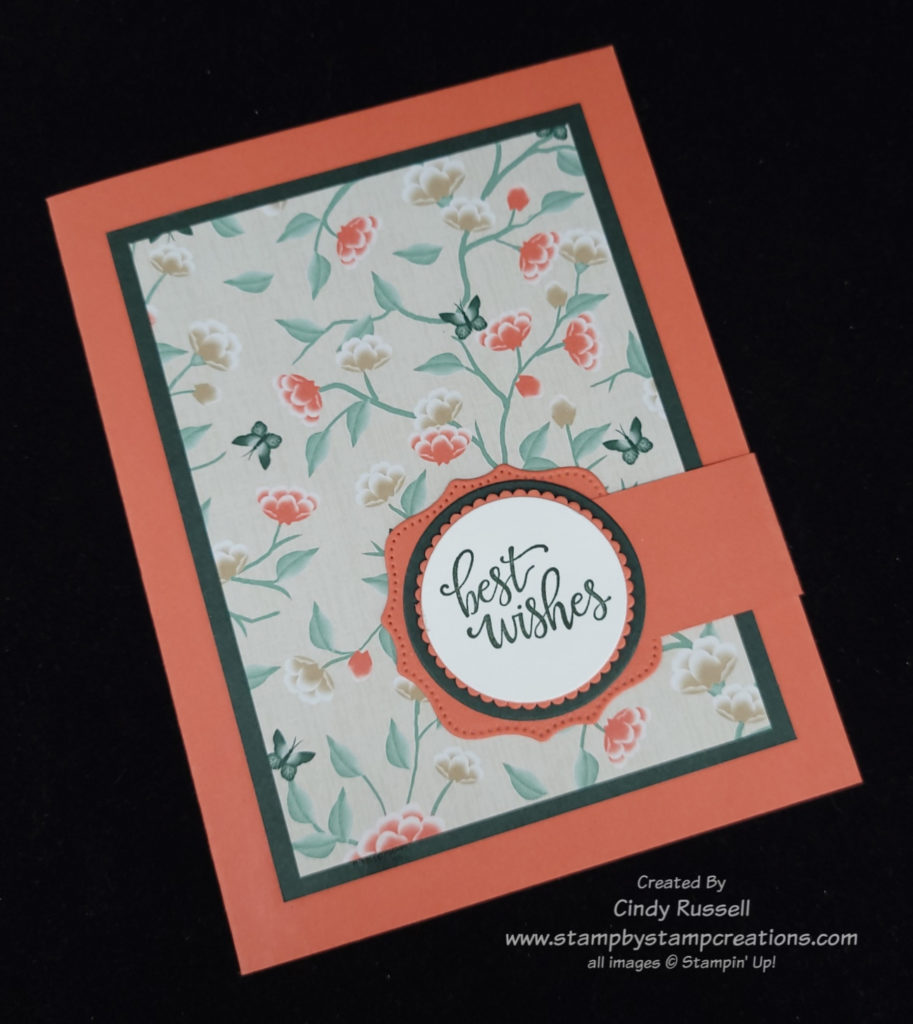
Best Wishes Swing Arm Fun Fold Card

Swing Arm Fun Fold Card – front

I love fun fold cards.  This fun fold card is called the Swing Arm Fun Fold and is quite easy to make.  The base of the card is the basic 5 ½” x 8 ½” piece of cardstock folded in half at 4 ¼”.  To make it a fun fold you just need to add a label (or focal piece) and the swing arm.

On my card I used Stampin’ Up!’s beautiful Symbols of Fortune Specialty Designer Series Paper from the January – June Mini Catalog. One side of each sheet of this paper has a gold foil design on it. So pretty!

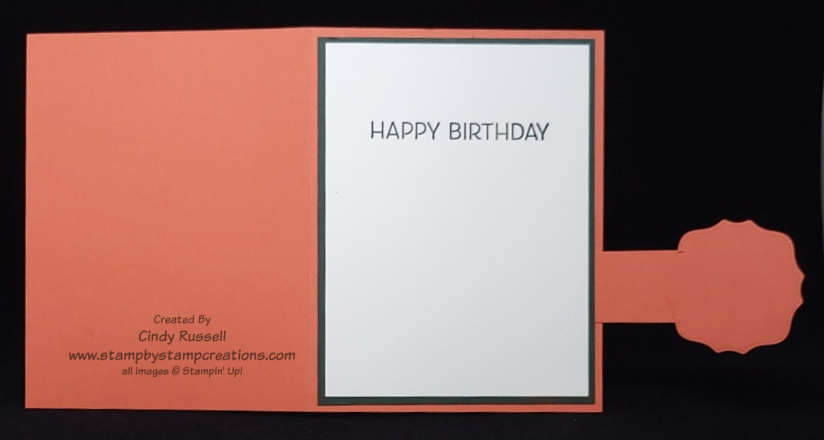
Both the “best wishes” on the front of the card and the “happy birthday” on the inside of the card are from the Artistically Inked stamp set in the Annual Catalog.

The circles are die cut using the Layering Circles dies and the decorative label is die cut using the Hippo & Friends dies. I have to admit that I purchased this die set because of all the layering dies in it. One of these days I may purchase the coordinating Hippo Happiness stamp set. 🙂

Swing Arm Fun Fold Card – inside

The swing arm on my card measures 1″ x 4 3/4″. It’s scored at 3″. The smaller section is adhered to the inside of the back section of the card. The long section is what folds over to the front of the card. When attach the swing arm to the label you want to make sure that you adhere the swing arm to the top of the label. The arm will be sandwiched between two layers so that you can’t see the end of it.

Swing Arm Fun Fold. So easy. So fun! Have a great day! Take care and Happy Stamping!

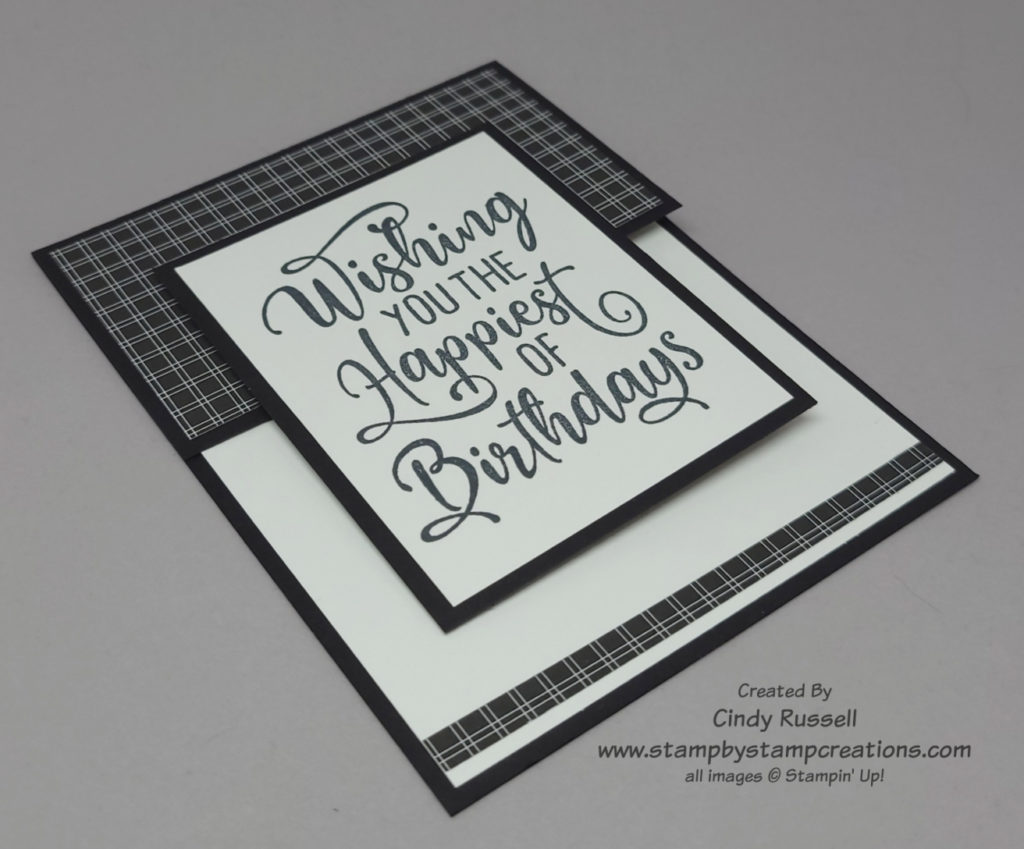
Black & White Half Front Fun Fold Card

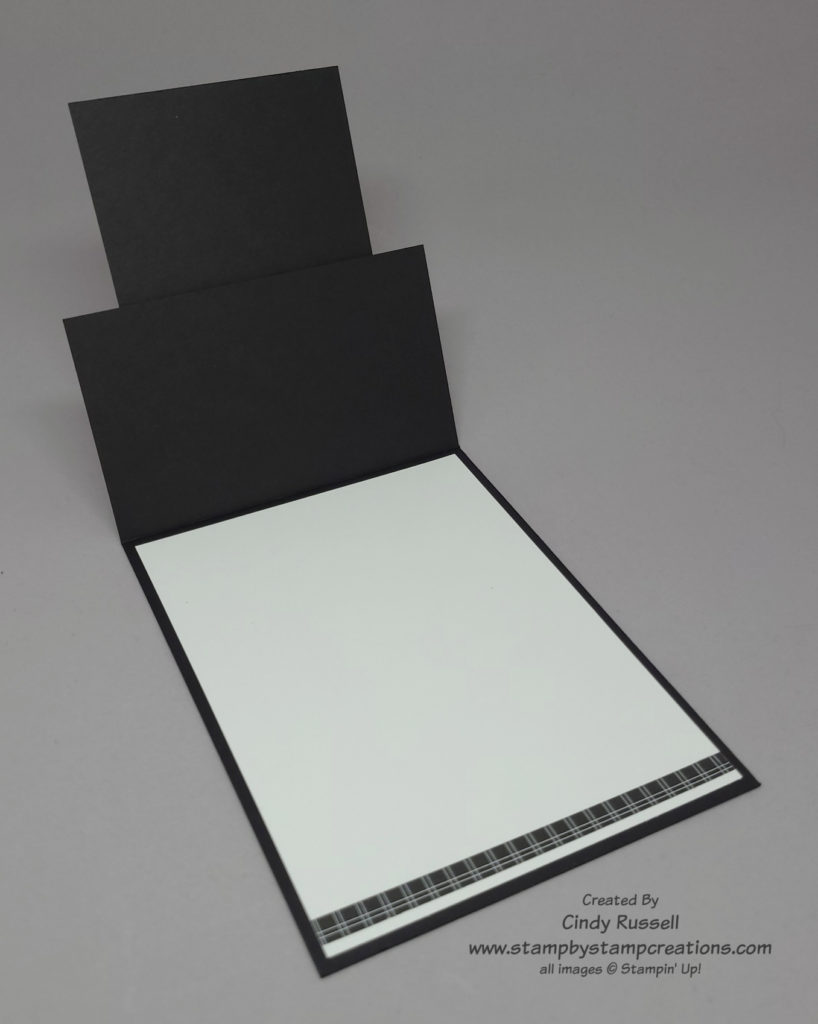
It’s a Fun Fold Card that highlights the fun All Together Designer Series Paper! This Half-Front Fun Fold is easy peasy!

I cut my cardstock 4 1/4″ x 11″ and scored it at 5 1/2″. Then I trimmed 3″ off of one of the sections which left the “front” of the card 2 1/2″. The large piece of designer paper is 2 1/4″ x 4″. I added a strip of 4″ x 1/4″ designer paper to the bottom of the inside piece (5 1/4″ x 4″) to add a little interest.

The sentiment focal point piece of Basic White cardstock is 2 3/4″ x 3 1/2″. The sentiment is from the Happiest of Birthdays stamp set. I love that it is so large and can be used as a focal point on a card.

This black & white birthday card would be perfect any guy in your life. Guy cards are so hard to design but you can’t go wrong with black & white!

It’s been a fun week playing with black & white cards but next week I think we’ll move back to some color!

Have a great day! Take care and Happy Stamping!

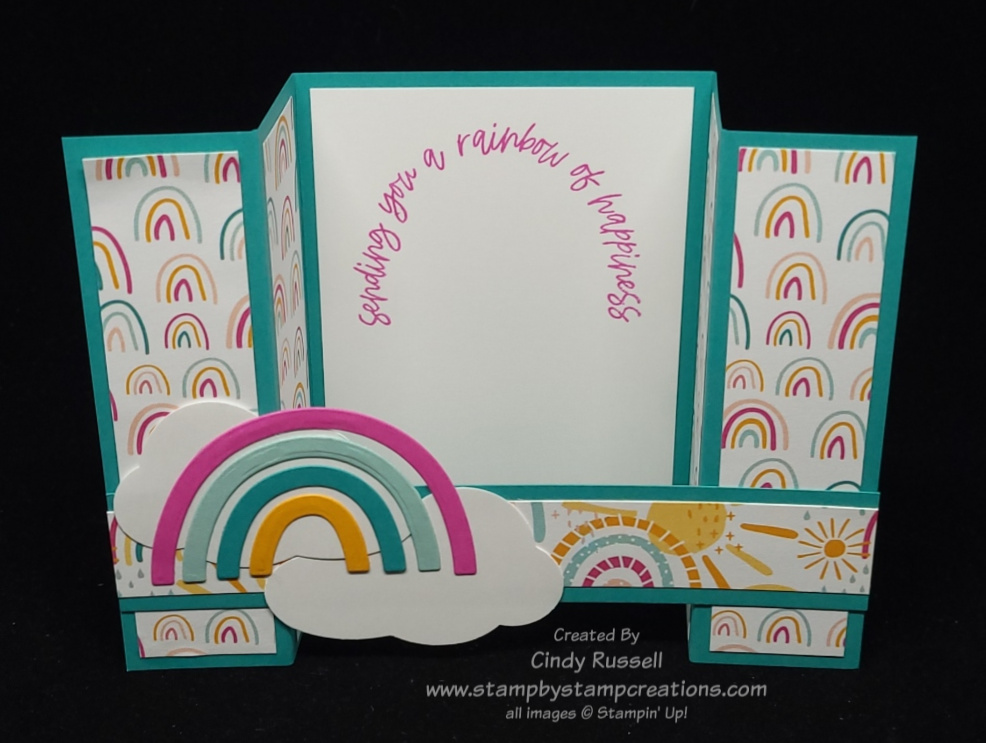
Somewhere Over the Rainbow Bridge Fun Fold Card

Bridge Fun Fold Card

How can you not sing Somewhere Over the Rainbow while looking at this fun fold card?  So many rainbows!  I’m going to be sad when Sale-a-bration is over on February 28th and I won’t be able to get any more of the fun Sunshine & Rainbows Designer Series Paper. The paper coordinates perfectly with the Rainbow of Happiness Bundle of products from Stampin’ Up!’s January – June Mini Catalog. I’ve used the Rainbow of Happiness stamp set, the Brilliant Rainbow dies and the Cloud Punch on my card.

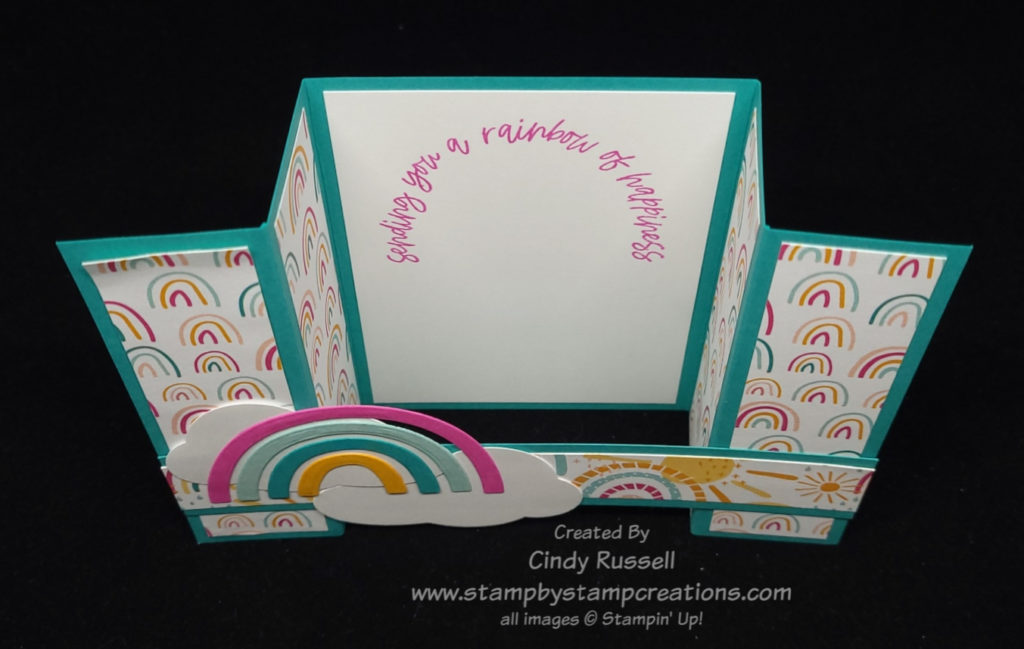
Bridge Fun Fold Card

This second picture gives you a top view so you can see all of the panels a little better.

This fun fold is pretty easy. Start with a card base that is 4 1/4″ x 8″. Make sure the length is 8″, not 8-1/2″. I made that error the first time around and couldn’t figure out why my “bridge” piece wouldn’t fit! Sheesh!

With the long edge of the card base at the top of your Simply Scored scoring board score the cardstock at 1 1/4″, 2 1/2″, 5 1/2″ and 6 3/4″. Fold the two outside score lines into mountain folds and the two inside score lines into valley folds. The “bridge” piece of cardstock is 5 1/2″ x 1″. The width of the “bridge” piece of cardstock can be any dimension that works for your design. The key is to make sure the length is 5 1/2″.

The four designer paper panels measure 4″ x 1″. The designer paper piece on the “bridge” measures 5 1/4″ x 3/4″. The Basic White piece of cardstock in the center of the card measures 4″ x 2 3/4″.

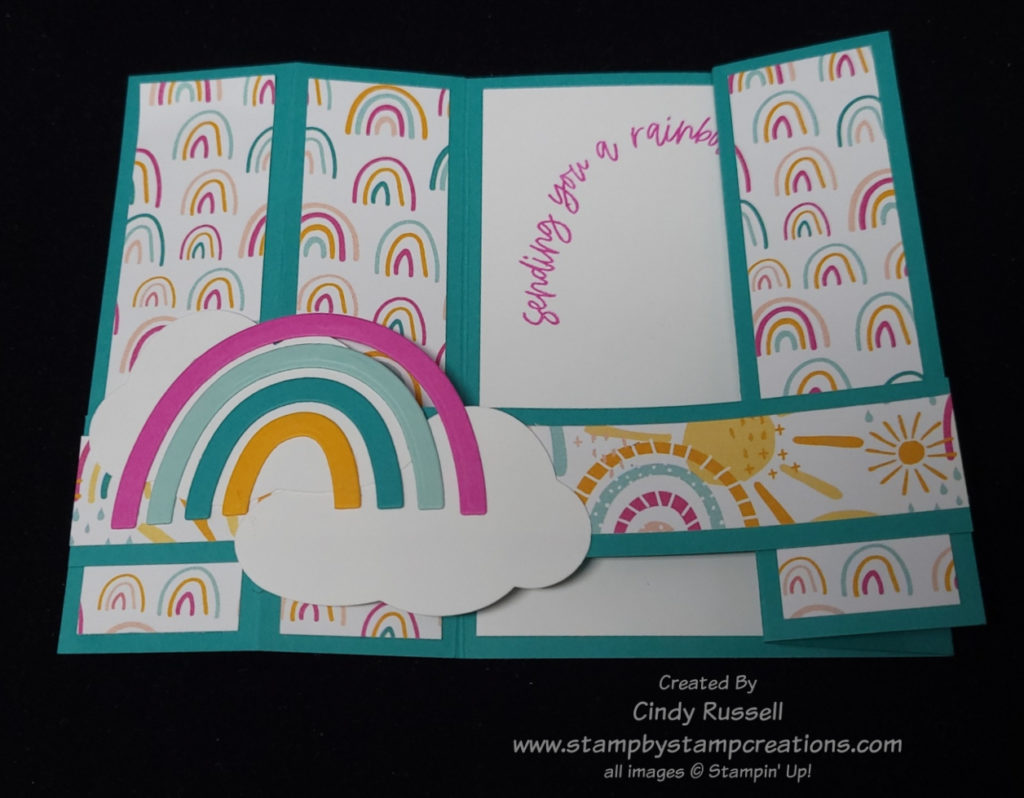
To adhere the “bridge” to the card you want to fold the card like in this picture. The sections on one side of the center piece of the card base should be “open” and the sections on the other side should be folded closed.

Make sure to put adhesive only on the areas of the “bridge” that will be adhered to the two outside panels.

The way the card is folded in this last photo is also the way you will fold it to slide it into an envelope.

Let me know if you have any questions on this fun fold. Have a great day! Take care and Happy Stamping!

A Fun Fold and Stamped Ribbon

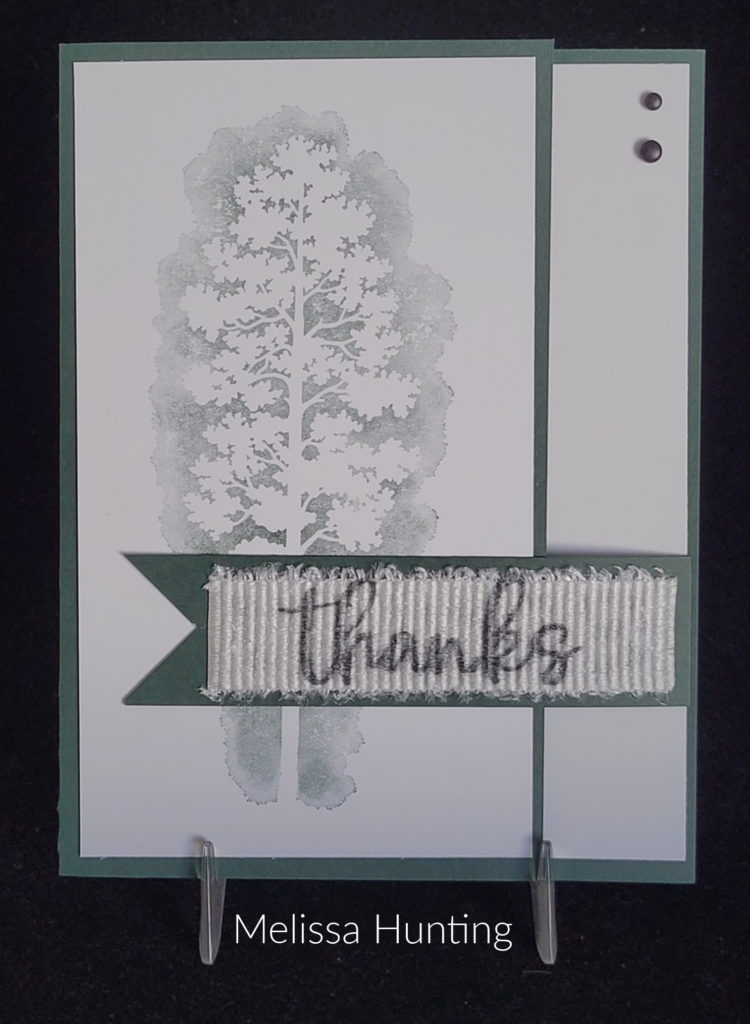
It’s Fun Fold Friday!  Not only do I have a fun fold card for you but it’s a swap card as well.  This fun fold is very similar to one I showed you back in October.  You can view that post here.  I called that fun fold in October the Side Flap Fun Fold.  This card is the same idea but the flap is a different size and in a different location on the card.

The image on the front of the card is from the Amazing Silhouettes stamp set in Stampin’ Up!’s January – June Mini catalog. The “thanks” is from the Biggest Wish stamp set in the Annual Catalog.

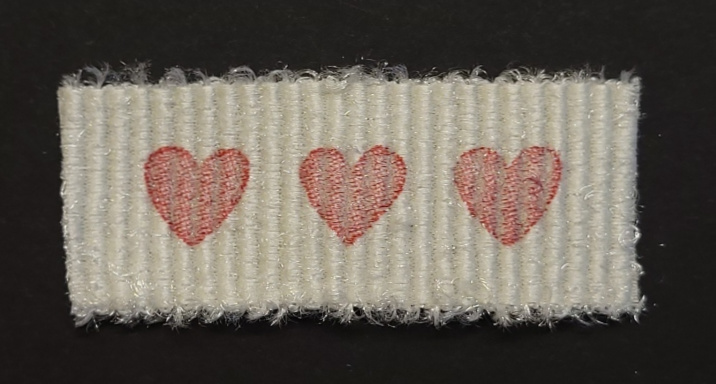
I have to tell you that my favorite part of Melissa’s card is that she stamped the sentiment directly on the ribbon! I have never done that. Have you? I’m especially impressed because this ribbon is very textured.

I was going to tell you that you should probably use StazOn ink when stamping on ribbon but then I thought I’d give it a try with regular Stampin’ Up! ink. Guess what? It worked just fine! Check out the second photo.

Stamping On Ribbon

I didn’t expect it to turn out so well! When I placed the inked stamp on the ribbon I held it in place for a few seconds and then lifted the stamp straight up. No problems at all! Hmm…I may have to try this on one of my own cards!

If you’re wondering, this ribbon is the White Frayed Ribbon (#158138 $7.50) found on page 33 of Stampin’ Up!’s January – June Mini Catalog.

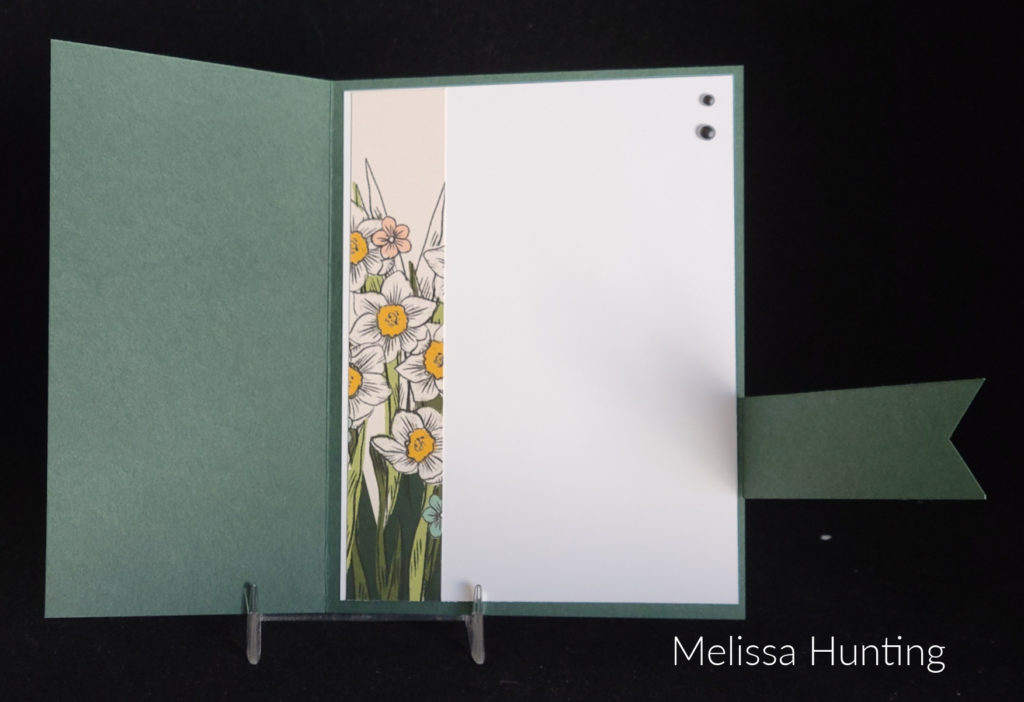
Here’s a photo of the inside of Melissa’s card. I like the way she used the Sale-a-bration paper, Daffodil Afternoon, to add a little something extra to the inside of the card.

No naked envelopes and no naked insides of your cards! If you’re going to the trouble of making a special card, make the envelope and the inside of the card special too.

Have a great day! Take care and Happy Stamping!

Artfully Layered Tropics

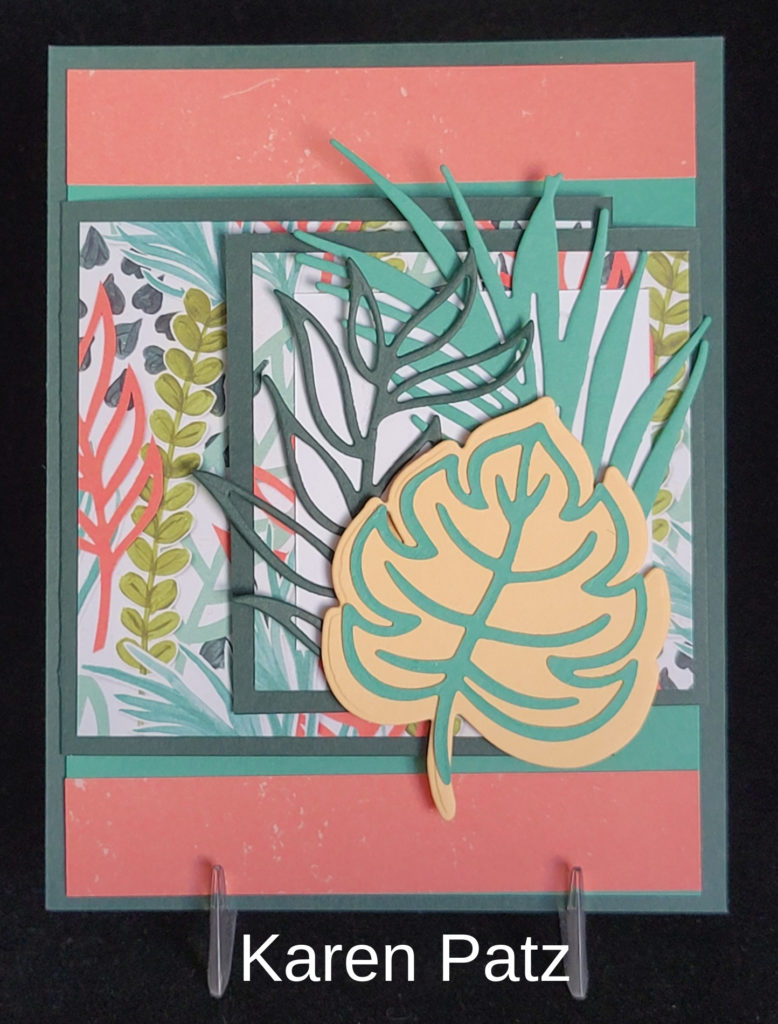
Artfully Layered Fun Fold

Tropics are definitely on the brain this week.  With two days of snow this week I’m ready for a tropical vacation.  Since I don’t have one scheduled, I’ll just look at this lovely tropical card and imagine a Mai Tai in my hand and the sandy beach under my toes!

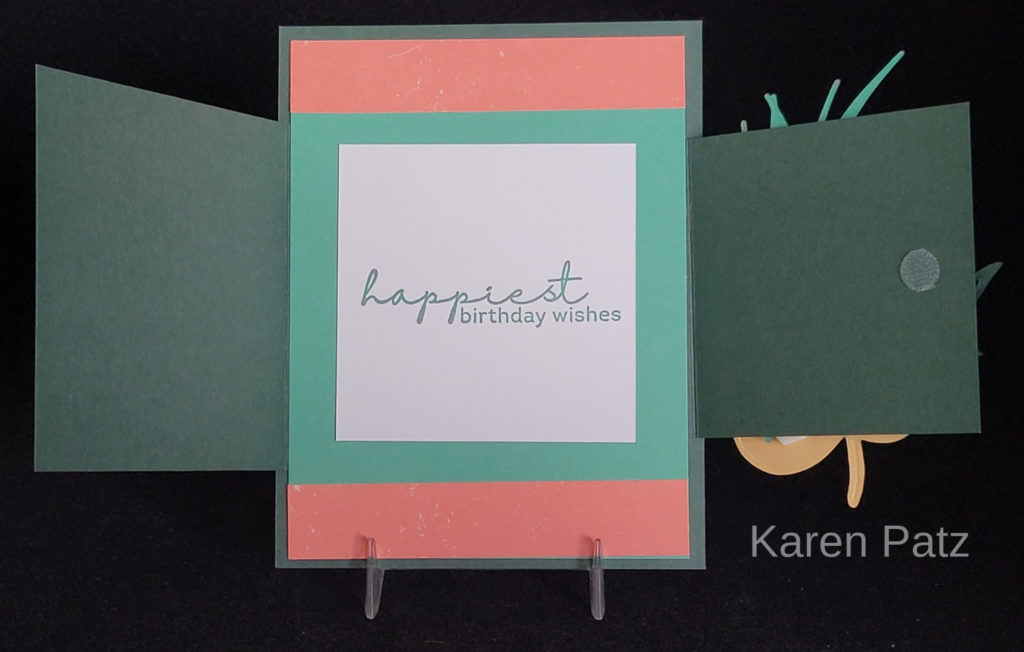
It’s Friday today and I usually do Fun Folds on Friday.  This swap is perfect to share today.  My downline Karen created this card for our Mini Catalog Swap.  Didn’t she do a nice job?  The Fun Fold may look familiar.  I shared it with back in September.  It’s funny how different the fold can look when you use different products.  You can view the original post on this Overlapping Flap Fun Fold card here.  The original post will give you dimensions as well as a quick video on how the fun fold was made.

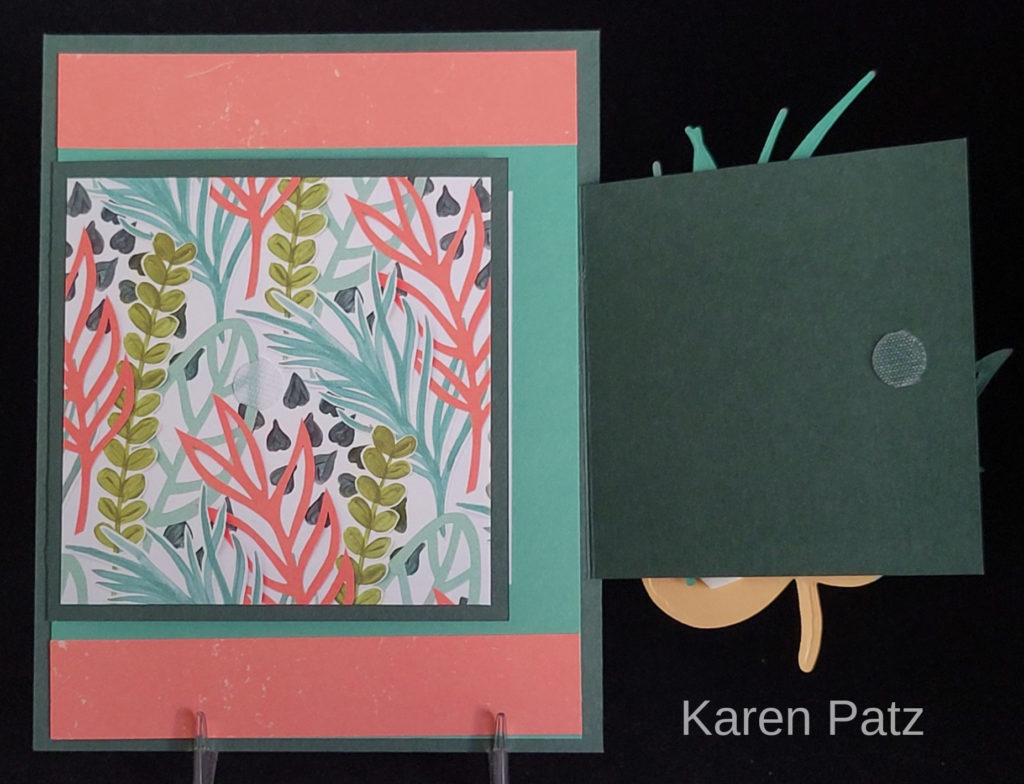
Artfully Layered Fun Fold

One fun feature that Karen added to her fun fold was the Velcro-type fastener to hold the top flap closed.  Sometimes with a lot of layers things don’t stay closed like you want.  Another option that would have worked would be tiny, thin magnets to hold things closed.  The nice thing about magnets is that you can hide them under cardstock.  I like the fasteners that Karen used because they’re almost clear.  You can hardly tell that they’re there.

Karen used some of the products from the Artfully Composed Suite in Stampin’ Up!’s new Mini Catalog on her card. So much fun to be had with Artfully Layered stamp set, the Tropical Layers dies and the gorgeous and fun Artfully Composed Designer Series Paper! I love the soft colors and bold designs of the paper and can’t wait to play with it.

Are you itching for a tropical vacation after seeing Karen’s card? I sure am! Have a great day. Take care and Happy Stamping!
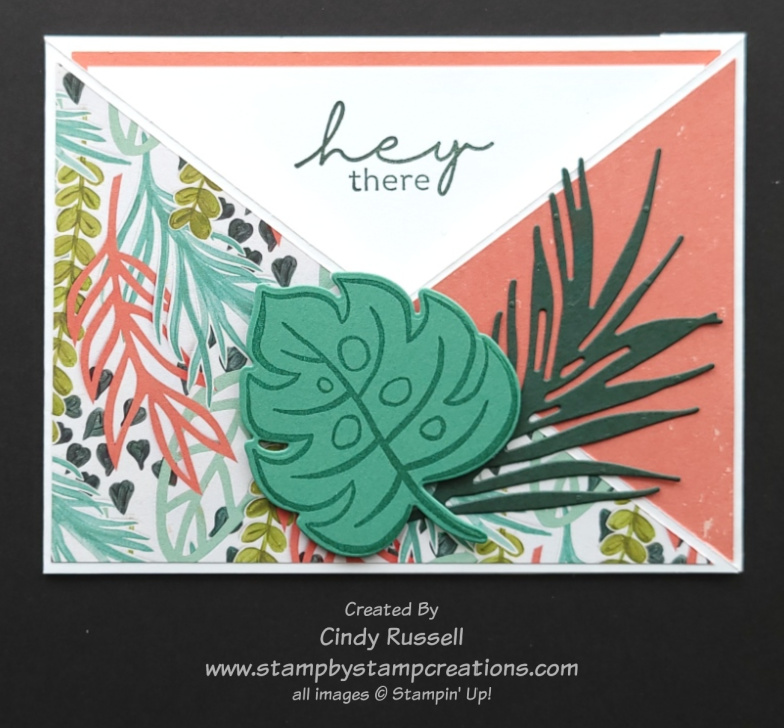
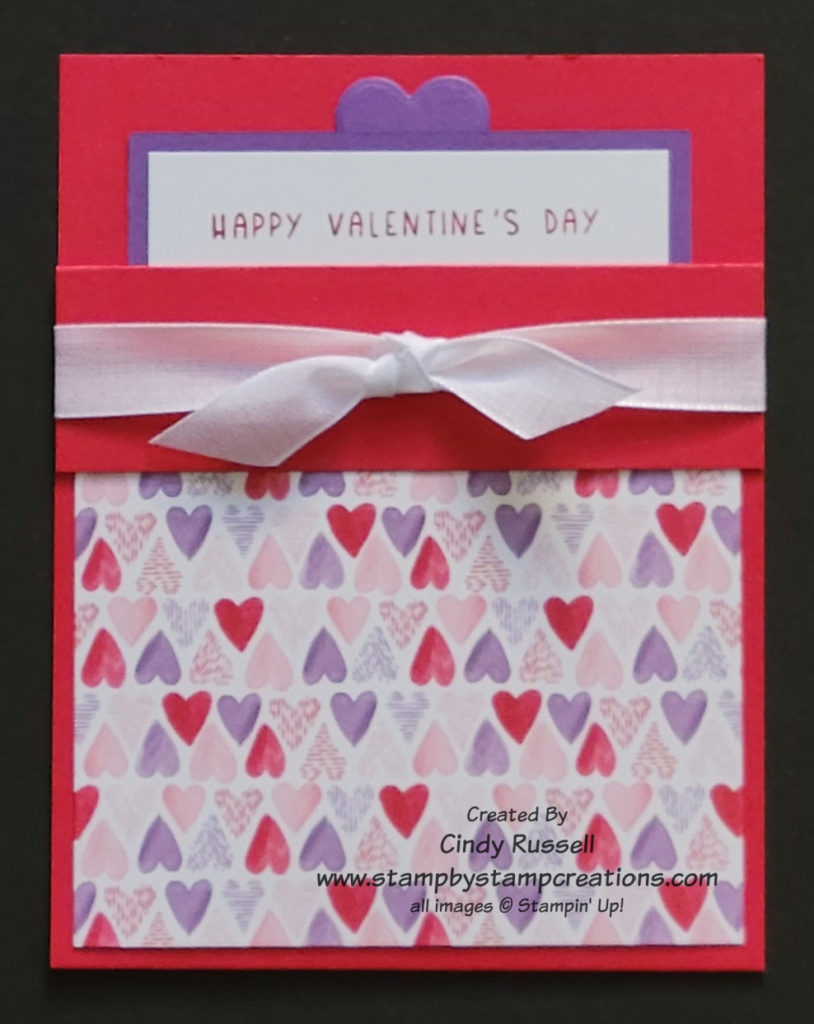
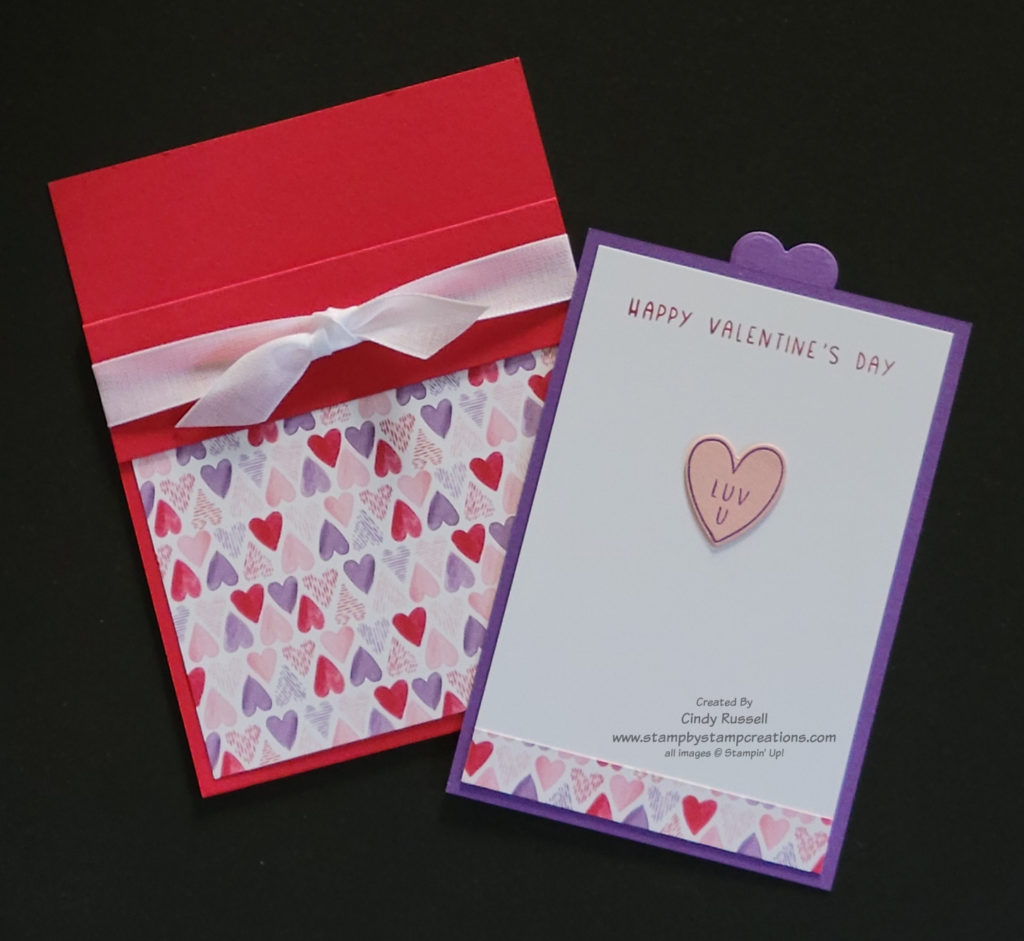
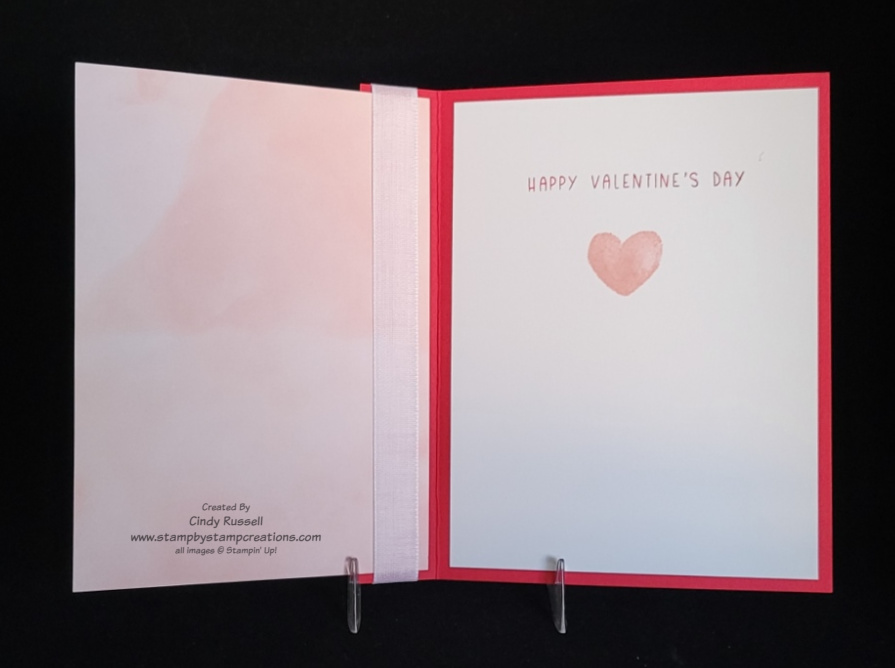
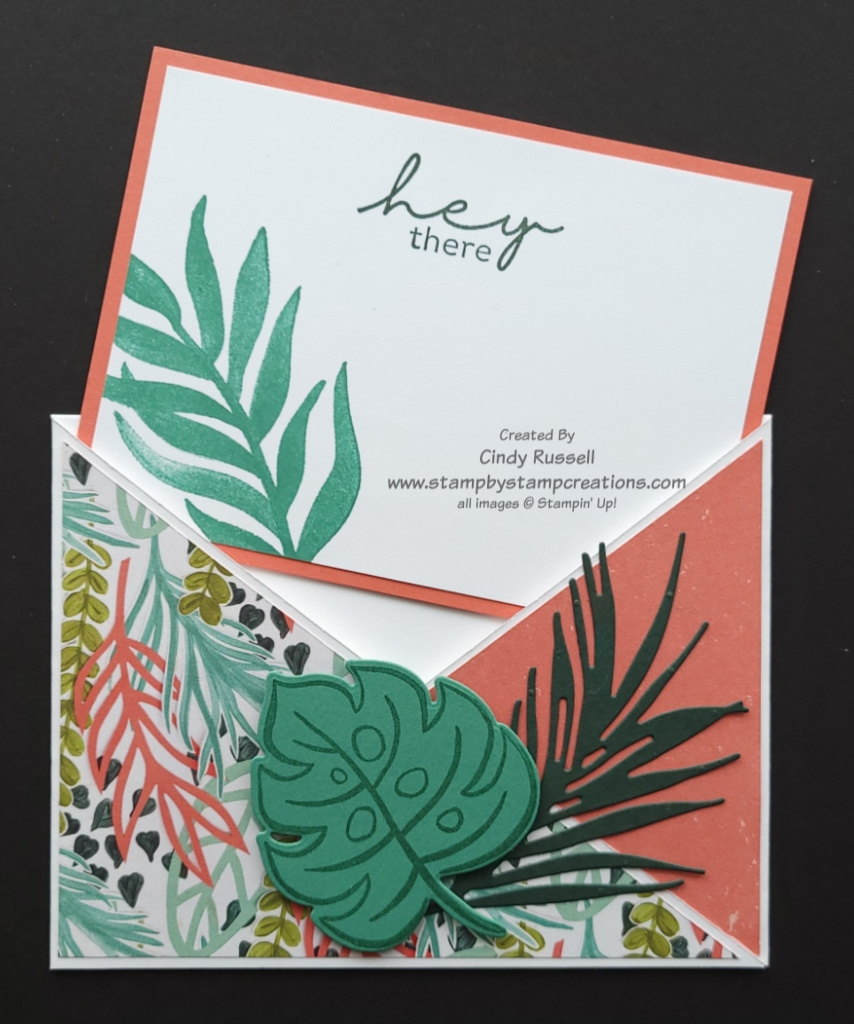
Pocket Fun Fold ValentineCard

I love Fun Fold cards and the easier, the better! The complicated ones can be amazing but it’s so much easier to duplicate the easier ones. Last week’s fun fold was very simple and this week’s Pocket Card comes pretty darn close.

This fun fold makes a really cute valentine but just change up the stamp set, dies and designer paper and you can make any type of card. I’ve used this design for a sympathy card.

The pocket portion of this card is only one piece of cardstock!  4 1/4” x 11” scored at 1 ¼” and 5 ½”.  The insert for the pocket is 5” x 3 ¼” and you can choose to put a “handle” to grab on the top or leave it off. 

If you’d like to recreate this project you can view my step-by-step instructions for this Pocket Card Fun Fold here.  These instructions also include a complete supply list.

Have a great day! Take care and Happy Stamping!

It’s All About The Candy

It’s all about the candy, right? I’m talking about Valentines Day. Where would Valentine’s day be with out the heart shaped box of chocolates or the fun little pink and red treats?

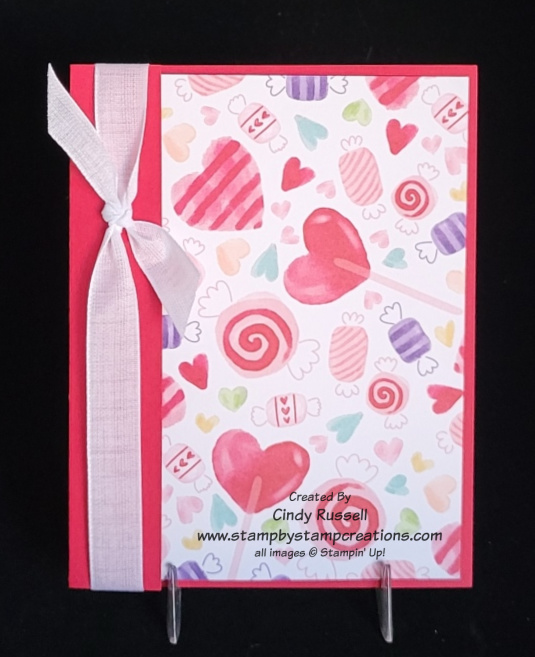
Valentines Day may be all about candy but so is this sheet of Stampin’ Up!’s Sweet Talk Designer Series Paper. This sheet of paper is perfect for this easy-peasy Fun Fold!

This card isn’t so much a Fun Fold as it is a unique card design. The cardstock portion of the card isn’t the usual 5 1/2″ x 8 1/2″ scored at 4 1/4″. The cardstock portion of this card is 5 1/2″ x 5 1/4″ with the score mark at 1″ on the 5 1/4″ edge.

The designer paper is cut at 5 1/4″ x 4″ and adhered to the 1″ flap of the cardstock. In the second photo that I’ve posted here you can see that the designer paper is not butted up against the fold of the cardstock. To get the designer paper lined up properly, I opened the cardstock and centered the designer paper on the large section. I placed my adhesive on the 1″ flap (being careful not to get it too close to the center fold) and then closed the cardstock so the adhesive adhered to the designer paper.

There are a couple of things you want to remember when working with the white insert for your card. First of all want to cut it slightly smaller than 5 1/4″ x 4″. You do this to make sure that none of the white shows when the card is closed.

The second thing to note is that you’re not going to just place adhesive on the back of the white cardstock and adhere it to the inside of the card. You’re going to place the adhesive on the back of the white cardstock and then center the front of the white cardstock on the backside of the designer paper. Once you have the white cardstock centered, you will close the card and your white cardstock should be perfectly centered on the inside of the card.

This card design will work for any of your favorite patterned papers. I’ve written up step-by-step directions for this card which include dimensions and supplies. You can view them here. Have fun creating your own Designer Paper Card Front Fun Fold card! Have a great day! Take care and Happy Stamping!

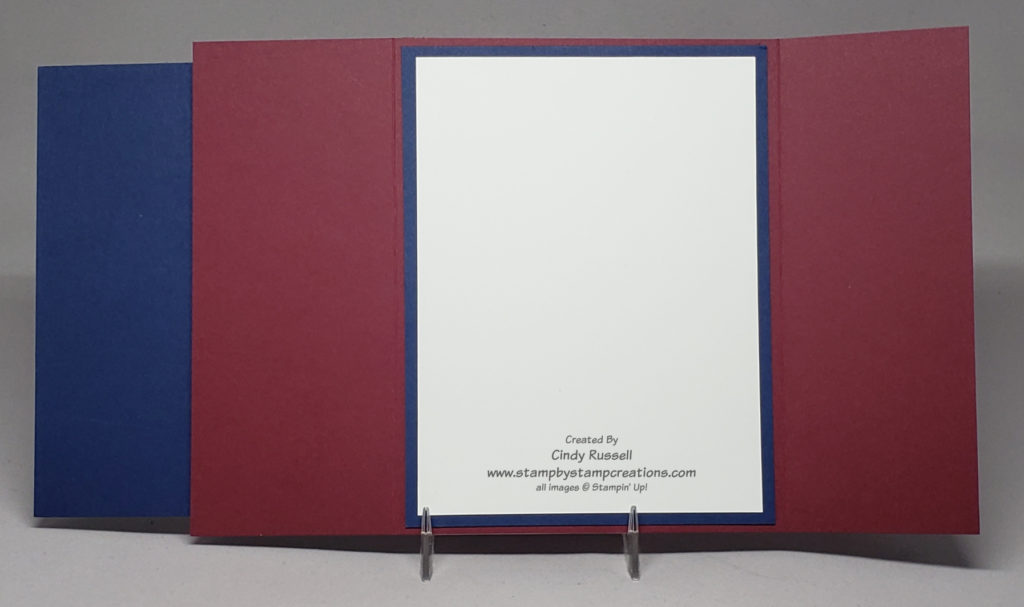
Full Panel Gatefold Card

Full Panel Gatefold Card

Last Spring I started sharing Gatefold cards with you and there were many different types.  Today’s card is a slight modification to the original Gatefold card.  To see my post on the original Gatefold card just click here.

Today’s Full Pane Gatefold card differs from the original Gatefold card in that the front focal piece of the card is larger.  It’s also slightly easier to make because on the original Gatefold card you decorate both side panels with designer paper and need to place them so they align together at the center opening.  On today’s modification you just need to choose your favorite piece of designer paper, layer it on a coordinating piece of cardstock and adhere it to the left flap of the card.  Easy Peasy!  This card is a great way to showcase Stampin’ Up!’s gorgeous designer series papers while at the same time featuring a fun fold.

Here you can see the inside of this fun fold. The base of the card is the regular 5 1/2″ x 8 1/2″. Instead of scoring in half at the 4 1/4″ you want the card folded at 2 1/8″ from each side. To make sure the edges of my card meet up perfectly in the center when closed I make one score mark at 2 1/8″. I then fold the card along that score line and then instead of scoring another mark I just fold the right side of the card closed and make sure the edges meet up and then just crease well. This way you know those edges will match up perfectly. Sometimes when you score you may not have the paper lined up exactly and the edges don’t meet up exactly. Just a quick little tip.

I used the same supplies on this card as I did on a Make-It-Mine card a few weeks ago. I love this pattern of the Beauty of the Earth Designer Papers and this color scheme. The sentiment is from the Time of Giving stamp set.

Have a great day! Take care and Happy Stamping!

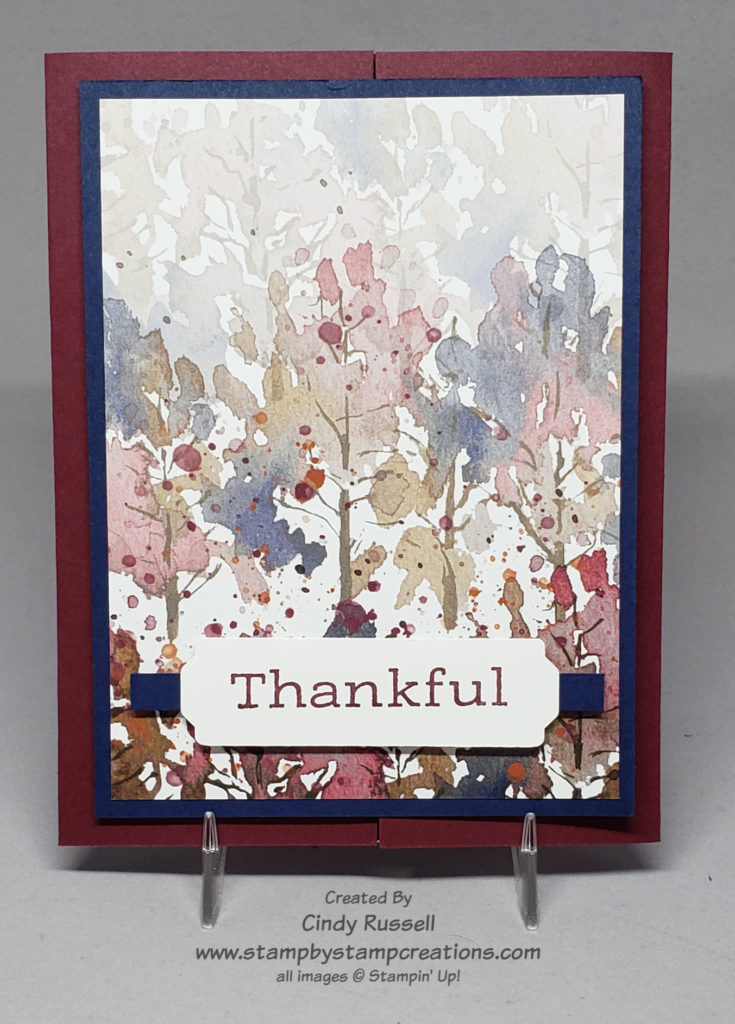
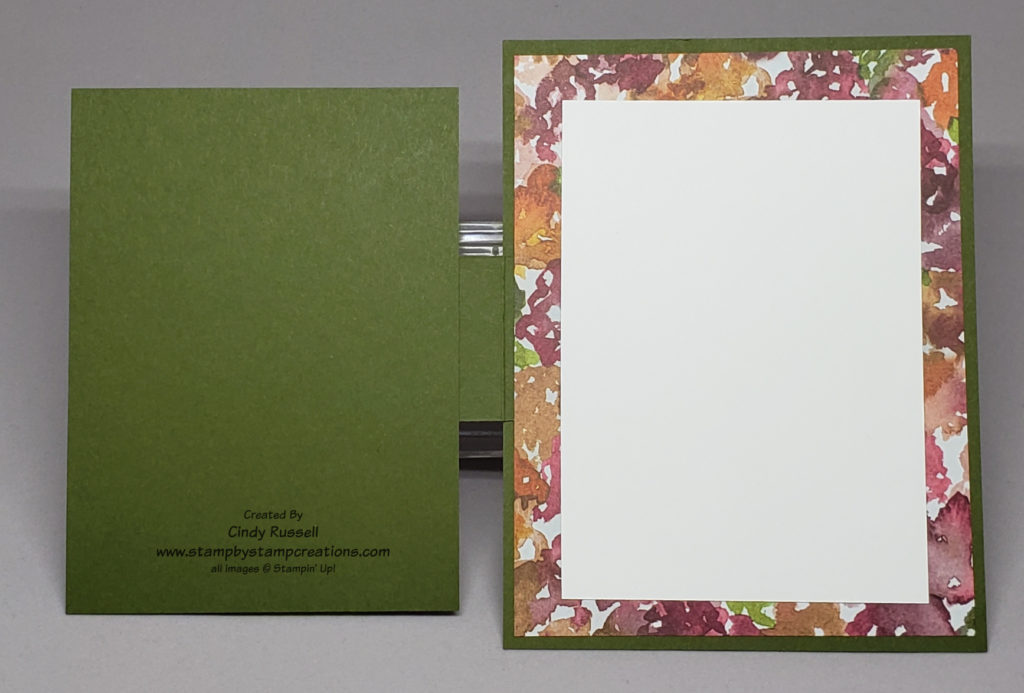
The Colors of Fall Strap Fold Card

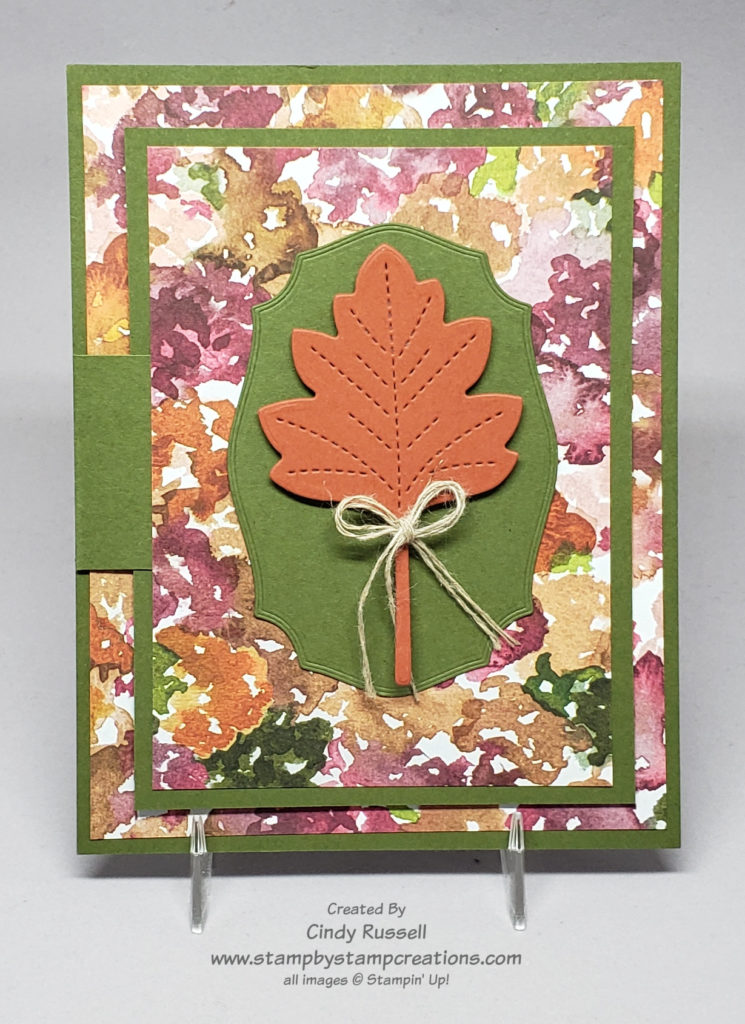
Ah, the colors of Fall.  That’s what I like best about Stampin’ Up!’s Beauty of the Earth Designer Series Paper….the colors!  This Strap Fold fun fold was the perfect choice for highlighting this paper because I got to use two large panels of it.  Doesn’t this paper design remind you of a pile of leaves that you can jump in?  Ok….that your kids or grandkids could jump in?

This fun fold is pretty easy to make.  You just need to be a little strategic when adhering the strap so that you don’t see it when you open the card.  For the card itself, not including the focal point label and leaf and the inside piece for you message, you only need three pieces of cardstock and two pieces of designer paper.  Here are the dimensions:

Cardstock:  5 ½” x 4 ¼”, 4 ¾” x 3 ½” and 1 ½” x 4 ¼” scored at 1 ¼”

Designer Paper:  5 ¼” x 4, 4 ½” x 3 ¼”

The small section of the strap will be sandwiched between the large base piece of cardstock and the large piece of designer paper.  When you adhere the strap to the cardstock be sure to line up the folded edge of the strap with the left edge of the cardstock.

The large section of the strap will be sandwiched between the smaller front piece of cardstock and the small piece of designer paper.  To make sure I got everything lined up straight I used temporary adhesive to adhere the top piece of cardstock to the base.  A sticky note or two will work also.  I then folded the strap over the top piece of cardstock and used a pencil to lightly draw around the edges.  This showed me where to place the adhesive on the cardstock piece.  Once I had applied the adhesive I again “closed” the strap and then adhered the small piece of designer paper.  The basic card is now complete and ready to be decorated!

The label on my card is die-cut using the Tasteful Labels dies and the leaf is die-cut using the Stitched Leaves Dies.  Such a fun card!  The inside piece of Basic White cardstock is 4 ½” x 3 ¼”.  It needs to be slightly smaller than the front piece of cardstock so it doesn’t show when the card is closed.

Happy Fall Y’all and enjoy those colors!  Take care and Happy Stamping!

Cookies and a Fun Fold

I love fun fold cards!  They make an ordinary card a bit more special.  When I find a fun fold that I want to recreate and it’s only called “fun fold” the hard part begins.  What do I call it? How do I describe it to you?  That’s where my unoriginal descriptive names come in.  Ha!

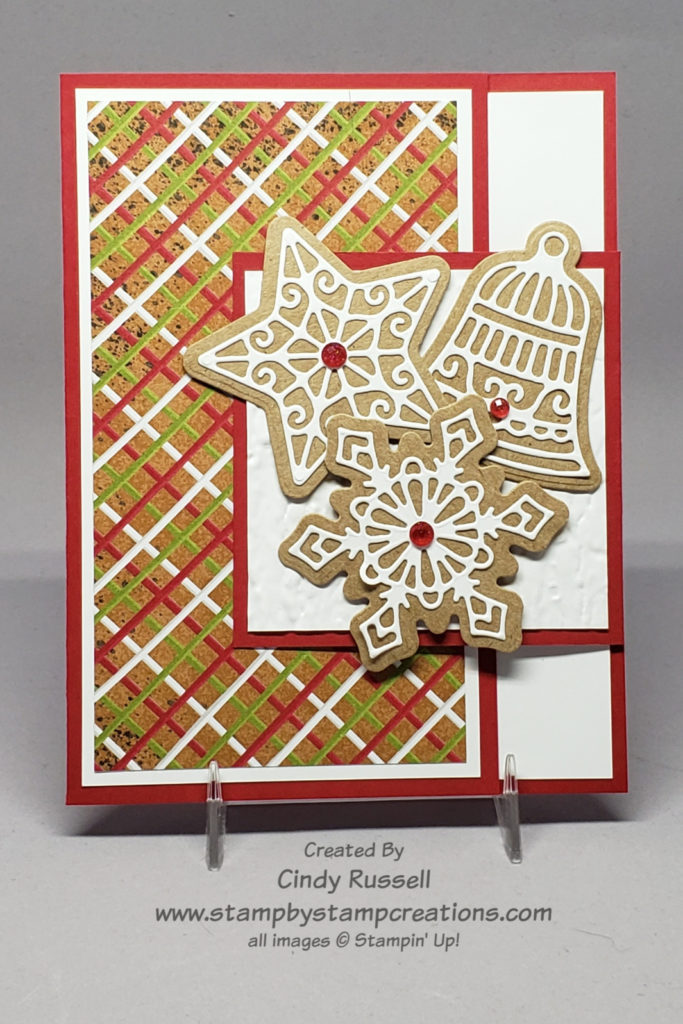
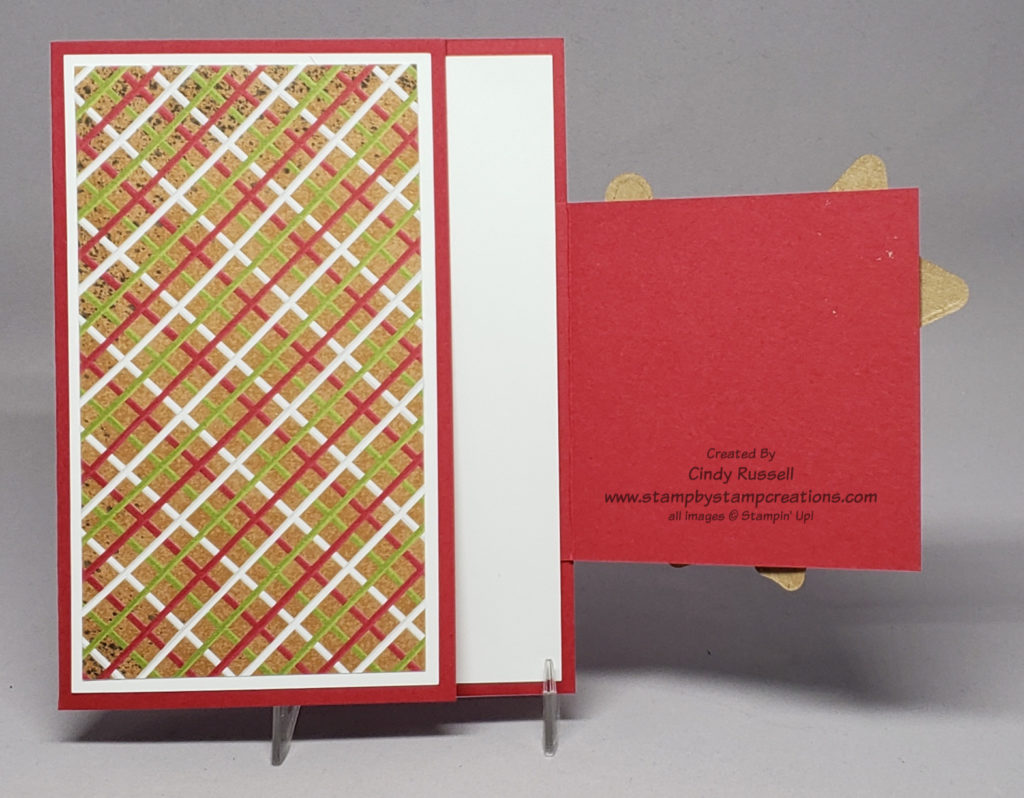
I am calling today’s fun fold the Side Flap Fun Fold because…it has a side flap.  Yep.  Original.  Whatever….let’s forget about the name and talk about how to make this fun card.  Basically, you take a regular-sized card, trim the front and add the side flap.  Easy peasy.

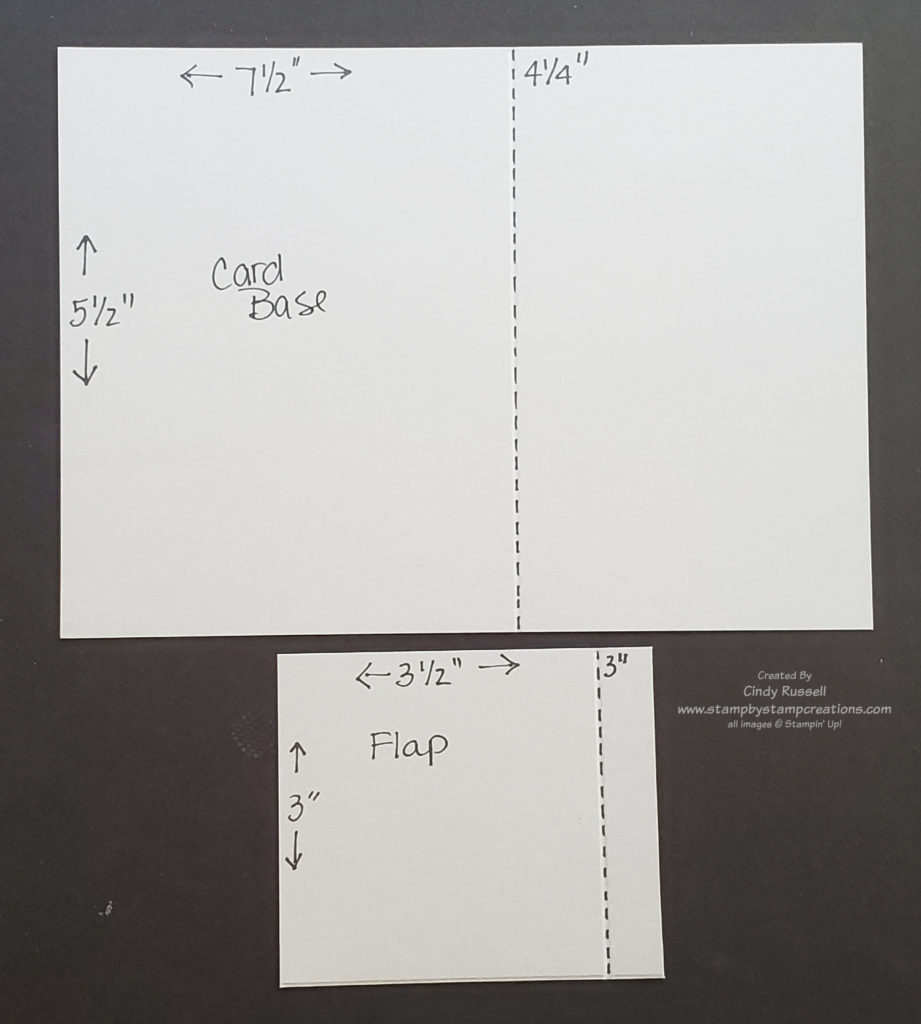
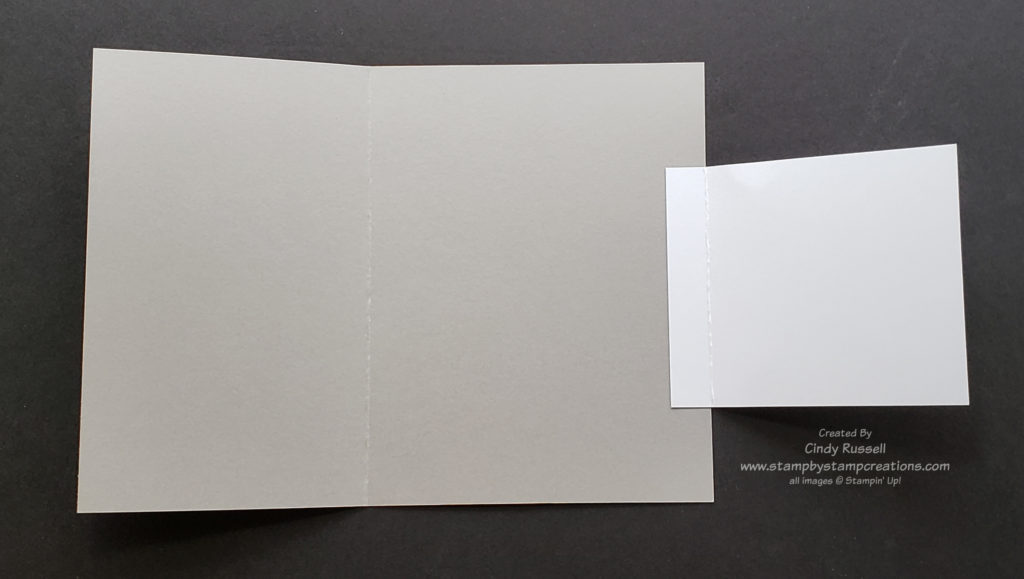
The base is 5 ½” x 7 ½” or a regular 5 ½” x 8 ½” card base with 1” trimmed off the front of the card.  The side flap is 3 ½” x 3”.  Score at the 3” mark on the 3 ½” side.  The ½” section of the flap is the part that gets adhered to the inside of the card back. 

After you’ve folded the card base along the score line it’s time to adhere the flap.  Fold the flap all the score line.  With the flap still folded, place adhesive on the small section.  Now, with the card base open, line up the fold of the flap with the right edge of the card base.  Adhere the flap to the card base.  That’s it.  You’ve made the Side Flap Fun Fold.  Now it’s time to decorate.

I used products form Stampin’ Up!’s Gingerbread & Peppermint Suite of products.  The sentiment on the inside of the card is from the Frosted Gingerbread stamp set and the “cookies” on the flap of the card are cut using the coordinating Gingerbread dies.  I love how you can die cut the “cookie” and the intricate “frosting”.  I just wish I could make cookies that look so good.  Ha!  The designer paper is from the Gingerbread & Peppermint Designer Series Paper pack.  Gotta love all that coordination!  The jewels on the “cookies” are Wonderful Gems.

Here are some additional dimensions for the layers on the card.
Basic White:  5 ¼” x 4”, 5 ¼” x 3”, 2 ¾” x 2 ¾” Designer Paper:  5” x 2 ¾”

This was a pretty easy fun fold card to make.  I hope you’re enjoying fun folds as much as I am.  Have a great day!  Take care and Happy Stamping!

A Squirrely Fun Fold Card

Window Double Card Fun Fold

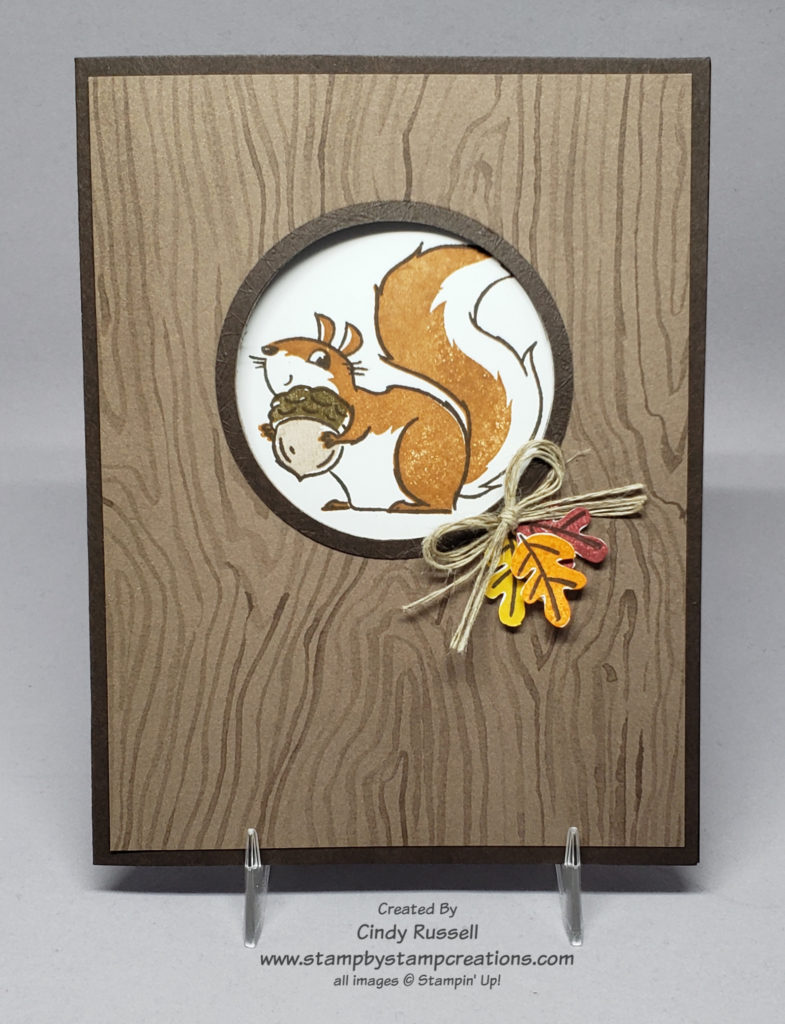
I was going through my stash of cards the other day and came across this Fun Fold that I call the Window Double Card Fun Fold.  It’s a rather easy fun fold and I decided to give it a try for today’s card.  Next was to figure out what supplies to use on it.  As I searched my shelf of stamps, I came across the adorable Nuts About Squirrels stamp set from the current Mini Catalog and knew it was perfect for this fun fold.

The little squirrels in this stamp set are so dang cute and the sentiments are cute too. The outline of the squirrel is stamped in Early Espresso and the shading of the squirrel is in Cinnamon Cider. The insides of the acorn are stamped with Soft Suede and Crumb Cake.

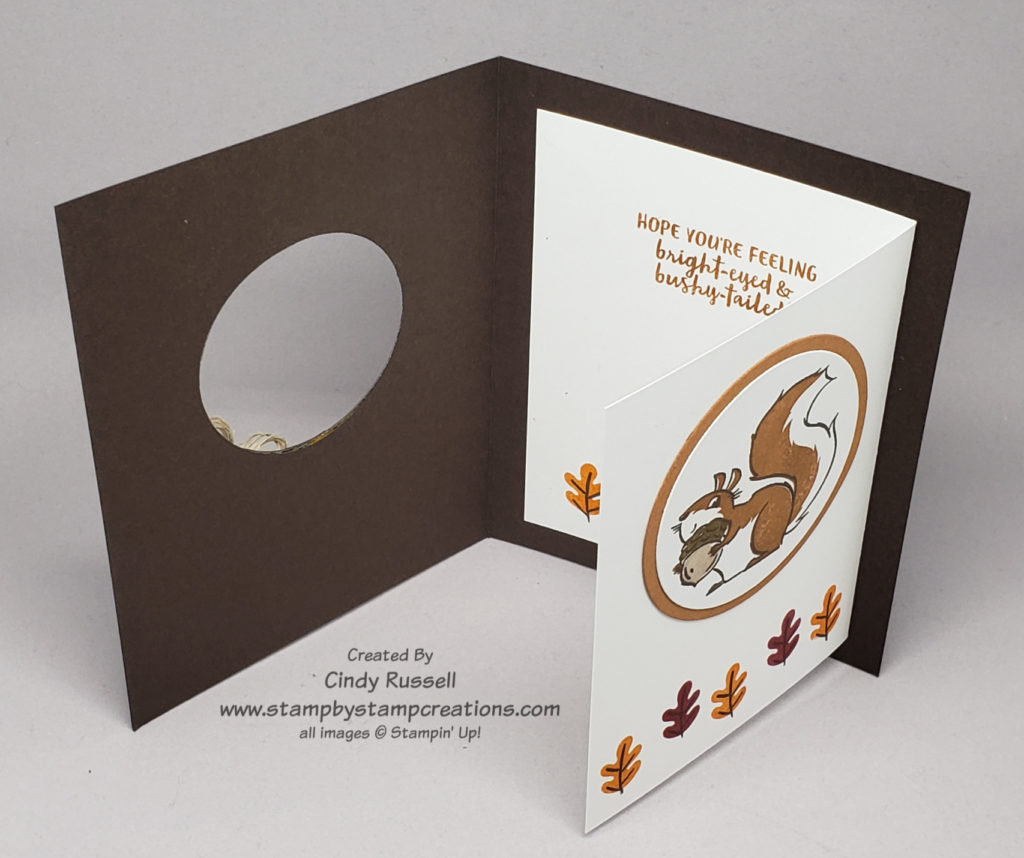
This fun fold gets it’s name because it’s basically two cards in one.  You have the outside decorative card and then you have another piece of cardstock folded into a card on the inside of the card.  The outside of the card is a basic 5 ½” x 8 ½” piece of cardstock folded in half.  The inside piece is a 4 ¾” x 7” piece of cardstock folded in half. 

I added the designer paper (from the Beauty of the Earth package) to the front of the card before die-cutting the circle.  After die-cutting the circle I die cut the circular frame to fit around it.  I started by die-cutting the larger circle and then chose the next smallest circle die from my Layering Circles Dies.  The outside of the smaller die fit the edges of the die-cut larger circle perfectly.  The leaves on the front of the card are stamped on Basic White cardstock and then cut out by hand.  Fussy-cutting isn’t my favorite thing but these little leaves finished off the front of my card perfectly!

This fun fold could easily be made without the window in the front but the little peek-through makes it so fun!  Have a great day.  Take care and Happy Stamping!
The Overlapping Panel Fun Fold Card

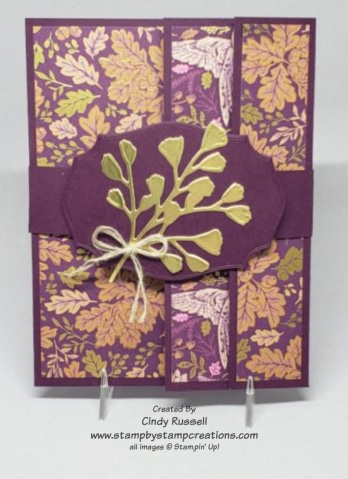
Another descriptive name for a fun fold card….the Overlapping Panel Fun Fold or if you prefer you can call it the Overlapping Tri-Panel Fun Fold. Three score marks make three front panels that show off your favorite designer series paper.

When I saw the Blackberry Beauty Designer Series Paper in Stampin’ Up!’s July – December Mini Catalog I wasn’t overly impressed. I thought it was a little busy and the I didn’t like the birds on it. Fast forward to actually seeing the paper in person and using it. I still don’t really like the birds on it but the paper is gorgeous! Deep purples and gold foil. A lovely combination. Have you seen this paper in person? What do you think of it?
I die cut the foliage on my belly band from Gold Foil using the Forever Flourishing Dies and adhered it to a label die cut using one of the Tasteful Label Dies. The purple cardstock used on my card is Blackberry Bliss.

In this photo you can get a better idea of how the card is folded and how the three different sections will overlap. I added a layer of gold foil to the inside white piece of my card to really set it off.

Here’s the template to show you where to score and in which direction to fold your score marks.

Start with a piece of cardstock that is 5 1/2″ x 11″. Score at 1 3/4″, 5 1/2″ and 9 3/4″. The designer paper measurements for the panels are 5 1/4″ x 1″, 5 1/4″ x 1 1/2″ and 5 1/4″ x 3 1/2″.

Overlapping Panel Fun Fold Card

Above is a quick video showing you how make this fun fold card. It shows you in which direction your folds should go and where to apply the designer paper. Enjoy!

Have a great day! Take care and Happy Stamping!