Make It Mine Monday: Pretty in Pink

Stampin’ Up!’s Color & Contour Bundle

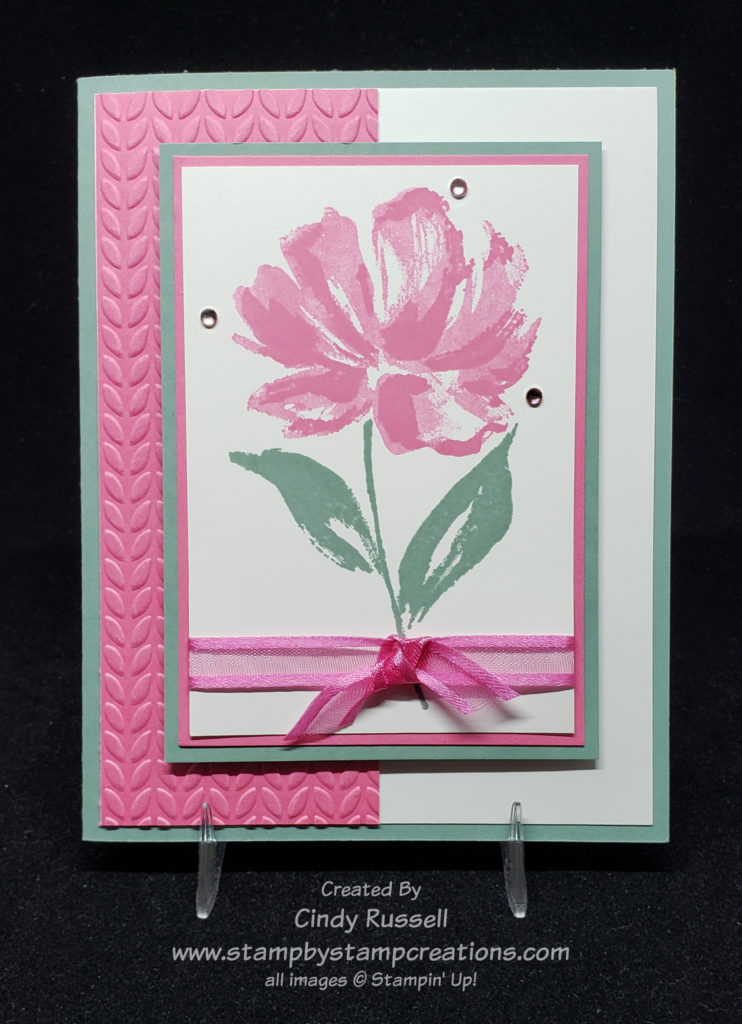
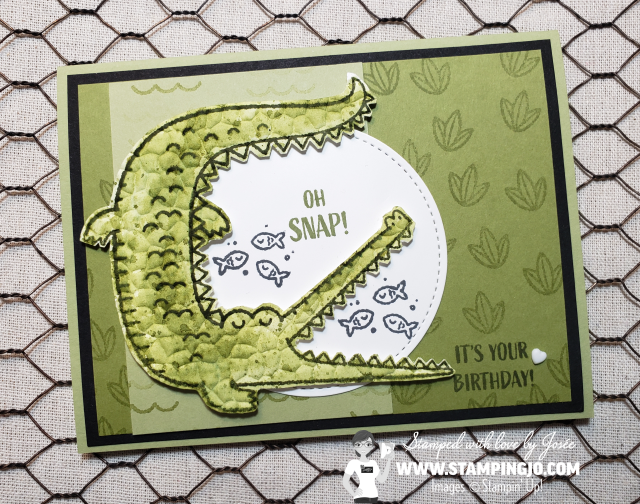
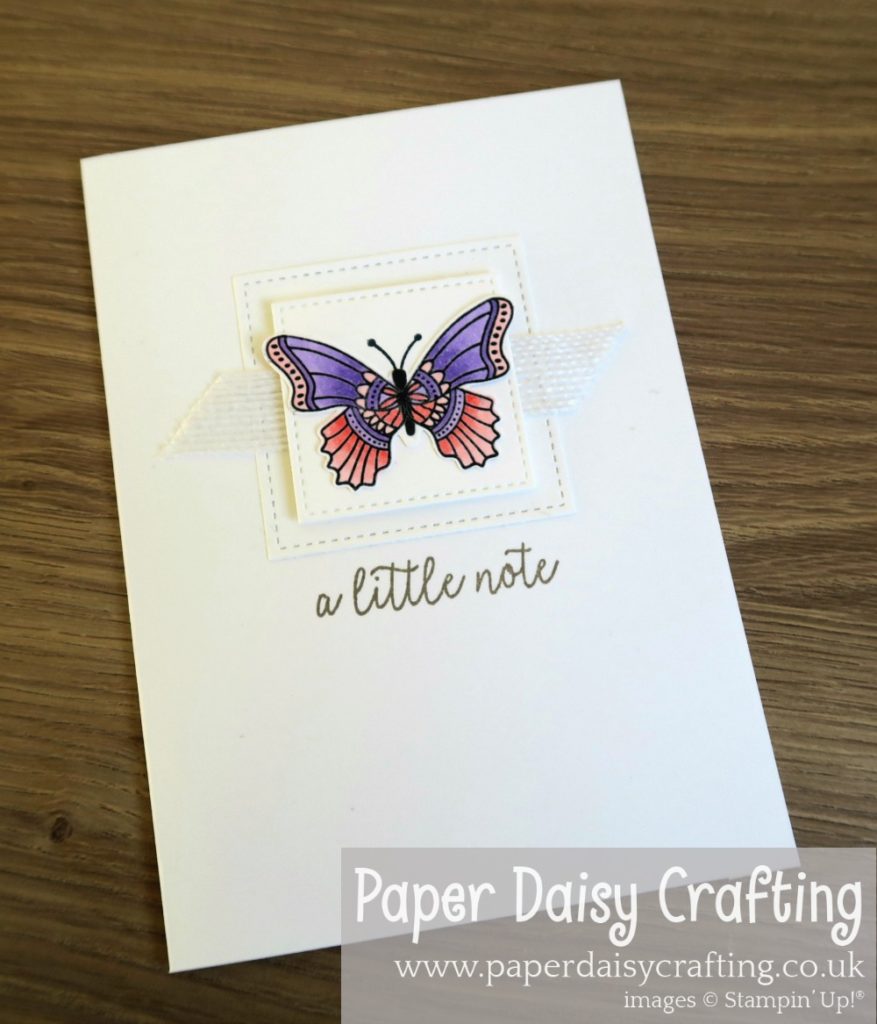
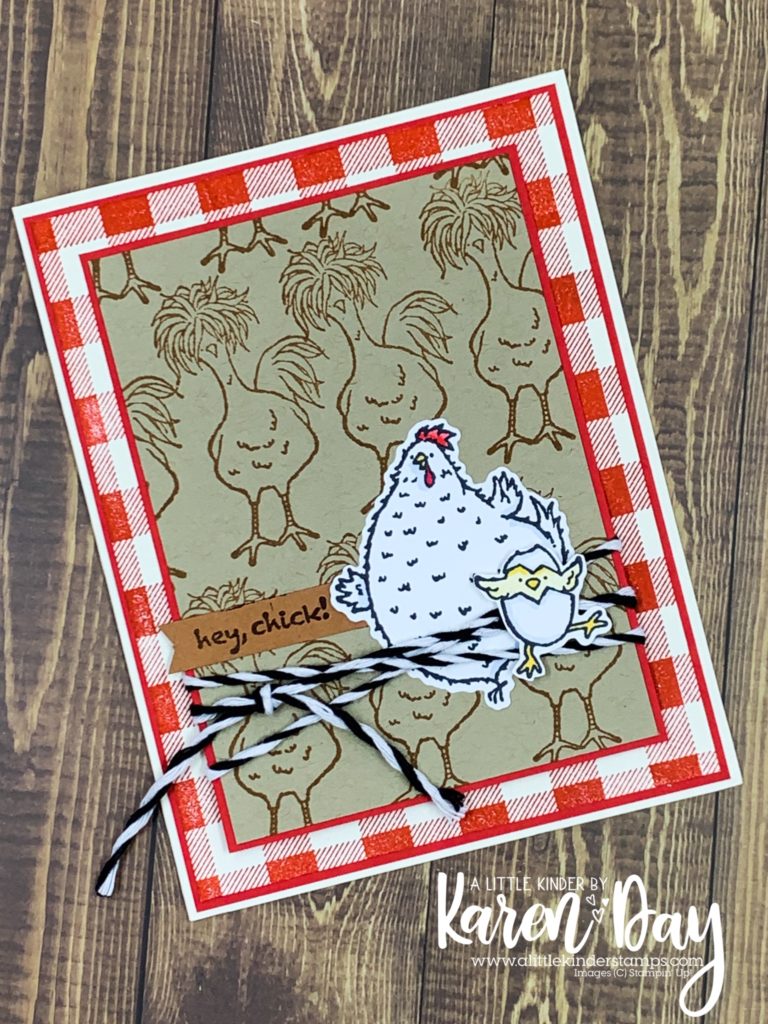
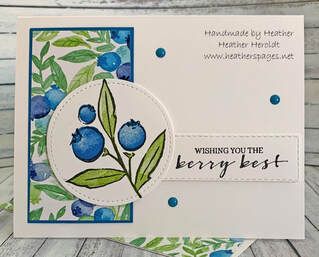
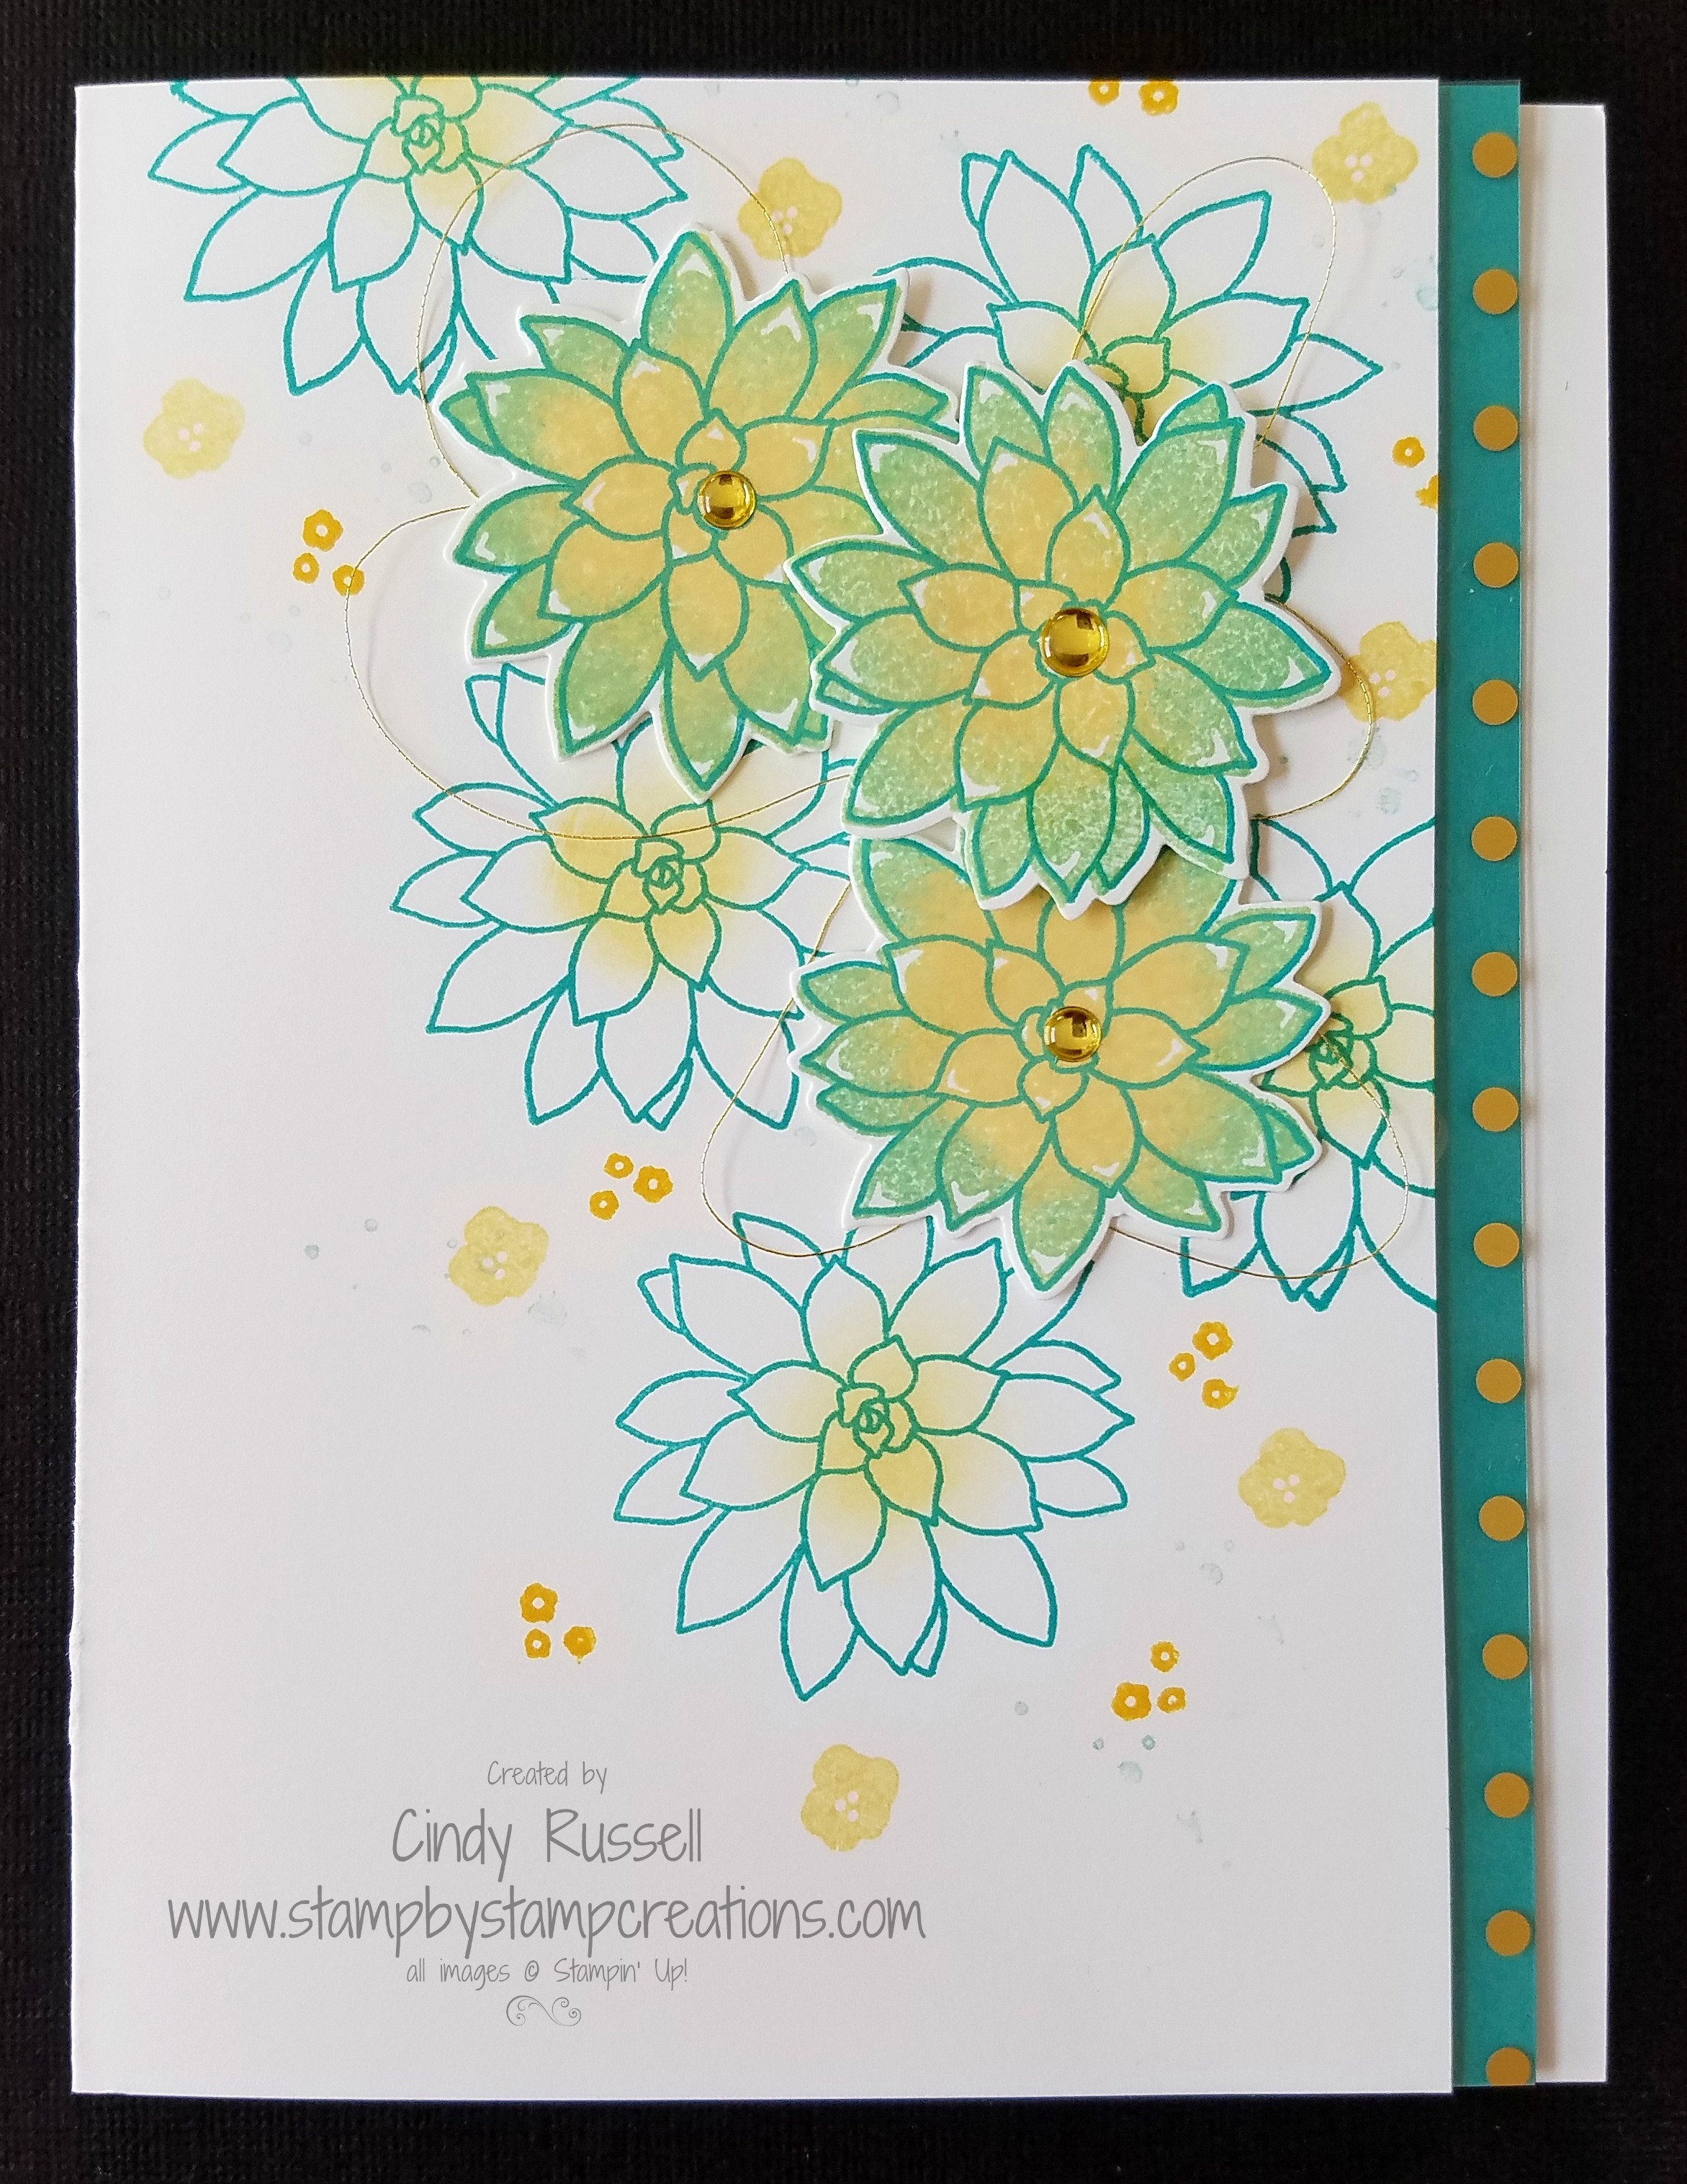
This past month I participated in two different card swaps.  For each of them I made twenty cards ( a different design for each one), mailed them to the hostess and each she sent me back twenty cards from other demonstrators.  This card was made by own of the hostesses.  Isn’t it lovely?  Michelle made it with the Color & Contour Bundle that you can find in Stampin’ Up!’s  2021-2022 Annual Catalog which comes out TOMORROW!  Woo Hoo! 

Michelle used two of the new In-Colors, Polished Pink and Pale Papaya.  The designer paper is from the Pansy Petal pack (pg. 132, #155807 $11.50). Aren’t the little flowers cute?   They’re from a package call Loose Flower Flower Flourishes (pg. 141, #155808 $7.50).  They come in two different sizes and three different colors, Pale Papaya, Polished Pink and Fresh Freesia.

Color & Contour Bundle Card by Cindy Russell

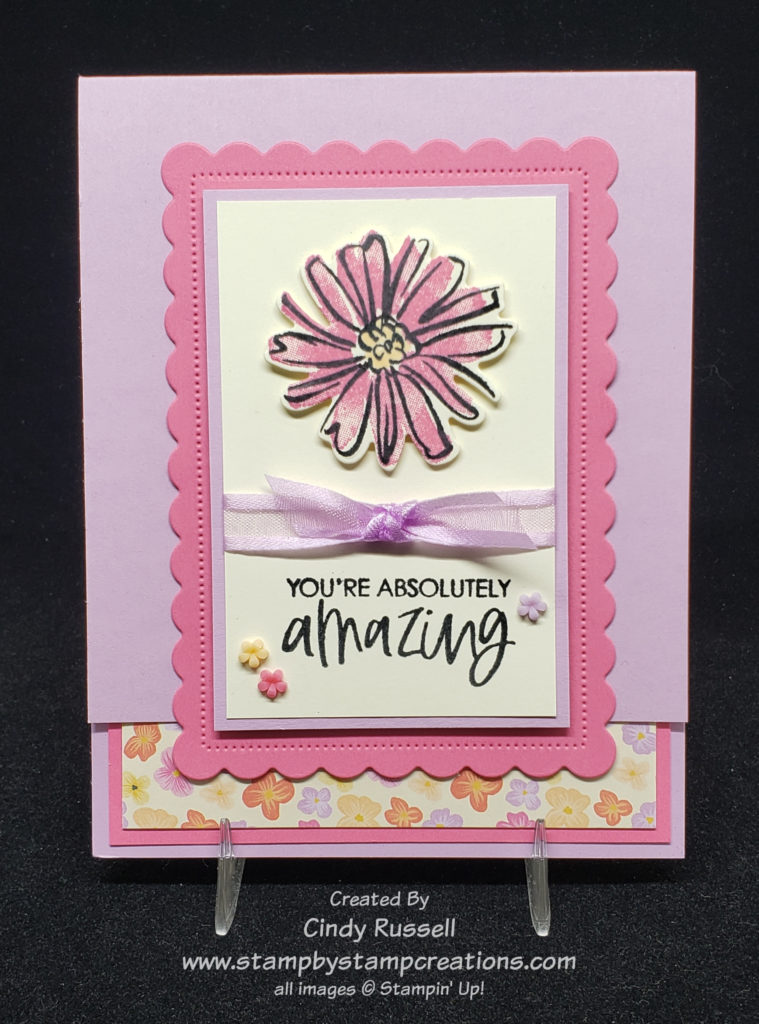
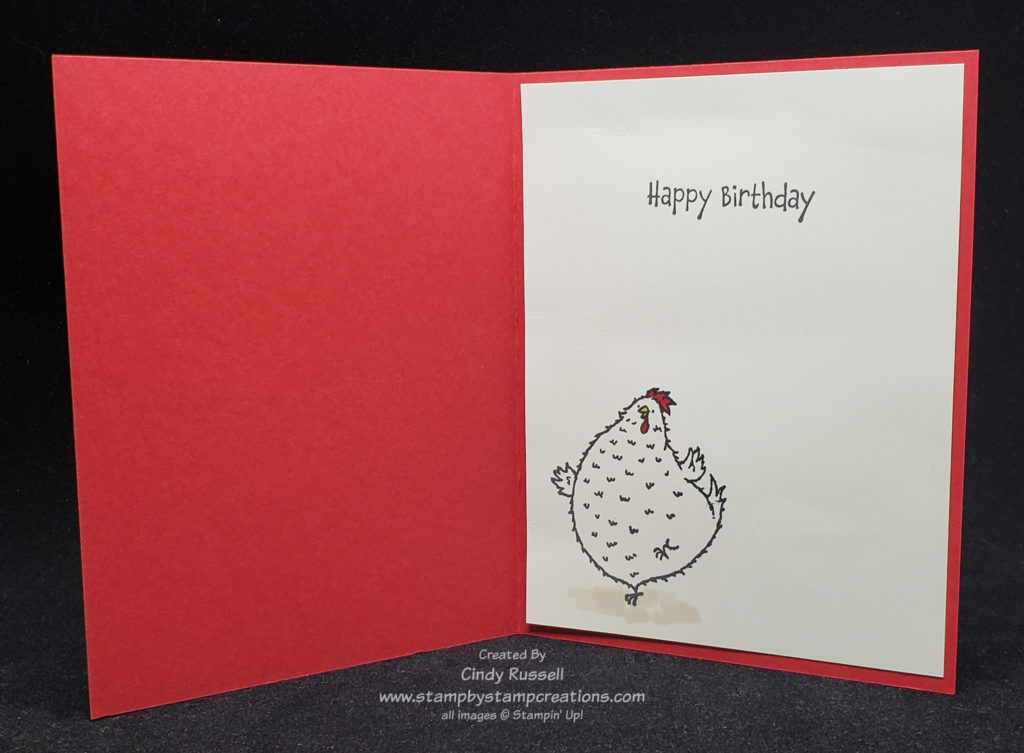
I really liked Michelle’s card but I knew I wanted to make it mine but where to start? Her card is so pretty and you know how much I love the new Polished Pink color! I like the new Pale Papaya color but I’m not sure how I like it with the Polished Pink.

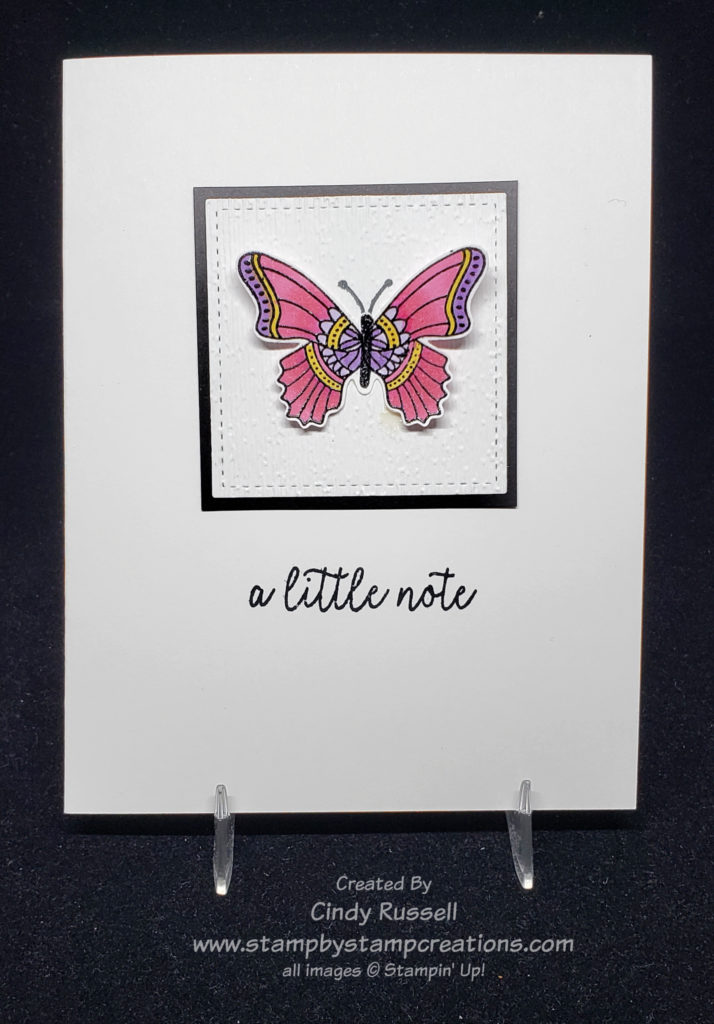
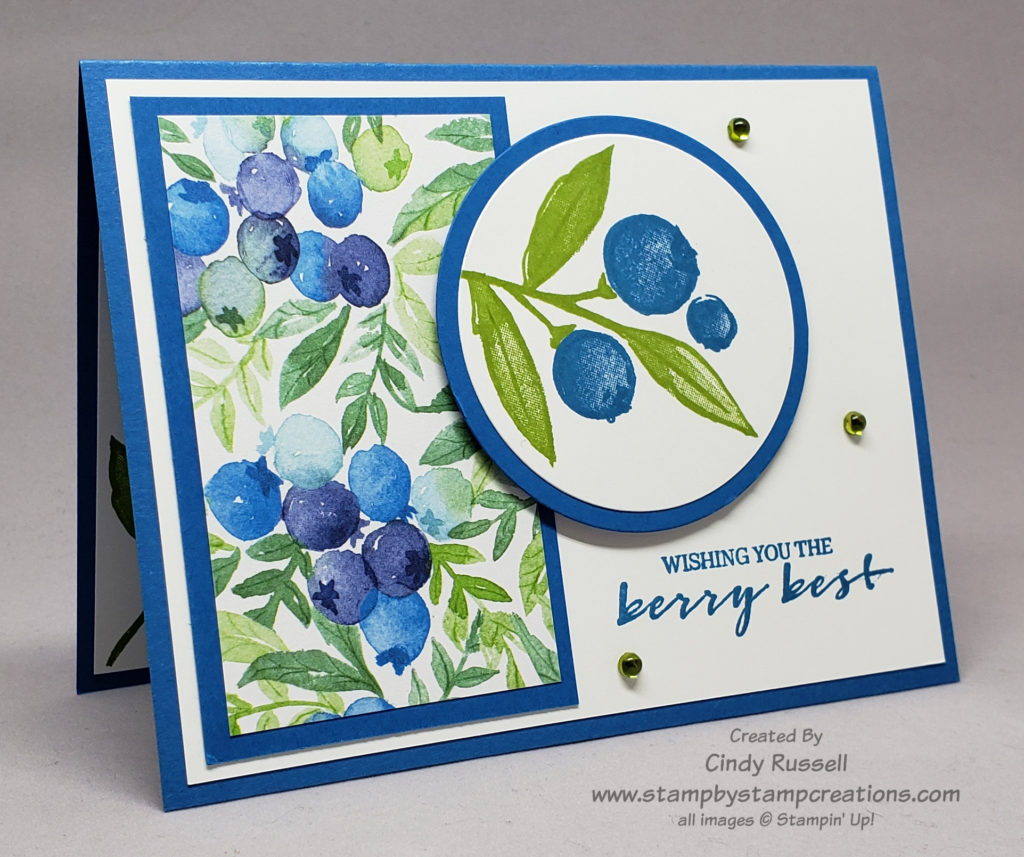
Changing the two major colors on the card was the first thing I did. I decided to coordinate Polished Pink with the Fresh Freesia. Next I changed the Basic White cardstock to Very Vanilla since I liked how it coordinated better with the designer paper.  Then, of course, I had to add more layers.  You know me and my layers!  I decided to go with Fresh Freesia and Polished Pink instead of the Polished Pink and Pale Papaya.   To finish off my card I switched out the ribbon and added another little flower. 

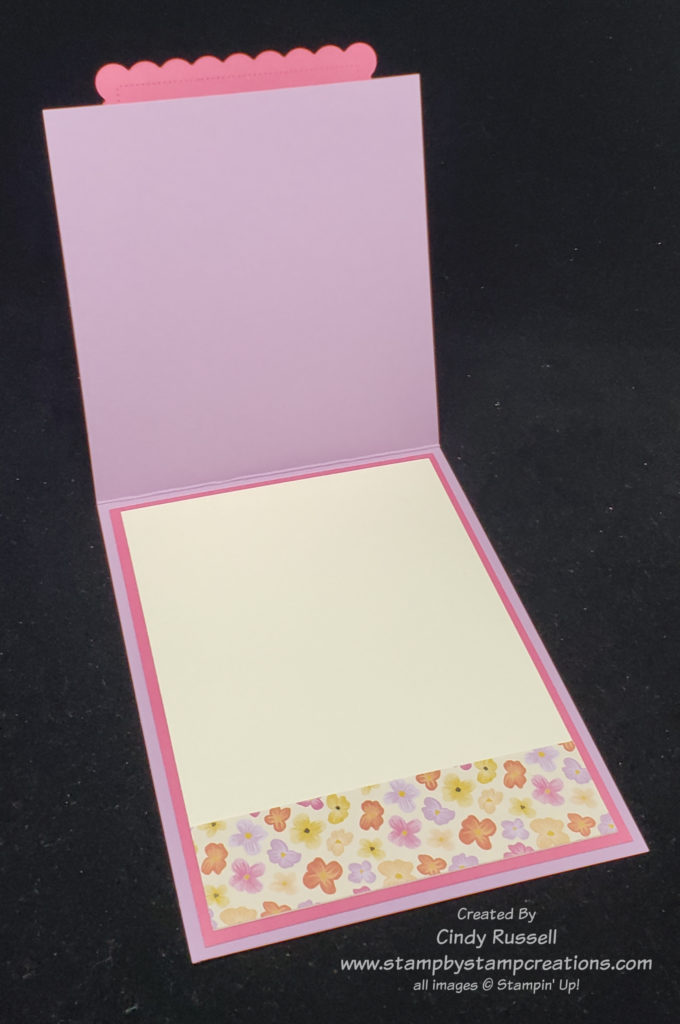
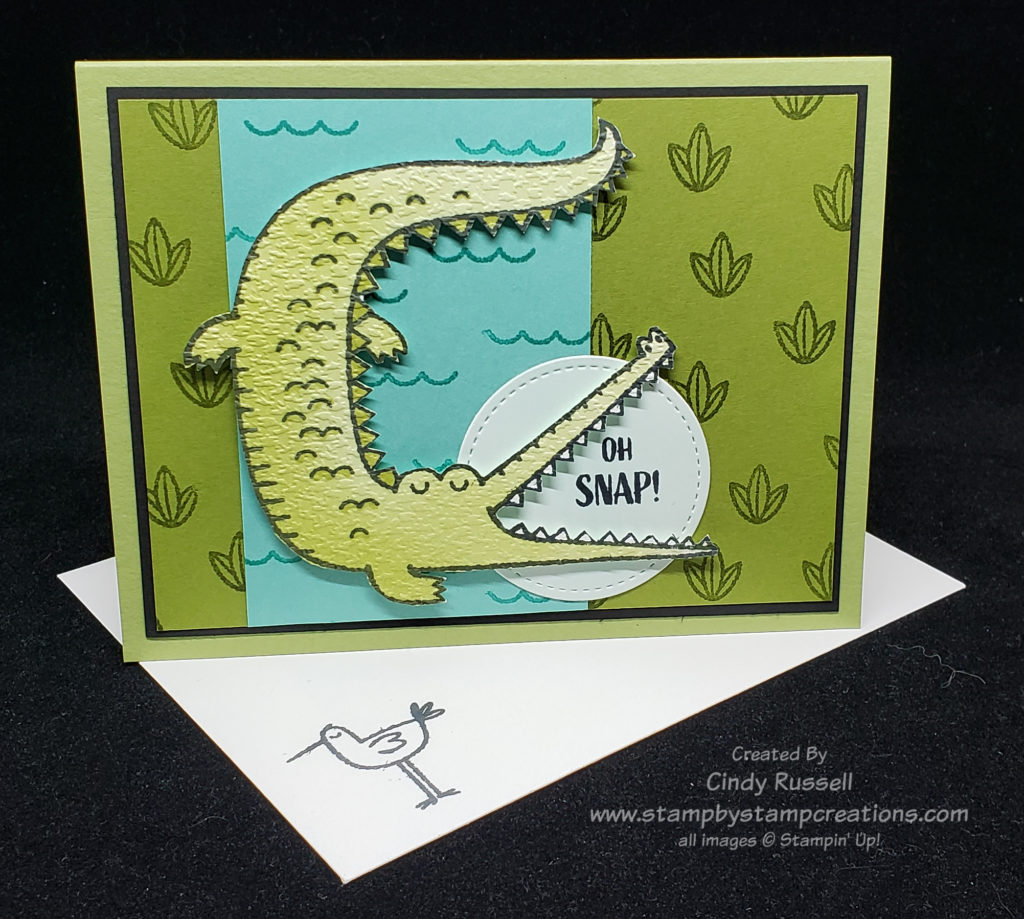
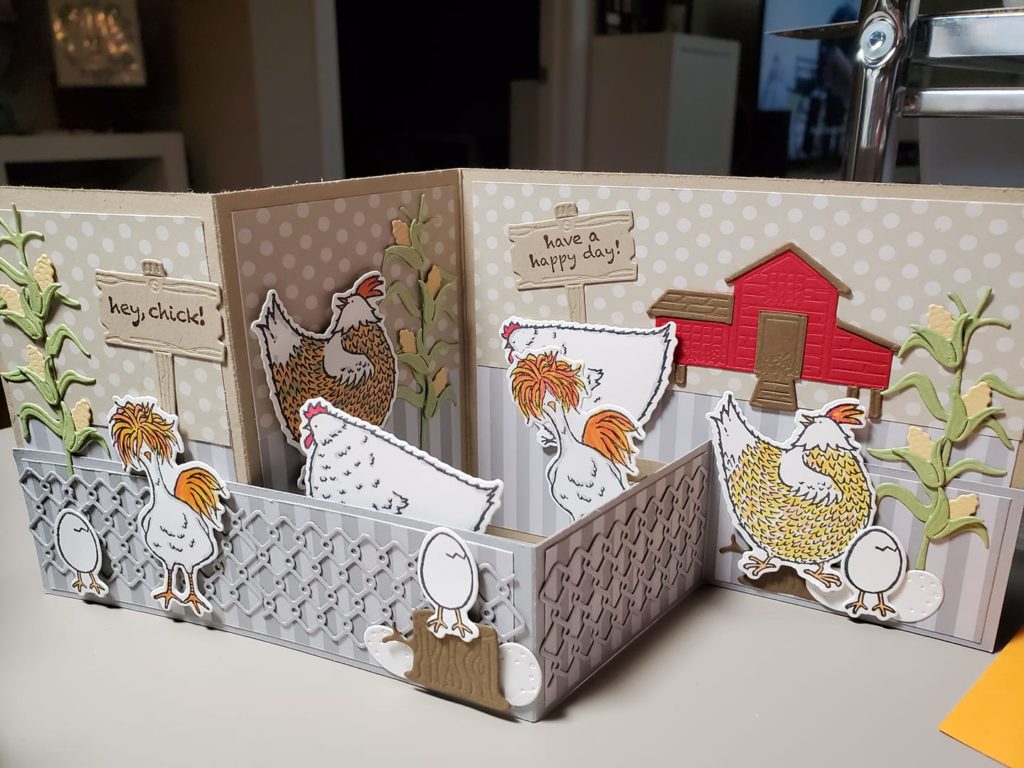
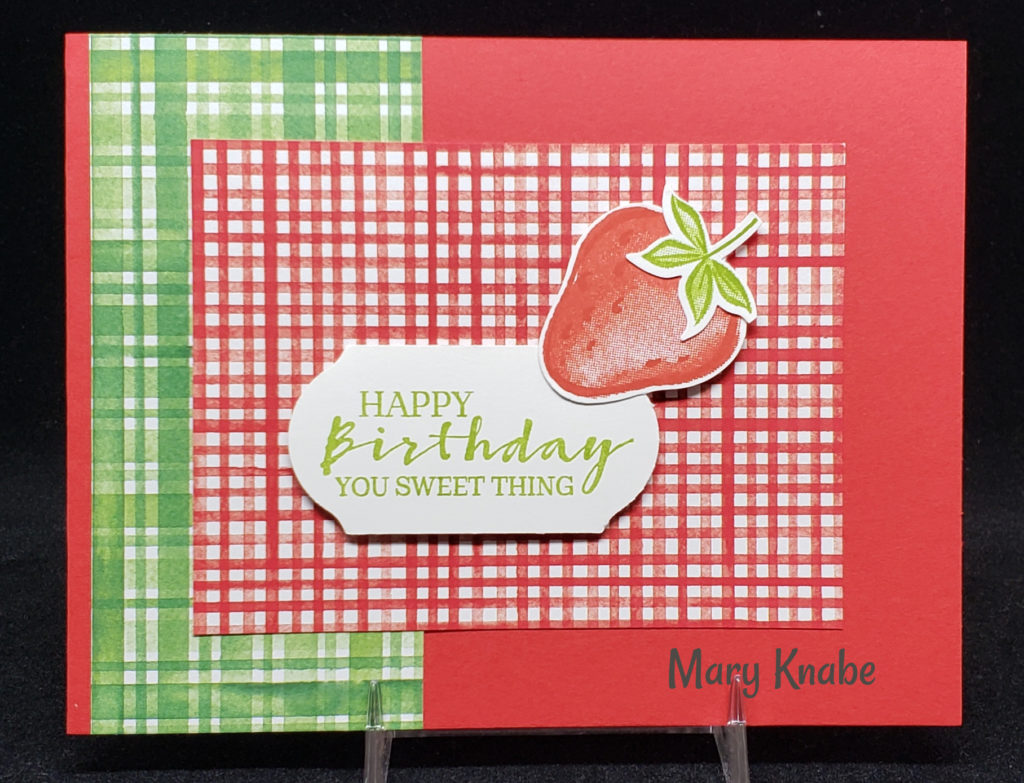
This card layout is fun because it gives you a chance to show off a little bit of designer paper.  The front of the card base is trimmed by 1”.  Then you add a piece of 1” designer paper to the insert of your card.  Add a focal point that overhangs the trimmed off area and your card is done!

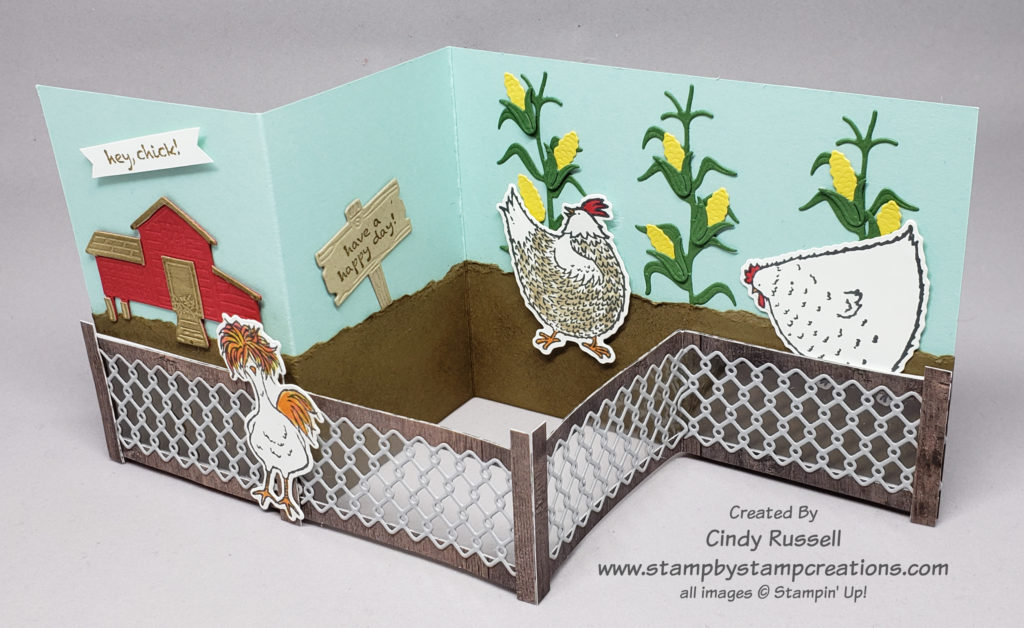
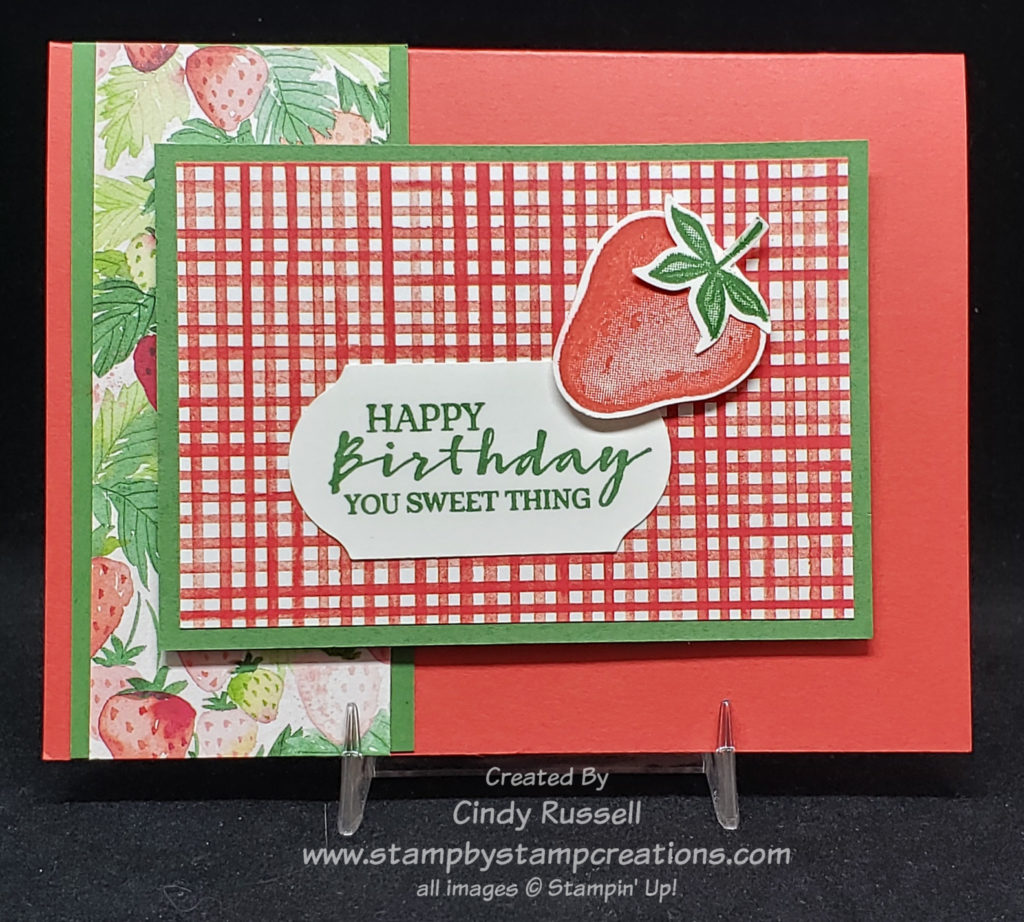
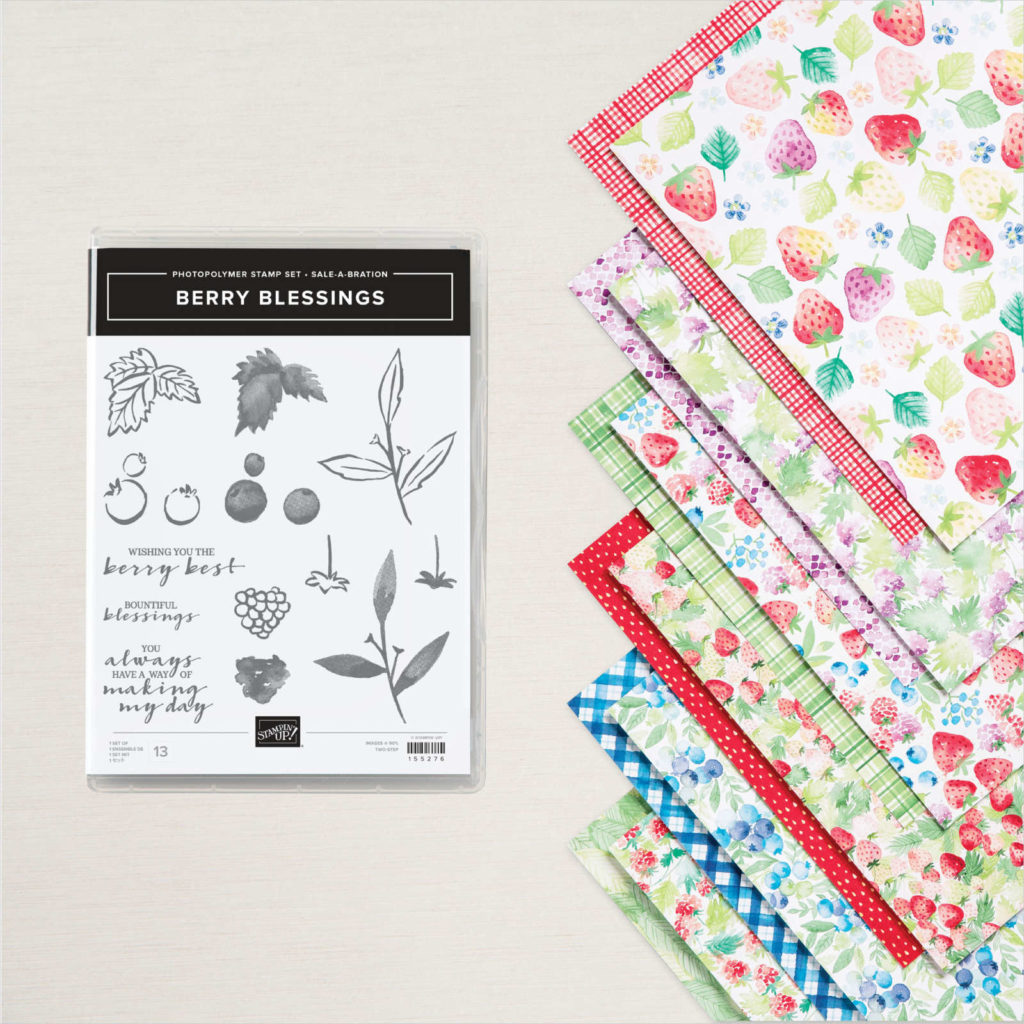
The Color & Contour Bundle is very versatile. The stamp set has a few fun flower images and five different sentiments. The die set has two dies that cut out the floral images from the stamp set and 5 different scalloped rectangle dies and a scalloped border die. Too fun! You can view this bundle on page 98 of the new Annual Catalog.

Have a great day! Take care and Happy Stamping!

Make It Mine Monday: A Blast From the Past!

I’m trying to get my craft room/things organized (yes, I realize this is on ongoing situation in my life) and came across this blast from the past.  Who remembers the Upsy Daisy stamp set? How about the Square Lattice Embossing Folder?  I remember both of these products as being favorites of mine. 

I’ve determined that this card has to be about 10-11 years old.  I went searching through old catalogs and found that embossing folders first appeared in Stampin’ Up! catalogs in the 2010-2011 catalog.   Wow!  That is a while ago!

When I came across this card I really liked the three-panel layout of the card.  I knew that with the new Fresh Freesia In-Color I had three purples that went well together so I thought I’d give the layout a try.

This is what I came up with for my new three-panel card. As I was posting the picture I realized that I did forget to use an embossing folder on the card. Oh, well….

I think it turned ok even without the embossing folder. Don’t look too closely at the image…my embossing got a little messy. Sorry!

I used a floral image from the new Quite Meadow stamp set that will be in Stampin’ Up!’s upcoming 2021-2022 Annual Catalog. It has a coordinating die set called Meadow Dies and they are actually the star of the bundle. There are six silhouetted floral dies, a couple of labels and a few smaller images. You can view it on page 160 of the new annual catalog.

The purples I used on my new card are Fresh Freesia, Highland Heather and Gorgeous Grape. I love that these colors coordinate together so well. This was a fun card to make. I hope you like it too.

Have a great day. Take care and Happy Stamping!

Make It Mine Monday: Think Spring!

Happy Monday!  We’re past the midpoint of April and I need to think Spring.  We had snow here in Colorado last week (over 6″!) and we’re suppose to get more tonight!  Sheesh!  I’m ready for warm weather.  Since flowers are definitely a sign of Spring I thought I’d find a floral card to copy for Make It Mine Monday.

I received this lovely card in a swap from Tina Barela.  It was made using the Art Gallery stamp set from Stampin’ Up!’s January – June Mini Catalog.  This stamp set is part of the Fine Art Floral Suite of products that can be found on pages 32-33 of the Mini Catalog.  So many fun products!  The sentiment and the die to cut it out are part of the suite.  Tina used Flirty Flamingo and Mossy Meadow as the colors on her card.

The first reason that this card caught my eye to CASE was that it was PINK! When the dominate color of the card is my favorite color of course it’s going to catch my eye! I also liked that Tina used two different embossing folders on her card. It may be hard to see but she used the Subtle Embossing Folder on the large piece of Basic White cardstock. This embossing folder is retiring on May 3rd so if you love it as much as I do you may want to get one fast!

Stampin’ Up!’s Art Gallery Stamp Set

As you can see I didn’t change too much on Tina’s card. I kept pink the main color but instead of using Flirty Flamingo like Tina did I used the brand new 2021-2023 In-Color Polished Pink! I think it’s my new favorite Stampin’ Up! color!

I also used the strip of pink embossed with one of the Greenery Mini Embossing Folders. I have to admit I wanted to add the Subtle Embossing Folder to the Basic White background of my card like Tina’s but unfortunately I didn’t remember until the card was put together….oh, well….

I did add a few more layers to my card. You know that I can never seem to have enough layers on a card. Ha!

Soft Succulent is the gorgeous green that you’re seeing on my card. It too is one of the new In-Colors. It’s very similar to Mint Macaron but with a little more gray to it. And of course my card wouldn’t be complete with ribbon….Polished Pink Open Weave Ribbon to be precise. Oooo….SO pretty!

It’s so fun (and easy!) to get inspiration from someone else’s project. Have you tried it lately? If not, go for it! Have a great day! Take care and Happy Stamping!

Make It Mine Monday: Hello New In-Colors!

I saw this card by Jeanna Bohanan and knew I had to Make It Mine!  I love the fun little envelopes from the Snail Dies.  So cute! 

This is another “long” card that fits in a regular letter-size envelope.  I shared my first “long” card with you about a month ago and knew it wouldn’t be my last.  It’s kind of fun to work with a different sized card.

Long card with Stampin’ Up!’s new 2021-2022 In-Colors

Here’s my take on Jeanna’s card.  I decided to leave the snail off the card and just focus on the fun little envelopes because I knew they’d be the perfect showcase for Stampin’ Up!’s new 2021-2022 In-Colors!  Yes!  This is your first peek at these gorgeous new colors!

The first envelope is this gorgeous soft green called Soft Succulent.  The bright pink envelope is Polished Pink.  The light peachy/yellow color is Pale Papaya.  The dark green one is Evening Evergreen and the light purple one is called Fresh Freesia.

These new in-colors are gorgeous!  They are probably my favorite grouping recently.  I like them all and am having a hard time deciding which one is my favorite.  How about you?  Which one do you like best?

Last year I made a video for each new In-Color comparing it to current Stampin’ Up! colors and I will be doing that again in the near future so stay tuned.

Let’s get back to talking about the card itself.  As I mentioned, the envelopes dies are from the Snail Dies as are the inserts for the envelopes and the die-cut hearts.  The stamped hearts are from the coordinating Snailed It stamp set and the die-cut letters are from the Playful Alphabet Dies.

My card base is 8” x 9 ¼” which you fold in half along the 8” side so that your card front is 4” x 9 ¼”.  My Basic White layer is 8 5/8” x 3 3/8”.  You can make your Smoky Slate layer 8 7/8” x 3 5/8” for simplicity.  I actually like to make my layers only 3/16” wider instead of ¼” wider so my Smoky Slate layer is actually8 13/16” x  3 9/16”.  I do this because 1/8” difference in layers is sometimes not quite enough.  I know, it can make things confusing but it’s just the way I like to make my cards.  To each his/her own.  Right?

The hardest part of making this card for me was randomly stamping the little hearts.  I just can’t do random very well.  I was stamping along quite nicely until the last few.  Naturally I waited until the end to mess things up but most of the hearts are covered by the envelops and letters so you can hardly tell.  Ha!

This was a fun card to make and it was my first time playing with the new In-Colors.  What do you think of these new In-Colors?  Which is your favorite?  Leave me a comment and let me know.

Have a great day!  Take care and Happy Stamping!

Make It Mine Monday: Oh Snap!

Oh Snap!

Oh Snap!  This stamp set is adorable and has such cute sentiments in it.  I couldn’t resist it.  This stamp set has been sitting on my shelf for a while now and it was just calling out to be used.  So I dusted it off and hit the internet to find a card to give me inspiration.

I thought this would be the perfect stamp set (and sentiment!) to make a belated birthday card. I do try to get cards out in a timely manner but it doesn’t always work.

Josee Smuck’s card was pretty darn cute and I knew this was the one I wanted to recreate. I didn’t change a whole lot on her card but enough to make it my own.

I made my “river” from Coastal Cabana cardstock and my background piece from Old Olive. I also made my sentiment circle a bit smaller.

I loved the way Josee’s alligator turned out so I tried to stay close to hers. I stamped my alligator in black and then used my Blending Brushes (love those things!) to add color. I started with Pear Pizzaz and then progressed to Old Olive. I did have to fussy cut the alligator but it wasn’t too hard. Josee’s texture on the alligator shows up better than mine. I should have used the Hammered Metal Embossing Folder instead of the Tasteful Texture Folder. Oh, well…next time. I will probably have to make this card again sometime since it turned out so cute. I may have to make my sentiment circle larger on the next one so I can add the fish!

Here’s the inside of my card. The sentiment is from the Happiest of Birthdays stamp set. I also had to add the adorable little bird on the inside of the card. If you notice in the picture of the outside of my card I used the little bird on the envelope too. No naked envelopes! 🙂

Have a great day! Take care and Happy Stamping!

Make It Mine: Butterfly Gala

Butterfly Gala

Since the Last-Chance Products List came out last week I’ve been removing the retiring items from my craft room.  As I was doing this I came across the Butterfly Gala stamp set and noticed how pretty these butterflies were.  I knew then that I needed to share a card with you using this stamp set and the coordinating Butterfly Duet Punch.  You know me, I love coordination!  Did you know that the Butterfly Duet Punch also coordinates with Butterfly Wishes stamp set?  Unfortunately that stamp set is retiring also.

Since this is a Make It Mine post (even though it’s Thursday…) I had to find a card that I liked that used the Butterfly Gala stamp set and the Butterfly Duet Punch.  Once again, Pinterest saved the day!  While scrolling through, I found this simple and lovely card made by Jill from Paper Daisy Crafting.  Jill did a beautiful job of coloring her butterfly.

I kept my card pretty darn close to the original. I used a couple of layers for my butterfly but I changed the bottom layer on my card to black and left off the ribbon.

Stampin’ Blends Markers were perfect for coloring the butterfly. I will admit that Jill’s butterfly turned out a bit more vibrant than mine.

I do like the simplicity of this card. If you’ve seen enough of my designs you know that I have a bit of trouble with “simple”. Having Jill’s inspiration though really helped me out.

I like this card so much that I’m trying to decide whether or not to keep this stamp set and the coordinating punch in my stash! Decisions, decisions!

What is your favorite stamp set/bundle that’s on the Last-Chance List and leaving us? Leave me a comment and let us know.

Have a great day! Take care and Happy Stamping!

Make It Mine Monday: Kangaroo & Company

Kangaroo & Company version 1

How cute is the Kangaroo & Company Bundle?  Have you checked it out on page 17 of Stampin’ Up!’s January-June Catalog?  If not, you should!  Cute little kangaroos, cute sentiments and more!

This first card is one I made following instructions that I received in an online class that I took.  So cute!  All sorts of products were used on the card.  The Kangaroo & Company Bundle, the Snail Mail Designer Paper and the Resin Hearts and white baker’s twine from the Snail mail Twine Combo Pack.  I loved the card but it was a little busy for me.  I know, you’re thinking “isn’t this the gal who can’t make a card without 10 layers?  What does she mean ‘too busy’?”.  Ha! 

Kangaroo & Company version 2

Here’s my simplified version.  I just left off some of the background layers and the Resin Hearts.  That’s it.  I kept the same color palette as well as the red strip and the baker’s twine bow.  On both cards I colored the kangaroo with my Stampin’ Blends Markers.  Cinnamon Cider is the perfect color for the kangaroo.

Do you know the secret to the kangaroo die?  This kangaroo can hide messages.  There’s a special die that slips perfectly into the die-cut slit in the kangaroo.  Stamp one of the small sentiments on cardstock and die cut with the special little sentiment die.  Attach the flower bouquet or the bouquet of hearts to the sentiment die and slip it in the kangaroo’s pouch! 

Kangaroo & Company hidden pouch

The thing to remember when “hiding” messages in the kangaroo pouch is not to put any adhesive in the way of the part the slides down in the slot.  I used Stampin’ Dimensionals and I had to move them a couple times to make sure my sentiment would slide right.  The key is to slide the sentiment in the slot and then add your dimensionals or adhesive.  This way you know it will slide correctly when on the card.

I can’t wait to try another card with the fun Kangaroo & Company Bundle.  Too fun!

Have a great day!  Take care and Happy Stamping!

Make It Mine Monday: Hey Birthday Chick!

Hey Birthday Chick card

I can’t say it enough….I love the Hey Chick and the Hey Birthday Chick stamp sets (and of course the coordinating dies!)! TSC…Too Stinkin’ Cute!

Now pair those adorable chickens with red plaid and chicken wire and you have the perfect combination! Right?!

I got the inspiration for my card from a card by Karen Day that I saw posted online. (You can see her card below.) It was definitely the red Buffalo Check background that caught my eye. I knew I wanted to use the All Wired Up background stamp too. I mean why wouldn’t you use a chicken wire background if your’e stamping chickens! Ha!

card by Karen Day

I started with the chubby dancing chicken on my card but it just didn’t seem to fit with the banner I had made. Then I grabbed the chicken floating with the balloon and tada! my card was complete!

Sometimes you just have to keep playing around. You may have a vague vision in your head of what you want but you just need to keep shuffling things around until it comes together.

Even when you’re copying someone’s card exactly this may happen. You’re cutting and gluing things together and all of the sudden….”OOO, what if I change this or add this…”. Be open to change.

I love browsing Pinterest and the Facebook page just for Stampin’ Up! Demonstrators that have SO many ideas! I may see a card that I want to copy exactly but in the end I usually end up changing up a little something.

Happy Birthday Chick card – inside

Don’t forget that if you’re going to all the trouble to make the outside of your card adorable you should add a little bit of that to the inside of the card (and envelope) too! I may not have used the chubby dancing chicken on the outside of my card but she definitely made it on the inside. I’m pretty sure she’ll be on the envelope too!

Have a great day! Take care and Happy Stamping!

Make It Mine Monday: Hey Chick Double Z-Fold

Hey Chick Double Z-Fold by Patti Bagin

Check out this fun Hey Chick Double Z-Fold card by my fellow demonstrator Patti Bagin! There’s so much happening and so many chickens! When I first saw this card I knew that I wanted to give it a try. But to make it my own I had to figure out where to start.

I couldn’t just copy Patti’s card because to start with I didn’t have the designer paper that she used. I did love how Patti made a fence and used that as the second Z of her Double Z-Fold. If you’re not sure what I’m talking about when I say “Double Z-Fold” check out my blog post from Friday. It’s all about the Double Z-Fold.

My Hey Chick Double Z-Fold Card

My card began with the fence. I knew I wanted to use the chicken wire on my fence but since I didn’t have the gray designer paper I had to come up with another option. I decided to a strip of clear Window Sheet and adhere by chicken wire to that. I then needed to add fence posts! The fence turned out just how I wanted it to. The only probably with it is that the Window Sheet doesn’t fold very easily. If I ever mail this card I’m going to have to probably put it in a larger envelope and pay extra postage.

I didn’t want to adhere my fence directly to the card so I used the foam adhesive strips that you’d use when making a shaker card. They worked perfectly! To get the two-tone chicken coop I die cut one from Real Red cardstock and one from Crumb Cake cardstock. I then cut out the tiny pieces from the Crumb Cake chicken coop and adhered them to the red one.

My tip when die cutting the corn stalks and the ears of corn is to to use Adhesive sheets. These pieces are so thin and so small it would be difficult to get adhesive on the back of them.

I didn’t include quite as many chickens on my version of this card as Patti did but I’m pleased with the results. Too fun!

Have a great day! Take care and Happy Stamping!

Make It Mine Monday: Berry Blessings

Wow! Winter 2021 Sale-a-bration is almost over! Can you believe it? There’s only a few days left so I thought my card today should use one of the Sale-a-bration items.

I haven’t used the sweet Berry Blessings stamp set yet so I chose that along with the coordinating Berry Delightful Designer Series Paper. So cute! Did you know that this designer paper also coordinates with the Sweet Strawberry stamp set/bundle from the January – June Mini Catalog? So much coordination! I love it!

Berry Blessing Stamp Set

Thank you to Heather Heroldt for the inspiration. As you can see, the biggest changes were just adding layers to Heather’s card. More layers seems to be what I do best. Ha!

I also decided to stamp the sentiment on the background piece of the card instead of a label and I also used green embellishments instead of blue. I used the Frosted and Clear Epoxy Droplets from Stampin’ Up!’s Annual Catalog and colored them with my Granny Apple Green Stampin’ Blends Markers.

Here’s a picture of the inside of my card. Heaven forbid that I didn’t decorate the inside as well as the outside! 🙂

I love getting my inspiration from fellow crafters. We all have to start somewhere, right?

The sentiment on the front of the card is from the Berry Blessings stamp set but the inside sentiment is from the Sweet Strawberry stamp set, which as I mentioned before, also coordinates with the Berry Delightful designer paper.

The Berry Blessings and Berry Delightful Designer Paper are grouped together as a Level 2 Sale-a-bration choice which means you need to spend $100 on Stampin’ Up! products in order to choose it. Don’t forget that February 28th is the last day of Sale-a-bration so get that order together and head on over to my online store or contact me with your order. I’d hate for you to miss out!

Have a great day! Take care and Happy Stamping!

Make It Mine Monday: Sweet Strawberry

Make-It-Mine Monday: Sweet Strawberry

Make-It-Mine Mondays are so much fun! I like seeing what changes I can make to someone else’s card to make it my own. This week I (or should I say “we” since my card is pretty darn close to my inspiration!) used the Sweet Strawberry stamp set and punch from Stampin’ Up!’s January – June Mini Catalog.

The Sweet Strawberry stamp set just screams “SUMMER!” to me but I received my inspiration card in a swap and fell in love with the bright colors and knew I had to recreate it.

Sweet Strawberry card by Mary Knabe

The card at the left is my inspiration. Bright and fun! You know me though….I had to add more layers. If a card doesn’t have about 10 layers it just doesn’t seem complete to me. Ha!

As you can tell by comparing the two cards I stuck pretty close to Mary’s original design. Other than adding a couple of layers, I just changed the ink color and one of the pieces of designer paper,

Speaking of the designer paper….where does it come from? It’s not in the January-June Mini Catalog. Hmmm….It’s in the Sale-a-bration Brochure! It’s part of a Level 2 Sale-a-bration offering meaning you need to purchase $100 in product to choose it. It’s called Berry Delightful Designer Series Paper and is bundled with the Berry Blessings stamp set. This stamp set has berries other than strawberries in it. I love how both the Berry Blessings stamp set and the Sweet Strawberry stamp set coordinate with the paper.

Have you played the “Make-It-Mine Monday” game? Where are you getting your inspiration from? I’d love to know. Feel free to share your card and your inspiration in the comments below!

Have a great day! Take care and Happy Stamping!

Simple & Sweet

Hello! It’s Make It Mine Monday and I have something Simple and Sweet for you today! The card is simple and the bundle I used is sweet. Actually, the name of the bundle is Sweet Ice Cream. It’s a brand new bundle that you can find in Stampin’ Up!’s January – June Mini Catalog starting tomorrow (page 49).

The inspiration for my card came from Amy Koenders. You can see her card below.

Sweet Ice Cream

I love how simple Amy’s card is but you know me….I need layers and possibly ribbon on my card. So that’s what I did.

Sweet Ice Cream: Make It Mine Monday

This card was so easy to make because the only stamping on the card was the sentiment! The ice cream and the cone were punched from the coordinating Ice Cream Corner Designer Series Paper with the Ice Cream Cone Builder Punch! How fun is that?!

Do you like Make It Mine Mondays? What would you have changed on Amy’s card to make it yours? I would love to hear what you’d do. Please leave a comment and let me know what you’d change (or not change). Better yet, post a picture of your card!

Have a great day! Take care and Happy Stamping!

Make It Mine Monday: Pocket Cards

Hello!  It’s time to bring back an old blog segment.  Make It Mine Monday.  I am going to show you how I take someone else’s design and make it my own.  Sometimes it will be just a little change like today and sometimes it will be a big change but I will always change something to make it my own.  I hope you like it!

From the title of today’s post you are thinking that I am going to show you how to make a card with a little pocket to place a sentiment or something in.  Well, you’re close….I am going to show you a couple of cards with an actually pocket on them.  Ok…a paper pocket made using the hidden gem of a stamp set “Pocketful of Sunshine”.

Pocketful of Sunshine.0718This sleeper of a stamp set has been sitting on my shelf and I think I’ve only used it once before.  As I was scouring the shelves for inspiration for my classes this week I knew I had to give it another try.

I got the idea for this cute card from Rachel Tessman on Pinterest.   I actually stayed pretty close to her original card.  I just added a colored layer to the front.

There’s actually not anything in the pocket of this card but it looks like the sunglasses are hanging out of the pocket.  Pretty darn cute.  What you can’t see from the picture is that I used my Wink of Stella Glitter Pen on the lenses of the glasses to add a little sparkle/reflection.

Today is Son #1’s birthday and I needed to make a card for him last week and pop it in the mail. What to make for him?  Hmmm….

Jared and his wife are non-skating officials with the LA roller derby team.  They used to do this in Sacramento too.  The gals in Sacramento gave him the knickname Pocket Rocket because he’s an aerospace engineer.  (Engineer’s used to wear pocket protectors in the pockets on their shirts and he’s a rocket scientist).  Anyway, it’s such a cute name and when I saw the pocket card I had just designed I knew exactly what card I wanted to send him.  So…

pocket rocketI made him this adorable card with a rocket in the pocket!  🙂

I know, sometimes I’m pretty clever.  Ha!  I simply downloaded a picture of a rocket, sized it to fit in the pocket, printed it and cut it out.  I sure hope he likes it!  Happy Birthday Bud!

Can you see how easy it is to start with someone else’s design and make it your own?  Now it’s your turn.  I’d love to see your Make It Mine design!  Please share!

Have a great day!  Take care and Happy Stamping!

Make it Mine Monday: Oh, So Succulent

Oh, So Succulent.0317Make it Mine Monday!  Today’s card is CASEd from the very talented Kimberly Van Diepen.  As you can see by comparing the two cards I didn’t change much at all.  I basically just left off the sentiment and switched up the linen thread for gold metallic thread (which is hard to see on the picture of my card).

Even though the cards look similar I used a different technique on the colored flowers.  Kimberly used the Rock ‘n Roll technique.  She first stamped the solid flower in So Saffron ink and then gently rolled the edges of the stamp in Mint Macaron ink.

IMG_5179I had a bit of trouble with that technique….I couldn’t get the soft look on the flowers that Kimberly had so I came up with a different plan.  I first inked up my solid flower stamp in So Saffron ink and then I took my sponge dauber, inked it up in Bermuda Bay ink and ever so lightly dabbed a bit of color on the ends of the solid flower stamp before stamping on the paper.  I really liked the way my flowers turned out and will definitely be trying this technique again.

So, I did survive Pastor DJ’s last Sunday with us at our church yesterday.  There were plenty of 17362864_10210400151153438_781859241223334724_ntears shed but he put a light spin on things so there were a few chuckles too.  He didn’t wear the cowboy hat during the entire service but he did wear the vest the whole time.  Gotta love him!  🙂  God speed DJ and Happy Trails!

Have a great day everyone!  Take care and Happy Stamping!


Make it Mine Monday: Avant Garden

Avant Garden.0217
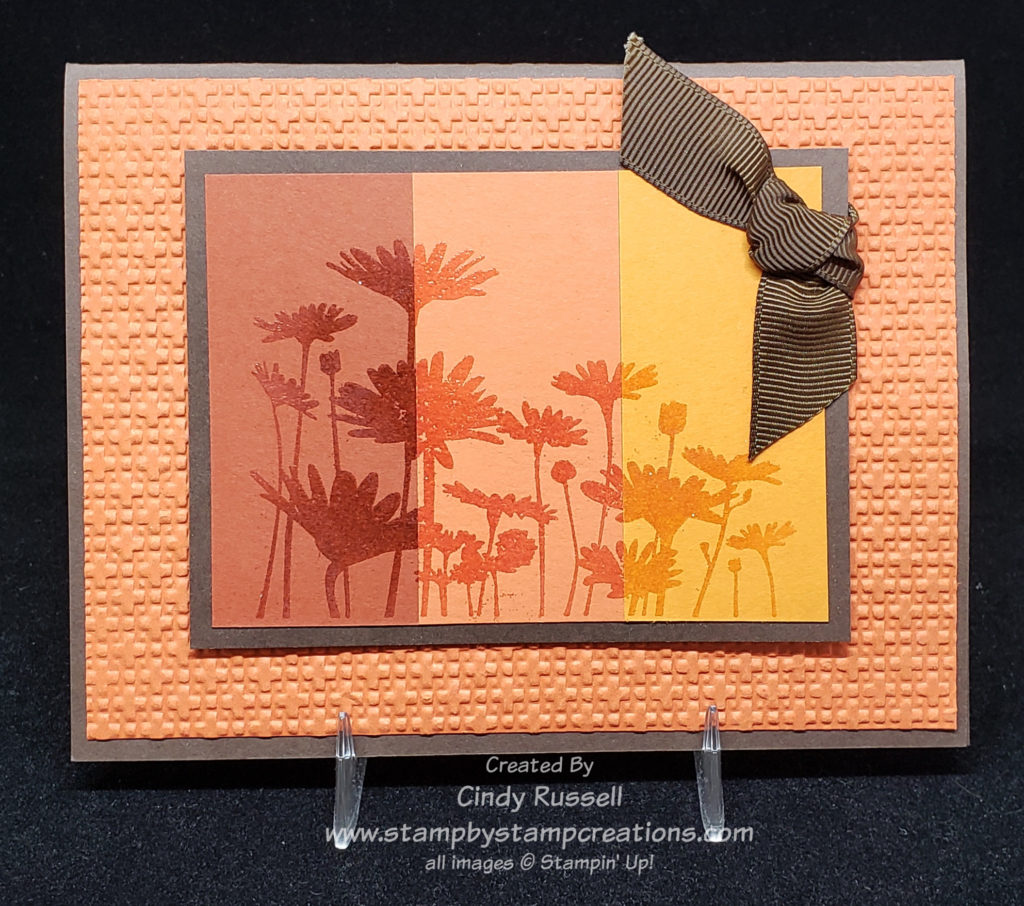
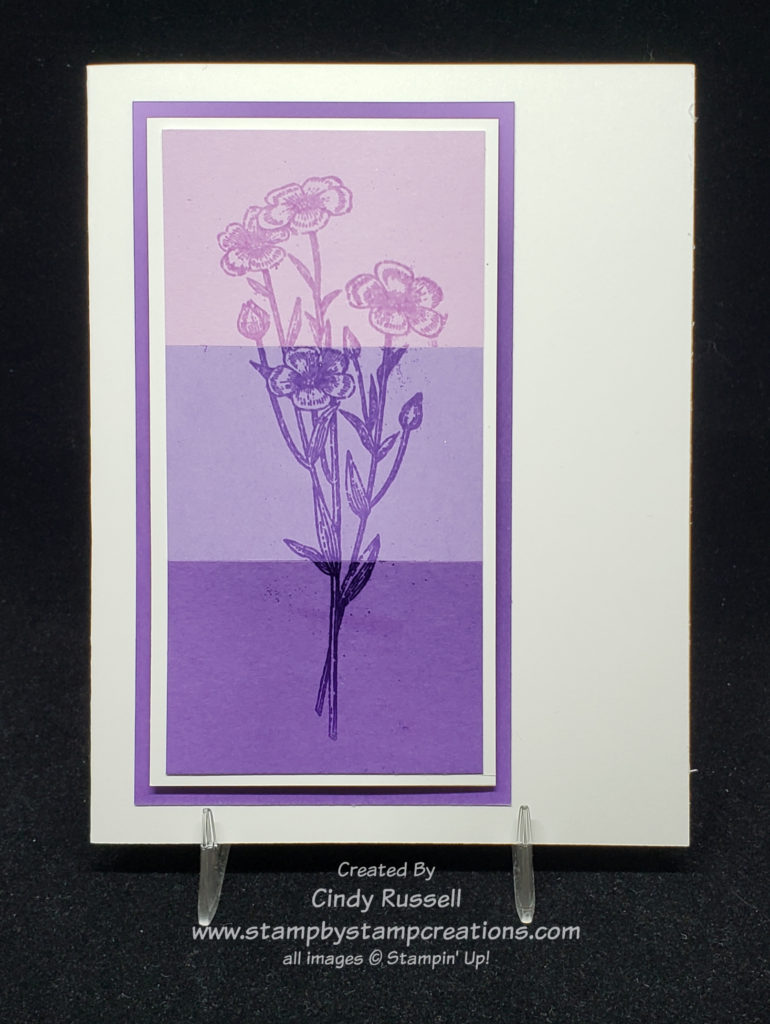
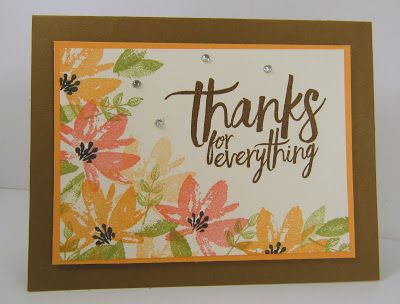
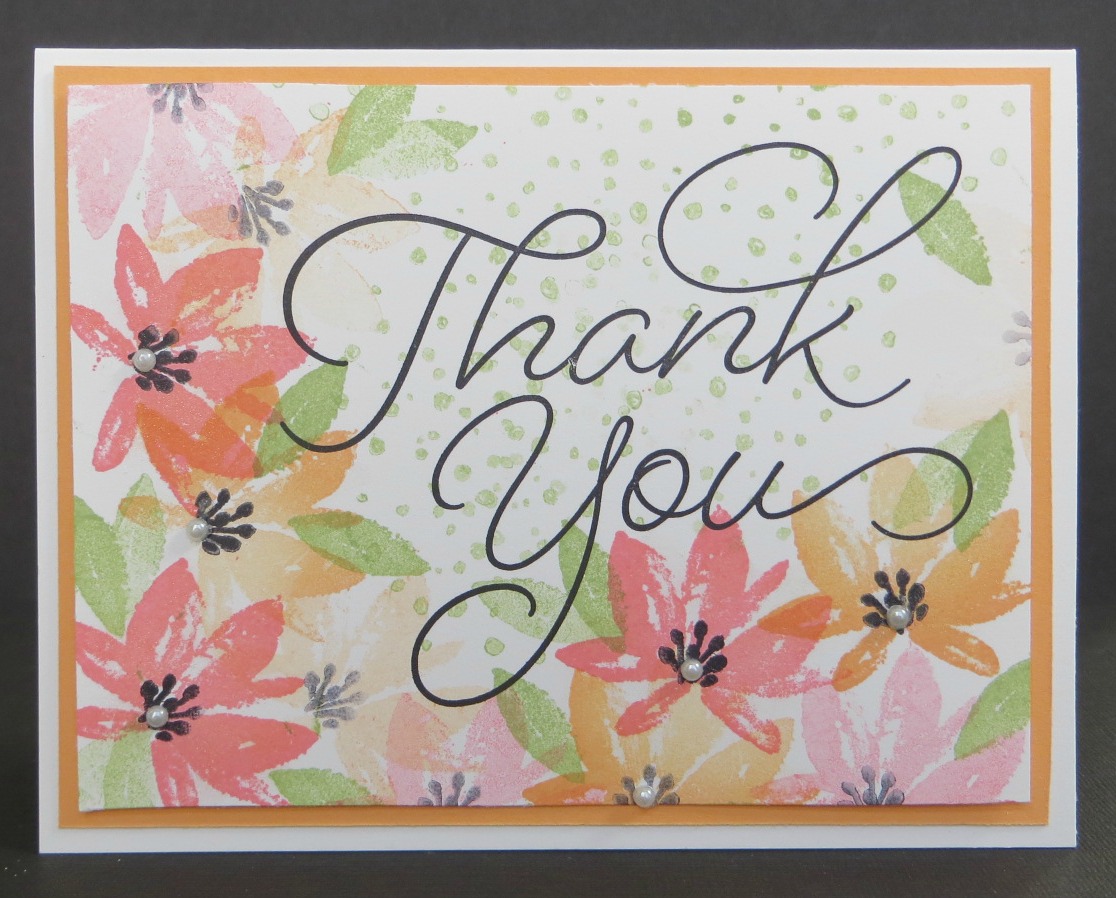
Have you played with the Avant Garden Sale-a-bration stamp set yet?  I love these flowers!

I designed this card for my Card Buffet Class that I’m holding this week.  I had plenty of inspiration.  I found quite a few cards on Pinterest that inspired me.  They were gorgeous but a little more involved than I wanted.  For the class I was looking for a simple design that people could make multiples of if they wanted.  I simplified my e78096e7b1d9e52eae829c52ea23a43edesign by only stamping the flowers along with the sentiment and leaving off the leaves and such.

You can see how I kept the basic layout but also simplified it by keeping my flowers one color.

This past weekend my group, Sassy Stampers & Friends held our Sale-a-bration Stamp Camp for our customers.  One of our IMG_9539designers came up with a card using this same basic design.

All three of these are basically the same card but they all look different.  From these you can see how easy it is to make a card your own.  Give it a try!

Avant Garden is a GORGEOUS stamp set and you can get it for FREE during Sale-a-bration with a qualified order.  There’s only a little over a month left of Sale-a-bration!  Don’t miss out!  Get those orders in today!  You can check out all the Sale-a-bration items available here.

Have a great day!  Take care and Happy Stamping!