Rococo Rose is another one of Stampin’ Up!’s new, upcoming 2019-2021 In-Colors. Woo Hoo! Another pink! A modern dusty rose. This color is really pretty. It’s too bad my photo below doesn’t do it justice.
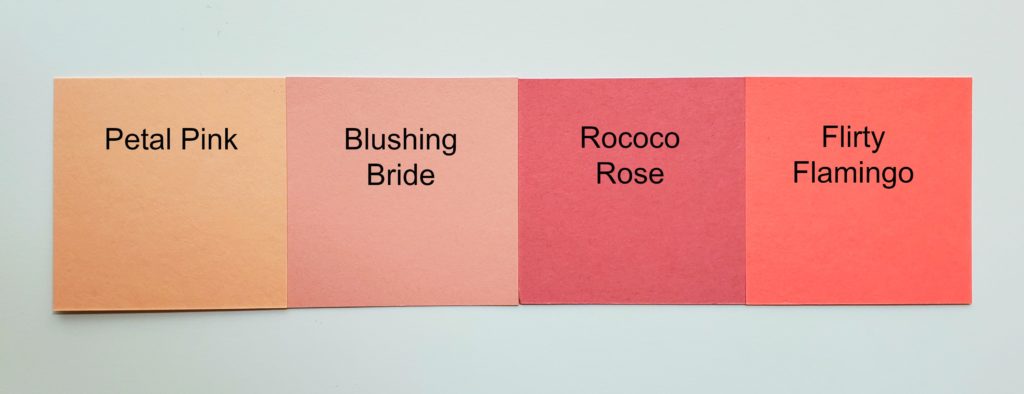
The New Rococo Rose
Even though I can’t get the colors right in my photo you can see how the new Rococo Rose compares to the other Stampin’ Up! pinks. It really helps fill out the pink spectrum. It definitely coordinates best with Blushing Bride. Petal Pink has too much orange/yellow in it and Flirty Flamingo is too bright. I don’t have Melon Mambo in my photo but that’s even bright/deeper in color than Flirty Flamingo.
Can you just picture the gorgeous flowers you can stamp using this amazing new color? Hmmm…I may have to get my stamps and ink out and see what I can come up with! I’m already picturing how gorgeous it will be when used with a DistINKtive floral stamp. Wow!
What do you think of Rococo Rose? Will you be adding it to your craft room? Have a great day! Take care and Happy Stamping!
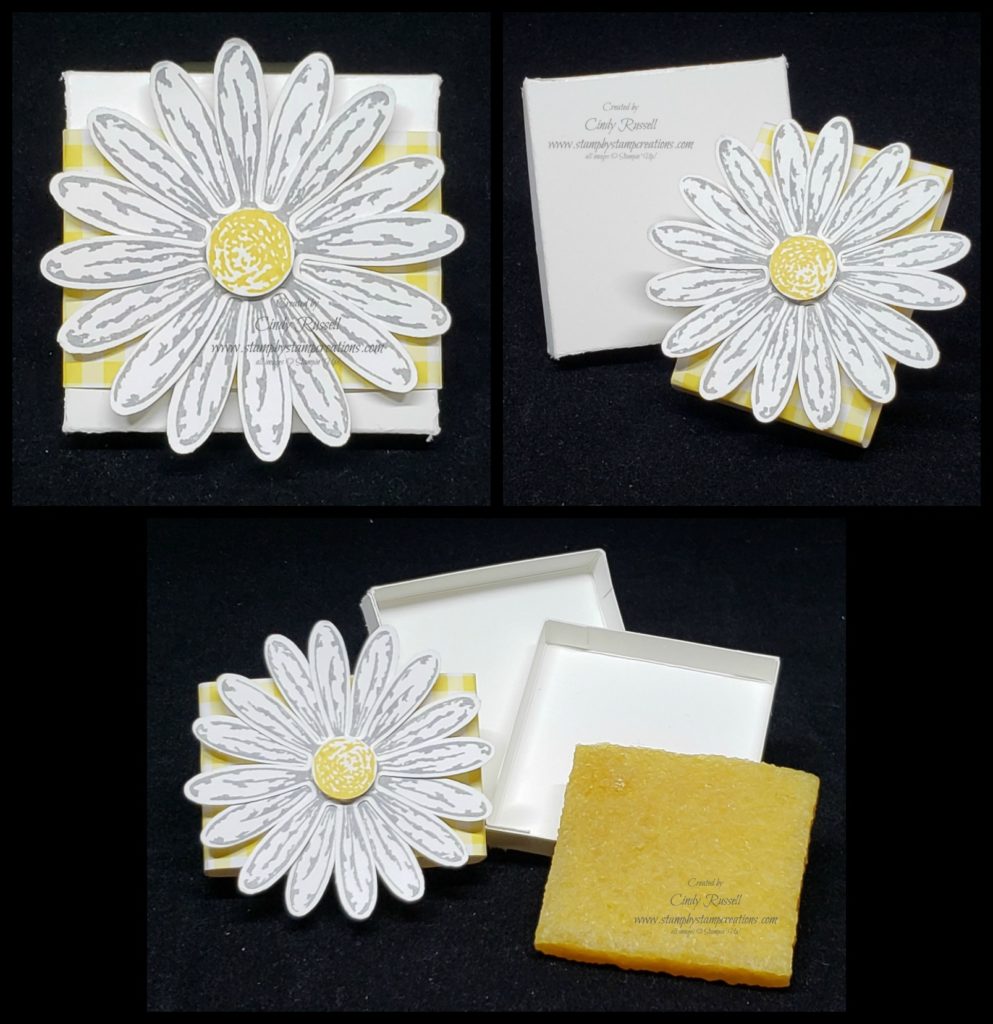
When my friends and I go to On Stage events many of us create small gifts for each other. For this last event I went to in Minneapolis I created these adorable little Daisy Boxes that were the perfect size for an adhesive eraser (Amazon!).
The box was pretty easy to make. I just measured the adhesive eraser and made the length and width of the box base just a hair bigger. The sides of the box were just a hair bigger than the height of the adhesive eraser. In order to have the lid fit over the base I added about 1/16″ to the length and width of the base dimensions.
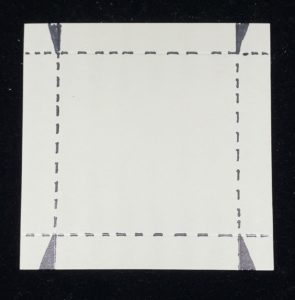
The adhesive eraser is about 1 7/8″ x 1 7/8″ x 1/4″. I then made the bottom of my box 2″ x 2″ x 3/8″ which made for a nice snug fit. So I started with a piece of cardstock that was 2 3/4″ x 2 3/4″ and scored each side at 3/8″. For the lid I started with a piece of cardstock that was 2 13/16″ x 2 13/16″ because I wanted the lid to fit snug. This piece of cardstock was also scored at 3/8″ on each side. On both the top and the bottom I snipped a little angle in the corners to reduce the bulk when I formed the box itself.
Daisy Box Pattern
Once the box itself was done it was time for the adorable belly band. You can’t go wrong with the Gingham Gala designer series paper stack and it coordinates perfectly with the daisy. I stamped the daisies with Smoky Slate ink and the center with Daffodil Delight ink. Once the flower was pieced together I attached it to the belly band with Stampin’ Dimensionals.
I hope you have a great day! Take care and Happy Stamping!
Ooooo! Stampin’ Up! is coming out with something new and I’m not just talking about the 2019-2020 Annual Catalog. They’re coming out with a Product Medley! What is a Product Medley? It’s kind of like a Product Suite in the Annual Catalog but everything comes together. Stampin’ Up! describes it as an “exclusive collection of cute, coordinating products” that will be available ONLY WHILE SUPPLIES LAST.
During the month of May, while supplies last, you will be able to purchase the Everything is Rosy Product Medley. I can’t wait! The products included in this medley are GORGEOUS! Check out this short video to learn more about the Everything is Rosy Product Medley:
Everything is Rosy
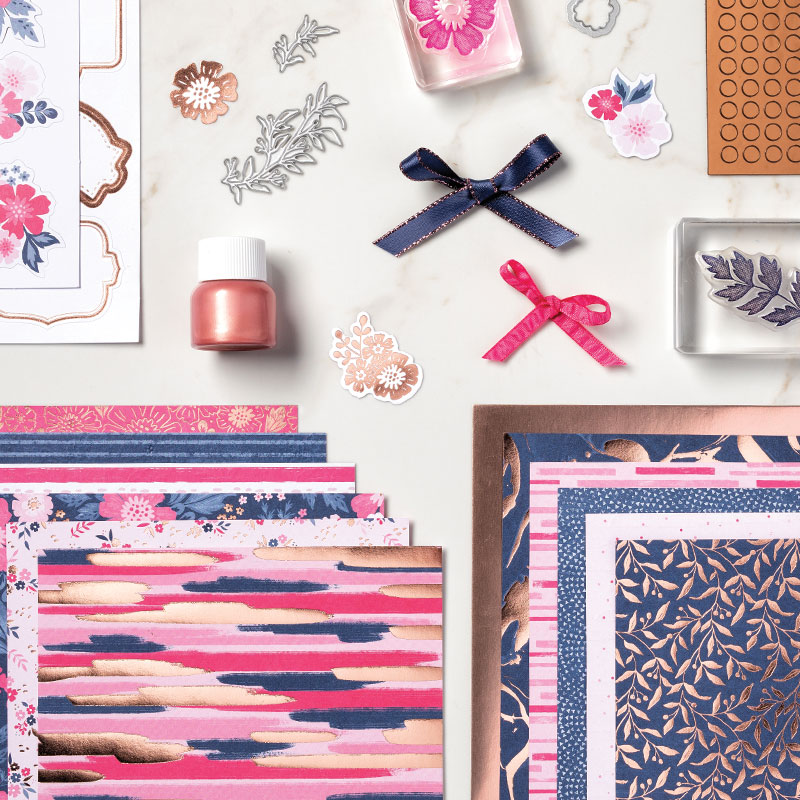
The Everything is Rosy Product Medley includes the following exclusive products:
Everything is Rosy Photopolymer Stamp Set (blocks NOT included)
Everything is Rosy Dies (10 dies)
6″ x 6″ Designer Series Paper Stack (48 sheets; 8 each of 6 double-sided designs
6″ x 6″ rose gold foil paper (8 sheets)
Printed die cuts (2 sheets)
Rose gold die cuts (4 sheets; 2 each of 2 designs)
Rose gold adhesive backed mirror embellishments (60 1/4″ embellishments)
Melon Mambo 1/4″ Ruched Ribbon (10 yards)
Night of Navy/Rose Gold 3/8″ Metallic-Edge Ribbon (10 yards)
Rose Gold Shimmer Paint (1/2 oz)
Included in Kit
OMG! I can’t wait! Look at those gorgeous colors! The kit isn’t available to demonstrators or customers until May 1st but some lucky demonstrators got it early so that they could demonstrate it at the various On Stage events a week or so ago. I’ve seen some gorgeous samples that I will definitely be sharing with you this week because I know you are going to want this Everything is Rosy Product Medley as much as I do!
The kit comes with all of the items I listed above. It’s not an all-inclusive kit as you don’t get the blocks for the stamp set, the die-cutting machine needed for the dies, cardstock or ink. It also doesn’t come with directions for specific projects either.
The products that I will want to make sure to have on hand to make projects with this medley are:
Night of Navy cardstock
Melon Mambo cardstock
Thick Whisper White cardstock
Whisper White cardstock
Stampin’ Dimensionals
Adhesive
Clear Blocks A, B & C for the stamp set
My die-cutting maching
Possibly a Stampin’ Spritzer for the shimmer paint
Mark your calendar now for May 1st! That is when the Everything is Rosy Product Medley will be available for purchase. Remember, it is available ONLY WHILE SUPPLIES LAST or until May 31st, whichever comes first. I am definitely placing my order on May 1st! Woo Hoo! How about you?
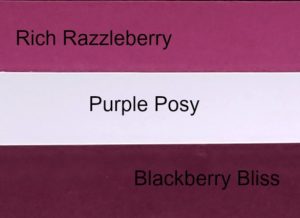
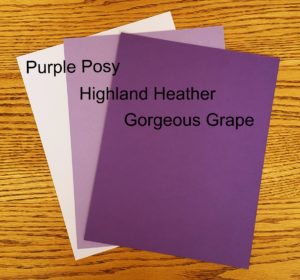
The new In-Color Purple Posy is just so soft and lovely. It’s a very light purple and compliments the four other purples in the Stampin’ Up! Spectrum.
Purple Posy is soft enough of a color to compliment the deep and beautiful Blackberry Bliss and the fun and bright Rich Razzleberry. However, I think it really shines when you pair it with Highland Heather and Gorgeous Grape. Spot on! Now my question for you is which of the current purples will you be pairing Purple Posy with first?
I can’t wait to start creating projects with this soft and lovely color! Be sure to put the Purple Posy cardstock, ink pad and ink refill on your wish list for June…..or join my team of SASsy Stampers and order it in May! Yep! Ordering new products ahead of time is definitely one of the many perks of being a Stampin’ Up! Demonstrator!
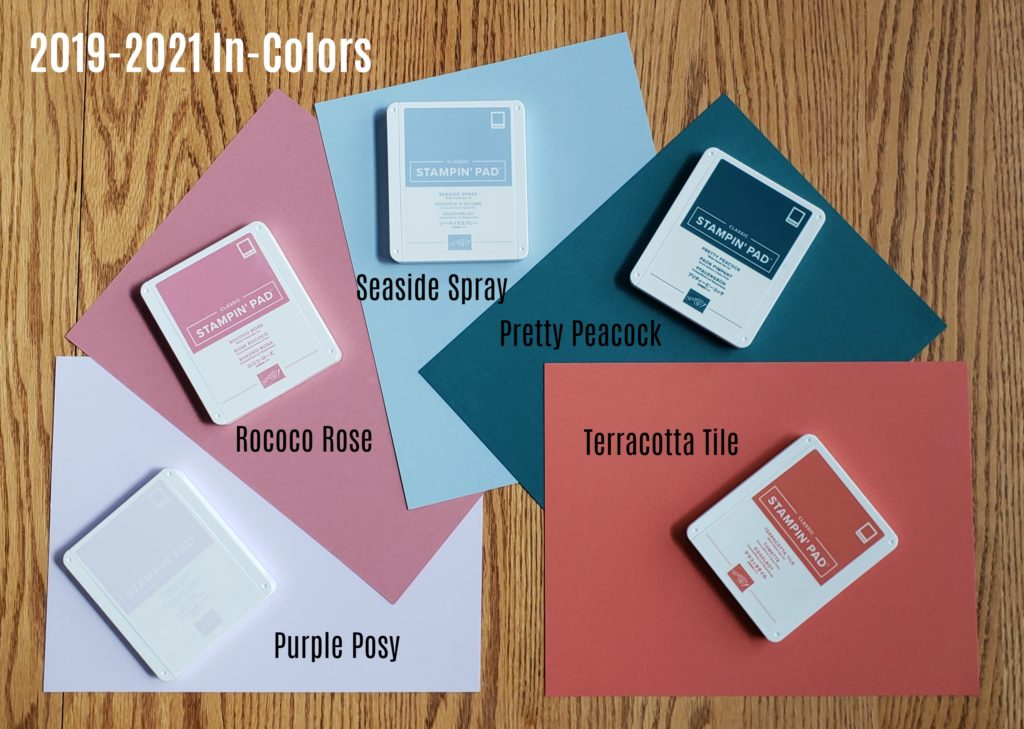
When I get a peek at the new, upcoming catalog one of the first things I check out are the new In-Colors. These are the 5 brand new colors that will be in the Stampin’ Up! spectrum of colors for the next two years. Here’s your peek at the 2019-2021 In-Colors:
2019-2021 In-Colors
What do you think? Pretty nice, huh? We have some nice new pastels as well as a couple of colors that I would probably place in the regals category. Which one is your favorite? Without really having worked with any of them I would have to say that at this point my favorite is the Pretty Peacock. It’s such a rich and deep color. I’m not really a pastels person but these three pastels are really pretty.
Do you remember a week or so ago when I was wondering about these new colors and what they’d be? I mentioned that Coral was the “color of the year” and wondered if Stampin’ Up! would come out with another coral color to stay current. Well, the Terracotta Tile is their choice of keeping in that Coral family. In the next few days I’ll be comparing these new colors with current Stampin’ Up! colors and show you where they fit in the Stampin’ Up! color spectrum. Stay tuned!
I’m back! Yes, I finally made it to Minneapolis a day later than expected. We made it and that was the important thing. We didn’t get a chance to do any site seeing but my friends and I had a fun evening putting together the projects we all brought to share.
It was an early morning on Saturday getting down to breakfast and then heading over to the convention center for our event. It was a fun-filled day learning new things, seeing and playing with new products and enjoying each other’s company.
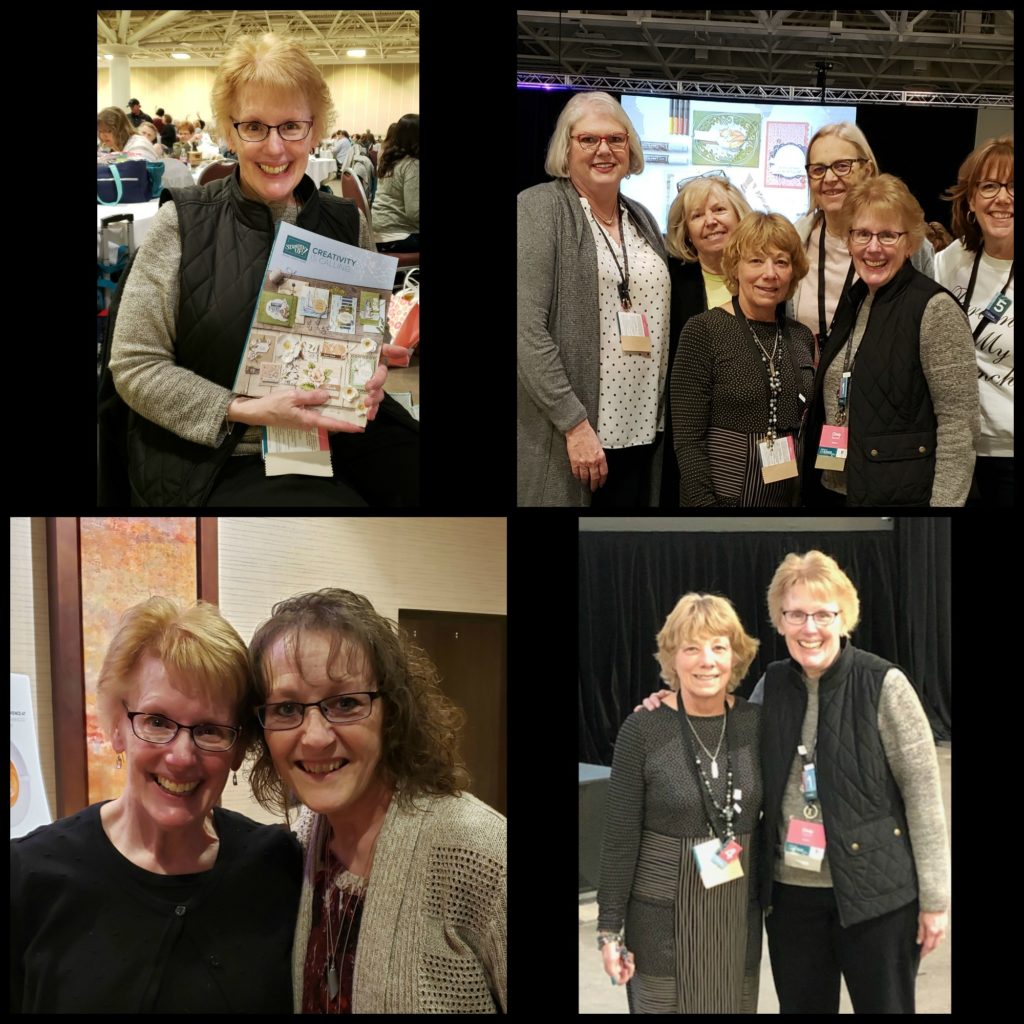
April On Stage Highlights
This collage shows some of the highlights of the weekend. The first picture is of my and my new 2019-2020 Annual Catalog. Woo Hoo! This publication is great! So many fun new products! Next to that picture you’ll find the group I went with. Glenda, Jan, Laura C., Laura K., me and Nancy. These events are a fun place to hang out with the friends you came with but it’s also fun to meet up with old friends. In the photo in the bottom left you see my friend Lori who I met when hubby and I went to Thailand for the Stampin’ Up! incentive trip. Lori and her husband live in Lincoln, Nebraska. It’s fun catching up with the friends I made on that Thailand trip. The last picture is of me and my friend Laura. We both had our 15 year anniversaries with Stampin’ Up! this past year. We got to walk across the stage in celebration.
These events are always fun. We’re already looking forward to the next one in November. Would you like to join us in Las Vegas? You just need to be a Stampin’ Up! Demonstrator to attend. Contact me if you’d like more information on what it entails to become a Stampin’ Up! Demonstrator and a member of my team. If you’re are anxiously awaiting the new Annual Catalog and don’t want to wait until June just remember that demonstrators are checking out the online catalog right now and can order from it on May 1st! 😀
As you read this I may or may not be in Minneapolis for Stampin’ Up!’s On Stage event. If you’d like to find out be sure to check out my Facebook Page. Whether or not I made it to Minneapolis I did make cards to swap with other demonstators. We exchange cards to get new ideas from each other.
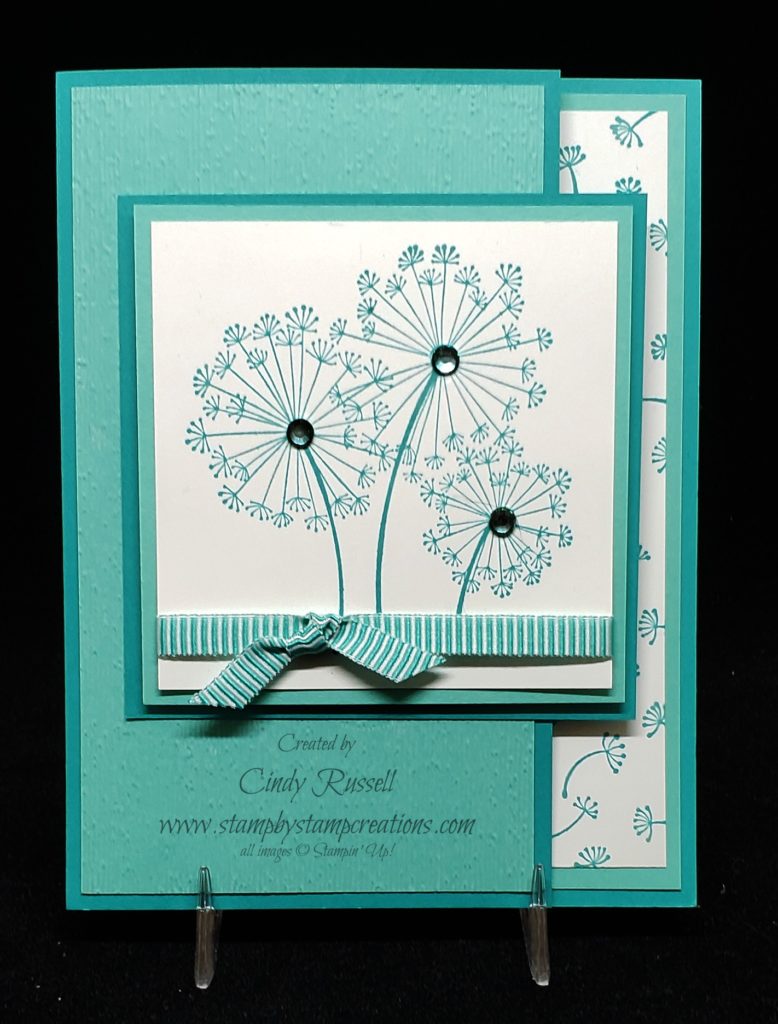
Dandelion Wishes Swap Card
I decided to use the Dandelion Wishes stamp set. It’s so pretty. I love the delicate dandelion images. Are you wondering why I chose the Bermuda Bay/Coastal Cabana color scheme? Don’t laugh….I wanted to use the Bermuda Bay Mini Striped Ribbon! Honest! 😀
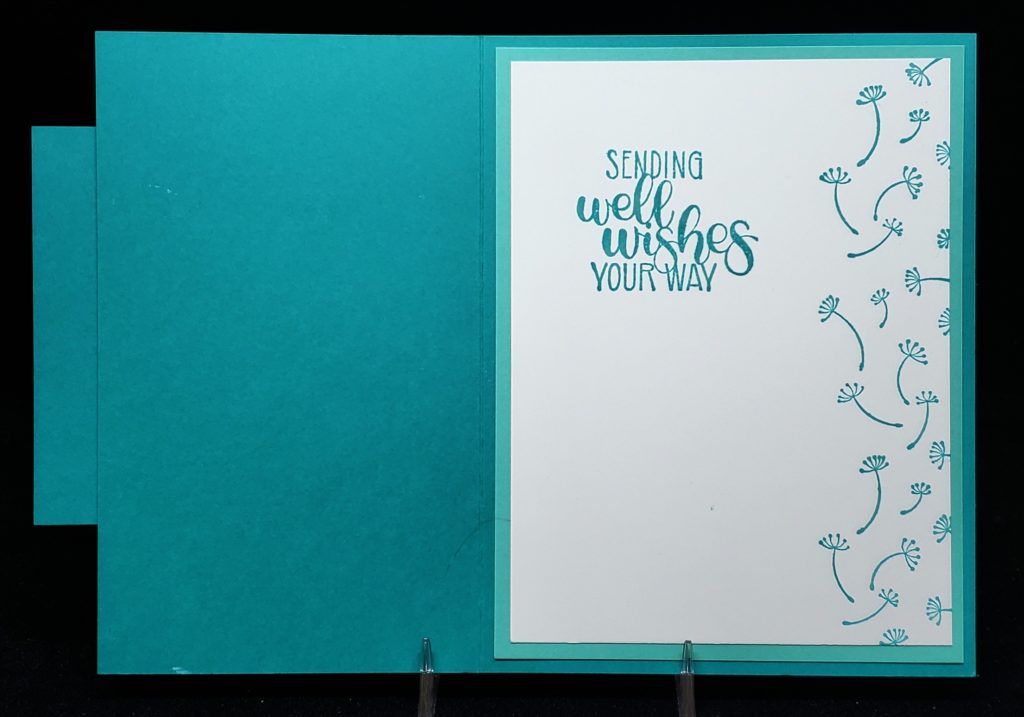
Dandelion Wishes Swap Card Inside
Isn’t this a fun card design? I like it because it’s a bit different yet not too complicated. We also made this card in class this week. What do you think of the rhinestones in the centers of the large dandelions? Pretty, aren’t they? Are you wondering how I got them to match exactly? Stampin’ Blends! Oh…that was another reason I chose this color scheme….I needed to make sure I had Stampin’ Blends markers that would coordinate with the cardstock and ink! Ha! Hey….you’ve got to plan! The plain rhinestones just didn’t do the trick.
OMG! Springtime blizzards everywhere! This weekend is Stampin’ Up!’s On Stage Local events throughout the country. My friends and I are heading to Minneapolis today (hopefully). I’m writing this post on Wednesday evening while watching the blizzard here in Denver out my windows. I’m also keeping tabs on the weather report for Minneapolis because….yep….they’ve got a blizzard too! Sheesh!
Update: It’s Thursday morning now and yes, our flight got cancelled but we are all on flights tomorrow. The weather is suppose to clear in MN in the morning. Keep your fingers crossed!
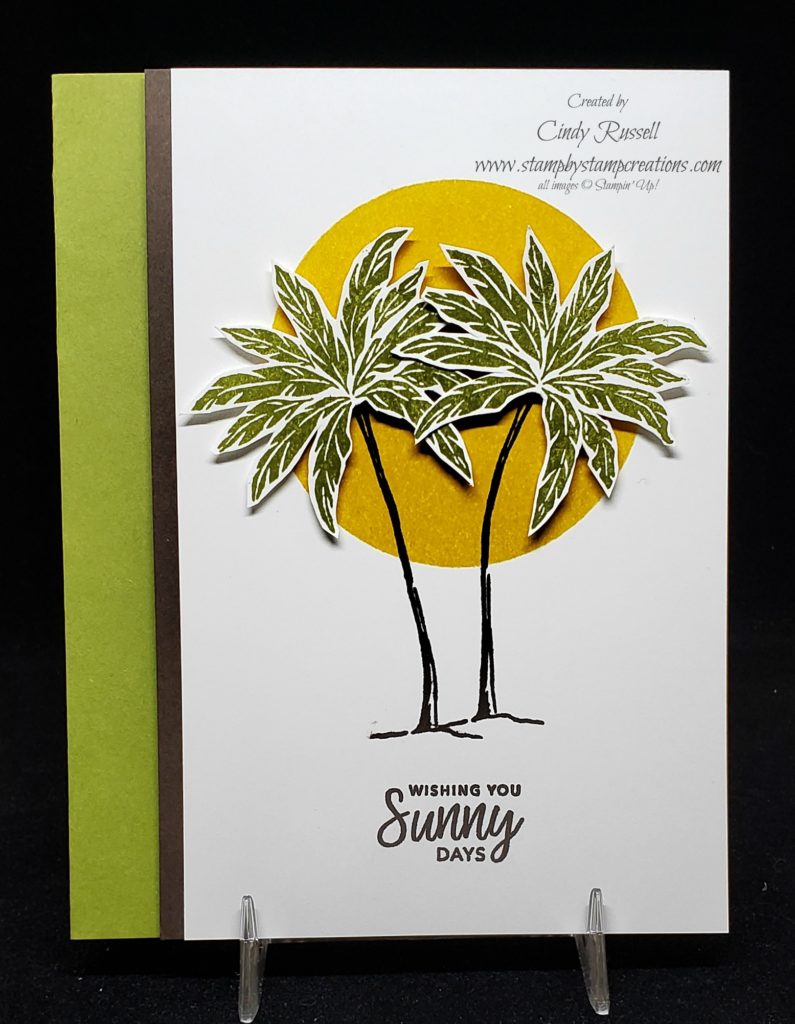
With all of these spring blizzards I definitely think we all need to dream about a warm, sunny beach somewhere…preferably with a nice cold fruity drink! That’s where today’s card come’s in. The Beach Happy stamp set is perfect for helping us to imagine that we’re on that warm sunny beach instead of shoveling snow in April!
Beach Happy Palm Trees
The palm trees were what hooked me on this stamp set. I have this thing about stamp sets with trees. I can’t seem to get enough of them. Weird, I know. The great thing about this stamp set is that it’s photopolymer and tree trunks and the palm fronds are separate stamps. There is only one tree trunk stamp in the set but did you notice how my palm trees face different ways? That’s the beauty of photopolymer…it’s bendable! I just curved the stamp on the block in different ways when I stamped the two trees. Tricky, huh? 😀
The stamp set has some cute sayings in it. Besides the “Wishing you sunny days” there is also “Don’t worry Beach Happy” as well as “Relax, you deserve it” and “Thanks”. You’ll also find a beach chair, a beach umbrella, beach bag and sun hat. What more do you need?
I do wish you all sunny days….especially today if you’re in blizzard territory. Keep your fingers crossed for my friends and me that we make it to Minneapolis. If not, I won’t be able to fill you in on the fabulous new catalog and upcoming new products! Have a great day! Take care and Happy Stamping!
Calling all stampers….who chose the fabulous Country Floral Embossing Folder as one of your free items during Sale-a-bration 2019? I did! I did! Woo Hoo! It is absolutely gorgeous!
Now don’t fret. It will be in the 2019-2020 Annual Catalog so if you didn’t get it during Sale-a-bration you will be able to purchase it starting in June.
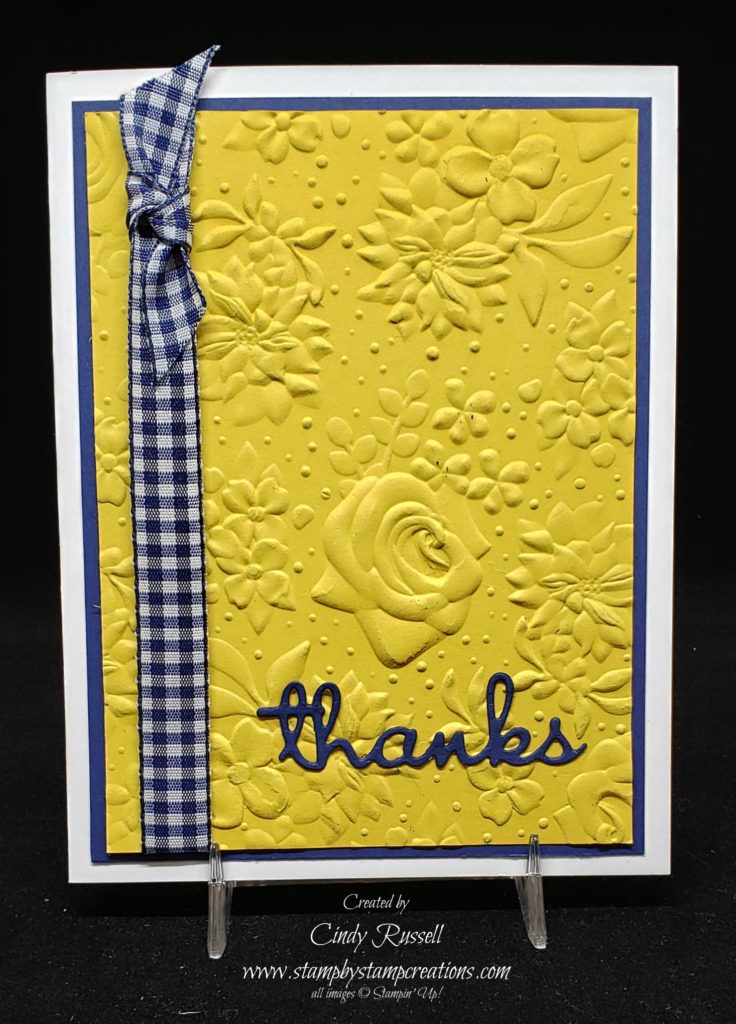
Country Floral Embossing Folder in yellow and blue.
Even though this gorgeous folder isn’t currently available I had to use it in this week’s classes. I saw a sample on Pinterest in these same colors and knew I had to make a similar card. The Night of Navy Gingham Ribbon is SO fun! This whole combination just makes me smile. How about you?
The “thanks” is from the Well Written Framelits (#148534 $40). This set of framelits has 24 dies in it and over half of them are words! Wow! I adhered a piece of Multipurpose Adhesive Sheet to the back of the Night of Navy cardstock before I ran the die through the Big Shot. Then I just peeled the backing off of the back of the die cut word and adhered it to the front of the card! Easy!
The Well Written Framelits coordinate perfectly with the Well Said stamp set (#148796 $45). This stamp set has 51 words/phrases in it that…you’ve got it….COORDINATE perfectly with the Well Written Framelits. Of course you can purchase these two items in a bundle (#150609 $76.50) until June 3rd and receive a 10% discount!
If you have a die cutting machine this card is EASY! Run a couple of things through the machine, layer them up and add some ribbon….your card is done!
Like this bright and cheerful card, I hope you have a bright and cheerful day. We’re suppose to get an April blizzard. Sheesh! Take care and Happy Stamping!
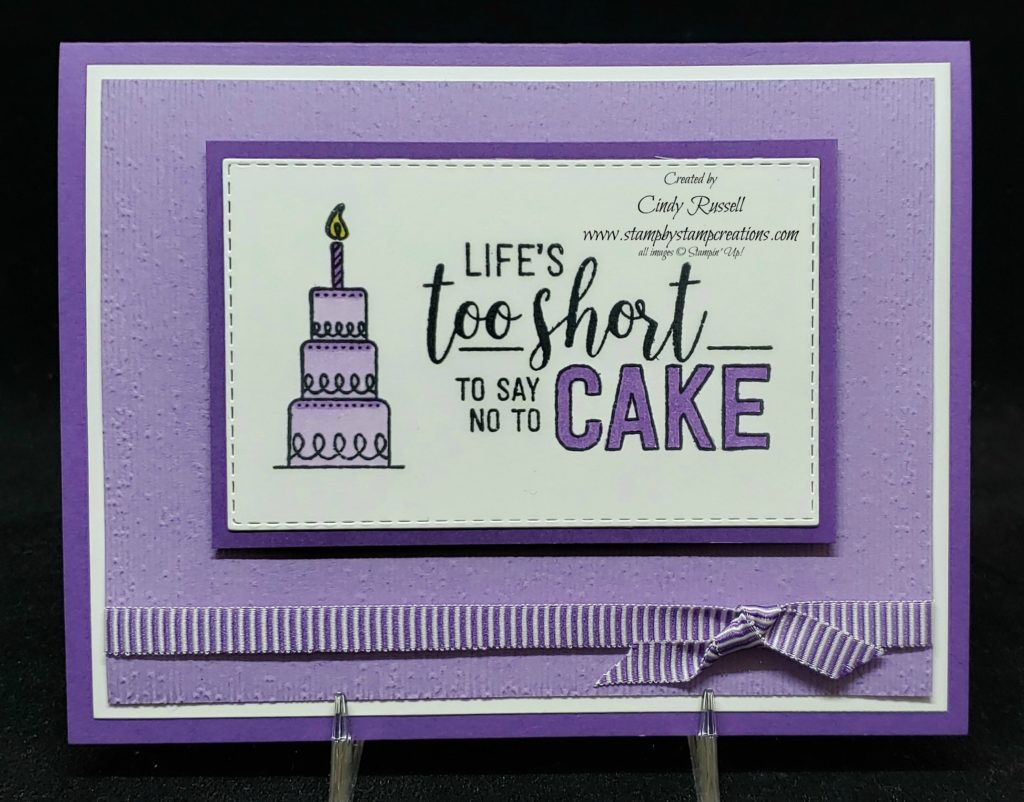
The Amazing Life stamp set was one we received at Stampin’ Up!’s On Stage event last November in Orlando. At the time, I have to admit that I wasn’t all that impressed with it. I don’t know why, it just didn’t do anything for me. As I was trying to figure out what stamp sets to use for this week’s classes I came across it and thought “I need to use this”. It’s been sitting on my shelf since November and it was time to dust it off.
The more that I look at this stamp set the more I like it. There are some great sentiments in it! “You are amazing!”. “Good luck”. and “I believe in you!”. These are all things we like to hear at one time or another and these are things we should definitely be saying to others. The stamp set also has small images that go with these wonderful sentiments.
Amazing Life Birthday Card
I chose to go with an Amazing Life birthday card. I mean really….you can never have enough birthday cards on hand! Once I had the stamp set and the theme of my card figured out I needed to figure out the color scheme. I knew I wanted to use Stampin’ Blends to color my image and I’m kind of falling in love with the Mini Striped Ribbon so I had to find colors that came in both. I was limited to Bermuda Bay, Gorgeous Grape and Poppy Parade with the ribbons. I already had a card using Bermuda Bay so I went with Gorgeous Grape and the coordinating Highland Heather.
I love the Rectangle Stitched Framelits….or any stitched framelits for that matter. They just add that little something, something to a card like my favorite Subtle Embossing Folder (which I also used on this card!) Did you know that you can purchase the Amazing Life stamp set (#148750 $21) and the Rectangle Stitched Framelits (#148551 $35) in a bundle (#150624 $50.25)?! Woo Hoo!
I hope this card brings a smile to someone’s face. Have a great day! Take care and Happy Stamping!
Thank you for sticking with my during my blog update. Things are getting a little crazy around here. Too much to do. Too little time. Does anyone else ever feel that way? Yikes!
Last week I talked about the retiring In-Colors. I mentioned that my favorite was definitely Berry Burst. I’m really going to miss that card. Since it’s retiring I thought I should probably use it on one of the cards for class this week. (OK…who schedules a class the week they leave town for 6 days? Sheesh!) Back on task…
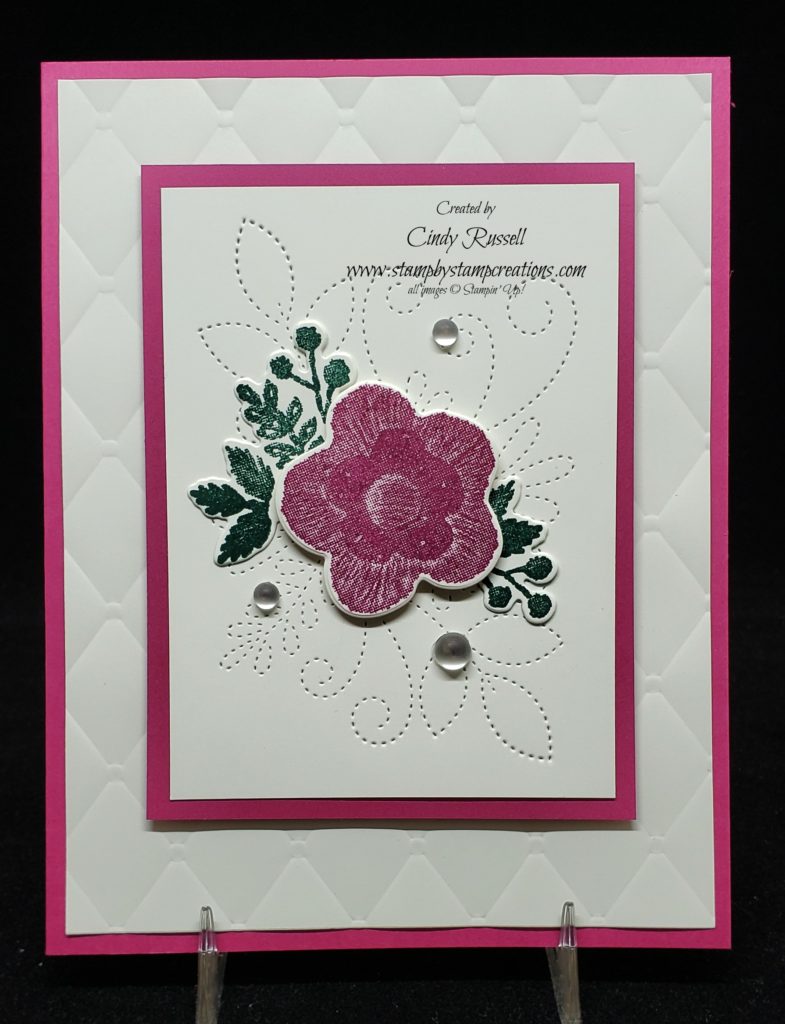
Needle & Thread in Berry Burst
I saw a card similar to this online and loved the simplicity, yet beauty of it so thought I should give it a try. Berry Burst seemed to be calling out to be used on it. Ha!
The new Distinktive stamps are amazing! Doesn’t that flower and foliage look like it was stitched? Oh, my! The Distinktive images are so realistic looking!
Speaking of Distinktive stamps….did you know that the April Paper Pumpkin kit will contain a Distinktive stamp set? Woo Hoo! I can’t wait to see it. There are only a couple more days to sign up for Paper Pumpkin if you want to receive the April Kit. You need to do it by April 10th! To sign up for a Month to Month Subscription where your credit card is charged every month when the kit ships simply click here. If you’d prefer to purchase a 1 month, 3 month, 6 month or 12 month prepaid subscription to Paper Pumpkin you can purchase it in my online store here.
Back to the card. I really love the “stitched” background behind the flower. It was actually made with a framelit on the Big Shot. Once again….AMAZING! The tufted background finishes off the card nicely along with the Epoxy Dots (that carried over from the Holiday Catalog).
I hope you enjoy this bright and cheerful card. Have a great day! Take care And Happy Stamping. Oh….don’t miss out signing up for the April Paper Pumpkin Kit. I think you’re going to love it!
Yesterday I showed you my fabulous new STORAGE by Stampin’ Up! storage for my Stampin’ Blends so today I thought I’d show you a card I made using my Stampin’ Blends!
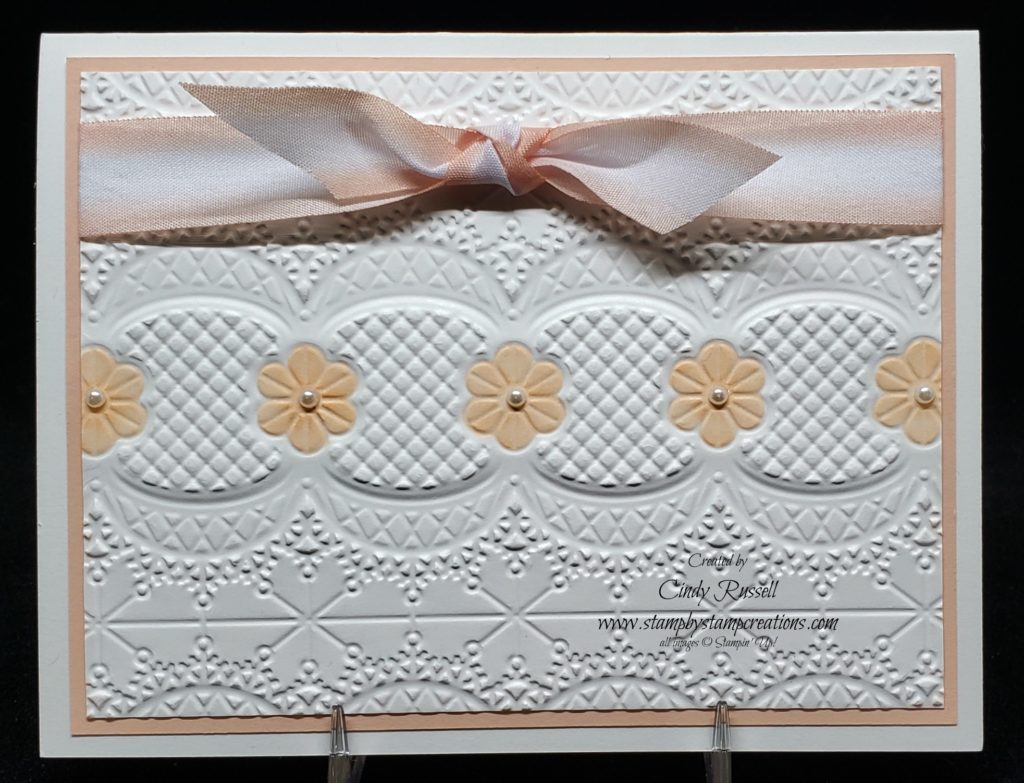
This card was SO Easy! With a few noted exceptions I could almost classify this card as “simple” stamping. First of all there is no stamping on the card at all! None! Hard to call it simple “stamping” if there isn’t any stamping on the card. Ha! Secondly, you need a Big Shot and the Lace Dynamic Textured Impressions Embossing Folder so these are items that a more seasoned stamper would have.
The hardest part of making this card was getting the piece of Whisper White cardstock centered in the embossing folder the way I wanted it. I wanted the row of flowers basically in the center of the cardstock. I think it would have worked if they were a bit lower too. The important thing was to make sure I wouldn’t cover up the row of flowers with the ribbon.
Speaking of the ribbon…isn’t this Petal Pink/Whisper White variegated ribbon lovely? It works so perfectly with this card! Ribbon is usually the very first accessory I look to when designing a card. Lately though I’ve noticed that I haven’t been using much ribbon on my cards. I don’t know what my problem is. Ha! You’ll be glad to know that of the 8 cards I have designed for next week’s Card Buffet only two of them DON’T have ribbon on them! Whew…
I guess I should tell you about the Stampin’ Blends technique that I mentioned in the title…. I first saw this technique used with the beautiful Country Floral Embossing Folder that was available during Sale-a-bration (and will available again in the new 2019-2020 Annual Catalog!). I saw people using their Stampin’ Blends to color the embossed flowers on their cards and it was gorgeous. I decided to try it on a simpler embossed image and this card is what I came up with!
I first embossed the Whisper White cardstock and then I used my Dark Petal Pink Stampin’ Blends Marker to color the embossed flowers. So easy! Then to really make the flowers pop I added Rhinestone Basic Pearls to the center of them. I then added a layer of Petal Pink cardstock and a Thick Whisper White card and my card was done!
I hope you enjoyed this simple technique that you can use with your Stampin’ Blends. Have a great day. Take care and Happy Stamping!
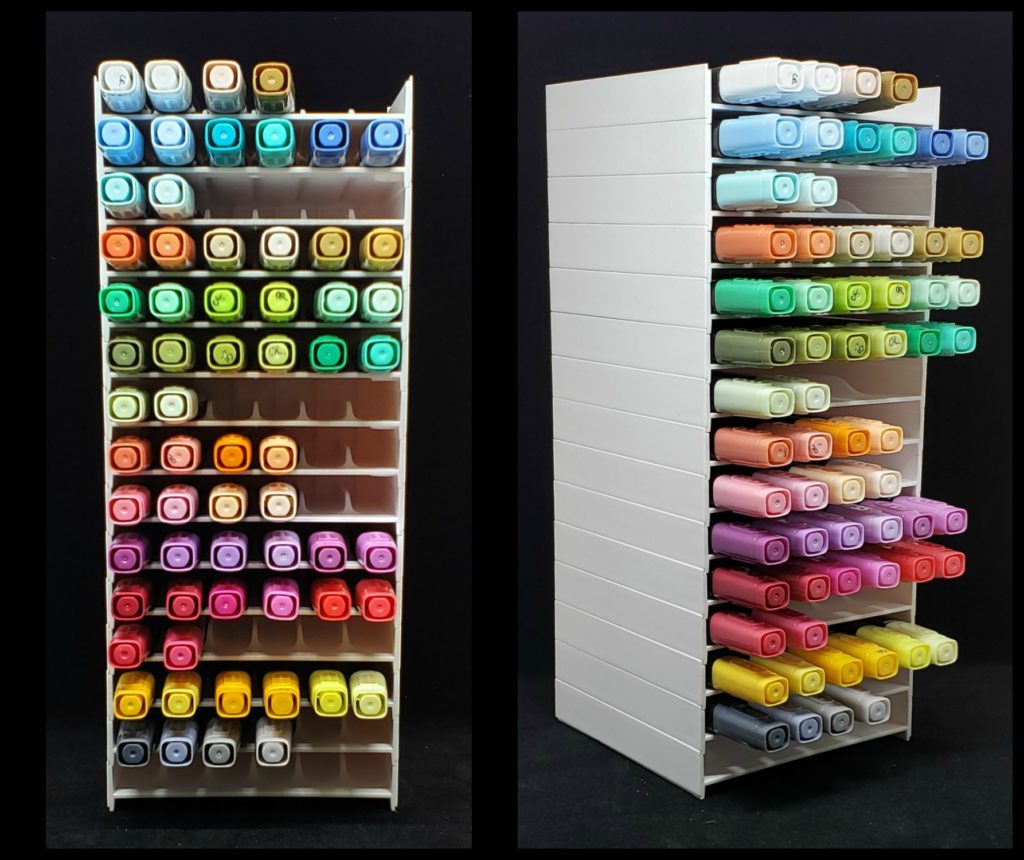
Look what the UPS driver brought yesterday! A whole box of goodies! Not only did I receive supplies that I need for next week’s classes but I also received the new STORAGE items that I ordered. Woo Hoo!
In the above photo you see three of the sets of Stampin’ Blends Storage Trays. Each set contains 5 trays. The total of 15 trays that I purchased is more than enough for all of my blends and I have all of the available colors.
Each set of 5 trays comes in a nice cardboard box with foam padding so that the ends and corners don’t get chipped or dinged or anything. You also get a little set of silicon feet for the bottom so the trays won’t slide. I forgot to put the storage lid that I also ordered on top of my stacked trays…..I was just too excited to get my Blends in the trays and take a photo for you! 🙂
Filled Stampin’ Blends STORAGE trays
If you’re wondering how I arranged my Blends I can tell you but don’t think I’m too anal. First it’s alphabetical by color: blues, browns, greens, etc. Then they are arranged alphabetically within each color: Balmy Blue, Bermuda Bay, Night of Navy. Hey! I told you not to laugh! I’m not going to tell you that I also arrange my cardstock this way….
If you are wanting to get some of these fabulous STORAGE by Stampin’ Up! items I wouldn’t wait. They are predicting that this first shipment will go fast and then you won’t be able to order them again until they’re back in stock.
I’m going to go finish unpacking the Stampin’ Up! box I received yesterday. I was too excited to get my Stampin’ Blends all organized that I never finished unpacking the box!
Head on over to my online store and get your favorite STORAGE items ordered today! Have a great day! Take care and Happy Stamping.
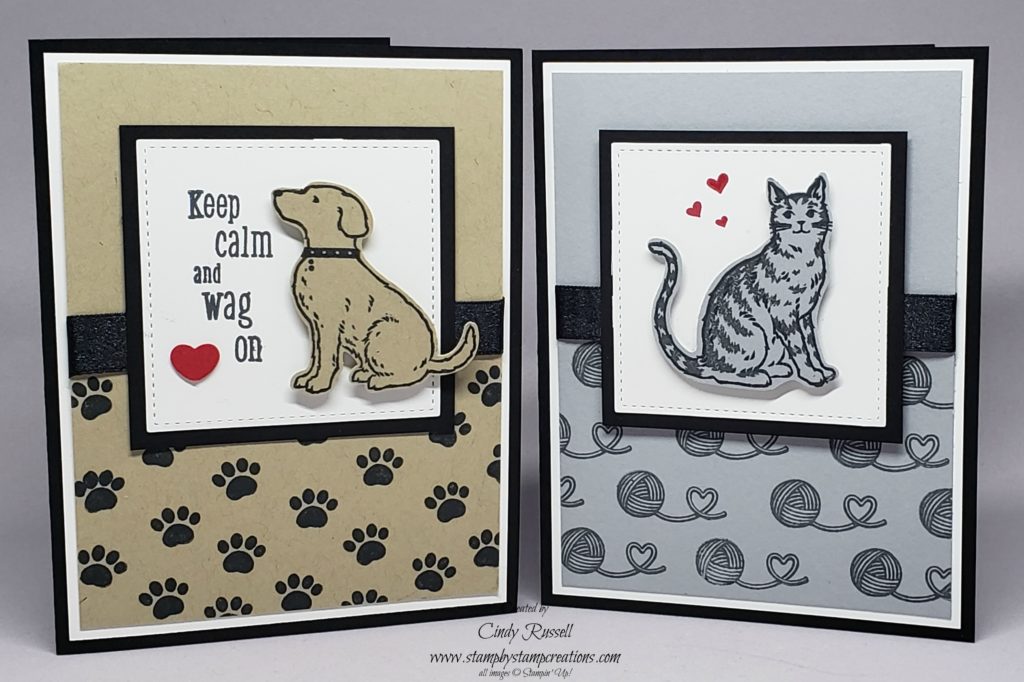
It’s probably safe to say that the majority of people in the U.S. have pets. That would probably mean that the majority of paper crafters have pets. So, who wouldn’t either love to make or receive a card with some type of pet on it?!
Pet Cards
I designed these cards for an upcoming class. I used the Happy Tails stamp set (#148682 $17 bundle (#150631 $31.50) for the dog card and the Nine Lives stamp set for the cat card (#148703 $16) Aren’t they adorable? Simple, yet TSC! Too Stinkin’ Cute! I love that Stampin’ Up! has both a dog punch and a cat punch (#144666 $18)!
Are you a dog person or a cat person? I am a cat person, I don’t dislike dogs I just prefer cats. I love my little (?) Tasha. She loves coming around during card class. She acts shy but she loves the attention she gets.
Tasha supervising card class.
I used the pet card photo above to advertise for my upcoming class in hopes that pet lovers might want to attend. I had to giggle when I got an email back in return asking “What about horses?”. Needless to say, I had to order the new Let It Ride stamp set and promise her we would use it in the following class! Ha! Stampin’ Up! does try to have a little something for everyone! 🙂