Are You A Halloween Fan?!!

Are you a Halloween fan? Then you’re going to want this fun new kit from Stampin’ Up!. Yep, everything you need to make this house, along with the tree and fence are included in the kit. The only things you will need to supply will be a hot glue gun and some battery-operated candles to make the windows glow.

You can view the details about the Haunted Home Kit as well as order it in my online store .

Be sure to check out the video below to see how easy this kit is to put together. Stampin’ Up! kits are only available while supplies last so order yours today!

Have a great day! Take care and Happy Stamping!

Day 27 of 30 Days of the New Catalog

Stampin’ Up!’s Delicate Details Box

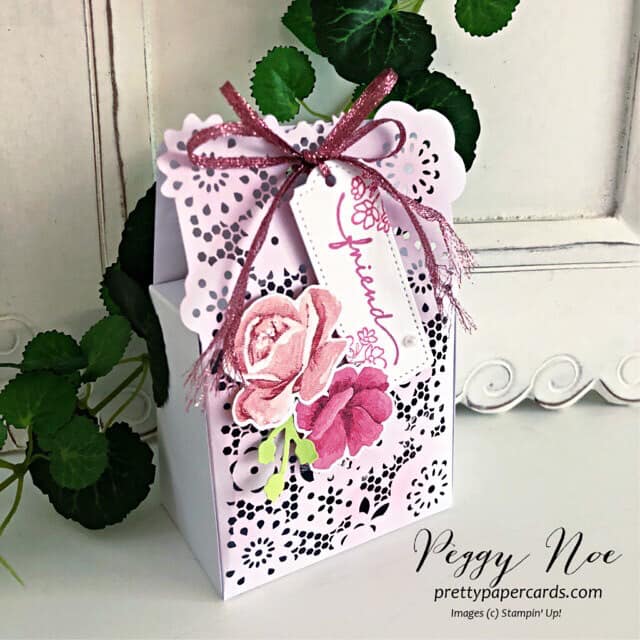
We’re getting close to the end of our 30 Days of the New Catalog! For Day 27 I am sharing another treat package for you. This is the Delicate Details Treat Box that can be found on page 140 of Stampin’ Up!’s new catalog.

This lacy-looking box measures 3-3/4″ x 5-1/4″ x 2″ and is food safe. So pretty!

Thank you Peggy Noe for sharing this box. Peggy used a Blending Brush to apply a color to the front of the box. I love Blending Brushes to apply ink to my projects. They make it easy to get a nice soft coverage of color on your project.

Are you adding this pretty treat package to your wish list? Have a great day! Take care and Happy Stamping!

Day 25 of 30 Days of the New Catalog

Stampin’ Up!’s Peekaboo Treat Bags

I have something a little different for Day 25 of our 30 Days of the New Catalog. Up to now, I’ve been sharing stamp sets, bundles and suites of products with you but now we’re moving to the back of Stampin’ Up!’s new annual catalog. This is where you will find all of the hidden gems that you didn’t even know were in the catalog!

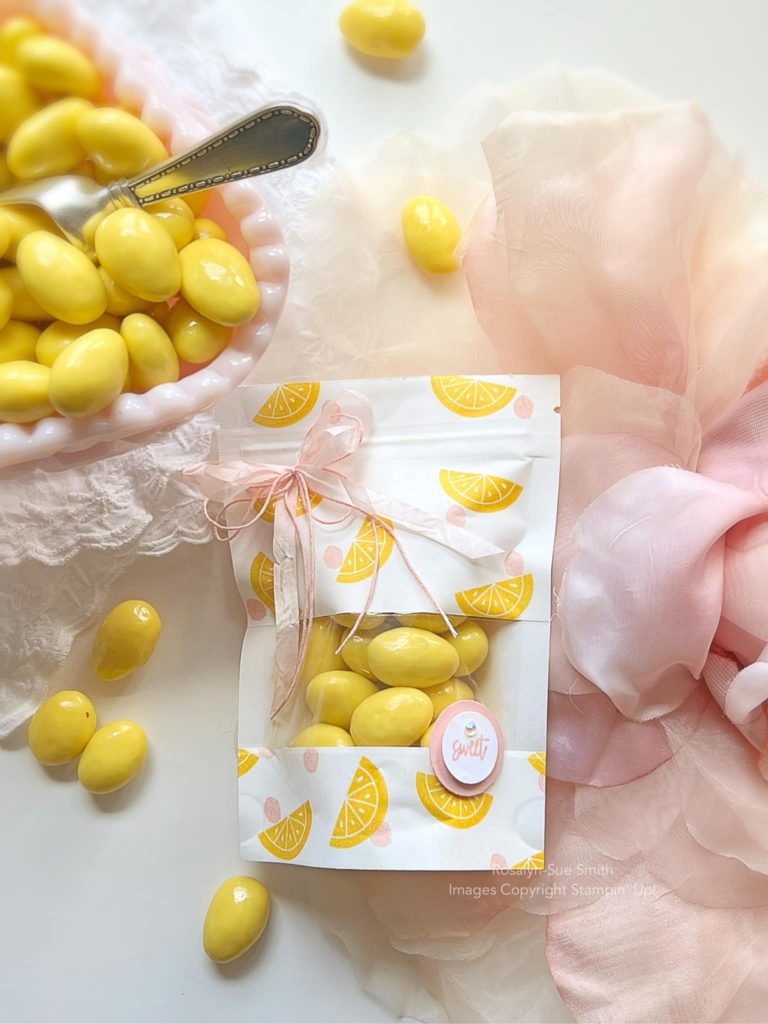
One of the first things that I check out in a new catalog are the ribbons and the designer paper but then I move back to the front of the catalog and start in on the stamp sets and such. This is how I miss so many hidden gems like this Peekaboo Treat Bag which can found on page 140 of the annual catalog.

This cute little bag is 3″ x 4″ x 1-1/4″ and is food safe. Thank you to Rosalyn Smith for this fun sample! The stamped lemons are from the Cup of Tea stamp set. The coated almonds that Rosalyn put in her treat bags are Lemoncello Almonds. I think I might have to look into getting some of those! 🙂

I will be putting these little treat bags on my wish list. How about you?

Have a great day! Take care and Happy Stamping!

Make It Mine: Halloween Tombstone

Halloween Tombstone

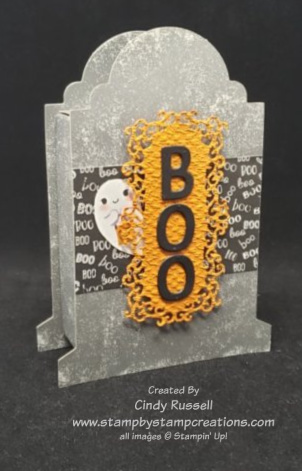
Boo! It’s October and that means it’s time to celebrate Halloween. These tombstone boxes from Stampin’ Up! are adorable and perfect for your Halloween treats. The box portion of the tombstone is 3 3/8″ x 2 1/2″ so it’s a good size. It’s also food safe! The boxes are quick and easy to put together.

I decorated my tombstone box with Stampin’ Up!’s Cute Halloween Designer Series Paper. Yes, I cut out the little ghost right from the paper! I didn’t have the Cutest Halloween stamp set or the coordinating Halloween Punch but my Paper Snips worked out perfectly for my project.

The label is die cut from the Ornate Frames Dies. After die-cutting the label I ran it through my Stampin’ Cut & Emboss Machine with the Tasteful Textile 3D Embossing Folder. The letters are die cut using the Playful Alphabet Dies.

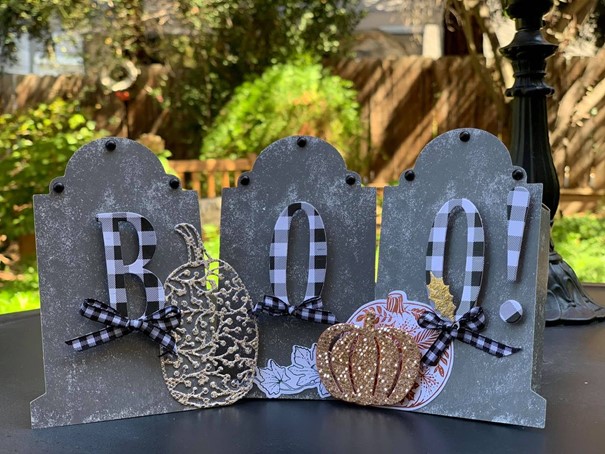
This fabulous little project was my inspiration for Make It Mine Monday. Isn’t it fun? I would have loved to use large letters on my project but unfortunately they are a retired product (although I do still have them…).

Not only did the large letters catch my eye but so did the use of the gingham ribbon and the gingham paper. I love my plaid!

This trio of tombstones is so dang cute you may just see another take on this project from me later this month so stay tuned!

Have a great day! Take care and Happy Stamping!

Fun Fold: Origami Treat Holder

Origami Treat Holder

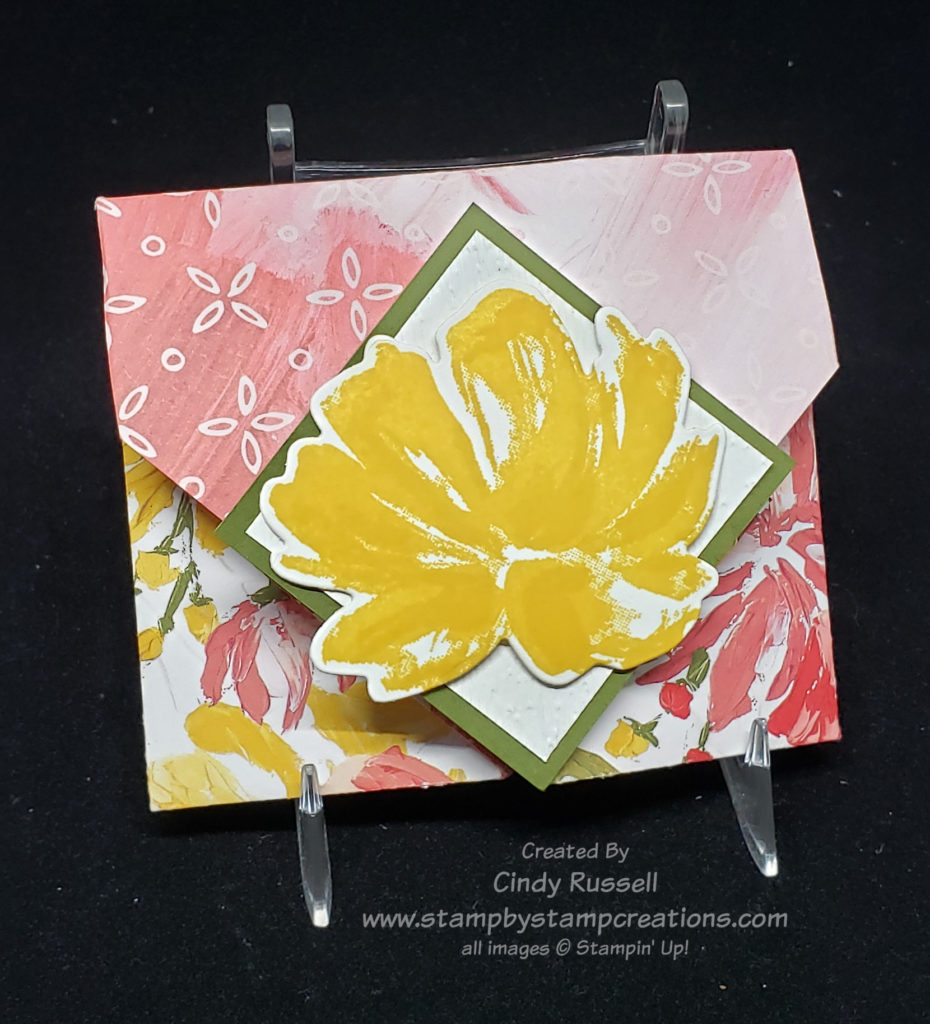
I wanted to share a Fun Fold Origami Treat Holder with you in time for Easter so I’m changing things up this week.   A Ghirardelli chocolate square fits in it perfectly.  I’m actually going to make these for my Easter table and put a couple of their little Easter chocolates in it.  So fun!

No adhesive is needed to make the treat holder itself.  The only adhesive you may need would be for your focal point on the front.  I’ve made a short video showing you how to make the treat holder.

Here are the important measurements for you:

8 ½” x 8 ½” piece of designer paper

After folding designer paper in half diagonally, score along the long folded edge at 2 ½”, 4 ¼”, 7 ¾” and 9 ½”

Once you’ve made one or two of these they go pretty easily.  You can leave the treat holder plain or you can add a focal point if you’d like. 

Have a great day!  Take care and Happy Stamping!

The Twelve Weeks of Christmas – Week 11 – Easy Gift Bag/Box

We’re getting down to the wire. Christmas is less than two weeks away! Yikes! Are you ready? I’m not! Don’t worry though. I’ve got you covered with a couple of easy, yet cute projects for the last two weeks of my Twelve Weeks of Christmas.

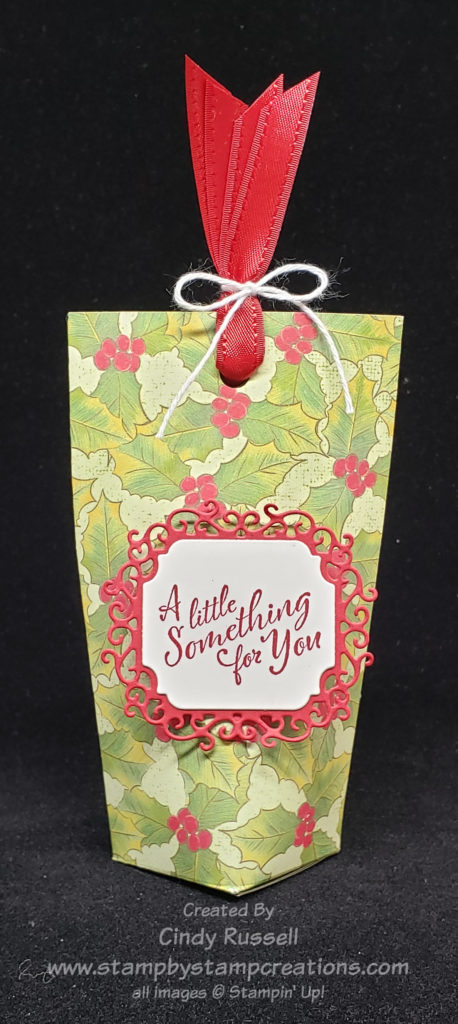
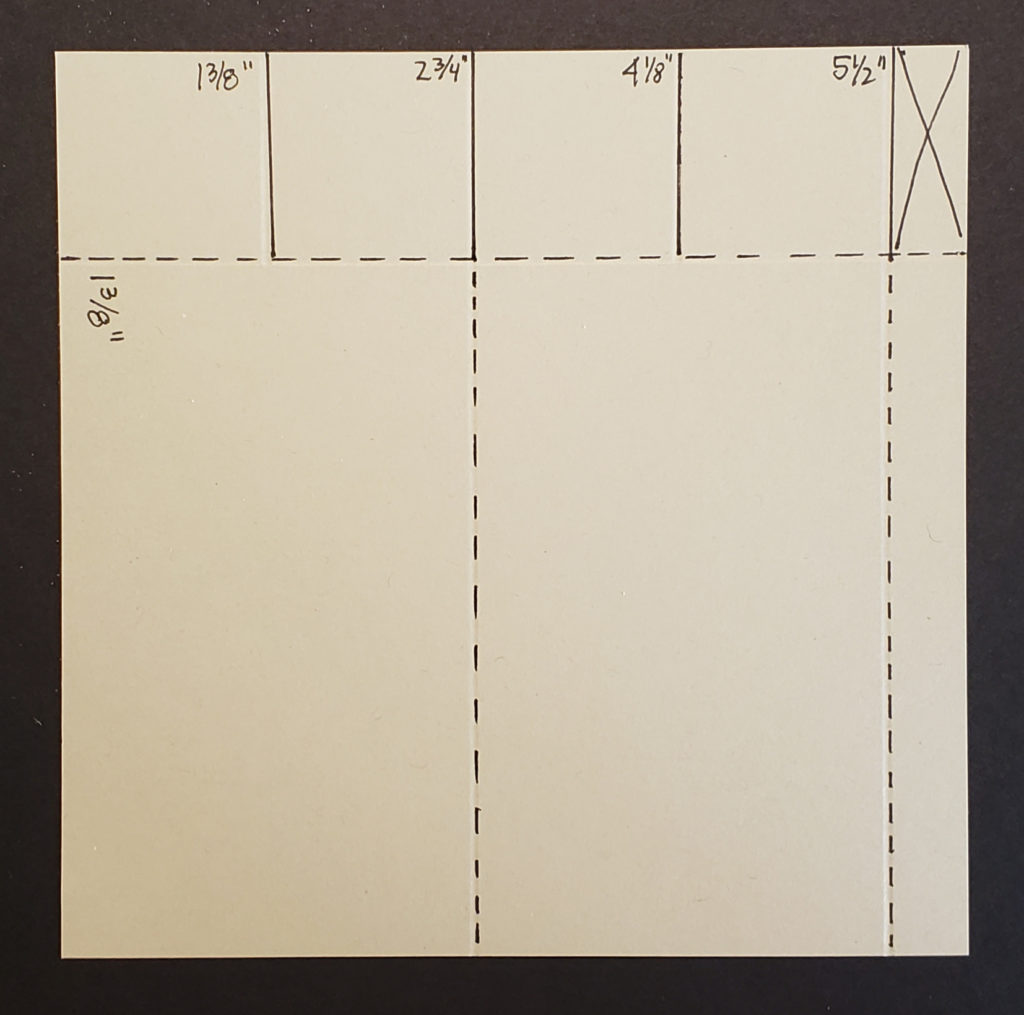
This week I have an easy-peasy gift/treat bag/box. You can wrap a small gift in it or fill it with treats. All you need to make it is a 6″ x 6″ piece of designer paper and whatever you want to decorate it with!

Easy Gift Bag/Box

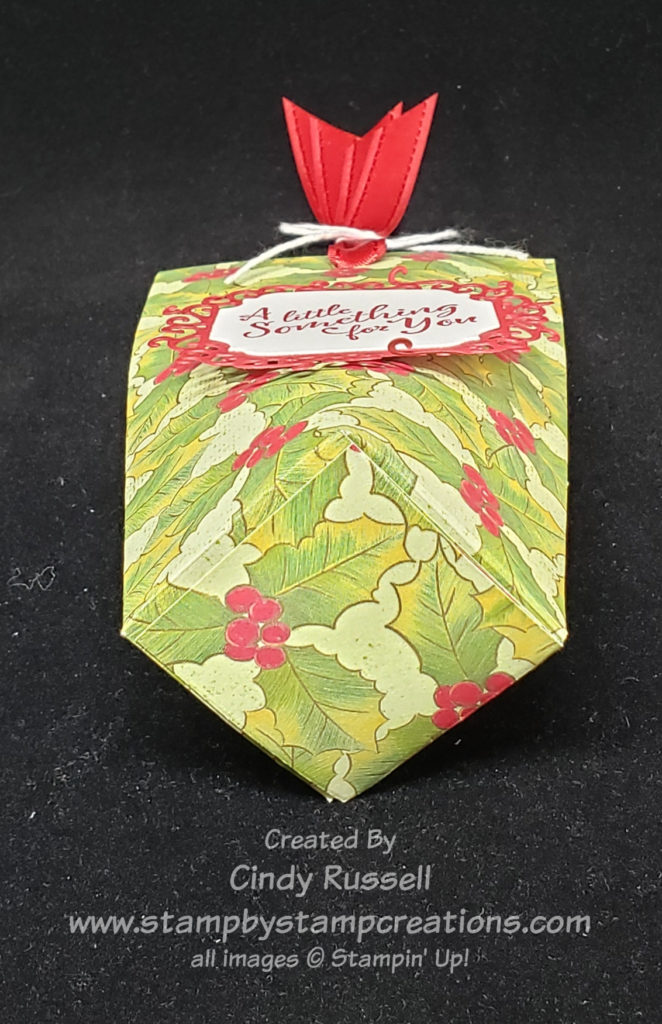
Isn’t it cute? I call it a bag/box because the top is like a bag and the squared bottom is like a box! Here’s a different angle of it:

To make this little bag/box you just need to do a little scoring, make a few snips and add a little strong adhesive like Tear & Tape or Seal +. Below you can see the pattern of where to cut and score. You can find complete instructions with photos here.

Give this fun little gift/treat bag/box a try. I may even use it for my Christmas table! Have a great day! Take care and Happy Stamping! Merry Christmas!

The Twelve Weeks of Christmas – Week 10 – Mini Curvy Keepsakes Box Rudolph

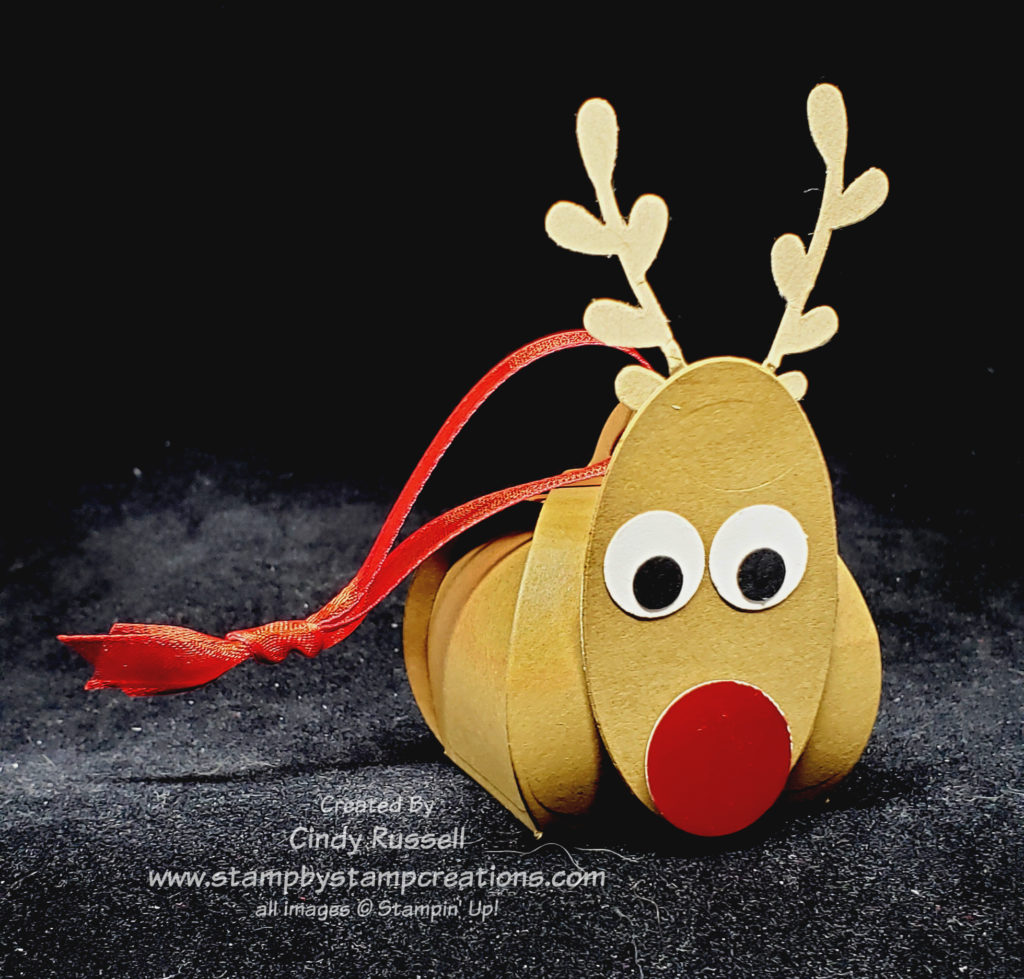
This week’s project is fun and adorable. It’s perfect for kids and adults. It’s also quite versatile. What is it? It’s a cute little Rudolph the Red-nosed Reindeer box!

Rudolph Mini Curvy Keepsakes Box

I have to thank fellow demonstrator, Sue McDonald, for this idea. I saw it online and knew I had to make one! It was pretty easy to make once I figured out what size circle punches to use.

Rudolph’s nose is punched from a Red Foil Sheet with a 3/4″ Circle Punch. The whites of the eyes are punched with a 1/2″ Circle Punch and the black portion of the eyes are punched with a 1/4″ Circle Punch.

The head is die cut with the 3rd smallest Layering Oval Die. I actually die cut two of them so I could layer the antlers between them. The antlers are punched using the Sprig Punch. I also cut two of them and adhered them together just to make them a little sturdier.

You can find the complete directions to make this cute little guy here. When you view the directions you’ll notice that I used Adhesive Sheets on many of the pieces. It made it so much easier adhering things together, especially the eyes. I did use a Stampin’ Dimensional to adhere Rudolph’s nose.

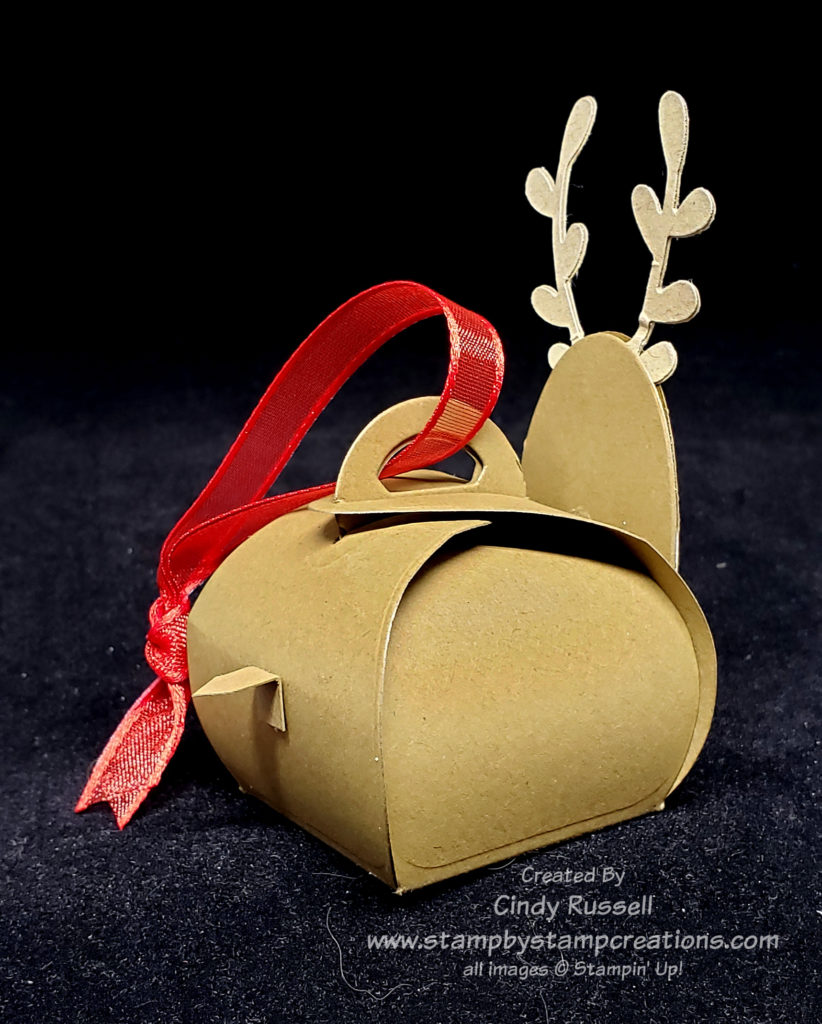
This festive little box has many uses. You can see from the photo that I added a ribbon which makes it the perfect little ornament. Since it’s a box you could even add a little treat to it before hanging it on your tree. If you don’t want to hang it on your tree just leave the ribbon off and it will make the perfect little treat box for your Christmas table.

Below you can see a photo of the back of the box…..you don’t want to forget Rudolph’s little tail! 😀

Have a great day! Take care and Happy Stamping!

Magnolia Treat Bag

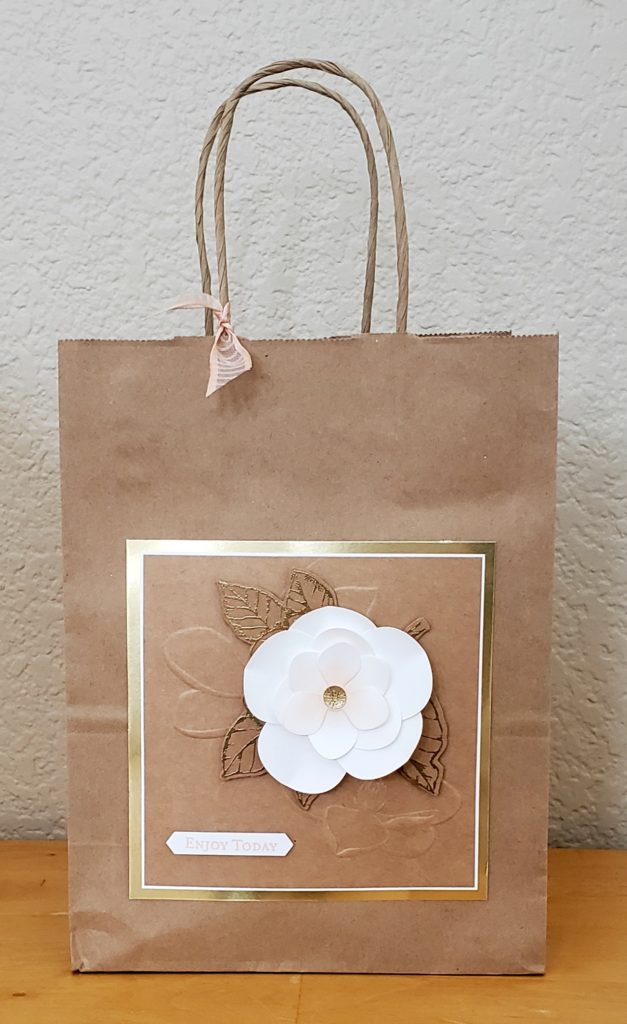
At our Sassy Stampers & Friends Stamp Camp we always give our guests a decorated bag when they check in. This bag has some 3D creations in it with a little bit of candy. There is plenty of room in the bag to put all of the projects they make during the day. Many of the guest have mentioned that reuse the bag as a gift bag or maybe remove the decoration and use it on a card.

Treat Bag.0619

This is the treat bag that Jan designed for our summer camp that we held last Saturday. I’m sorry that the picture doesn’t do it justice. This bag is GORGEOUS! If you’re not in love with the Magnolia Lane Suite of products yet, you will be. I have seen SO many fabulous projects made with it. This bag is simple, yet elegant.

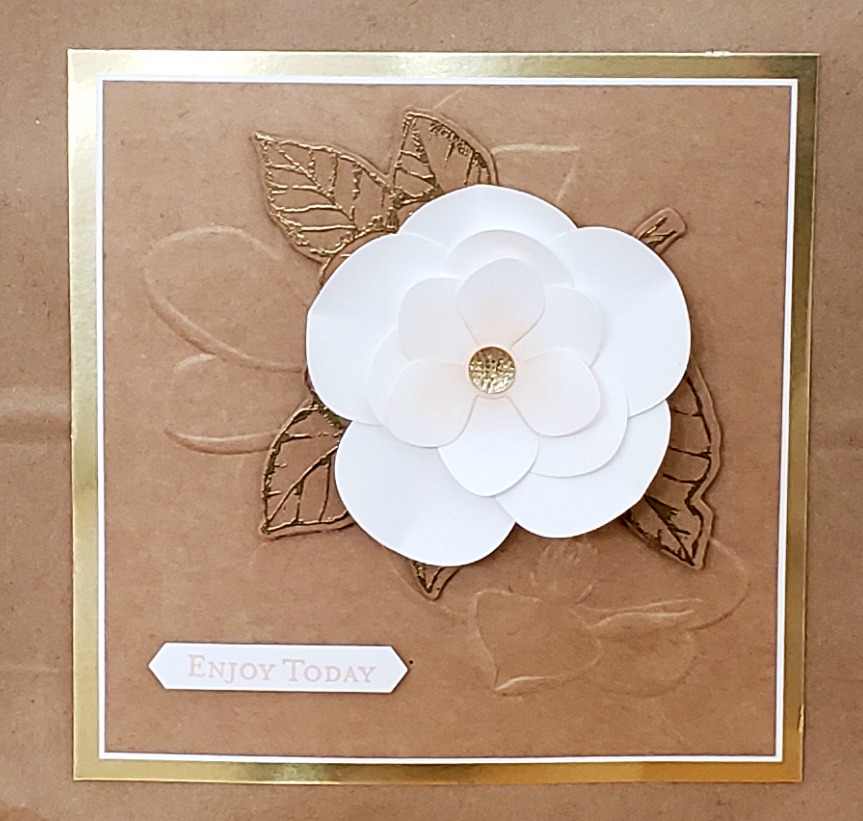
While we were putting the bags together on our work day I almost suggested that we skip the embossed leaves and the 3D flower. The Magnolia 3D Embossing Folder can hold it’s own as a focal point. It’s not just backgrounds for this folder!

Magnolia.0619

Look at the details on this! First, as I mentioned above, the embossed background is amazing! Then Jan had heat embossed the leaves with gold embossing powder before we die cut them. And the flower!

You’ll see this 3D magnolia a lot because it is GORGEOUS! You use the Magnolia Memory Dies for the smaller, center portion of the flower but you will never guess what is used for the larger, outside portion! Are you curious now? Ha! You use the Hot Air Balloon Punch! Yep! Balloon! Check out the video below to see how it’s done!

I haven’t made any of these flowers myself…Jan had them all made for us on work day…but I’m anxious to give it a try. Of course that means I need to purchase the balloon punch! Ha!

I hope you’ve enjoyed this project! Have a great day! Take care and Happy Stamping!

Oh…there have been new items added to the Clearance Rack…even stamp sets! Be sure to check it out!

Simple Treat Holder

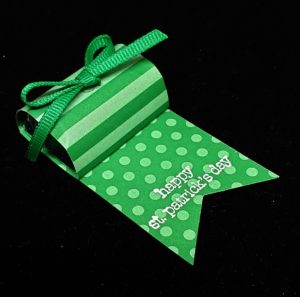
Treat.simple.0319Are you looking for a quick and easy treat holder for your St. Patrick’s Day party, Easter, graduation or any other occasion?  Here is a quick and easy treat holder for you.  My friend Jan made these for our Stamp Camp guest back in January.

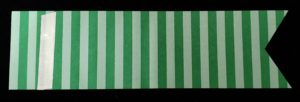
Start with a 1 1/2″ x 6″ piece of designer series paper.

Punch one end of the strip of designer paper with the Banner Triple Punch (#138292 $23).

With the side of the paper you want covering Treat.simple.3.0319the Hersey Nugget facing up, place a piece of Tear & Tape about 1/2″ – 3/4″ from the straight end.  Turn the paper over.

With the side of the paper that you want Treat.simple.2.0319showing on the flap facing up, place your Hershey Nugget on the straight end.  Roll the paper and candy once so that the Hershey Nugget is upside down.  Remove the backing from the Tear & Tape and roll the paper and candy one more time so that the Hershey Nugget is right side up again.

If desired, heat emboss a sentiment on the pennant flap as pictured above.  Jan used the retired stamp set, Teeny Tiny Wishes for her “Happy St. Patrick’s Day”.  There is a “Have a Lucky Day” sentiment in the new Itty Bitty Greetings (W-#146664 $48 C-#146667 $36).

Tie a bow with coordinating ribbon and attach to the top of the Hershey Nugget with a Mini Glue Dot.

That’s it!  Quite easy!

Have a great day!  Take care and Happy Stamping!

How Sweet It Is!

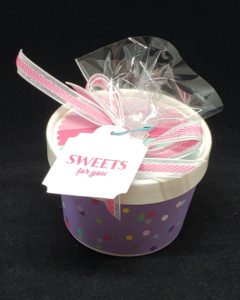
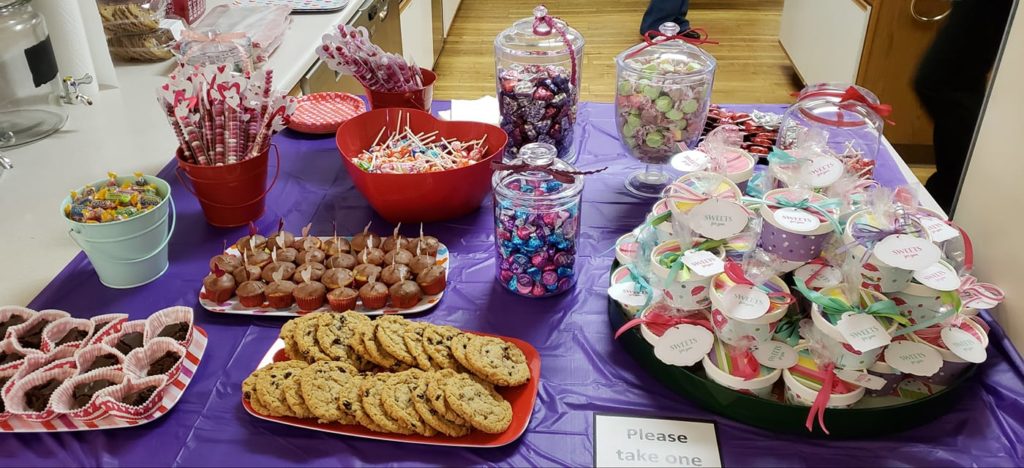
Sweet Treat CupCandy!  Sweets!  Sugar Treats!  Many of us have a sweet tooth and at Saturday’s Stamp Camp we had our Treat Bar with lots of different sweets.  You can check out yesterday’s post to see our Treat Bar.  In the How Sweet It Is suite in the Occasions Catalog you can find little Sweet Cups which we used for some of our treats.

These Sweet Cups are perfect for all sorts of treats.  They are about 2 1/8″ high and about 3 1/2″ across at the lid.   The lid is solid but for our camp we punched a hole in the lid, filled a cello bag with candy and poked the top of the bag through the hole.  This added a little dimension to the cup and made the perfect spot to tie our ribbon.

We used the fun How Sweet It Is designer series paper to decorate our Sweet Cups.  This paper is too fun with all of it’s bright colors and happy designs.  The label and the pin are also part of the How Sweet It Is suite.  You get 24 tags and 24 pins in a package.  That’s a lot of decorating for only $5!

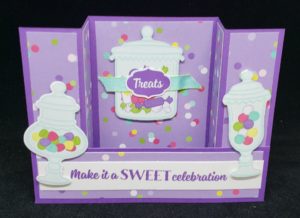
Sweetest ThingOne of the cards at Stamp Camp went perfectly with our sweet treat theme.  Tena’s card used the Sweetest Thing Bundle along with the How Sweet It Is designer paper.  What is fun about this card is that the little candy jars (with the candy in them) were die cut from the designer series paper!  Stampin’ Up! is starting to do this more and more where you can use the coordinating framelits to die cut the designer paper.  Love it!

This fun fold is called a Bridge Card because of the long strip on the front the “bridges” the two sides together.  I’ve not made on before but I’m anxious to give it a try.

I hope you have a sweet day!  If you live in the Midwest….STAY WARM!  Have a great day!  Take care and Happy Stamping!

SASsy Stampers & Friends Winter Stamp Camp

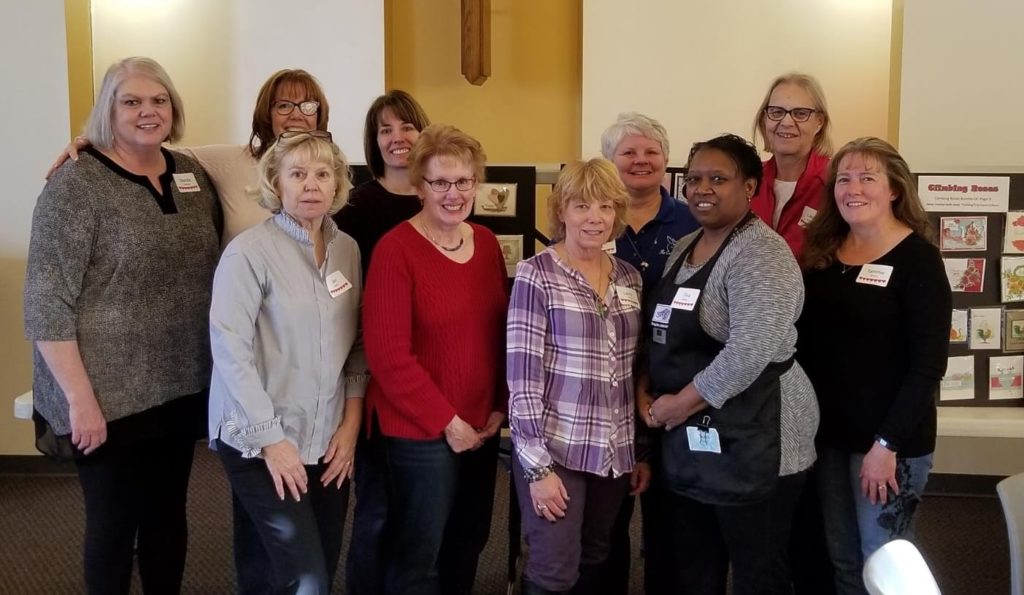
camp1Saturday was a busy and exhausting day.  It was the day of my SASsy Stampers & Friends Winter Stamp Camp.  It’s an all day stamping event for our customers.  Our customers really enjoy Stamp Camp.  They come and get to make 8 different projects designed by 8 different designers.  They also get a delicious lunch, snacks and door prizes.  This year things went quite smoothly because we had a couple of helpers to man the kitchen and help out where needed.

camp2My friend Jan (to my right) loves to design the treat packaging for our guest.  All of her projects are SO cute!  This year she was inspired by the Sweetest Thing bundle in the Occasions Catalog.  Not only did she design the bag we hand out to customers for their projects (with more treats inside) but she designed the little treat cups too.  We always have a camp work day a few weeks TicTacsahead of time to help Jan make all of her creations.  We love hanging out together.

Would you like to be a part of our SASsy Stampers & Friends group?  You just need to be a Stampin’ Up! Demonstrator.  Now is the perfect time to join!  With both of the Starter Kit options found in the Sale-a-bration Brochure you get to choose $175 for only $99!  That is $76 of FREE merchandise that you get along with a 20% discount on all future purchases!  WOW!  It’s a deal you don’t want to miss out on!  I would love to have you join my team!  Contact me today with any questions you may have!

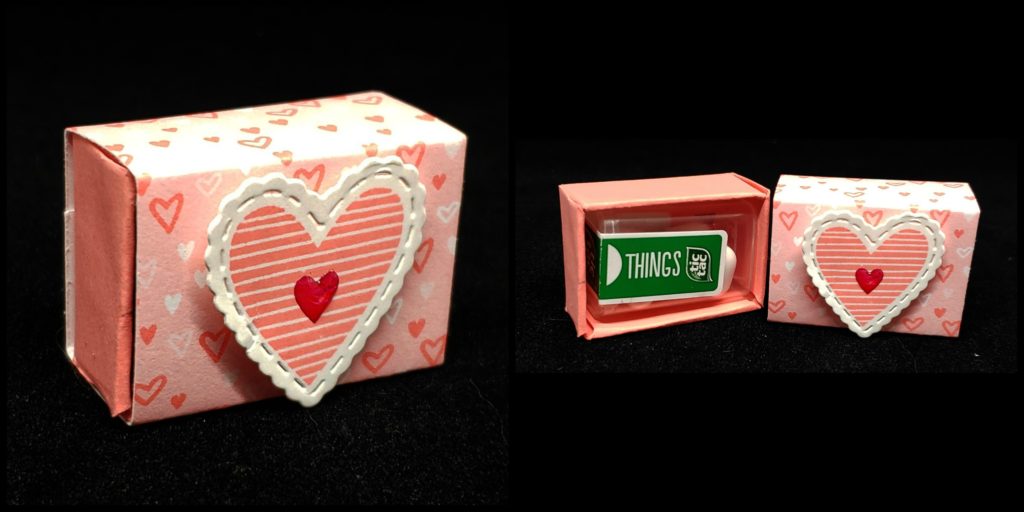
TicTacsThis is my favorite treat project that Jan made for camp.  TSC!  Too Stinkin’ Cute!  It’s absolutely adorable!  The box is only 1 1/2″ x 1″ x 3/4″ and has a teeny tiny Tic Tac box in it.  There are only 6-7 Tic Tacs in the box.  Oh….and I like it because it’s PINK!  🙂

This week I’ll be sharing more of the projects that were made during Stamp Camp so check back in!  Have a great day!  Take care and Happy Stamping!

Fun Frame Friday!

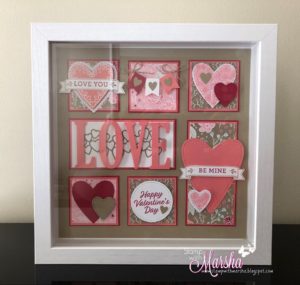
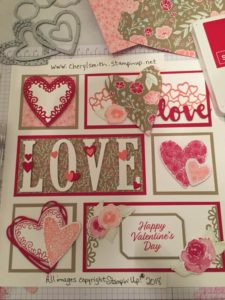
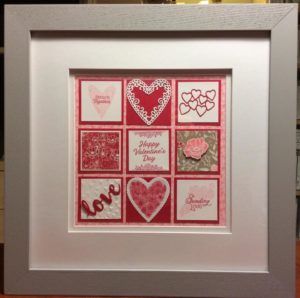
50201667_10161474597010158_7032170771447283712_nSamplers are so much fun. They are the perfect home decorating item for seasons or holidays.  I’ve seen a ton of them made with the All My Love Suite and want to share some of them with you today.

I don’t make them myself very often but I love looking at them.  I’m inspired to make my own samplers but I don’t seem to find the time to get them made.  That is why I appreciate all of my fellow demonstrators who share their creations online!  🙂

49900103_10218143157561126_4607362382224687104_nAren’t these great?  So many different ideas!  I’m not sure where I’d even begin….

Well, I will admit I did buy a frame the other day but that’s as far as I got.  These samplers I’m sharing with you look like they are 12″ x 12″.  I only bought a 10″ x 10″ frame so mine will have to be totally different.  IF I do get one made I will definitely share it with you.  🙂

I hope these have inspired you!  Have fun creating!  Have a great day!  Take care and Happy Stamping!


50320724_1166896576807139_3172182232584421376_n

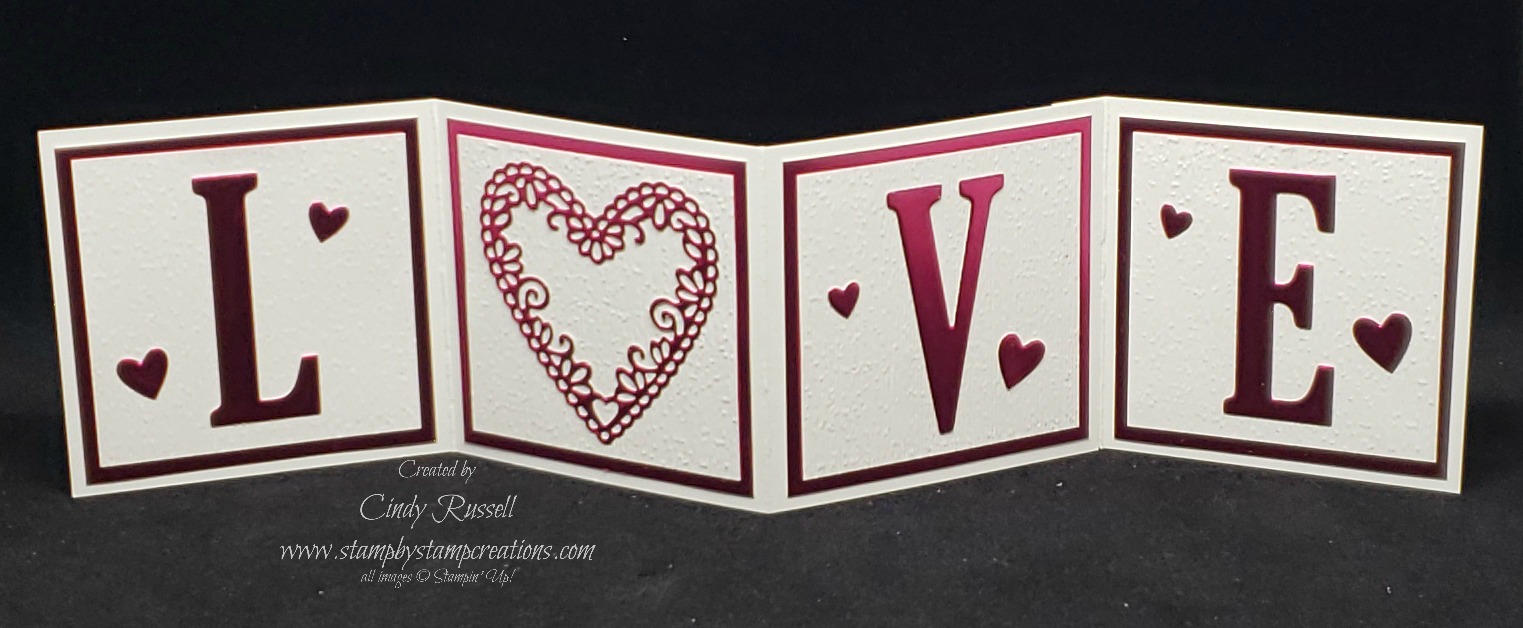
L-O-V-E

Love Banner.2As I mentioned yesterday, February and Valentines Day are all about LOVE!  As paper crafters we’re all about making cards but it’s also fun to make 3D projects.

At Christmas time my demo friend Jan gave me a fun little banner like this one that said “SNOW” and had a large snowflake for the “O”.  I had just received my pre-order of items from the Occasions Catalog and the Sale-a-bration brochure and my little brain went into overdrive!  I just knew I had to make one of these for Valentine’s Day using the GORGEOUS Lovely Lipstick Foil Sheets that you can get as a FREE Sale-a-bration item and the Be Mine Framelits.

This turned out just as cute as I imagined!  I can’t wait to display it!

This little LOVE banner was pretty easy to make.  You should start with a 12″ x 12″ piece of Whisper White cardstock.  (I say “should” because the cardstock I had was only 11 7/8″ x 11 7/8″ so I had to improvise.)

Cut a 12″ x 3″ piece of Whisper White cardstock.  Score at 3″ and 9″.  Flip it over and score at 6″.  Fold along score lines.  You want the outside score marks to be valley folds and the inside score mark to be a mountain fold.

(Improvisation:  Start with an 8 1/2″ x 11″ piece of cardstock (I used Thick Whisper White for a little more support).  Cut a piece that is 3″ x 9″ and a piece that is 3″ x 3 1/2″.  Score the large piece at 3″.  Flip cardstock over and score at 6″.  Score the small piece at 3″.  You want your score marks folding as mentioned in the step above.  Once you have your pieces situated this way you will adhere the 1/2″ section of the small piece to the back of the right side of the large piece.  If you look closely at the picture above you can see that I did this.)

Cut 4 –  2 3/4″ x 2 3/4″ pieces of Lovely Lipstick Foil Sheets and adhere to the four sections of the scored Whisper White cardstock.

Cut 4 – 2 1/2″ x 2 1/2″ pieces of Whisper White cardstock.  Run them through the Big Shot with the Subtle Embossing Folder (my favorite!) for a little texture.  Adhere them to the squares of Lovely Lipstick Foil Sheets.

Figure out how large of pieces of Lovely Lipstick Foil Sheets you want to use to die cut the letters and heart and adhere pieces of Multipurpose Adhesive Sheets to the back.  (You can use regular adhesive on the letters but the Multipurpose Adhesive Sheets make adhering the heart SO much easier.)  Die cut the “L”, “V” and “E” and the intricate heart from Lovely Lipstick Foil Sheets.  Adhere these pieces to the embossed squares of Whisper White cardstock.
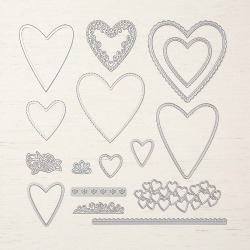
Be Mine FramelitsTo finish off the banner I die cut the little piece with all the little hearts on it and adhered some of the hearts to each of the letter squares.  Don’t worry….I didn’t waste the outline of the little hearts….I used it on a card!

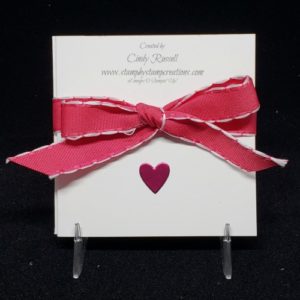
These little banners would make wonderful gifts.  I may have to make some more of them!  Of course if you are going to give this as a gift how do you present it?  Tie a ribbon around it of course and add one of the many little hearts that you just die cut to make the banner!
Love Banner.1.blogHave a great day!  Take care and Happy Stamping!

Favorite Friday: Go 3D!

Favorite Friday is very similar to Throwback Thursday.  In fact, it’s basically the same thing but on a different day!  Ha!  It gives me a chance to go back through old posts and pull out some of my favorite projects and share them with you again.  🙂

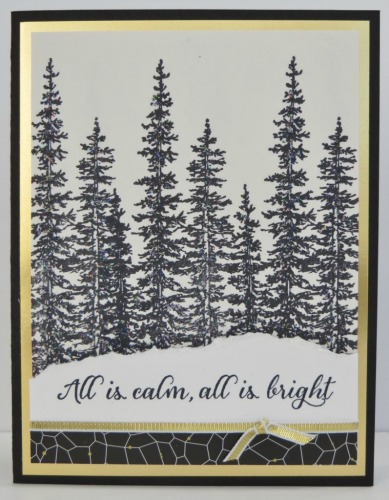
Wonderland2First of all I want to share with you one of my favorite Christmas cards that I’ve made.  It’s from three years ago and was made with the Wonderland stamp set.  I fell in love with the trees and I’m sure it was one of the first stamp sets I had to purchase from the 2015 Holiday Catalog.

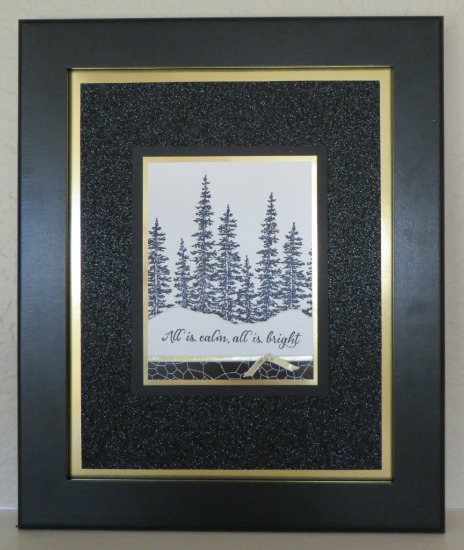
This card definitely says “winter wonderland”.  I love seeing fresh snow on a landscape.  This was the Christmas card I sent out three years ago but I couldn’t stop there.  I love this card so much I framed it and I have to say that the framed project turned out even better than the card.  Check it out….what do you think?

WonderlandFrame.2Don’t you just love how the Black Glimmer Paper and the mat of Gold Foil finish off the project perfectly?  I just love this project and it’s sitting out right now.  In fact, a couple people at my class last night commented on it.

Have you ever take a card you’ve made (or received) and turned it into a 3D project?  I need to do that more often.

Actually, I just may do that again.  I’m thinking of a few cards that would look good framed….they may not be quite as stunning as this but I may have to give it a try.  Hmmm…

Have a great day!  Take care and Happy Stamping!


Throwback Thursday!

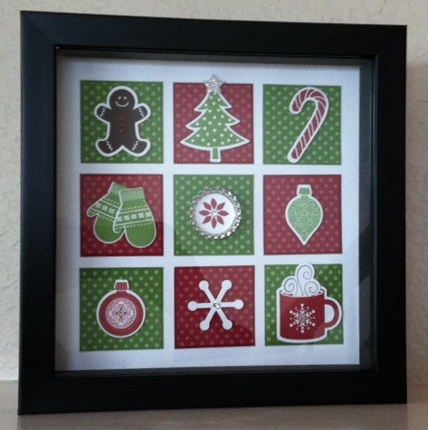
ShadowBox.1212I was in a quandary about what to post today and then I remembered that it was Thursday!  How about a Throwback Thursday post?  So, I  scrolled through all of the photos I’ve posted to my blog and came up with this 8″ x 8″ shadowbox that I made way back in 2012.  In fact, the post was on December 9th so this is just about 6 years ago exactly!  Ha!

How many of you remember the Scentsational Season stamp set and the coordinating Holiday Collection Framelits?  What’s scary is that I still have this bundle of products!  Seriously!

Not all of the images in the shadowbox are from that stamp set and framelit set.  There must have been an ornament stamp set with framelits or a punch.  I know the mittens were punched because I still have the punch!

The green color is Gumball Green and I think the red is Cherry Cobbler.  Too fun!

I think I need to make another shadowbox of some sort.  Hmmm…..

Have a great day!  Take care and Happy Stamping!