Fun Fold: Envelope Flap Gate Fold

Envelope Flap Gate Fold Card

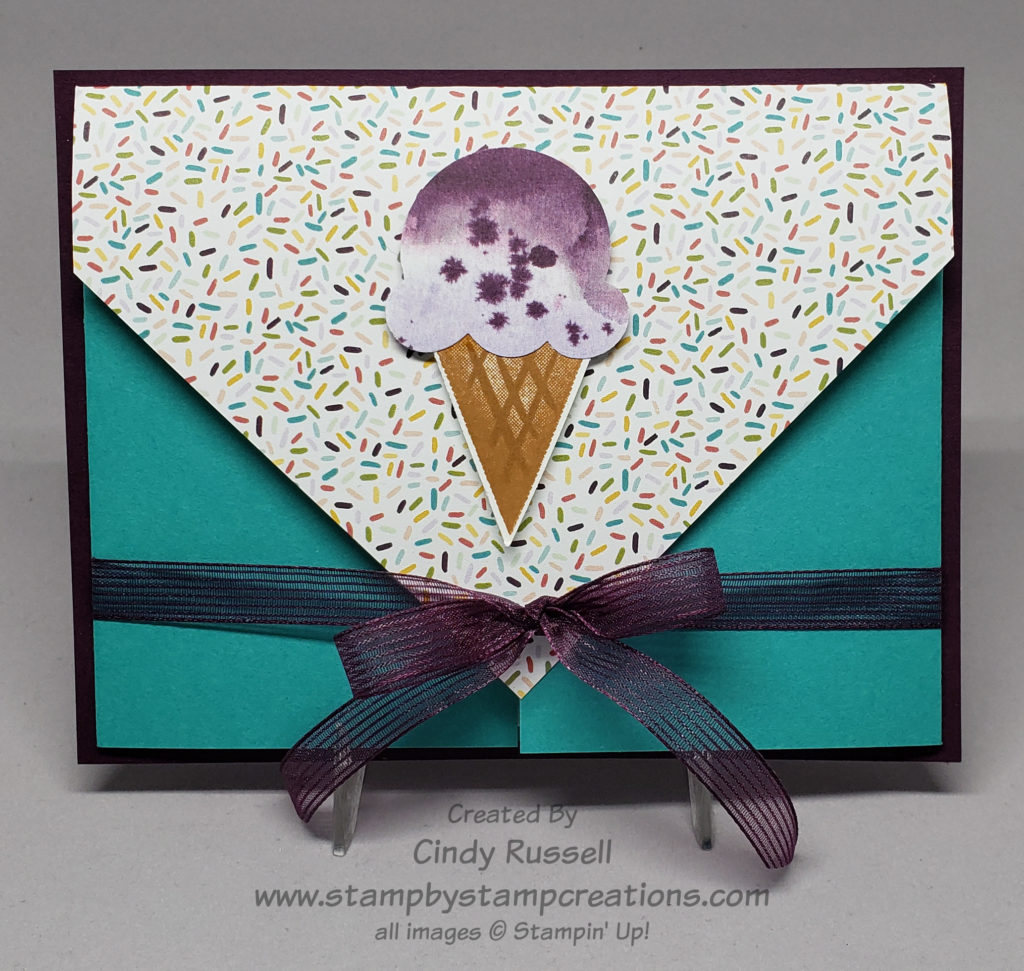
Last week I shared with the Graduation Cap & Gown Gate Fold Card and this week’s card is very similar.  Today I want to share with you the Envelope Flap Gatefold Card.  So fun and not too difficult. I used the Ice Cream Corner Suite of products on my card. 

Before I go into detail, I want to mention that if you like these products many of them will be retiring starting on June 1st so you may want to snap them up now before they’re gone.  The only items from the suite that are in the new 2021-2022 Annual Catalog are the Sweet Ice Cream stamp set and the Ice Cream Cone Builder Punch.

This card was fun to make and I do want to thank Debbie Crowley for her wonderful tutorial on this fun fold.  I was going to describe in detail how to make this card here on my blog but decided it was easier to write up my own tutorial with photos. Be sure to check it out for all of the dimensions and instructions on how to make the card.

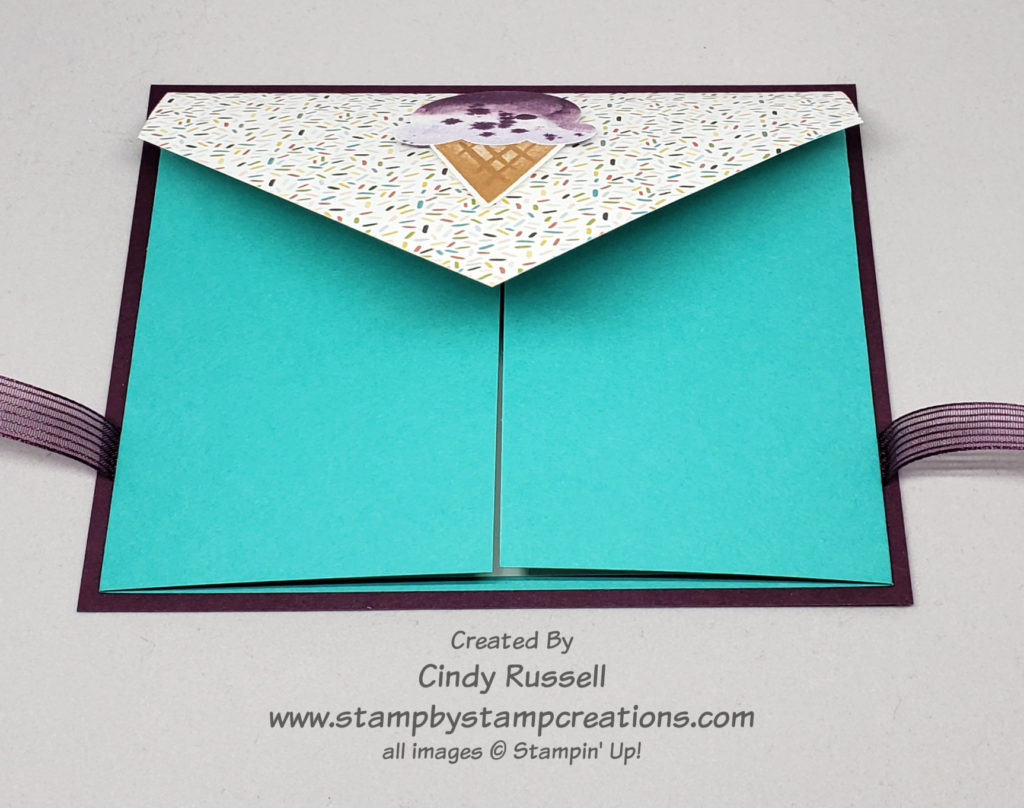
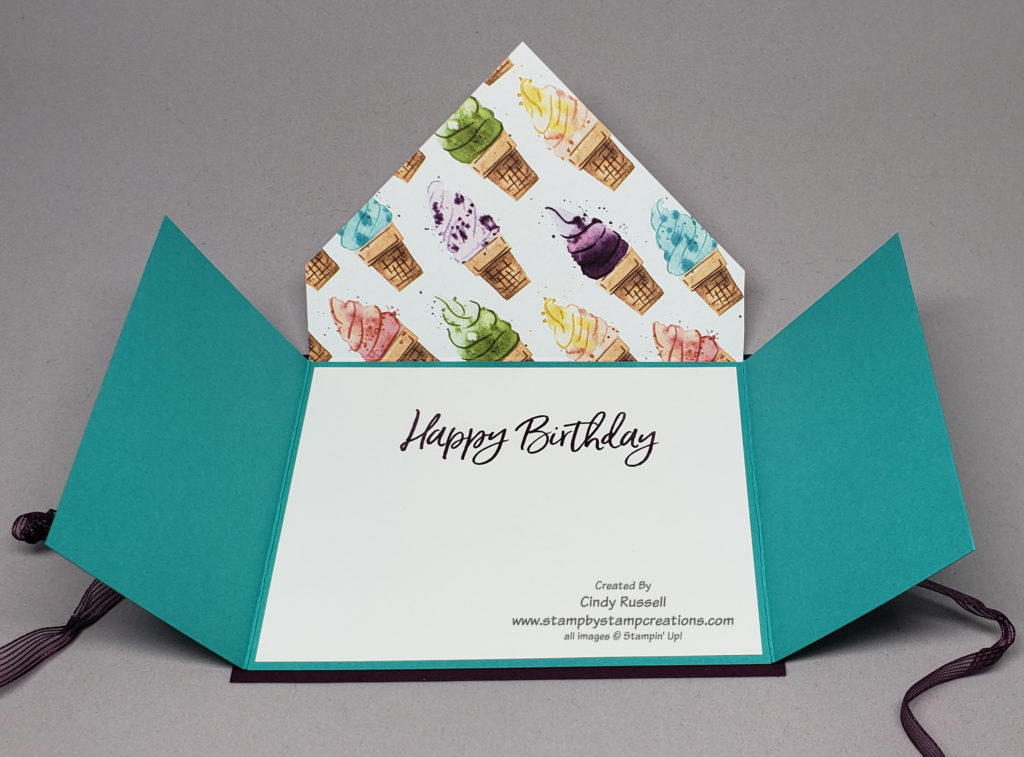
Below you can see a few more photos of the card.  Can you see how similar it is to the graduation card I made last week.  The main differences is that the gate fold portion of this card is adhered to a base.  I also added ribbon to help keep the card closed.

Isn’t this a fun card? I hope you like it. There are so many different types of gate fold cards. I may have to see if I can find another one for next week’s post! Have a great day. Take care and Happy Stamping!

Fun Fold: Double-Flap Gatefold Card

Double-Flap Gatefold Card

It’s time for another fun fold and this week’s fun fold is another Gatefold card. It’s the Double-Flap Gatefold. As you can see from the photo, a little flap of the card front is folded back on itself. This card also has a bellyband like last week.

Do you ever finish making a card and just have to stop and smile? That’s what happened when I finished this card. It turned out even better than I imagined!

I used the gorgeous Hydrangea Hill designer paper to layer on the card base. After I made my bellyband I was stuck. I didn’t know what to use as the focal point on my bellyband. I couldn’t use anything from the Hydrangea Haven bundle because I didn’t have it! It was at this point that I regretted not owning it. But then, I noticed the Butterfly Brilliance stamp set on my shelf and thought “buttefly die!”. Of course then I had to figure out what to die-cut it from. Back to my package of designer paper and I found the perfect pattern that coordinated with the front of my card!

Now for the details on how to make this fun fold. You need to start with a piece of cardstock that is larger than your regular card base. You want a piece that is 5 1/2″ x 10 1/2″. I’ll give you a hint though. It works best if you measure just short of the 10 1/2″ mark on your cutter.

Lay your cardstock on your Simply Scored scoring tool with the long edge at the top. Score at 1″ and 3 1/8″. Now turn it over so that the other long edge is at the top and score at 1″ and 3 1/8″ again. The inside score marks will be valley folds and the outside score marks will be mountain folds.

The larger pieces of designer paper are 1 7/8″ x 5 1/4″. The smaller ones are 3/4″ x 5 1/4″. You can see how to make the bellyband on last week’s post. Before I die cut the butterfly I adhered a piece of designer paper to a piece of cardstock to give it a little more support. Instead of adhering the butterfly directly to the bellyband I die cut a small circle to adhere it to.

In the second photo you can see that I added another die-cut butterfly to the inside of the card as well as adding a layer behind the Basic White. Don’t forget to decorate the inside of your card too!

I liked this card so much I had to make two more for Mother’s Day. One for my mom and one for my mother-in-law! I hope you liked it too.

Have a great day! Take care and Happy Stamping!