A Fabulous Fall Card Sketch!

Gorgeous Leaves Card Sketch

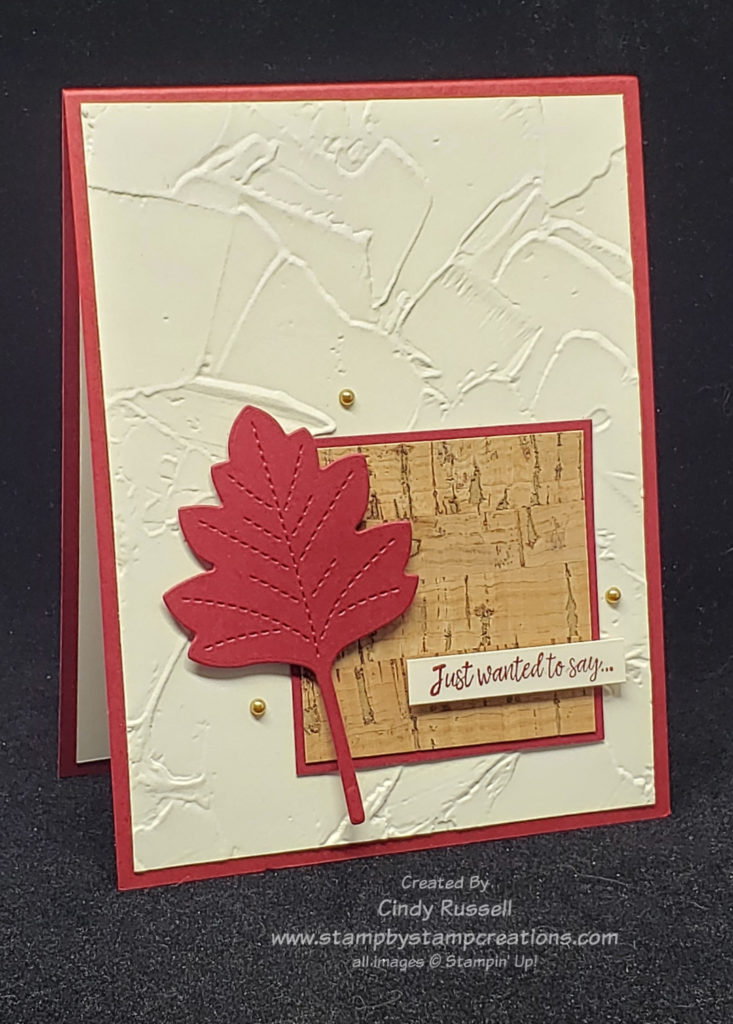
Woo hoo! It’s officially the second day of Fall so it makes sense that I post a Fall card for today’s card sketch.

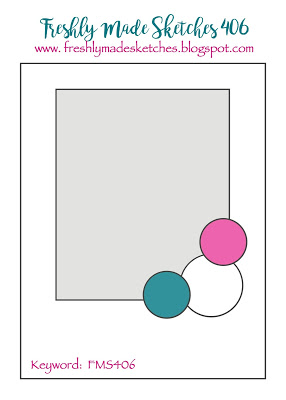
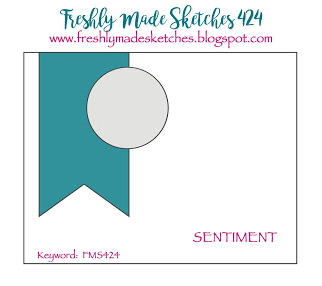
Ok folks…take a good look at my card for today….now take a look at the card sketch. Are you impressed? I actually left something OFF with my rendition. Unbelievable!

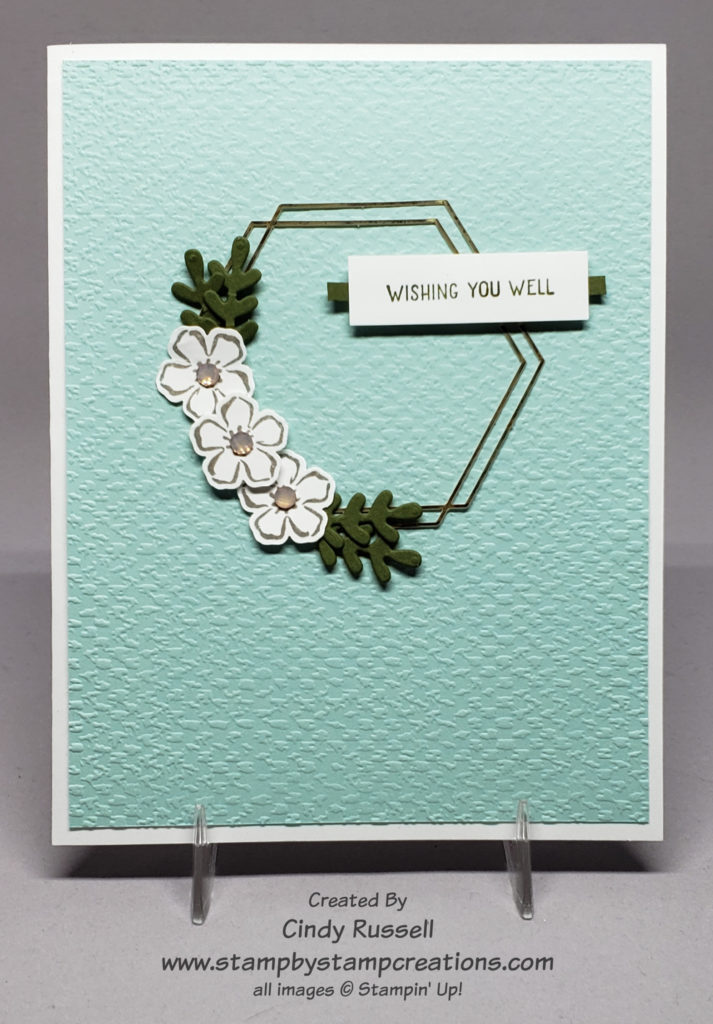
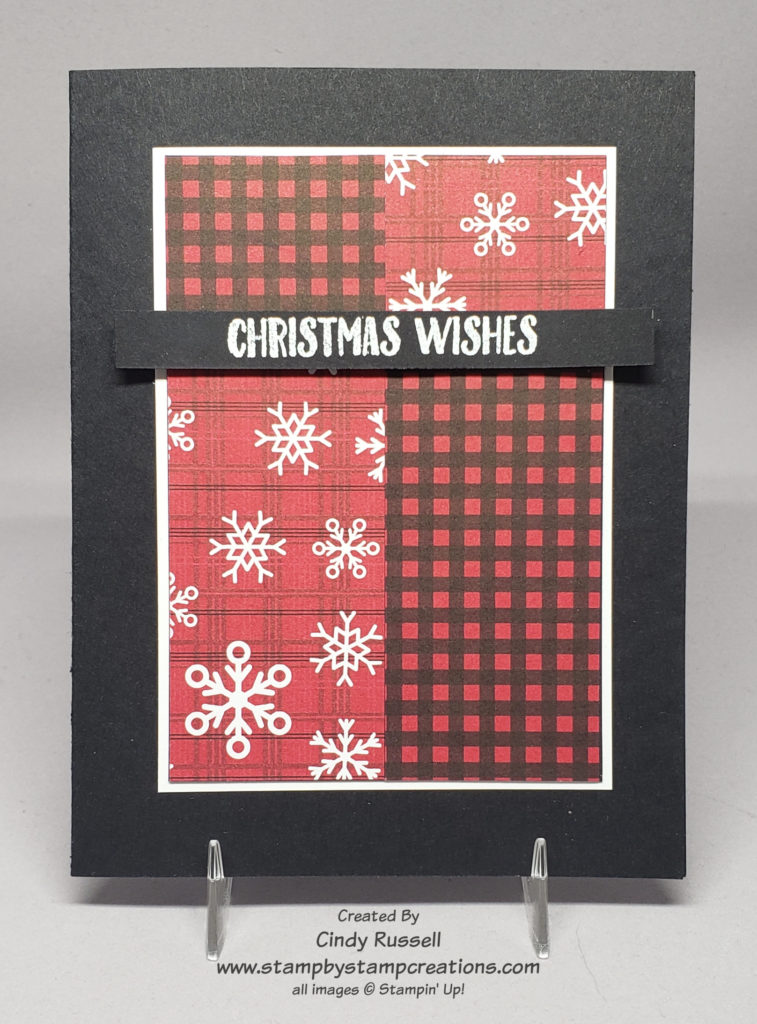
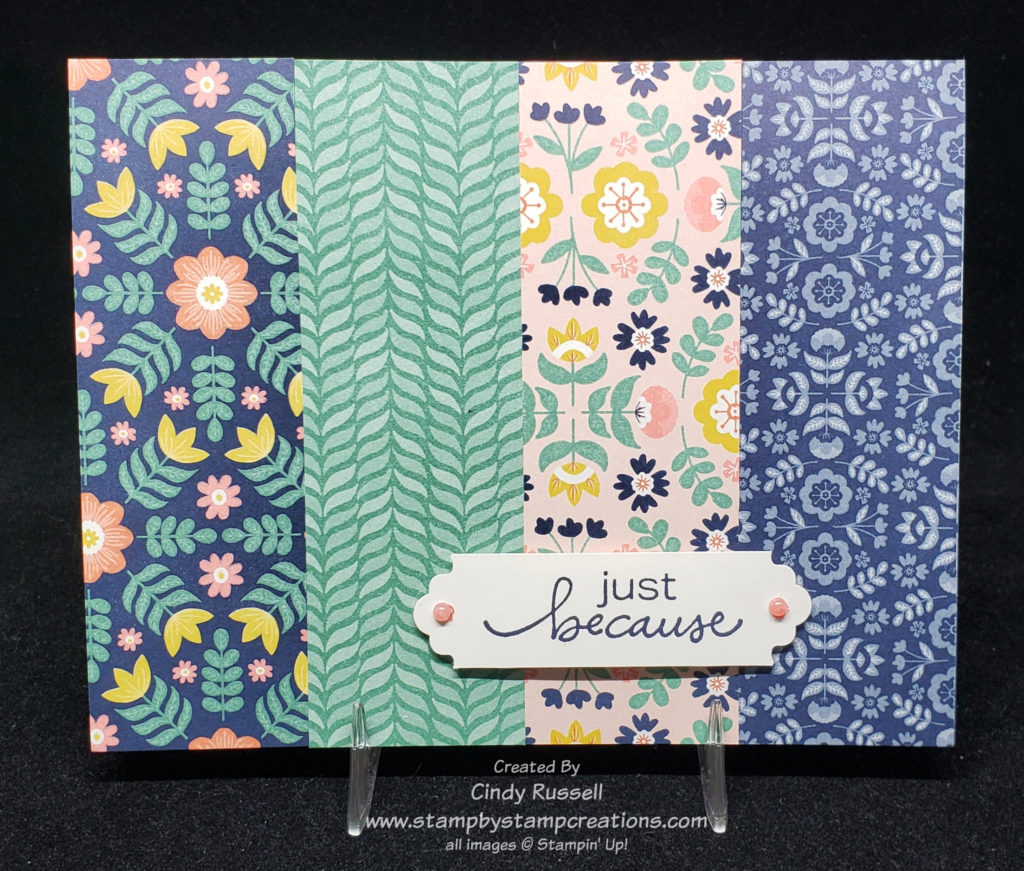
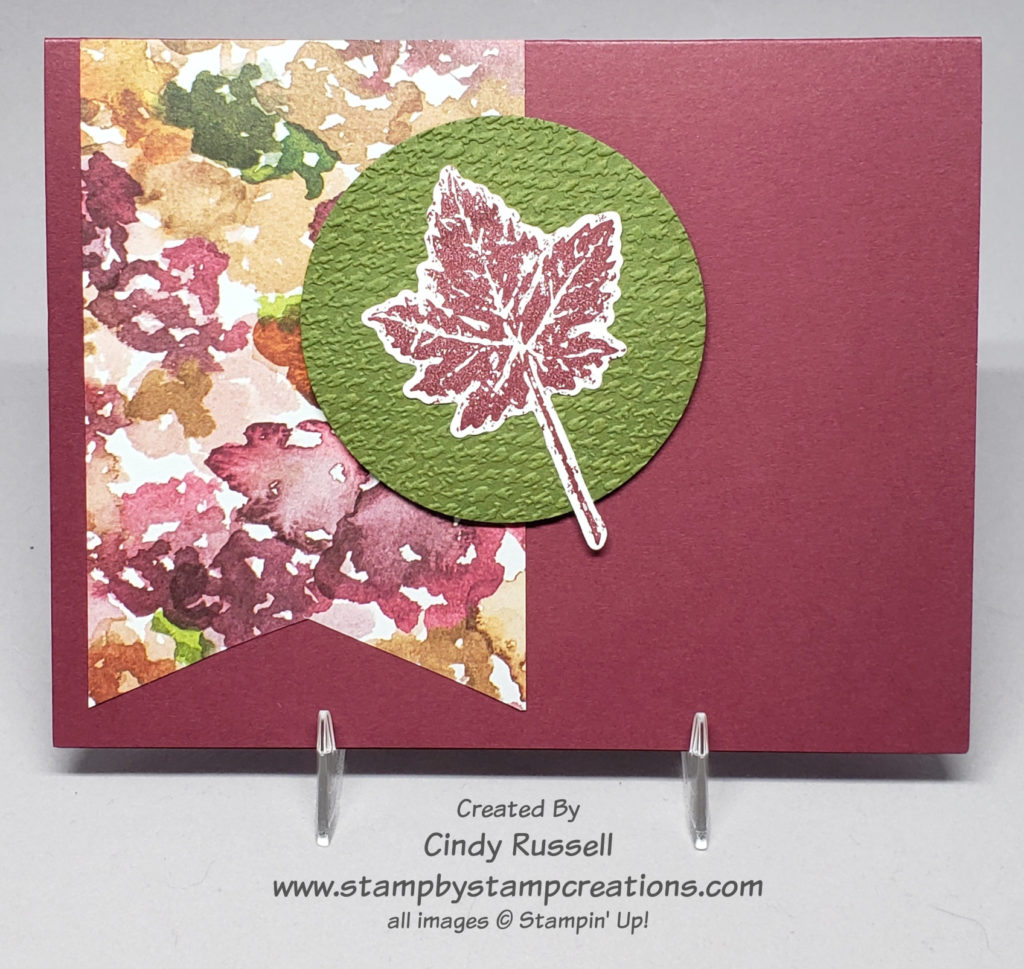
The gorgeous Beauty of the Earth designer paper is so perfect for Fall. I love all of the rich colors. Golds, browns, reds and greens. So pretty! Do you recognize the color of my card base? I used Merry Merlot which is one of those colors that may get forgotten. I know I mostly think about using it in Fall and for Christmas cards. I stamped the leaf from the Gorgeous Leaves stamp set in Merry Merlot and die cut it with the Intricate Leaves Dies.

This was a fun and easy card sketch to make. I can’t wait to see what I’m going to post for next week’s sketch. Have a great day! Take care and Happy Stamping!

Stitched Snowflake Trio Card Sketch

Snowflake Trio Card Sketch

What a fun card sketch for today! The hardest part was figuring out what images to use down in the corner. Since I’ve been working on tons of Christmas card designs snowflakes won out!

Have you checked out the Stitched Snowflake dies that are bundled with and coordinate with the Merry Snowflakes stamp set on page 13 of Stampin’ Up!’s July – December (Holiday) Mini Catalog? I love these die because the stitching sets them off perfectly! You can see three of the snowflakes on my card. Of course, you don’t want a naked snowflake so I had to add a rhinestone to the center of them. Ha!

Once again I managed to create above and beyond the sketch. The extra layer was a given but I also added the little sentiment and the strip of cardstock to make it pop. Maybe if the designer paper was a little brighter and busier I could have got by without the sentiment but I think it finishes off my rendition perfectly.

The designer paper is the Penguin Playmates paper from the Sale-a-bration Brochure. It’s a package of designer paper that you can choose for FREE when placing a $50 order but only through September 30th. The sentiment is from the Penguin Place stamp set on page 33 of the July – December Mini Catalog and yes, the paper coordinates with the stamp set! Gotta love coordination!!!

What products would you use on a project if you were using this card sketch? I’d love to know! Leave a comment and let me know!

Have a great day! Take care and Happy Stamping!

Gorgeous Leaves & Cork Specialty Paper Card Sketch

It’s September and, despite the continuing hot weather, my mind say’s it’s Fall.  I love the changing colors of the leaves and I love making cards with leaves so when I saw this card sketch that already had a leaf on it I knew it was perfect for a fall card!

Stampin Up!’s Stitched Leaves Dies are so fun to work with and so easy to use on cards. These dies are a great size and I love the stitching on them! While figuring out what to use on this card I decided that the new Cork Specialty Paper would be just the right thing. This was my first time using it and I was pleasantly surprised at how easy it was to use. It’s extremely thin so you don’t have to worry about adding extra bulk to your card.

I stuck fairly close to this week’s Card Sketch. Only two extra layers and a few extra embellishments….oh, and I did emboss the background piece. Close, right?! I freely admit that I have a hard time with simple.

The sentiment is from the Many Messages stamp set. Have you checked this stamp set out? Actually, it’s a single stamp with nineteen different sentiments. It coordinates with a single die that will cut out the various sentiments in different shapes. Quite fun. These items are from a previous catalog and in the 2021-2022 Annual Catalog Stampin’ Up! came out with another stamp that works with the Messages Die. I don’t have the new one yet but it’s on my wish list.

Don’t forget to try working with a Card Sketch. Have a great day! Take care and Happy Stamping!

A Whimsy & Wonder Card Sketch

Whimsy & Wonder Card Sketch

Here I go again using Stampin’ Up!’s Whimsy & Wonder Specialty Designer Series Paper thatI was sure I wouldn’t like. Who uses pink and light green on a Christmas card? The more I use this paper the more I like it. There are some really nice patterns even if they include pink! Ha!

I like having a starting point for my design when I use a card sketch. When I look at the sketch I try to envision different stamp sets and papers in the design and then go from there. Sometimes I just thumb through my designer papers to see which ones I think will work best with the design. As you know, the design of a project is usually the hardest part of creating.

What products would you use with this card sketch? Make a card and share your design in the comments section! Have a great day! Take care and Happy Stamping!

Expressions In Ink Card Sketch

Here is today’s card sketch. I think I did pretty good on this one. Just a few additions, right? Naturally I had to add another layer….

I used Stampin’ Up!’s gorgeous Expressions in Ink Specialty Designer Series paper as the focal point for my card. This paper is so beautiful! The sentiment is from the Artistically Inked stamp set which also is part of the Expressions in Ink Suite of products that can be found on pages 96-97 of Stampin’ Up!’s Annual Catalog. “thanks” is heated embossed with Gold Embossing Powder .

Did you notice how I used the “Rule of 3” with the gold? There is gold in the designer paper, the sentiment is embossed in gold and my added layer is gold. If you don’t remember what the Rule of 3 is it is this: when things are used in threes they are more pleasing to the eye. You may use this when creating your projects and not even realize that you’re using the “Rule of 3”.

Once again, I’m going to encourage you to try creating with card sketches. Whether you get your sketches from Freshly Made Sketches where I’ve been finding mine or some other source, card sketches are a great way to start the creative process.

Have a great day! Take care and Happy Stamping!

Spot On With A Wintery Card Sketch

I hope you agree with me that I hit the nail on the head with this card sketch. I didn’t add anything and I didn’t change anything. Can you believe it? With recreating projects I have a hard time leaving well enough alone.

How about you? When you are inspired by a project do you copy it verbatim or do you switch things up to follow your own personal style more? Even with step-by-step instructions right in front of me I change things up….mostly because I didn’t read the directions correctly or I wasn’t paying close enough attention to the video/instructor.

Whether you do follow something step-by-step or completely change things up, the important thing is that you are happy with the results. You need to enjoy what you do and that includes enjoying the finished product!

Go create and enjoy! Have a great day! Take care and Happy Stamping!

Ephemera Wreath Card Sketch

I’m going to start today’s post with a definition of “ephemera”. At first I looked it up in the dictionary and the definition didn’t make any sense at all. Then I “googgled” it and had better luck. I typed in “ephemera in crafting” and got a more useful definition. “Ephemera is generally defined as collectible memorabilia that is was for a short term purpose. … Ephemera is almost always paper-based and is often written or printed items that were expected to have short term popularity or usefulness.” When I look in Stampin’ Up!’s catalog at the Expressions in Ink Ephemera Pack on page 141 of the Annual Catalog I would call it “pretty stuff to put on my latest project”. I wouldn’t call this the best description but it works for me. Ha!

The reason I went into all this detail for today’s card sketch is because the gold wreath on my card is part of the Expressions in Ink Ephemera Pack. Since I was using it I thought I should figure out what the word “ephemera” meant.

My take on today’s card sketch is pretty close. That is if you discount the extras I added. Ha! In my opinion the sketch needed another layer and I added the sentiment to finish it off.

Are you wondering how I got the gold ephemera wreath to adhere to the card front? I didn’t. I placed the wreath where I wanted and when I adhered the flowers and the sentiment they held the wreath in place. There was no way I would have been able to get glue on the back of that skinny wreath!

That would be my tip of the day….when trying to adhere something really thin and narrow to your project use another piece to actually anchor your thin item.

Have a great day! Take care and Happy Stamping!

Card Sketch: Summer Sunflowers

How about some sweet sunflowers for today’s Card Sketch? I saw this card sketch and had to try and figure out what type of image to put in the two circles. After scouring my stamp shelf I decided on these small sunflowers. As you can tell though, I couldn’t stick to just two. You know….that rule of three….things are more eye catching/pleasing in three or odd numbers.

Once I decided on the images to use this sketch came together quite easily. Of course I had to add a few extra layers but that seems to be par for the course! The sunflowers are from the Celebrate Sunflowers stamp set. I colored them with my Stampin’ Blends markers. Coloring isn’t my favorite thing to do but it’s SO easy with Stampin’ Up!’s Stampin’ Blends markers. The sentiment is from the Tasteful Touches stamp set. I needed something large to fill the space.

I heat embossed all of the stamped images on my card. I like to do this when I used the Stampin’ Blend Markers. It makes it easier to stay in the lines (Ha!) and is especially nice when using the lighter colors. Just my preference but give it a try sometime.

If you haven’t tried playing with card sketches be sure to give it a try. It’s fun! Have a great day! Take care and Happy Stamping!

Card Sketch: Blocked Christmas

Card Sketch: Blocked Christmas

This week’s Card Sketch features designer paper again.  I wanted to get one last plug in for Stampin’ Up!’s Designer Series Paper Sale before it ends next Monday. So here’s my plug:  don’t forget about the sale!  Ha!  If you’re interested in getting 15% off of 9 of Stampin’ Up!’s fabulous designer series papers be sure to click here and check it out.

Now that that’s out of the way let’s get back to today’s card sketch!  I thought about trying this sketch with one of the papers that’s on sale but decided to try it with one of the brand new papers that you will be able to find in the Sale-a-bration Brochure next week.  This package of paper is called Peaceful Prints and is 12” X 12”.   There are lots of fun patterns in the package and it coordinates with the Peaceful Deer Bundle from the upcoming (Holiday) Mini Catalog!  Love that coordination!  😊

I did pretty well with this week’s sketch.  I only added one teeny tiny layer behind the designer paper to make it pop as well as adding the sentiment (from the Banner Year stamp set) to the small strip of paper.

When I work with papers that butt up against each other and need to be straight like on this sketch I like to start with a piece of cardstock the same size as my finished designer paper design will be.  On this card I started with a piece of Basic Black cardstock that was 3” x 4 ¼”.   I then cut two strips of designer paper that were 4 ¼” x 1 ½”.  I cut 1 ¼” off of each strip for the small section.  Then I adhered my papers to the Basic Black card stock piece. 

The layer of Basic White cardstock that I added is 4 3/8” x 3 1/8”.  Just enough of a border to make the designer paper pop.  The strip of Basic Black cardstock is 3 5/8” x 3/8”.  I heat embossed the sentiment with White Embossing Powder since it was on the black cardstock.  The sentiment strip is popped up with Mini Stampin’ Dimensionals.

This Card Sketch is a great design to highlight those gorgeous papers you have in your craft room.  You’ll just want to remember to stick with smaller patterns.  Have a great day!  Take care and Happy Stamping!

Card Sketch: Make It Simple!

This card sketch couldn’t have been any easier.  Four pieces of designer paper that are 1 3/8” wide by 4 ¼” tall.  That’s it!  The hardest part of using this sketch was finding just the right combination of designer paper!  

The sketch didn’t call for a sentiment but I thought my card needed a little something more on the front. This sentiment is from the Lovely You stamp set and the label that my sentiment is on was punched with the Lovely Labels Pick A Punch.  So easy!  I did have to color the pearls with my Flirty Flamingo Stampin’ Blend Marker so they would match the paper.  That’s just me being picky though.  😊

I used Stampin’ Up!’s Sweet Symmetry package of Designer Series Paper on my card.  Such fun patterns!  And yes, this package of paper is one of the one’s that is on sale this month for 15% off!  Be sure to check out the pdf of all of the patterns on sale here or view them directly in my online store here.

I’d love to see what you do with this sketch!  Leave a comment with your card or send me a photo!  Have a great day!  Take care and Happy Stamping!

Card Sketch: Summer Daisy

Do you think of summer when you see daisies?  I know I do.  And you can’t beat a yellow, white and black color combination.  Oh, wait a minute….yes you can….PINK, white and black.  Ha!

Whatever color you like to pair with black and white, this simple card sketch is for you.  Three strips of designer paper, a sentiment and the focal point.  That’s it! I really like the simplicity of this sketch. Clean and simple.

Did you notice that I kept pretty darn close to the sketch with this card.  The only “extras” I added were the Matte Black Dots.  That’s pretty good for me!

Card Sketch: Hey Birthday Chick

It’s time for this week’s card sketch. I know this is only the second one I’ve done but it’s kind of fun. It can definitely be a challenge too. The sketch looks simple enough but then I need to figure out which of my supplies to use.

The first thing I did after deciding on this sketch was to find a stamp/die that would fill most of the white space on the sketch. After browsing my shelf of stamps I chose Hey Birthday Chick with the adorable chicken being lifted in the air by a balloon.

As you can see, I added a couple of layers to the card. My sentiment is a bit lower as I didn’t want to cover up the adorable chicken. Other than that I kept pretty close to the card sketch. I used a blending brush to lightly add Bermuda Bay ink for the sky.

Have you tried working with card sketches yet? Give this one a try and then either post your photo in the comments below or email me (cindy@stampbystampcreations.com) a photo of your card. I’d love to see what you come up with!

Have a great day! Take care and Happy Stamping!

Card Sketch & Challenge!

It’s a new month so I think it’s time to try something new.  We’re going to move on from Tools of the Trade to Card Sketches!

What is a Card Sketch?  It’s exactly what the name says.  It’s a sketch of a design you can use as the basis for your card.  Many of us have a difficult time making decisions.  (Yep!  That’s me!).  A card sketch gives you the design starting point for your card.  From there you choose the stamp set, colors and embellishments you want to add to the card.

You can come up with your own card sketches but I’ve found this fabulous site called Freshly Made Sketches that has almost 500 sketches on it and they keep adding to it! Be sure to check it out sometime! I will be sharing one of their sketches every week along with the card I make using it.

When using a card sketch you can keep your project as close to the sketch as you want.  As you can see on my card, I kept the basic elements of the shape in the upper left corner with the diagonal strips behind it.  But I added to that.  I (naturally) added a couple of layers and I also added a sentiment on the front of my card.

Working with card sketches should be pretty fun.  I don’t think I’ve worked with them much.  Here’s my challenge for you.  My challenge for you is to make a card using this sketch and send it to me.  I really would like to see what you do with the sketch.  Then, I would like to share your creations on my blog and possibly my Facebook Page (with your permission of course).  You can email your card to me at cindy@stampbystampcreations.com or add it to the comments for this post. Will you join the challenge and play along?  I hope so!

Have a great day!  Take care and Happy Stamping.  Don’t forget to join the challenge!  I can’t wait to see your projects!