Father’s Day Polo Shirt Easel Card

Hello! I’m back from the MN Homeland where I helped put on a bridal shower for my niece. This photo is my mom, my sisters and myself. The shower was lovely and it was great to see family again. We haven’t seen them since last October.

I apologize for not getting any posts ready for you while I was gone. I hope you didn’t miss me too much! Ha! This week will be a little mixed up because I just had to share this Fun Fold with you today so that you could maybe duplicate this week for Father’s Day.
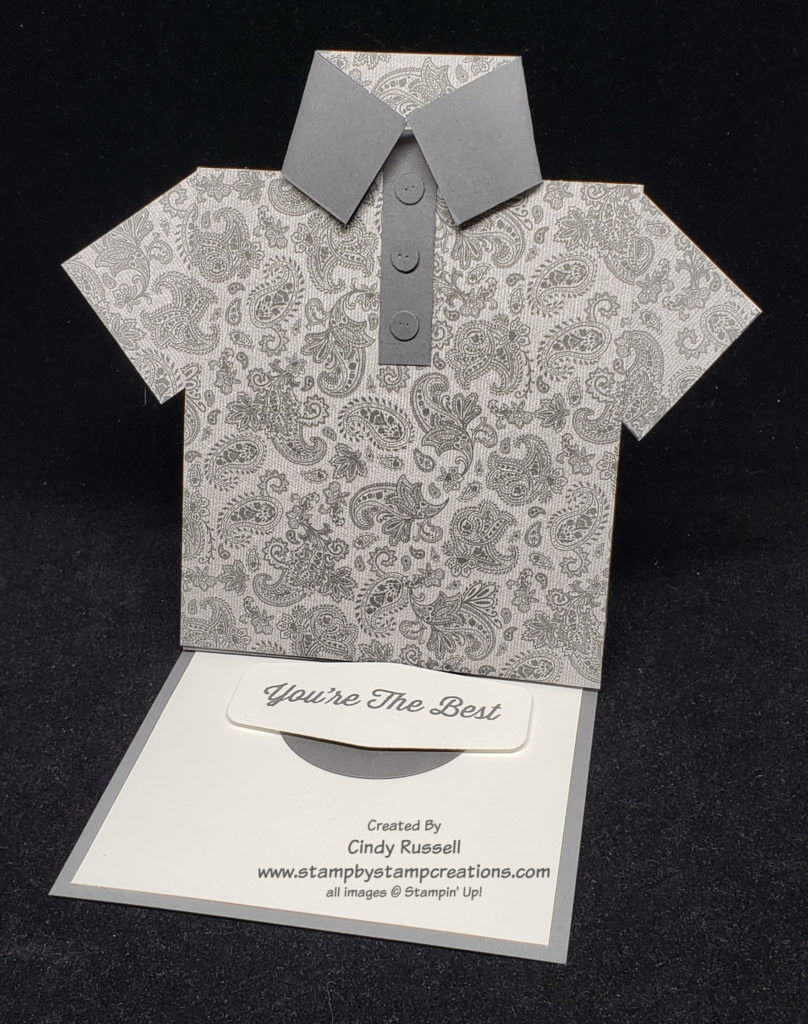
Polo Shirt Easel Card

We’re always looking for masculine cards, right? Today you hit the jackpot. This fun card can be used for any occasion. I originally saw it online and knew I had to try making it myself. The card I saw was actually larger so I had to adjust the measurement so that the card would fit into Stampin’ Up!’s regular size envelope.

The card isn’t too difficult to make and you can add a pocket on the back for a gift card! That’s what I’ll be doing for my dad’s Father’s Day card.

To see exactly how I made this card please view the video below.

If you like written instructions I’ve got you covered you can view the pdf with step by step instructions and photos here.

I hope you liked the video. My videos are a little rough but I think I’ve covered everything. If you like this project please leave a comment below. If you liked the video I’d appreciate it if you could head on over to my YouTube channel and subscribe. Thanks!

Have a great day! Take care and Happy Stamping!

Tools of the Trade: Using the Stamparatus

In the past few weeks in my Tools of the Trade posts I’ve introduced you to Stampin’ Up!’s stamp positioning tool, the Stamparatus.

This tool is a must-have for any craft room. Today I am sharing a video that will show you three different ways of using this stamp positioning tool as well as a few little tips.

You will learn the basics of using the Stamparatus, how to hinge stamp as well as how to use the Stamparatus for perfectly die cutting or punching out a stamped image. Check out the video below and let me know if you have any questions.

Using the Stamparatus stamp positioning tool

The video is a little longer than most of my videos but I think you’ll learn a lot! Have a great day! Take care and Happy Stamping!
All My Love Suite Video

Today I want to share with you a Stampin’ Up! video that tells you all about the All My Love Suite.  I was mistaken when I told you that this suite only included the Forever Lovely Bundle.  It also includes the Meant to Be Bundle with lots of fun heart images.  These two bundles do work really well together.

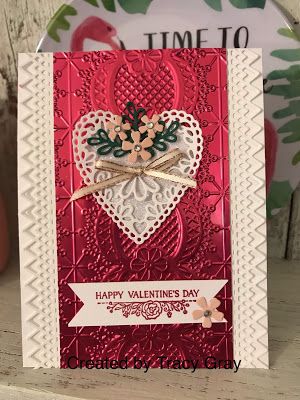
3c500f220f320ffb766851bfc8144099Both of these bundles make beautiful cards.  Here’s an absolutely gorgeous card that uses both bundles.  Thank you Tracy for sharing it!  I love all of the different elements on it.  The zig-zag borders and the detailed die cut heart are from the Be Mine Stitched Framelits and the little die cut flowers and leaves are from the Lovely Flowers Edgelits.  Isn’t the embossed Lovely Lipstick Foil Sheet amazing?  It was embossed with the Lace Dynamic Textured Impressions Embossing Folder which is part of another suite of products.

What’s nice about both of the stamp sets in the All My Love Suite is that they include sentiments that are just about Valentine’s Day or love.  Both bundles can be used for other occasions too.

Have a great day!  Take care and Happy Stamping!
 

Cling Stamps: They’re Coming!

Woo Hoo!  Stampin’ Up! is getting Cling Stamps!  Look for them in the 2019 Occasions catalog that comes out in January!  Here’s how Stampin’ Up! describes them:

“Our die-cut, cling stamps are made of high-quality red rubber. They come with a strong image label that clings like crazy to our clear blocks or Stamparatus plates for easy stamping. Stamp, then remove the stamp for space-saving storage. (Clear blocks and Stamparatus are sold separately.)”

These amazing stamps were demonstrated at the recent On Stage event that I attended earlier this month and we got to play with them a bit.  They really stick!

There are some important tips to remember when using Cling Stamps.  First of all, when cleaning your Cling Stamps don’t use alcohol based cleaners (StazOn Cleaner) or wipes of any type.  The fibers from the wipes can stick to the sticky label and then it won’t stick to your block.  When removing the stamp from your block don’t just yank it off.  You’ll tear the foam.  You need to grasp the stamp near the label, maybe even get your fingernail under the label a little to pull the stamp off.

I haven’t really had a chance to play with the cling stamps at home yet but I’m looking forward to it!  I just counted and there are 27 Cling Stamp sets in the upcoming 2019 Occasions Catalog and 5 in the 2019 Sale-a-bration Brochure!  Woo Hoo!

I’ll give you more info and my “expert” opinion of these once I really start playing with them.  Have a great day!  Take care and Happy Stamping!
 

Clear Block & DistINKtive Stamps

Healing Hugs.0718Yesterday was all about wood block stamps and today we’re moving on to clear block stamps.  If you watched the video I posted on Monday you know that wood block stamps and clear blocks stamps are exactly the same except for the fact that you don’t permanently mount a clear block  stamp to the block.

Clear block stamps are easy to store since they come in a smaller, DVD-like case.  One of the best things about clear block stamps is that you can use them with your Stamparatus.  You can’t use a Stamparatus with wood block stamps.

I LOVE my Stamparatus.  It makes it so easy to line things up and to make multiple projects.  I won’t go into details about the Stamparatus today.  It deserves it’s own post that I may go into at later date (maybe check back next week….).  Needless to say though….YOU NEED A STAMPARATUS!

But back to clear block stamps….

They do stamp just as well as wood block stamps but I do sometimes have problems with them staying stuck to my block.  This mostly happens if the block isn’t clean or if I’m using a really small stamp.  If I can’t get my stamp to stick to the block I may get out my SNAIL adhesive and put just a bit on the block.  The problem with this is that then your block is all sticky.  I haven’t tried this, but other stampers have said that they spread a small amount of Tombow Liquid Glue on the label of the stamp and let it dry.  It dries a little tacky and therefore sticks better to the block.  If you’ve tried this leave me a comment and let me know what you think.

Stampin’ Up! has recently come out with a new type of red rubber stamp called DistINKtive.  The images stamped with these type of stamps are AMAZING!  Check out this short video about this type of stamp.

The card I posted at the beginning of this post is made using the Healing Hugs stamp set.  It’s a DistINKtive stamp set.  I posted this card a month or so ago and you can read about it here.  Isn’t the image amazing?  I’ll be designing another card using this stamp set for my December class.  I can’t wait!  I love this flower image.

Don’t forget that today is the last day of the Online Extravaganza.  It’s your last chance to get a 10% discount on Tools & Inks from the Annual Catalog.  Have a great day!  Take care and Happy Stamping!
Are you ready?

Are you ready?  Tomorrow is the day that you can order products from the FABULOUS Snowflake Showcase.  Woo Hoo!  Check out this short video that tells you all about these products:

Aren’t they great?!  If you love any of these products and want to purchase them be sure not to delay too long.  They will only be available while supplies last.

NotecardThis is a notecard I sent my team after our recent Stamp Camp.  I used the Happiness Surrounds stamp set and the Snowfall Thinlits both from the Snowflake Showcase.  See how versatile this showcase is?

Have a great day!  Take care and Happy Stamping!

Tin Tile Embossing Folder

You may miss it if you don’t look close.  This amazing product in the Country Lane Suite is easy to miss….unless you look at all of the fabulous samples made using it!

PicMonkey Image.countrylane

Look how versatile this embossing folder is!  You can use it on all sorts of projects!  If you want to see some of these samples a little closer I will be posting them on my Facebook Page later today so jump on over there.

Are you looking for some tips for using this folder?  Take a look at this video.  Stampin’ Up! has done a great job of telling you some great ideas and tips on using this folder.

Leave me a comment and let me know what you’ve thought of the Country Lane Suite.  Are you adding some of these amazing products to your order?  Be sure to head on over to my online store and get that order placed.  Don’t forget to use October’s Hostess Code to receive your free gift from me.

Have a great day!  Take care and Happy Stamping!
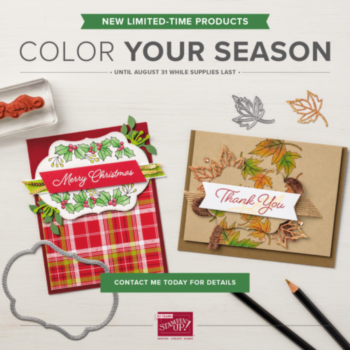
 

Color Your Season

07.01.18_SHAREABLE2_COLOR_YOUR_SEASON_USWho doesn’t LOVE versatile products?!  That’s what Stampin’ Up! has come out with for the month of August.  There is a stamp set, coordinating framelits and a new package of watercolor pencils!  These three products are only available during the month of July while supplies last.

The stamp set is SO versatile!  You can make Christmas projects with it, fall projects, summer projects and spring projects!  Not only are all four seasons covered but there are sentiments for many different occasions too!  And that’s just the stamp set!

Stitched Seasons Framelits.0818The framelits are fabulous!  Not only will they cut out some of the stamped images but there are 3 different sizes of double-stitched labels!  These are definitely my favorite part of the whole bundle.  Not only does the shape you die cut have the stitching around it but so does the area you cut out!

Here is a quick video highlighting these fabulous products.  Remember….they are only available through August 31st or while supplies last, whichever comes first!  Don’t miss out!  Order yours TODAY!

Oh….and don’t forget that you can earn BONUS DAY COUPONS with your order!

Have a great day!  Take care and Happy Stamping!
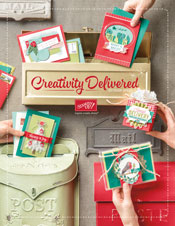
The 2017 Holiday Catalog is Live!

20170614_holiday17-cover_en-usOh my!  That’s about all I can say.  Stampin’ Up!’s new Holiday Catalog is fabulous!  There are so many new and wonderful products.  I know you’re going to LOVE them!

If you don’t have the catalog in your little hands yet you can view it here online.  If you’d like to have your very own hard copy though please contact me and I will be happy to mail one to you.  You can email me here.

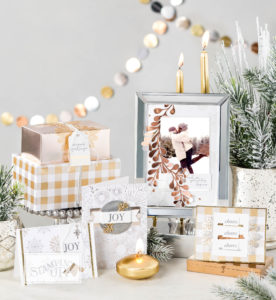
There are so many fabulous products that it’s hard to decide which one is my favorite.  Stampin’ Up! has divided the Holiday Catalog into suites which makes it easy to coordinate products.  One of my favorite suites in this new catalog is the Year of Cheer Suite.  It’s all about metallics.  From the new Champagne Foil Sheets to the Foil Snowflakes, I’m in love.  You can find these gorgeous products on page 37 of the new Holiday Catalog.

Holiday17_p36-35 (2)I haven’t had a chance to play with these gorgeous new products yet but here is a picture from the catalog with some samples made using these fun new products.  I know you’re going to want to get your hands on them!

Watch the video below to see how well these products coordinate together.  Be sure to add these products to your wish list or order them here right now!  🙂

Have a great day!  Take care and Happy Stamping!
Video Week: Soft Sayings All Inclusive Card Kit

softsayingsNot only is it still Video Week but it’s also Simple Saturday!  What can be more simple than an all-inclusive kit?!  Yes!  The Soft Sayings Kit is all-inclusive and comes with EVERYTHING (except adhesive) that you will need to make the 20 projects!  Even the clear block for the photopolymer stamps!

I brought this kit with me last month on my trip to the cabin.  No…I didn’t attempt to put it together in the car but I did put it together one afternoon in the cabin.  The directions were clear and easy to follow.  If you look at the picture closely you can see that you get to make three different sizes of cards.

The little stamp set that comes with the kit has some great sentiments that fit perfectly on the different card sizes.  There’s also a couple of leaves and flowers.

One of the great things about this kit is that you can purchase a refill!  The refill comes with everything the kit contains except the stamp set, clear block, ink spot and the box.

Check out the video below and see how easy it is to make these cards!  Oh…did I mention what a great gift this would make?!!  🙂

Have a great day!  Take care and Happy Stamping!
Video Week: You Move Me Bundle

you move me bundleYou will definitely have to check out todays video!  The You Move Me Bundle is amazing.  I’ve actually never seen anything like it.  The picture to the left here doesn’t do the bundle justice.  Watch the video!

Why do you need to watch the video?  The butterfly actually will look like it’s fluttering it’s wings if you pull the white card stock with the stamped image up out of the pocket.  This is one of those things you have to see to believe.  Check it out!  These products are pretty fun.

If you like versatility in your projects you’ll get it with this bundle.  There are plenty of other images and framelits besides the ones that show motion.  You can see the stamp set and framelits as well as more details about the bundle in my online store.

Have a great day!  Take care and Happy Stamping!

Video Week: Love Today Planner Kit

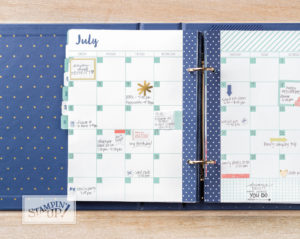
planner2Oh my!  This planner is beautiful!  I put mine together yesterday and can’t wait to begin to use it!

There are pages, stickers, pockets, photo protector pages and sticky notes.  You will be amazed at how fabulous this planner is!

You have to check out the video below because these photos don’t do it justice!

The month pages don’t have dates on them so you can start using the planner whenever you want.  The months have a planner1month-at-a-glance page as well as weekly pages.

Not only will this planner be great for your own use but it will also make a fabulous gift!  I’m actually contemplating giving them to my sisters for their birthday in a few weeks.

I know you’re going to love it.  Don’t take my word for it though.  Watch the video and see just how fabulous this planner is….did I mention one of the best parts?  You can buy a refill for it!  The refill comes with everything you find in the original planner kit except the 3-ring binder cover.  How great is that?!

You can find out more details about the planner and purchase it in my online store.  Have a great day!  Take care and Happy Stamping!
Video Week: Embossing Paste

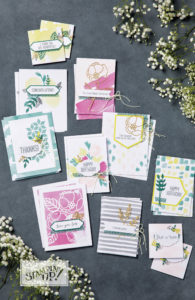
Welcome to the second installment in Video Week.  Today I want to share with you a product that I had never heard of before I saw the new Annual Catalog:  Embossing Paste.  I know, some of you are asking “have you been living under a rock?”.  I guess this isn’t a new craft product but it’s new to me.

Embossing Paste is pretty cool.  I haven’t actually played with it yet but I’m anxious to give it a try.  It looks like so much fun and it really looks easy to use.  Check out the video below and let me know if this is a product that you might like to try.

You can purchase decorative masks to use with the Embossing Paste but I’m also wondering if you could kind of create your own masks with punches and thinlits.  Hmmm….I’m definitely going to give it a try.  I’ll let you know how things turn out.

Another fun thing you can do with Embossing Paste is actually color it with Stampin’ Up! reinkers.  Did you catch that in the video?  Too fun!

I might have to go grab my Embossing Paste and give it a try!  If you want to purchase your own Embossing Paste you can do it right in my online store.

Have a great day!  Take care and Happy Stamping!
Video Week: Oh, So Eclectic Bundle

Hello!  I have to admit that I didn’t really get a chance to play with all my new toys yesterday.  I did get them put away but in order to do that there was a lot of cleaning up and organizing to do. Yuck!  I really wanted to play.  It is a good feeling to be organized though.

I’m calling this week Video Week on the blog.  Stampin’ Up! has some great videos out about some of their new products and I want to share them with you.

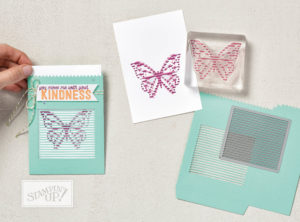
Oh, So Electic.0517The first video I want to share with you is about the Oh, So Eclectic Bundle.  I used this stamp set on the card I shared a few days ago.  There is so much you can do with this stamp set and COORDINATING framelits.  Here’s a simple card  that I made using just the stamp set and the new Fresh Fig In-Color.

Be sure to check out the samples at the end of the video.  There are some really cute ones that I’m anxious to try.

You can check out more details on this bundle here.  Have a great day!  Take care and Happy Stamping!
Inside the Lines Specialty Designer Series Paper

sab17_10aDo you like to color?  If you do, you definitely need to check out the Inside the Lines Specialty Designer Series Paper.  It’s a 2017 Sale-a-bration item that you can choose for FREE with a $50 dollar order.

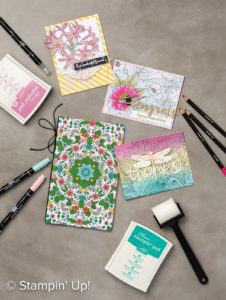
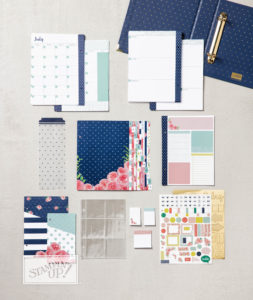
This fun package of paper contains 12 sheets of coloring paper….3 sheets of 4 different designs.  In the picture at the left you can see some of the many different ways that you can color this fun paper.   The video below shows these techniques in more detail.  Check it out!

If you love to color and want to try out this fun paper remember that it is only available through March 31st with a qualifying order!


Have a great day!  Take care and Happy Stamping!