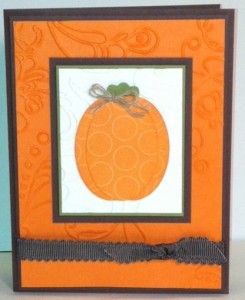
Punch Art Pumpkin

Woo Hoo!  The election is OVER!  No more annoying phone calls, no more annoying TV ads, no more annoying junk mail and no more annoying people coming to door telling me to vote for their candidate!  It’s OVER!!!!!  Whew…I sure feel better getting that off my chest!  Congratulations President Obama and I wish you and our country a successful 4 years.

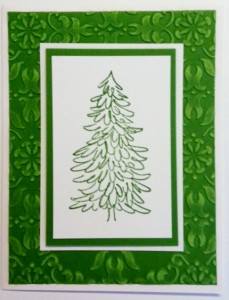
I CASEd this cute card from my upline Tara.  So simple, yet so cute!  😀  The fun part of this card that you can’t really see from the picture is that the Elegant Lines embossed background actually continues on the Water Color Paper!  Before you emboss your large background piece you use your temporary adhesive to adhere the Water Color Paper to it.  Then emboss.  When you’re ready to put your card together just align the embossed images and you have a really neat looking card.  Too cute!  Thanks Tara!

Off to get some things done like cut tons of card stock for next week’s Christmas Card Stamp-a-Stack!  Have a great day!  Take care and Happy Stamping!


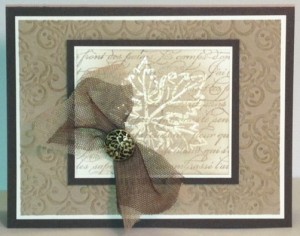
Gently Falling Emboss Resist

Stamp Sets: Gently Falling, En Francais
Card Stock: Early Espresso, Very Vanilla, Crumb Cake
Ink: Crumb Cake, Versamark
Accessories: Crumb Cake & Early Espresso Tulle, Antique Brads, Stampin’ Dimensionals, Clear Embossing Powder
Tools: Big Shot, Lacy Brocade Embossing Folder, Stampin’ Sponge, Paper Piercing Tools, Heat Tool

I really haven’t forgotten you….I just have to stop leaving town for long periods of time because I get too far behind on everything!  Yikes!  Busy, busy, busy!  Class last week, class this week and Stamp Camp on Saturday.   I may have time for a quick breath starting Sunday but then it’s time to get ready for my Christmas Card Stamp-a-Stack classes.  Good thing I love what I do!

I need to catch you up on all of the great projects we’ve done in the last few weeks.  This card is probably my favorite of the ones we made in our Fall/Thanksgiving class.  I CASEd it from my sister stamper, Gina.  Thanks Gina!  Of course I changed it up just a bit but I love the look of this card.  I used the Emboss Resist Technique on the leaf.  First I stamped the small piece of Very Vanilla card stock with the En Francais Background stamp with the Crumb Cake Ink.  Then I stamped the leaf in Versamark and embossed it with clear embossing powder.  The next step was to rub the Crumb Cake ink gently over the embossed leaf to bring out the design.  Isn’t it gorgeous?

I need to go start working on all of those final details for Stamp Camp.  Have a great day!  Take care and Happy Stamping!
Home, Sweet Home

Hello Denver!  I’m home!  My trip didn’t seem quite so long while I was away but when I got home and saw all of the mail and packages on the kitchen table I realized just how long it had been!  2 1/2 weeks is a long time to be gone.  Glad to be home but now I have to tackle unpacking, laundry and of course the trip to the grocery store that will probably take hours since we have no food in the house!  It should be a very busy day but then I get to watch the Denver Broncos play the Sand Diego Chargers tonight!  Woo Hoo!


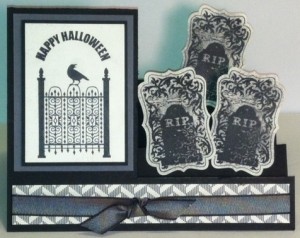
Stamp Set: Toxic Treats
Card Stock: Basic Black, Basic Gray, Very Vanilla
Designer Paper: Howlstooth and Scaringbone
Ink: Basic Black, Basic Gray
Tools: Decorative Label Punch
Accessories: Basic Black Taffeta Ribbon

Today’s card is a Halloween card that I CASEd.  I received the original in a swap.  Don’t you love it?  I love the side- step idea.  Doesn’t it work perfect for the grave stones?  I used the Toxic Treat Stamp Set from the Holiday Catalog on this card.  Pretty spooky, huh?!

Well, I should get to work on the millions of things that need to get done.  Have a great day!  Take care and Happy Stamping!
French Foliage Collage

Hello again!  Two days in a row!  Aren’t you thrilled?  Ha!  Today’s card is another one we will be making at my sister’s class this week.  It’s a nice and simple fall card.  I actually used it as a thank you note for some of my customers recently.

The first step in making this card is to ink up your clear block with Crumb Cake ink and then stamp it on your card stock.  This is such a cool technique!   I love how you get a different look each time you ink the block.   After that I just stamped all the other images.  Simple!  I did have to add a few layers of card stock though.  Simple is one thing….no layers is another!  🙂

Have a great day!  Take care and Happy Stamping!
French Foliage Swap

Stamp Set: French Foliage
Card Stock: Early Espresso, Island Indigo, Very Vanilla
Ink: Early Espresso, Island Indigo
Tools: Big Shot, Square Lattice Embossing Folder, Stampin’ Sponge

Hello!  Saturday I attended Stampin’ Up!’s Regional Event in downtown Denver.  It was FABULOUS!  I LOVE Stampin’ Up! events.  I always come home motivated and full of fabulous ideas that I can share with you!

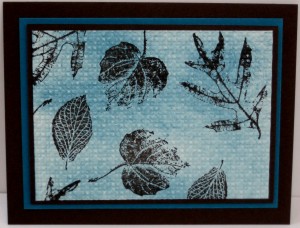
This was my swap card for the event.  Isn’t it pretty?  I love this color combination of Early Espresso and Island Indigo.  The card definitely looks better in person.  Can you see from the picture that the stamped image is embossed with the Big Shot?  I first stamped the leaves and then I rubbed the Island Indigo ink over the stamped image with the Stampin’ Sponge.   Then I ran the card stock through the Big Shot.  This gave a total different look than you would get if you ran the card stock through the Big Shot before rubbing the ink on it.  Give it a try!  It’s pretty easy.

My team had a meeting yesterday to plan our Holiday Stamp Camp.  We have some great projects in store for you.  I hope you can join us on November 3rd if you’re in Denver area!  Have a great day and Happy Stamping!

Framed Embellished Events

Stamp Set: Embellished Events
Card Stock: Whisper White, Raspberry Ripple
Markers: Raspberry Ripple, Gumball Green
Accessories: Raspberry Ribble Striped Satin Ribbon, Basic Pearls, Stampin’ Dimensionals, Mini Glue Dots
Tools: Big Shot, Square Lattice Embossing Folder, Dotted Scallop Ribbon Border Punch

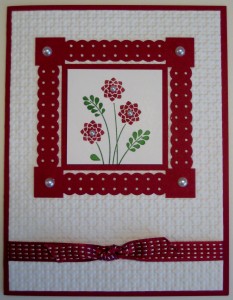
Hello!  Happy Anniversary to me and my DH.  We’ve been married 31 years!  Yikes!  That’s over half of my life time!  Luckily he’s a keeper.  Today’s card is a lovely one that could be used for an anniversary or any other occasion.

My favorite part of this card is the “frame”.  Here’s another one of those things someone did with a punch that I would never have thought of!  It was SO easy to make this little frame.  You need to start with a 3″ x 3″ square of card stock.  Then you simply center the punch on each side of the square and punch!  The secret is to make sure the punch is centered.  That’s it!  Then of course you need to add the pearls to make it really pop!  What a great idea!  The Dotted Scallop Ribbon Border Punch isn’t just for borders!  😀

Have a great day!  Take care and Happy Stamping!
Midnight Muse Serene Silhouettes

Stamp Set: Serene Silhouettes
Card Stock: Midnight Muse, Crumb Cake
Ink: Midnight Muse
Accessories: Midnight Muse Satin Ribbon, Stampin’ Dimensionals, Dazzling Details, Mini Glue Dots
Tools: Big Shot, Square Lattice Embossing Folder, Stampin’ Sponge, Apothecary Accents Framelits

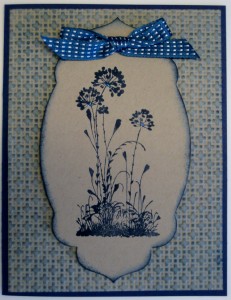
This “Serene Silhouettes” stamp set is definitely one of my favorite from the new catalog.  I can’t seem to get enough of it!  We used it again in classes last week.  This card is very basic and simple but striking, if I do say so myself!

After embossing the large Crumb Cake card stock with the Square Lattice Embossing Folder (one of my favorites!) I lightly rubbed Midnight Muse ink over it with a Stampin’ Sponge.  This technique just adds so much to the finished project.  To finish off the card and give it a little zip I added just a drop of Dazzling Details to the base of all large flowers.  It really made them pop.

Have a great day!  Take care and Happy Stamping!
Punch Art Gold Fish

Stamp Set: Itty Bitty Banners
Card Stock: Gumball Green, Whisper White, Bashful Blue, Crumb Cake , Pumpkin Pie, Marina Mist
Ink: Crumb Cake, Bashful Blue
Accessories: Stampin’ Dimensionals, Mini Glue Dots, 2-Way Glue Pen, White Gel Pen, Gumball Green Striped Satin Ribbon, Window Sheet or Transparency
Tools: Big Shot, Perfect Polka Dots Embossing Folder, 3 1/2″ Circle Die, 3″ Circle Die, #2 Circles Die, Owl Builder Punch, Birde Builder Punch, Cupcake Builder Punch, Bitty Banners Framelits, 1/4″ Circle Punch, Stampin’ Sponges

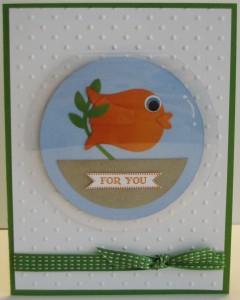
Is this not the cutest thing you’ve ever seen?  OMG!  I received a little goldfish card similar to this at convention and absolutely fell in love! TSC! Too Stinkin’ Cute!  The title gave away the fact that this adorable little fishy was made from a punch but can you guess which one?  It’s that darn Owl Builder Punch!  Who would have thought you could make so many adorable things from one punch!  I really admire those people who can look at a punch and come up with all of these ideas.  I certainly don’t see them just by looking at a punch!

In case you’re having trouble seeing it, the owl body is the fish body, half of the owl “vest” is the fin and the little heart from the owl punch is the little fish lips!  I have to say it again….TSC!  The fish “bowl” is made by folding a piece of window sheet or a transparency in half and placing it on your 3 1/2″ Circle Die so that the fold in the window sheet is just below the “edge” of your circle part of the die.

Have you come up with some creative ideas for punches or seen some on other websites?  Leave me a comment and tell me about them.  I love new ideas!

Have a great day!  Take care and Happy Stamping!
Creative Elements – Layered Stamping

Stamp Sets: Creative Elements, Blooming With Kindness
Card Stock: Very Vanilla, Cherry Cobbler
Ink: Cherry Cobbler, Crumb Cake
Accessories: Cherry Cobbler Seam Binding, Stampin’ Dimensionals, Temporary Adhesive

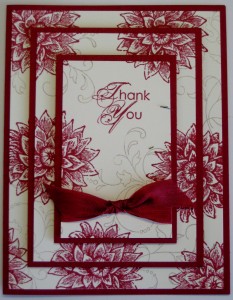
Hello!  Isn’t this a beatiful card?  I absolutely LOVE this technique but I honestly don’t know what it is called so my name for it is Layered Stamping.  Why Layered Stamping?  Well, that’s basically what you do.  You have three different size pieces of a light colored card stock (Very Vanilla on my card) and using temporary adhesive, adhere them all together so that they are centered on each other.  Then simply stamp your design.  You will notice while you are stamping that the “edges” where the smaller piece meets the larger piece doesn’t stamp perfectly but that’s ok.  When you layer the light colored pieces on the darker colored cardstock (Cherry Cobbler on mine) and adhere everything together these parts are covered up!  How simple is that?!

I’ve seen so many beautiful cards done using this simple technique.  Fall leaves, snow flakes, flowers.  It’s definitely a style of card that can be used with many different stamp sets.

Have a great day!  Take care and Happy Stamping!
Bleached Everything Eleanor

Stamp Set: Everything Eleanor
Card Stock: Perfect Plum, Crumb Cake, Shimmery White
Ink: Crumb Cake, Black StazOn
Accessories: Stampin’ Dimensionals, Dazzling Details
Perfect Plum Taffeta Ribbon
Tools: Aquapainter, Bleach, 1 1/4″ Square Punch, 1 3/8″ Square Punch

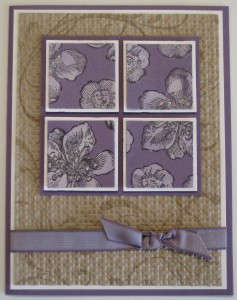
Hello!  The BIG Sale went well although I still have lots of items left.  I think I’ll keep them out for classes next week and hopefully get rid of a few more items.  Today’s card is one we made in classes last week.  Isn’t it beautiful?  I CASEd it from my Stampin’ Sister Gina.  Thanks Gina!  😀

I just love this technique!  I stamped the flowers with Black StazOn and then colored them in with bleach.  I did have to go out and buy new bleach as the old stuff I had on hand wasn’t bleaching the paper!  Who would have thought that bleach goes bad?!

Once I stamped the Crumb Cake background I really made it pop by running it through the Big Shot with the Square Lattice Embossing Folder.  What a great look!

Have a great day!  Take care and Happy Stamping!
Bright Blossoms

Hello!  I hope you all had a Happy 4th of July.  Our day was pretty mellow and low-key.  In fact, it was a pretty average day.  I did a little of this, a little of that and a whole lot of nothing!  It was actually rather nice.

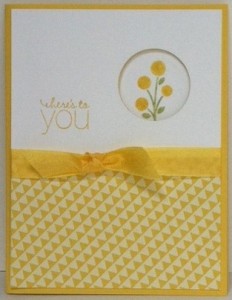
Today’s card is one we made in our June class.  I used the new Bright Blossoms stamp set and the fun Summer Smooches Designer Paper on it.  I found this idea on Pinterest.  Have you been on that sight?  It’s quite addictive!   It’s a simple card but fun to make.  I first adhered the designer paper to the Whisper White card stock and added the ribbon.  Then I adhered this piece to the front of the card BEFORE punching the circle.  After adhering another piece of Whisper White card stock to the inside of the card I closed the card and lightly traced the circle onto the inside piece.  This told me where to stamp my image.  What you can’t see on the inside (yes, I should have taken a picture of that too…) is the vase I stamped under the flowers.   I like the color yellow but I’ve never used it a lot on my cards….until now.  I’m using it quite a bit lately.  It’s a great color for summer!

I have all of my swaps done for convention and the countdown has begun!  Then first day of convention is actually two weeks from today!  I can’t wait!  It’s always so much fun.  There’s so much excitement and I always learn so much.  Of course I always come home with a mile long list of things I just have to have!  Oh, well…..

Have a great day!  Take care and Happy Stamping!