Thankful Forest Friends

IMG_6823Isn’t this bear adorable?  If you like him you need to check out his little buddies fox and hare in the Thankful Forest Friends stamp set.   Stinkin’ cute!

Did you notice that I used my favorite corrugated paper on this card?  It just adds so much to the card.  I really miss Stampin’ Up!’s textured card stock.  Even though the texture was subtle it added a little something-something to the card.  But now they have corrugated card stock!  Woo Hoo!  I wish they had it in ALL the colors!  🙂

I did have to “fancy cut” the bear since there aren’t any framelits for this stamp set.  I tell you…a girl gets spoiled….!

Have a great day!  Take care and Happy Stamping!


Built for Free Using: My Stampin Blog

Lighthearted Leaves Swap

IMG_6771It was a busy weekend with family.  My cousin and her husband drove out here to CO from Chicago.  Their daughter has been living with us for a few months after moving to Denver.  She finally got into her new apartment and we all moved her belongings into the new place on Friday.  We’ve had a busy weekend of visiting, sight-seeing and having a good time.  Now it’s time to get back to reality.  🙂

I designed this card for a swap I participated in.  I do have to admit that I was pretty pleased with the results.  This is actually the first card I used my new favorite on…corrugated paper!  I tell you….I can’t get enough of it!  Love that stuff!  Since the corrugated paper pack comes with both kraft and white and I’ve only been using the kraft I’m going to have to design something with the white.  I’m thinking the white will be perfect for a Christmas card!  Don’t you?  The card is really quite simple but I think it’s rather striking.  Isn’t the little acorn from the Into the Woods Elements cute?  To color it I simply took my Sponge Dauber and rubbed the ink directly on it.  If you try that sometime be sure to rub off the excess with a tissue or you’ll have the ink all over you.

Have a great day!  Take care and Happy Stamping!

Built for Free Using: My Stampin Blog

Definitely Dahlia for Fall

IMG_6830I always think of my mom and her dad when I see a Dahlia.  I’m sure I’ve mentioned this before but they were both avid Dahlia growers.  My mom still grows them.  My grandpa used to enter his at the Minnesota State Fair and win medals.  In our first house in Minnesota I had a little garden and grew some.  It was fun to carry on the tradition.   We weren’t in our next two houses long enough to even think about a garden and our yard here in Colorado is so small a garden would take up the whole thing!   Well, maybe not the whole thing.  Actually, the back yard does get sun most of the day….maybe I should think about growing some dahlias next summer…..  🙂

I think I came up with this card when I was coming up with ideas for my “fall” class last month.  I like it, but it didn’t make the cut.  It’s hard to tell but I kind of did a little bit of the Rock ‘n Roll technique on the flower.  I first inked up the flower in the Crushed Curry and then I barely rolled the edges in the Tangerine Tango.  Actually, you can hardly tell there’s any orange in the flower at all…just a hint.  It’s one of those cards that definitely has a little more pizzazz in person.

Did you notice that I it’s my favorite size card?  Yep…4 1/4″ x 4 1/4″.   I made this card a while ago….I think it’s time to start creating again….  🙂

Have a great day!  Take care and Happy Stamping!


Built for Free Using: My Stampin Blog

More Weekly Deals!

If you’re like me, you love a deal!  Do you ever check out Stampin’ Up!’s Weekly Deals or the Clearance Rack?  Do you know that you can check them both out on my website?  Both can be found at the top of the left-hand section.

Below you can find this week’s Weekly Deals.  Hmmm….what should I order?  I think I’ll definitely get some of the Old Olive Baker’s Twine.  It will be perfect  for those Christmas projects!  What are you going to order?

I just checked out the Clearance Rack.  Wow!  There’s a lot of stuff on there.  Do you remember the Halloween Wreath from last year?  Well, they have the kit for it in the Clearance Rack now for only $10.79 (item #135866).  They were pretty darn cute.  There’s still plenty of time to order yours and get it ready for the big day!

Have a great day!  Take care and Happy Stamping!

Built for Free Using: My Stampin Blog

Woodland Embossing Folder

IMG_6805It finally feels like fall around here!  Woo Hoo!  Of course when I think fall I think falling leaves so this card is perfect!

I’ve used my new favorite embossing folder:  Woodland!  Gotta love those trees!  This time I did a little fussy-work on them to color them.  I used a sponge dauber to carefully and lightly apply a little color to them to make them pop a bit more.  Then once you add the colored leaves you have a card front!

This week at classes we’re making Halloween cards then we jump right into Christmas.  Yikes!  It’s October 4th and I need to start designing Christmas cards.  Actually, I’m probably a little behind.  If you get on Pinterest there are a ton of Christmas cards posted already!  I guess I better start catching up.

Have a great day!  Take care and Happy Stamping!

Built for Free Using: My Stampin Blog

Acorny Thank You

IMG_6832I love the name of this stamp set.  Acorny Thank You.  Who thinks of these things?  Ha!

Aren’t these little acorns fun?  I knew I had to have them when I first saw them…..of course there is a COORDINATING punch!  Woo Hoo!  The saying is pretty cute too.

My new favorite embossing folder is the Woodland Embossing Folder with the trees.  Isn’t it great?  So perfect for fall!

Well, I hate to admit it but I didn’t win any raffle baskets last night at this year’s Octoberversary celebration at church.  I’m thinking it was the change of location.  We had it at one of the rec centers in town instead of at church.  I was pretty bummed that I didn’t win but my friend sitting next to me won a basket as did her daughter.  There’s always next year….

Have a great day!  Take care and Happy Stamping


Built for Free Using: My Stampin Blog

Vintage Leaves

IMG_6827Sheesh!  I almost forgot to post today!  What was I thinking?!  I mean, really….it’s only been a few days since I promised to TRY to post everyday.  Anyway, lets get back on track to today’s really cute card.

This is one of those designs that I found on Pinterest and made my own.  I don’t think I changed too much.  This Vintage Leaves stamp set is gorgeous and I love the fact that there are COORDINATING framelits!!!!  Gotta love COORDINATION!!!  (Do you think I used enough exclamation points?  Can you tell how much I LOVE coordination in products!)  Ha!

Besides the coordinating stamp set and framelits, I really love the this color combination.  It’s not a combination I would have picked for a fall card but it’s gorgeous!  Island Indigo, Sahara Sand and Basic Black.  Wow!  Very striking.

What do you think of the White Perfect Accent dots?  This was the first time I used them.  I kind of like them.  They definitely add a little something to the card.  The great thing about them is that just like with the pearls and rhinestones you can color them with your Sharpie markers.

I’m going to have to make more of these cards because they’re so versatile.  You just need to change out the sentiment.  Birthday, sympathy, thank you, thinking of you….anything!

Tonight I’m off to Octoberversary for our church.  We always have an Octoberfest party with raffle baskets to raise funds.  This year is our church’s 30th anniversary so we’re combining to make Octoberversary!  It’s always a fun time.  I’m usually pretty lucky with the raffle baskets winning at least one.  I’ll let you know how I do…

Have a great day!  Take care and Happy Stamping!

Built for Free Using: My Stampin Blog

Happy Scenes

IMG_6816The new Happy Scenes stamp set is so dang cute!  I love all of the little scenes.  The best part is the COORDINATING Hearth & Home Thinlits dies.  If you’re going to have these cute little scenes that will fit perfectly with the window frame Thinlit die you need to use the window frame, right?

Another plus to this stamp set is that you can color the images if you want to.  I used both Aqua Painters and Blender Pens to color my image.  It was easier to do the little tiny leaves with the Blender Pen.

This is the only card I’ve made using this stamp set but I can’t wait to make cards for other seasons.  So dang cute!  (I know, I already said it but it’s true!)  🙂

I used my favorite new product on this card.  I’m in love with the Corrugated Paper.  I guess it’s not that new since it came out in the regular catalog in June.  You get two 12″ x 12″ sheets of Kraft corrugated paper and two 12″ x 12″ sheets of white corrugated paper in the package.   It adds such fun texture to your project!

Well, I’m pretty proud of myself.  I posted two days in a row.  Woo Hoo!  Keep your fingers crossed that I can keep on track!  Ha!

Have a great day!  Take care and Happy Stamping!


Built for Free Using: My Stampin Blog

Happy October!

Wow!  It’s October!  Can you believe it?  I know that you can’t believe that I’m finally posting again.  Yep.  It’s the first of the month and I hope to have a post for you every single day this month!  That is definitely my goal.

So, you’ve been wondering where the heck I’ve been.  Well, mostly I’ve been swamped trying to keep my head above water.  I just seem to get farther and farther behind.  It doesn’t help that I don’t know how to say ‘no’.  Do you have that same problem?  Our church had a ministry fair a few weeks back and they wanted display boards showing pictures and descriptions of the various groups around church so people can see what they do.  I was asked to do a board for my two groups (book club and card making), a board for the worship teams and of course I volunteered to do the board for the music ministries since I knew our choir director was even busier than I was.  Isn’t there some type of motto “just say no!”.  Well, one day I’m going to learn to say it!

Anyway, other than being busy making display boards I was on a trip.  Thanks to you, my loyal followers and customers I earned Stampin’ Up!’s Getaway Incentive Trip.  Woo Hoo!  My husband and I just spent a long weekend in Newport Beach, CA.  The best part of the trip was that we got to see our son and his wife since they live in the Los Angeles area.  We did a lot of sight seeing and a lot of driving on those HUGE and busy California freeways!

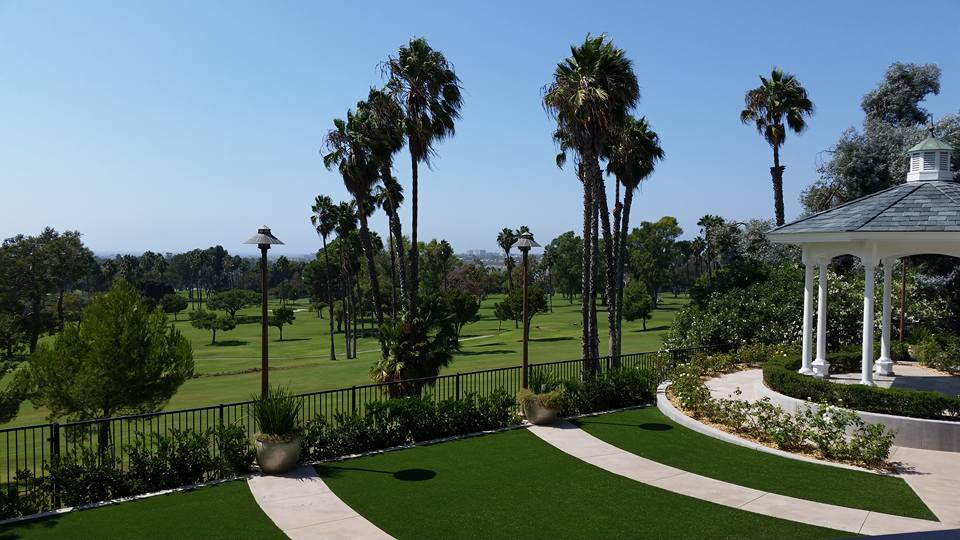
Below you will see a few of my favorite pictures from the trip.  We stayed at the Newport Beach Marriott Hotel and Spa.  Very nice.  We added a few days on to the beginning of the trip to have more time with Jared and Margot.  When we checked in to the hotel we were pleasantly surprised to find out that we had a suite!  Wow!  You can see the view from our little patio below….we were right on the golf course and the hotel’s Rose Garden.  Stampin’ Up! had breakfast for the group each morning in the Rose Garden so we didn’t have to go far at all!

NewportBeach.3NewportBeach.1
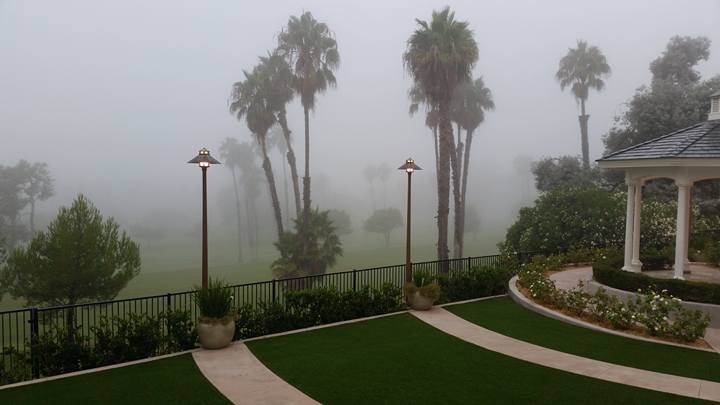
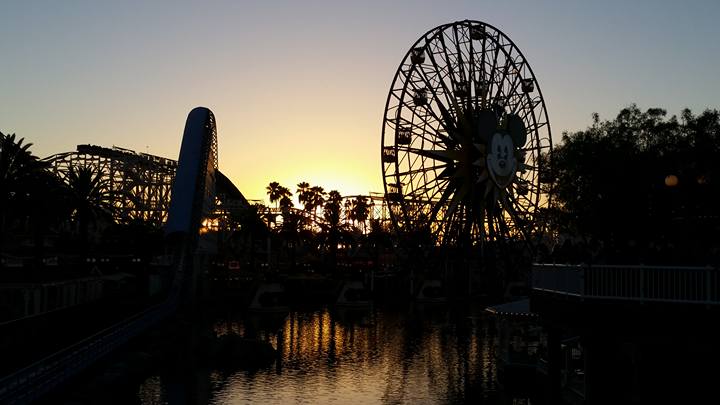
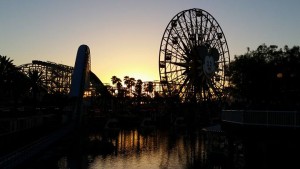
I love the second picture of the golf course.  It was so foggy that morning.  Kind of eerie.  The last picture is probably the favorite one I took.  We went to Disney’s California Adventure with “the kids” on Saturday and had a wonderful time.  We just happened to catch the sunset and got some great pictures.  You’d be proud of me.  I don’t really like roller coasters but I actually did the one in the park TWICE!  I even went on the tower of terror ride too.  Such a big girl I am!  Ha!

NewportBeach.2
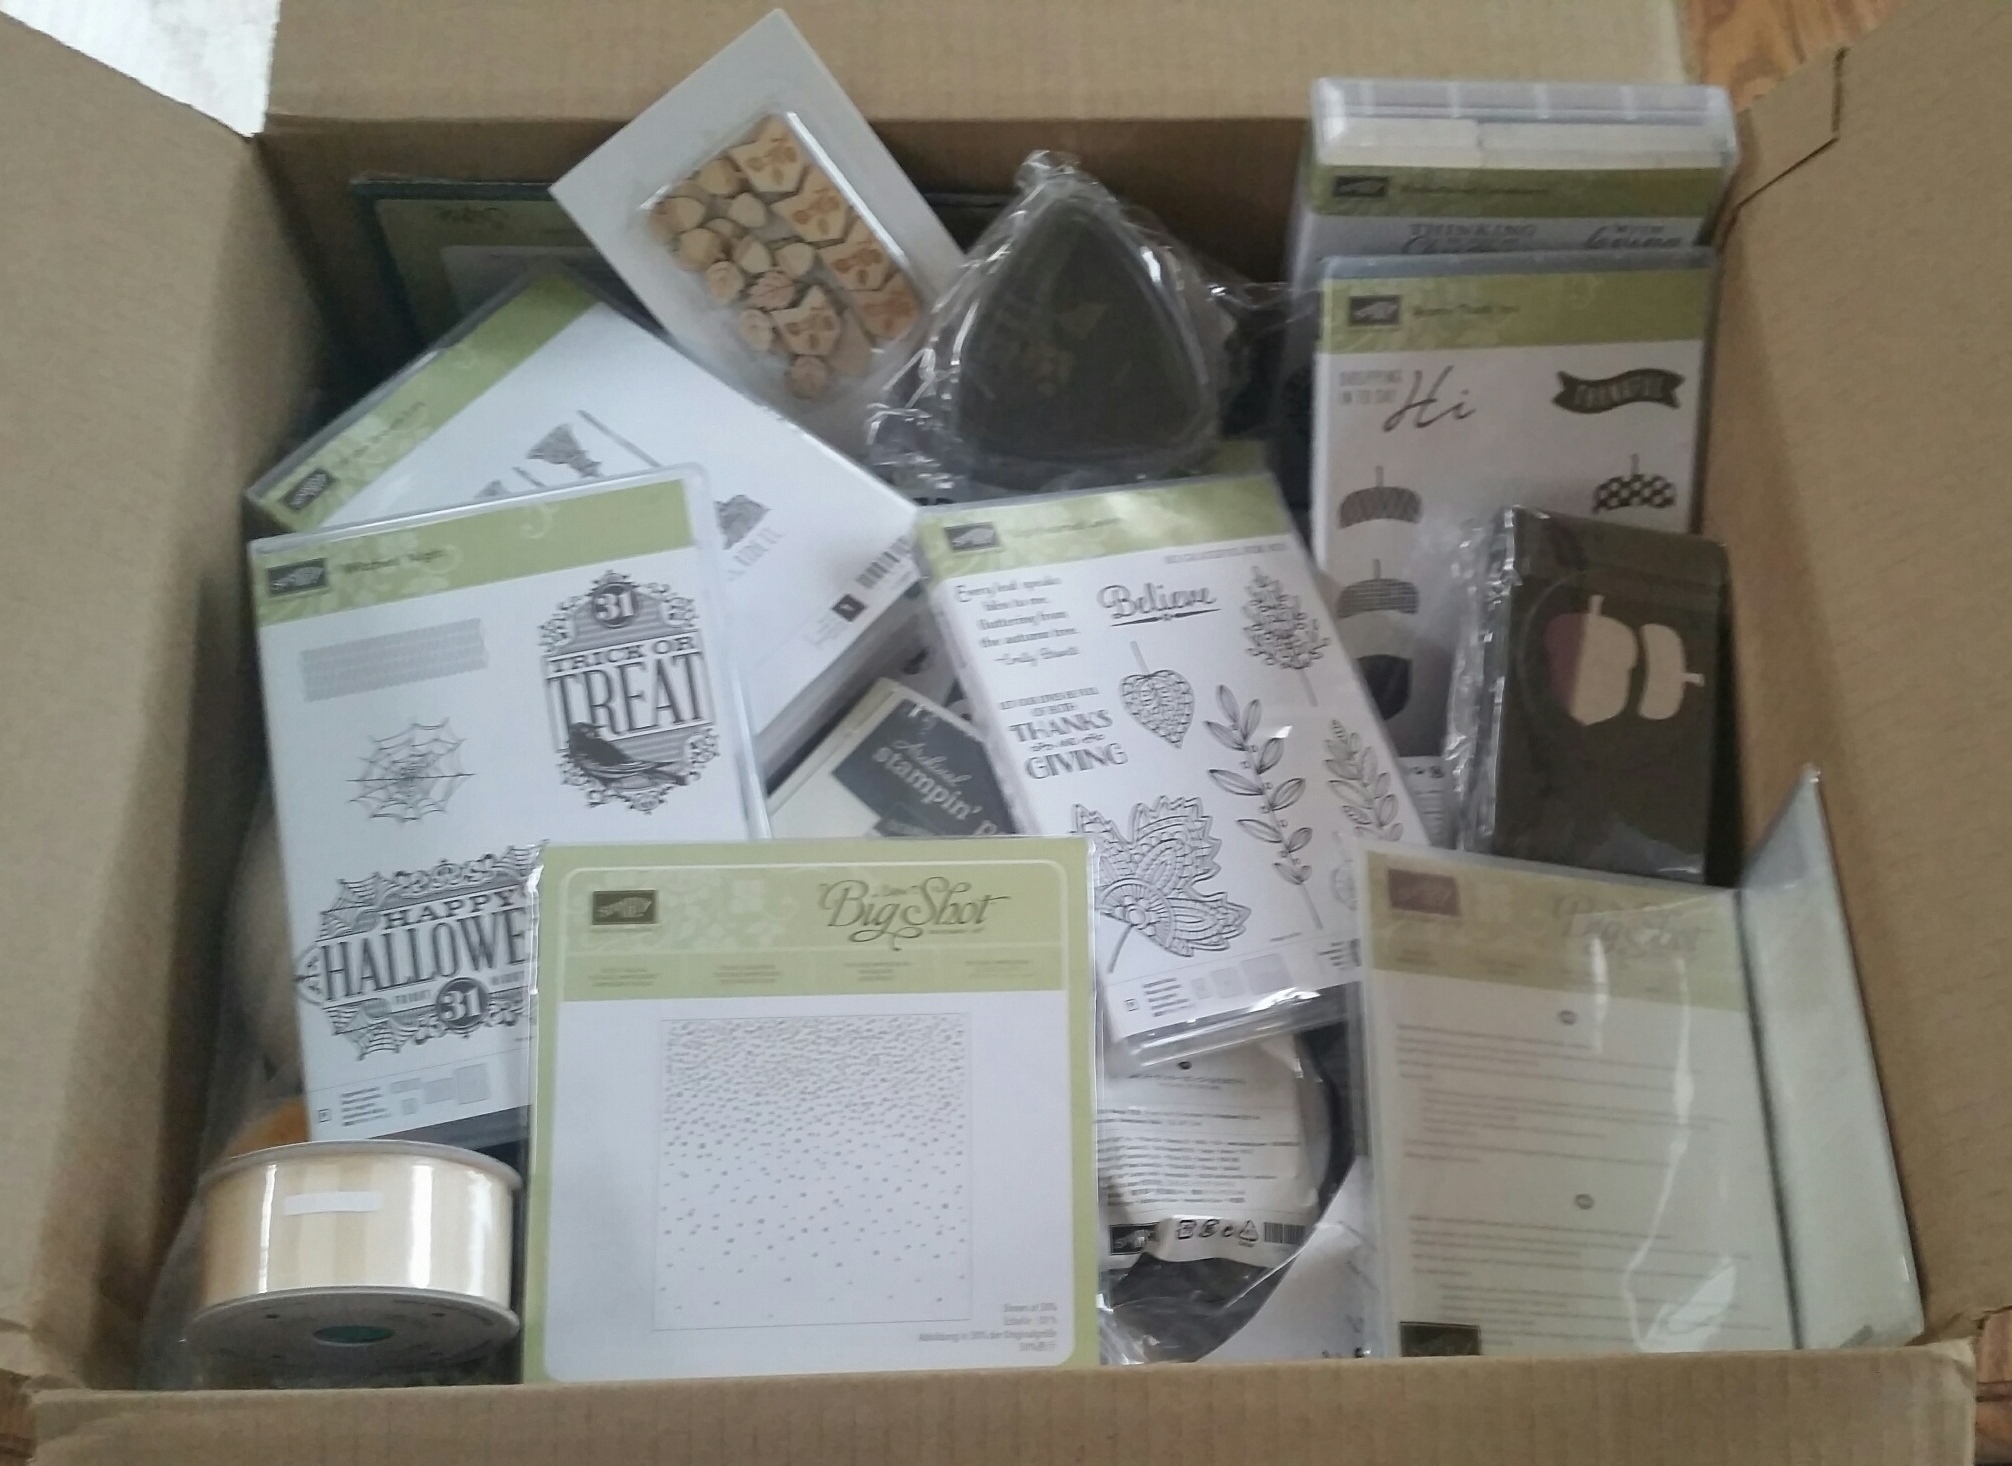
All in all in was a wonderful week.  Thank you again to all of you who helped me earn it.  I couldn’t have done it without you.  Stampin’ Up! gave us pillow gifts each night of the trip.  If you want to see what they were be sure to check out my Facebook page.

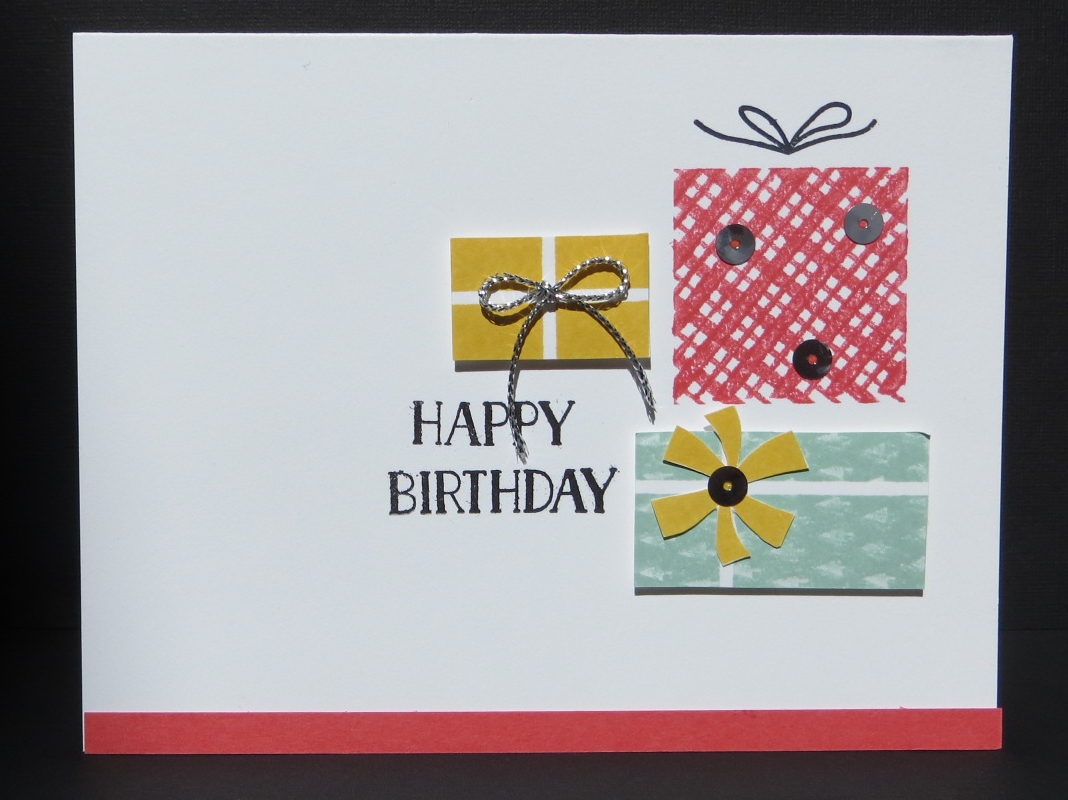
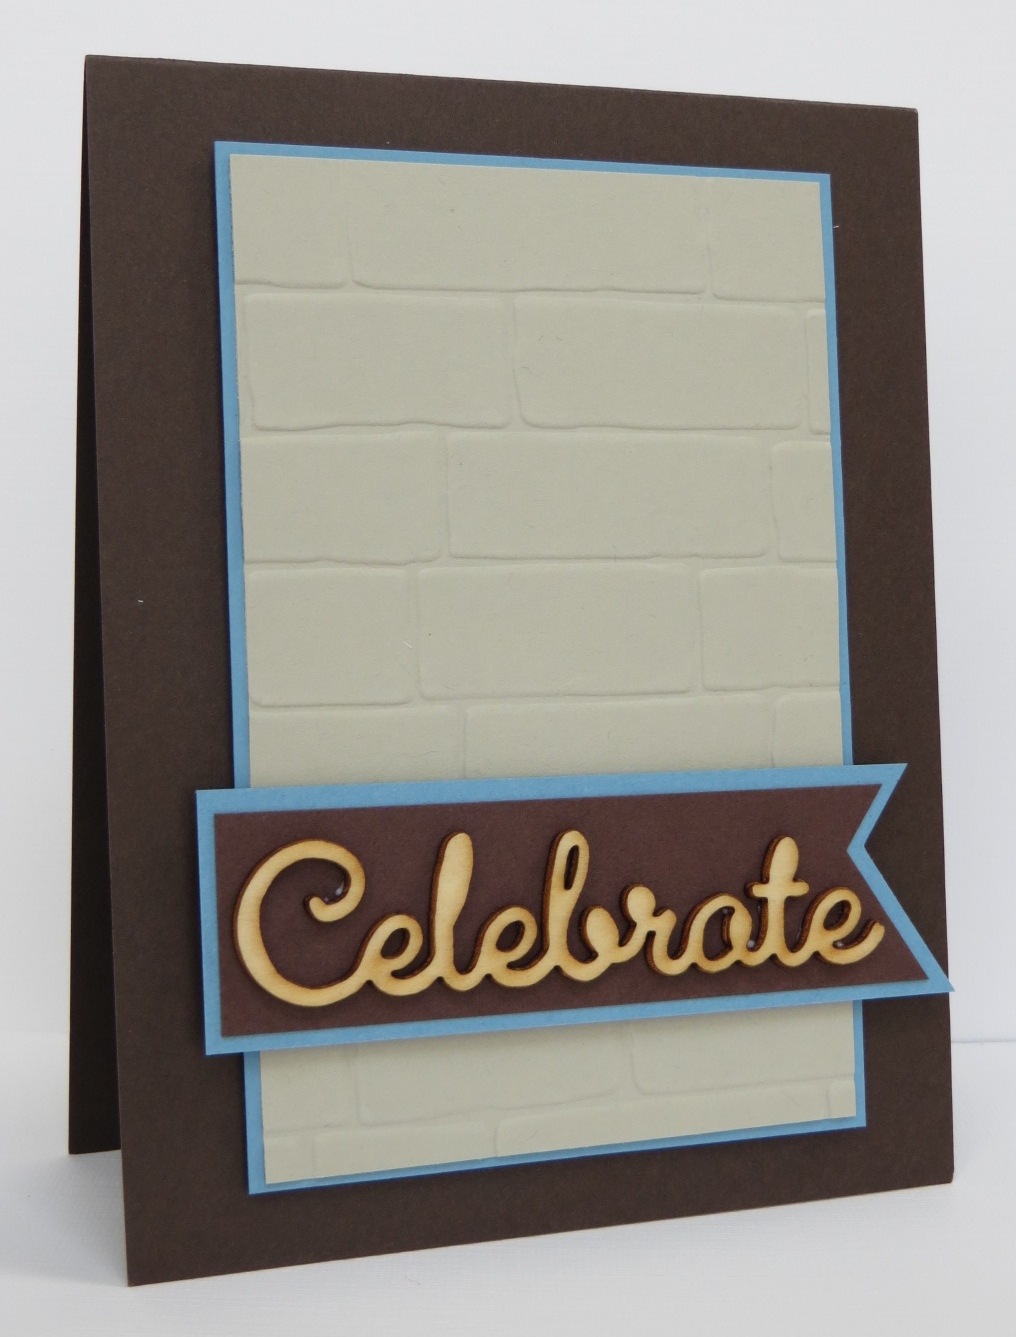
Have a great day!  Take care and Happy Stamping!  Come back tomorrow….I’m going to post an actual project!  🙂
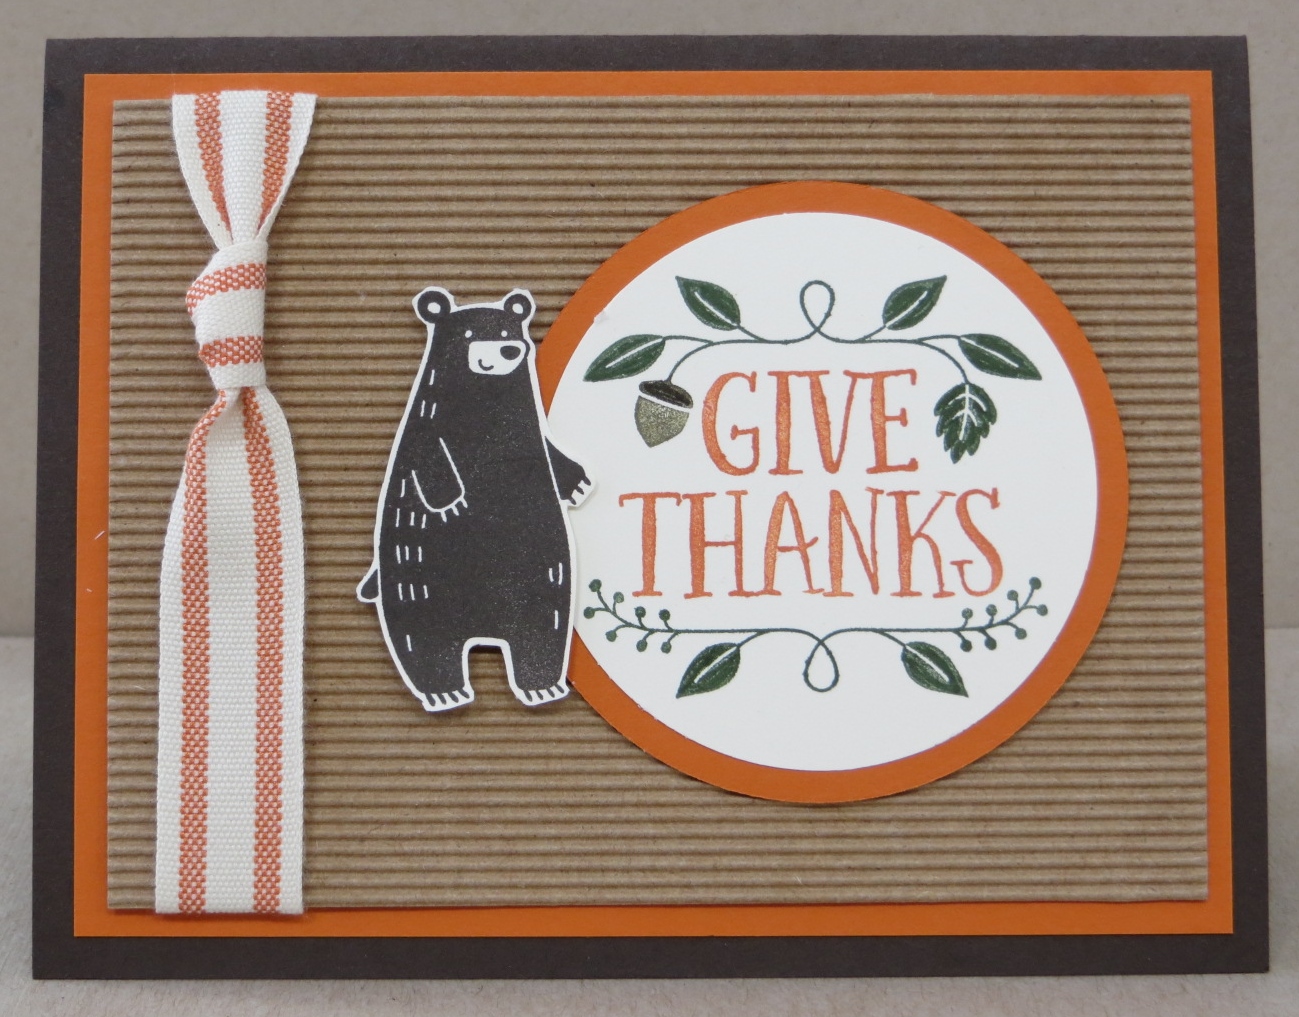
Greetings Thinlits

IMG_6783Hello!  Isn’t this the perfect card just to send someone to let them know you’re thinking about them?  I received the original of this card at convention.  I didn’t change it too much but I did have to add another layer or two!  😉

That’s the great thing about participating in swaps.  You get so many great ideas to use as is or just as a starting out point for your own idea.

Have you tried out these fun new Greetings Thinlits yet?  They’re perfect for adding a little greeting to your card.  You can’t tell from the picture but on this card I actually die cut the “hello” out of the red card stock so that see through to the black.  What a fun idea!

When you use these Thinlits the best way to cut them out is to use wax paper and a dryer sheet.  Place the bottom cutting pad on the Magnetic Platform.  Now place your dryer sheet, card stock, wax paper and then finally your Thinlit before adding the top cutting pad.  Run through the Big Shot and you ta-da!  Your greeting should pop right out.  No poking through all of the little holes to get the card stock unstuck from the Thinlit.  I love this little hint!

Don’t forget to use the fabulous new Fine-Tip Glue Pen to adhere your greetings to your project.  Have you tried this new adhesive?  I LOVE it!  It makes adhering small things to your projects a snap!  The great thing about this pen other than the wonderfully fine tip is that the lid has a pin in it so that the tip never gets clogged!  Check out this Stampin’ Up! video for more tips on this great new product.

Here’s another fun little tip I used on this card.  I actually colored my Basic Rhinestone Jewels with a red Sharpie marker!  Yep…you can color both the rhinestones and the pearls.  A great way to match the colors on your cards.

So much information for you!  Ha!  Have a great day!  Take care and Happy Stamping!

Built for Free Using: My Stampin Blog

Choose Happiness

IMG_6780Choose Happiness.  What a lovely name for a stamp set!  It makes me smile.  🙂

I’ve had this stamp set for a while and have been wanting to use it but I just didn’t know what to do with it.  I finally decided just to open it up and play.

When I have a stamp set I want to use I usually jump on Pinterest and check out ideas.  The samples others have posted usually give me my starting out point for a card.

Once again I’m using my new favorite card size.  4 1/4″ x 4 1/4″.  I started by stamping the flower randomly on the card front with the same color ink.  It’s hard to tell but I also did this to the narrow layer right under the flower.  It really made the focal point pop.  The flower is embossed for even more pop.

I also used another of my new favorite ideas on the card.  Again it’s hard to tell but I have a layer of Rich Razzleberry directly on the card front before the layer of white.  I am the Layer Queen.  The more layers the better.  🙂

Have a great day!  Take care and Happy Stamping!

Built for Free Using: My Stampin Blog

2015 Holiday Catalog!

2015 Holiday Catalog.1Whew!  I almost forgot where to find my blog!  Where have I been?  Other than 2 1/2 weeks back in the MN Homeland I’ve just been trying to catch up on things.  I’ve hardly had a chance to play with my new toys from the FABULOUS Holiday Catalog.

Have you seen the FABULOUS Holiday Catalog?  Wow!  Stampin’ Up! did it again. Tons of wonderful stamp sets, kits, tools and accessories.  I’m not sure which item is my favorite.  Do you have  favorite?  If you haven’t checked it out yet just click on the picture of the cover on the right side of my blog.

I’m about a week late with this post but like I said, I’m still playing IMG_6788catch-up.  I don’t want to just whine about how busy I am in this post….I do want to share a card with you.  This one is one we made at convention with the new stamp set “Your Presents”.  It’s a pretty fun stamp set.  You can use it for many occasions including birthdays and Christmas.   This stamp set is mostly a bunch of shapes that are a perfect for the kissing technique.  It has solid shapes and shapes with designs on them.  For the kissing technique you ink up one of the design shapes and stamp it onto a solid stamp.  Huff on the solid stamp and then stamp it on your card stock.  Kissing is a fun and easy technique.  You should give it a try!

Have a great day!  Be sure to take a peek at the new Holiday Catalog and let me know what your favorite item is.  Take care and Happy Stamping!


Built for Free Using: My Stampin Blog

Look What I Got!!!

20150808_064431_resizedWoo Hoo!  Mr. Brown came the other day with this package full of goodies for me from the new Holiday Catalog!  I made myself wait until this morning to open it as I had things that needed to get done and I knew they wouldn’t get done if I started to play with my new toys.

Don’t worry though.  This afternoon I’m going to play!  Actually, I’m off to play with a few of my demo friends this morning.  We’re going to make one of the kits from the fabulous new Holiday Catalog.  Maybe I’ll share some pictures tomorrow so you can see how much fun we had!

Are you excited to see the new Holiday Catalog?  You should be!  If you usually receive catalogs in the mail from me you should see this one by the end of August.  If you don’t usually receive catalogs from me but would like to please email me at cindy@stampbystampcreations.com.

Have a great day!  Take care and Happy Stamping!

Birthday Blossoms

IMG_6073Here’s a pretty birthday card for you on a Wednesday morning.  I have two cousins that have birthdays today so this is for them.  Happy Birthday Sally and Sandy!

The Birthday Blossoms stamp set is one of those stamp sets that caught my eye when I first viewed the new catalog but I held off purchasing it (at least for a few weeks!).  But as usual I saw someone post an adorable sample with it and knew I needed to use it in a class.

Yes, this card is CASEd.  (Copy And Share Everything)  I tell you…CASEing is a life saver!  It definitely saves on time and brain cells!  I get most of the ideas I CASE from Pinterest.  Are you addicted to Pinterest?  I sure am.  I’d be lost without it.  Now I just need to start pinning my own projects there!

Yesterday I placed an order for tons of stuff from the new, upcoming Holiday Catalog.  I paid for expedited shipping so I should have it tomorrow!  Woo Hoo!  I can’t wait to play!   It was tough limiting myself with my order.  Of course I wanted just about everything but knew it was silly to get everything at once.  You can only play with so many stamps at one time!

Have a great day!  Take care and Happy Stamping!

Built for Free Using: My Stampin Blog

Brick Wall Birthday Card

IMG_6076Who needs masculine cards?  Wow!  That’s a lot of me! me! me! that I’m hearing!  🙂

We all love to make flower cards but sometimes you need cards for the guys in your life like your husband, your father, sons, nephews….well you’re getting my drift.  Masculine cards are the hardest to come up with unless you have that perfect guy stamp set but even then you can’t use the same stamp set for the same person occasion after occasion!

Brick Wall Embossing Folder to the rescue!  This embossing folder is going to be your new best friend for those guy cards.  No frilly flowers for the guys in your life!  OK…you can still use flowers it this folder but like on this card, you can use it by itself with a sentiment and have the perfect guy card.  This is actually the card I sent to my son a few weeks ago for his birthday.  Simple and masculine all in one.  It doesn’t get any better than that!

Hey….did you notice that this card was actually made without one single stamp set?  Wow!  I think this is the first time I’ve ever done that!  Amazing!

Have a great day!  Take care and Happy Stamping!

Built for Free Using: My Stampin Blog