Peaceful Pines Tag Card

IMG_6968
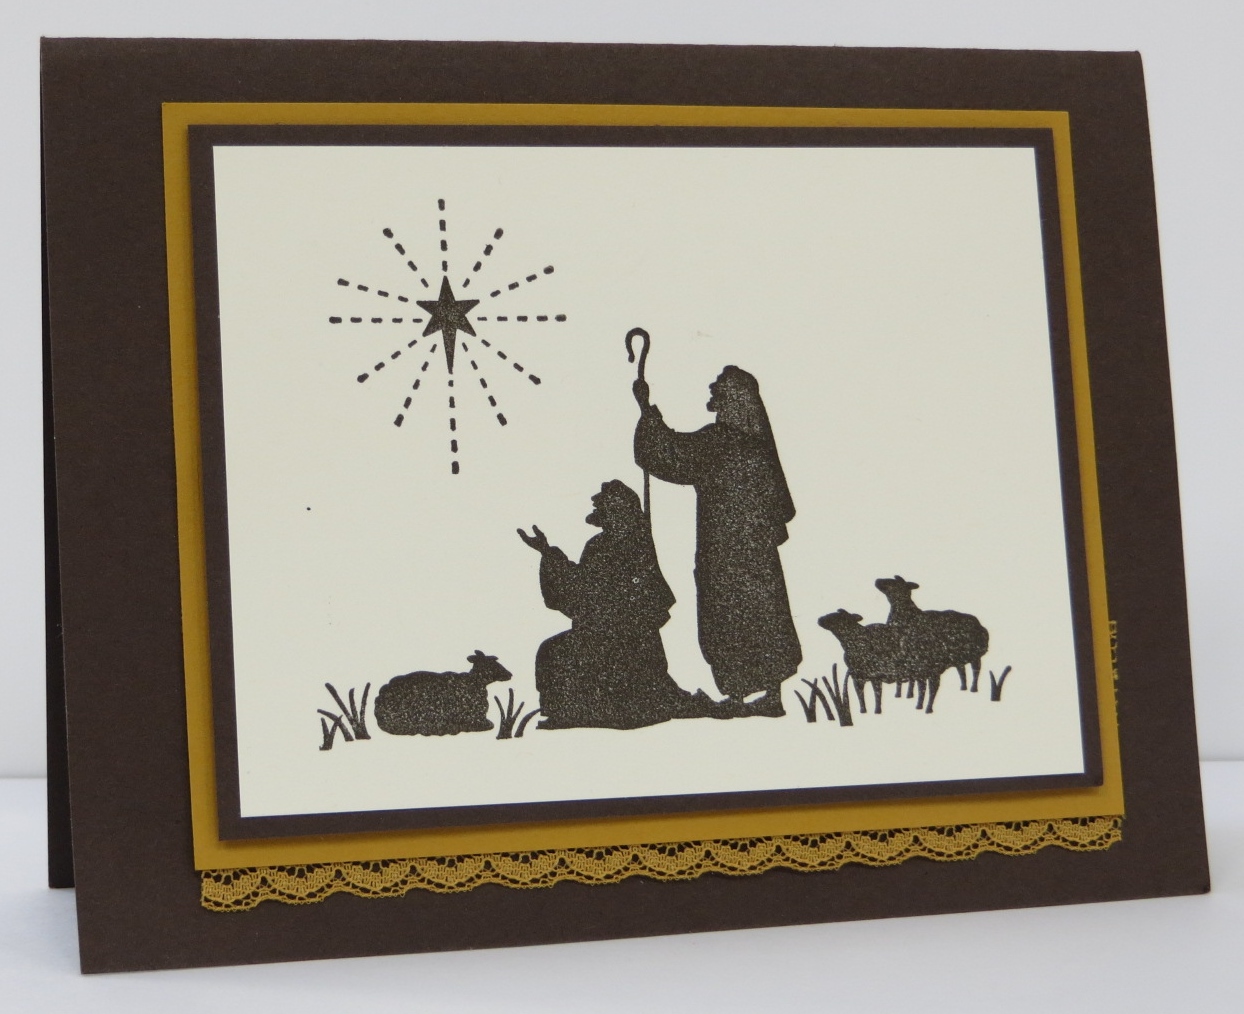
Oh, Christmas Tree, Oh, Christmas Tree….

It is November so I’m sure that some store or radio station somewhere is playing Christmas carols.  I’m one of those people though who like to wait at least until December before I start listening to them.  Practicing for the church choir doesn’t count though.  I think we’re going to start working on our Christmas music tonight.

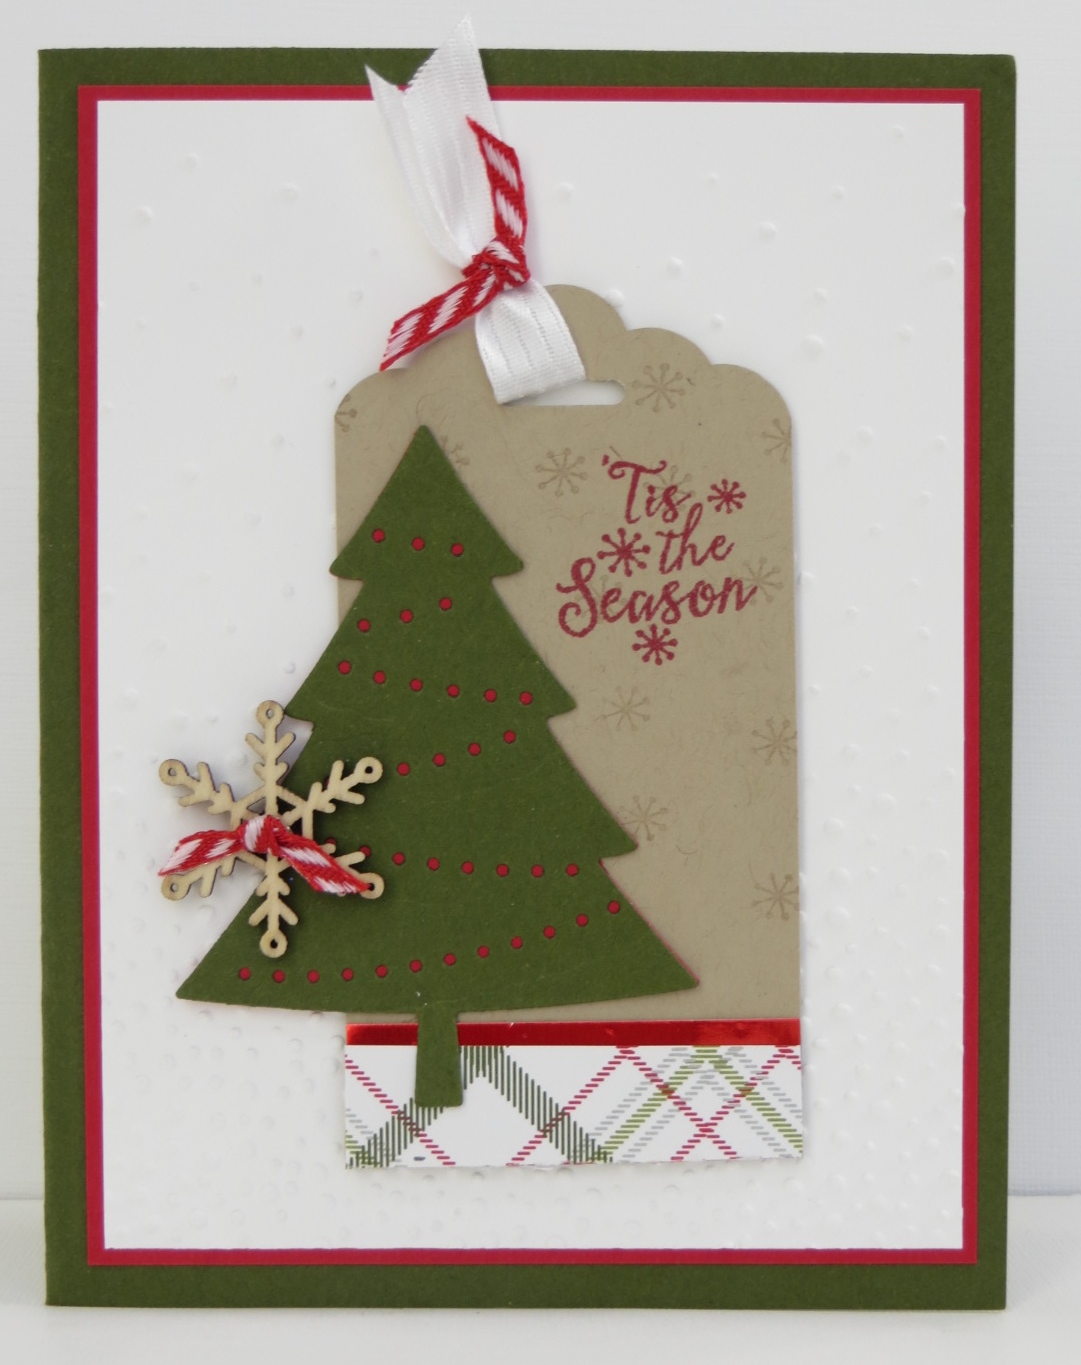
I like using tags on my cards.  It’s just fun!  🙂

The Peaceful Pines stamp set has COORDINATING (yep, my favorite word!) framelits.  How great is that?!  What’s so fun about these framelits is that they don’t just die cut the two different size trees.  You can also add texture and design to the trees.  Check out the tree on this card.  If first die cut the green tree.  Then I used one of the design framelits and die cut the little string of holes into the tree.  The next step was to die cut a red tree and adhere it to the back o f the green tree.  Now it looks like I have a string of berries or lights hanging on my tree.  Brilliant!  🙂

All that talk yesterday about snow and there isn’t a flake to be seen this morning.  Oh, well.  That’s the way it goes.  At least I won’t have to worry about slick roads when I’m out running errands this morning!

Have a great day!  Take care and Happy Stamping!  Oh….and Happy Birthday Mom!  Love ya!

Built for Free Using: My Stampin Blog

A Sparkly Flurry of Wishes

IMG_6986Happy Day After Election Day!  Did you all vote?  In our area we only had a few things to vote on but I dropped my ballot off on Monday.  I did my civic duty and was glad to see that everything I voted for passed!  🙂

Today’s still going to be a nice day here in the Denver metro area but rain tonight will turn into those pesky little snowflakes by morning.  Don’t get me wrong….I like snow….it’s just that the first snow of the season is always a little hard to take….especially after the temperature has been in the 70’s for the past two day!

Since snow is on it’s way I thought I should post a card with snowflakes on it.  This card is from my “fancy” Christmas card class a few weeks ago.  It’s hard to see in the picture but everything sparkles!  The paper is Shimmery White.  I embossed the snowflakes and words with Iridescent Ice Embossing Powder and the ribbon is sparkly!  Don’t you love the new Gold & White 3/8″ Glitter Ribbon?  It’s so fun!  I know…you’re looking at the ribbon and are trying to tell me it’s not white.  You’re correct!  I used a sponge dauber and the Pool Party ink to color the back side of the ribbon!  How fun is that?!!!

I’m sure I’ve mentioned this before but I LOVE the new Softly Falling Embossing Folder!  Isn’t it great?  It doesn’t even have to be for snow if you don’t want it to.   Of course, another thing that I love on this card is the COORDINATING punch that goes with the Flurry of Wishes stamp set!  It’s great!

I don’t think I’m going to have to drag out my snow boots or snow shovel quite yet but I may have to dig out my winter sweaters for tomorrow.  Have a great day!  Take care and Happy Stamping!

Built for Free Using: My Stampin Blog

Santa’s Gifts

IMG_6973How many day’s left until Christmas?  I really don’t like those count downs.  They make me so nervous.  Other than Christmas stamping projects I really haven’t begun to think about the big holiday.  I need to think about Thanksgiving first.  We always have a big crowd over and my parents are flying out this year.  The nice thing about having my parents here is that they think they have to help me clean for the big dinner.  That’s ok by me!  🙂

This Santa’s Gift stamp set is another one that is in the main Stampin’ Up! catalog.  It’s so darn cute!  I just wish we still had Blendabilities…..oh, well….I just got out my Aquapainters and ink pads to color.  I stamped the image on the Shimmery White card stock with the fabulous new Basic Black Archival Ink and then colored away.  The Shimmery White card stock is a great alternative to water color paper.

This card is another one that didn’t quite make the cut for my classes.  In early December I am having more of a Christmas 3D project class so maybe I can work Santa into that one!  Have a great day!  Take care and Happy Stamping!

Built for Free Using: My Stampin Blog

Every Blessing

IMG_6810Well, it’s November so I don’t feel bad about posting Christmas projects.  Even though I had a Christmas class in October it just felt wrong to post a Christmas project before November 1st.

It’s not that I haven’t been making Christmas projects or thinking about Christmas projects.  I actually spent all weekend and then some cutting card stock for my Christmas card Stamp-a-Stack that happening this week.

This card is the first Christmas project that I made this year.  I think I actually made it in the summer.  This stamp set, Every Blessing, is one of the few holiday stamp sets in the big catalog.  I like how Stampin’ Up! included the holiday carry-over items and a few new holiday items in the big catalog.  I know there are a lot of people who like to get an early start on their holiday projects.

This is a fairly simple card.  You may recognize the design from my convention swap card this past summer.  I know…that was a LONG time ago!  Just some layers, a stamped image and a little lacy ribbon peeking out from the bottom.  A nice simple card that you could whip up in no time!

Have a great day!  Take care and Happy Stamping!

Built for Free Using: My Stampin Blog


Lighthearted Leaves Thank You

IMG_6962Thank you!  Thank you!  Thank you!  Yep….another thank you card.  A person can’t ever have enough of these.  I like to put a little 3″ x 3″ thank you card in with all of my orders when I sort them.  If someone has an order sent directly to them I try (try being the operative word here) to send them a full size thank you card.  Today’s card is one that I sent out recently to people who ordered online or had their order shipped directly to themselves.

I used one of my favorite new embossing folders on this card as well as one of my favorite new stamp sets.  Who doesn’t love the Woodland Embossing Folder?  I have seen some gorgeous things done with this folder.  Maybe if I can find a little time to sit down to play I’ll make some samples to share with you!  🙂

Another thing I love (yes, I love lots of things…) is that the Lighthearted Leaves and Vintage Leaves stamp sets BOTH coordinate with the Leaflits Framelits!  It’s nice to get double the use out of a set of framelits!  Woo Hoo!

The “thanks” on this card is actually from one of the sentiments in the Lighthearted Leaves stamp set.  I just used my trusty Cajun Craze marker to color only that word and then I stamped in on the front of the card.  Versatility my friend, versatility!

Have a great day!  Take care and Happy Stamping!

Built for Free Using: My Stampin Blog

Lighthearted Leaves: Z-Fold

IMG_6975A few weeks ago I did a workshop.  I wanted the gals to be able to make 2 easy cards that had a WOW factor to them.  This fun Z-fold card was one of the cards I came up with.

From the outside it looks like your basic easy card.  Just stamp a sentiment and some leaves on the card, add some ribbon and layers and your done.

However….open it up…..and you have fun and IMG_6990unique card!  I was so excited when I found directions for this card on Pinterest.  On my card the long Very Vanilla piece on the inside that you make your “Z” with is 3 1/4″ x 11″.  You then score it 4 1/4″ and 9″.  You can probably make the width of the piece whatever you’d like but 3 1/4″ is the width the directions I found used so I went with that and had plenty of room for my various layers.  (Have you noticed that I love layers!)

IMG_6992Here’s another picture of the card where you can see the “Z”.  The key to making this card is to first attach the “Z” to the back piece of card stock.  Then make your “Z”, place adhesive on the section that will attach to the front piece of the card.  Then line up the front piece over the back piece, press down so that the “Z” adheres to the back of the front piece and your card is complete!

Be sure to let me know if you’d like more detailed instructions.  I’d be happy to share.

I can’t wait to try this type of card in class some time.  Maybe in my December All-Occasion class! 🙂

Have a great day!  Take care and Happy Stamping!

Built for Free Using: My Stampin Blog

More Weekly Deals!

One of the first things I do on Tuesday mornings is check out Stampin’ Up!’s weekly email.  I love to see what’s going on in the SU world and what’s coming up.  I also like to see what the new Weekly Deals are.  Who doesn’t love a deal?  There may be something that I “need”.  🙂

Last week’s stamp sale was a huge success for Stampin’ Up!  They sold tons of stamps and none of them went on back-order!  Ha!  Yes, they’ve been having some trouble with back-orders….lots of back-orders but hey….it happens.  You just have to go with the flow.  I got all worried and panicked because I had a class scheduled for today and tomorrow using the Shaker Card Kits and the silly things are on back order.  Well, guess what?  I rescheduled the class.  What a concept!  Sometimes I get stressed out for nothing.  I’m really trying to work on that.  That being said, I sure hope those kits ship this week!  😉

If you “need” any of the items from this week’s deals or anything else just go to my “store“.  Or you can click on one of the items below and it will take you right there too.

Have a great day!  Take care and Happy Stamping!

Built for Free Using: My Stampin Blog

Wicked

IMG_6852I’ve got to stop taking all of these breaks!  You’d think I was busy or something….sheesh!  I know that I’m not busier than anyone else but I seem to have a difficult time staying on task.   Does anyone else have this problem?

I had classes last week and then I had to plan for my next class so I could order the supplies so that they’d get here in time.  I keep telling myself that I’m going to plan ahead more but it doesn’t seem to happen.  OK.  Enough whining!

My friend Jan designed this card and I absolutely love it.  Isn’t it fun?  I especially like “wicked” across the bottom of the card.  Ohhh…..speaking of wicked….on Friday evening I got to see Idina Menzel in If/Then!  Wow!  Absolutely fabulous!!!!  She’s amazing…as was the rest of the cast.  Yesterday was the final day of the show here in Denver but if the show comes to your city you definitely want to go.  Incredible!

Alright….back to the card….

My favorite parts are probably the glittery witch’s hat and the spider web doily (and the “wicked”).  I actually had to purchase the Project Life Seasonal Snapshot 2015 just for the “wicked”.  Ok…I do like the rest of the stamp set too….

Part of the reason I like the card so much is that it is totally different from anything I’d design.  That’s why I like participating in swaps where I trade my cards for other people’s.  New ideas and fun new methods.

In a few weeks Jan and I are heading to Dallas for a Stampin’ Up! event.  We’ll get a sneak peek at the upcoming Occasions Catalog.  I can’t wait!  We’re going a few days early to hang out in Dallas.  We’re not sure what we’re going to do so if you have any ideas for us to do while we’re there let me know.

Have a great day!  Take care and Happy Stamping!


Howl-o-Ween Treat Bag

IMG_6834One more fun Halloween project!  This treat bag turned out pretty darn cute if I do say so myself.  These Petite Café Gift Bags are cute themselves but add the adorable owl and….oh, my!  🙂

Confession….this was the first time I used my Hearts & Stars Decorative Masks.  I have them sitting on my shelf, I just don’t think to use them.  They’re very easy to use though.  Just place them on your project, ink up a Sponge Dauber and daub away!

Did you check out the second photo?  I actually did a little something to the back of the bag.  I guess I could have sponged some more stars on the back too but I just didn’t want to get carried away.  Ha!

IMG_6835I usually don’t end up using a lot of the 3D projects I create.  (OK….let’s be honest….I don’t actually even send many cards even though I love to create them!)  I do want to let you know though that I did use this one.  I had a little workshop on Friday and I filled this adorable treat bag with Halloween candy and gave it to the hostess.  That was quite a big step for me…using something I had on hand.  I’m usually trying to figure out a hostess gift at the last minute.

Don’t forget about the BIG SALE!  15% off all stamps!  It only lasts a week….don’t miss out!  Shop now!

Built for Free Using: My Stampin Blog

Howl-o-ween Treat Pillow Box

IMG_6842I only bought one Halloween stamp set and one Halloween stamp.   The stamp was the fun If the Broom Fits (see this post).  The stamp set was the adorable Howl-o-ween Treat.  One of the reasons I really like this stamp set besides the the adorable images is that there is a COORDINATING framelit set:  Boo to You!  Woo Hoo!  How can you go wrong with a cute stamp set and coordinating framelits?

I wanted to use some more of the cute Happy Haunting Halloween designer paper.  The ghosts pattern I used yesterday and these little spider webs pattern are probably my favorite from the pack.

Have you tried the Square Pillow Box Thinlits Die yet?  It’s SO easy to use!  You just die cut two of the pattern, adhere the sides together and fold in the tops!  Done!  Then you just decorate it in whatever way you’d like!  Easy peasy!

The hardest part of these little pillow boxes is figuring out what to put in them!  Ha!

Have a wonderful day!  Take care and Happy Stamping!

Don’t forget that ALL Stampin’ Up! stamps are 15% off this week and this week only!  Shop now!

Built for Free Using: My Stampin Blog

It’s a SALE!!!

stampsale.1015Woo Hoo!  Today’s the day!  Stampin’ Up! stamps are on SALE!  15% off!  Did I say Woo Hoo yet?  I’m SO excited!!!  Are you?

ALL Stamps are on sale except for Hostess stamp sets, rotary stamps and bundles.

Have you made your wish list yet?  Get busy as this sale is good only through Friday, October 23rd.

I’m having a Mystery Hostess Workshop this week and you can be part of it just by placing an order.  Place your order in my online store and on the check out page you can enter the Hostess Code ZW6EKPTG.  Your name will be in the running for hostess!  For the Mystery Hostess Workshop, all orders must be placed no later than Thursday, October 22nd at 9 pm (MT).  I will draw names for the hostess that evening and contact her on Friday morning for her hostess choices.

Don’t miss out!  Get shopping!  🙂

Halloween Among the Branches

IMG_6965What is Halloween without a spider web, a spooky spider and ghosts?!   This card has them all along with glittery paper!

I used many fabulous new products on this card.  The only things not new are the Pumpkin Pie card stock and ink!  Oh…and the Very Vanilla card stock.

Don’t you love the Spider Web Doily.  It is so fun!  Unfortunately the Spider Web Doilies are also very popular and are on back-order.  🙁  You can still order them but you won’t have them for Halloween.  There’s always next year’s projects though.  Right?  I also love the Black Glimmer Paper.  Oooo!  It goes so well with the Happy Haunting Designer Paper….Of course it does!  Stampin’ Up! loves coordination almost as much as I do!

I do have a story about this card though.  Naturally I got the idea for this card from Pinterest.  (Love that site!)  When I went to make my sample to see if it was “class worthy” I couldn’t figure out how they punched/die cut out the “spooky” circle.  I checked all my circle punches and every single circle framelit in the set and none of them fit.  I finally cut the darn thing out by hand!  I know….fussy cutting!  Yikes!

After I got the card together and had moved on to other things I thought to check the catalog to see if I was missing something.  Sure enough….did you know that Stampin’ Up! has a 2″ Circle Punch?  It’s not even new this year and I didn’t have it!  I have almost every tool in the darn catalog!  How had I missed that one?  Luckily I still had to order all of the supplies for my Halloween class so that 2″ Circle Punch was the first item on the order form.  Sheesh!  I guess I need to start going through the new catalog with a fine tooth comb so I don’t miss anything else!

I just happened to have the catalog open to the punch page while I was writing this and noticed that there’s a 1 1/2″ Circle Punch with the word “NEW” by it.   Hmmm……I better add it to my next order…

Have a great day!  Take care and Happy Stamping!

Built for Free Using: My Stampin Blog

Halloween Treat Bag

What is the candy that no matter what time of year it is you think….Halloween!  Yep!  Candy Corn!halloween candy corn  There are so many fun craft projects with candy corn.  Don’t you love these wine bottles?  I may have to give them a try…..

At convention one of the presentersIMG_6195 showed us this adorable treat bag made with the Sketched Dots Tag a Bag Gift Bag.  Don’t you love it?  I have to admit that I was going to try to recreate it but I had a problem when I inked the bag.  It didn’t seem to dry very fast, even when I used the heat tool.  I knew I couldn’t use that technique in my Halloween class so I came up with my own little treat bag.  I do think I’ll have to try this one from convention again.  It’s so stinkin’ cute!

So finally, here’s the project I came up with.  I call it a treat bag card.  Instead of inking the treat bag directly I just kept the bag plain and designed a card to go in it!  Much easier to replicate in class.


IMG_6855

IMG_6858


Instead of inking the bag I just inked a piece of card stock.  Now I had a cute candy corn card to put in my bag and I still had room for treats!  🙂

I thought of putting one of the cute spider web doilies on the front under the “trick or treat” but I wanted to make sure you could see the candy corn.

Have a great day!  Take care and Happy Stamping!

Built for Free Using: My Stampin Blog

If the Broom Fits Halloween

IMG_6849Halloween is a little over two weeks away!  Yikes!  I guess I better start showing you my Halloween projects!

I may as well start with the first Halloween stamp that caught my eye in the Holiday Catalog.  I saw this and just knew I had to have it!  It’s so appropriate!  Ha!

It’s so stinkin’ cute!  Of course the saying is my favorite part!  🙂

This was a very easy card.  Layers, a little designer paper (the fun Happy Haunting paper) and of course some ribbon (baker’s twine).  Oh, don’t forget the dimensionals!

Do you have a favorite Halloween stamp set from the Holiday Catalog?  Which one?  Leave a comment and let me know!

Have a great day!  Take care and Happy Stamping!

Built for Free Using: My Stampin Blog

Fall Sheltering Tree

IMG_6813Here I go again with the corrugated paper!  Have I told you how much I like it?  Ha!  🙂

I came up with this card designing for my “fall class” that was held last month.  It’s definitely a “Cindy card”.  Layers, ribbon and now of course the corrugated paper!  The kraft corrugated paper works so perfectly for fall cards (or hadn’t you noticed by some of my latest posts!).  🙂

I love fall.  It’s my favorite season.  This year it’s been kind of weird though.  I’m pretty sure the temperature in CO isn’t suppose to be in the mid 80’s at the end of September/beginning of October.  Sheesh!  I want to have to wear my jeans and sweatshirts, not my flip-flops!  I know.  There are plenty of people who love summer and the warm weather but I’m just not one of them.  What about you?  What’s your favorite season?  Leave me a comment and let me know!

Have a great day!  Take care and Happy Stamping!

Built for Free Using: My Stampin Blog