
 A few weeks ago I did a workshop. I wanted the gals to be able to make 2 easy cards that had a WOW factor to them. This fun Z-fold card was one of the cards I came up with.
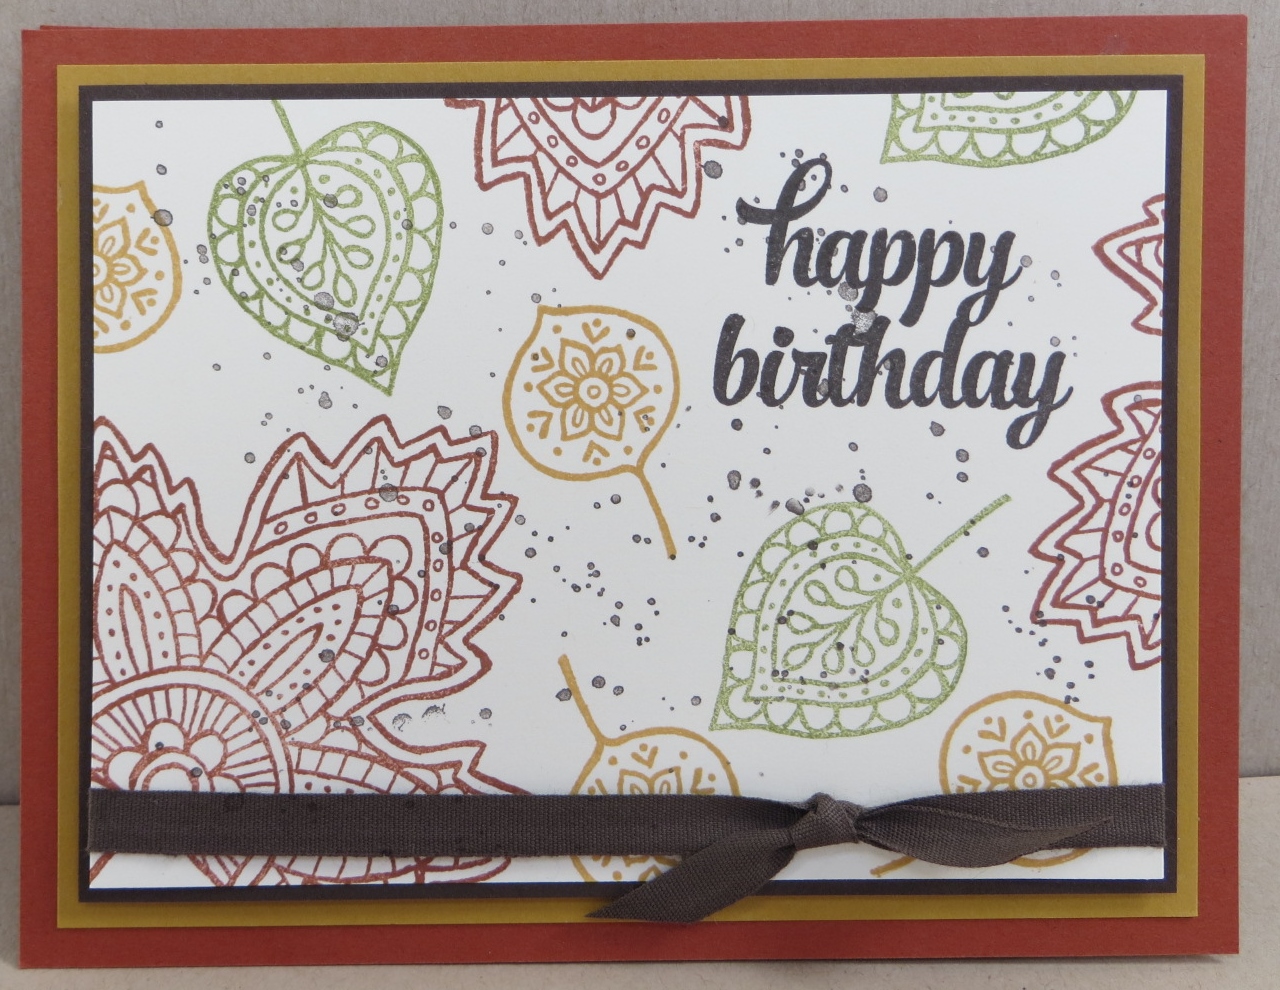
From the outside it looks like your basic easy card. Just stamp a sentiment and some leaves on the card, add some ribbon and layers and your done.
However….open it up…..and you have fun and 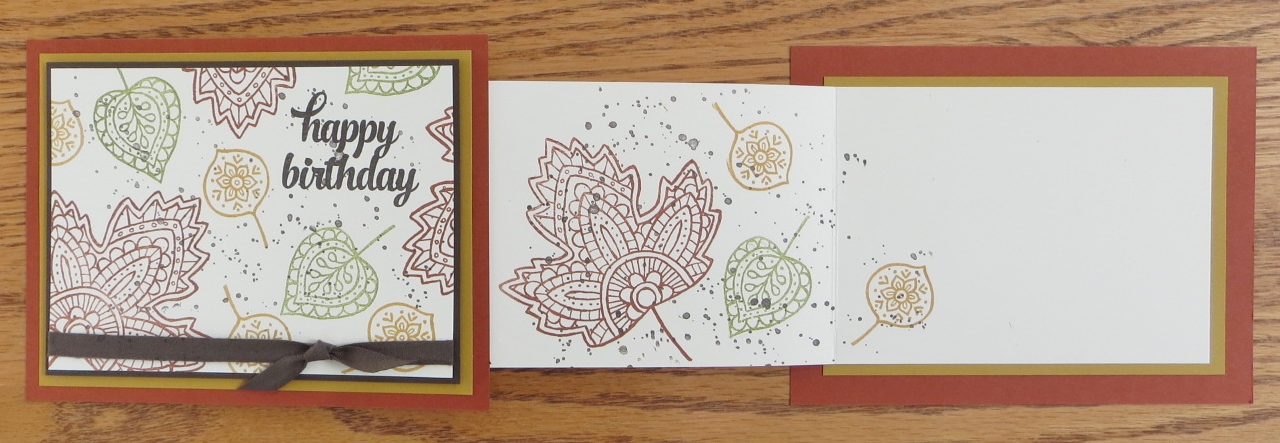 unique card! I was so excited when I found directions for this card on Pinterest. On my card the long Very Vanilla piece on the inside that you make your “Z” with is 3 1/4″ x 11″. You then score it 4 1/4″ and 9″. You can probably make the width of the piece whatever you’d like but 3 1/4″ is the width the directions I found used so I went with that and had plenty of room for my various layers. (Have you noticed that I love layers!)
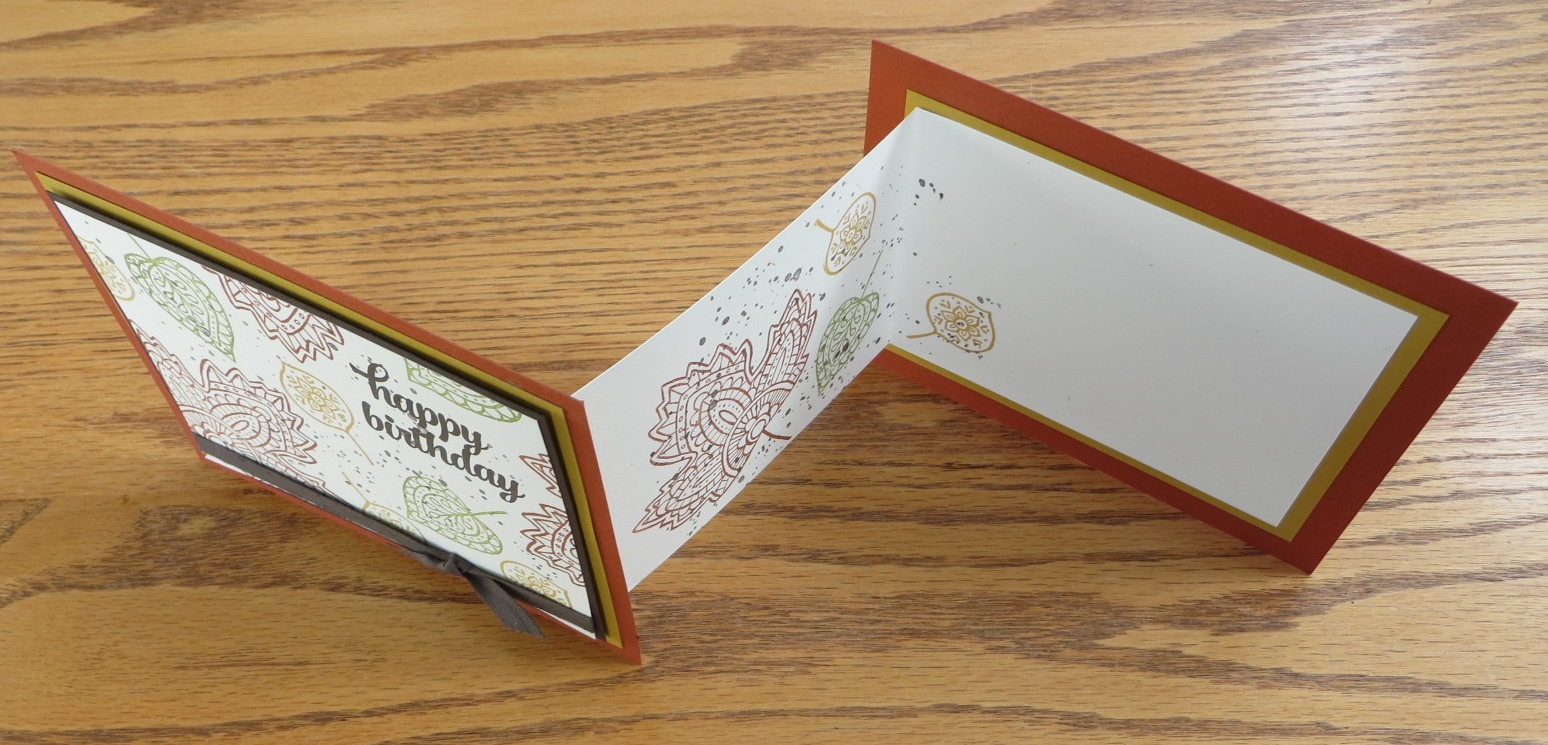 Here’s another picture of the card where you can see the “Z”. The key to making this card is to first attach the “Z” to the back piece of card stock. Then make your “Z”, place adhesive on the section that will attach to the front piece of the card. Then line up the front piece over the back piece, press down so that the “Z” adheres to the back of the front piece and your card is complete!
Be sure to let me know if you’d like more detailed instructions. I’d be happy to share.
I can’t wait to try this type of card in class some time. Maybe in my December All-Occasion class! 🙂
Have a great day! Take care and Happy Stamping!