Have You Made Your Wish List Yet?

Occasions_Toolkit-2_12.29.2015_USThere are only a few days left before you can order from the new Occasions Catalog.  Are you ready?

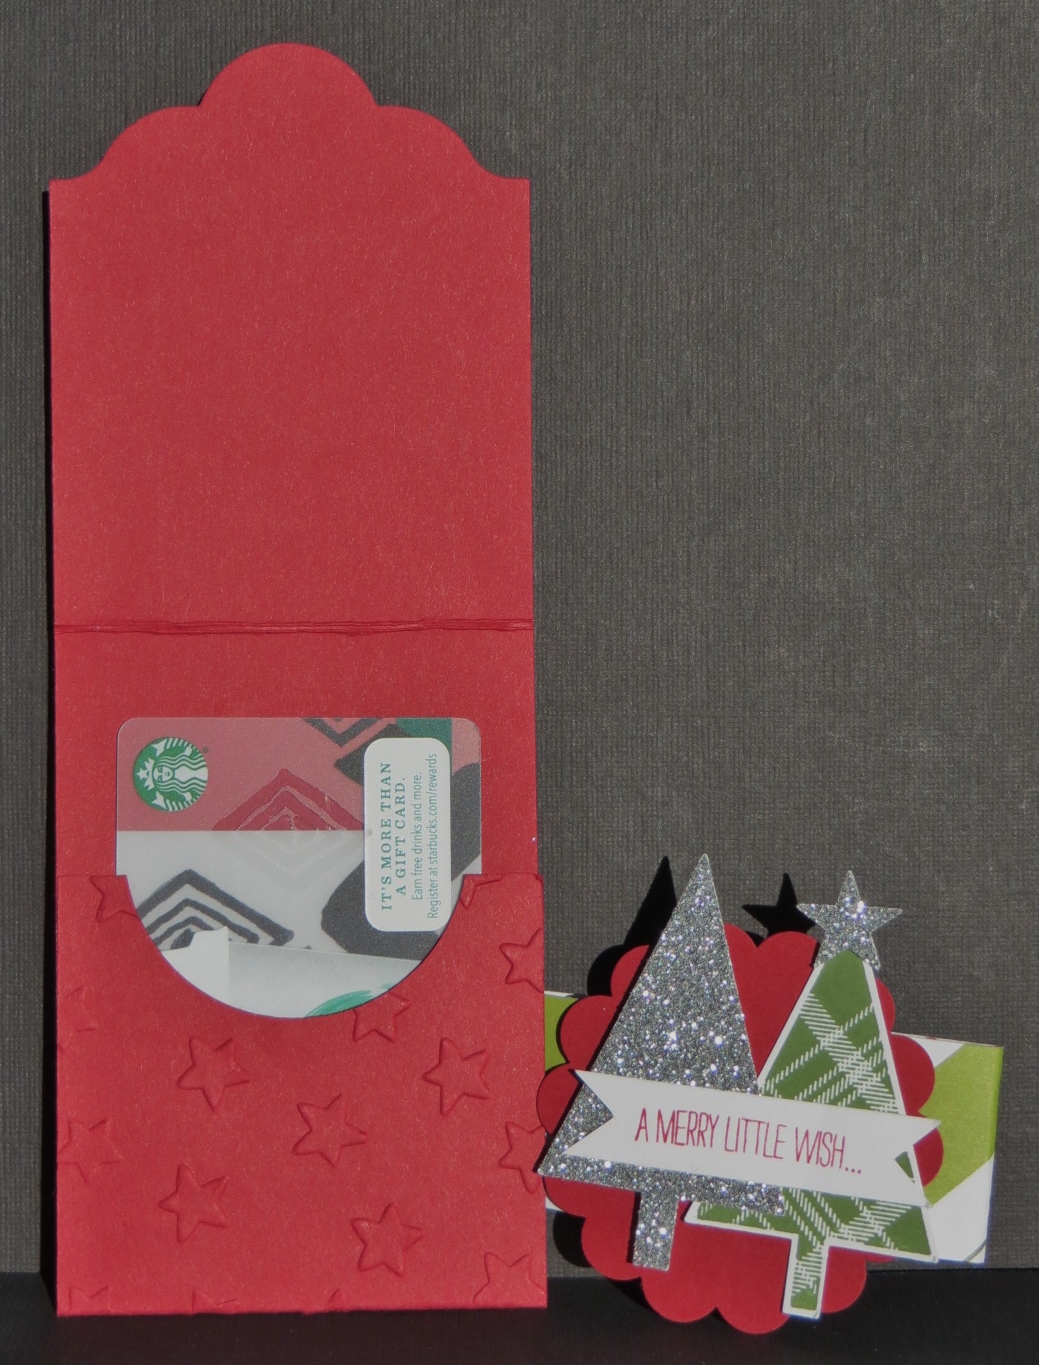
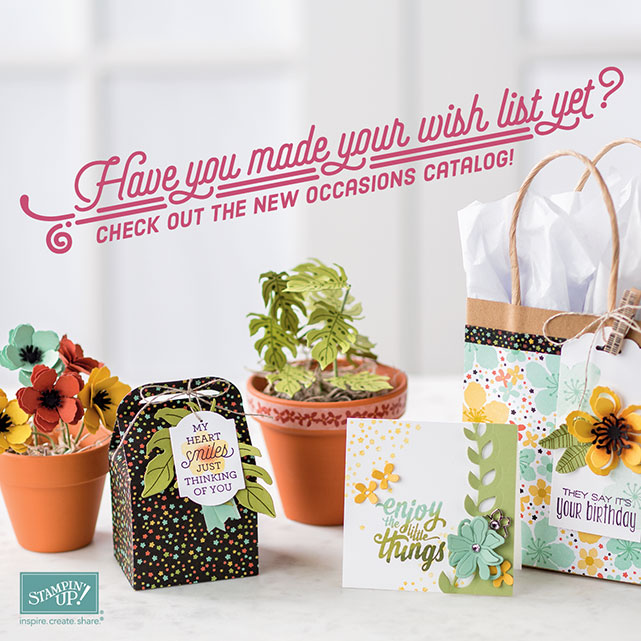
I hope you have your wish list in order.  If you’re like me you’re going to want just about EVERYTHING in it!  This catalog is fantastic!

The items pictured here are from one of my favorite suites (groupings) in the Occasions Catalog….the Botanical Gardens Suite.  There is a fun floral stamp set with COORDINATING framelits, washi tape, floral embellishments and gorgeous designer paper.  Wow!

You are definitely going to want to at least take a look at this gorgeous grouping of products.  I can’t wait to play with it some more.  I have designed a few projects using the items but there’s so much more I can do with it!

Get those wish lists started!  Remember that January 5th is also the start of Sale-a-bration!  During Sale-a-bration you get to choose a Sale-a-bration item for every $50 you spend!  It’s a stamper’s favorite time of the year.  Stay tuned for more information on some of the other fabulous benefits of Sale-a-bration.  You’re not going to want to miss out!

Happy New Year!  Take care and Happy Stamping!

Merry Christmas!

WonderlandFrame.1215Merry Christmas!  I know you’re thinking that you’ve seen this before…..you haven’t.  You’ve seen the card that gave me the inspiration for this but not this actual project.

I just had to smile when I finished this.  It turned out just like I had hoped and if I must say….it’s GORGEOUS!  Yep.  It’s simply stunning up close and personal.  The Gold Foil makes it shine and the Black Glimmer Paper makes it shimmer.  What more can you want for Christmas than shimmer and shine?  🙂

Don’t forget the Dazzling Details on the trees and the “snow bank”!   I make this for a gift but I’m definitely going to have to make one for myself now that I’ve seen the finished results.

If you’re thinking of recreating this gorgeous framed piece you’re going to want to place an order prior to January 5th to get the Black Glimmer Paper, the Wonderland stamp set and the 1/8″ Gold Ribbon.  All three of these items are going away with the end of the Holiday Catalog.  You can check out all of the items I used on this card (other than the frame) here.

Christmas Blessings!  I wish you all peace and happiness in 2016.  Take care!

Sneak Peek: Going Global

IMG_7466Here’s another sneak peek from Stampin’ Up!’s On Stage event.  This fun new stamp set is called Going Global and it’s perfect for those masculine cards.

We used three brand new products on this card.  We used the Going Global stamp set, The World Traveler Embossing Folder and the Going Places Designer Series Paper Stack.

The globe on the card is an image that we stamped directly on designer series paper for that fun multi-color look.   We made the background using the embossing folder but we didn’t emboss it!  We inked up the raised design, put our card stock in the folder, closed the folder and then gently rubbed with a little pressure over the enter folder.  A pretty fun techinique.

I don’t know about you but I’m feeling a little stressed today.  Too much to do, too little time.  Christmas Eve is tomorrow and I’m NOT ready!  I went to the grocery store last night after choir rehearsal (so I didn’t have to face the crowds today) and they were completely out of a number of items that I wanted.  That means that today I’m going to have to run to a number of other grocery stores to see if they might have what I need.  BUMMER!  Oh, well.

So here’s a funny story for you…..yesterday I got up, got ready and headed out to my hair appointment.  Well, I was a few minutes early and when Vanessa finished with the gal she was working on she comes out, looks me in the eye and says “Can you check your calendar, I think your appointment is tomorrow”.  I didn’t doubt her for a minute…..it doesn’t surprise me at all when I do things like that.  The funny thing was that the night before I had checked my calendar to make sure my appointment was at 9:30 and not 9 but I didn’t bother looking at what day the appointment was penciled in on.  In my defense, I usually go on Thursdays so this different day just kind of threw me off a little.  Ha!  Probably the worst part of this happening is that I hadn’t really “done” my hair before heading out since Vanessa would be making me beautiful soon.  Well, I still had errands to run so I had to do them with “un-done” hair.  Needless to say I felt a little weird but hey….no one probably cared but me!  🙂

Have a wonderful, stress-free day!  Take care and Happy Stamping!

Snow Place Treats

IMG_7016Tell me that this penguin isn’t adorable!  I dare you!  Ha!  TSC!  Too Stinkin’ Cute!

These little treat holders are made using the Ornate Tag Topper Punch.  They are the perfect size for Ghirardelli Minis.  I have the Peppermint Bark candies in my treat holders.  Perfect for the Christmas table.

Start with a piece of card stock that’s 2″ x 7 1/8″.  Score at 3 3/8″ and 3 5/8″.  Punch each end with the Ornate Tag Topper Punch.  Fold along the score lines, run card stock through the Big Shot, add your ribbon and decorate.  That’s it!  I used a Mini Glue Dot to hold the candy to the back of the treat holder.

You can decorate these any way you’d like for any occasion!  The snowman would have looked cute on these but like I mentioned yesterday, I’m rather partial to this little penguin.  🙂

Now that I have treat holders for the Christmas table I need to figure out what to make for Christmas dinner.  Actually, we’re heading over to the neighbor’s for dinner.  I’m bringing a potato dish and dessert.  Now I just need to peruse Pinterest and find the perfect recipes.   Maybe I’ll look for a festive cocktail recipe too….

Have a great day!  Take care and Happy Stamping!

Built for Free Using: My Stampin Blog

Fun and Simple Gift Wrap

IMG_7427Christmas is almost upon us so I guess it’s time to start thinking about wrapping presents.  I suppose many of you are completely done with this little chore.  Hmmm…

If you’re not done wrapping those gifts here’s a fun and simple idea for you.  Last week I went to a team Christmas party.  I had this pom pom trim on hand that I wanted to try and use.  This is what I came up with for wrapping my gift.  I had first wrapped the trim around the box going in both directions and then tried to tie a bow.  That DID NOT work.  Have your actually tried tying this stuff?  I finally just wrapped it in one direction and tied a cute little knot.  The red trim and the white box worked.  My job was done….except it needed an adorable tag.

IMG_7426You can’t get much more adorable than the little critters in the Snow Place stamp set!  Love it!  I’ll definitely be hanging on to this stamp set and the COORDINATING framelits.  Did you know that these two items are not retiring at the end of the Holiday Catalog?  Nope!  They’re among the “returning favorites” from the Holiday Catalog.  Yippee!

My favorite critter from the Snow Place stamp set is actually the stinkin’ cute penguin.  I have a fun project I made with him that I think I might just share with you tomorrow!  🙂

Have a great day!  Don’t get too stressed during these days leading up to Christmas!  Take care and Happy Stamping!


World of Dreams

IMG_7391This card is another from my last class of 2015.  It’s gorgeous if I do say so myself.  Of course I didn’t come up with the idea on my own.  I did change the card up quite a bit but the sponged “sunset” idea was copied.

Isn’t the “sunset” striking?  It’s made with ink and sponges.  Start with your lightest color.  Sponge it on your card stock until you get the desired depth of color.  Then move on to the next color.  Just remember to overlap the colors a little.  Easy-peasy!

On my card I added the required multiple layers and ribbon and it was complete!

This is another card that can really be used for any occasion but I think it would be perfect for a sympathy card.  You just never seem to have one of those on hand when you need one.

Have a great day!  Take care and Happy Stamping!

Get Well Soup

IMG_7387Well, it’s that time of year.  The time of colds, flue and all around yuck.  Luckily (knock on wood) no one in my family has gotten sick yet.

Since it’s “that time of year” it’s always good to have a few get well cards on hand.  This Get Well Soup stamp is perfect!  Isn’t it cute?  The hardest part of the card was figuring out the design.  I got this idea from my favorite source….Pinterest!

I didn’t want to color in the entire bowl so I stamped the image a second time on Crumb Cake card stock, cut out the front portion of the bowl and adhered it the image I had stamped on the Whisper White card stock.  Quite a creative idea if I do say so myself.  🙂

Unfortunately I had to use a retired product for the red heart.  Stampin’ Up! no longer has heart framelits but that’s what I used.  Oh, well….there’s a reason I don’t get rid of retired product!  Ha!

I’m hoping that I don’t have to use this card too soon.  Stay healthy, have a great weekend, take care and Happy Stamping!

Joyful Season

IMG_7384A beautiful and simple card.  This is a great card because it can be a Christmas card or a card for almost any occasion.  We actually made it this week in class.

I was suppose to have three classes this week, two on Tuesday and one on Wednesday.  Unfortunately the weather didn’t cooperate.  I knew I’d wake up to snow on Tuesday but I didn’t quite realize how much.  I got up early to shovel a little but the further along I got the more I realized no one would want to come out in this mess.  At 7:30 am we probably had 8″-10″ of snow already and it was still snowing.  We ended up with close to a foot of snow.  I did cancel both classes on Tuesday and had only 3 people show up on Wednesday.  That’s ok.  It really is a bit close to Christmas.

Christmas….YIKES!  It’s only a week away!  I’m not ready!!!!!

Back to the card…..I fell in love with this cardinal when I first saw it in the catalog but I wasn’t sure what to do with it.  I didn’t use it on any Christmas projects but I wanted to use it before it goes away on January 4th so I came up with this card.  I wanted something pretty easy.  I’ve figured out that my favorite 4 1/4″ x 4 1/4″ size works perfectly for easy!  🙂

A few fancy punches on the corners and this card goes from easy to WOW!  Did you notice that I used two of the punches on the Curvy Corner Trio Punch?  One on the Early Espresso piece and one on the white piece.  It’s becoming one of my favorite punches.

I think this card will be perfect for winter birthdays, thank you notes or almost any occasion.  OK…I have to ask….did anyone notice that I forgot to stamp the beak?  Yikes!  I did remedy that before class but never got another picture taken.  Oh, well….

Have a great day!  Take care and Happy Stamping!

Built for Free Using: My Stampin Blog

Lots of Joy Gift Card Holder

IMG_7379Another gift card holder!  I actually saw this gift card holder way back in July.  My friend Jan gave those in our group attending convention one of these.  Aren’t they cute?  All of the items used on it are from the main Idea Book and Catalog.

The adorable little plaid stamped tree is from the new Lots of Joy stamp set although you could use any of the tree images in the Festival of Trees stamp set which was originally found in last year’s Holiday Catalog.  The little sentiment is from Festival of Trees also.

This little gift card holder isn’t too difficult.  Start with a piece of card stock that’s 10″ x 2 3/4″.  Score it at 2 1/2″ IMG_7367and 6 1/2″.  After that you just fold and decorate.  Most of the decorating is on your belly band.  I love projects that aren’t too complicated.

Well, do you have all of your shopping done?  Nope, be neither.  I should be able to finish the out of town gifts tomorrow.  I do love Amazon Prime!  🙂  However I am still at a loss on what to get my husband and my younger son.  It doesn’t help that hubby has a birthday four days after Christmas.  Well, I have a little over a week, right?

Good luck with the rest of your holiday shopping!  Take care and Happy Stamping!

Built for Free Using: My Stampin Blog

Flurry of Wishes Gift Card Holder

IMG_7373Some people like giving gift cards, some people don’t.  Some people like receiving gift cards, some people don’t.

I kind of like giving and receiving gift cards.  At least with a gift card you can’t buy the wrong thing or get the gift in the wrong size or color.  The recipient can get exactly what they want.  As the recipient of a gift card I can get exactly what I want.  I especially love gift cards for e-books!

If you like to give gift cards then you really must have an attractive gift card holder, right?  I got the idea for this gift card holder online from another talented demonstrator.  I love when those talented stampers share their ideas!  🙂

IMG_7374This gift card holder starts with a Sketched Dot Tag a Bag.  Simple!  Just score and fold and you have two pockets.  One pocket for the gift card and one pocket for a little card to put your sentiment on.

To begin with, score your bag at 3″.  With the bag in front of you fold the bottom edge up along the score line.  You don’t need to use adhesive to adhere the bottom portion of the bag to the top to form your front pocket.  Your decorated belly band holds the bag together.

The sentiment card for the back pocket is 3 3/4″ x 4 1/4″.  I decorated the top corners of mine with the new Curvy Corner Trio Punch.  The other piece of card stock for the front pocket is 5 3/4″ x 4 1/4″.  Score at 3 3/8″ to from the pocket.  You will need to use adhesive on the edges of this to form the pocket.

This gift card holder is pretty quick and easy to make depending on how fancy you get with your belly band.  I’ll probably be making a few more before Christmas arrives!

Have a great day!  Take care and Happy Stamping!

Built for Free Using: My Stampin Blog

Sneak Peek: It’s My Party

IMG_7408At Stampin’ Up!’s recent On Stage events we got introduced to many of the new products in the upcoming Occasions Catalog.  Not only did we get to see them, we got to play with them.  We didn’t actually make full projects, we just made parts that we could use on our own projects.

On today’s project I made everything but the Melon Mambo card.  The rest of the design is with all new products from the It’s My Party Suite.  This suite of course includes all sorts of fun products for birthdays!

The It’s My Party designer paper is bright and fun!  The best thing about it is that it comes in a pack of 48 sheets.  4 sheets each of 12 different designs.  This is especially great for us demonstrators that hold classes and need lots of designer paper!  🙂

Did you notice the three fun new punches?  It’s a new little punch pack that of course COORDINATES with the Party Wishes stamp set!  You know me, I LOVE coordination.  One of the great things about these new little punches and the stamp set is that the stamped image is slighty larger than the punch so you won’t end up with the white edge around your punched image.  BRILLIANT!

I know you’re going to love the new Occasions Catalog.  If you’d like a copy of it be sure to contact me.  You’re not going to want to miss out!

Have a great day!  Take care and Happy Stamping!

Adorable Punch Art Santa Tag

IMG_7381My bank has a branch in one of the local grocery stores so I had stopped the other evening on the way to choir rehearsal to make a deposit.  After making my deposit I had walked by the bank again and Santa was there!  He was right there at the bank!  There weren’t any little kiddos around but all of the adults in the area were smiling.  It was quite a fun sight.  You just have to smile when you’re around Santa, right?  🙂

Well, this little Santa tag makes me smile too.  I received one as a swap while I was at the event in Dallas last month.  It uses about a gazillion punches but it’s pretty easy to make.  The fun part is making his beard and moustache out of the Bow Builder Punch.  Another creative person on the loose again.  I would never have made anything but a bow with Bow Builder Punch.  You?

You’ll definitely want a package of Mini Glue Dots around when you put this little tag together.  You use a ton of them!

Here’s a run-down of the uses for the different punches you’ll use on this card:

Bow Builder Punch: Moustache and Beard
Tree Punch: Hat
Word Window Punch: Hat Brim
Note Tag Punch: Tag, Face
Owl Builder Punch: Nose
¼” Handheld Punch: Eyes
Tree Builder Punch: Pom Pom on Hat

Have a great day!  Take care and Happy Stamping!

Built for Free Using: My Stampin Blog

Snow Place Tic Tac Holder

IMG_7017Last week or so I showed you a cute Tic Tac holder that was perfect for Thanksgiving and promised you more details on how to make it.  Well, here it is.

This is the holder we made at classes this week.  It’s really easy and everyone liked it.  As you can tell from my two posts on this little project you can change it up for any occasion.

For any Tic Tac holder for the regular size box of candies you want to start with a piece of card stock that is 3″ x 5 3/8″.  With a long side of the card stock at the top place your card stock in the Simply Scored (or your Stampin’ Trimmer) score at 1 3/4″, 2 1/2″, 4 1/4″and 5″.  Just crease well along the score lines and form your little box.

IMG_7020You can decorate your box however you’d like.  I used the adorable Snow Place stamp set and the COORDINATING Snow Friends Framelits on mine.

Fold the wide ribbon (12″) in half, slip the candies between the two sides and then tie a piece of baker’s twine (10″) around the ribbon.  Now just slip the box of candies, ribbon and all, in the box.  That’s it!  An adorable and easy treat holder for those holiday parties or dinner favors!

Have a great day!  Take care and Happy Stamping!

Built for Free Using: My Stampin Blog

Classy Bottle Tag

IMG_7362Did you notice how I didn’t say Classy WINE Bottle Tag in the title?  That’s because this project can be so much more!  You can use it for any type of bottle.  How about fancy home-made flavored oils?  Yep.  There are many types of bottles out there so don’t be limited .

I had to use the word classy just because of the fancy black and gold color scheme.  Isn’t it sharp looking?  This was one of those projects that when I finished it I just sat back and smiled.  It made me happy that it turned out so well!

I started with the Gold Foil sheet then decorated it with the fabulous Winter Wonderland Vellum and some Basic Black card stock.  The vellum is GORGEOUS!  Of course with vellum you have to figure out how to adhere it so that the glue doesn’t show.  Well…I had a brain storm!  🙂

I first adhered my Candy Dots to the vellum with Mini Glue Dots to make sure they didn’t come off.  Then on the back side of the vellum I used a dot of the Fine Tip Glue Pen behind each Candy Dot to adhere the vellum to the card stock.

If you don’t want your bottle tag to be holiday related you could always use the “cheers” or the “thanks” from the Greetings Thinlits.

Such a cute project.  Now I just need to figure out who might need a bottle of wine or flavored oil so that I can give one of these great tags away!

Have a great day!  Take care and Happy Stamping!

Built for Free Using: My Stampin Blog

Fabulous Advent Calendar Tree

IMG_7308Hello on this first day of December!  Who all has some type of Advent Calendar in their home?  I have one that I made a few years ago when Stampin’ Up! had an Advent Calendar stamp set.  I guess I’ll have to share that with you soon.  This Advent Calendar tree is one that I WANT to make.  I know it won’t get done for this year seeing as this is the first day of December but maybe next year…..

One of the gals at the Dallas event had made this and shared it with us?  Isn’t it great?  It’s a wooden tree frame with Stampin’ Up!’s little clothes pins attached to it to hold the muslin bags on.  Too clever!  That way you can easily remove the muslin bag to take out the day’s treat!

IMG_7309This second picture is of the back of the tree and you can see how easy it would be to make.  I imagine I could probably do it myself but why bother when you have a husband who is quite handy with tools……just sayin’!

I’m sure you’re now wondering how the adorable little bags were decorated.  Well, the designer used the Hello December 2015 Project Life Card Collection!  Project Life isn’t just for scrapbooks!  How simple is that?!!!  Just punch/die cut some circles, adhere them together and you have your date for the muslin bag!  Clever, clever, clever!  I can’t say it enough.  You can see a close up of the bag tags in the last photo.

IMG_7308 (2)Now I’m getting all excited again about this project!  Hmmm….can I get it done by Christmas?  OK…it’s not really going to happen but I’ll definitely let you know if it does!  Have a great day!  Take care and Happy Stamping!