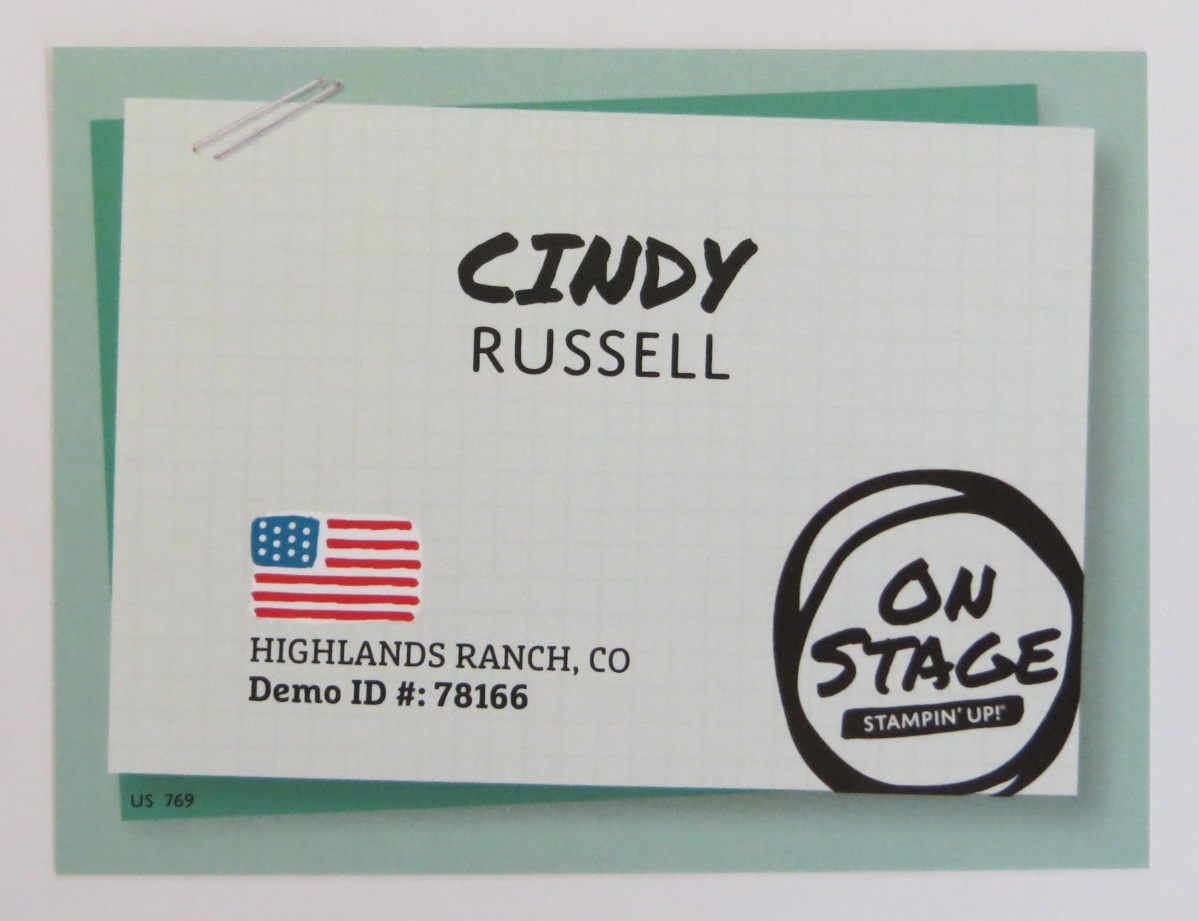
Look what came in the mail yesterday! I received my name tag for Stampin’ Up!’s upcoming On Stage event! Woo Hoo!
The On Stage event is what used to be convention. They’ve changed the name as well as the timing of their events. The event I’ll be attending in about a week and a half is a multiple day event. It starts on Thursday afternoon and ends at noon on Saturday.
There will be demonstrations on stage, classes, swapping and best of all….we’ll be able to get our little hands on the new catalog coming out June 1st! Woo Hoo! I won’t be able to share it with you until June but I can tell you about it and how fabulous it is. 🙂
I really look forward to these events. I get to get away for a few days and hang out with my peeps! We always have a great time. Maybe you’d like to join us for the next event…..just join my team! 🙂
Have a wonderful day! Take care and Happy Stamping!
What a perfect card for Colorado! You can count on sunshine here almost any day of the year. It’s great! Sure we can get snow into May but most days you can count on sunshine. 🙂
Doesn’t this card just make you smile? With the bright yellow and the sunburst how can you not at least have a little grin on your face?
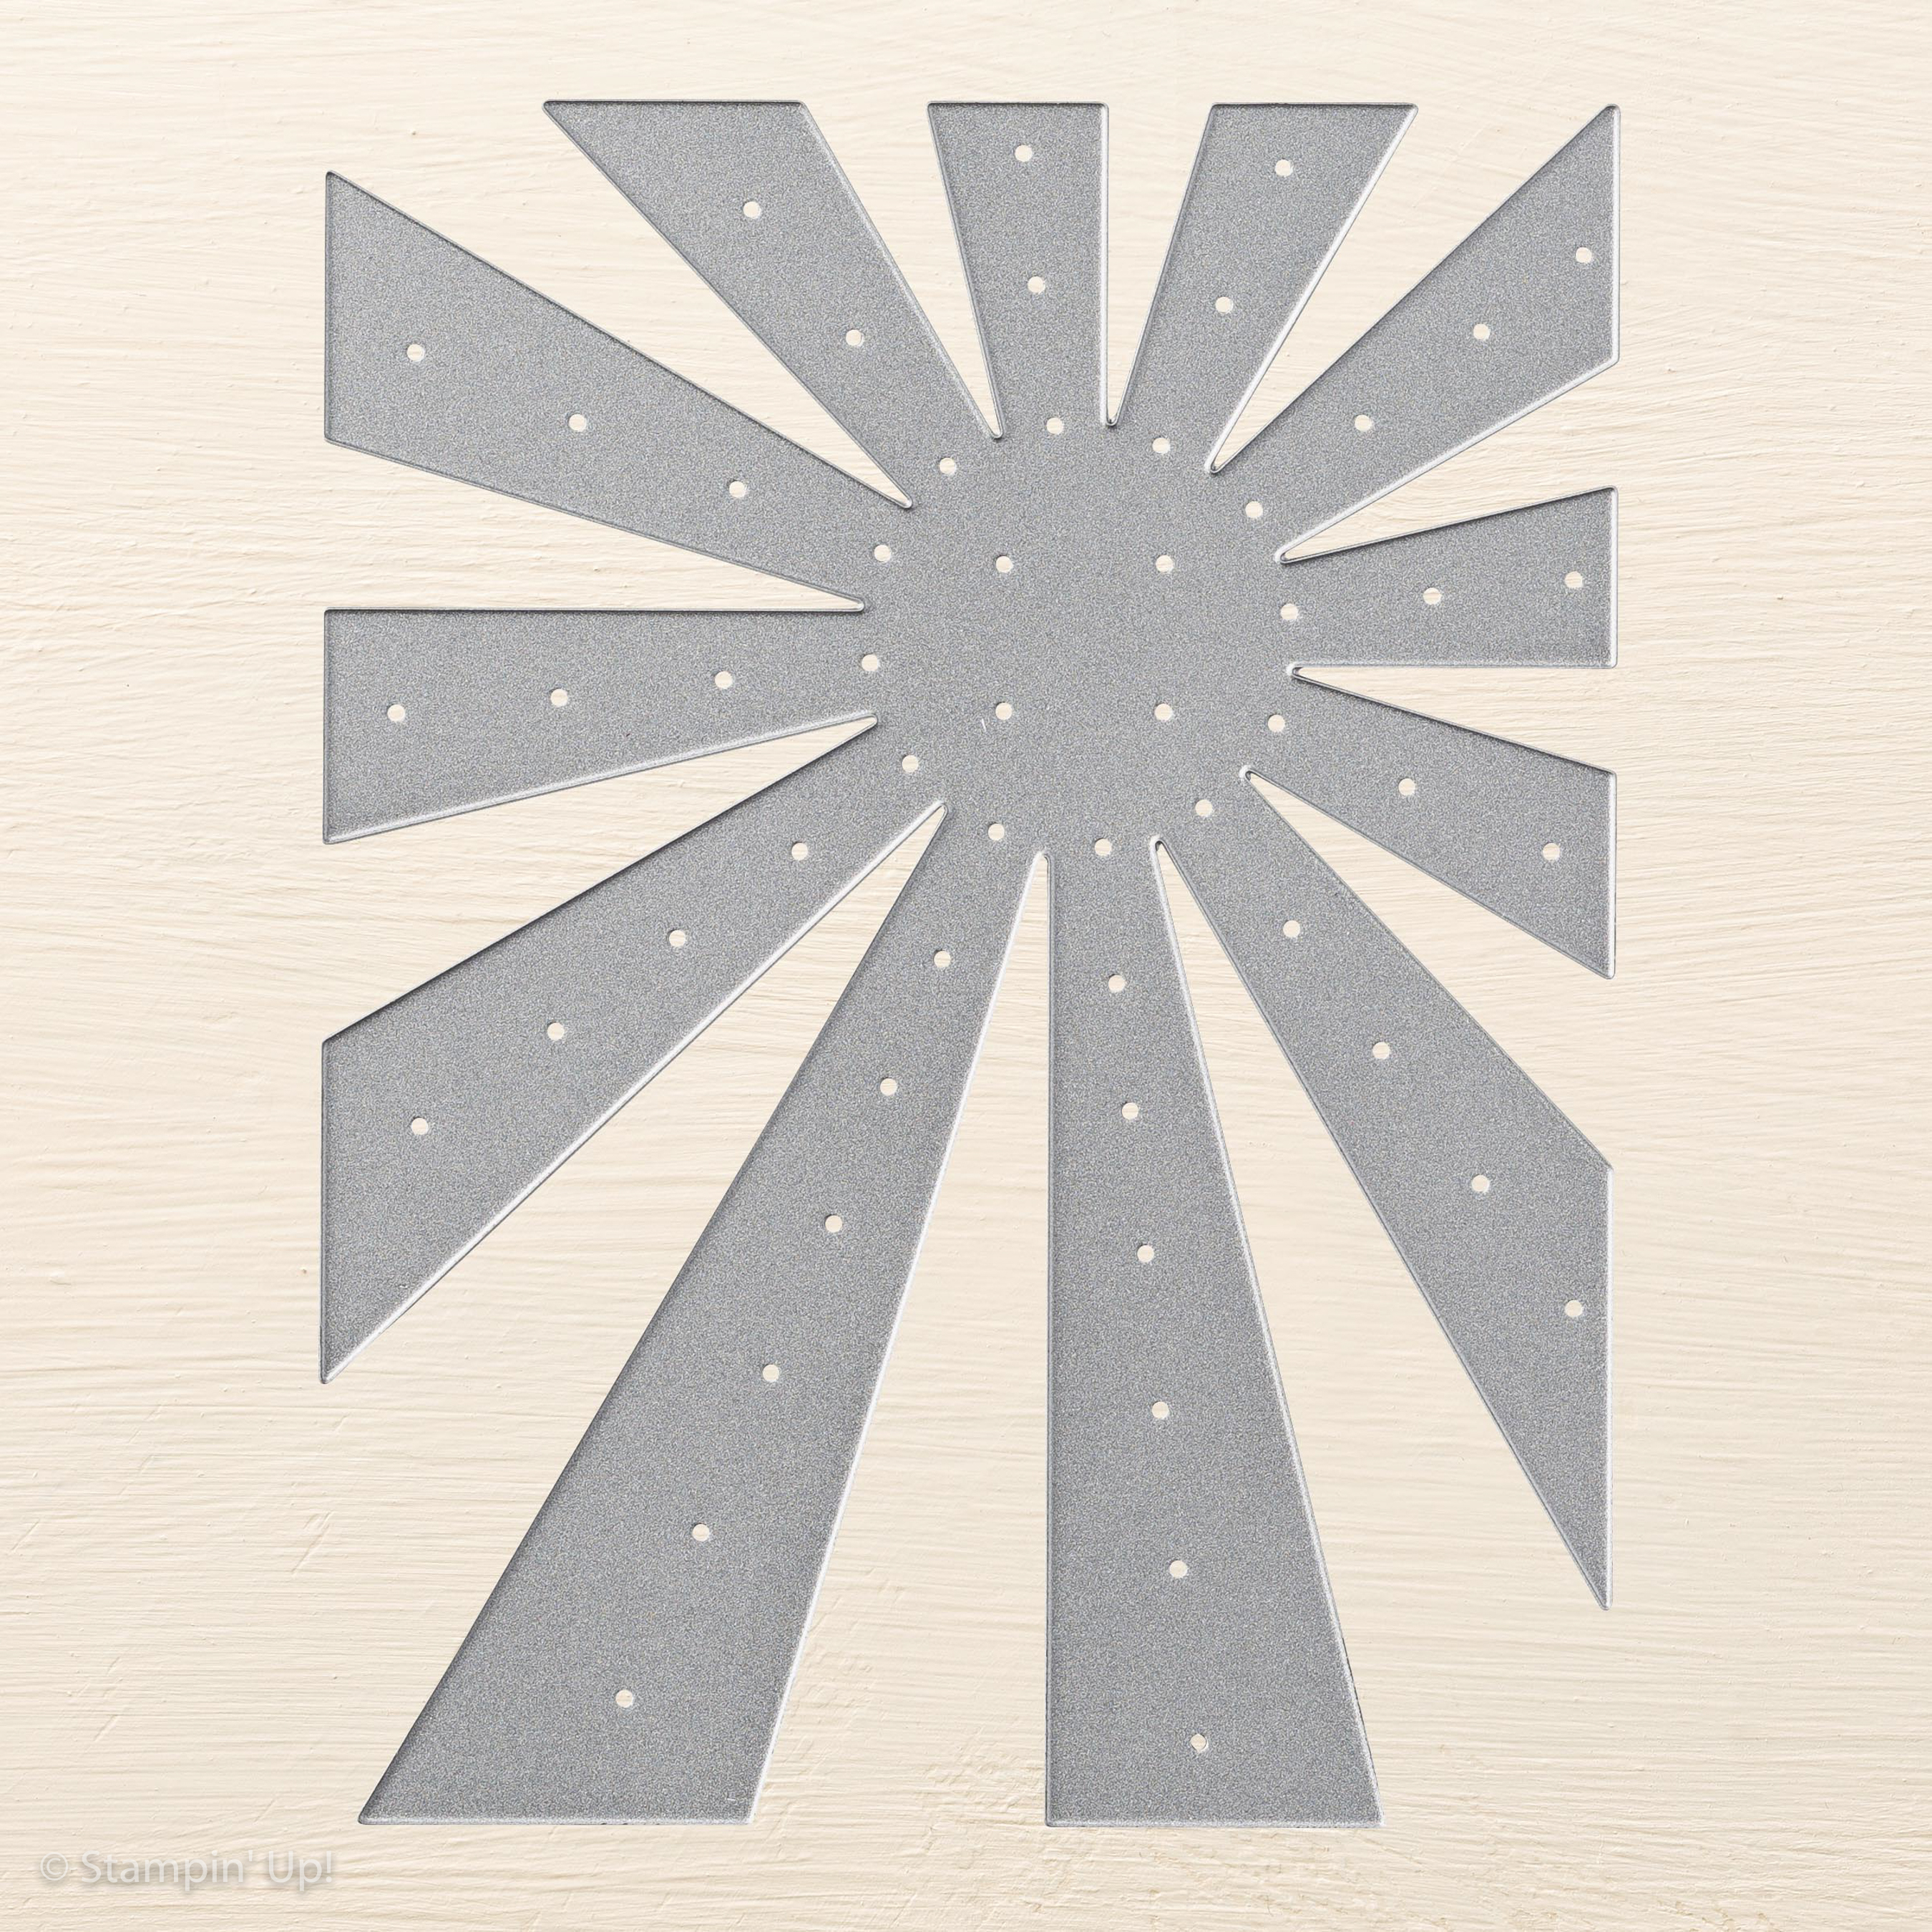
If you’re wondering how I made a perfect sun like this let me share my secret….the Sunburst Thinlit! Yep! I just die cut the sunburst design and then I center my Circle Framelit around the solid part of the Sunburst Thinlit to make my sun. Pretty tricky, eh? (I’m showing my Minnesota roots with that comment!)
As you can see I’m using my favorite new accessory…the Candy Dots again. They’re just so fun! The only problem I have with them is when I want to use them in a class. You only get 10 of each color in a package so if I have 10 people at class I need 4 packages of Candy Dots and then I have all of the other colors left over. Maybe I need to plan a class around a package of Candy Dots so each person gets their own package….hmmm……
I’m all prepped for my classes next week and have got a good start on my swaps. Hopefully I can get a lot more done today. Wish me luck! Have a great day! Take care and Happy Stamping!
Happy April Fool’s Day! No pranks from this girl. It’s just too much work to come up with something creative. Ha!
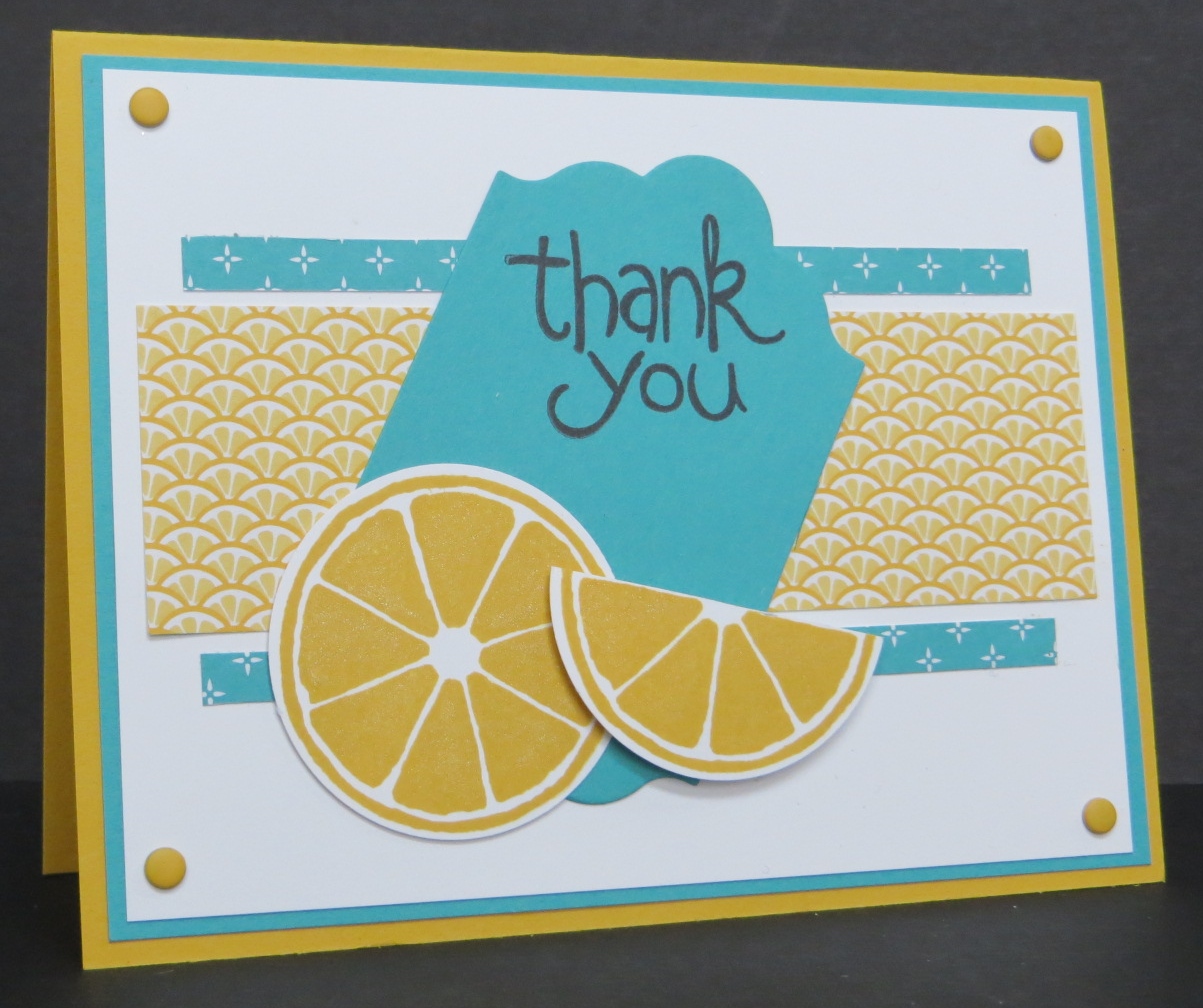
I’d rather use my creativity designing a card or in the case of today’s card, copying someone else’s creativity! I think on this card I only added a layer or two and the candy dots in the corners.
Yes, I’m liking the candy dots. They work really well for filling in white space which you know I have a problem with. I always use a little tiny drop of liquid glue under my candy dots to make sure they stick. They have adhesive on the back of them but they don’t always stick.
You can’t tell from the picture but I used my Clear Wink of Stella Glitter Brush to add a little sparkle to the lemons. It really made a difference on the card. Have you used the Wink of Stella brushes yet? They’re great and fun to use.
I have a busy stamping weekend ahead of me. I need to finish prepping for next week’s Stamp-a-Stack classes as well as work on my swaps for convention in a few weeks. I also need to start thinking about the stamp camp my team is putting on right after convention. Yikes! I better get busy! What’s on your schedule? Anything fun?
Thank you! Thank you! Thank you! We never say this enough do we? I am blessed and have so much to be thankful for including all of you!
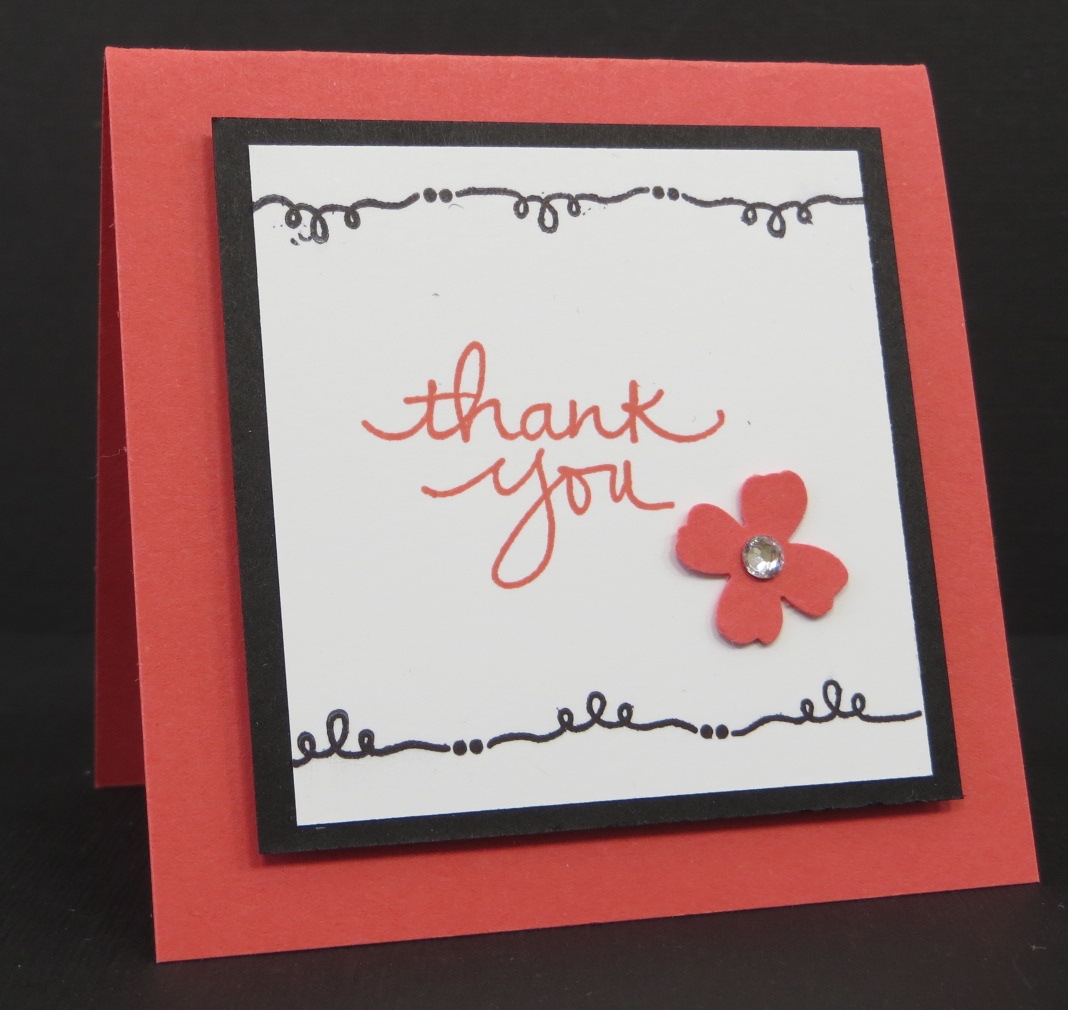
This little 3″ x 3″ note is one that I recently enclosed with my customer’s orders. I try to enclose a note whenever they place an order.
This little note includes a few of by new favorite things. Ok…they “things” aren’t that new but they’re new as my favorites. 🙂
I’m in love with the font in the Endless Thanks stamp set. There’s just something about it. I’m also in love with the Watermelon Wonder color. I don’t think it will actually take over Melon Mambo as my absolute favorite Stampin’ Up! color but it comes close. What is your favorite Stampin’ Up! color?
Speaking of colors….don’t forget that the 2014-2016 In-Colors will be leaving us at the end of May. Now is the time to stock up on these colors (especially the ink refills!) before the Retired List comes out. Don’t miss out!
Have you checked out Sale-a-bration’s Metallics Glitter Tape yet? If not, you better hurry….it’s only available for a few more day!
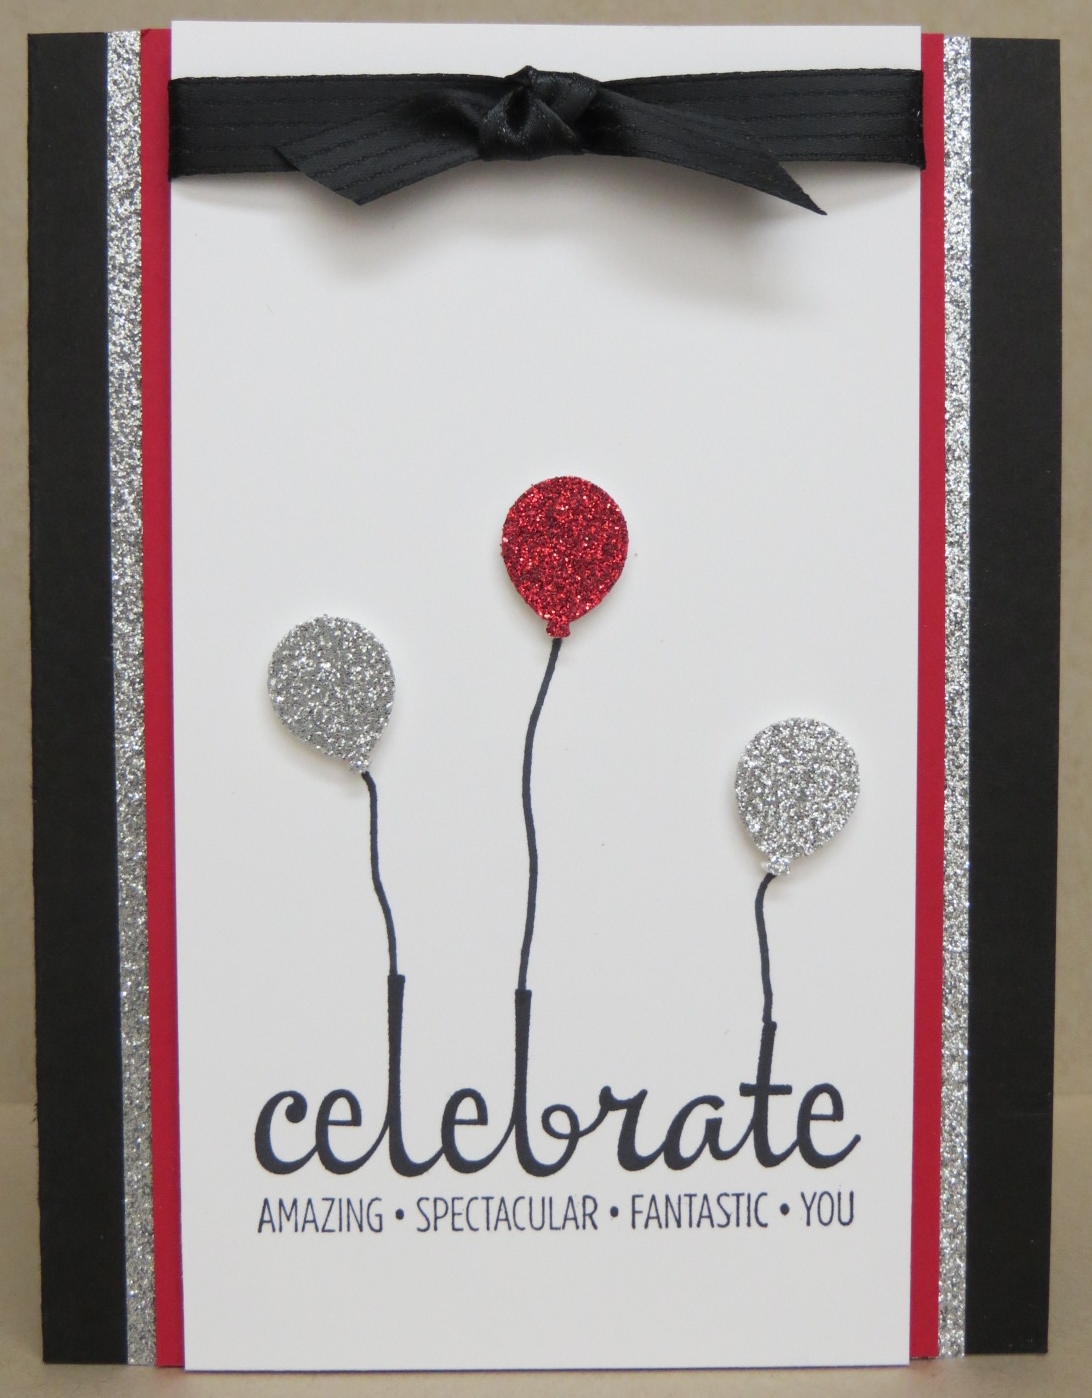
The Metallics Glitter Tape comes in Gold, Silver and White and you get a roll of each when you choose it for your FREE Sale-a-bration item. The fun thing about the white glitter tape is that you can actually color it! Check out the video below to see how easy it is to do!
I used the Silver Glitter Tape on my card. I used it for the silver strips on the either side of the Real Red card stock and I used it for the silver balloons. For the balloons I first adhered a strip of tape to a piece of Whisper White card stock and then punched out the balloon with the Party Punch Pack balloon punch.
Let’s celebrate! Sale-a-bration is almost over. Don’t miss out!
It’s almost over! Oh no!!! There’s only a few days left of Sale-a-bration! Have you placed your order yet? Don’t miss out!
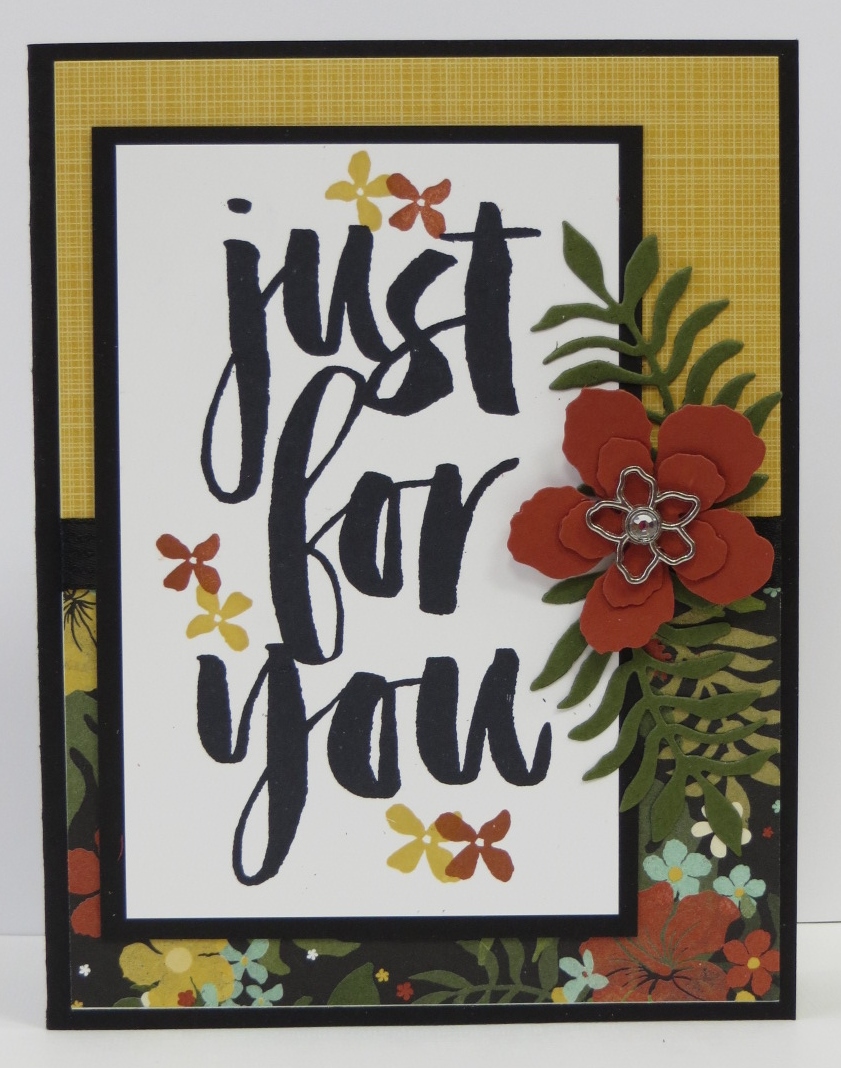
Today’s card is made using one of the Sale-a-bration stamp sets Botanicals for You. I love the font on this stamp. Isn’t it nice? This stamp set is great because not only does it coordinate with the Sale-a-bration item Botanical Gardens Designer Vellum Stack but it also coordinates with the entire Botanical Gardens Suite in the Occasions Catalog.
The Botanical Gardens Suite in the Occasions Catalog has to be one of my favorite suites in the entire catalog. The suite contains the stamp set, framelits, designer paper, jewels and washi tape. Everything COORDINATES! Woo Hoo! You know how much I love that word! 🙂
The designer paper is GORGEOUS and you can make so many different types of flowers with the framelits. You can see the entire suite on pages 26-27 of the Occasions Catalog.
Don’t forget to place that Sale-a-bration order! You don’t want to miss out. Shop now!
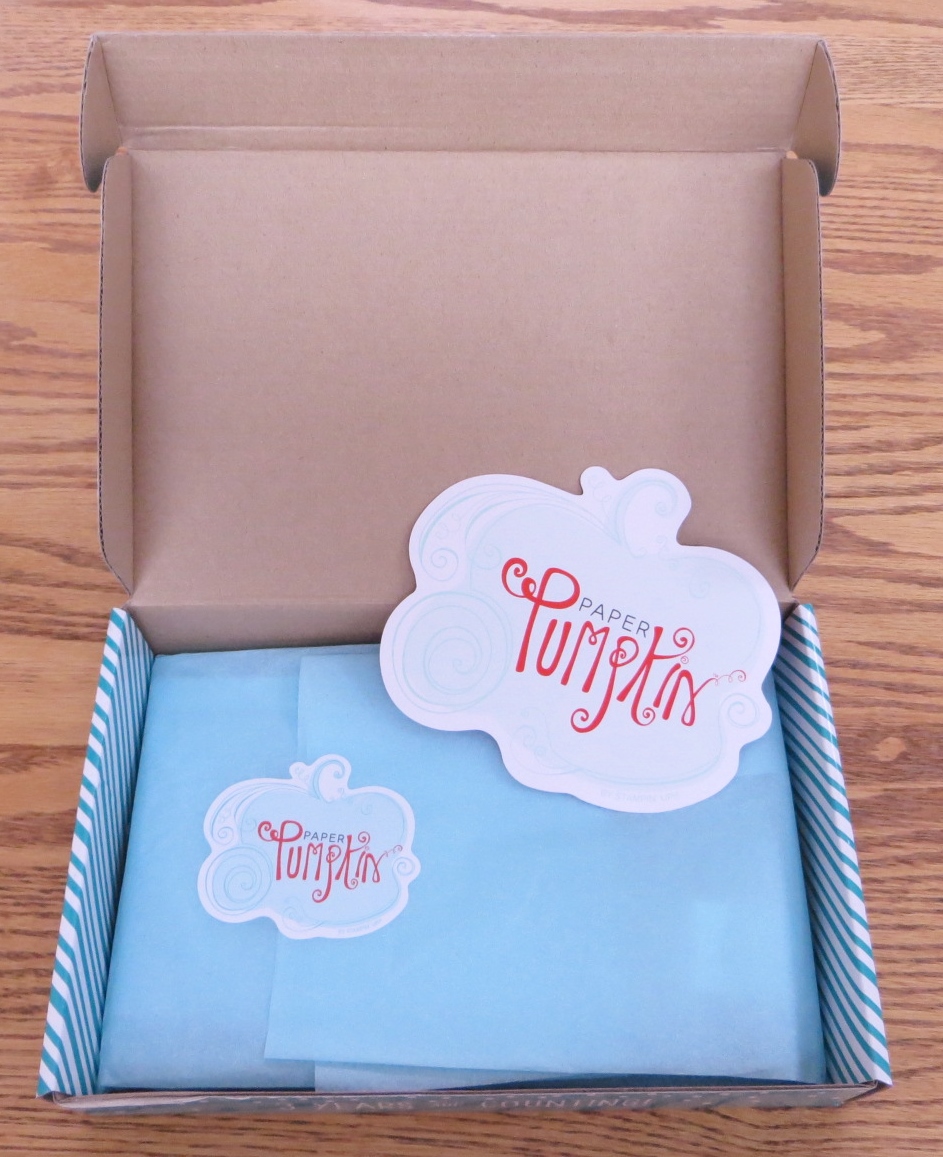
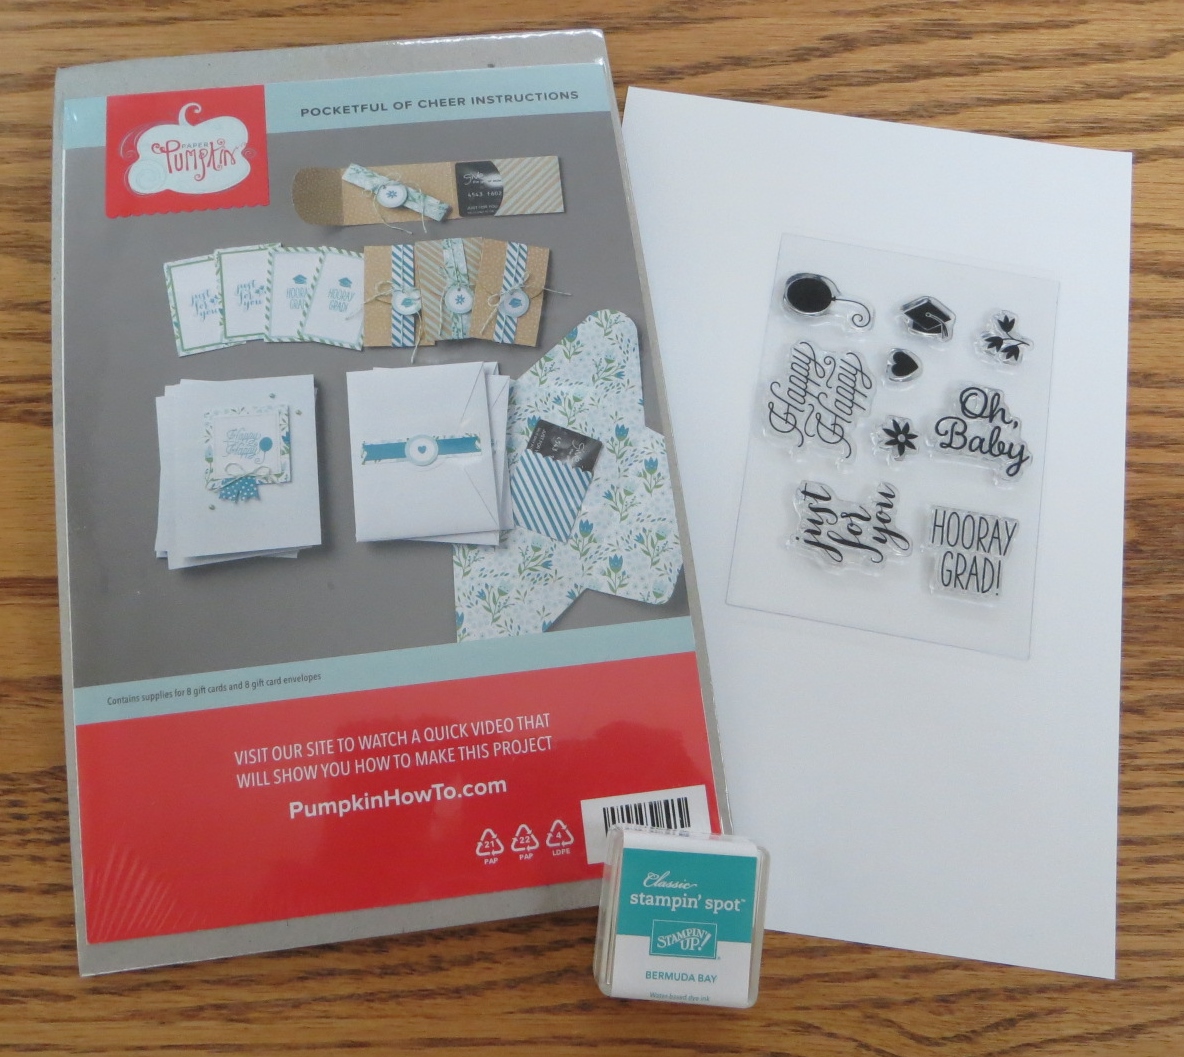
I received my March Paper Pumpkin Kit the other day! Woo Hoo! These kits are so fun and easy to make!
In the second picture to see everything that comes in your monthly kit. You get a set of instructions (with photos), all of the pieces and parts needed for your projects including glue dots and adhesive strips, a mini stamp set and an ink spot (sometimes two!).
This month’s kit was called “Pocketful of Cheer” because you make 8 cards and gift card holders. Too cute! As I was working on this month’s kit I realized that one of the things that I really like about Paper Pumpkin is the fun color combinations that you find. This month’s kit used Bermuda Bay and Cucumber Crush together. I don’t think I would have come up with that combination on my own but I love it! I’m definitely going to have to try it on some of my own projects!
These kits keep getting better and better. I liked last month’s kit so much that I ordered 3 refills so I could make more! Yep….as a Paper Pumpkin subscriber you can order refill kits for many of the kits! These refill kits and sometimes extra kits are only available to current subscribers.
Check out this month’s video to see how easy it is to make a project.
Paper Pumpkin just celebrated their 3rd Birthday and they just sent out their 1,000,000th kit! Wow! To help celebrate they are including an exclusive stamp set in the April kits. Woo Hoo! Subscribe to Paper Pumpkin by April 10th to make sure you receive your April kit as well as the exclusive stamp set.
There are two different ways to subscribe to Paper Pumpkin. You can either purchase a prepaid subscription or a month-to-month subscription. Check out both methods here. Sale-a-bration is almost over but you can not until March 31st. Give Paper Pumpkin a try with a 3 month subscription for only $55 AND choose a FREE Sale-a-bration item. It’s win-win! 🙂
I hope you consider Paper Pumpkin. I think you’ll enjoy it. I do! Have a great day! Take care and Happy Stamping!
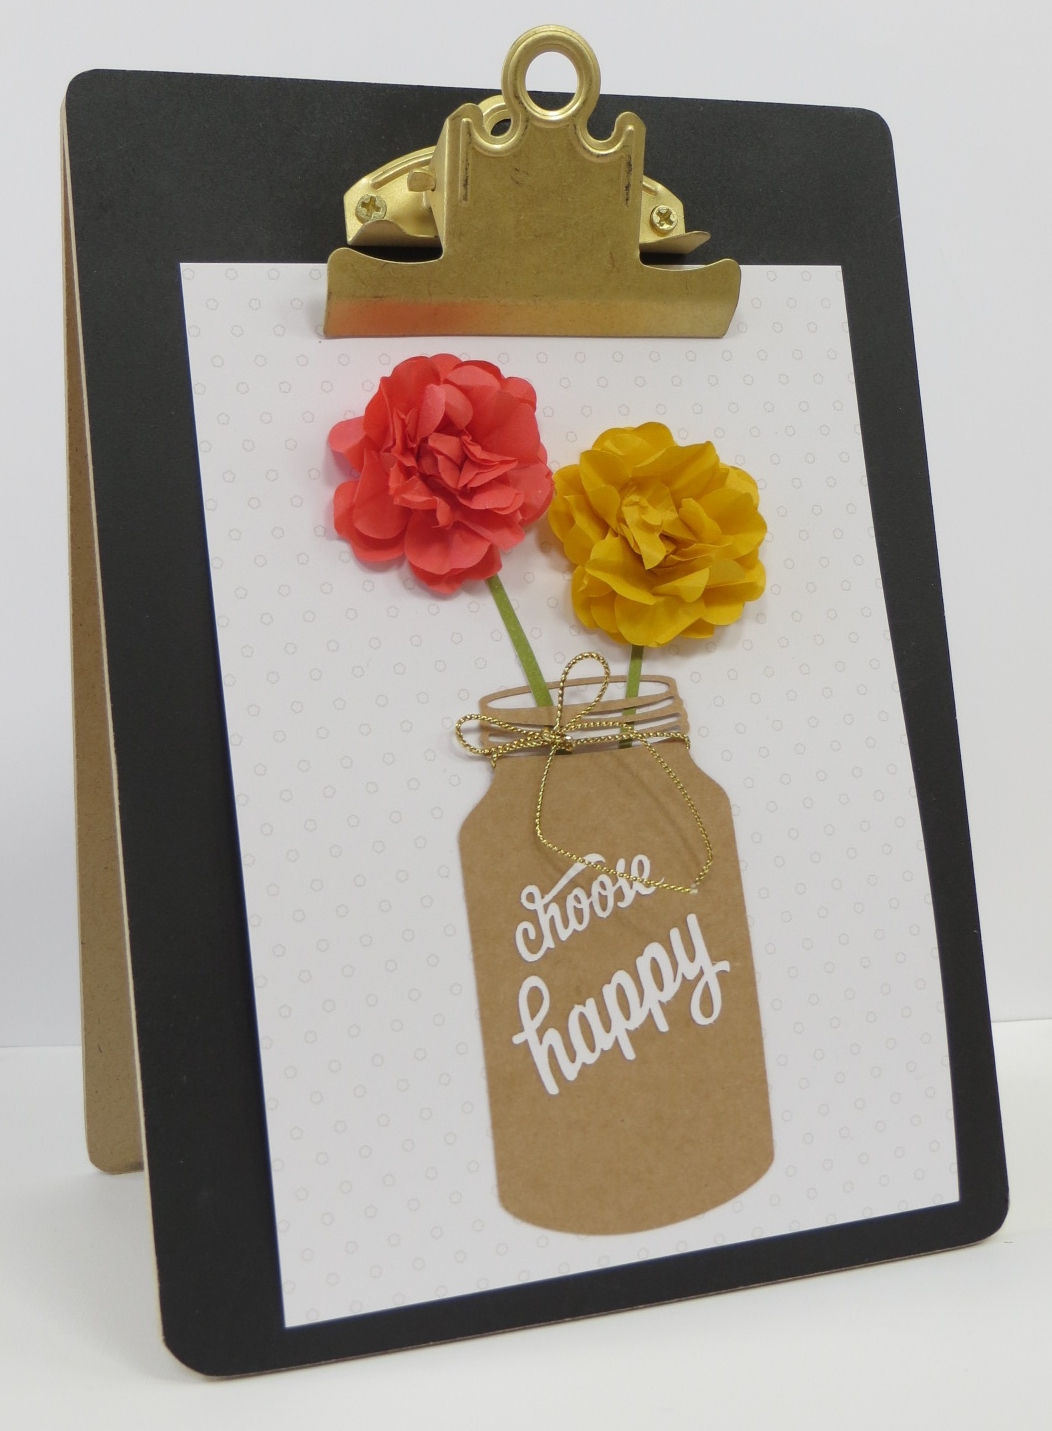
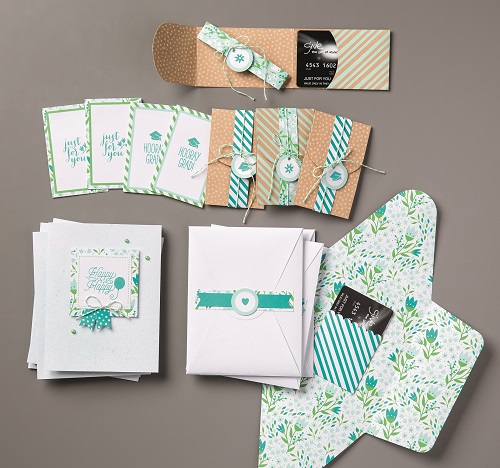
Have you checked out this kit in the Occasions Catalog (pg. 33) yet? You really need to. I had purchased it way back in January and of course it just sat around in my craft room for the longest time. I finally decided to put it together during classes last week and I am so glad I did! It’s so fun!
The “cards” are easy to make and quite fun. In the kit you get the little clip board easel and all of the paper products and accessories to make the “cards”. You do need the Enjoy the Little Things stamp set (#140958 $17) as well as all of the inks and your own adhesive. That’s why it’s the perfect project to make in a class with your demonstrator. (My class is in May!)
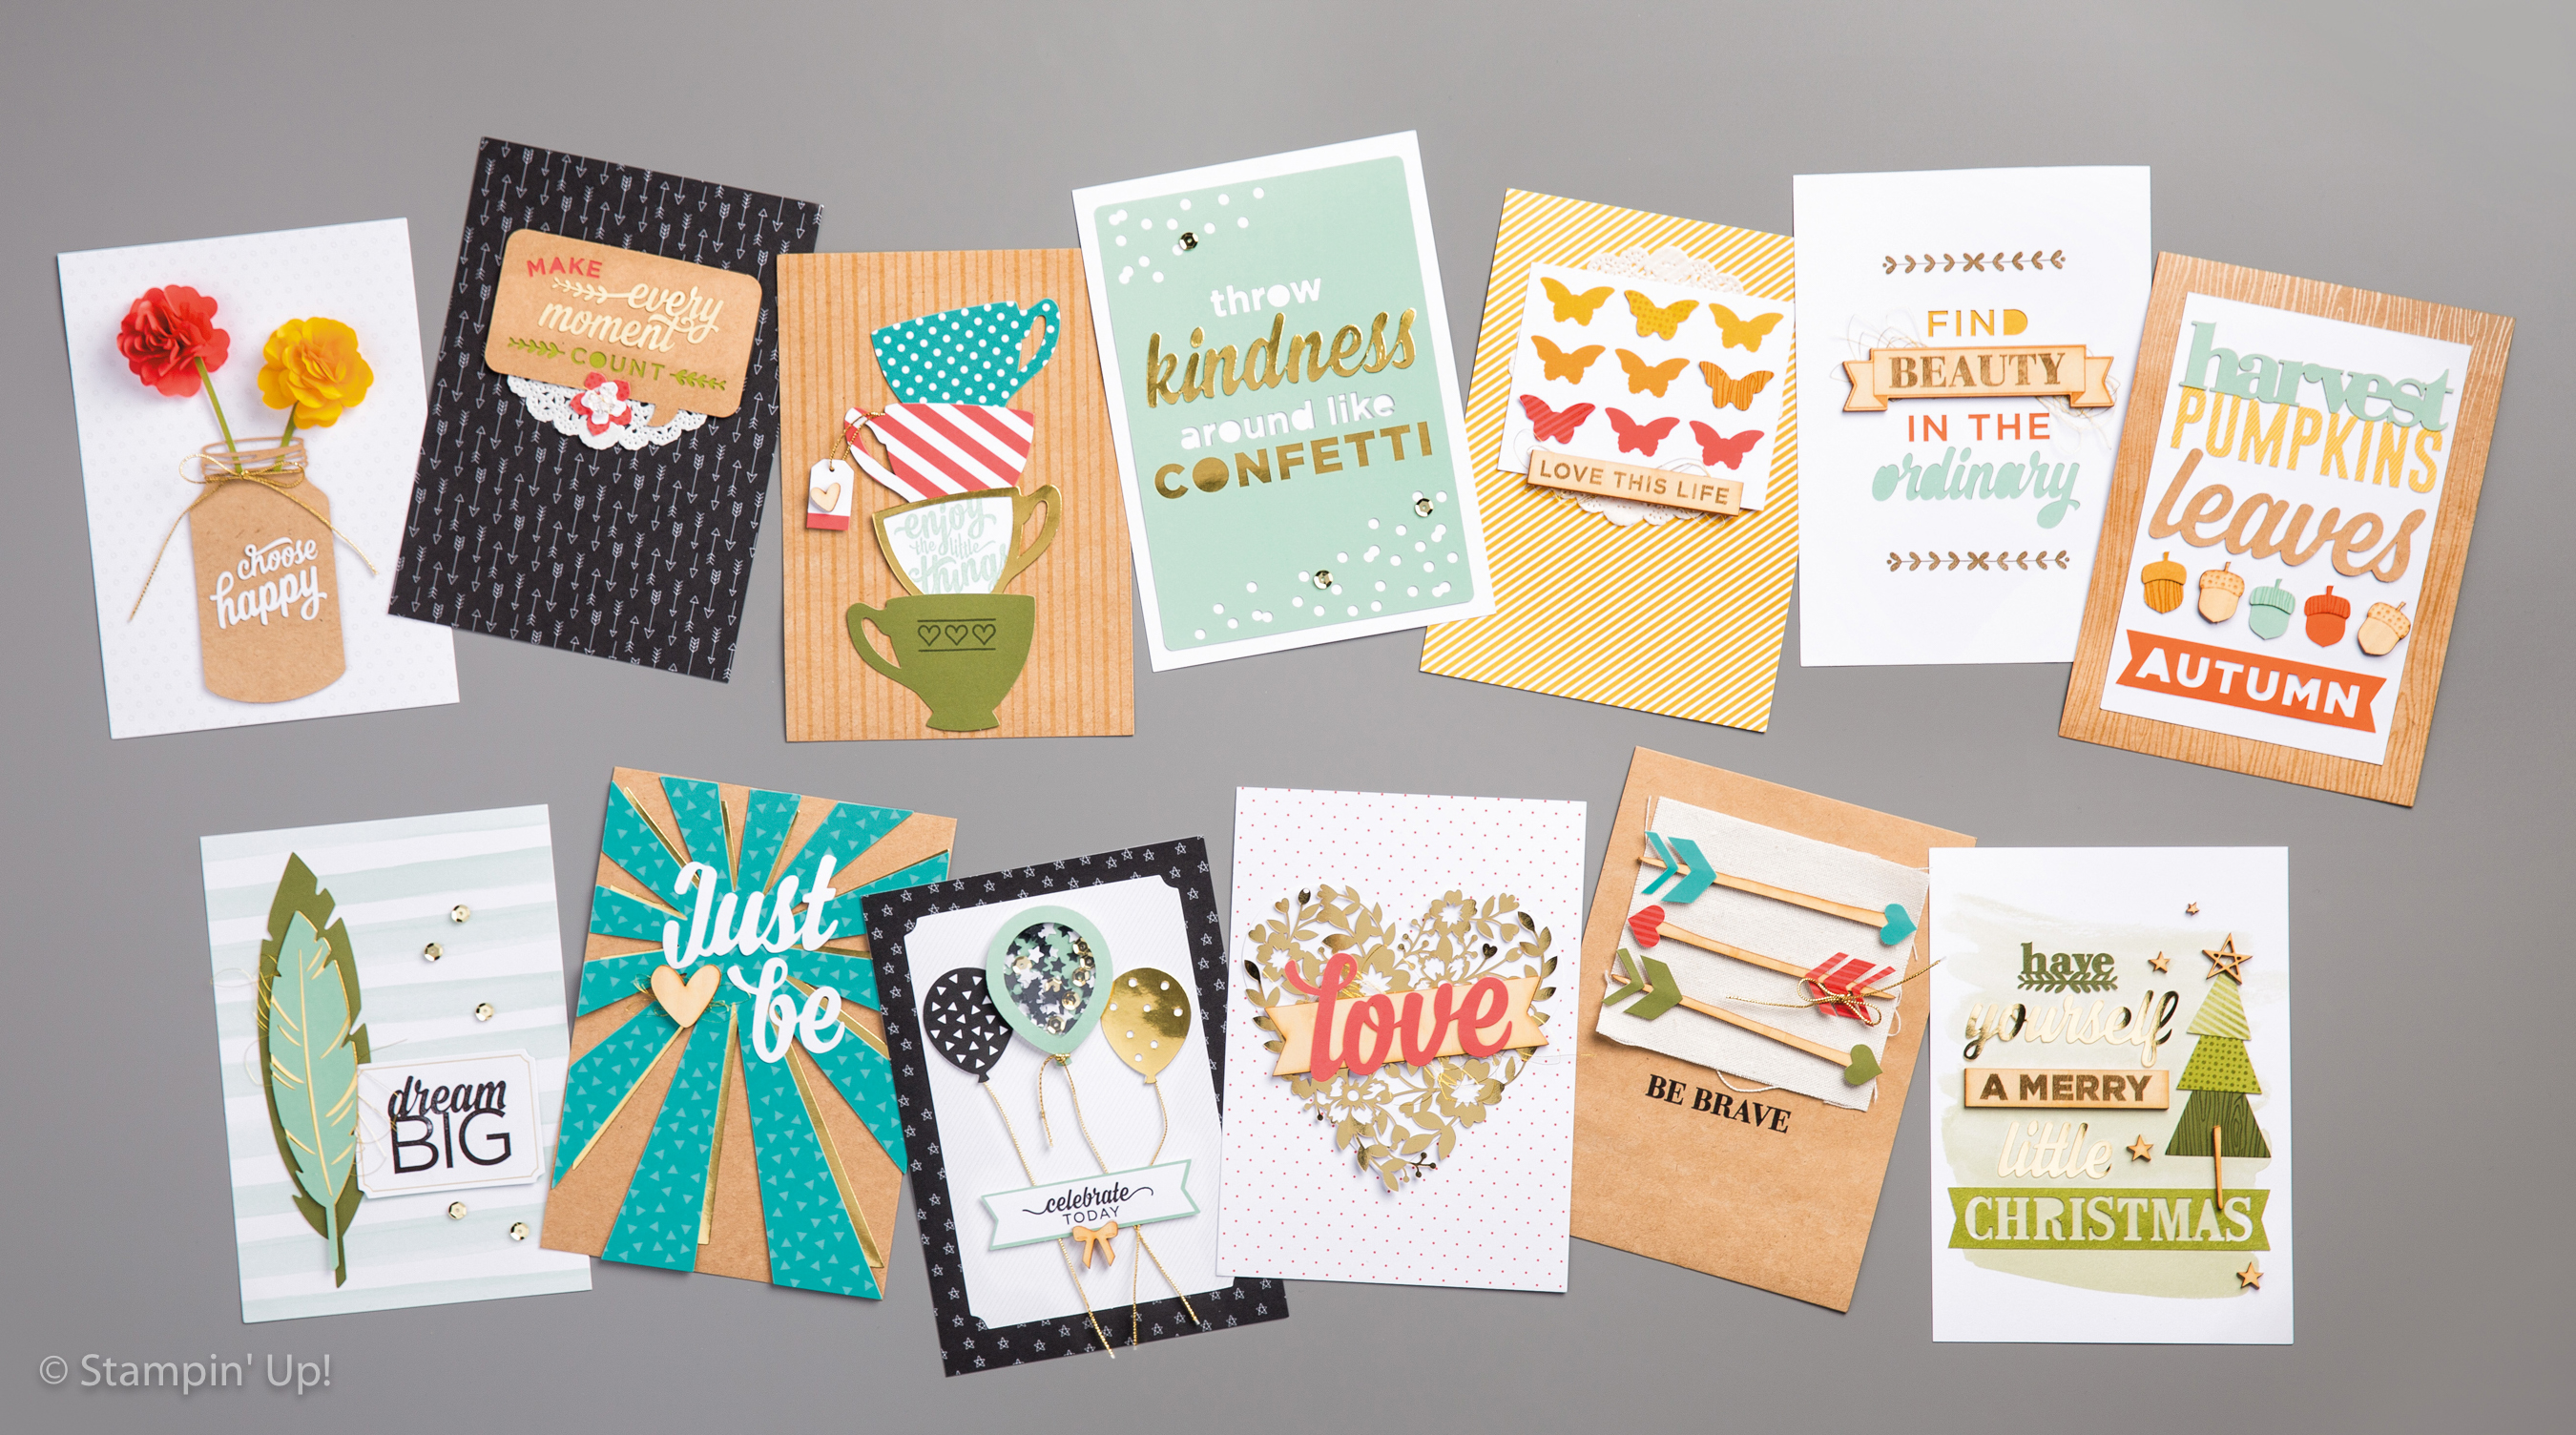
In the second picture here you can see all 13 of the cute “cards” that you make with the kit.
One of the great things about the kit is that all of the die-cut pieces are number by which card they go on (see instruction sheet). This really made it easy to put things together. I did take the organization one step further. Before I started I placed all the pieces and parts for each card in their own cello bag. That way I wasn’t shuffling through all the pieces every time I was looking for a specific one. OK….I started the process with the shuffling and the got fed up with it so I organized into the cello bags. Once I did that putting the pieces together was EASY! There’s a color picture of each “card” in the directions so you just have to copy what you see! There are simple written instructions for each card too.
Check out Stampin’ Up!’s video to see how easy it really is!
I would really recommend getting this kit. It’s so fun and cute! I can’t wait to come up with some of my own “cards” to add to the mix!
There’s nothing like a spring blizzard! We had over 12″ of heavy wet snow yesterday along with wind and white-out conditions. The airport was closed and the highways into and out of Denver were closed. I’m really glad I had no where to go but my warm and cozy craft room!
I didn’t actually do much crafting but that’s where I hung out. I did a little computer work along with some reading. I had to start rereading Dragonfly in Amber by Diana Gabaldon. I need to get ready for the second season of Outlander! If you haven’t read Diana’s Outlander Series you really need to. They’re fantastic! The series on Starz is great too.
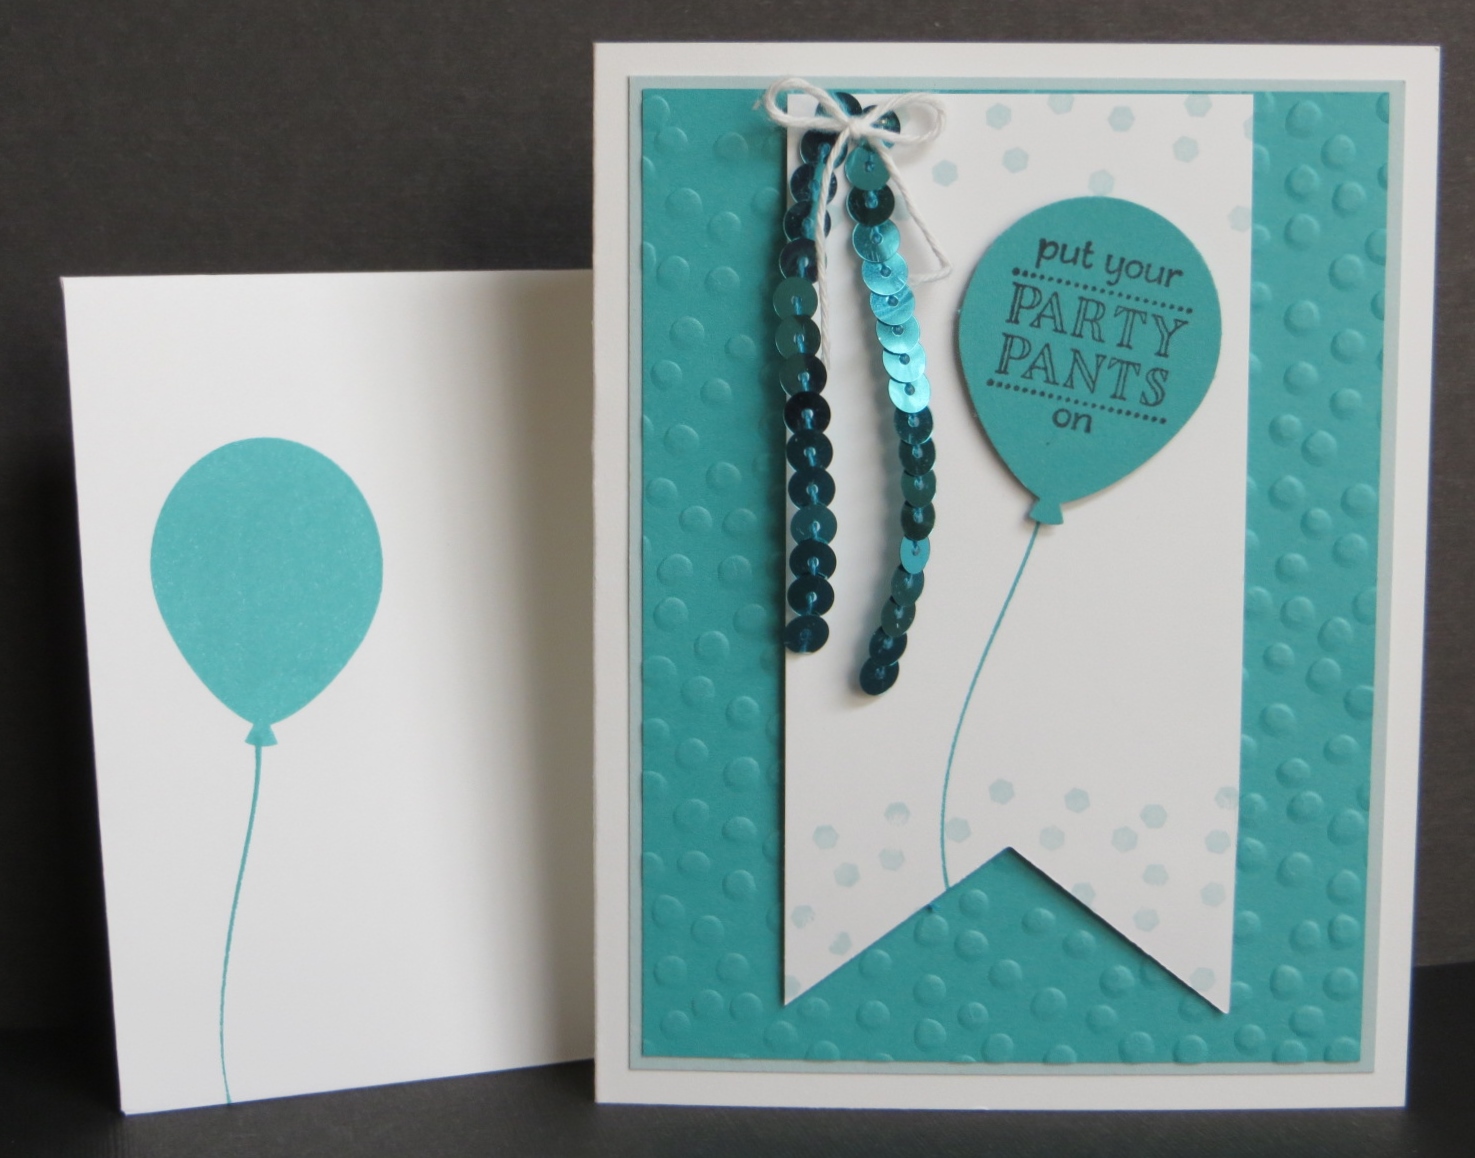
Luckily I was actually on top of things this week and got birthday cards out prior to Wednesday. I don’t think I would have wanted to walk to the mailbox yesterday. My son’s birthday was on Tuesday and yesterday there were three birthdays that I sent cards for. A niece, a nephew and a friend. Then my daughter-in-law’s birthday is on Saturday. That’s a lot of birthdays in one week! Oh…I even remembered to mail out a few Easter cards! 🙂
If you have as many birthdays as this to celebrate the Sale-a-bration stamp set Party Pants is perfect for you. Cute balloons and fun sayings. Don’t wait though. March 31st is the last day of Sale-a-bration. After that these fun items will not be available. Don’t miss out! Place that order today!
Did you know that Stampin’ Up! has Weekly Deals? They do! Every week there are 4 – 6 items that are on sale. Who doesn’t love a sale? This week they have some pretty good stuff on sale. In fact, my very favorite punch is on sale this week. The Curvy Corner Punch is on sale! Woo Hoo! I just may pick up a second one to have on hand…
There are also some great accessories on sale this week. Pearl Basic Jewels and the White Perfect accents. I’ll be doing a little stocking up this week too!
You can check out this week’s great deals here or check them out below. Just don’t miss out! Add them to that order you’ve been thinking about placing to bump it up to $50 so that you can get that FREE Sale-a-bration item. Don’t forget that Sale-a-bration ends next week. Oh, no!
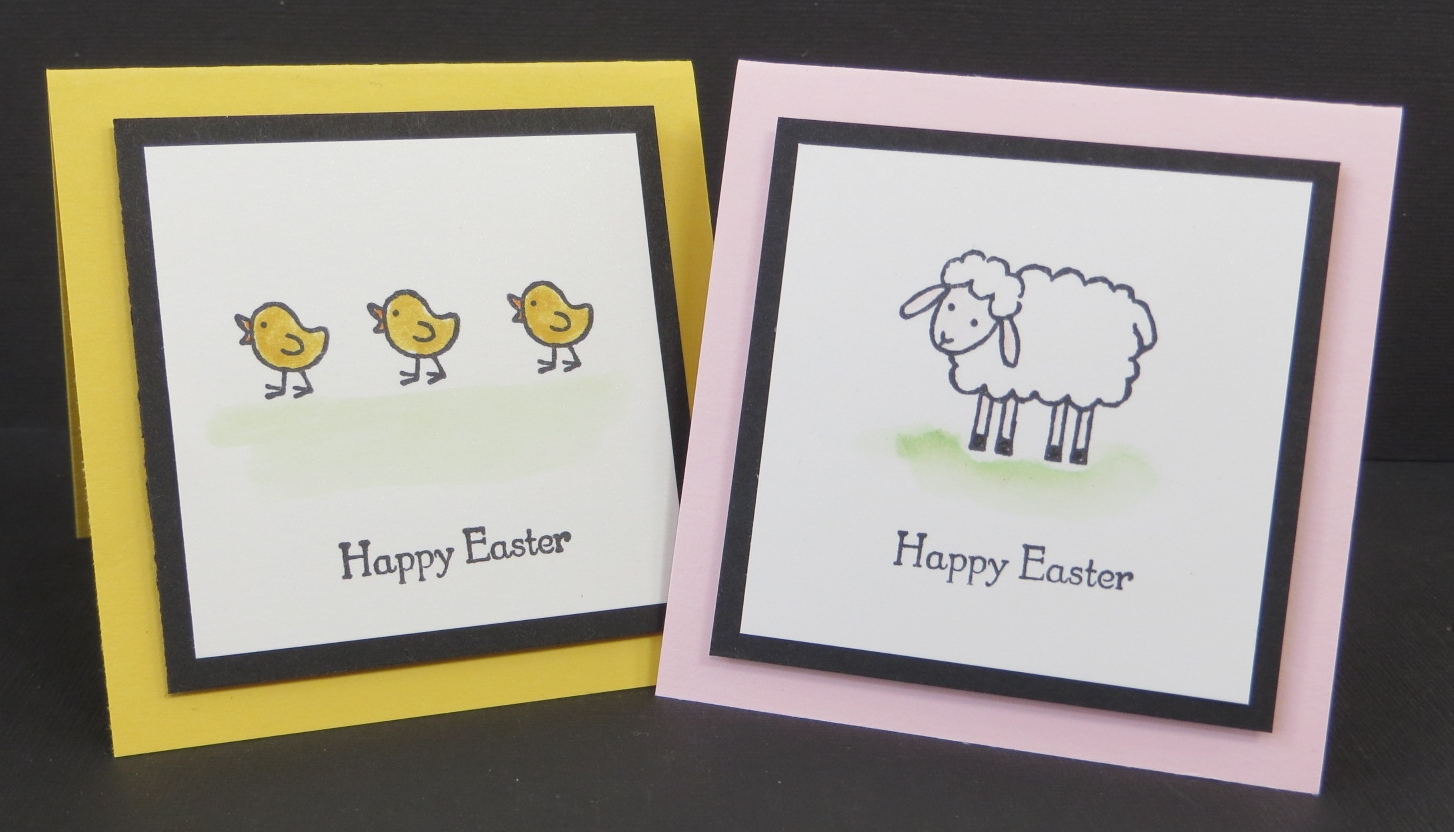
I was looking for something on my shelf of stamps and my eyes stopped on the Barnyard Babies stamp set. The little light bulb went off and I knew I had to make some cute little Easter notes with the stamps.
Didn’t they turn out cute? I just love the little critters in this stamp set and they’re the perfect size for a little 3″ x 3″ note. Won’t these be perfect for a little Easter gift?
I can’t believe that Easter is almost here. I realize that it’s pretty early this year but still…..those 6 weeks of Lent went by pretty darn fast! I should probably start thinking about getting all those Easter cards I made in the mail! Concept…right? 🙂
What type of foods do you make for Easter? We gather with the neighbors and everyone brings something. My job is the “Easter Potatoes”. They’re the hash brown casserole with corn flakes on top….everyone’s favorite. Ham and Easter Potatoes. What else could you want for a meal?
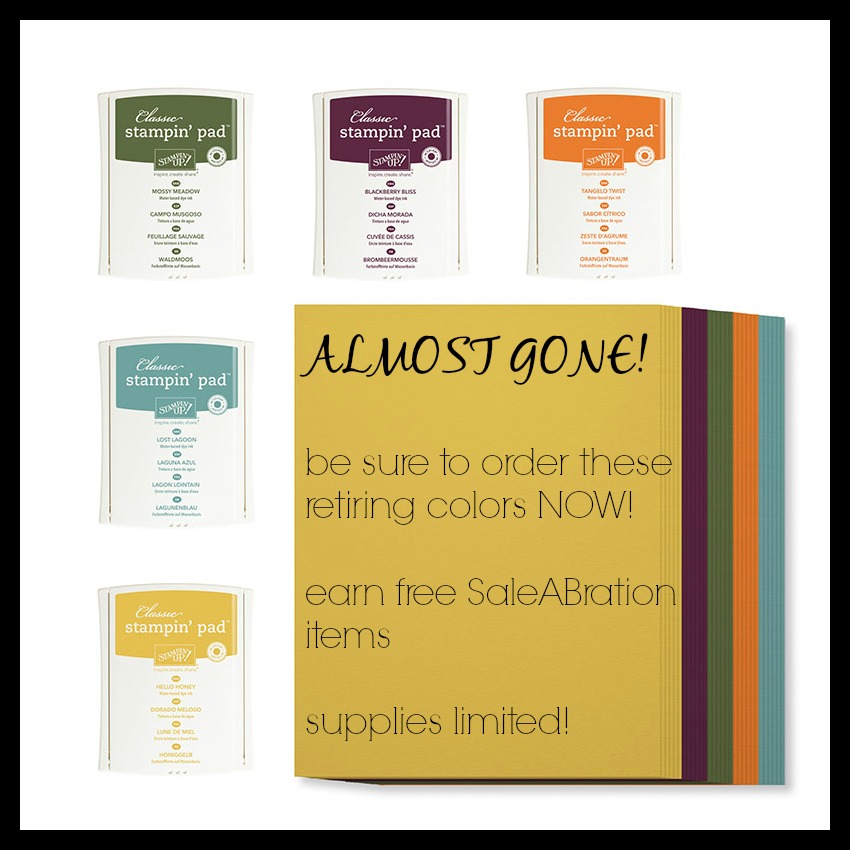
Every year Stampin’ Up! retires the current In-Colors. Every year these items go FAST! The ink pads, the card stock, the ribbon, the embellishments and especially, the ink refills.
I really like these colors and am going to miss them. I’ll especially miss Mossy Meadow and Blackberry Bliss. They’re such rich colors.
I have my ink pads but I’m going to have to double-check my ink refills and my card stock supplies. I always like to keep some of these items on hand after they’re gone.
Do you have these colors? Mossy Meadow, Blackberry Bliss, Tangelo Twist, Lost Lagoon and Hello Honey? If you don’t, get them now! Don’t wait. Once the retired list comes out in May these items will go fast and they’ll only be available while supplies last.
If you own the ink pads, but don’t own the ink refills order them TODAY! Ink refills go really fast and your ink pad isn’t going to do you much good if it dries out.
Don’t forget that Sale-a-bration ends soon (3/31). Stock up on your 2014-2016 In-Color items today and earn a FREE Sale-a-bration item! It’s a win-win situation!
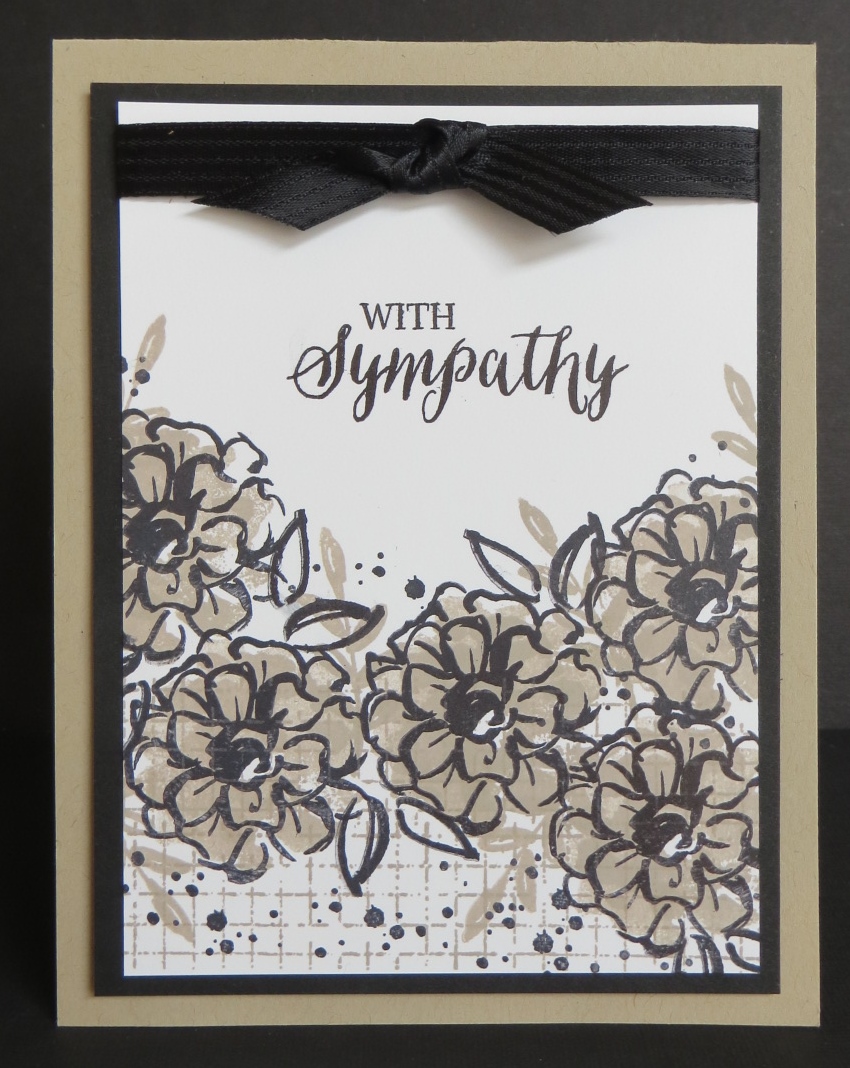
If you don’t have the ‘What I Love’ Sale-a-bration stamp set you still have a few weeks to get it. I LOVE this stamp set and this flower. It’s gorgeous!
I wanted to use this stamp set in a class again before the end of Sale-a-bration but I wasn’t sure what to do with it. As I was perusing Pinterest I came across a card in Basic Black, Crumb Cake and Whisper White. I was in love. I thought it was gorgeous and knew I had to do my own thing with it.
The Whisper White piece of my card is pretty much as the same as the card I saw on Pinterest but then I added more layers and the ribbon to make it a “Cindy” card. You know me. It’s hard for me to have a card with out those two items! 🙂
One of the best things about this card is that you can use it for most any occasion. My customers have been asking for sympathy cards and I knew this would be perfect for that.
Now don’t forget! Sale-a-bration ends on March 31st! Put together that order and get your FREE stuff! One free Sale-a-bration item with every $50 you spend! Shop NOW!
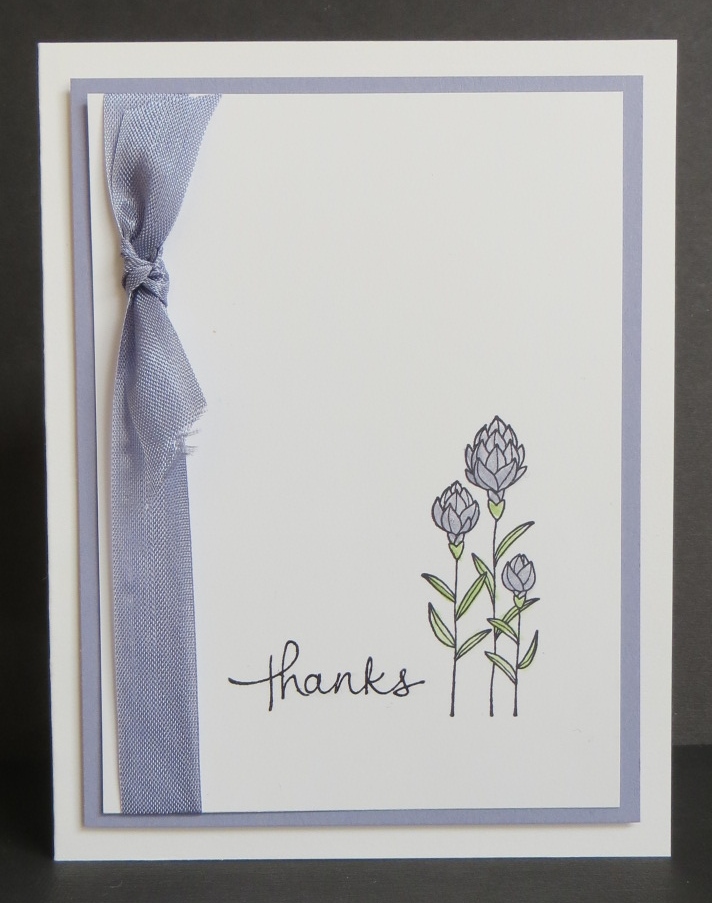
A simple and lovely card. That pretty much describes this one. This card was one of the favorites in class this week along with the Wink of Stella vellum card I showed you yesterday.
You can’t tell from the picture but there’s a lot of shimmer going on with this card. The card is made using Shimmery White card stock (my new favorite!) and the flowers are colored with the clear Wink of Stella Glitter Brush.
I know that you’re thinking “Wisteria Wonder”? She never uses that color….well, this was one of those times where I sat looking at my collections of ribbon trying to figure out what ribbon I could use to figure out the colors for my card. It’s crazy, but that’s how I work. If I know I want to use ribbon on my card I start with ribbon and go from there.
How do you decide on the color combination for your cards? I’d love to know! Leave me a comment!
It’s a sparkly day….at least according to this card! Shimmery and sparkly. It doesn’t get any better than that! 🙂
There’s only two weeks left of Sale-a-bration so I wanted to use Sale-a-bration items in my classes this week. On this card I used TWO items! Can you spot them?
The first Sale-a-bration item that I used was the new gold Metallic Glitter Tape. So fun! It comes in a package of three with gold, silver and white. The white is pretty fun because you can color it any color you’d like!
The second Sale-a-bration item I used was the Botanical Gardens Vellum. It’s so fun because the designs in the vellum match the designs of the Botanical Gardens Designer Series Paper. For my note card I chose to just mount the vellum on Basic Black card stock. Then, to jazz it up a little bit I used my Wink of stella Glitter Brushes. I used the gold one on the little flowers and the clear one on the slightly larger flowers. The clear glitter flowers don’t show up too well in my photo but they look real sparkly in person.
One more thing I did to add a little sparkle to my card was to use the gold Wink of Stella Glitter Brush on the wooden “congrats”. Again, it’s hard to tell from the photo but it really adds a lot to the card.
Sparkle, shimmer and shine. I just can’t get enough! Have a great day! Take care and Happy Stamping!

 Look what came in the mail yesterday! I received my name tag for Stampin’ Up!’s upcoming On Stage event! Woo Hoo!
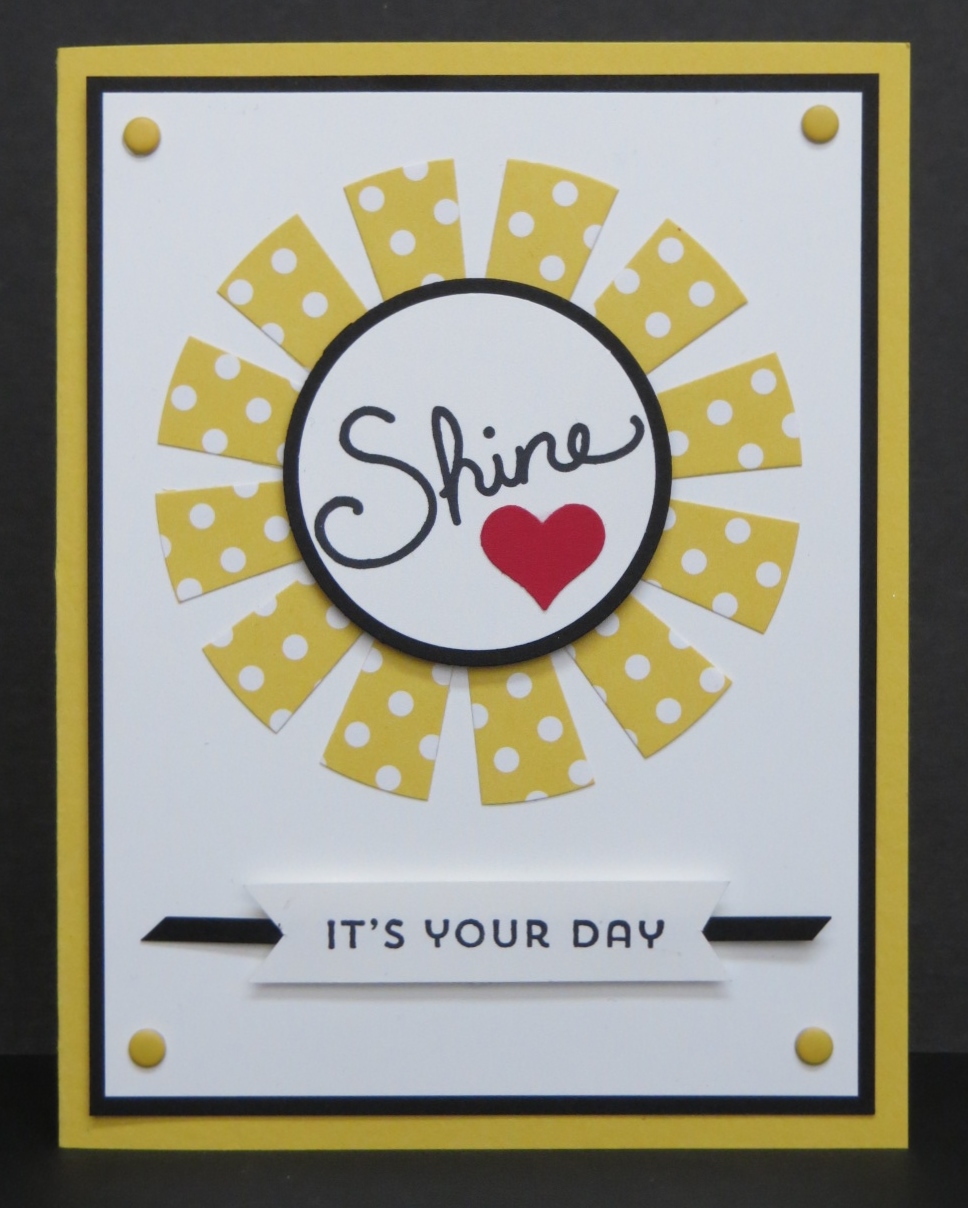
