Happy Anniversary!

jar-of-love-0716
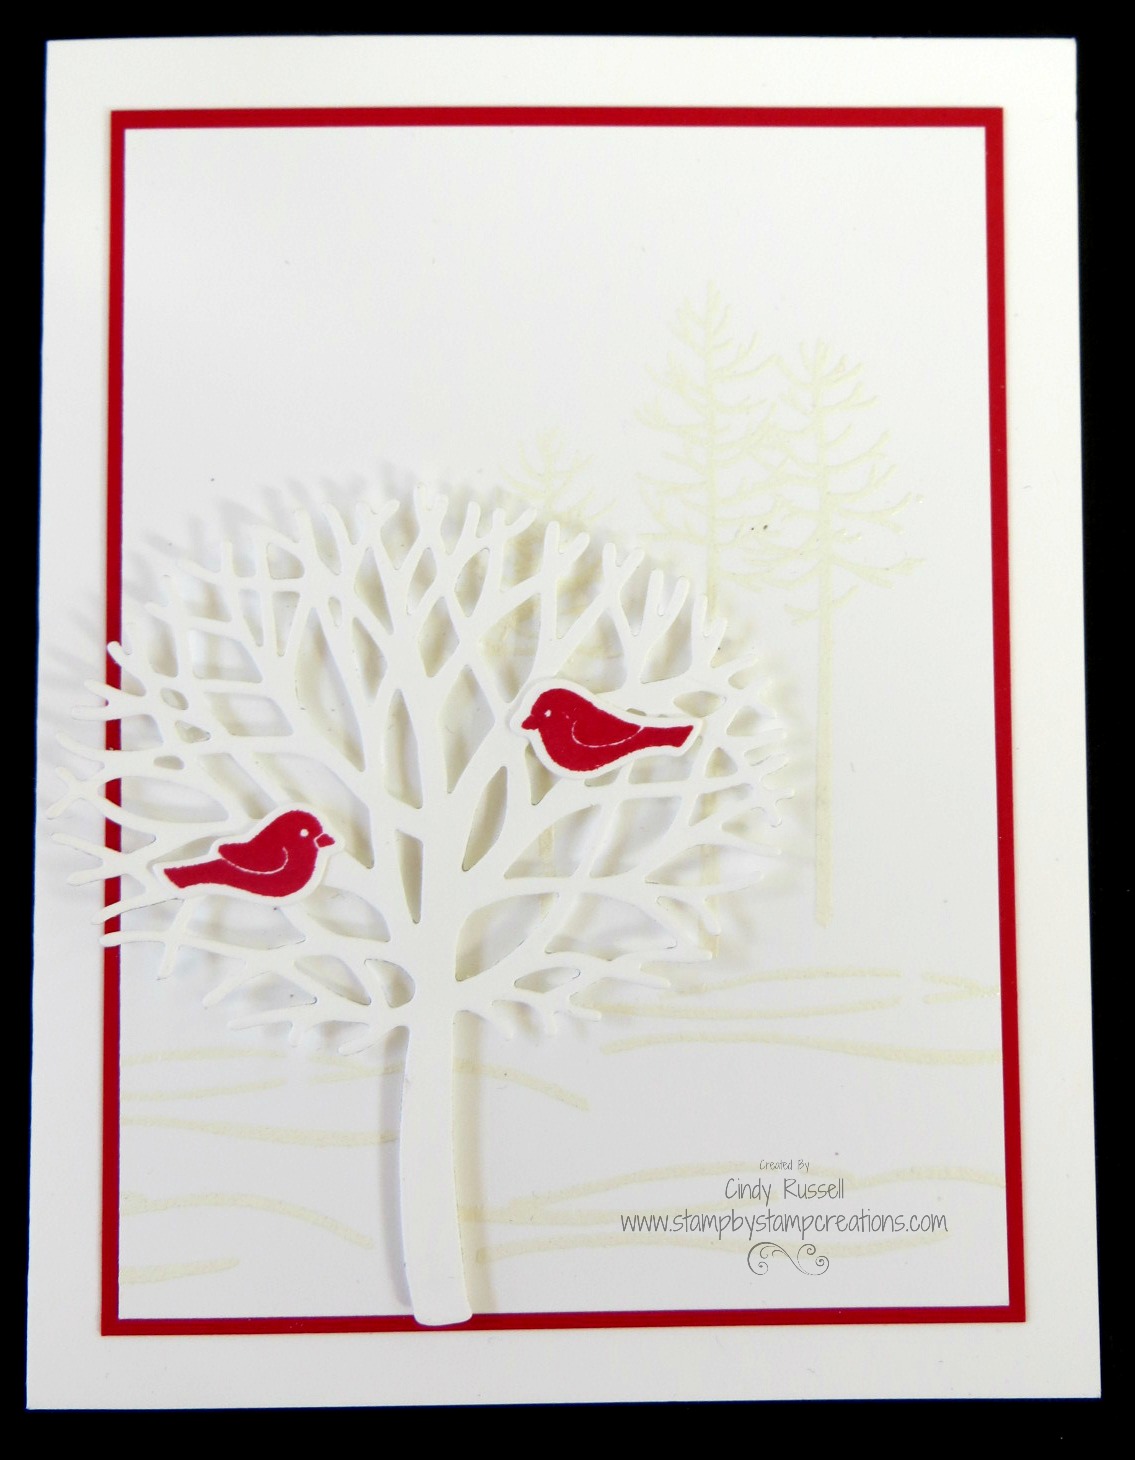
Last week, on Labor Day, my husband and I celebrated our 35th wedding anniversary. Yes, that does mean we’re getting old.  We don’t usually do a lot to celebrate.  We’ll go out to dinner but we don’t buy gifts and we’re lucky if we remember to give each other a card.   I’ve been looking forward to our anniversary for over a month now just so I could give Mark this card.

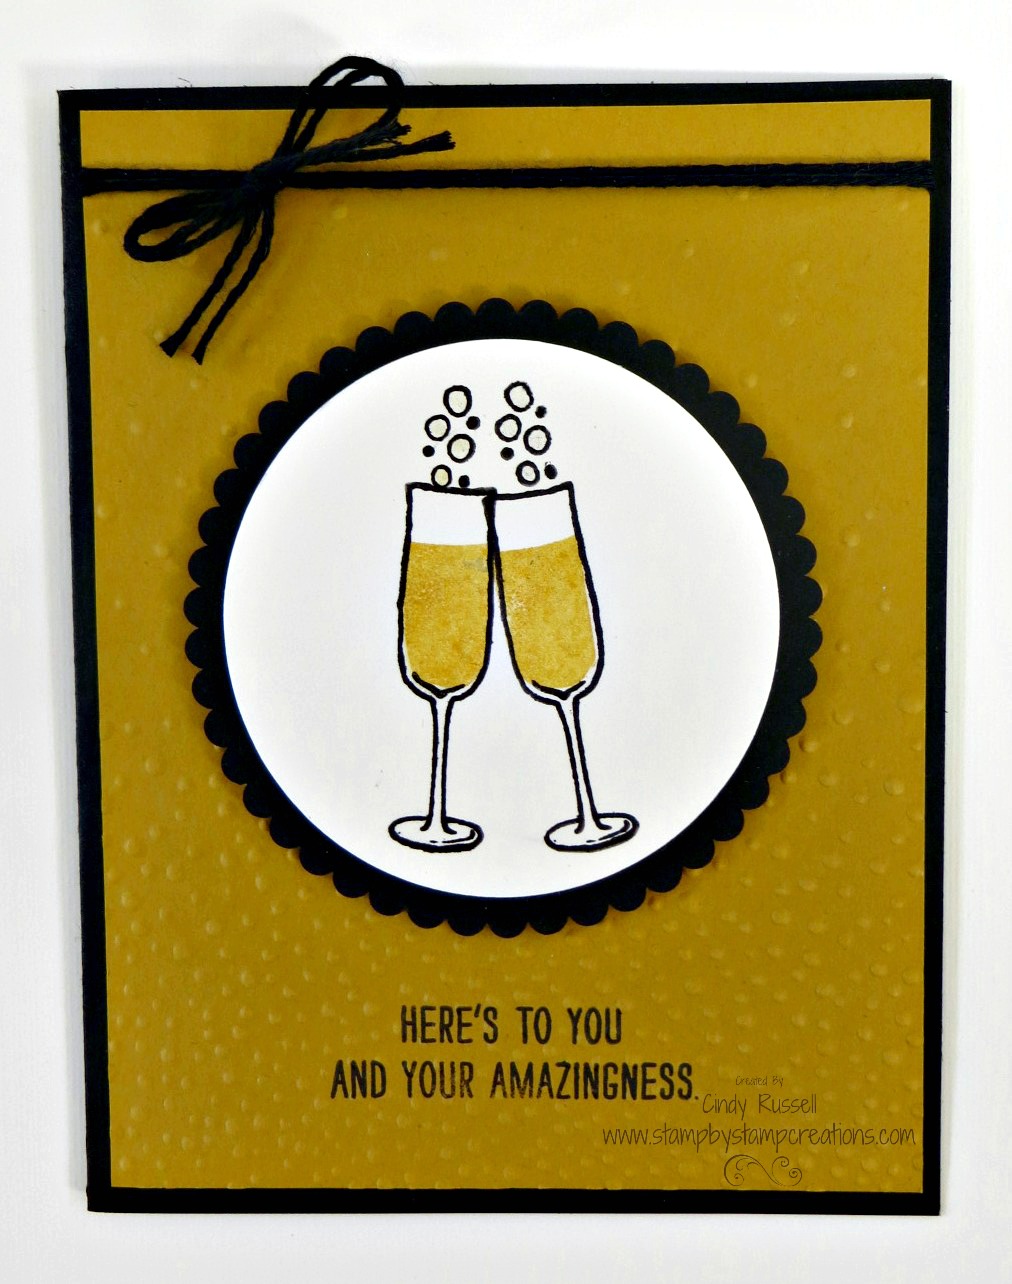
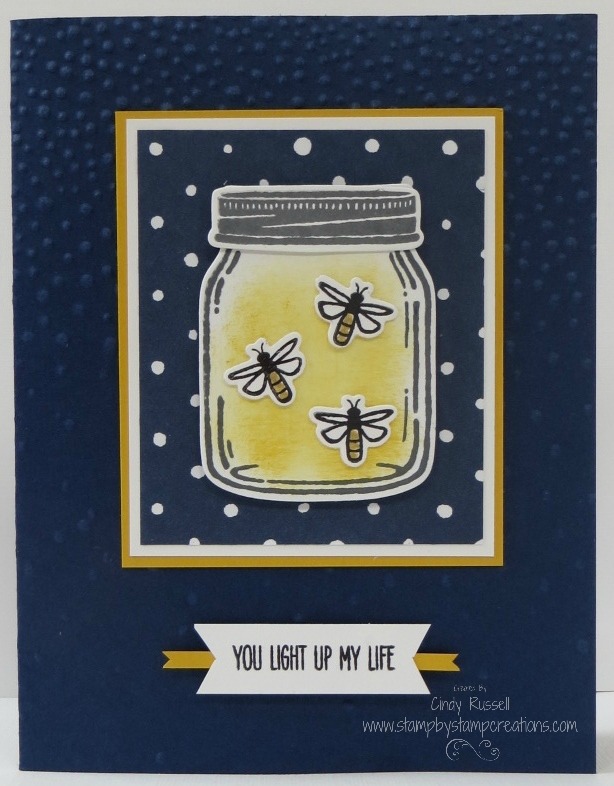
No.  He doesn’t have a thing for fireflies.  Back in college when we were dating “our song” was “You Light Up My Life” by Debbie Boone.  Do any of you remember that song?  It was a long time ago!  Ha!  Anyway, I couldn’t resist giving this card to my hubby.  We both got a chuckle out of it.  🙂

cm-13

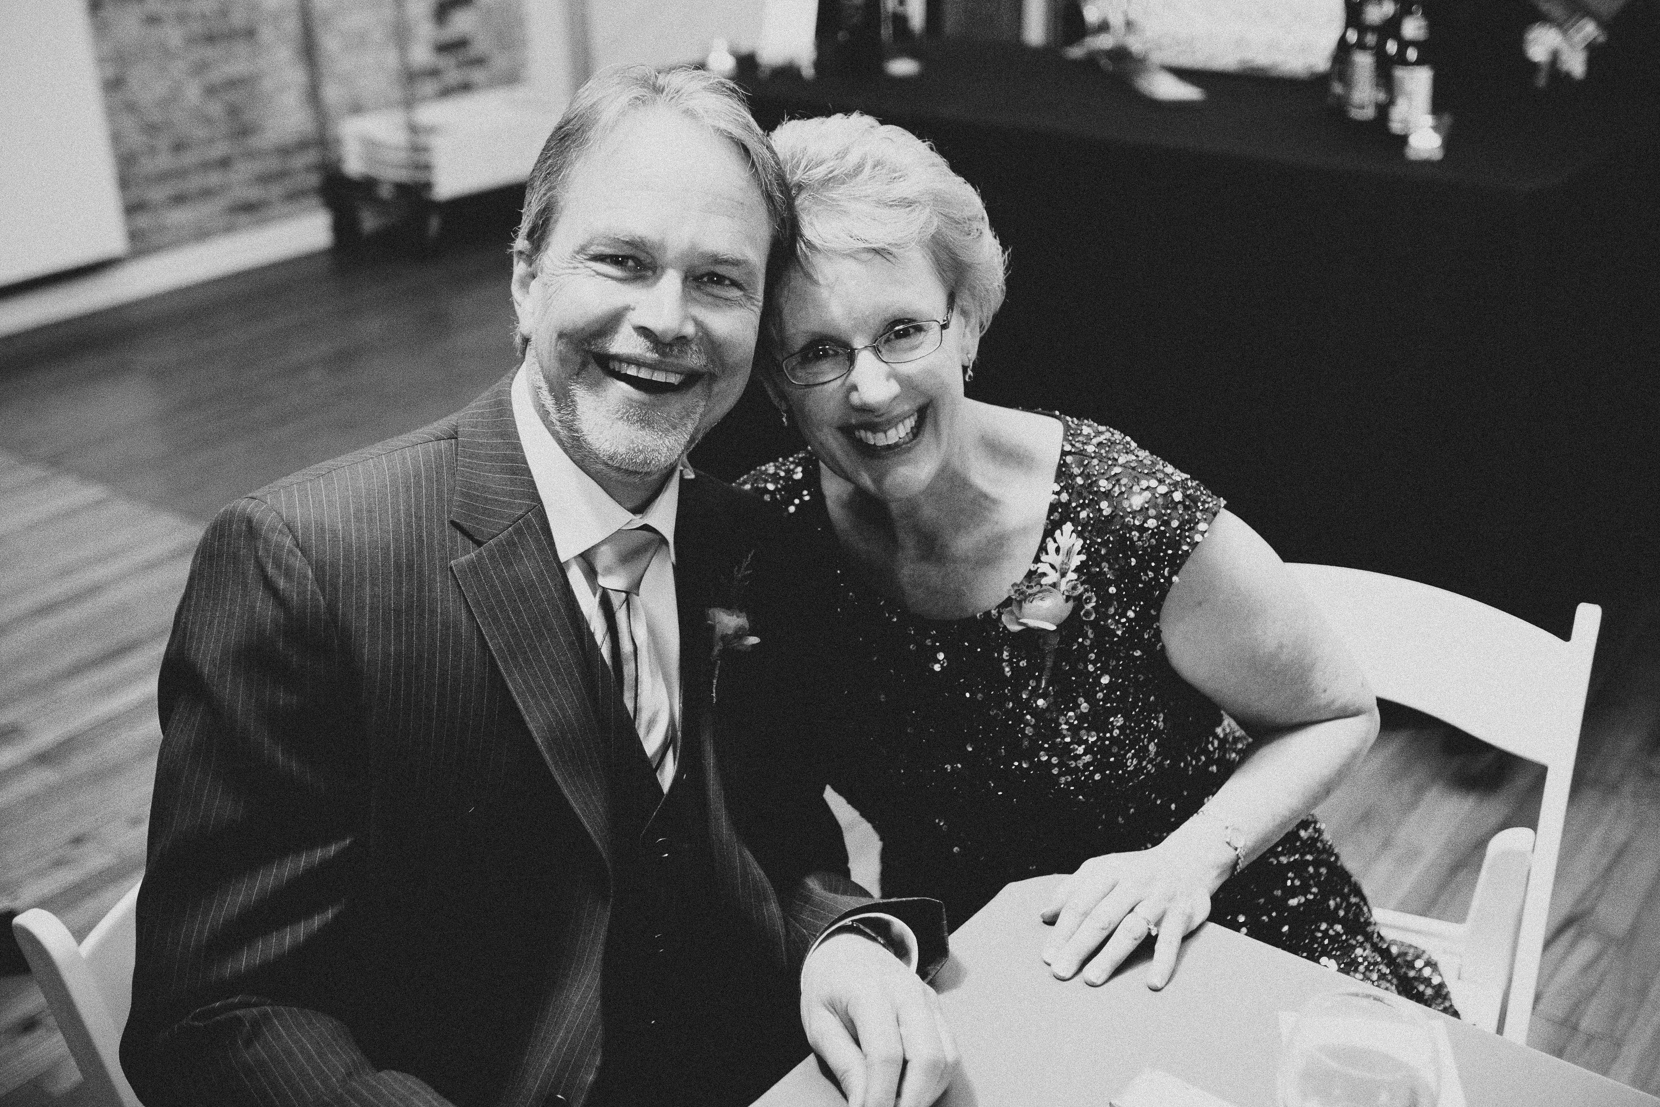
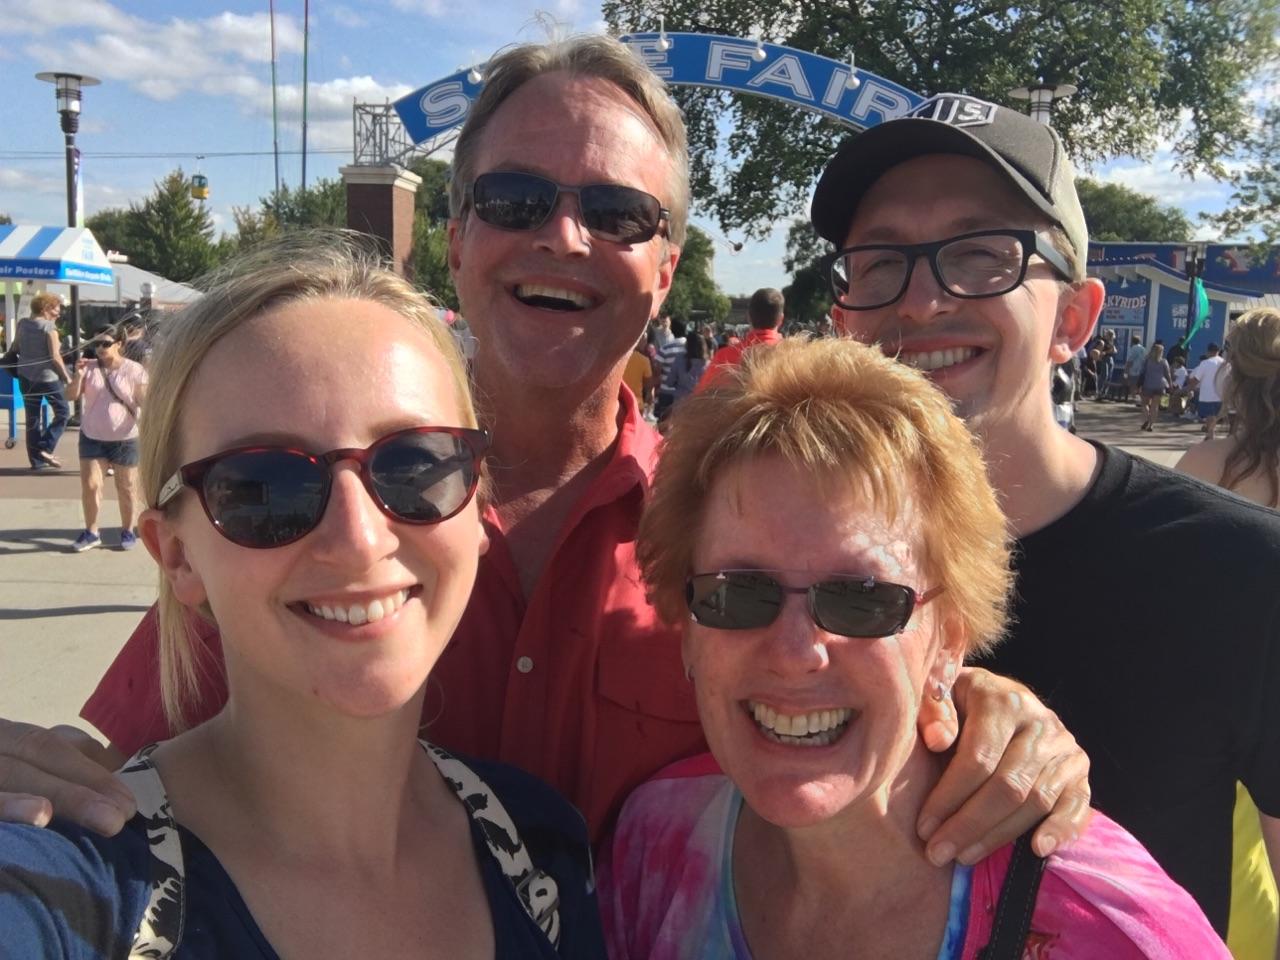
This picture is one of my favorites of us.  It was taken almost three years ago at our oldest son’s wedding.  I take a lot of pictures but I’m usually never in them so it was nice to have this one of the two of us.

I designed this card (OK…I probably copied the basic idea for it) using the Jar of Love stamp set.  These little fireflies are so dang cute!  I sponged some Crushed Curry ink inside of the jar and I colored the bodies of the little critters with my Gold Wink of Stella Glitter Brush.  It worked perfectly to give my little fireflies a bit of sparkly shine!

I hope you all have a sparkly day! Take care and Happy Stamping!

Spooky Fun!

spooky-fun-2-0816
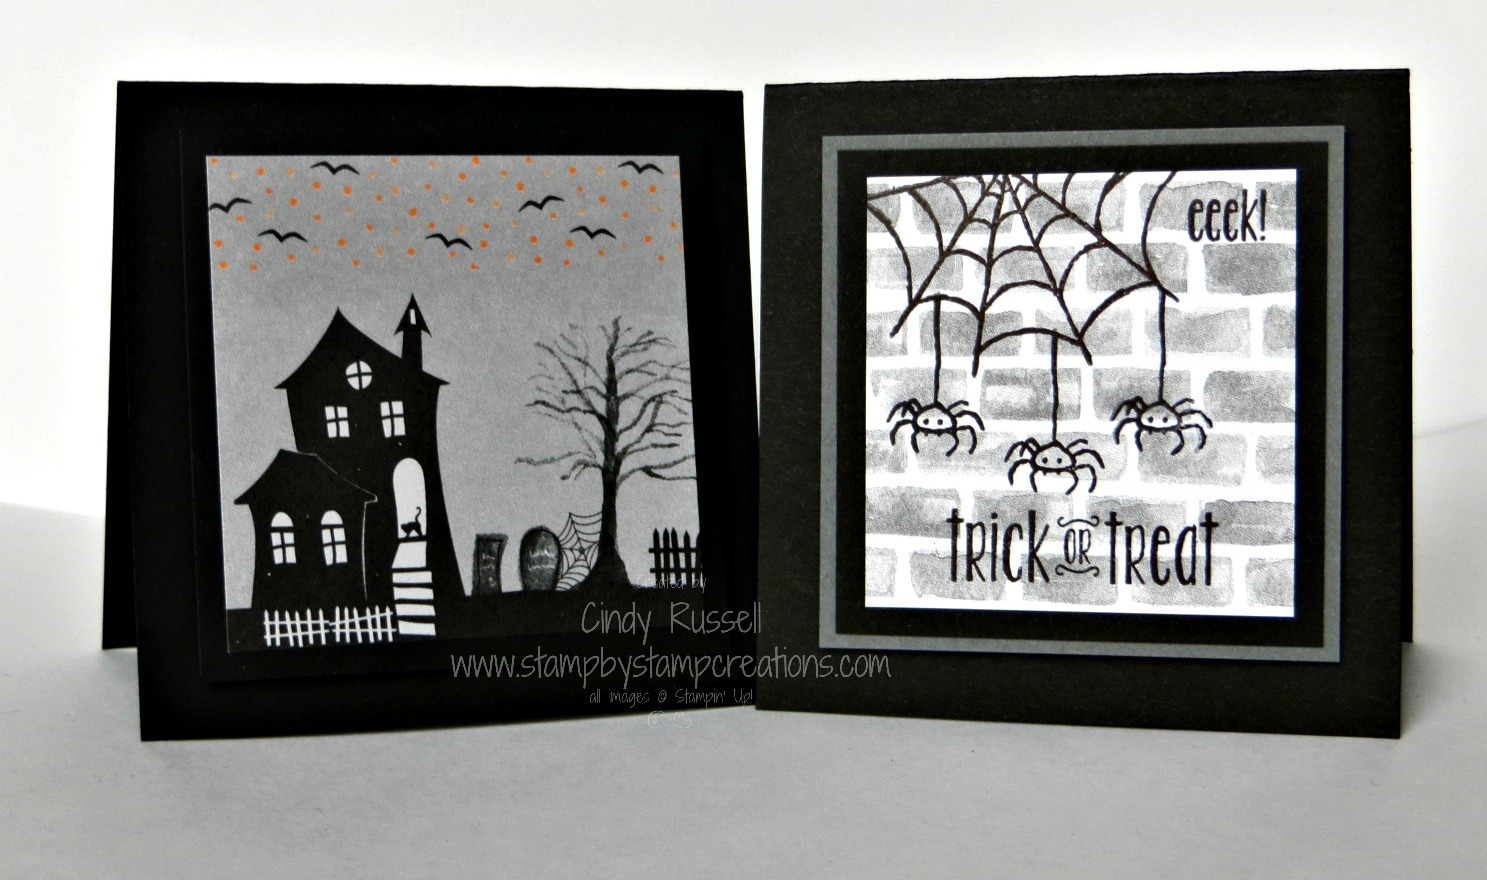
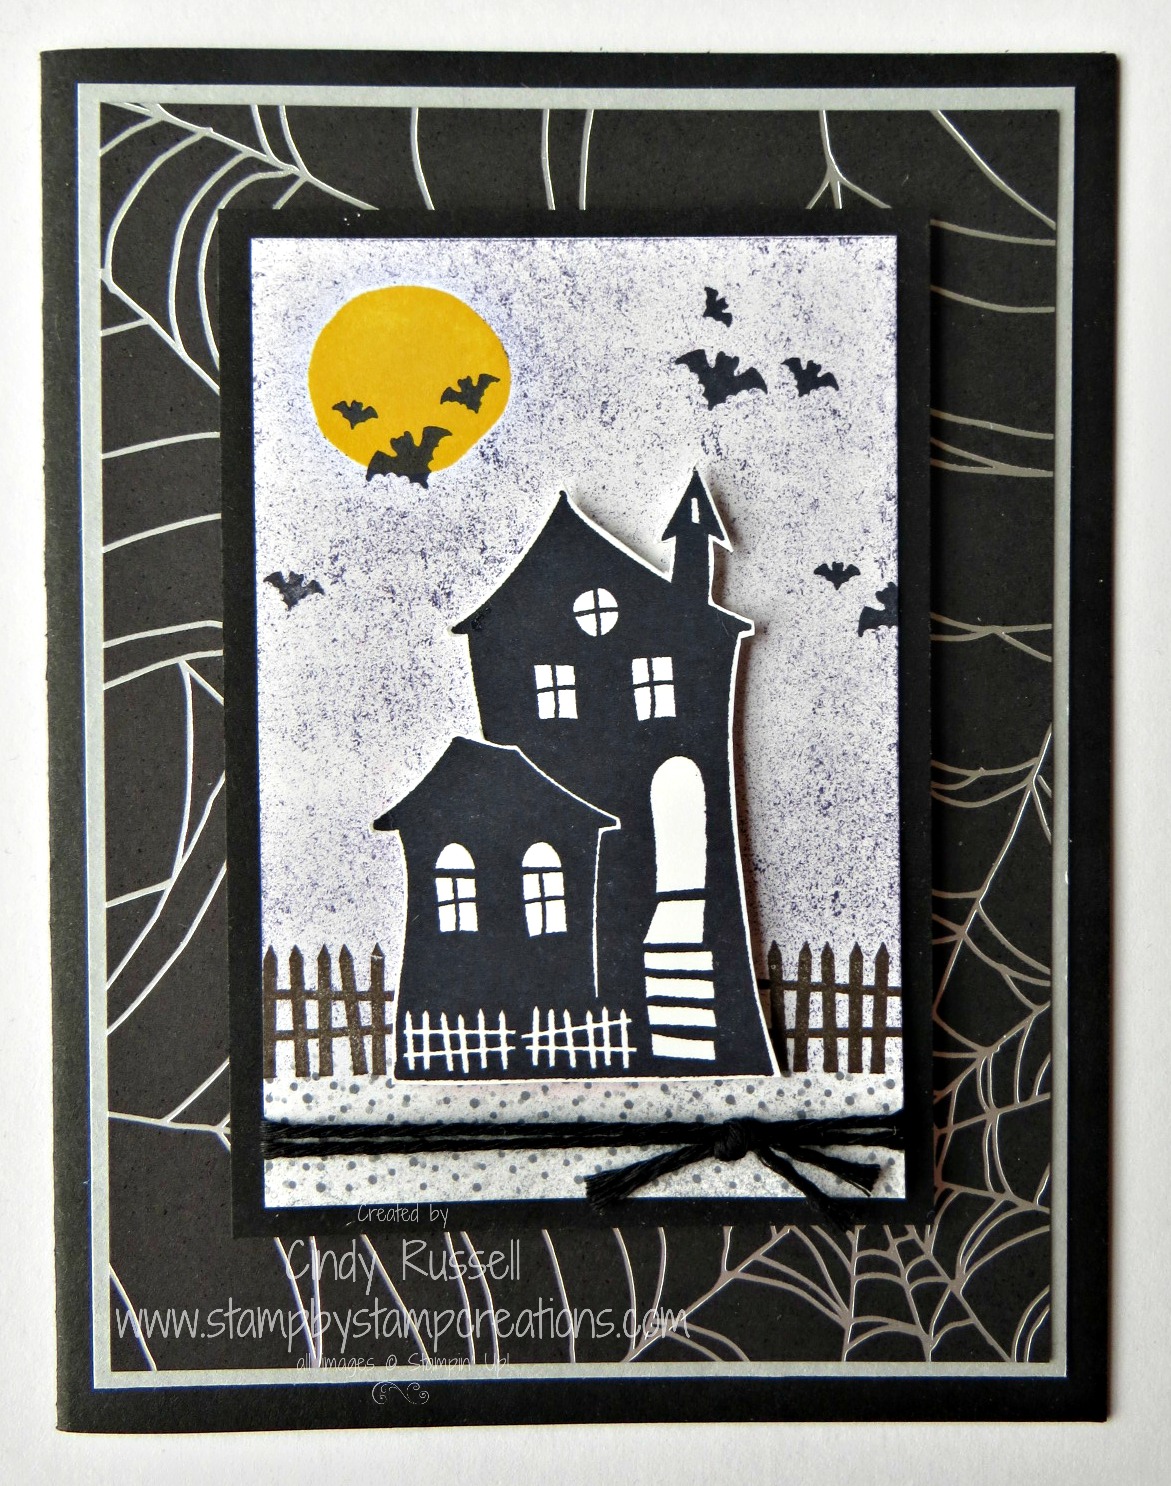
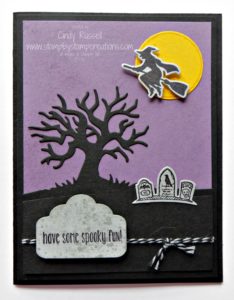
Are you ready for Halloween?  I’m not!  It’s still over 6 weeks away!  I do have to admit I’ve been hitting the Halloween candy aisle at the grocery store.  No, I’m not trying to gain weight….I’m creating Halloween treat projects and for that I need Halloween candy.  It is a no-win situation though because I don’t necessarily use all of the candy in a project and then there’s left overs that are calling my name.  Can you feel my pain?  I am a little disappointed though…I’ve been searching for Halloween colored M & M’s and I can’t find them.  Crazy!

I love the tree die in the Halloween Scenes Edgelits set.  Too fun.  There’s also a fun fence that I could have/should have added to the card.  Hmmm….maybe I’ll have to remake this.  The witch die and the grave stones are also in the set.  This set of dies COORDINATES with the Spooky Fun stamp set.  You know me and COORDINATION!  🙂

Do you like the little grave stone that I made for the sentiment?  I thought I was pretty clever with that one.  I used a die from the Tags & Labels Framelits!  After I die cut the image and stamped my sentiment I distressed the label with some stamping and sponging.  I cut it down a bit and then used my Project Life Corner Punch to round the corners.

I need to sit down and play with more of my Halloween toys from the Holiday Catalog.  So many fun items!

Have a great day!  Take care and Happy Stamping!

Back Again!

mnfair2016I know!  I need to stop traveling so I can post to my blog more.  Ha!  That’s not going to happen but I will try to be more diligent about posting.

We just returned from another trip to the MN Homeland.  I was able to visit the Minnesota State Fair with my family one day (first picture) and over the Labor Day Weekend my sisters and I hosted a party to celebrate my mom’s 80th birthday.  Her birthday really isn’t memomuntil November but it’s so much easier for people to travel in September in that part of the country.  The second picture is of me with my mom.

The fun wasn’t over yet.  The day after the party my husband, son and daughter-in-law headed up to Canada to my husband’s family cabin for about 5 days of fun, fishing and relaxation.  We caught plenty of fish, played games and were actually able to watch our Denver Broncos on Thursday Night beat the Carolina Panthers!  Woo Hoo!

markfish16The fishing was really good.  We all caught plenty and everyone caught some nice big ones that were fun to reel in.  My husband caught the biggest fish of the week.  A beautiful walleye.  We didn’t have time to weigh or measure it because we wanted to get it back in the water right after the photo-op.

Now it’s time to get back to stamping.  Woo Hoo!

Take care and Happy Stamping!

Simple Saturday: A Sneak Peek

Halloween.1.0816It’s Simple Saturday AND a sneak peek!  How great is that?!!!  🙂

Stampin’ Up! has fabulous designer paper and what better way to make a simple card than to use it as the focal point or background of your card.

I couldn’t resist making these little fun and easy 3″ x 3″ cards.  They are both made with the Halloween Nights Designer Series Paper that you will find in the upcoming Holiday Catalog.  The little haunted house scene is printed in strips over and over again on the 12″ x 12″ sheet.  I simply trimmed out one little tiny scene, mounted it on a slightly larger piece of Basic Black card stock and then popped that up on my card.

The spider web card is only slight my involved.  The little spider web, spiders and words are from the Spooky Fun stamp set.  They fit perfectly on my little 3″ x 3″ card.  I added some layers and now I have a fun little spooky card!

The Halloween Nights Designer Paper pack is full of fun and spooky designs.  I know you’re going to love it.  If you don’t have a copy of the upcoming Holiday Catalog you can request one from me (cindy@stampbystampcreations.com) or check online on September 1st.  I know you’re going to love it!

Have a fun and Simple Saturday!  Enjoy!

Holiday Catalog Sneak Peek!

Halloween Scares.2.0816Who’s ready for Halloween, Thanksgiving and/or Christmas?!!!  It’s time to start creating for these upcoming holidays and Stampin’ Up! is here to help!

Their 2016 Holiday Catalog is going live on Thursday, September 1st!  Woo Hoo!  Luckily, as a demonstrator, I was able to start purchasing from this amazing catalog during August.  🙂

I love being a demonstrator and receiving little perks like that.  It’s great to be able to get a head start on planning classes and such.  This week I was able to take advantage of another perk….I got to register for Stampin’ Up!’s OnStage Local Event taking place in November.  It’s a mini one day convention held in 6 different locations across the country here in the US while the main OnStage event is taking place in Australia.  I went to my first OnStage Local event last fall and really enjoyed it.  I love to get a sneak peek of the new upcoming catalog!  Wouldn’t you love to receive these perks as well as a discount on all your Stampin’ Up! products?  Yes, all of them!  You can receive at least a 20% discount as a Stampin’ Up! Demonstrator!  Think about it!  I’d love to have you join my team!

But back to this fun card made with the new Halloween Scares stamp set!  Isn’t this little haunted house fun?  There are quite a few fun little images in this stamp set:   house, cat, bat, tree, moon, pumpkin.  You can make so many fun projects with it.  The spider web design on the background of the card is a piece of the Halloween Night Specialty Designer Series Paper.  This is actually one of the “specialty” pieces.  The web itself is silver foil so it shimmers and shines!  Too fun!

There are a lot of fun Halloween items to choose from in the 2016 Holiday Catalog so check them out.  If you’d like a copy of the catalog just send me an email and I’ll pop a copy in the mail.  cindy@stampbystampcreations.com.  I know you’ll enjoy it!

Have a great day!  Take care and Happy Stamping!

Fall Thoughtful Branches

Thoughtful Branches.pumpkin.0816I can’t get enough of this bundle!  OMG!  I LOVE it!

OK..enough is enough.  You’re probably getting tired of seeing fabulous cards made with this absolutely fabulous bundle but I did have to share this one card.  (I can’t promise that it will be the last but hey…there’s only one week left to purchase it!)

Anyway…..I had seen someone made a pumpkin out o the leaves/flowers die and I had to give it a try!  I was pretty tickled with the results.  Yes, I completely CASEd (copy and share everything) the card and background but I did add the linen thread and bow.  Thank you Kim Jolley….your card was beautiful and definitely inspired me.  I couldn’t quite hit the artistic not on Kim’s card but I’m please with my results.

On my card I used the tree top leaves from the Sheltering Tree stamp set to stamp all the leaves at the top and the bottom of my card.  Of course, as I was putting things away after I finished my card I started wondering why I didn’t just use the leafy/flowery stamp from the Beautiful Branches stamp set.  Hmmm….it makes me wonder where I leave my brain sometimes.  Oh, well….all is good!

Have a great day!  Take care and Happy Stamping!

One Week Left: Thoughtful Branches

Thoughtful Branches.2.0816Have you fallen in love with the Thoughtful Branches stamp set and the coordinating Beautiful Branches Thinlits yet?  I know I mentioned this during my Thoughtful Branches Week of posts but I LOVE these products!  They are SO gorgeous and versatile.

There’s only ONE week left to purchase these fabulous products!  Don’t miss out!!!!!!  Purchase yours TODAY!

I think these three trees are my favorite image.  Do you remember the first card I showed you made with this bundle?  Well, I tried to recreate it and just couldn’t do it justice so I took the basic idea and ran with it.  This is what I came up with.  I know…it’s not even close to the original….what can I say…

I do love how the sky turned out.  I first stamped the trees on watercolor paper with Basic Black Archival Ink.  Then I took my Aqua Painter and “washed” water over the whole piece of paper.  After I did that I added Dapper Denim ink to the paper with my Aqua Painter.  The “wash” of water helps your inks spread and that’s how I got the fun look of the sky.  Isn’t that a neat technique?  And to make it even more lovely I added a layer of glimmer with my Clear Wink of Stella Glitter Brush!

Don’t forget….only ONE Week left to order this fabulous bundle!  Shop now so you don’t miss out!  Have a great day!  Take care and Happy Stamping!

Mixed Drinks Z-Fold Card

Mixed Drinks.0816It’s Happy Hour! OK…maybe it’s a little early as I’m writing this but as the saying goes “It’s 5 o’clock somewhere”!  I’ve had the fun Mixed Drinks stamp set for a while and decided it was finally time to open it up.  Of course once I did I needed to figure out what to make with it.  There are a lot of cute ideas out there on the internet but I decided to go with a fun fold…a Z card!

Once again I got the basic idea for the card from someone else out there and changed up just a little thing or two.  Really, why reinvent the wheel?  Thank you Claudia from Germany!Mixed Drinks.0816.1

A Z-fold card is pretty simple.  Start with a piece of card stock 4 1/4″ x 11.  Score at 5 1/2″ and then at 2 3/4″.  You’ll fold the card in half at the 5 1/2″ mark and then you flip back the top of the front piece at the 2 3/4″ mark.  When you add the focal point to the front of the card just be sure to only adhere it the 2 3/4″ section or you won’t be able to open your card.  Ha!  You also want to be sure to stamp your sentiment in the area that will be hidden by your front focal point when the card is closed.  Those are the only little tricks that you need to know to make a Z-fold card.

I’d love to see examples of Z-fold cards that you create.  Send me a photo!  I’d love to see what you come up with!  Have a great day!  Take care and Happy Stamping!

Weather Together

Weather Together.0716Here’s the perfect card for someone going through a rough time.  It has some nice sayings about being there to help someone through a tough time.  That’s not all though.  There’s a “thanks” stamp, a “celebrate” stamp and a “love” stamp.  It’s quite versatile.  Along with a couple of umbrellas you also get some little hearts, little flowers and some presents.

The Weather Together stamp set was another one of the ones I “didn’t need”.  Sheesh!  Why do I even say that?!  I need to remember that just because it doesn’t jump out and grab me the first time I take a peek through a catalog doesn’t mean I won’t end up owning it sometime.  I just have to wait and see what everyone else is making with it before I decide I absolutely “have to have” it.  🙂

Weather Together.a.0716I was so excited to actually use one of the fun, new, little enamel dots on the umbrella.  Have you checked these little things out yet?  They’re so cute!  You purchase them by color family and you get 20 shapes in each color:  5 hearts, 5 stars, 5 circles and 5 mini circles.  They really add a “little something” to your project.  You can find them on page 177 of your catalog or right in my store.

Have a wonderful day!  Take care and Happy Stamping!

Foxy!

Foxy Friends.0716Here’s another one.  Yep….another stamp set/bundle that I didn’t need.  Too cutesy I said.  Ha!  You have proof right here in this blog post that I broke down and purchased it.  Yikes!  Never say never.

I pretend I have self-control but I don’t.  Not at all.  I need EVERYTHING!  That’s one of the basic reasons that I’m a Stampin’ Up! Demonstrator!  Now I can “justify” all my extravagant purchases.  Sheesh!

Misery loves company so if you’re like me and want EVERYTHING you might want to consider the 25% discount Stampin’ Up! gives me on all of my purchases.  Sure, when you first sign up you will only get a 20% discount but I’m sure it won’t take you long to work up to that 25%!  🙂  Seriously, the Holiday Catalog is coming out soon and I know that you will want all those fabulous new goodies too.  Contact me and we’ll talk.

Anyway, isn’t this card cute?  That darn fox was just sitting in the catalog with a sly look on it’s adorable face and I couldn’t resist.  Did you know that there’s a coordinating punch for this stamp set?  Yep, you can punch out all those critters too!  You know me and coordination!  Ha!

I didn’t use the punch on this card because I designed it for a class.  There’s already so much stamping that I didn’t want the card to take too long to make.  I think it turned out pretty cute without the punching.  What you can’t see is that on the front of the card base I embossed the trees with the Woodlands Embossing Folder.  Very woodsy, don’t you think?  🙂

Have a great day!  Take care and Happy Stamping!  Don’t forget about that 205 discount! 🙂

Fresh Fruit! Palaside Peaches!

FreshFruit.0716.2It peach time here in Colorado.  It’s the time of the year when peaches from the Western Slope (west side of the Rockies) are juicy and ripe.  In fact, this coming weekend there is a whole festival in Palaside, CO celebrating the peach!

People around here go crazy for these peaches.  Apparently they’re delicious.  (Personally I don’t care for them).  My friend and her daughter spent Sunday cutting up 75 peaches.  They made 4 batches of jam and 7 peach pies for the freezer.

OK.  If you’re like me and don’t really care for peaches you can still appreciate a cute card with peaches on it, right?!  You can’t go wrong with the Fresh Fruit stamp set and the Fruit Stand Designer Series Paper.  I thought this card turned out pretty nice, how about you?

I didn’t want to use the designer paper on the whole card.  In this type of situation I usually put the designer paper on the bottom of the card and leave a little white space at the top.  This time I wanted to try something different so I put the designer paper on the side.  However, this left a little bit too much empty white space for me so I ran the white through Big Shot.  Actually….and here’s your trick for a Tuesday…..I first put my designer paper on the piece of Whisper White card stock and then I ran ONLY HALF of it through the Big Shot with the Seaside Embossing Folder!  Woo Hoo!  I LOVE that look!  Sometimes I can amaze myself.  Ha!

The last thing I did to the card to make it a little special was to color the peach with my Clear Wink of Stella Glitter Brush!  I love that little gem!  It always adds a little something to any card!

Have a great day!  Take care and Happy Stamping!

Here’s to You! Mixed Drinks

Mixed Drinks.1.0816Here’s to you!  You’re amazing!  Thank you for checking out my blog!  I appreciate it.

I’ve had the Mixed Drinks stamp set for a bit and have finally had a chance to play with it.  The stamp set has all sorts of glassware for different types of drinks.  Not only can you stamp the glass, you can stamp the beverage inside it!  No coloring necessary!

Hmm….as I’m looking at this card, watching the Olympics and writing this I’ve decided that it would be perfect to send to any of the many athletes participating in the games….those who’ve won medals and those who didn’t but still gave it their all.  They’re all amazing!  What’s your favorite sport to watch in these Summer Olympics?

Delightful Dijon turned out to be the perfect color for champagne.  It’s not my go-to color for cards but it was perfect for this one.  It might be hard to tell but I used the Softly Falling Embossing Folder on the background.  It reminds me of champagne bubbles.  🙂

Have a great day!  Take care and Happy Stamping!

Thoughtful Branches Gift Bag

Thoughtful Branches.JanIt’s the last day of Thoughtful Branches week.  Have I convinced you yet that you absolutely need this bundle?  🙂

Today’s project is actually from my team’s Stamp Camp that was held a few weeks ago.  My friend Jan made these gift bags for all of the camp participants as well as all of us demonstrators who put on the event.  Isn’t it gorgeous?!!  She made over 40 of these!  Whew!

Jan die cut the flower twice.  Once was out of a solid piece of Dapper Denim card stock and the top layer is watercolor paper which she colored with her Aqua Painter.  Beautiful, beautiful, beautiful.  Jan is the friend who always makes us amazing 3D projects at convention.  I love traveling with her.  Ha!  🙂

I still have a ton of gorgeous projects made with this bundle saved to my computer.   I’m not sure I’ll ever get all of them made.  A girl can only try, right?  I guess if I stopped babbling on about how wonderful this bundle is I’d have more time to play so I better get going.  Have a great day.  Take care and Happy Stamping!

P.S.  Don’t forget that August 31st is the last day to order this fantastic bundle!

Wintery Thoughtful Branches

Thoughtful Branches.3.0816Yes.  Winter is coming.  OK….let’s have fall first since it is my favorite season.  🙂

This Thoughtful Branches stamp set is SO versatile.  You can make winter cards, spring cards, summer cards, birthday cards, sympathy cards, get well cards…you name it….you can probably make it with this stamp set and thinlit bundle!

I am so glad that I have it.  This is one that will stay in my craft room for a VERY long time.  How about you?  Have you purchased it yet?  You really should.  🙂

I CASEd (copy and share everything) this card directly from Stampin’ Up!  Their card didn’t have the red layer and they added a sentiment banner where my watermark is.  See, I can’t just leave well enough alone.  I always manage to change something on a card I copy.

What do you like to do?  If you see a card/project that you really like do you copy it piece by piece or add your own little changes to it?  Let me know.  I’d love to know.  Just leave a comment below.

Have a great day!  Take care and Happy Stamping!

Thoughtful Branches Pines

Thoughtful Branches.5.0816It’s another Thoughtful Branches card from my Thoughtful Branches class.  I’m pretty sure that this was the very first time I’ve done a class centered around a single stamp set.  #6monthstampingoals

It’s a bit difficult to plan a class like this, especially when you do a class the way I do.  I usually design 5 cards for a class and put everything needed for each card in it’s own container.  Then people just grab a container, work on that card and then grab a new one.  It works pretty well for my customers.  So, when you’re working with only one stamp set and multiple containers that means you can’t use the same stamp on two different cards!

I was able to make it all work for this class but we only made four cards instead of five.  Those people that attended enjoyed the class but I had a very small turnout.  Oh, well.  It happens.  I’ll just have to show these fabulous cards at next week’s class.

This card is actually my own creation although I probably borrowed bits and pieces of it from other sources.  I know I had seen the background somewhere else.  I really like this background.  First you stamp the Crumb Cake card stock with the Hardwood stamp and then you run it through the Big Shot with the Woodgrain embossing folder!  Double woodgrain!  It really looks nice.

The trees are stamped on watercolor paper to add a little more texture to the card because the double woodgrain background just wasn’t quite enough.  Ha!

This card reminds me of the north woods of MN where I’ll be headed in a few weeks.  I love it up there.  So serene and peaceful.  I hope you have a serene and peaceful day.  Take care and Happy Stamping!