Stitched from the Heart

shareableimage_1_na

Not only are stitches a classic trend, they illustrate the quality, precision, and extra care taken when creating a piece. When you give a stitched gift it shows just how much you value that relationship. Starting November 1, you can purchase Stitched Shapes Framelits ahead of their official release in the 2017-2018 annual catalog! With Stitched Shapes Framelits you can make thoughtful paper stitches in seconds, turning any project into one that is stitched from the heart. And during the month of November, coordinating stamp sets are 25% off! But don’t worry…Stitched Shapes Framelits will still be available for purchase after November 30.

You can see the list of stamp sets on sale below or check them out here in my online store.  I can’t wait to order mine?  How about you?

Item Description Retail Price Sale Price
145372 Stitched Shapes Framelits Dies—set of 12 dies which includes four circles, ovals, and squares $30 USD/ $40 CAD No discount
142069 (HC p. 11) Greetings From Santa Wood-mount Stamp Set $27 USD/ $35 CAD $20.25 USD/ $26.25 CAD
143269 (HC p. 11) Greetings From Santa Clear-mount Stamp Set $19 USD/ $25 CAD $14.25 USD/ $18.75 CAD
142114 (HC p. 15) Hang Your Stocking Photopolymer Stamp Set $21 USD/ $26 CAD $15.75 USD/ $19.50 CAD
142049 (HC p. 19) Christmas Pines Photopolymer Stamp Set $35 USD/ $43 CAD $26.25 USD/ $32.25 CAD
142142 (HC p. 23) Merry Mice Wood-mount Stamp Set $23 USD/ $30 CAD $17.25 USD/ $22.50 CAD
142145 (HC p. 23) Merry Mice Clear-mount Stamp Set $17 USD/ $22 CAD $12.75 USD/ $16.50 CAD
142180 (HC p. 33) Tin of Tags Photopolymer Stamp Set $21 USD/ $26 CAD $15.75 USD/ $19.50 CAD
142206 (HC p. 43) Suite Season Wood-mount Stamp Set $28 USD/ $36 CAD $21 USD/ $27 CAD
142209 (HC p. 43) Suite Season Clear-mount Stamp Set $20 USD/ $27 CAD $15 USD/ $20.25 CAD
140386 (AC p. 31) Oh, What Fun Photopolymer Stamp Set $21 USD/ $26 CAD $15.75 USD/ $19.50 CAD
141859 (AC p. 61) Baby Bear Photopolymer Stamp Set $26 USD/ $32 CAD $19.50 USD/ $24 CAD
141784 (AC p. 139) Blooms & Wishes Photopolymer Stamp Set $21 USD/ $26 CAD $15.75 USD/ $19.50 CAD

*AC refers to the annual catalog; HC refers to the holiday catalog.

Have a great day!  Take care and Happy Stamping!

Halloween Box Card With Drawer

jar-of-haunts-3Happy Halloween!!!!

Yesterday I told you how much I love this little mummy from the  Jar of Haunts stamp set.  I hadn’t had a real chance to play with him but I had a workshop/party a week or so ago and decided to make this fun little box for the hostess.   I was pretty tickled with how cute it turned out.

The box and drawer were pretty easy to make.  I’d explain all of the directions here but my philosophy has always been “Why reinvent the wheel?”…so I’m just going to give jar-of-haunts-2you the link to the blog where I learned how to make it.  One of these days I will figure out how to make a video and start sharing these type of things with you.  Until then…thank you Julie Davison!  🙂

You simply make the drawer/box and then you make a wrapper/outside to go around it.  That’s it!  Of course, don’t forget to fill the drawer with your favorite candy/treat or small gift.

Have a spooky, fun and safe Halloween!  Take jar-of-hauntscare and Happy Stamping!


Jar of Haunts

jar-of-haunts-swap1
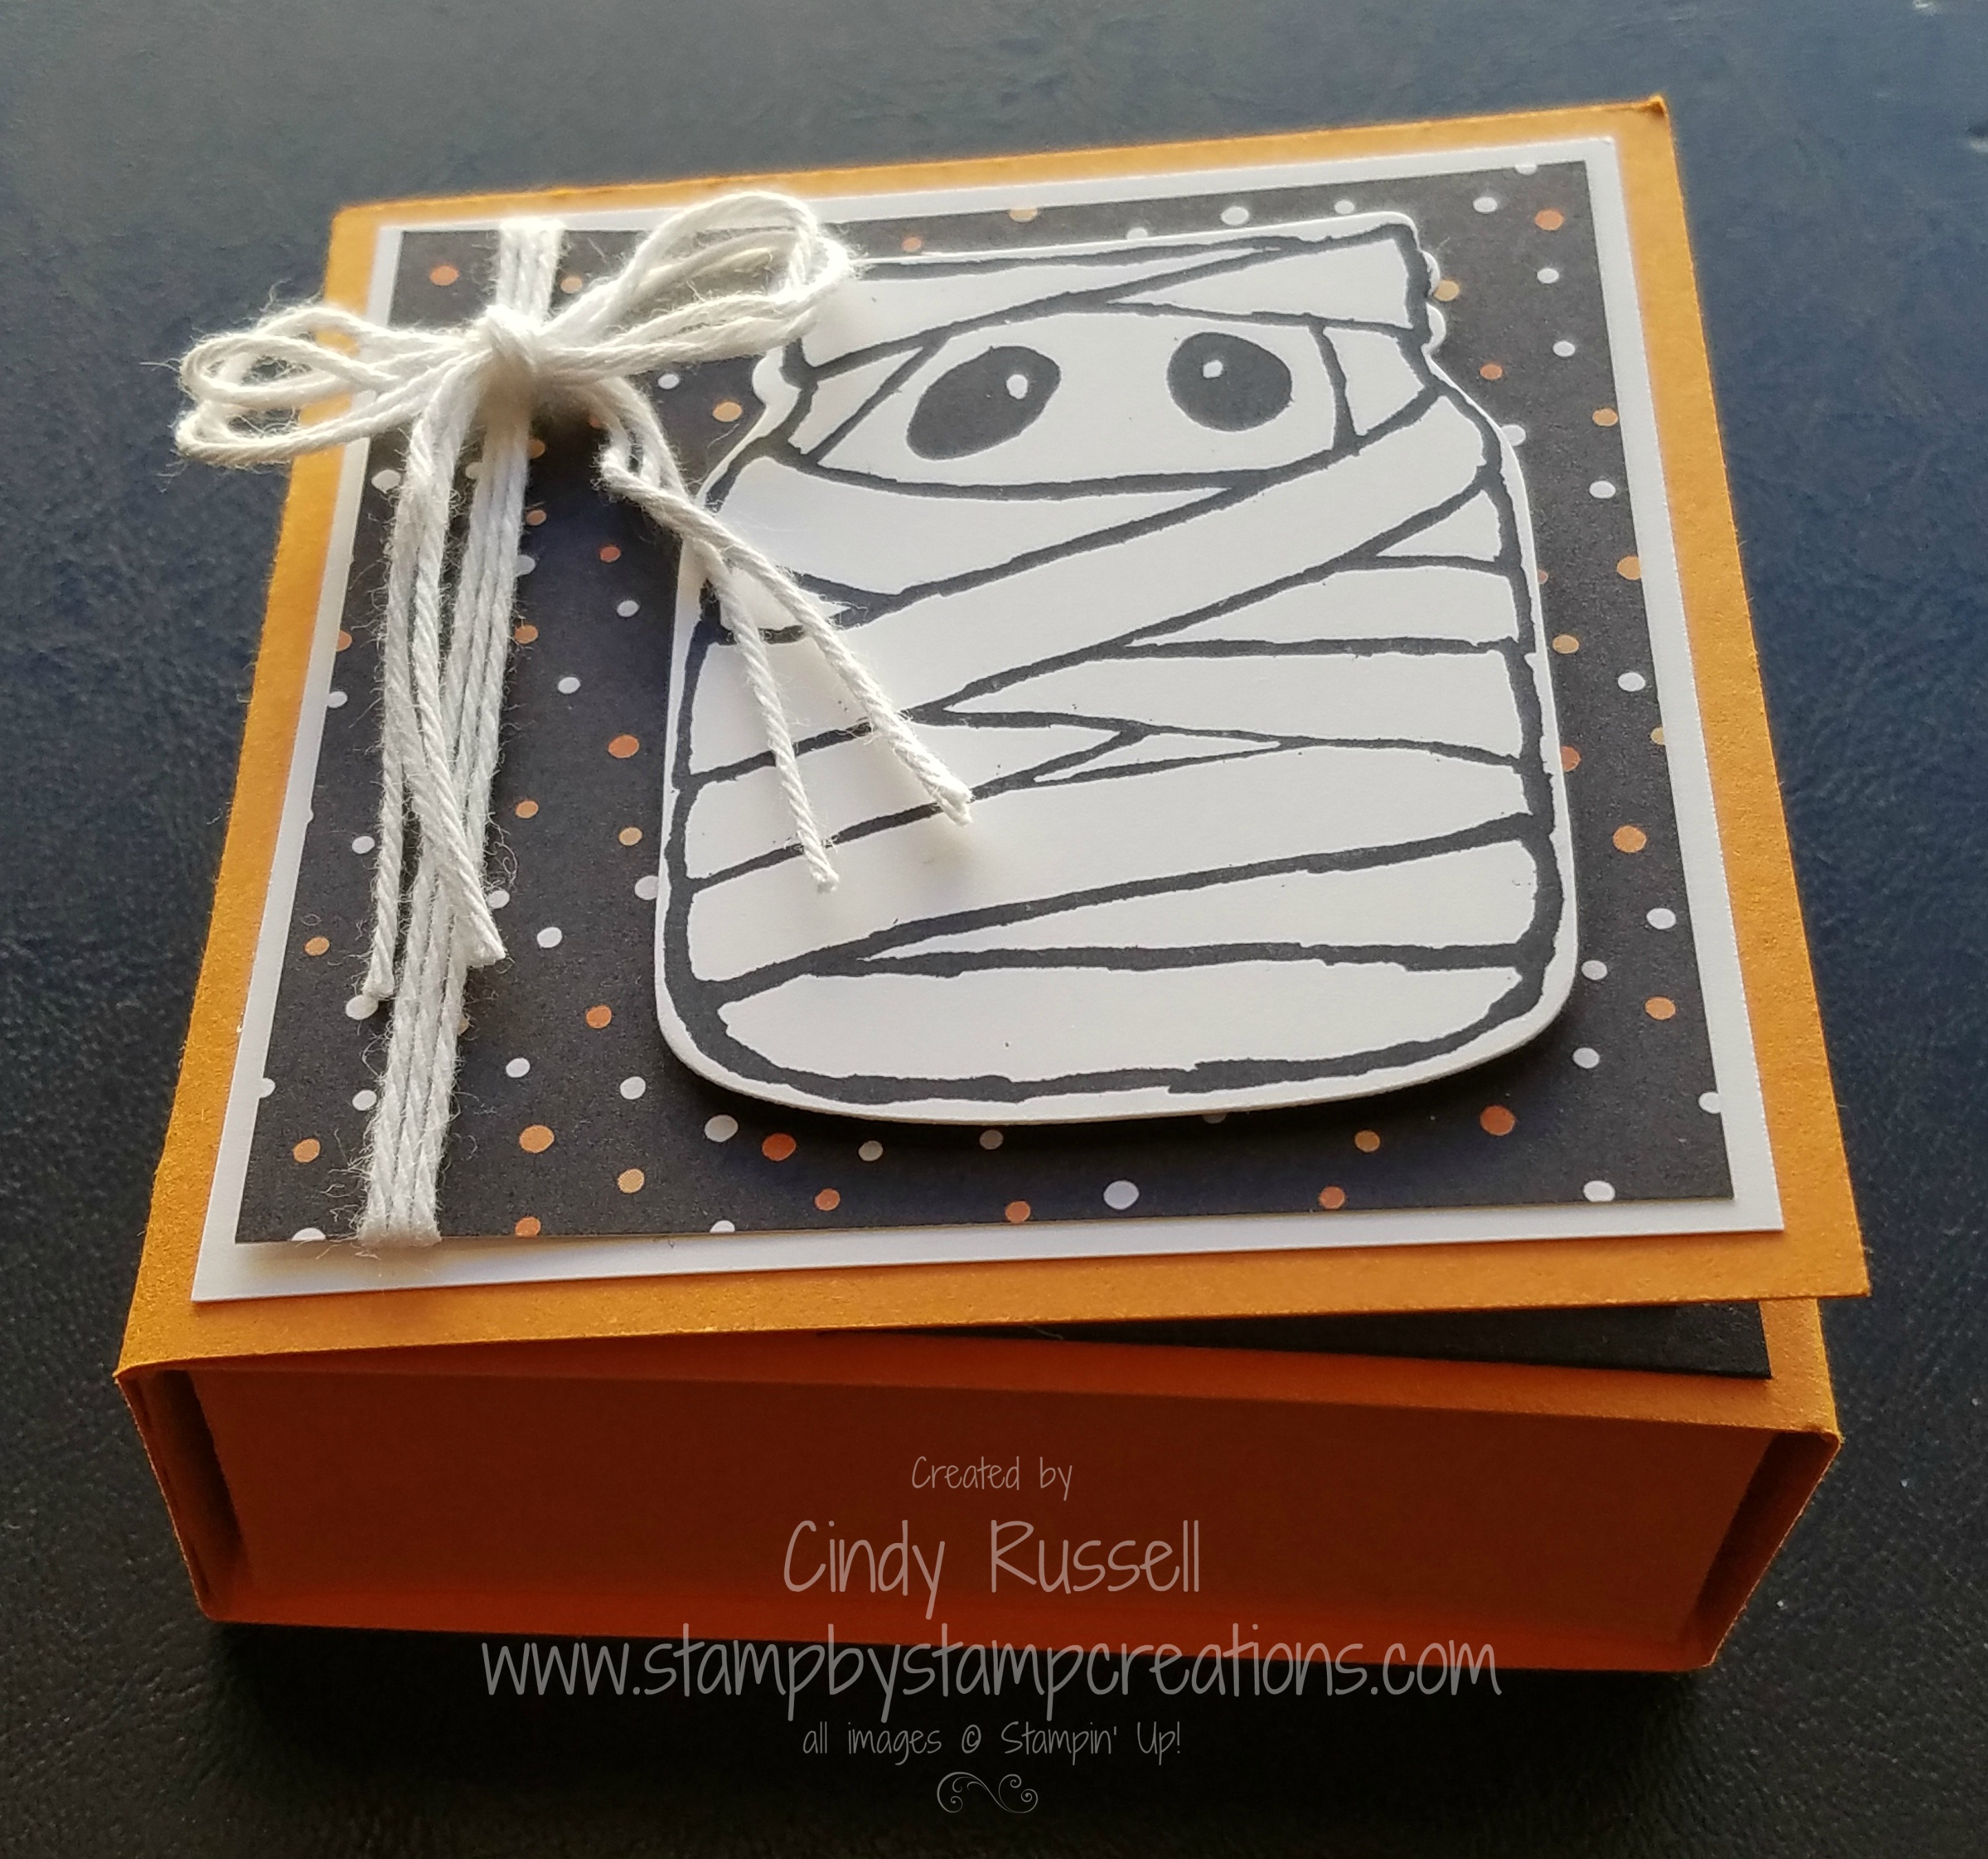
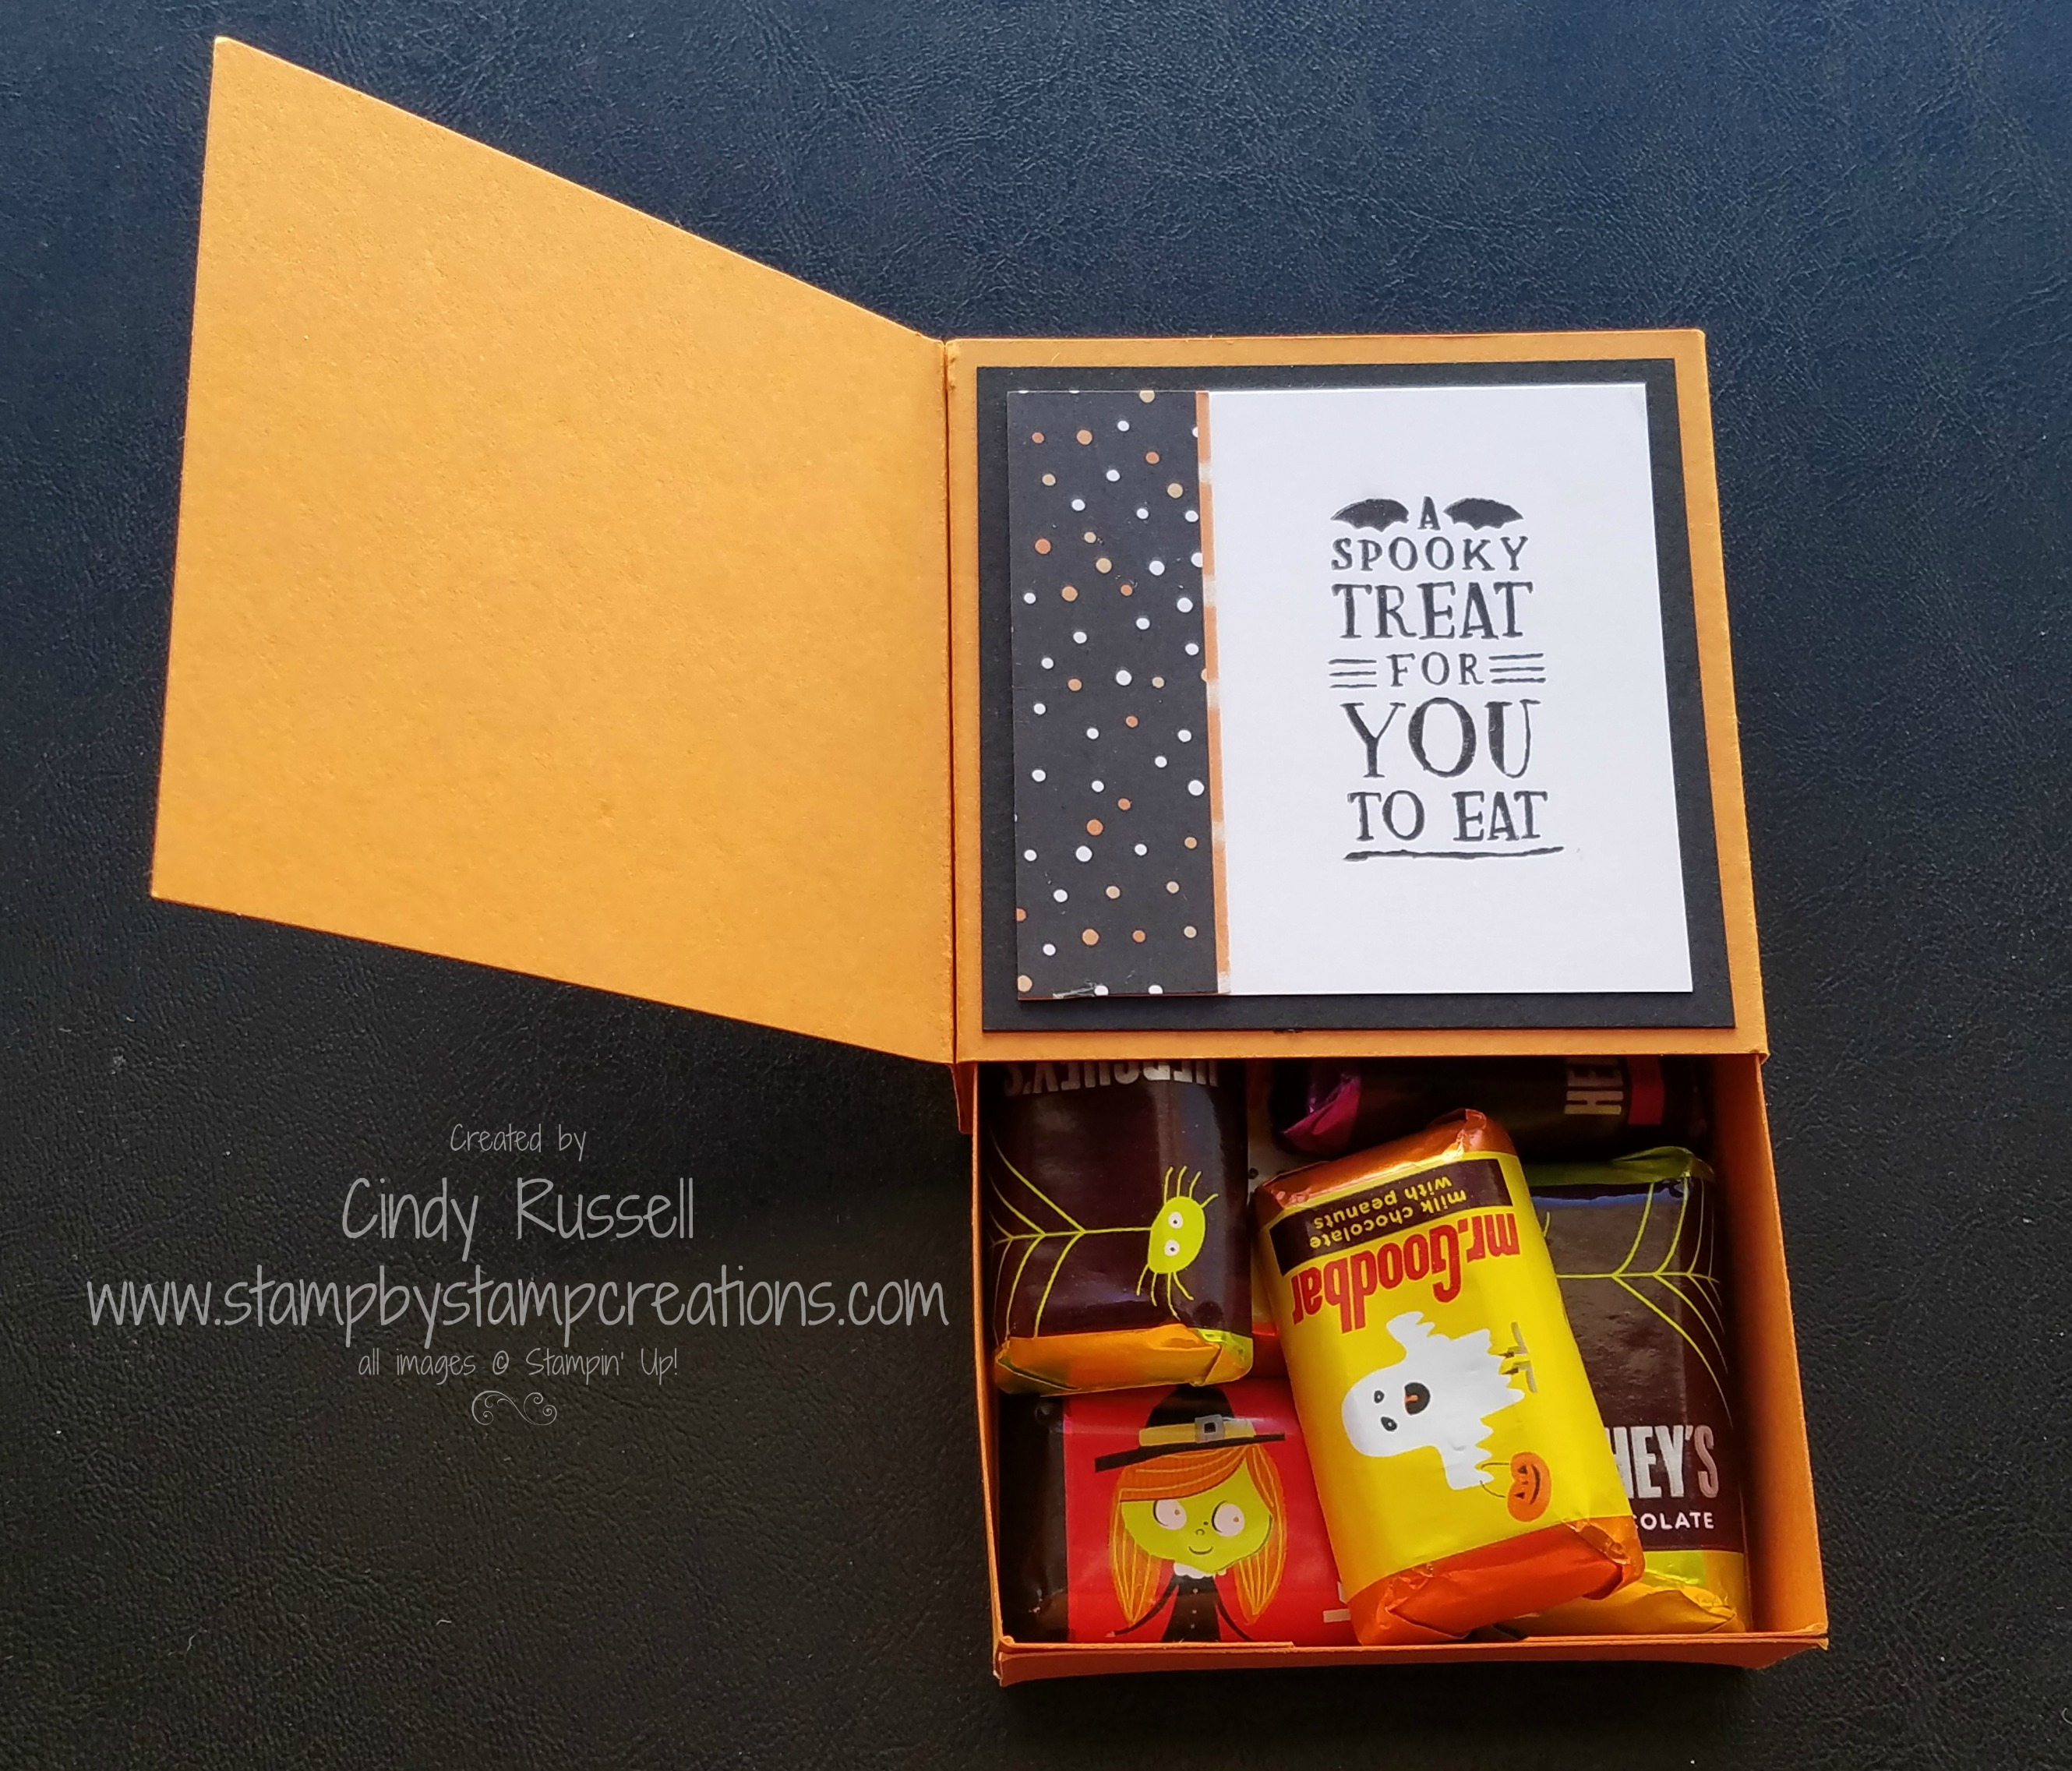
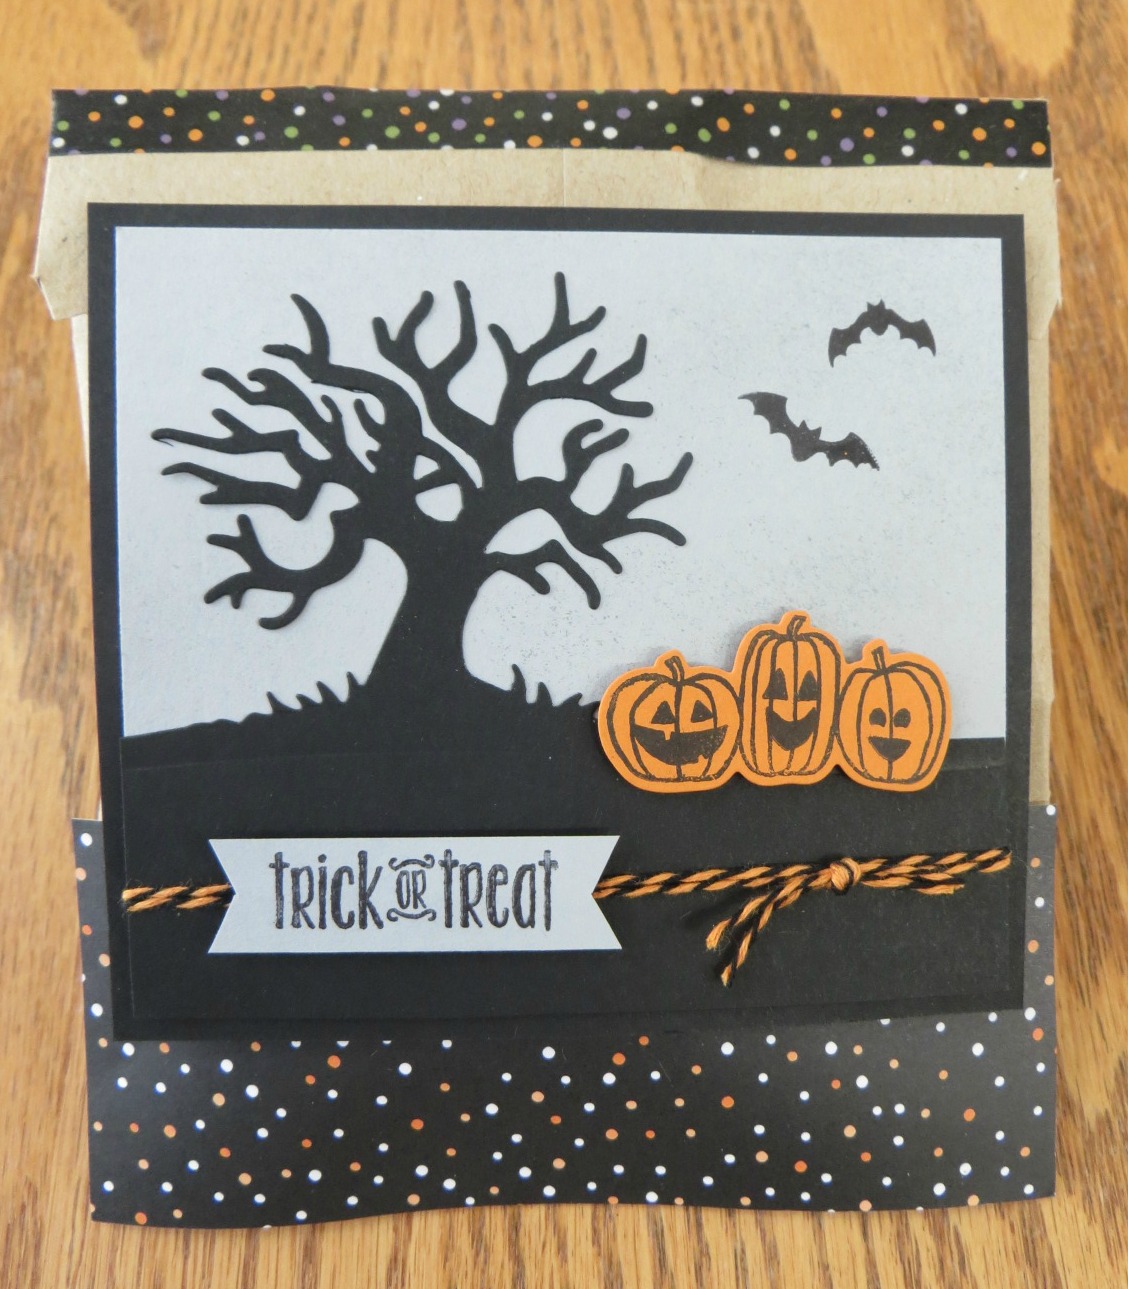
Boo!  It’s almost Halloween!  Are you ready?

Jar of Haunts is a great stamp set with lots of fun images.  The little mummy jar has to be my favorite.  He’s just so darn cute!  I received this card as part of a swap from my friend Tammie.  I like the way she was able to incorporate many of the images on the card.  I’m glad she was able to make the mummy the focal point since he’s so cute.  🙂

I love when lots of things coordinate together.  The Jar of Haunts stamp set, Jar of Love stamp set and the Jar of Cheer (Christmas stuff) all coordinate with the Everyday Jar Framelits.  How great is that?!!!  One set of framelits that coordinate with 3 different stamp sets!  Woo Hoo!

Isn’t this a fun card design?  I’m not sure I’ve seen one like this before.  Fun and different.  A lot of my cards end up looking the same.  I get stuck on the same old design.  I need to start branching out a bit and try some new things.  How about you?  Do you get stuck in a creative rut or do you try new things all of the time?

Have a great day!  Take care and Happy Stamping!

Acorny Thank You

acorny-thankyou-0916I love my Stampin’ Up! catalogs.  They are full of great products that you can purchase but they are also full of fabulous ideas to make with those products!  How often do you go back through the catalog looking for a project idea?

I’m finding that I’m doing this much more often.  It should be the first place I look for an idea but I usually head over to Pinterest first and as a last resort head to my catalog.

I don’t usually copy an idea exactly.  I have to change at least a few things up on it.  Take this card for example.  It is very close to the sample on page 36 of the annual acorn1catalog but I just changed out a couple of things.  How many differences can you spot?

Do you do change things up or do you copy a card exactly?  I’m usually a changer.  I almost always have to make the card a little different.  Not that I don’t love what the original artist has done but I just like to make the card my own.

I hope you have a wonderful day!  Take care and Happy Stamping!

Paisleys & Posies/Take Two

paisleys-posies-1016
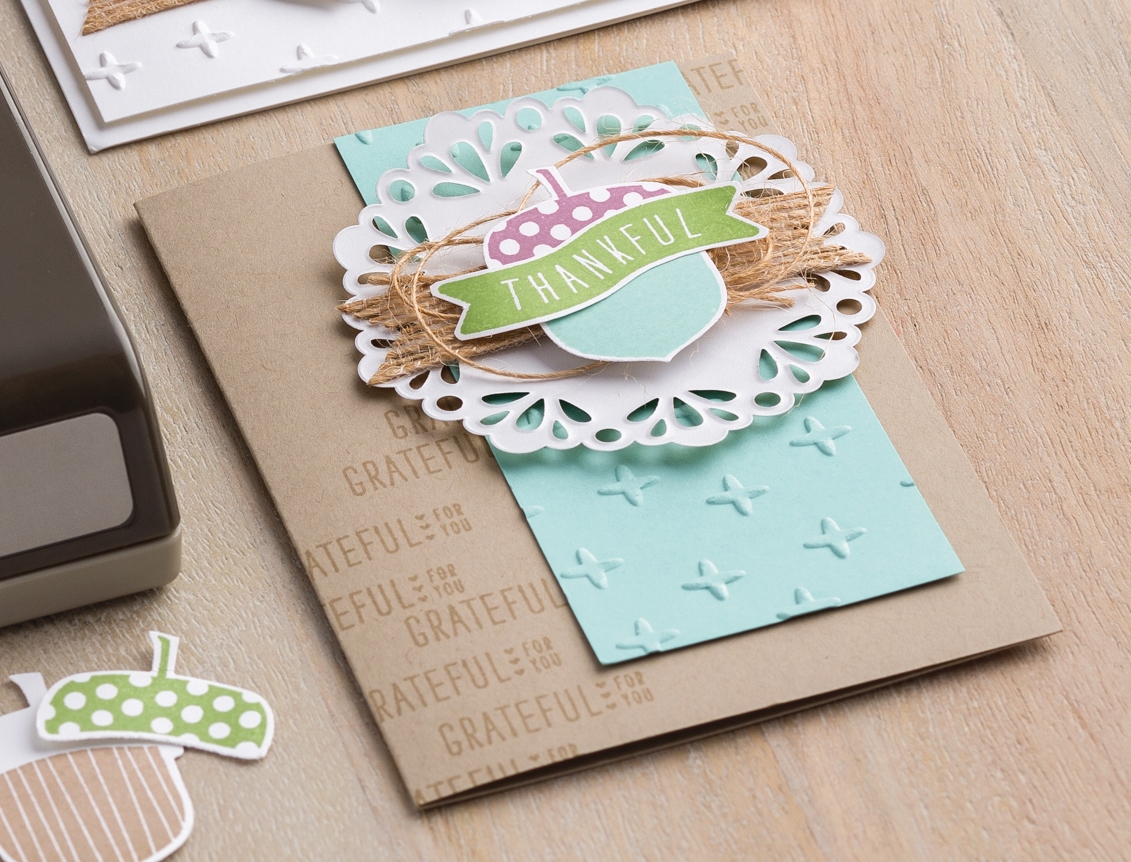
Today’s card is one that I made for my first ever Card Buffet.  Nice and easy.  I had some cut pieces left over and decided to figure out how to repurpose them for a workshop I had last Thursday.  I also wanted to try the “Give Thanks” stamp from the Suite Seasons stamp set.

Hmm….what to do….

The first thing I did was change the orientation of the card from vertical to horizontal.  I then added a little more Baker’s Twine and stamped the sentiment on a separate piece of paper and popped it up.  Check out my “new” card in the second picture.

paisleys-posies-1-1016Don’t you love the Petals & Paisleys designer paper?  This sheet is one of my favorite from the package.  I can’t decide which one of these sentiments I like the best.  They both hit home for me.  I may have to choose the Thankful, Grateful, Blessed.  How about you?

Both cards are pretty easy.  Which one do you like the best?  Leave me a comment and let me know.

Have a great day!  Take care and Happy Stamping!

Stunning Totally Trees!

totally-trees-copper-0816I need to start out this post by saying that the picture doesn’t do this card justice.  It is stunning!  Don’t you just love it when a plan comes together?  I designed this card for a swap when the Holiday Catalog first came out.  Totally Trees was the first stamp set I knew I had to have from the catalog.

I really fell in love with the palm tree from this stamp set but this tree with the heat embossed copper leaves was what I knew I had to use for the card.  After embossing the tree I just had to grab some of the new Copper Foil Sheets.  Oo La La!  They’re gorgeous!

I’m sorry to keep going on and on about this card but I think it’s one of my absolute favorites of all the cards I’ve made….and I’ve made a lot of cards!  🙂

This was my other card that we used at Stamp Camp and everyone loved it.  It’s easy to make and as I’ve mentioned before….it’s stunning.

One little tip I’d like to share with you is that when die cutting the foil sheets you really should use clean cutting pads for your Big Shot…especially the top one that touches your foil sheet.  Otherwise all of those little cuts in the cutting pad get etched into your foil…..not a good look.

Have a great day!  Take care and Happy Stamping!

Water Color Basket of Wishes

basket-of-wishes-camp-1016Stamp Camp is tomorrow!  This is an all-day event that my group of SASsy Stampers & Friends puts on.  My team is the SASsy (Seriously Addicted to Stamping) Stampers but we have so many demo friends that join us that we’ve add “& friends” to our name!  🙂

That’s one of the best things about being part of Stampin’ Up!….the friendships.  I can’t imagine my life without some of these gals.  I love stamping with them, traveling to events with them and just hanging out with them.  They’re all a lot of fun and I wouldn’t have met them without Stampin’ Up!.

Of course the next best thing about being part of Stampin’ Up! is the 20% discount on Stampin’ Up!’s fabulous products!  Who doesn’t love a good discount?!  If you’ve been toying with the idea of being part of Stampin’ Up! and would like more information just click here or check out the link at the top of this page.  The Starter Kit is only $99 and for that amount you get to choose $125 of Stampin’ Up! merchandise.  I’d love to have you on my team!  🙂

So, back to this lovely card.  Yep.  It’s a Cindy original.  The guests at our last Stamp Camp in July loved to water color so I designed another water color card for this camp.  The Basket of Wishes stamp set is perfect for water coloring.  The image even has it’s own shading to make things easier for you.

The card does have a crazy amount of layers on it but that seems to be my thing…the more the better.  Ha!  The hardest part of making this card was figuring out what color to use on what pumpkin/gourd.

Have a wonderful day!  Take care and Happy Stamping!

Cookie Cutter Halloween Mummy

cookie-cutter-halloween-1016
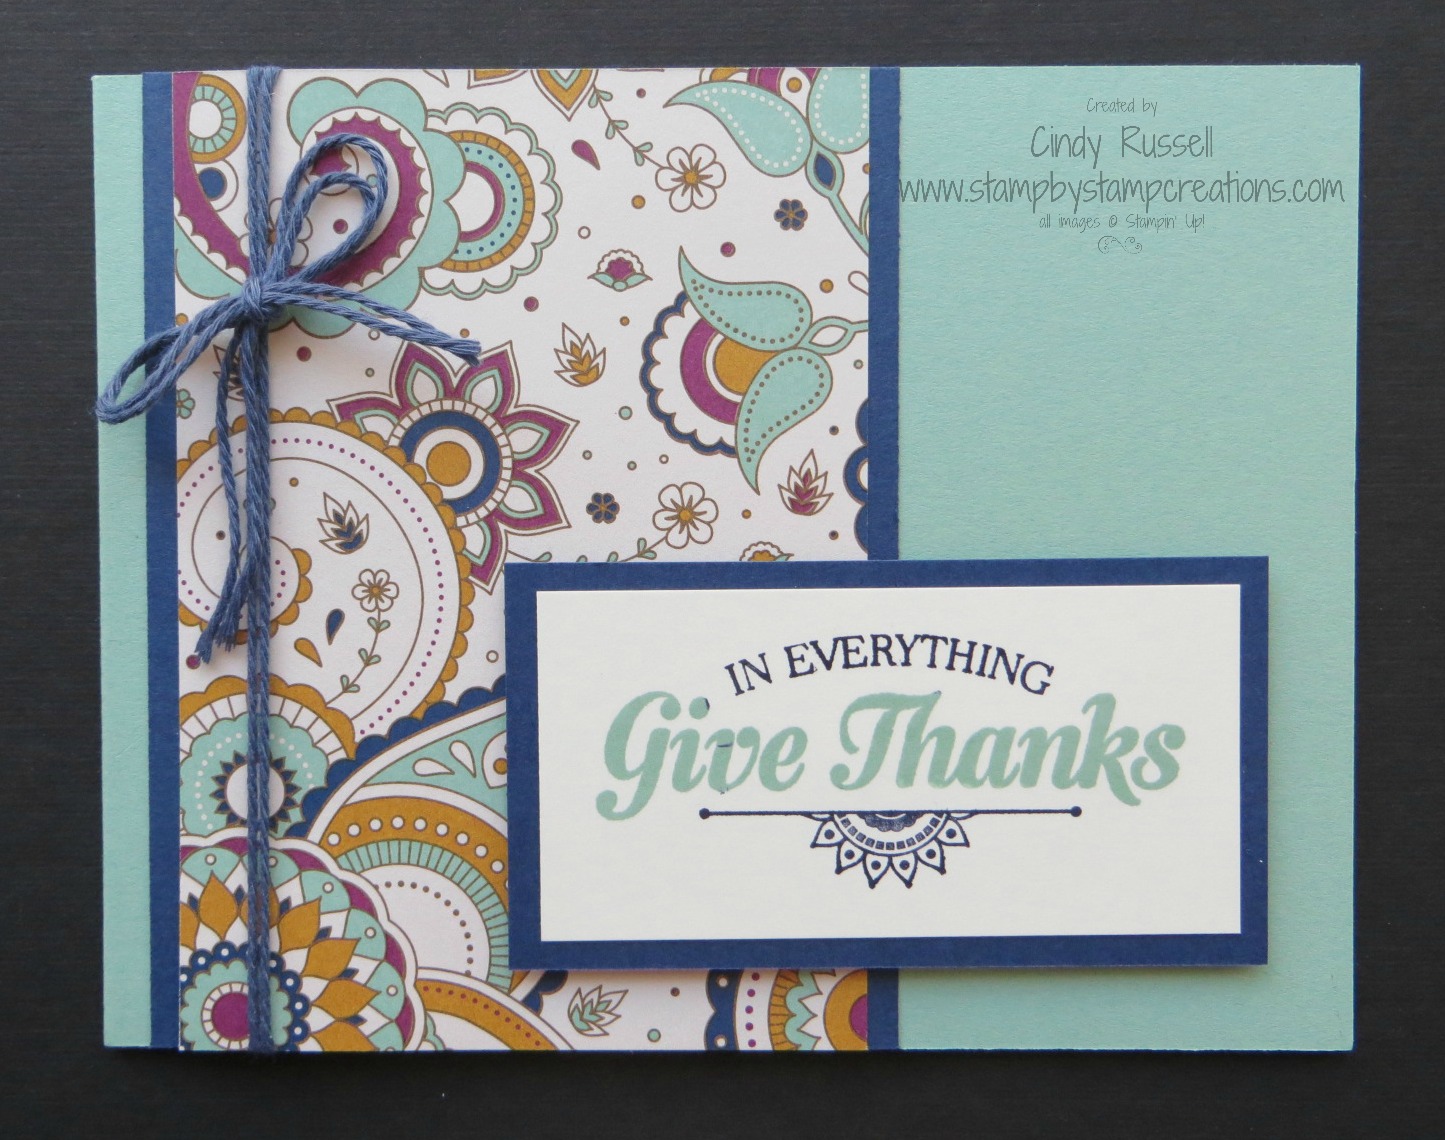
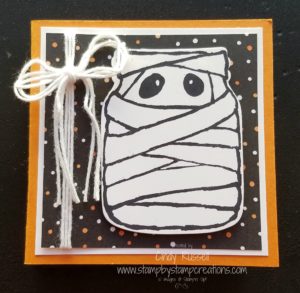
I have a workshop/party tonight!  It was fun getting ready for it even if I’m getting ready for Saturday’s Stamp Camp at the same time.  It keeps me on my toes, right?!  🙂

Vonnie, my hostess, told me exactly what type of cards she wanted to make so I went to work creating.  Today’s card is the Halloween card that I came up with (OK…I CASEd it!)  Isn’t it cute?  I was telling you the other day how I really didn’t think I needed this stamp set but now I can’t seem to get enough of it!  Ha!

My favorite part of this card is the little pieces of mummy wrapping sticking to him.  You can use muslin fabric or if you’re lazy like me I just grabbed a roll of white ribbon from my stash and cut it in thin strips and tied them in a knot.  Too cute!  I hope the gals like it tonight!

Well, I’m not quite all ready for the party tonight.  I’m trying to think of a hostess gift.  Hmm…..I guess I better get to work.  Have a great day!  Take care and Happy Stamping!

Card Buffet: Sheltering Tree

sheltering-tree-1016I think fall has finally arrived….at least for a few days.   Fall here in Colorado has been crazy!  The temperature has been in the upper 70’s and even low 80’s most of the time.  Then, like today, we will get a high in the 50’s and 60’s which in book is where it should be!  I want jeans and sweatshirts!

OK…enough whining about the weather!  I originally designed this card for my card group at church to make.  We make cards for the church office to send out.  I like to keep the cards fairly easy since many of the gals aren’t experienced stampers.

It turned out to be perfect for my new class event:  The Card Buffet!  Yep.  I tried a new event this month.  This first Card Buffet of mine actually was a glorified Stamp-a-Stack.  I had designed 8 cards and my guests could make up to 3 of each card if they desired.  In a true Card Buffet a guest should be able to make as many of any design that they’d like.  With this being my first event though I had no idea how many of each card to cut.  Even though I didn’t cut as many as I could have I still had extras.  That’s ok though.  I did get a lot of positive feed back on the class though and will definitely do another one.  My guests enjoyed being able to pick and choose which cards they wanted to make.  #6monthstampingoals

6monthIf you’re wondering about the hashtag let me explain.  Back in April at Stampin’ Up!’s On Stage event we all were challenged to hold one new event each month.  It was kind of fun trying to figure out what type of event to hold.  I did manage to rock my #6monthstampingoals so I’m pretty proud of myself.  I wonder if they’ll give us a new challenge at the November event?

Have a great day!  Take care and Happy Stamping!

Tuesday Treats: Halloween Treat

halloween-treat-0916
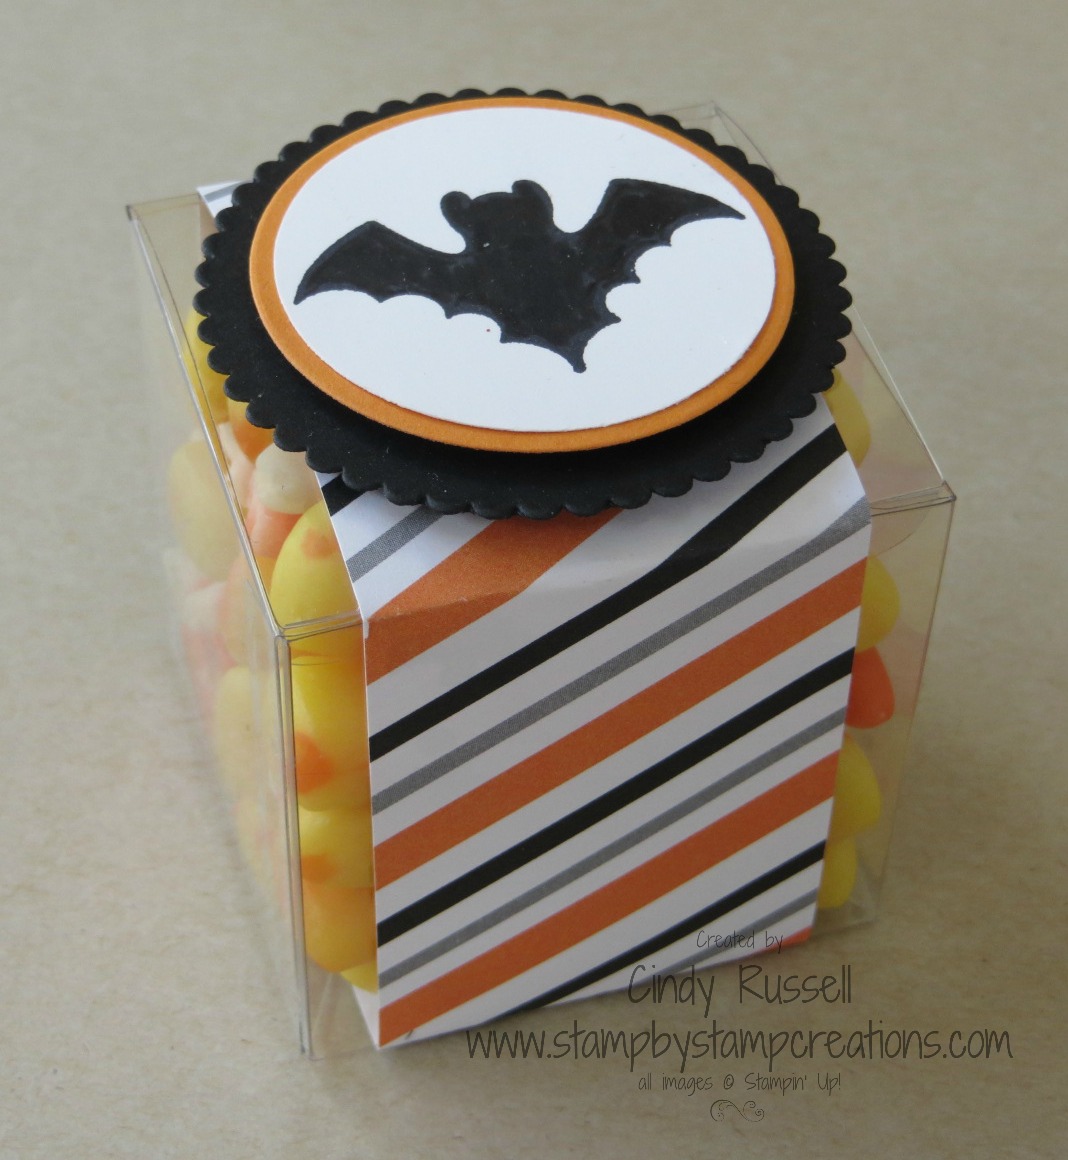
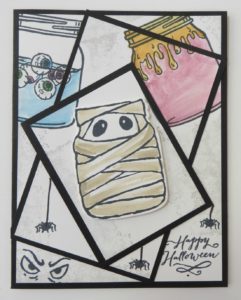
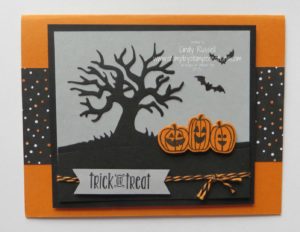
Tuesday Treats!  I think I may have to start a new weekly post….hmm….

Here is a SIMPLE idea for a Halloween treat.  I put some candy in a cello bag.  Tied it with some fun Halloween Night Baker’s Twine and added the fun Halloween Treat tag.  Like I said…simple!  The most difficult part was coloring in the little pumpkins with my Pumpkin Pie marker and that wasn’t tough at all!

I’ve been debating with myself on whether to make little treat bags or something to hand out to all of the little kiddos that come to my door on Halloween.  I usually just give them a handful of candy.  Of course, that would be a lot of little treat bags to make and fill.  I will get around 50 or so kiddos.  The nice thing about just handing out the candy is that I can grab as much or as little as I like.  Decisions.  Decisions.  I’m guessing that with my upcoming schedule the little treat bags are not going to happen.

What do you hand out on Halloween?  Leave a comment and let me know.  Thanks!

Cookie Cutter Halloween Swap Card

cookie-cutter-halloween-swap1TSC!  Too Stinkin’ Cute!  This card is SO adorable!  Here’s another confession….I didn’t want to purchase the Cookie Cutter Halloween stamp set or the Cookie Cutter Christmas stamp set.  Nope.  They were way too cutsie for me.  I don’t have little kids around and I had no reason for these stamp sets.  HA!

These little critters are way too cute!  There are so many great projects online made with these stamp sets!  I may be in love.  Oh, well….never say never…right?  I’ll have to remember that when the next new catalog comes out.

I received this totally fun card as a swap.  I just love the way the little characters are peeking through the frames.  I’m not sure which character is my favorite.  How about you?  I do love the little spider and web from the Spooky Fun stamp set.  I really need more time to play with my Halloween stamps.  It’s coming up way too fast!  Only 2 weeks.  Yikes!  Unfortunately I’ve already bought some candy and we’ve been nibbling away at it.  I really shouldn’t do that!  I’m trying to LOSE weight!  Not gain it!  Ha!

Have a wonderful day!  Take care and Happy Stamping!

Thankful, Grateful, Blessed

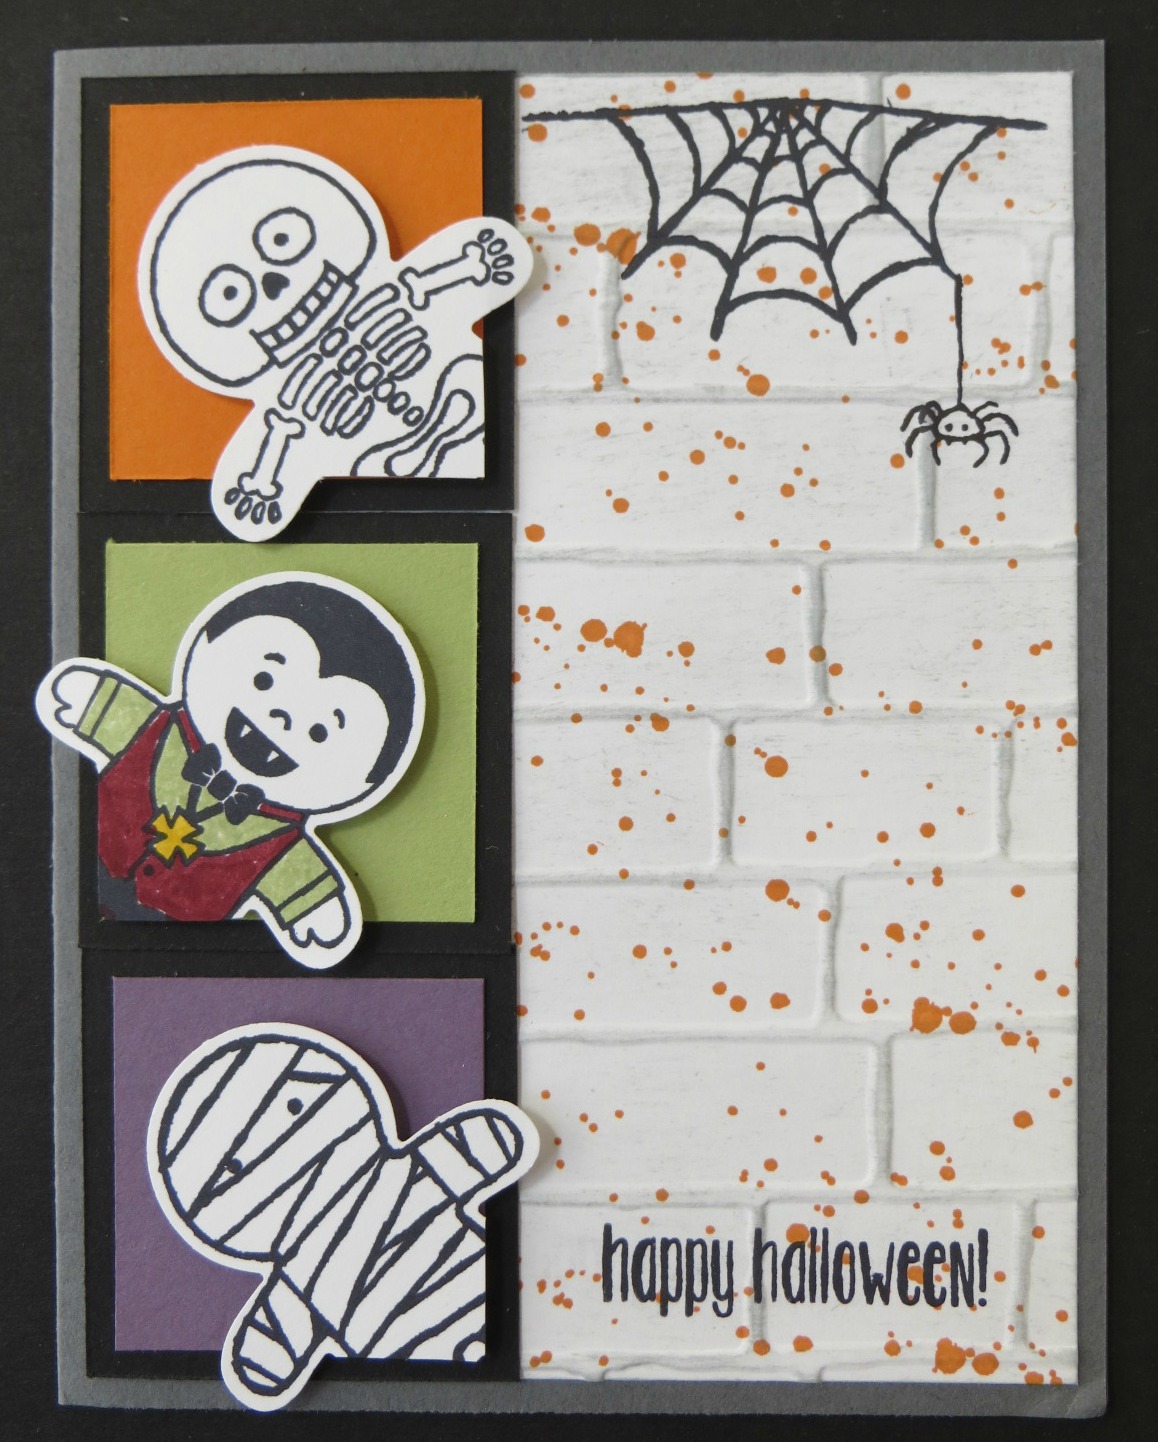
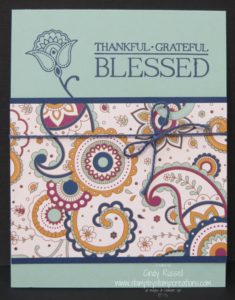
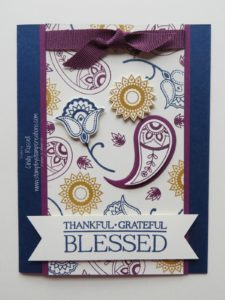
My favorite part of this card is the sentiment.  Thankful, Grateful, Blessed seems to cover it all.  As I mentioned in my last post I am very Thankful, Grateful and Blessed for all of you and also to Stampin’ Up!.  They allow me to “Love what I do” and “Share what I Love” as well as give me the opportunity to earn incentives like the trip to Thailand.  Stampin’ Up! is a great company to be part of.

This card was made with the Paisleys & Posies stamp set along with the COORDINATING Paisley Framelits Dies.  Don’t you love how I always capitalize COORDINATING?  Ha!  Anyway, this is a fun stamp set with all of the different designs and shapes.  The set has wonderful sentiments too like the Thankful, Grateful, Blessed.

As I’m writing this and realizing how powerful this sentiment is, at least to me, I think I’m going to have to make some kind of little frame with this sentiment on it to simply remind me each day that I should be thankful and grateful and that my life truly is blessed.

This card is pretty easy unless you’re me and have trouble with stamping randomly.  Ha!  I started by stamping the three images in the center that are popped up and then moved out from there.  After I filled in my sheet I stamped the three popped images on scrap paper, die cut them and added them to the card.

I hope that today your are thankful and grateful for something and that your day is truly blessed.  Have a great one!  Take care and Happy Stamping!

You’re the Best!

thailandThank You!  Thank You!  Thank You!  You…my friends, customers, blog followers, fellow demonstrators and supporters are THE BEST!

Because of all of you and your support of my business I’ve earned Stampin’ Up!’s  incentive trip to Phuket Thailand!  Woo Hoo!  I am SO excited!  The trip isn’t until next July but I’m really looking forward to it.  This is the first “big trip” that I’ve earned.  Stampin’ Up! used to have “Getaway” trips which were a little easier to earn.  I was able to go to San Diego and Newport Beach on those but this is the first time I’ve earned the major incentive trip.  Have I mentioned how excited I am?

Thank you again for all of your support!  You’re the best!

Hugs to all!

Cindy

Spooky Fun!

spooky-fun-1-0816Are you like me?  Does life seem to get away from you?  I haven’t actually been stressed this week but I haven’t got as much done as I’ve wanted to get done or should have got done.

I have this great notepad that I can list everything that needs to get done each day.  I’m really good at writing on it but somehow I manage not to look at it during the day.  Sheesh!  Oh well, I can only improve, right?  🙂

spooky-fun-treat-0916This Halloween card is the last one that we made in our Fall/Halloween class.  I really like that spooky tree, don’t you?  It’s the perfect background for the adorable pumpkins and the spooky little bats.  The Halloween Scenes Edgelits are so fun and they coordinate with quite a few of the images from the Spooky Fun stamp set.   You know how I love COORDINATION!  🙂

Halloween is coming up FAST!  Yikes!  I really want to play with all of my Halloween products more but I’m in the midst of planning Christmas classes!  Ah….the work of demonstrator is never done.  Ha!

I hope you have a spooky fun day!  Take care and Happy Stamping!

A Halloween Treat

halloween-treat-boxAre you looking for a fun and easy Halloween treat holder?  I have just the thing for you!

If you’re like me, you’ve completely overlooked the adorable little Clear Tiny Treat Boxes on page 176 in the regular catalog!  They are 2″ x 2″ x 2″ and absolutely perfect for your Halloween treats!

Fold along the score lines on the box, put together according to the enclosed directions, add a strip of the fun Halloween Night Designer Series Paper and a quick topper.  Now you have your fun and easy Halloween treat!

My treat topper is made using the Layering Circle Framelits and the bat is from the Halloween Scares stamp set.  Easy peasy!  It would take you no time at all to make these for a party or a group of friends.  Get busy!

Have a great day!  Take care and Happy Stamping!