Thankful, Grateful, Blessed

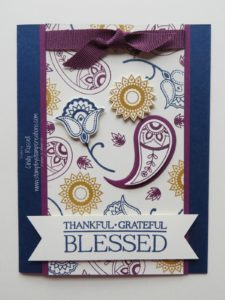
My favorite part of this card is the sentiment.  Thankful, Grateful, Blessed seems to cover it all.  As I mentioned in my last post I am very Thankful, Grateful and Blessed for all of you and also to Stampin’ Up!.  They allow me to “Love what I do” and “Share what I Love” as well as give me the opportunity to earn incentives like the trip to Thailand.  Stampin’ Up! is a great company to be part of.

This card was made with the Paisleys & Posies stamp set along with the COORDINATING Paisley Framelits Dies.  Don’t you love how I always capitalize COORDINATING?  Ha!  Anyway, this is a fun stamp set with all of the different designs and shapes.  The set has wonderful sentiments too like the Thankful, Grateful, Blessed.

As I’m writing this and realizing how powerful this sentiment is, at least to me, I think I’m going to have to make some kind of little frame with this sentiment on it to simply remind me each day that I should be thankful and grateful and that my life truly is blessed.

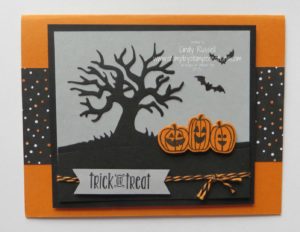
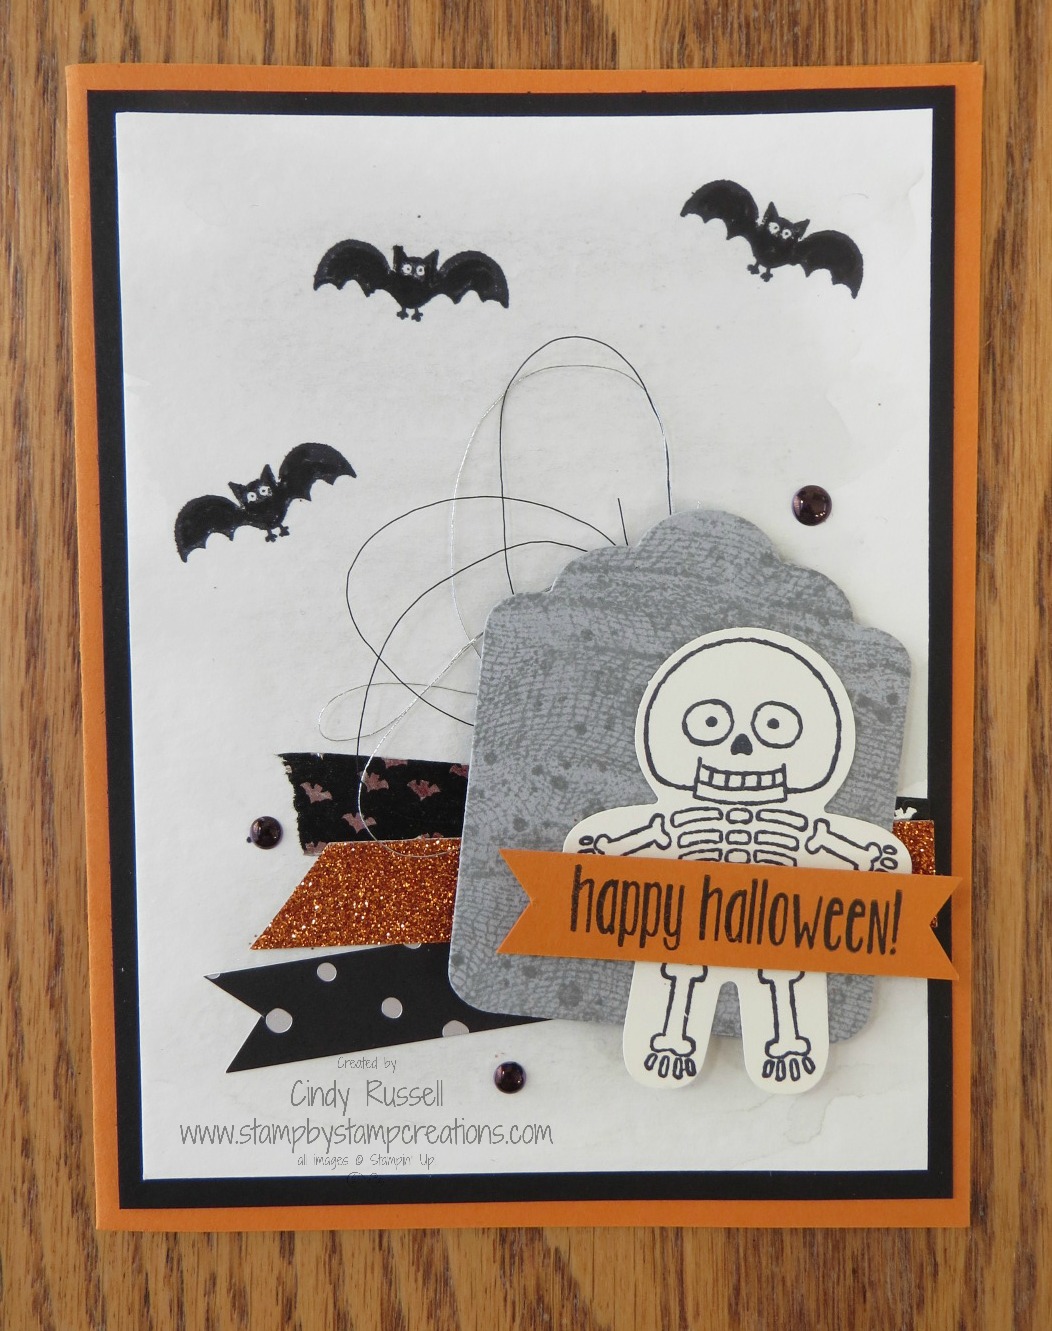
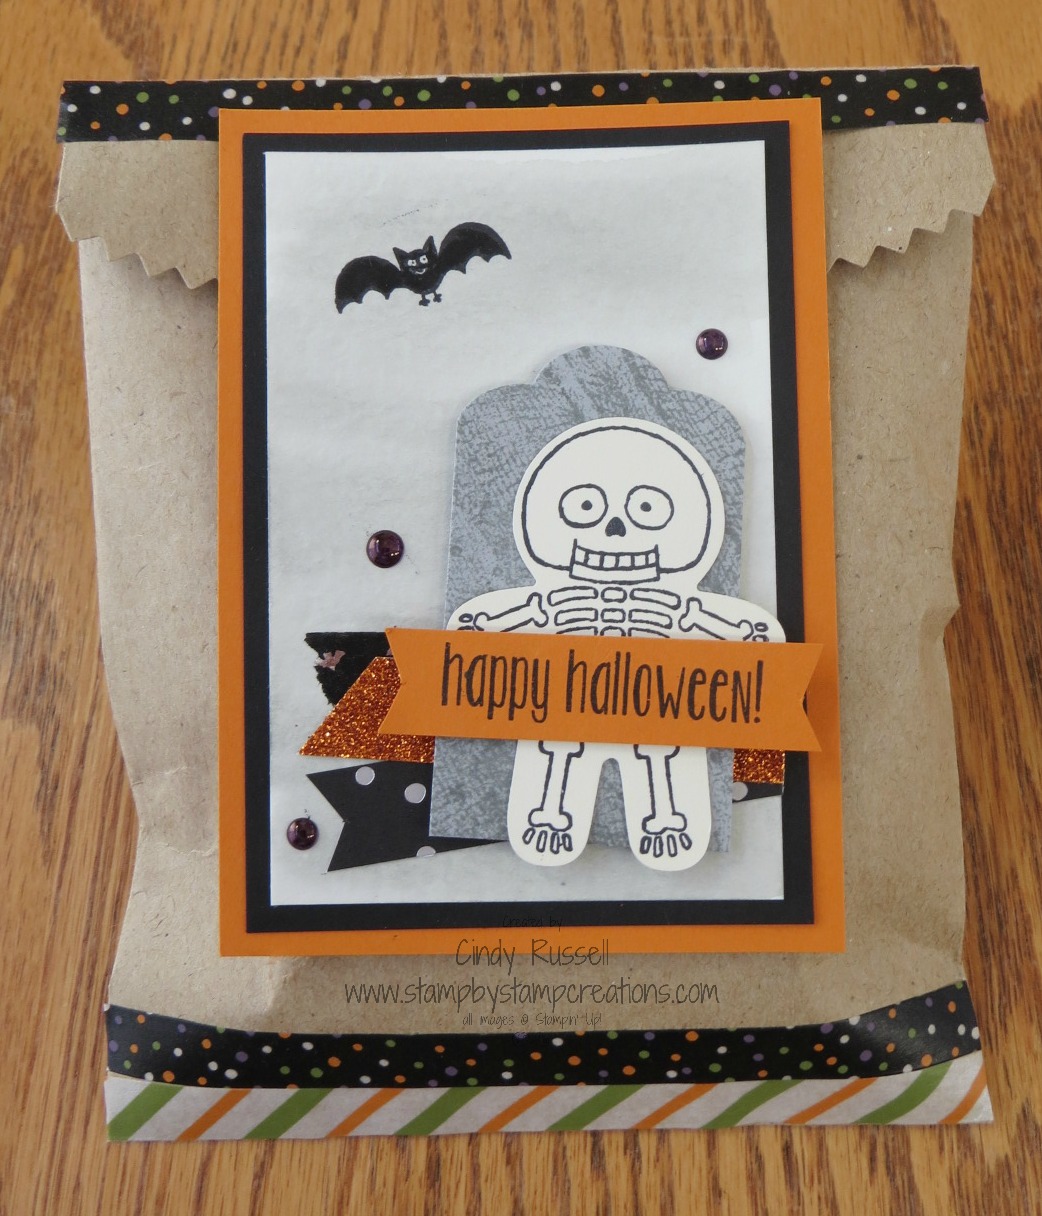
This card is pretty easy unless you’re me and have trouble with stamping randomly.  Ha!  I started by stamping the three images in the center that are popped up and then moved out from there.  After I filled in my sheet I stamped the three popped images on scrap paper, die cut them and added them to the card.

I hope that today your are thankful and grateful for something and that your day is truly blessed.  Have a great one!  Take care and Happy Stamping!

You’re the Best!

thailandThank You!  Thank You!  Thank You!  You…my friends, customers, blog followers, fellow demonstrators and supporters are THE BEST!

Because of all of you and your support of my business I’ve earned Stampin’ Up!’s  incentive trip to Phuket Thailand!  Woo Hoo!  I am SO excited!  The trip isn’t until next July but I’m really looking forward to it.  This is the first “big trip” that I’ve earned.  Stampin’ Up! used to have “Getaway” trips which were a little easier to earn.  I was able to go to San Diego and Newport Beach on those but this is the first time I’ve earned the major incentive trip.  Have I mentioned how excited I am?

Thank you again for all of your support!  You’re the best!

Hugs to all!

Cindy

Spooky Fun!

spooky-fun-1-0816Are you like me?  Does life seem to get away from you?  I haven’t actually been stressed this week but I haven’t got as much done as I’ve wanted to get done or should have got done.

I have this great notepad that I can list everything that needs to get done each day.  I’m really good at writing on it but somehow I manage not to look at it during the day.  Sheesh!  Oh well, I can only improve, right?  🙂

spooky-fun-treat-0916This Halloween card is the last one that we made in our Fall/Halloween class.  I really like that spooky tree, don’t you?  It’s the perfect background for the adorable pumpkins and the spooky little bats.  The Halloween Scenes Edgelits are so fun and they coordinate with quite a few of the images from the Spooky Fun stamp set.   You know how I love COORDINATION!  🙂

Halloween is coming up FAST!  Yikes!  I really want to play with all of my Halloween products more but I’m in the midst of planning Christmas classes!  Ah….the work of demonstrator is never done.  Ha!

I hope you have a spooky fun day!  Take care and Happy Stamping!

A Halloween Treat

halloween-treat-boxAre you looking for a fun and easy Halloween treat holder?  I have just the thing for you!

If you’re like me, you’ve completely overlooked the adorable little Clear Tiny Treat Boxes on page 176 in the regular catalog!  They are 2″ x 2″ x 2″ and absolutely perfect for your Halloween treats!

Fold along the score lines on the box, put together according to the enclosed directions, add a strip of the fun Halloween Night Designer Series Paper and a quick topper.  Now you have your fun and easy Halloween treat!

My treat topper is made using the Layering Circle Framelits and the bat is from the Halloween Scares stamp set.  Easy peasy!  It would take you no time at all to make these for a party or a group of friends.  Get busy!

Have a great day!  Take care and Happy Stamping!

Happy World Card Making Day!

wcmd_shareable-1_oct0116_naHappy World Card Making Day!  Are you planning on making cards today?  I’m hoping to get a few cards made if I can fit it in with all of the cooking and cleaning I need to get done today.   Stampin’ Up! has some great card making products on sale to help us celebrate World Card Making Day but don’t miss out….the sale is only 5 days long.  Check out all of the great sale items below or view them here.

138339 2015-2017 In Color Card stock 15% $8 USD/$10 CAD $6.80 USD/$8.50 CAD
141413 2016-2018 In Color Card stock 15% $8 USD/$10 CAD $6.80 USD/$8.50 CAD
141697 2015-2017 In Color Envelope Paper 25% $11 USD/$14.50 CAD $8.25 USD/$10.88 CAD
141698 2016-2018 In Color Envelope Paper 25% $11 USD/$14.50 CAD $8.25 USD/$10.88 CAD
133774 Envelope Punch Board 25% $20 USD/$27 CAD $15 USD/$20.25 CAD
141651 Designer Tin of Cards Project Kit 25% $27 USD/$36 CAD $20.25 USD/$27 CAD
129027 Fast Fuse Adhesive Refill – Buy a Fast Fuse Adhesive (item 129026) and get a Refill for FREE! $7.50 USD/$10 CAD FREE with purchase of Fast Fuse Adhesive


I have to tell you that I love the Designer Tin of Cards Project Kit!  I just made the 16 cards last week and they are great.  You get everything you need to make the cards except the stamp set and inks.  Fast Fuse is also a favorite of mine.  I had some problems working with it when it first came out but now I love it.  I’ll definitely be stocking up on that!

Don’t miss out on this sale!  Shop now!

Have a great day!  Take care and Happy Stamping!

Lovely Basket of Wishes

basket-of-wishes-2-0816
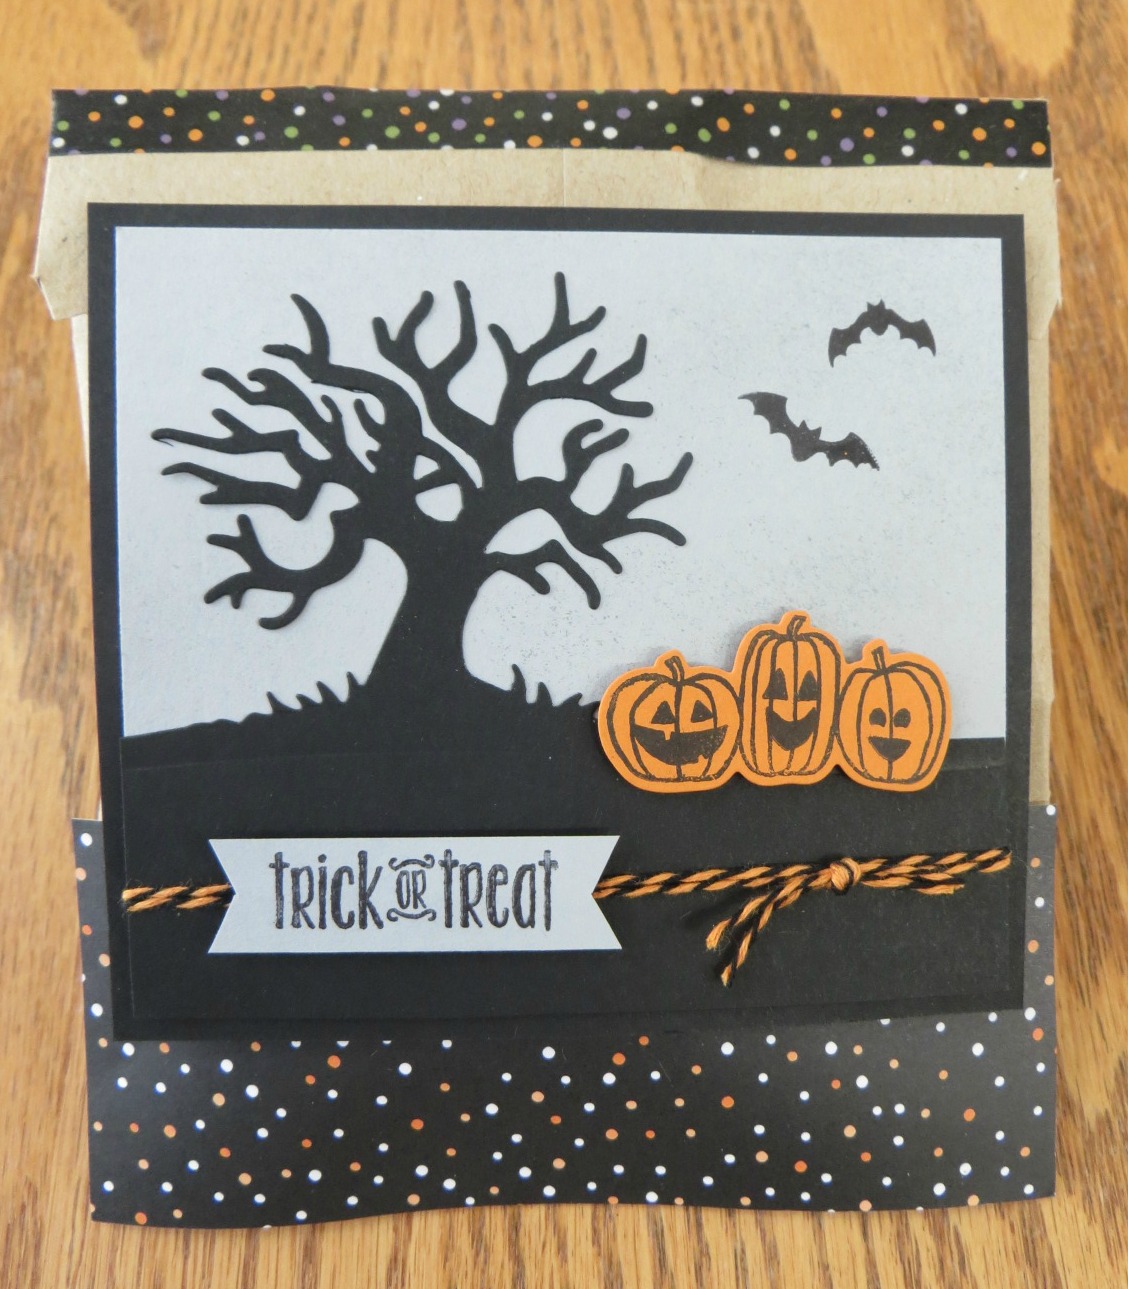
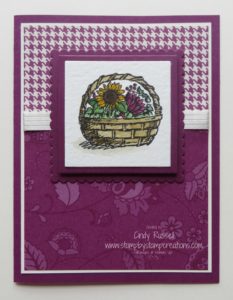
Do you like to watercolor?  If you do, the new Basket of Wishes stamp set is for you!  The stamp set comes with three different basket images, four different images to “put in” your baskets and four lovely sentiments.  It’s quite versatile, not just for fall.  Besides the basket you see on this card there is a berry basket and a produce basket.  It’s a very nice stamp set.

I really like the Petals & Posies Designer Paper too.  It contains lots of fall colors without just sticking to fall images.  Very nice for this time of year.

I used both an Aqua Painter and a Blender Pen when color my basket of flowers.  Some of the images were just a little too small for to use an Aqua Painter on.  I like to use both tools when coloring.  Which one is your favorite?

Have a great day!  Take care and Happy Stamping!

Halloween Scares

halloween-scares-1-0816Here’s a fun and spooky Halloween card for you!  Don’t you love this cute little haunted house?  This was definitely the stamp that called out to me “Buy me!  Buy me!”.  Ha!

Do you ever come across stamp sets where you fall in love with one of the images and have to have the whole set?  Unfortunately that happens to me way too often!

I designed this card for a swap and am using it in my Halloween/Fall class this week.  Do you remember me telling you the other day how I was doing something a little different for my class?  I gave people choices on halloween-scares-treat-0916what type of projects they wanted to make.  I had the first two classes yesterday and they went really well.  I was a little concerned about getting backed up on the two fall cards but it all worked our pretty smoothly and people seemed to like that they had a choice.  Of course they had to let me know what they wanted to do before I started cutting.  It just took a little organization on my part.  Another success for the books!

I definitely like this design better as a card.  I think it pops more on the black background.  The little skeleton dude from the other day looks much better on the treat bag than this one does.  What do you think?  I’d love to know what you think.  Leave a comment and let me know.

Have a great day!  Take care and Happy Stamping!

A Beautiful Day in the Mountains

14440805_10207577866627505_8563262435070739868_nIt’s so nice to be (kind of) caught up on things and to play hooky with your hubby for a drive up in the mountains.  That’s what we did yesterday.  We drove up and over one of the passes in the mountains and checked out the fall foliage.

Fall here in the Colorado Rockies is gold.  No reds or oranges, just the gold of the Aspen trees.  I do miss the other colors this time of year but the golden Aspen are stunning.

Fall is definitely my favorite time of the year.  I love the cooler weather, the fall colors and being able to wear jeans and sweatshirts.  Looking at these pictures relaxes 14485125_10207577868987564_581656653320053502_nme.  What’s your favorite season of the year?

Have a great day!  Take care and Happy Stamping!

14445995_10207577867667531_7346556058530406012_n

14463071_10207577868187544_2051952345526047113_n


Cookie Cutter Halloween

cookie-cutter-halloween-1-0916This little skeleton guy is just too darn cute!  I know.  I know.  I didn’t want this stamp set because it was too cutesie.  I should have know better!

This card is almost an exact copy of one I saw on Pinterest.  Have I ever mentioned how much I love Pinterest?  I’m not sure I could create without it!  OK…that may be a slight exaggeration but I’d have a much harder time creating without it.

This week is my Halloween and Fall class.  I’m actually trying something a little different.  I had designed three Halloween cards and two fall cards for the class.  When I sent out an email for people to sign up someone cookie-cutter-halloween-2-0916asked me if they could just make fall cards since they didn’t really get into Halloween.  It got me thinking…why not?  So I decided to give my customers some choices with the five projects.  They could make the five cards as I designed, they could make the Halloween cards into treat bags if they wanted or they could make 5 fall cards (3 of one design, 2 of the other).  In the second picture you can see how I altered the card so the focal point would fit on the treat bag.   I’m anxious to see how it all works out.    It might be something to offer again in the future.  #6monthstampingoals

The light colored background piece is watercolor paper which I gave a watercolor wash to with Smoky Slate although it is hard to see in the picture.

I was a little sneaky with  my Halloween Night Enamel Dots….I colored them with a black Sharpie so they’d match the card a little better.  What do you think of my random threads?  I used both silver and black.  I don’t think they turned out too bad.  One of these days I’ll get the hang of randomness!  Ha!

It’s almost October and time to really get into Halloween.  I’ll have to try and play a little more with all of my Halloween products!

Have a great day!  Take care and Happy Stamping!

Halloween Scenes Spooky Fun!

img_8783Cute and easy for a Sunday morning!

Don’t you just love this spooky tree from the Halloween Scenes Edgelits? Too fun.  One of my sister Stampin’ Demos, Carn Meagher, here in Colorado made this spooky card.  Thank you Carn!

I never would have thought about layering a second die under the black tree for a shadow effect but it works perfectly!  Thanks for the tip Carn!

It looks like Carn die cut a square and sponged in the opening for her background before stamping a few spooky bats from the Spooky Fun stamp set.    The banner looks like it was punched using the Duet Banner Punch.  Then, and here’s your tip for the day…..Carn bent her sentiment to fit onto banner!  Yep!  You can do that with Photopolymer stamps.  Pretty cool, huh?  🙂

Thanks again Carn for a fun and easy card!

Have a great day! Take care and Happy Stamping!

Glamper Greetings Halloween!

img_8805How can you not fall in love with this stamp set?  It’s SO stinkin’ cute!  I actually don’t have this stamp set yet…..I just ordered it yesterday.  Ha!

Not only is the camper cute but there are tons of adorable little stamps to help you decorate your camper and the area surrounding it.

Ok…let’s be honest here.   The main reason I fell in love with this stamp set is the little yard ornament flamingo.  Yep….the flamingo.  Call me crazy but I have a thing for flamingos!  True story….I met someone yesterday who likes flamingos as much as I do.  It was pretty funny.

I’m looking forward to playing with my Glamper and all of it’s accessories.  I need to thank Diana Ball for this cute card that I received in a swap.  There are good things about swaps and bad things about swaps.  I like swaps because I get all sorts of samples that use techniques that I don’t often use or that use stamp sets that I don’t have.  The bad thing about swaps is that some of the cards use stamp sets that I don’t have, I fall in love with the card and then I have to buy the stamp set.  This could be the reason I’m not rich….oh, well…I can think of worse problems than having too many fun, adorable stamp sets!  Ha!

Have a great day!  Take care and Happy Stamping!

Happy First Day of Fall!

img_8821It’s finally Fall!  Although you’d never know it here in Colorado.  The temperature is still getting up to at least 80 degrees!  Yuk!  I want cool weather so I can wear jeans and sweatshirts!  I suppose I shouldn’t complain too much.  One of the first years we lived here in Denver we actually had a snow storm in September and lost power.

Let’s celebrate fall even though it’s really warm outside….ok…the mornings here are pretty chilly but it warms up fast once the sun comes out.   Let’s celebrate with the adorable little scarecrow from the Cookie Cutter Halloween stamp set.

You guessed it….I wasn’t going to get this stamp set or the Cookie Cutter Christmas stamp set because the images were too cutsie for me.  Well….I have them both.  Those darn talented stampers that post such great cards with all of those stamp sets I’m not going to buy.  Sheesh!

Anyway, I received this card in a swap that I participated in.  Thank you Julie Sperman!  I love participating in swaps with other demos because I get some great ideas.

The little images in both the Cookie Cutter Halloween and the Cookie Cutter Christmas stamp sets are easy to color.  And guess what?  There’s a punch that COORDINATES with them.  Yep!  The Cookie Cutter Builder Punch!  Woo Hoo!  COORDINATION…..my favorite word!  🙂

Have a wonderful first day of Fall!  Take care and Happy Stamping!

Technique Tuesday: Angled Z-Fold

spookyfunanglezfold-1
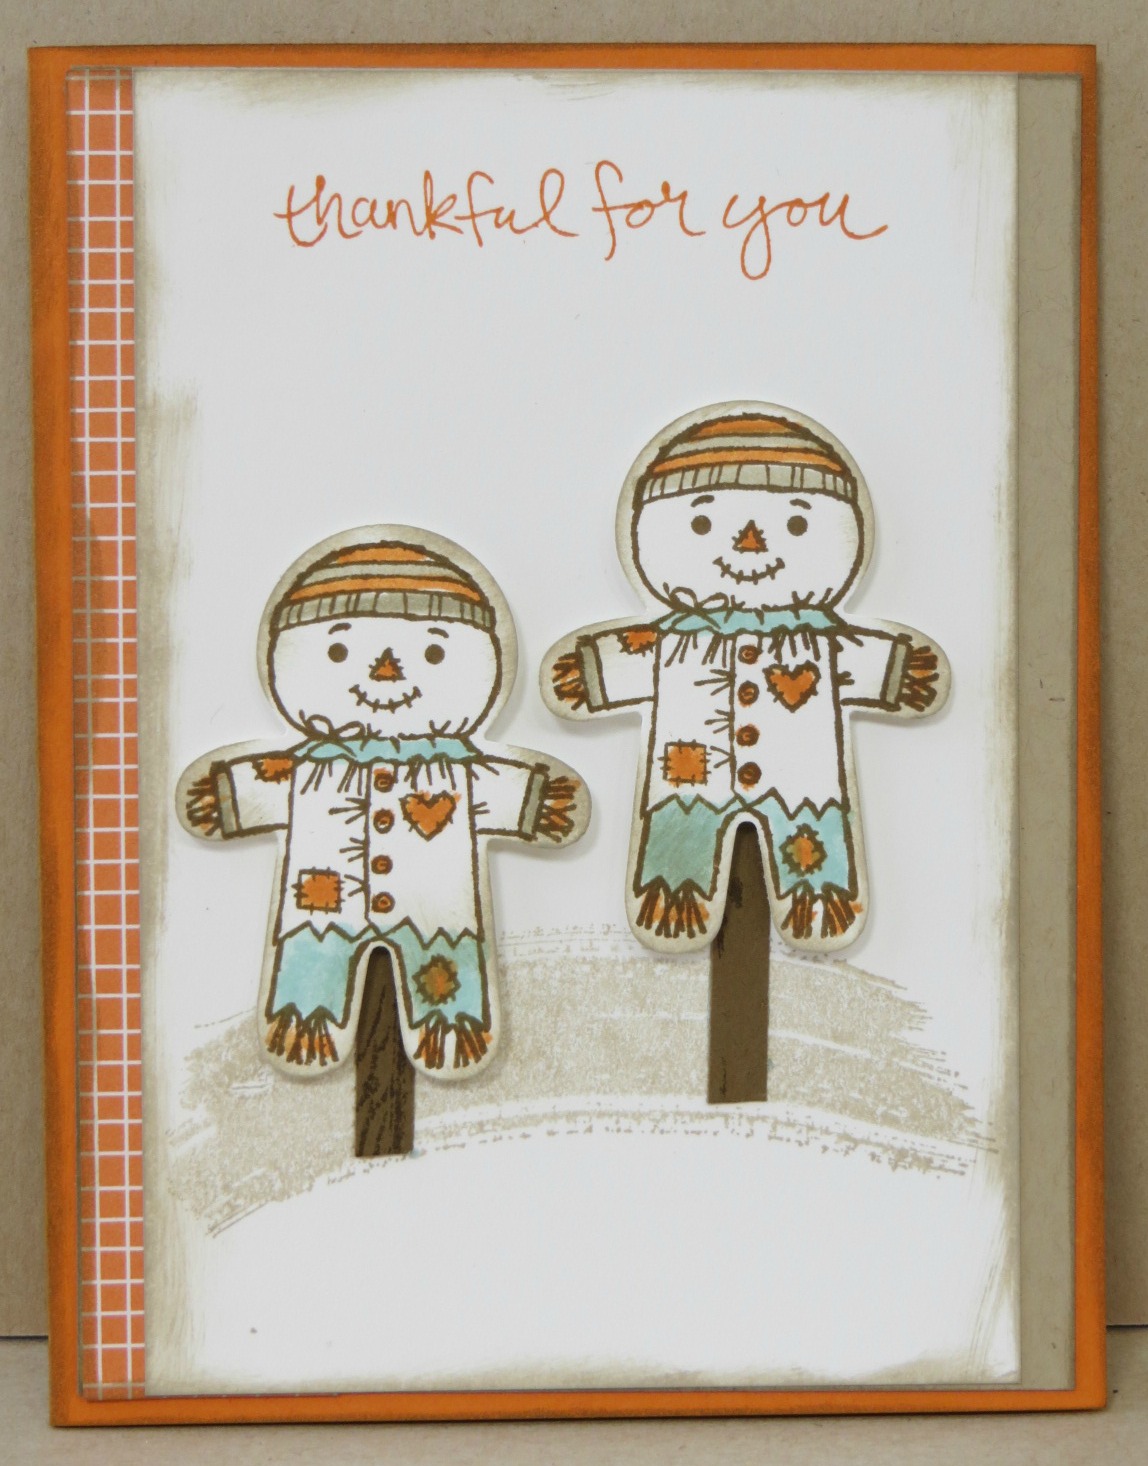
So…it’s actually Wednesday today.  I had this post all ready to go for yesterday and managed to not actually schedule it to post.  Sheesh!  Well, now you can enjoy Technique Tuesday on Wednesday!  🙂

Isn’t this card fun?  I received in a swap.  Thank you Jennifer Pukah!

This card is so cute and so easy to make!  You do need to start with a 12″ x 12″ piece of card stock.  Cut it to 5″ x 12″.  Mark one short end at 2 1/2″.  Now draw a line from the corner of the 5″ end down to the mark you just made.  Trim along line to make the angle of the card.

Score card stock at 4″ and 8″.   Make a valley fold at the 4″ mark and a mountain fold at the 8″ mark.  Your Z-fold card is done!  Now you just need to decorate!

spookyfunanglezfold-2Notice in the other pictures I’ve included that on one side of the card you decorate the first and third panels and on the opposite side you decorate the middle panel.

I’m definitely going to have to design my own Z-fold card.  They’re so fun!

Have you checked out the Halloween Night Designer Series Paper yet?  There are so spookyfunangledzfold-3many cute patterns I can’t even choose which one is my favorite.  How about you?

Have a wonderful day!  Take care and Happy Stamping!


A Birthday Shaker Card!

birthday-fiesta-shaker-0816
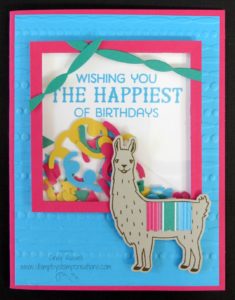
Are you in love with this little llama?  I sure am!  It always makes me think of the children’s book “Is Your Mama a Llama?” from when my kids were little.  (Once again I’m probably dating myself….)

The Birthday Fiesta stamp set is so much fun.    Other than this adorable llama I love the sentiment “Fiesta like there’s no tomorrow.”

Shaker cards are pretty easy to make now that Stampin’ Up! has such fabulous tools for us to use.  Everything used on this card is in the catalog!  The shaker portion of the card is made using the Layering Circles Framelits, Window Sheets, Foam Adhesive Strips and the Sprinkles Punch for the confetti!

TIP:  If you want to make sure that the confetti doesn’t stick to the sides of the foam strips rub your Embossing Buddy along the sides of the foam strips.  🙂

Do you have a special someone to send this birthday card to?  Have a great day!  Take care and Happy Stamping!

Places You’ll Go

places-youll-go-0816Can you say Dr. Seuss? That’s what I think of when I hear/read the name of this stamp set, Places You’ll Go.  How about you?

This card would have been perfect for my friend Sallie from church. She just left for a river cruise in Europe.  Of course, with everything going on around here I forgot.  Some day I will remember to send some of the millions of cards I make.  Ha!

This is another card that I CASEd (copy and share everything) but tweaked just a tiny bit.  Thank you Brian King.  I used a different sentiment and put the airplane on the globe instead of a punched out heart.

To give the globe a little dimension I first stamped the Watercolor Wash background on the Soft Sky card stock with Soft Sky ink then stamped the globe.  I like the way it turned out.  I popped up the globe too on the card.  Other than that the card is pretty simple, just some stamping and layering.  Simple is good.  🙂

Have a great day and I hope that adventure awaits you!  Take care and Happy Stamping!