A Walk Down Memory Lane

Stampin’ Up! had a wonderful timeline display at our On Stage event which showed their journey over 30 years.  It was really fun to check out.

Timeline1
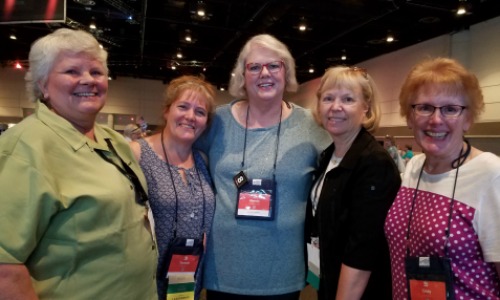
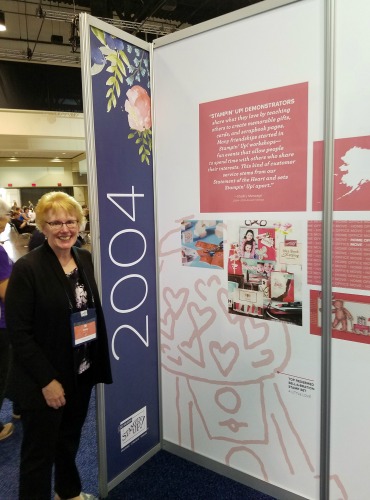
Here I am at the 2004 display.  This was the year I joined Stampin’ Up!.  Yes, I have my 15 year anniversary coming up in February!

You’re looking at how I’m dressed in the photo and thinking “wasn’t she in Orlando?”.  I was in Orlando and the weather outside was beautiful and warm but inside of the convention center it was freezing.  In our main stage presentations we were sitting right under a fan blowing extremely cool air on us.  So glad I had a sweater and jeans from the plane ride!

Catalog94.1
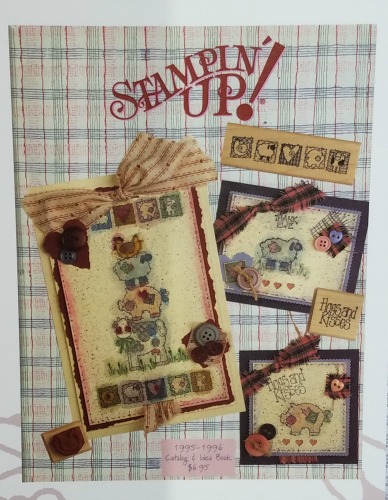
This is a picture of the first catalog I can remember.  My how things change!  It was 9 years prior to my becoming a demonstrator but I can remember the cover.  I had gone to a party at my aunt’s house and got introduced to Stampin’ Up!  when we lived in Minnesota.  It was then another seven or eight years before I really got addicted to stamping after a three moves and another baby.  The rest is history…  🙂

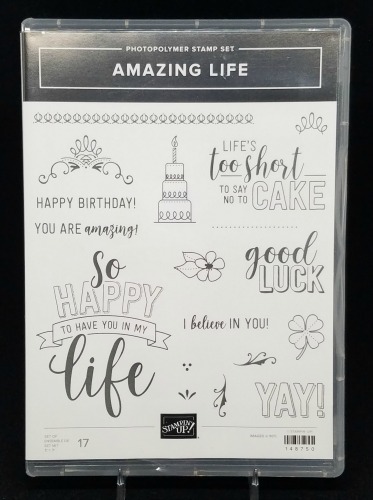
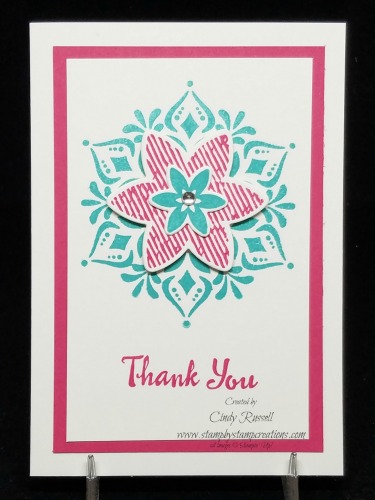
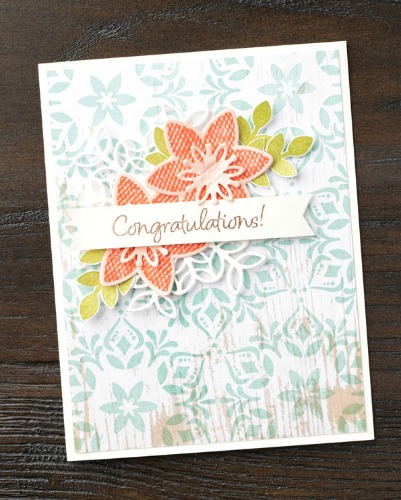
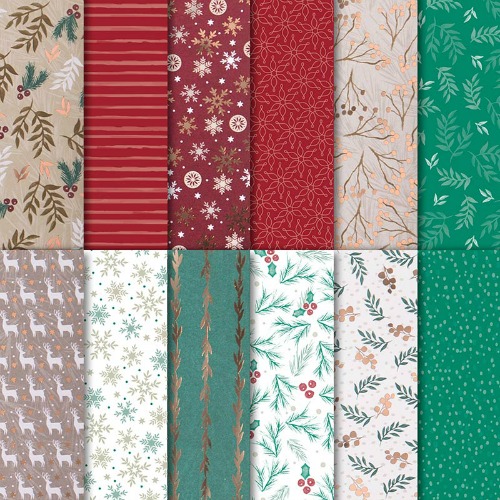
Let me know what you think of this catalog cover.  Would you purchase any of the stamps today that you see on the cover?

Have a great day!  Take care and Happy Stamping!

Orlando Treats

When my friends and I attend Stampin’ Up! events we like to make treats for each other.  We don’t necessarily make them for the treats they contain but we love to make the holders for the treats!

Treat.Janet1aThis fun and simple treat holder was made my downline Janet.  ADORABLE!  So simple!  A cello bag, a couple of circle punches, a piece of ribbon and some Goldfish crackers with Mickey ears in them!  She found the crackers at the local grocery store.  Too fun!  You can’t go to Orlando without thinking about Mickey!

Treat.Laura2aMy friend Laura brought us these yummy cookies that a friend of her’s made and decorated.  Aren’t they gorgeous?  Another amazing treat!  “Love It, Live It, Share It” is Stampin’ Up’s theme this year.  Laura shared these fun cookies in one of Stampin’ Up! Pizza Boxes that she decorated.  It fit perfectly!

Treat.Jan1aJan brought us cookies too in this fun treat bag to remind us to celebrate Stampin’ Up!’s 30th Anniversary.

Aren’t my friends creative?  It’s always fun to see what kind of treats they bring to Stampin’ Up! events.  Of course that puts the pressure on me to come up with a fun idea or two.  I did bring a couple of treats for my friends.  I can’t decide though whether to share them with you this week or save them and surprise you sometime.  Hmmm…

Have a great day!  Take care and Happy Stamping!

Orlando Excitement – Part 1

SU Friends.2It was a fun and busy week in Orlando last week.  I am so glad I get to attend these events with my friends.  These are all friends I wouldn’t have met if I hadn’t been involved in Stampin’ Up!.  We took this photo and sent it to the gal who is my upline in the organization.  We thanked her for holding events where we could all get to know each other and become friends.

Meeting new people and making new friends is definitely one of my favorite parts of of being a Stampin’ Up! Demonstrator.  If you love Stampin’ Up! products and want to share that love with others, consider joining the Stampin’ Up! family.

Amazing Life.2Besides being able to hang out with my demonstrator friends one of the fun perks of attending Stampin’ Up! events is receiving free product.  Yep….we never pack our suitcases full when we head to an event because we know that we’ll be coming home with more than we left with!  We receive this Amazing Life stamp set when we checked in for the event on Wednesday.  Woo Hoo!  I can’t wait to get out my paper and inks and create with it!

This week I will share with you lots of fun things from my time in Orlando so be sure to check back tomorrow!  Have a great day!  Take care and Happy Stamping!

Snowflake Showcase Samples

What are you thinking about these fun products in the Snowflake Showcase that I’ve been sharing with you this week?  Aren’t they great?  Today I’m just going to share some samples with you that I’ve found on Pinterest and Facebook.  That way you can see for yourself!

Next week I head to Orlando, FL for Stampin’ Up!’s 30th Anniversary Celebration!  Woo Hoo!  I can’t wait.  Be sure to follow my antics on my Facebook page throughout the week.  We are now allowed to share new things with you right away so you’ll be able to see the cover of the upcoming Occasions Catalog as well as some of the new products!  If you’re not on Facebook I’ll try to do a couple of blog posts during the week for you.

Have a great day!  Take care and Happy Stamping!  Enjoy these Snowflake Showcase samples.  Remember that they are only available while supplies last!

43739965_274812550040788_354113916046934016_n6a00e54f94e01b8834022ad36fd428200c-500wifinal44243096_2009837822369855_7632999810978545664_n

Velvet Paper

velveteen paper2Of course I didn’t think I needed the Velvet Paper that you can find in the Snowflake Showcase.  Sure, you can use it to make pretty snowflakes but what else can you use it for?  A person can make only so many projects with snowflakes on them even during the winter….and how can you use this gorgeous paper with the Happiness Surrounds stamp set in the showcase if you’re not making snowflakes?

Well, have I got a tip for you on Tip of the Day Thursday!

velveteen paper1First of all, the paper is soft and fuzzy.  Naturally you can’t see it in the photos but it is.  I tried to get a close-up picture where you could see the fuzzy but I’m not sure it turned out all that well.  My apologies.

The velvet paper does make gorgeous snowflakes but did you know that you can add color to it?  Yep!  You can make your white velvet paper ANY color you want and quite easily too!

velvet paper3Here is a photo of 5 different snowflakes and as in real life, no 2 are alike.

  1.  This is the original, unaltered velvet snowflake.
  2. Hard to tell from the photo but this is a sparkly snowflake.  I simply took my Wink of Stella Glitter Brush and lightly brushed it over my die cut velvet snowflake.  It adds just the perfect touch of sparkle to the snowflake.
  3. I colored this snowflake with my Aquapainter and Balmy Blue ink.  I picked up a little bit of ink from the lid of my ink pad and brushed it over the snowflake.  What I like about this method is that the color doesn’t go on evenly.  The thing to remember is that it dries a lot lighter than when it goes on.
  4. This snowflake is colored with a sponge brayer.  I inked up my brayer and rolled it over the die-cut snowflake.  With this method it’s easy to get just the right amount of color that you want.
  5. This last snowflake is colored with a Stampin’ Blend Marker!  Yep.  Just use the brush tip of your marker and you can change the color of your snowflake.  Easy-Peasy! (I used the Light Pool Party Stampin’ Blends Marker because they don’t make a Balmy Blue one.)

What do you think of today’s tip(s)?  I was pretty excited when I discovered that you could change the color of the Velvet Paper.  And of course this means that you can use any type of die on any type of project!  Amazing!  🙂

Have a great day!  Take care and Happy Stamping!

OH! Don’t forget that today is THE DAY that you can start ordering the Snowflake Showcase!


Are you ready?

Are you ready?  Tomorrow is the day that you can order products from the FABULOUS Snowflake Showcase.  Woo Hoo!  Check out this short video that tells you all about these products:

Aren’t they great?!  If you love any of these products and want to purchase them be sure not to delay too long.  They will only be available while supplies last.

NotecardThis is a notecard I sent my team after our recent Stamp Camp.  I used the Happiness Surrounds stamp set and the Snowfall Thinlits both from the Snowflake Showcase.  See how versatile this showcase is?

Have a great day!  Take care and Happy Stamping!

Snowfall Thinlits

Snowfall ThinlitsMy favorite product(s) from the upcoming Snowflake Showcase are the Snowfall Thinlits!  There are SO any different shapes to choose from!  There are big snowflakes, little snowflakes, fat snowflakes, skinny snowflakes…..OK…sorry I got carried away…..I was channeling my inner Dr. Seuss from Go Do Go.  Back on point….there are tons of snowflake dies in this set.  There are 20 different dies and not all of them are snowflakes…or have to be snowflakes.  Many of the dies in this set coordinate with the Happiness Surrounds stamp from the showcase as well as the Snow is Glistening stamp set.  You can check out the thinlits as well as the rest of the products in this showcase on the second page of this flyer.

Snow is Glistening.1.1018It’s been awhile since I’ve posted a card that I actually designed and made myslef but today I have!  🙂

I used the Snowfall Thinlits, Silver Foil Sheets, the Subtle Embossing Folder, the Silver Metallic Edge Ribbon and the brand new Silver Foil Edged Cards & Envelopes.  These Silver Foil Edged Cards & Envelopes (#147900 $9.50) are great!  You get 20 full-size cards and 20 envelopes in a package for only $9.50!  They really add a little bit of elegance to your project and you can see from my card how well they coordinate with the Silver Foil Sheets!  And guess what?  They come in gold foil too!  What an easy way to dress up your project!

I used three different sizes of snowflakes on my card and layered them for this elegant look.  I can’t wait to play with these products more…..I just need to find the time.

Is your calendar marked?  November 1st is the day that you can begin ordering these fabulous products!  Have a great day.  Take care and Happy Stamping!

The Snowflake Showcase is Almost Here!

10.01.18_SHAREABLE_Q4_OUT_OF_PUB_ENGThe Snowflake Showcase is almost here and you’re going to LOVE it!  The items in this showcase are gorgeous and you’re going to want them all.  I did!  These products aren’t available until Thursday, November 1st but as a demonstrator I was able to purchase them during the month of October.  Yep.  That’s one of the perks of being a demonstrator….early access to new products!  The products in the Snowflake Showcase will only be available while supplies last so don’t delay!  Better yet…..sign up today to become a member of my team and add them to your Starter Kit!  🙂

Back to these great products!  There are 2 stamp sets, a set of framelits, gorgeous velvet paper and fun snowflake embellishments in this showcase.  It’s not a bundle as you can purchase all of the items separately.  You can check all of these items out here.  Take a good look at them and let me know which one is your favorite by leaving a comment.  I will tell you about my favorite tomorrow.

Here’s a couple of different samples using these fun products.  Enjoy!  Have a great day.  Take care and Happy Stamping.  Don’t forget to mark your calendars for November 1st so you can order these great products!

10.01.18_SAMPLE5_Q4_OUT_OF_PUB 10.01.18_SAMPLE3_Q4_OUT_OF_PUB


Fab Friday: Joyous Noel Gift Bag

camp bag 2We all love to see those over-the-top project ideas.  My friend Jan is the queen of fabulous ideas for our group Stamp Camps we put on for our customers.  Each camp we (I should say Jan) come up with an idea to decorate the bag we give each attendee so they have something to put their completed projects in.  This GORGEOUS bag was what our customers received at the Holiday Stamp Camp we put on a few weeks ago.  Don’t you wish you had been there?

Jan used a number of products from the Joyous Noel Suite on this project.  The ribbon, the glimmer paper and the Sprig Punch are all from the suite.  She used the Tin Tile Embossing Folder (pg 43 HC) from the County Lane Suite and the deer is die cut from the Detailed Deer Thinlits (pg 9 HC).  Jan and her husband have a lot of trees on their property so one day when they were hauling brush she kept aside some branches and had her husband slice them up for her.

I love this gift bag.  It’s absolutely AMAZING!  Wouldn’t you like to receive it on Christmas?  Have a great day!  Take care and Happy Stamping!

Make Christmas Easy With a Kit!

This Thursday’s Tip of the Day is this:  Make Christmas Easy!  Use a kit!

Stampin’ Up!’s Holiday Catalog has two kits in it to make your Christmas easy.  A kit for fun tags and a kit for gorgeous Christmas cards.

2018_HOLIDAY_P32With the Sincerely Santa Project Kit you will receive enough supplies to make 30 tags as well as a tin to store them in!  Wow!  You will also need the coordinating Sincerely Santa stamp set, a Real Red ink pad, a Garden Green ink pad, your adhesive and scissors.  Here’s a video showing you how quick and easy these tags are to make:

2018_HOLIDAY_P33With the Timeless Tidings Project Kit you receive enough supplies to make 20 cards.  To complete this kit you will need a Jet Black StazOn ink pad, your adhesive and Stampin’ Dimensionals.

Here’s a video showing you how to make these gorgeous cards:

Now you’ve seen how easy you can make your Christmas crafting!  Which kit are you going to make….or do you want both?!  🙂

Have a great day!  Take care and Happy Stamping!

Take Your Pick Tool

Take Your Pick ToolToday’s highlighted product isn’t found in the Joyous Noel Suite but it is found in that section of the Holiday Catalog.  Page 30 to be exact. You may have missed it in the catalog but you definitely need to check it out!   This tool is pretty amazing.  You can do SO many different things with it.  Stampin’ Up! says this “multipurpose pickup and precision tool simplifies meticulous tasks”.

There’s a putty tip, a mini spatula, a paper piercing tool and a stylus.  So useful for all those little items and things you want to add to your card.  Check out the video below to see how versatile this little tool really is.  I know you’re going to want to add one to your next order!

I love when Stampin’ Up! comes out with new products that make my crafting a little easier!  Don’t you?  Have a great day!  Take care and Happy Stamping!

I Love Copper!

Well, I had a really hard time coming up with my favorite product for this suite…everything is so gorgeous!  I love copper and all of the products in this suite (except the stamp set and punch) have some touch of copper!  What’s a girl to do.  I almost had to do “eenie meenie minie moe” to choose one but I finally settled on:

147816GThe Joyous Noel Specialty Designer Series Paper!  (#147816 $14) Oh, my!  Look at all of those amazing patterns!

I know, I chose the designer paper in the Festive Farmhouse Suite last week but when you like something you’ve got to go with it!

boxesDesigner Paper is so versatile.  Sure, it can add pizzazz to a card but it’s also great on 3D items.  Check out these boxes that I found on Pinterest!  Thank you Sam Hammond Donald for sharing such beautiful projects!

These boxes were all made with the Joyous Noel Specialty Designer Series Paper and coordinating cardstock and embellishments.  You can find everything but the cardstock and the Tranquil Tide ribbon in the Joyous Noel Suite on page 29 of the Holiday Catalog.

I’m definitely stocking up on these fun coppery products.  I love them!  Have you added them to your list?

Have a great day!  Take care and Happy Stamping!

The Joyous Noel Suite

Joyous Noel SuiteThe week’s suite of the week is the Joyous Noel Suite found in Stampin’ Up!’s Holiday Catalog.

In my opinion, this suite contains the most gorgeous products that you’ll find in the Holiday Catalog.   “Deck your halls with elegant touches of copper” is how Stampin’ Up! describes this suite.  There copper accents on one side of each sheet of the STUNNING designer series paper, a copper sheen on one side of the reversible ribbon and a copper touch to one of the glimmer papers and the wire elements.  If you like copper, this suite is for you!

In this section of the catalog you will also find 4 other stamp sets, a new tool and 2 kits.  You can find all of these great products on pages 28-35 of the Holiday Catalog.   https://su-media.s3.amazonaws.com/media/catalogs/2018%20Holiday%20Catalog/20180710_HOL18_en-US.pdf.

86ccb0340d6779df3b3eeb62dc74ddb0This beautiful sample which I found online shows off the designer paper, the gorgeous reversible ribbon and the Sprig Punch which can be purchased separately or in a bundle with the Peaceful Noel stamp set.

You will definitely have to check out the Joyous Noel Suite and let me know in the comments below what your favorite item in the suite and/or section of the catalog is.  I know I’ll have a hard time deciding, but I’ll let you know tomorrow.

Have a great day!  Take care and Happy Stamping!

You’ve Got to See This!

I will admit that I do not own the Farmhouse Christmas stamp set and the Farmhouse Framelits Dies but after seeing so many fabulous cards online using these products I am sorely tempted.

Glenda1I received this card in a swap and wanted to head right over to my computer and order the Farmhouse bundle just so I could recreate it!  This card is AMAZING!  Look at all the detail that went into making this card!  Isn’t it gorgeous?   Thank you to my sister demonstrator Glenda who created this card!

Glenda4This style of card is called a Double Z-Fold.  The card itself is a Z and then the picket fence is on Glenda2another piece of cardstock that makes a Z going the other way.  Check out some of these other pictures.  Don’t you want to make this as your Christmas card?  OK…maybe just make a few of them for those special people in your life…..

Don’t forget to add the Festive Farmhouse Suite and the Stampin’ Blends to your next order!

I hope you enjoyed seeing this fabulous card.  Leave a comment and let me know what you think.  Have a great day!  Take care and Happy Stamping!