Stampin’ Up!’s Paper & Embellishments On Sale!

OnlineEx1a.1118Woo Hoo!  The sale has begun!  Did you get your wish list written down for Paper & Embellishments?  Our dinner guests didn’t leave until late last night so I need to get my list done ASAP.

I know I need to get some envelopes as someone we know hasn’t even begun to make their Christmas cards….Ssh! don’t tell!  I’ll probably add on some card stock colors that I’m low on as well as some of my favorite ribbons and designer papers.  What are you going to purchase in this first little mini sale?

Have a great day!  Take care and Happy Stamping!

Online Extravaganza

On this busy day of family, friends and giving thanks I want to remind you of Stampin’ Up!’s Online Extravaganza that begins tomorrow.

First, I need to apologize for not posting for almost a week.  My little ‘ole computer wasn’t cooperating and then, you know, life happened.  I’m ready to get back on track though so be sure and join my next week as I get back into the swing of things.

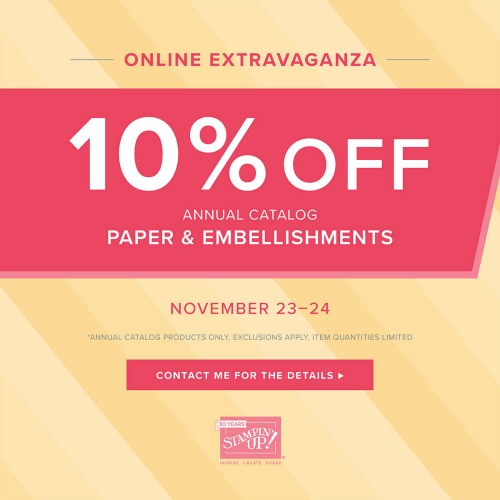
Stampin’ Up!’s Annual Online Extravaganza begins tomorrow.  This year they are actually running three different 48-Hour Sales!  By the end of the three sales ALMOST everything in the Annual Catalog will have been on sale at 10% off.  Yes, there are some items that will NOT be on sale.  You can view those exceptions here.

Here’s what’s on sale when:

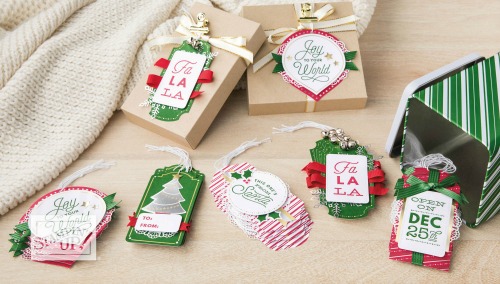
Friday November 23rd & Saturday November 24th:  Paper & Embellishments

Sunday November 25th & Monday November 26th:  Stamps & Kits

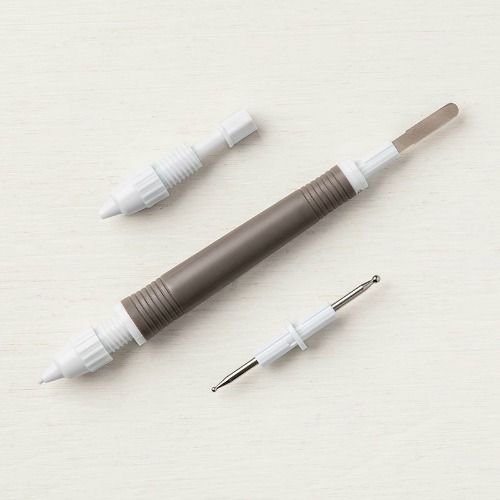
Tuesday November 27th & Wednesday November 28th:  Tools & Inks

OnlineEx1a.1118Sale #1 begins tomorrow, Friday November 23rd and ends at 11:59 pm on Saturday November 24th.  This sale includes paper and embellishments from the Annual Catalog.  Woo Hoo!  Time to stock up!

There are a couple of things to remember during this sale.  First, only a predetermine amount of product will be available at sale prices.  If there is something you want, order it early!  Secondly, you must remember that sale prices for any specific item are only good during it’s 2-day period.  If you want that package of Basic Black cardstock at 10% off you need to order it Friday or Saturday.  It won’t be available at the sale price on Sunday.  This means that you may need to place three different orders over the course of the Online Extravaganza.

Orders can be placed online or through me.

I will be placing an order early during each mini sale.  If you would like to me to place your order please have it to me by noon the first day of each sale.

Paper & Embellishments:  Noon on Friday, November 23rd

Stamps & Kits:  Noon on Sunday, November 25th

Tools & Inks:  Noon on Tuesday November 27th

Enjoy these great deals and Happy Stamping!


On Stage Fun

OnStage Fun.1aStampin’ Up! events are a lot of fun and sometimes we get a little crazy….even our CEO Sara Douglass gets in on the action!


OnStage Fun.3aIt’s always fun watching this Mother/Daughter duo together.  Founder Shelli Gardner and CEO Sara Douglass.


OnStage Fun.2a


The entire Gardner clan celebrates 30 years of Stampin’ Up!.  Mom, Dad, their five daughters along with their families.  Only two members were missing.  Such a beautiful family.

I hope you’ve enjoyed my recap of Stampin’ Up!’s 30th Anniversary Celebration.  Does it make you want to join me at the next event in April?  Think about…..Sale-a-bration is a great time to join the Stampin’ Up! family!

Have a great day!  Take care and Happy Stamping!

Coming Soon: Needle & Thread Bundle

When we demonstrators go to Stampin’ Up! events there is always some Stamping involved.  Woo Hoo!  The best part is that we always get to stamp with new products!

Needle & ThreadaThis is one of the Make-n-Take projects we got to make.  It is made with the lovely new Needle & Thread Stamp set and the Needlepoint Elements Framelits.

It’s one of Stampin’ Up!’s DisINKtive stamp sets.  This means that images are very real looking.  In this stamp set it actually looks like you made the flowers with your needle & thread!  It’s really amazing.  The artist actually took a photo of the image and made it into a stamp.  Amazing.

It’s Tip of the Day Thursday so here’s your tip on working with  DistINKtive stamps:  You don’t want too much ink on your stamp so that the life-like image really pops.  Use your bone folder to “scrape” off a little ink on the top of your ink pad before inking up the stamp.  You could also just pick up some of the ink from your ink pad with a Sponge Dauber and dab it on the stamp before stamping the image on your paper.  It really works!

Needle & Thread1aDid you notice the big solid looking die on the framelit sheet?  It creates this lovely background image with all the poked holes.  (OK…I know there is a name for this but I can’t think of it this morning….if you know what word I’m looking for, please let me know!)  I just love it!  I can’t wait to play some more with this bundle.

You don’t get a very good view of the Needlepoint Nook Designer Series Paper but it is amazing too!  Be sure to put this bundle and the coordinating products on your wish list for January!

Have a great day!  Take care and Happy Stamping!

A Walk Down Memory Lane

Stampin’ Up! had a wonderful timeline display at our On Stage event which showed their journey over 30 years.  It was really fun to check out.

Timeline1Here I am at the 2004 display.  This was the year I joined Stampin’ Up!.  Yes, I have my 15 year anniversary coming up in February!

You’re looking at how I’m dressed in the photo and thinking “wasn’t she in Orlando?”.  I was in Orlando and the weather outside was beautiful and warm but inside of the convention center it was freezing.  In our main stage presentations we were sitting right under a fan blowing extremely cool air on us.  So glad I had a sweater and jeans from the plane ride!

Catalog94.1This is a picture of the first catalog I can remember.  My how things change!  It was 9 years prior to my becoming a demonstrator but I can remember the cover.  I had gone to a party at my aunt’s house and got introduced to Stampin’ Up!  when we lived in Minnesota.  It was then another seven or eight years before I really got addicted to stamping after a three moves and another baby.  The rest is history…  🙂

Let me know what you think of this catalog cover.  Would you purchase any of the stamps today that you see on the cover?

Have a great day!  Take care and Happy Stamping!

Orlando Treats

When my friends and I attend Stampin’ Up! events we like to make treats for each other.  We don’t necessarily make them for the treats they contain but we love to make the holders for the treats!

Treat.Janet1aThis fun and simple treat holder was made my downline Janet.  ADORABLE!  So simple!  A cello bag, a couple of circle punches, a piece of ribbon and some Goldfish crackers with Mickey ears in them!  She found the crackers at the local grocery store.  Too fun!  You can’t go to Orlando without thinking about Mickey!

Treat.Laura2aMy friend Laura brought us these yummy cookies that a friend of her’s made and decorated.  Aren’t they gorgeous?  Another amazing treat!  “Love It, Live It, Share It” is Stampin’ Up’s theme this year.  Laura shared these fun cookies in one of Stampin’ Up! Pizza Boxes that she decorated.  It fit perfectly!

Treat.Jan1aJan brought us cookies too in this fun treat bag to remind us to celebrate Stampin’ Up!’s 30th Anniversary.

Aren’t my friends creative?  It’s always fun to see what kind of treats they bring to Stampin’ Up! events.  Of course that puts the pressure on me to come up with a fun idea or two.  I did bring a couple of treats for my friends.  I can’t decide though whether to share them with you this week or save them and surprise you sometime.  Hmmm…

Have a great day!  Take care and Happy Stamping!

Orlando Excitement – Part 1

SU Friends.2It was a fun and busy week in Orlando last week.  I am so glad I get to attend these events with my friends.  These are all friends I wouldn’t have met if I hadn’t been involved in Stampin’ Up!.  We took this photo and sent it to the gal who is my upline in the organization.  We thanked her for holding events where we could all get to know each other and become friends.

Meeting new people and making new friends is definitely one of my favorite parts of of being a Stampin’ Up! Demonstrator.  If you love Stampin’ Up! products and want to share that love with others, consider joining the Stampin’ Up! family.

Amazing Life.2Besides being able to hang out with my demonstrator friends one of the fun perks of attending Stampin’ Up! events is receiving free product.  Yep….we never pack our suitcases full when we head to an event because we know that we’ll be coming home with more than we left with!  We receive this Amazing Life stamp set when we checked in for the event on Wednesday.  Woo Hoo!  I can’t wait to get out my paper and inks and create with it!

This week I will share with you lots of fun things from my time in Orlando so be sure to check back tomorrow!  Have a great day!  Take care and Happy Stamping!

Snowflake Showcase Samples

What are you thinking about these fun products in the Snowflake Showcase that I’ve been sharing with you this week?  Aren’t they great?  Today I’m just going to share some samples with you that I’ve found on Pinterest and Facebook.  That way you can see for yourself!

Next week I head to Orlando, FL for Stampin’ Up!’s 30th Anniversary Celebration!  Woo Hoo!  I can’t wait.  Be sure to follow my antics on my Facebook page throughout the week.  We are now allowed to share new things with you right away so you’ll be able to see the cover of the upcoming Occasions Catalog as well as some of the new products!  If you’re not on Facebook I’ll try to do a couple of blog posts during the week for you.

Have a great day!  Take care and Happy Stamping!  Enjoy these Snowflake Showcase samples.  Remember that they are only available while supplies last!

43739965_274812550040788_354113916046934016_n6a00e54f94e01b8834022ad36fd428200c-500wifinal44243096_2009837822369855_7632999810978545664_n

Velvet Paper

velveteen paper2Of course I didn’t think I needed the Velvet Paper that you can find in the Snowflake Showcase.  Sure, you can use it to make pretty snowflakes but what else can you use it for?  A person can make only so many projects with snowflakes on them even during the winter….and how can you use this gorgeous paper with the Happiness Surrounds stamp set in the showcase if you’re not making snowflakes?

Well, have I got a tip for you on Tip of the Day Thursday!

velveteen paper1First of all, the paper is soft and fuzzy.  Naturally you can’t see it in the photos but it is.  I tried to get a close-up picture where you could see the fuzzy but I’m not sure it turned out all that well.  My apologies.

The velvet paper does make gorgeous snowflakes but did you know that you can add color to it?  Yep!  You can make your white velvet paper ANY color you want and quite easily too!

velvet paper3Here is a photo of 5 different snowflakes and as in real life, no 2 are alike.

  1.  This is the original, unaltered velvet snowflake.
  2. Hard to tell from the photo but this is a sparkly snowflake.  I simply took my Wink of Stella Glitter Brush and lightly brushed it over my die cut velvet snowflake.  It adds just the perfect touch of sparkle to the snowflake.
  3. I colored this snowflake with my Aquapainter and Balmy Blue ink.  I picked up a little bit of ink from the lid of my ink pad and brushed it over the snowflake.  What I like about this method is that the color doesn’t go on evenly.  The thing to remember is that it dries a lot lighter than when it goes on.
  4. This snowflake is colored with a sponge brayer.  I inked up my brayer and rolled it over the die-cut snowflake.  With this method it’s easy to get just the right amount of color that you want.
  5. This last snowflake is colored with a Stampin’ Blend Marker!  Yep.  Just use the brush tip of your marker and you can change the color of your snowflake.  Easy-Peasy! (I used the Light Pool Party Stampin’ Blends Marker because they don’t make a Balmy Blue one.)

What do you think of today’s tip(s)?  I was pretty excited when I discovered that you could change the color of the Velvet Paper.  And of course this means that you can use any type of die on any type of project!  Amazing!  🙂

Have a great day!  Take care and Happy Stamping!

OH! Don’t forget that today is THE DAY that you can start ordering the Snowflake Showcase!


Are you ready?

Are you ready?  Tomorrow is the day that you can order products from the FABULOUS Snowflake Showcase.  Woo Hoo!  Check out this short video that tells you all about these products:

Aren’t they great?!  If you love any of these products and want to purchase them be sure not to delay too long.  They will only be available while supplies last.

NotecardThis is a notecard I sent my team after our recent Stamp Camp.  I used the Happiness Surrounds stamp set and the Snowfall Thinlits both from the Snowflake Showcase.  See how versatile this showcase is?

Have a great day!  Take care and Happy Stamping!

Snowfall Thinlits

Snowfall ThinlitsMy favorite product(s) from the upcoming Snowflake Showcase are the Snowfall Thinlits!  There are SO any different shapes to choose from!  There are big snowflakes, little snowflakes, fat snowflakes, skinny snowflakes…..OK…sorry I got carried away…..I was channeling my inner Dr. Seuss from Go Do Go.  Back on point….there are tons of snowflake dies in this set.  There are 20 different dies and not all of them are snowflakes…or have to be snowflakes.  Many of the dies in this set coordinate with the Happiness Surrounds stamp from the showcase as well as the Snow is Glistening stamp set.  You can check out the thinlits as well as the rest of the products in this showcase on the second page of this flyer.

Snow is Glistening.1.1018It’s been awhile since I’ve posted a card that I actually designed and made myslef but today I have!  🙂

I used the Snowfall Thinlits, Silver Foil Sheets, the Subtle Embossing Folder, the Silver Metallic Edge Ribbon and the brand new Silver Foil Edged Cards & Envelopes.  These Silver Foil Edged Cards & Envelopes (#147900 $9.50) are great!  You get 20 full-size cards and 20 envelopes in a package for only $9.50!  They really add a little bit of elegance to your project and you can see from my card how well they coordinate with the Silver Foil Sheets!  And guess what?  They come in gold foil too!  What an easy way to dress up your project!

I used three different sizes of snowflakes on my card and layered them for this elegant look.  I can’t wait to play with these products more…..I just need to find the time.

Is your calendar marked?  November 1st is the day that you can begin ordering these fabulous products!  Have a great day.  Take care and Happy Stamping!

The Snowflake Showcase is Almost Here!

10.01.18_SHAREABLE_Q4_OUT_OF_PUB_ENGThe Snowflake Showcase is almost here and you’re going to LOVE it!  The items in this showcase are gorgeous and you’re going to want them all.  I did!  These products aren’t available until Thursday, November 1st but as a demonstrator I was able to purchase them during the month of October.  Yep.  That’s one of the perks of being a demonstrator….early access to new products!  The products in the Snowflake Showcase will only be available while supplies last so don’t delay!  Better yet…..sign up today to become a member of my team and add them to your Starter Kit!  🙂

Back to these great products!  There are 2 stamp sets, a set of framelits, gorgeous velvet paper and fun snowflake embellishments in this showcase.  It’s not a bundle as you can purchase all of the items separately.  You can check all of these items out here.  Take a good look at them and let me know which one is your favorite by leaving a comment.  I will tell you about my favorite tomorrow.

Here’s a couple of different samples using these fun products.  Enjoy!  Have a great day.  Take care and Happy Stamping.  Don’t forget to mark your calendars for November 1st so you can order these great products!

10.01.18_SAMPLE5_Q4_OUT_OF_PUB 10.01.18_SAMPLE3_Q4_OUT_OF_PUB


Fab Friday: Joyous Noel Gift Bag

camp bag 2We all love to see those over-the-top project ideas.  My friend Jan is the queen of fabulous ideas for our group Stamp Camps we put on for our customers.  Each camp we (I should say Jan) come up with an idea to decorate the bag we give each attendee so they have something to put their completed projects in.  This GORGEOUS bag was what our customers received at the Holiday Stamp Camp we put on a few weeks ago.  Don’t you wish you had been there?

Jan used a number of products from the Joyous Noel Suite on this project.  The ribbon, the glimmer paper and the Sprig Punch are all from the suite.  She used the Tin Tile Embossing Folder (pg 43 HC) from the County Lane Suite and the deer is die cut from the Detailed Deer Thinlits (pg 9 HC).  Jan and her husband have a lot of trees on their property so one day when they were hauling brush she kept aside some branches and had her husband slice them up for her.

I love this gift bag.  It’s absolutely AMAZING!  Wouldn’t you like to receive it on Christmas?  Have a great day!  Take care and Happy Stamping!

Make Christmas Easy With a Kit!

This Thursday’s Tip of the Day is this:  Make Christmas Easy!  Use a kit!

Stampin’ Up!’s Holiday Catalog has two kits in it to make your Christmas easy.  A kit for fun tags and a kit for gorgeous Christmas cards.

2018_HOLIDAY_P32With the Sincerely Santa Project Kit you will receive enough supplies to make 30 tags as well as a tin to store them in!  Wow!  You will also need the coordinating Sincerely Santa stamp set, a Real Red ink pad, a Garden Green ink pad, your adhesive and scissors.  Here’s a video showing you how quick and easy these tags are to make:

2018_HOLIDAY_P33With the Timeless Tidings Project Kit you receive enough supplies to make 20 cards.  To complete this kit you will need a Jet Black StazOn ink pad, your adhesive and Stampin’ Dimensionals.

Here’s a video showing you how to make these gorgeous cards:

Now you’ve seen how easy you can make your Christmas crafting!  Which kit are you going to make….or do you want both?!  🙂

Have a great day!  Take care and Happy Stamping!

Take Your Pick Tool

Take Your Pick ToolToday’s highlighted product isn’t found in the Joyous Noel Suite but it is found in that section of the Holiday Catalog.  Page 30 to be exact. You may have missed it in the catalog but you definitely need to check it out!   This tool is pretty amazing.  You can do SO many different things with it.  Stampin’ Up! says this “multipurpose pickup and precision tool simplifies meticulous tasks”.

There’s a putty tip, a mini spatula, a paper piercing tool and a stylus.  So useful for all those little items and things you want to add to your card.  Check out the video below to see how versatile this little tool really is.  I know you’re going to want to add one to your next order!

I love when Stampin’ Up! comes out with new products that make my crafting a little easier!  Don’t you?  Have a great day!  Take care and Happy Stamping!