Sale-a-bration Foil Sheets

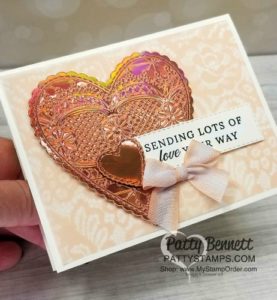
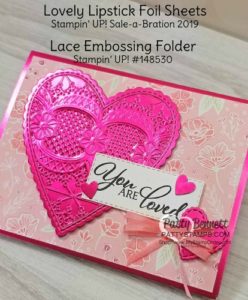
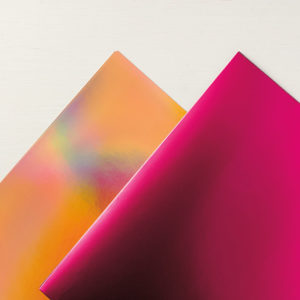
149712GI’ve been talking about and sharing the Sale-a-bration Foil Sheets with you most of the week.  I am in LOVE!  These colorful foil sheets in Lovely Lipstick and Grapefruit Grove are GORGEOUS!  I want to use them on everything!  I still haven’t tried the Grapefruit Grove sheets but can’t wait to play with them.

Did you know that you can emboss the foil sheets….not just these gorgeous ones that you can get for FREE during Sale-a-bration, but ANY of Stampin’ Up!’s foil sheets.  They turn out absolutely amazing!

PattyBennettgrapefruitblog PattyBennettPinkblog


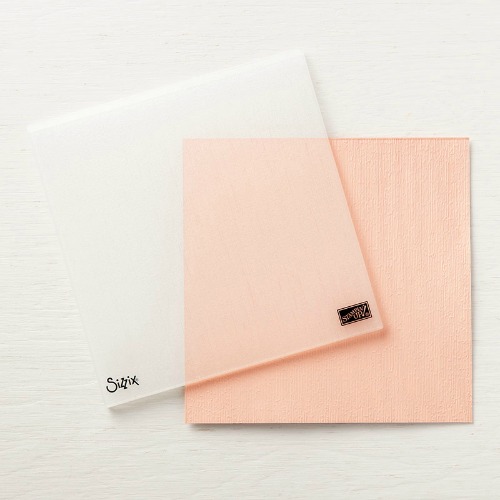
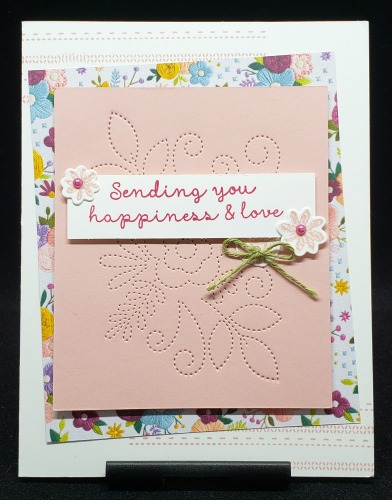
Here are some cards made by fellow demonstrator Patty Bennett made with embossed foil sheets.  They’ve been embossed with the brand new Lace Dynamic Textured Impressions Embossing Folder.  Patty made the same card in both the Lovely Lipstick and the Grapefruit Grove.  The cards are just as gorgeous in either color, don’t you think?  Actually, I am partial to the PINK one.  Ha!  I just received my Lace embossing folder so I haven’t had a chance to try it with these foil sheets…yet!  🙂

Have I convinced you yet that the Grapefruit Grove and Lovely Lipstick Foil Sheets should be on your Sale-a-bration wishlist?  You get 4 sheets of each color in the package.  That’s 8 FREE sheets of these gorgeous foil sheets when you make a $50 purchase during Sale-a-bration.  Be sure to contact me if you have any questions on Sale-a-bration.  Don’t forget…it’s a stamper’s favorite time of the year!

Have a great day!  Take care and Happy Stamping!


A Bunch of Hearts

Valentine’s Day is all about the hearts, right?  It’s the one time of the year where you can figuratively wear your heart on your sleeve, or anywhere else for that matter and no one will look twice at you!  What do you call a group of hearts?  Does it have a specific name like a gaggle of geese?  A flock of birds?  I’m not sure…we’ll just call them a bunch….

Yes, Valentine’s Day is still almost a month away but as crafters we have to think ahead!  It’s never too early to start on the next holiday’s crafts, right?  🙂

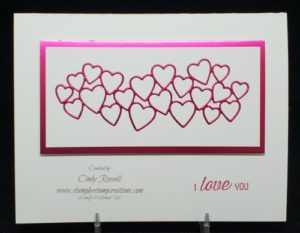
Be Mine Stitched Framelits.blog.0119Today I want to share with you the project I talked about yesterday.  On yesterday’s project I used some if the little hearts that I die cut from the Be Mine Framelits set.   Today’s card uses the piece that I got those little hearts from.  Isn’t this a fun little die cut?

As I mentioned yesterday, I adhered a piece of the Multipurpose Adhesive Sheets to the back of the Lovely Lipstick Foil Sheet before I ran it through the Big Shot with the die.  That way I didn’t have to try to get just a little bit of glue on the back of those hearts!

I also conserved paper…..I only use one piece of Lovely Lipstick Foil Sheet on this card.  I die cut the hearts out of the Lovely Lipstick Foil Sheet layer.  Once I die cut the hearts out of it, I added the Whisper White layer and then adhered the hearts die cut.  Just make sure that your top clear cutting pad is fairly new and doesn’t have a lot of scratches on it.  You don’t want those scratches marring your foil sheet.

I’m pretty sure that the Lovely Lipstick Foil Sheets are my new favorite product for 2019.  They’re GORGEOUS!  I have to admit that I haven’t really even looked at the Grapefruit Grove Foil Sheets that come in the same package.  I’m sure they’re pretty but they’re not PINK!

Have a great day!  Take care and Happy Stamping!

L-O-V-E

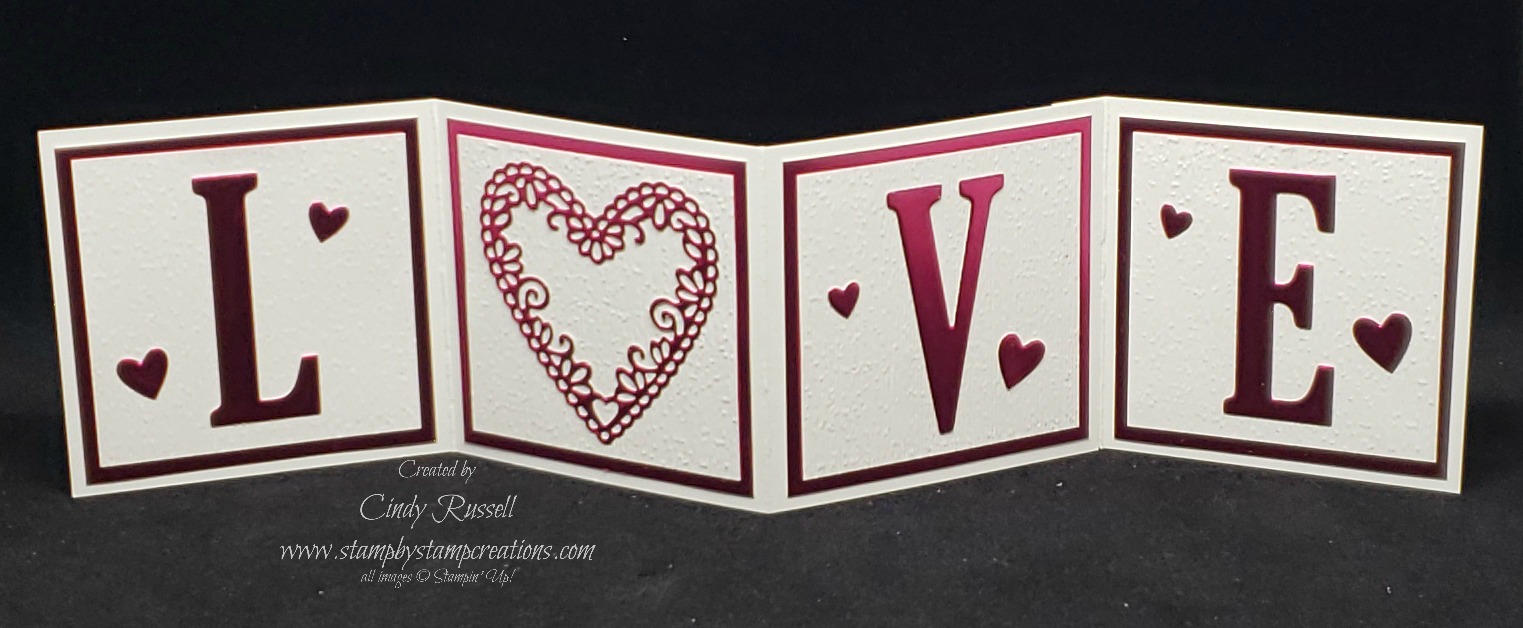
Love Banner.2As I mentioned yesterday, February and Valentines Day are all about LOVE!  As paper crafters we’re all about making cards but it’s also fun to make 3D projects.

At Christmas time my demo friend Jan gave me a fun little banner like this one that said “SNOW” and had a large snowflake for the “O”.  I had just received my pre-order of items from the Occasions Catalog and the Sale-a-bration brochure and my little brain went into overdrive!  I just knew I had to make one of these for Valentine’s Day using the GORGEOUS Lovely Lipstick Foil Sheets that you can get as a FREE Sale-a-bration item and the Be Mine Framelits.

This turned out just as cute as I imagined!  I can’t wait to display it!

This little LOVE banner was pretty easy to make.  You should start with a 12″ x 12″ piece of Whisper White cardstock.  (I say “should” because the cardstock I had was only 11 7/8″ x 11 7/8″ so I had to improvise.)

Cut a 12″ x 3″ piece of Whisper White cardstock.  Score at 3″ and 9″.  Flip it over and score at 6″.  Fold along score lines.  You want the outside score marks to be valley folds and the inside score mark to be a mountain fold.

(Improvisation:  Start with an 8 1/2″ x 11″ piece of cardstock (I used Thick Whisper White for a little more support).  Cut a piece that is 3″ x 9″ and a piece that is 3″ x 3 1/2″.  Score the large piece at 3″.  Flip cardstock over and score at 6″.  Score the small piece at 3″.  You want your score marks folding as mentioned in the step above.  Once you have your pieces situated this way you will adhere the 1/2″ section of the small piece to the back of the right side of the large piece.  If you look closely at the picture above you can see that I did this.)

Cut 4 –  2 3/4″ x 2 3/4″ pieces of Lovely Lipstick Foil Sheets and adhere to the four sections of the scored Whisper White cardstock.

Cut 4 – 2 1/2″ x 2 1/2″ pieces of Whisper White cardstock.  Run them through the Big Shot with the Subtle Embossing Folder (my favorite!) for a little texture.  Adhere them to the squares of Lovely Lipstick Foil Sheets.

Figure out how large of pieces of Lovely Lipstick Foil Sheets you want to use to die cut the letters and heart and adhere pieces of Multipurpose Adhesive Sheets to the back.  (You can use regular adhesive on the letters but the Multipurpose Adhesive Sheets make adhering the heart SO much easier.)  Die cut the “L”, “V” and “E” and the intricate heart from Lovely Lipstick Foil Sheets.  Adhere these pieces to the embossed squares of Whisper White cardstock.
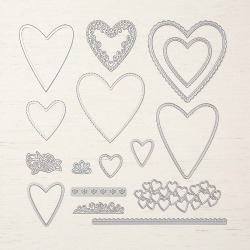
Be Mine FramelitsTo finish off the banner I die cut the little piece with all the little hearts on it and adhered some of the hearts to each of the letter squares.  Don’t worry….I didn’t waste the outline of the little hearts….I used it on a card!

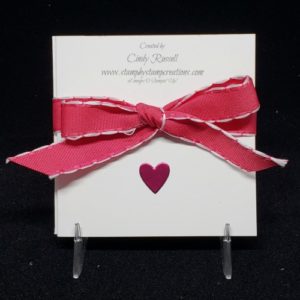
These little banners would make wonderful gifts.  I may have to make some more of them!  Of course if you are going to give this as a gift how do you present it?  Tie a ribbon around it of course and add one of the many little hearts that you just die cut to make the banner!
Love Banner.1.blogHave a great day!  Take care and Happy Stamping!
It’s All About the Love!

heartHappy January 14th!   There’s only one month until Valentines Day and there’s so much I want to share with you!  There are some great products in the new Occasions Catalog that are perfect for Valentines Day but before I jump into sharing those with you I want to share something else.

Not only is February the month of love, it is also my anniversary with number-15Stampin’ Up!  This coming February 12th I will have been a Stampin’ Up! Demonstrator for 15 years!  Yes!  15 years!!!!  And I still LOVE it!  I was talking to a gal the other day and she asked me how long I’ve been doing Stampin’ Up!.  When I told her, she was amazed and told me how she can still see how much I love doing it.  That’s important.  We should always love what we do!  I’m glad my love and joy of creating and Stampin’ Up! shows in what I do.

Have you noticed the byline on all the catalogs this past year?  “Love It.  Live It.  Share It.”  It definitely speaks to me.  I do pretty much live card making.  If I’m not designing and preparing for a Stampin’ Up! class or Stamp Camp I’m designing and preparing projects for my card group at church.  I’m proud and excited to be doing this for 15 years!

Since this is such a big occasion I think we need to celebrate the entire month of February!  I’m not sure how we’ll celebrate but we will!  Be sure to keep reading my blog posts and checking my Facebook Page to see what’s going on!

Have a great day!  Take care and Happy Stamping!

Incredible Like You Project Kit

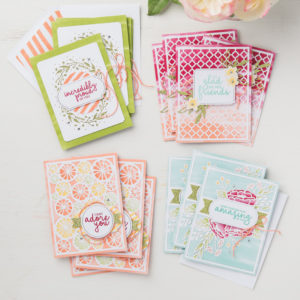
Incredible Like You Kit.0119Here’s the last kit I’ll be sharing with you this week.  The Incredible Like You kit!  This kit will make 16 cards.  I love the fun laser-cut overlays on the cards that highlight the images underneath.

This kit is not all-inclusive.  It will come with all the card bases, overlays, accents, die-cuts and embellishments.  The kit also comes with a plastic envelope-type box to store your completed cards in.  You will need the Incredible Like You stamp, the Lovely Lipstick and Coastal Cabana ink pads and your adhesive of choice to complete these cards.

I did start this project in the car on my recent trip to MN.  I got the overlays on the card bases.  My tip for this kit is to definitely use some type of liquid glue where you can just a little bit on some of the finer areas of the overlays.   You don’t need to cover the back of the entire overlay, just in strategic spots like the corners and some center areas.

I did have everything I needed to complete the kit in the car.  I do have to admit that the reason I didn’t complete the cards was that I personally wanted to use different colors of ink on some of the cards and I only had the two colors (Lovely Lipstick and Coastal Cabana) of ink with me that they recommended.

Now that I’ve admitted that, you can see how having to supply the stamp set and the ink colors for a kit can be a good thing.  Since you have to supply the stamp set and the ink pads this might not be the perfect kit for a beginner.  The beginner stamper would have to purchase the stamp set, the clear block(s) to fit those stamps and an ink pad or two as well as adhesive to complete the kit.  On the flip side, this would be a good way to start on their supplies for their craft room.  All they need to do is maybe add a package of notecards & envelopes to their order and they would be able to make more cards!  (Hmmm….I’m envisioning another post…)

I will update this post when I complete the cards and you can compare my finished kit to the photo above.  Have a great day!  Take care and Happy Stamping!

Made to Bloom Card Kit

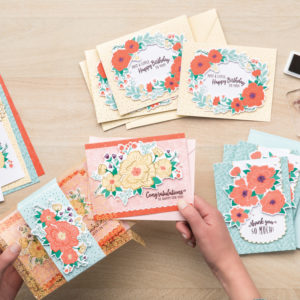
Made to Bloom Card KitThis week is all about the kits!  Today I’m going to share with you the Made to Bloom All-Inclusive Card Kit.  All inclusive.  You can’t beat that!  The kit comes with EVERYTHING you need (except adhesive) to make 12 beautiful cards, an acetate card box to hold them and a matching belly band for the card box.  You can find this kit on page 20 of the Occasions Catalog.

You get a small photopolymer stamp set, a clear block for the stamps and an ink spot to stamp your sentiments!   The sentiments included in the little stamp set are “Congratulations, so happy for you”, “Just a little Happy Birthday to you”, “Thank you so much” and “Thinking of you”.  So not only is the kit all-inclusive, it’s all-occasion!

Check out this video by Stampin’ Up! that tells you all about the kit and how easy it is to put together.

This kit was very easy to put together.  I put this kit together in the car too on our trip to MN after Christmas.  Hey….a girl’s got to make good use of her time, right?

Have a great day!  Take care and Happy Stamping!

Animal Expedition and Paper Pumpkin!

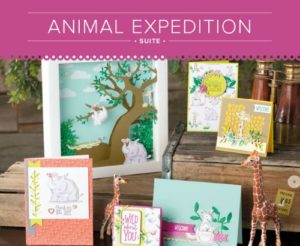
Animal Expedition.blogHave you checked out the Animal Expedition Suite in the Annual Catalog (pgs. 26-27)?  Oh, my!  It’s ADORABLE!  How about you?  Do you love the Animal Expedition Suite and those adorable critters?  Can you not get enough of them?

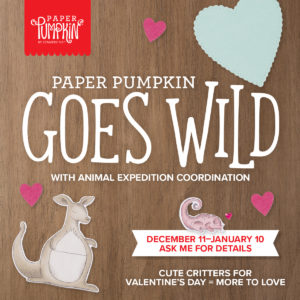
Guess what?  The Paper Pumpkin Kit this month (January 2019) is going to coordinate with the Animal Expedition Suite!  It’s also going to be 3D valentine projects.  I can hardly wait!  They will probably be 12.11.18_ANIMAL_EX_PP_25_SHAREABLEValentine treat holders with the fun critters from the Animal Expedition Suite!  Oh, my!  I’m going to have to order an extra kit for this month!

If you’re loving this combination but want to make cards instead of 3D projects, don’t worry.  I will share with you cards you can make using the supplies in the Paper Pumpkin kit!  Don’t miss out on this fun combination!

Here are some important details….

  1.  What is Paper Pumpkin?  Paper Pumpkin is a monthly subscription kit that comes to you in the mail by about the middle of every month.  You can subscribe to Paper Pumpkin right here!  With this method you enter your credit card number and it will be charged every month before the kit ships.  You can put holds on your subscription or you can cancel your subscription at any time.
  2. Prepaid Subscription:  Stampin’ Up! offers prepaid subscriptions also for Paper Pumpkin.  In my online store you can purchase a 1 month, 3 month, 6 month or 12 month subscription.  The 3, 6 or 12 month subscriptions are great to purchase during Sale-a-bration because you can earn Sale-a-bration rewards with your purchase.
  3. Last day to subscribe:  If you are interested in subscribing to Paper Pumpkin and to receive this Animal Expedition Valentine Kit you MUST sign up no later than January 10th.  The 10th of the month is the last day to sign up/cancel  for any month’s kit.

If you have any questions about Paper Pumpkin please don’t hesitate to contact me.  I’m here for you!  Have a great day!  Take care and Happy Stamping!

Precious Parcel Card Kit

Who likes card kits?  Stampin’ Up! card kits are great!  They are the perfect way to make a bunch of cards without all of the design work!

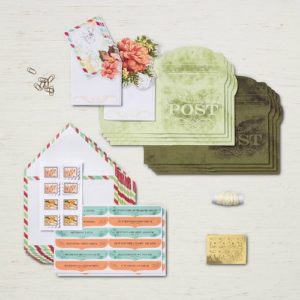
Precious Parcel Kit.blogToday I’m highlighting a fun kit that you can get for FREE….yes FREE! during Sale-a-bration.  The Precious Parcel Card Kit (#149750) is one of the Sale-a-bration items that you can choose for FREE with a $50 order!  Woo Hoo!

This kit is absolutely perfect for the beginner crafter because there is no stamping involved and you don’t even need adhesive!  The pieces already have adhesive strips on them!  Wow!

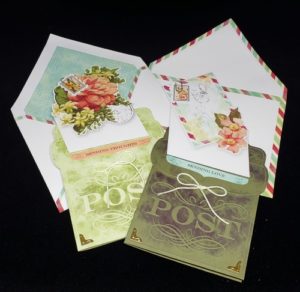
I put this card kit together while we were Precious Parcel Kit.blog.1driving to MN right after Christmas.  Piece of cake!  I can’t wait to get another one with my Sale-a-bration rewards!

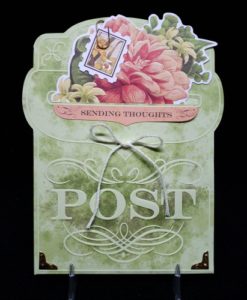
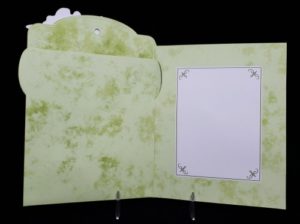
As you can see from the pictures there is a little piece that slides into a slot in the front.  You can write a little note on this piece but you can also open the card up and have another space to write.  So cute!  Don’t you love the “air mail” envelopes too?!

Don’t judge this kit by the pictures.  It’s much cuter in person.  We watched someone put the kit together at Stampin’ Up!’s On Stage Precious Parcel Kit.blog.1event in November and I knew I had to at least give it a try.  I’m so glad I did!

This kit will be perfect for my “Mail a Card Monday” challenges.  What’s that you say?  I mentioned on my Facebook Page (which I hope you all visit and “like”) yesterday but I forgot to mention it here!

I am challenging all of us to mail a card every Monday this year!  How easy is that?  If you’re like me, you make lots of cards but you kind of don’t get them into the mail.  I know…I’m terrible!  I need to mail all of these beautiful Precious Parcel Kit.blog.2cards that I make!  Just think…if you mail one card every Monday that’s 52 cards that you’ve sent!  Let’s do it!

Since I didn’t tell you about this challenge until today I would like you to mail your Monday card today.  Just do it!  Grab a card and send it to someone.  You know you’ll make their day!  When you do pop your card in the mail be sure to leave a comment on this post or on my Facebook Page so I know you did it!  Let’s flood the mail system and make someone’s day!

Have a great day!  Take care and Happy Stamping!  Make someone’s day!

Precious Parcel Kit.blog.3


Make it Mine Monday: Lovely Lattice

Happy Monday to you!  It’s Make it Mine Monday today!  On these special Monday’s I will share with you a lovely card that I’ve seen somewhere and show you how I changed it up to make it my own.  Sometimes I change just a little bit and sometimes I change a lot!

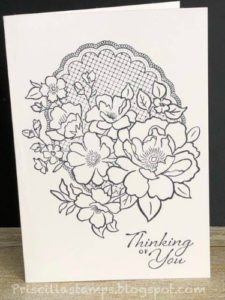
Lovely Lattice simple blogToday’s card is made with the Sale-a-bration stamp set Lovely Lattice that you can choose for FREE with a $50 purchase.  We demonstrators have a Facebook Page where we can share ideas with each other and this is where I saw today’s lovely and simple card.  Thank you Priscilla for sharing it.

I received this stamp set as a door prize at November’s On Stage event.  I like coloring but I get a little overwhelmed when there is a lot of it like with this stamp set.  I was pretty excited to see this simple card that Priscilla made with it and it gave me hope that the stamp set wouldn’t just sit on my shelf.  Ha!

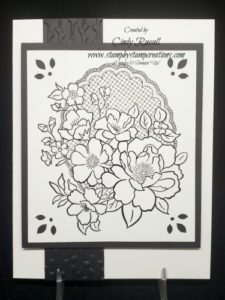
Lovely Lattice.blog.0119The first thing I changed when making this card my own was to change the card size.  Priscilla used a Notecard for her design and the image and sentiment fit perfectly on it.  Since I was designing cards for my next class I decided to go with a regular 5 1/2″ x 4 1/2″ card front size.  I then heat embossed my image so that it would stand out a bit more.

Then, since I was using a larger size card I needed to add a few layers.  I know…shocker!  I can never have enough layers on my cards.  The strip of Basic Black cardstock in the background is embossed with of the small embossing folders from the Petal Pair Embossing Folders set.

To really make my image pop I finished off the piece of Whisper White cardstock with the stamped image by punching the four corners with the Detailed Trio Punch.  Ta-da!  The Make it Mine project is complete!

See how easy it is to transform someone else’s idea to make it your own?  My challenge to you is to give Make it Mine Monday a shot.  Find an idea that you like and make it your own.  Of course, I’d love if you’d share that idea with me.  Have a great day!  Take care and Happy Stamping!

Happy New Year!

happy-new-year-background-with-golden-confetti_1048-4402Happy New Year!  Sorry these wishes are a few days late.  We headed to the MN Homeland for a short visit after Christmas and have just returned.

I’m excited about 2019.  Are you?  My social calendar is already filling up and now I need to work on my business calendar.

Today is a big day at Stampin’ Up!.  The 2019 Occasions Catalog is now available to order from and Sale-a-bration has begun! Woo Hoo!

During the upcoming weeks I’ll be highlighting some of these fabulous new products so stay tuned!

Are you new to stamping and aren’t sure what Sale-a-bration is?  Well….it’s the most wonderful time of the year for a stamper.  It’s the time of the year when you can earn FREE products from Stampin’ Up!

SHOP:  For every $50 you spend on Stampin’ Up! merchandise and you can choose a FREE product from the Sale-a-bration Brochure!

HOST:  When you host a qualifying party (or place a qualifying order of at least $250) you get to choose an additional $25 in Hostess Rewards.  Would you like to host a Stampin’ Up! party?  I’d love to get together with you and your friends to stamp.  Contact me today to choose a date!

JOIN:  Choose an additional $50 of product when you purchase a Demonstrator Starter Kit.  There are two starter kit options for you to choose from.

Option 1:  Get up to $175 worth of Stampin’ Up! products for just $99

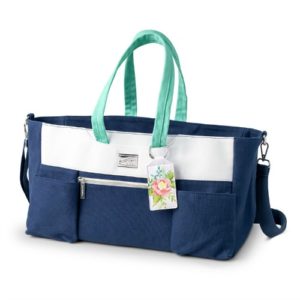
Option 2:  Get up to $175 worth of Stampin’ Up! products AND the exclusive Craft &         Carry Tote (valued at $50) for just $129!  This tote is great!  You can fit tons of Stampin’ Up! products in it.  Check out the details of the tote in this video.

Craft & Carry Tote.blogThis Craft & Carry Tote is only available during Sale-a-bration to those who sign up as a Stampin’ Up! Demonstrator.  Please contact me if you have any questions.  I would love to have you join my team!

As you can see, Sale-a-bration has something to offer to everyone!  Whether you want to shop, host or join you can get FREE products!  I LOVE Sale-a-bration, do you?

Have a great day!  Take care and Happy Stamping!


Happy Holidays!

christmas-cute-macro-40541.blogHello!  I hope everyone had a wonderful Christmas.  Things got a little hectic for me over the weekend as I’m sure it did with many of you.  I sing in the church choir which I’ve done for years and this year I started playing in the bell choir.  We had a fantastic program on Monday morning with an orchestra so there have been a number of rehearsals along with regular services over the weekend.  It was all worth it though.

Of course, after all that was through I needed to actually think about Christmas.  Luckily I had the gifts purchased and wrapped but I need to fill stockings and get going on cooking for Christmas Day.  As things usually do, everything came together and we enjoyed a lovely Christmas.  I watched a Christmas movie on Christmas Eve while I was cooking and another one after dinner on Christmas Day.  I hate to admit which movies I watched because both of them I watched for the very first time if you can believe it.  On Christmas Eve I watched “It’s a Wonderful Life” and on Christmas Day I watched Die Hard.  I know, there is a bit of a controversy on whether Die Hard is actually a Christmas movie…..ha!

Don’t forget that the Year-End Closeout is coming to an end January 2nd.  You can see what’s included in this sale here.  There are still great items for sale on the Clearance Rack including some of my favorite Designer Series Papers.  Don’t miss out.  Get these items while they’re still available.

Have a great day!  Take care and Happy Stamping!


Butterfly Sneak Peek

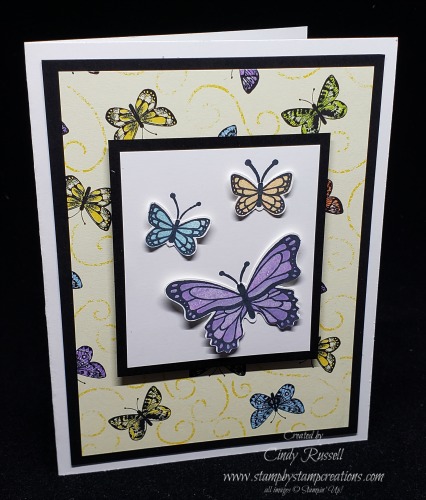
Butterfly Gala.blog.1218It’s not even officially winter yet and I’m going to make you think Spring!  How can you not think spring when you see butterflies?

This springtime card was made using the Butterfly Gala Bundle found in the upcoming 2019 Occasions Catalog.  The designer paper is the Botanical Butterfly Designer Paper found in the upcoming 2019 Sale-a-bration Brochure that you can earn for FREE with a $50 purchase.  I love Sale-a-bration!

The Butterfly Gala bundle includes the Butterfly Gala photopolymer stamp set and the coordinating Butterfly Duet Punch.   There are four different butterfly images and each one has both the large butterfly and the small butterfly.  This makes it easy to use the punch which has both butterflies also.

The Botanical Butterfly Designer Series Paper is beautiful.  One side of each sheet is colorful with the colors you see in the card above and the other side of each sheet has a black and white image on it.  You’re going to love it!

So start making that wish list for January!  Sale-a-bration and the Occasions Catalog are almost here.

Have a great day!  Take care and Happy Stamping!

Clearance Rack Updated!

clearanceHave you checked out all of the new items that have been added to Stampin’ Up!’s Clearance Rack?  There are some really great products on it.  You need to get them before they’re gone!

Picture Perfect Party DP.blogMany of the items are from the 2018 Occasions Catalog.  I placed an order yesterday to get some of the gorgeous designer papers that were in that catalog.  I know, I don’t really need any more designer paper but they’re so pretty and the prices are so good!  Who doesn’t love Designer Paper?

Picture Perfect Collage.1The Picture Perfect Designer Paper is SO fun with it’s photographic imagery.  All you need to do with it is add a sentiment!  If you love this paper as much as I do you better place that order ASAP!  It’s only available while supplies last!

Have a great day!  Take care and Happy Stamping!

Tool of the Day: Subtle Embossing Folder

Subtle Folder.blog.1218The Tool of the Day is my absolute favorite tool in the entire Stampin’ Up! catalog.  We won’t count the Big Shot itself because I need to use it on almost every card I make.  My favorite tool is something that you use with the Big Shot…it’s the Subtle 3D Dynamic Textured Impressions Embossing Folder.  That’s a mouthful so I’m just going to call it the Subtle Embossing Folder.

I LOVE this folder.  I use it ALL the time.  I would use it on every single card I design if I could.  This folder is a definite must for anyone who has a Big Shot.  If you don’t have a Big Shot, get one just so you can use this embossing folder!  I’m serious!

This embossing folder is perfect for almost any type of card.  It doesn’t distract from your design, it just adds a little texture.  Check out the card from yesterday’s post.  I embossed the entire front of the card!  I also used it on a card I posted last week using the Winter Woods stamp set.  This was one of those cards that on my first try I didn’t use it and thought the card was too plain.

If you already own this embossing folder I encourage you to start using it more.  I know you’ll love how it adds that little bit of texture to your card and completes it.  If you don’t own this embossing folder put it on your wish list!

Have a great day!  Take care and Happy Stamping!

Make it Mine Monday: Needle & Thread

Needle & thread.onstage.blog

It’s time for a Make it Mine Monday.  In this post I show you a lovely card that was designed by someone else and I show you how I change up the design to make it my own.  Today’s starting card is one we made at Stampin’ Up!’s On Stage event back in early November.  I’ve actually shared this card with you before, giving you a sneak peek of the new products.  You can check out the original post here.

As I mentioned in that original post, I LOVE this stitched design made using the Needlepoint Elements Framelits.

I love this original card but the off center designer paper just isn’t my thing and to be honest, I didn’t want to use that large of a piece of designer paper on my card for an upcoming class.  So, I took all the things (most everything) that I liked on this original card and figured out how to put them into my own card.

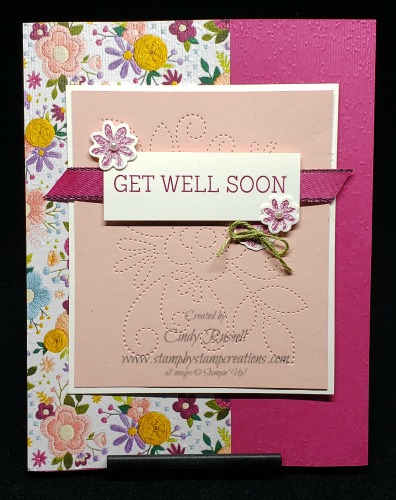
Needle & Thread.blog.1218This is what I designed.  I have the stitched design, the designer paper, the little stitched flowers and the sentiment.  I just changed the color of the card, the size and placement of the designer paper and I added a layer and a piece of ribbon.

What do you think?  Can you see how I basically kept the same elements of original card?

Give Make it Mine Monday a shot.  Share with me what you come up with.  I’d love to see your creations.

Have a great day!  Take care and Happy Stamping!