Climbing Roses And Polished Stone

Climbing Roses
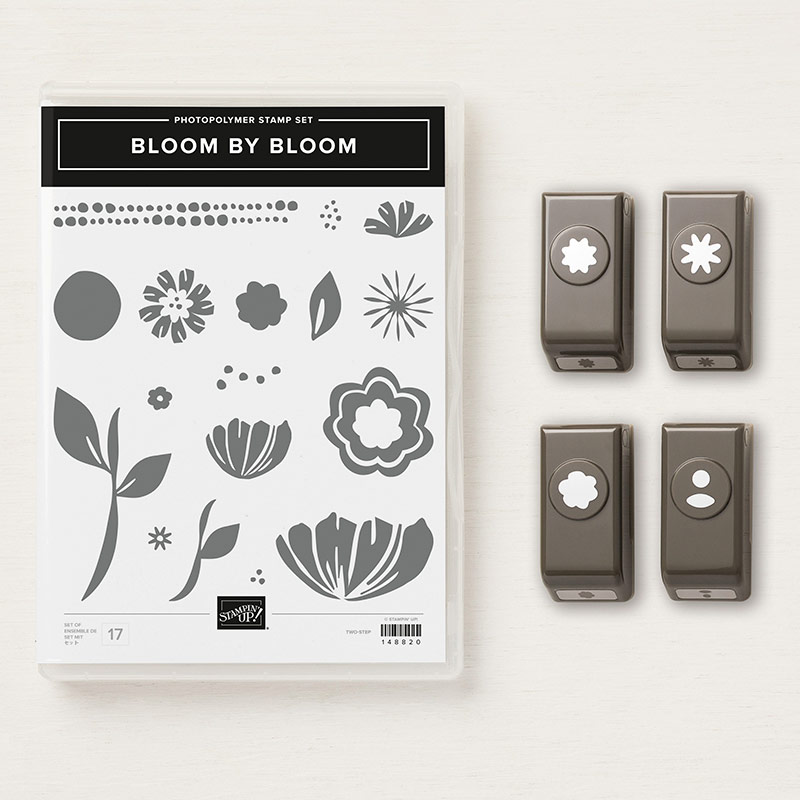
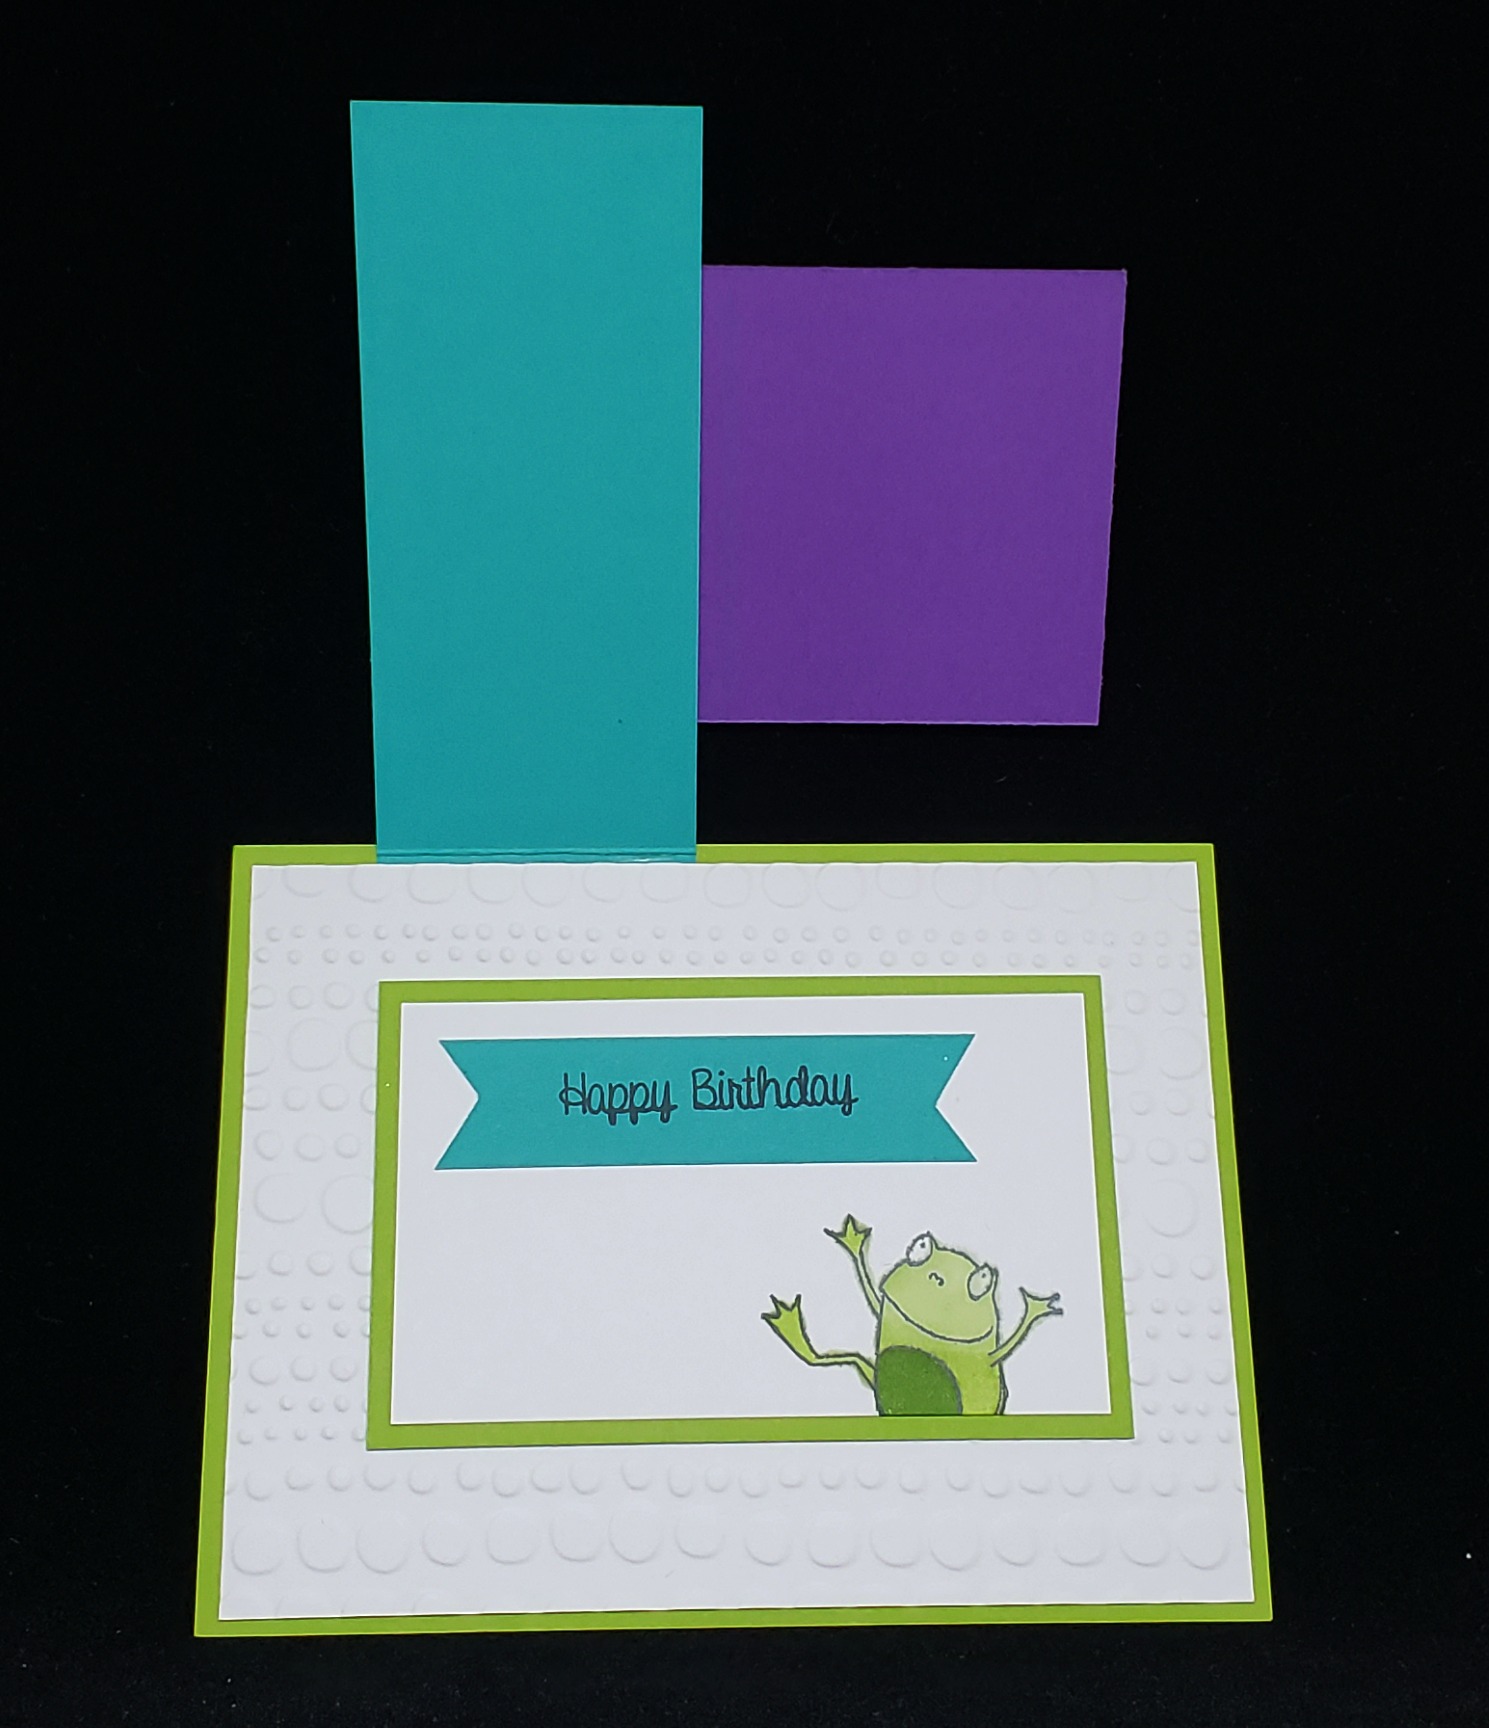
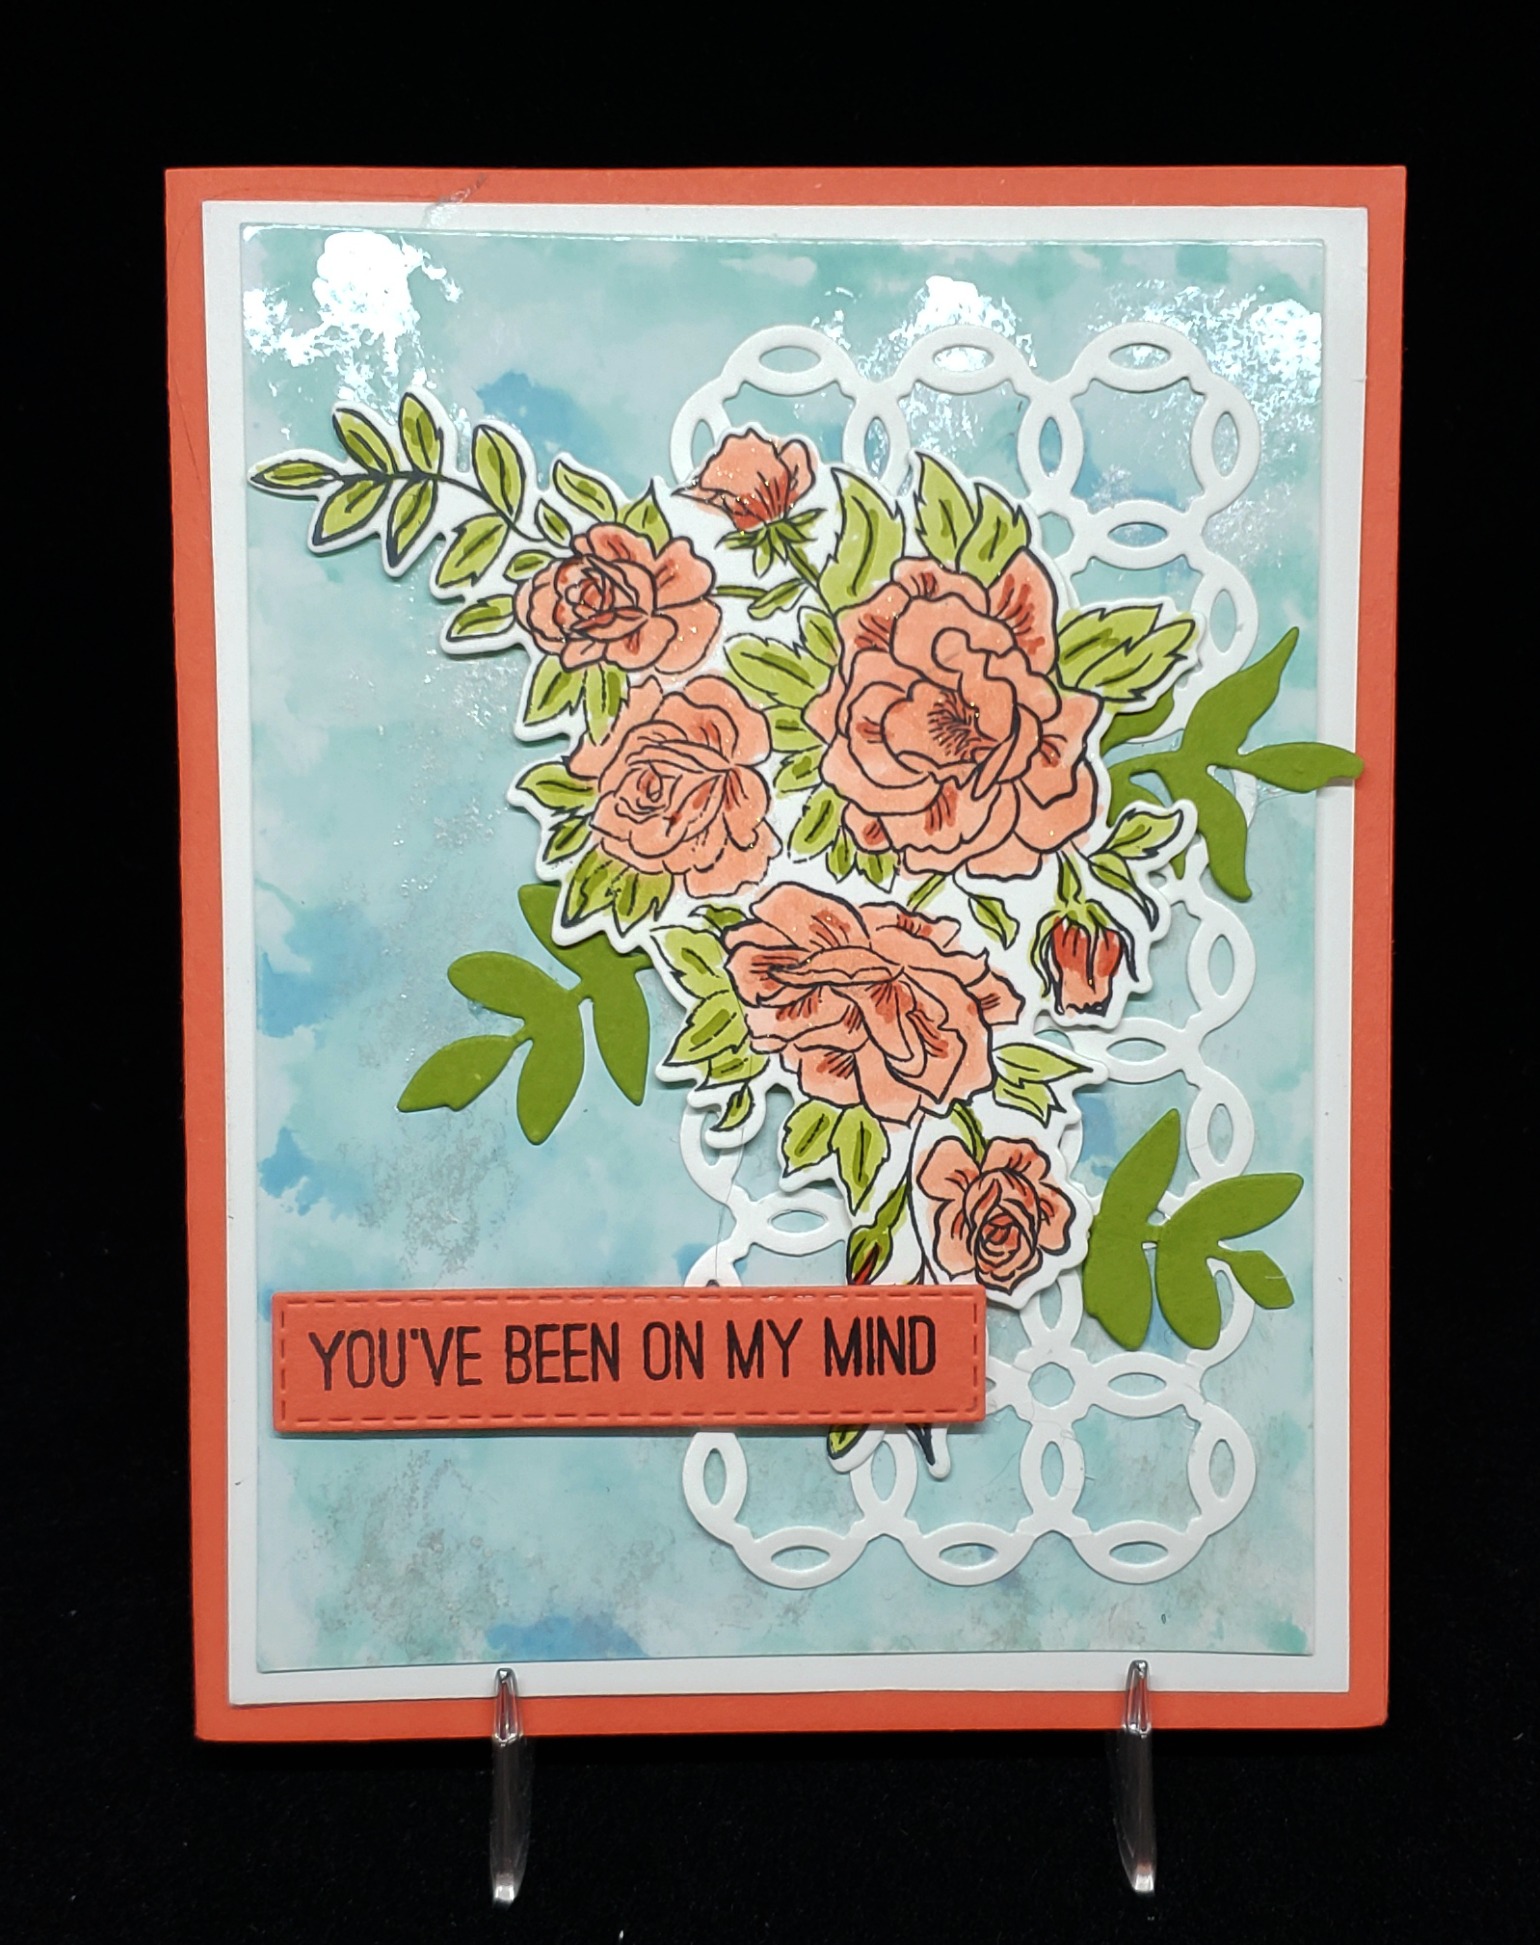
I’ve shared almost all of the projects from Stamp Camp.  Haven’t they been great?  Today’s project was designed by Laura C.  Laura combined the beautiful Climbing Roses Bundle with the Polished Stone Technique on the background.

The Polished Stone Technique is an oldie but goodie.  For this technique you need Glossy White cardstock, cotton balls, rubbing alcohol, ink refills and if desired, shimmer paint.  To make your background you dampen the cotton ball thoroughly with alcohol. Add 2-3 drops of each of the colored ink refills you have chosen (only choose a few or the background will look muddy) . Dip a toothpick in the shimmer paint and dab on the cotton ball. Pounce the cotton ball all over the Glossy White paper. The alcohol will spread the ink and shimmer. Use a dry cotton ball to remove excess ink for a softer look.  Let dry.  You can get some amazing looking backgrounds with this technique.  I think the background can look just as amazing without the shimmer paint.  It all depends on how much shimmer you want on your card.

Climbing Roses bundle
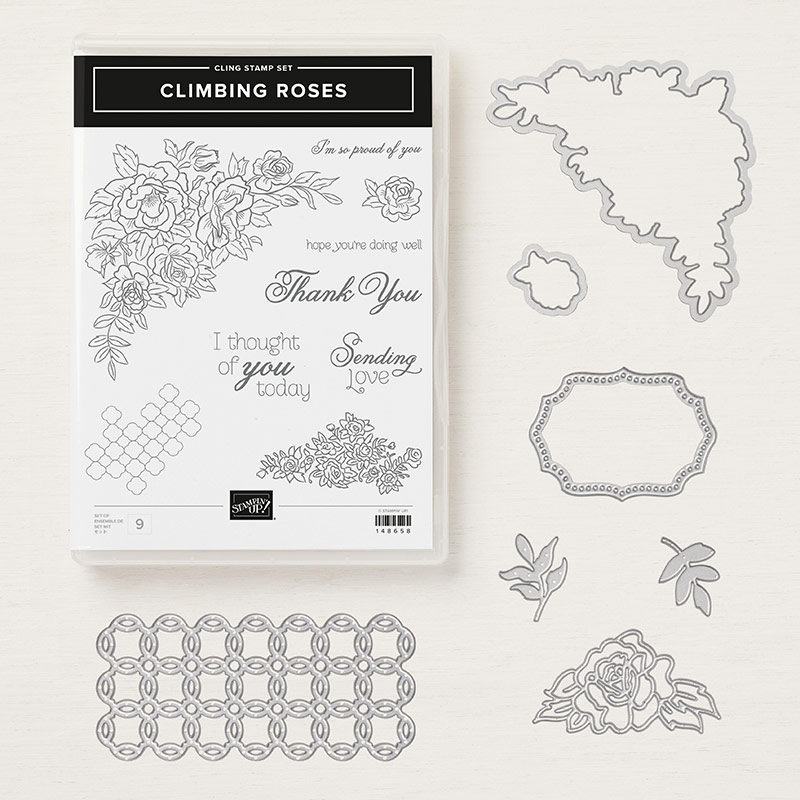
Isn’t this a lovely card?  The trellis die really adds to the card doesn’t it?  There are some really nice dies in the Rose Trellis Thinlits set and some great sentiments in the Climbing Roses stamp set.  Definitely a must have…..I should probably put it on my next order….  😮

Have a great day!  Take care and Happy Stamping!

Bridal Shower Card

Apron of Love.0119I just finished making 30 of these fun shower invitations.  My nephew in Minnesota is getting married this coming summer and I volunteered to make the shower invitations.  Emma, the bride-to-be, loves to cook so the Apron Builder Framelits were the perfect choice for the invitation.

Of course then you have to figure out what colors to use.  I asked my sister and she suggested the gray and yellow combination.  I was so excited when I was searching through my designer papers and came across this gray pattern in the Twinkle Twinkle Designer Series Paper package.  It works perfectly for the apron!  And of course you can’t go wrong with the gingham pattern!  So glad it came in yellow!  🙂

Everything on the card is current product except the “you’re invited”.   My sister wanted the “you’re invited” on the front of the card so I had to use a retired set.  If it had been up to me I would have just used the apron on the front of the card.

The little flower on the apron pocket is punched from the Bitty Blooms Punch Pack in the Occasions Catalog.  This is the set of four little punches that coordinates with and is bundled with the Bloom by Bloom stamp set.  I love when all sorts of products that weren’t actually designed together coordinate so well with each other.  That’s one of the best things about Stampin’ Up!……COORDINATION!

Leave a comment if you love COORDINATION as much as I do!  Have a great day!  Take care and Happy Stamping!

Technique Tuesday: Hello Cupcake Pop Up Slider Card

Hello Cupcake2.0119 Hello Cupcake1.0119I love Fancy Folds and new techniques/types of cards.  The card that I CASEd (Copy and Share Everything) for Stamp Camp is called a Pop Up Slider Card.

Isn’t this a fun type of card?  Everyone at Stamp Camp really enjoyed making it.  The card is designed so that when you pull up on the ribbon the card stock slides up to open the “shutter” (this is what I call it) to reveal your message.  Too fun!

I used the new Stitched Rectangle Framelits to create the opening of my shutter.  I know…your question is how did I do that so it only cut on three sides?  Ha!  The answer is SO easy.  Of course I had to watch a video to figure it out but I will share the answer is with you.  🙂

You will make your regular Big Shot “sandwich” with the two clear plates but instead of just placing the top plate over the card stock and framelit you will line up the top clear plate just underneath the top edge of the rectangular framelit.  This way the top of edge of the framelit doesn’t cut!  Amazing!  Why can’t I think of things like this on my own!?  When you do this you your cutting plates aren’t even over the platform.  I found it worked best when I sent the overlapping edge of the top framelit through the Big Shot first. (see photo below). Pop-up Slider Collage

Pop-up Slider Card.1Pop-up Slider Card.1aThe next step is to make your “shutter” by scoring across this “flap” that you made.  I scored across the flap at the top of my shutter.  Then I scored about 1/4″ from the bottom of the shutter and once in the middle.  The two outside score lines will be valley folds and the middle score line will be mountain fold.

To attached your slider piece you will turn the cardstock over and attach the slider piece ONLY to the 1/4″ area of the “shutter”.  This is how the slider pulls the shutter open.  This slider piece is a little wider than the window opening.

These tips for the Pop Up Slider card are the most difficult steps for the card.  Just remember that when you attach this piece of cardstock to the next layer don’t get your adhesive too close to the slider piece….if you do, your slider won’t slide.

To make the rest of the card you simply layer things and decorate.  You can find the complete directions for my Hello Cupcake Pop Up Slider Card here.  Be sure to contact me with any questions you may have.

Have a great day!  Take care and Happy Stamping!


Bloom by Bloom

Bloom by Bloom CampHappy Monday!  Are you a person who looks forward to the beginning of a new week or do you dread it?  After seeing this bright and cheerful card how can you not at least smile?

Here is another card from my group’s Winter Stamp Camp.  Laura K. designed this one.  Aren’t these bright flowers fun?  Laura made this card with the Bloom by Bloom stamp set.  You can make all sorts of different types of flowers with this stamp set.

You can purchase the Bloom by Bloom stamp set by itself or in a bundle.  The interesting thing about this bundle is that punches in the bundle don’t actually Bloom by Bloom bundlepunch out any of the images in the stamp set.  The punch set is called the Bitty Blooms Punch Pack and there are four small punches in the pack.  You can see from the image to the left how the punches coordinate with the stamp set but don’t actually fit any of the stamp images.

It’s fun to see how different people see things differently.  On Laura’s card she used the large flower image upside down with the small flower image to make her flower.  In the Berry Burst card that I made I only used the large flower for my floral image.  It’s also fun Bloom by Bloom.0119to see the different colors people choose.  I almost always gravitate towards PINK while Laura chose yellow for her flowers.

The Bloom by Bloom stamp set is very versatile since you can basically create any type of flower you’d like!  It also coordinates with the Happiness Blooms Memories & More Card Pack and the Happiness Blooms Memories & More Cards & Envelopes.  So much COORDINATION!  I love it!

Have a great day!  Take care and Happy Stamping!

And They Call It Puppy Love

OK….how many of you were thinking of Donny Osmond or at least singing along to the title of this post when read it?   Be honest….I know I’m not the only one!  Ha!

Happy TailsEnough kidding around.  Today’s card is another one from Stamp Camp designed by Janet.  She is a big dog lover.  Her and her husband have 2 dogs.  I have to admit.  I’m not really a dog person….more of a cat person.  It’s not that I dislike dogs or anything but I definitely prefer cats.

The Happy Tails stamp set is pretty darn cute.  It includes the out line of the dog as well as two different sets of “spots” you can use to “decorate” your dog.  It also has a paw print, a dog house, a bone and some nice sentiments.

On her card, Janet used the Happiness Blooms Designer Series Paper for her background.  At camp she had a bunch of different color combinations of her card using the different colors of paper.  They were all cute.

I don’t own the Happy Tails Bundle (stamp set and coordinating Dog Builder Punch) but I will probably invest in it.  A lot of my friend own dogs it it would be fun to send them cards using this bundle.

Well SaidThe “love” was die cut using the Well Written Framelits Dies.  This set of framelits has 24 different dies!  The words that you can die cut with this set coordinate perfectly with the Well Said stamp set.  This bundle is a little pricey but there is SO much you can do with it.  Definitely something to save up for!

I hope you like Janet’s card or I at least hope it made you smile.  Have a great day!  Take care and Happy Stamping!


Beauty Abounds

Beauty Abounds1Today I have another card from Stamp Camp for you.  Keri designed this lovely card made with the Beauty Abounds stamp set.  I really like the soft colors.  They work so well with this stamp set.  This set includes sentiments, a floral design, some small butterflies and a couple of background images.

Keri used a fun fold on her card like Glenda did on yesterday’s card.  Keri shortened the front of the card a little and overlapped it with Beauty Abounds2the focal point.  Then she “hid” the inside portion of the card behind the focal point.  A fun little design.

The Beauty Abounds stamp set has a coordinating thinlits set.  The Butterfly Beauty Thinlits Dies are really amazing.  First of all there 20 dies in this set.  Wow!  That’s a lot.  The majority of them of them are all butterflies!  All different shapes and sizes.  Two of the thinlits are large with multiple butterflies on them.  I haven’t had a chance to play with them yet but I sure am looking forward to it.  I’m sure I’ll be sharing more projects made with this beautiful bundle….once I find time to play.  🙂

Beauty AboundsHave a great day!  Take care and Happy Stamping!

So Hoppy Together

So HoppyI LOVE THESE FROGS!  They are SO Stinkin’ Cute!  I have seen so many adorable cards made with the So Hoppy Together stamp set.  It was one of my first Sale-a-bration choices.

I’ve always thought frogs were cute.  Who doesn’t love Kermit?!!  I actually used to collect frog figurines way back when.

My friend and fellow demonstrator Glenda designed the most adorable card for Stamp Camp using this fun stamp set and the fun Detailed Birthday Edgelits.  The colors Glenda used are so fun and bright.  I just love this So Hoppy Together1card.  I love the fun fold she did with it too!  The base of the card front is just the strip of Bermuda Bay cardstock with the focal point attached to it.

How can your card not be adorable when you have frogs, a fun fold and bright colors?

These line-art frogs are perfect for coloring.  You can use your Stampin’ Blends, your Aquapainter and ink pad or even your So Hoppy Together2Stampin’ Write Markers.  Which is your favorite method of coloring?  I like using the Stampin’ Blends.  They’re easy to use and blend and I’m not very good at watercoloring!  Ha!

Have a great day!  Take care and Hoppy Stamping!


How Sweet It Is!

Sweet Treat CupCandy!  Sweets!  Sugar Treats!  Many of us have a sweet tooth and at Saturday’s Stamp Camp we had our Treat Bar with lots of different sweets.  You can check out yesterday’s post to see our Treat Bar.  In the How Sweet It Is suite in the Occasions Catalog you can find little Sweet Cups which we used for some of our treats.

These Sweet Cups are perfect for all sorts of treats.  They are about 2 1/8″ high and about 3 1/2″ across at the lid.   The lid is solid but for our camp we punched a hole in the lid, filled a cello bag with candy and poked the top of the bag through the hole.  This added a little dimension to the cup and made the perfect spot to tie our ribbon.

We used the fun How Sweet It Is designer series paper to decorate our Sweet Cups.  This paper is too fun with all of it’s bright colors and happy designs.  The label and the pin are also part of the How Sweet It Is suite.  You get 24 tags and 24 pins in a package.  That’s a lot of decorating for only $5!

Sweetest ThingOne of the cards at Stamp Camp went perfectly with our sweet treat theme.  Tena’s card used the Sweetest Thing Bundle along with the How Sweet It Is designer paper.  What is fun about this card is that the little candy jars (with the candy in them) were die cut from the designer series paper!  Stampin’ Up! is starting to do this more and more where you can use the coordinating framelits to die cut the designer paper.  Love it!

This fun fold is called a Bridge Card because of the long strip on the front the “bridges” the two sides together.  I’ve not made on before but I’m anxious to give it a try.

I hope you have a sweet day!  If you live in the Midwest….STAY WARM!  Have a great day!  Take care and Happy Stamping!

SASsy Stampers & Friends Winter Stamp Camp

camp1Saturday was a busy and exhausting day.  It was the day of my SASsy Stampers & Friends Winter Stamp Camp.  It’s an all day stamping event for our customers.  Our customers really enjoy Stamp Camp.  They come and get to make 8 different projects designed by 8 different designers.  They also get a delicious lunch, snacks and door prizes.  This year things went quite smoothly because we had a couple of helpers to man the kitchen and help out where needed.

camp2My friend Jan (to my right) loves to design the treat packaging for our guest.  All of her projects are SO cute!  This year she was inspired by the Sweetest Thing bundle in the Occasions Catalog.  Not only did she design the bag we hand out to customers for their projects (with more treats inside) but she designed the little treat cups too.  We always have a camp work day a few weeks TicTacsahead of time to help Jan make all of her creations.  We love hanging out together.

Would you like to be a part of our SASsy Stampers & Friends group?  You just need to be a Stampin’ Up! Demonstrator.  Now is the perfect time to join!  With both of the Starter Kit options found in the Sale-a-bration Brochure you get to choose $175 for only $99!  That is $76 of FREE merchandise that you get along with a 20% discount on all future purchases!  WOW!  It’s a deal you don’t want to miss out on!  I would love to have you join my team!  Contact me today with any questions you may have!

TicTacsThis is my favorite treat project that Jan made for camp.  TSC!  Too Stinkin’ Cute!  It’s absolutely adorable!  The box is only 1 1/2″ x 1″ x 3/4″ and has a teeny tiny Tic Tac box in it.  There are only 6-7 Tic Tacs in the box.  Oh….and I like it because it’s PINK!  🙂

This week I’ll be sharing more of the projects that were made during Stamp Camp so check back in!  Have a great day!  Take care and Happy Stamping!

Fun Frame Friday!

50201667_10161474597010158_7032170771447283712_nSamplers are so much fun. They are the perfect home decorating item for seasons or holidays.  I’ve seen a ton of them made with the All My Love Suite and want to share some of them with you today.

I don’t make them myself very often but I love looking at them.  I’m inspired to make my own samplers but I don’t seem to find the time to get them made.  That is why I appreciate all of my fellow demonstrators who share their creations online!  🙂

49900103_10218143157561126_4607362382224687104_nAren’t these great?  So many different ideas!  I’m not sure where I’d even begin….

Well, I will admit I did buy a frame the other day but that’s as far as I got.  These samplers I’m sharing with you look like they are 12″ x 12″.  I only bought a 10″ x 10″ frame so mine will have to be totally different.  IF I do get one made I will definitely share it with you.  🙂

I hope these have inspired you!  Have fun creating!  Have a great day!  Take care and Happy Stamping!


50320724_1166896576807139_3172182232584421376_n

Meant to Be Bundle

Meant to BeWho loves hearts?  I sure do.  I was pretty disappointed when the Sweet & Sassy heart framelits retired.  There’s always some type of project that you need a heart on!  That means I was pretty excited then when I saw the new Occasions Catalog and the Meant to Be Bundle.  HEARTS!!!!  Woo Hoo!  I will probably still hang on to my Sweet & Sassy Framelits though….a girl can never have too many heart framelits!  Ha!

Below you will find a Stampin’ Up! video about this bundle, how versatile it is and some little tips about it.  Enjoy!

50600973_10157053601433872_2269576283891433472_nHere’s a card that I found on Pinterest that shows some of the many hearts in the Meant to Be bundle.  It also shows how well this bundle coordinates with some of the other products in the suite:  The Forever Lovely bundle, the ribbons and the designer paper.

I sure do love COORDINATION!  Two bundles, one suite!  I love it!  Have a great day.  Take care and Happy Stamping!


All My Love Suite Video

Today I want to share with you a Stampin’ Up! video that tells you all about the All My Love Suite.  I was mistaken when I told you that this suite only included the Forever Lovely Bundle.  It also includes the Meant to Be Bundle with lots of fun heart images.  These two bundles do work really well together.

3c500f220f320ffb766851bfc8144099Both of these bundles make beautiful cards.  Here’s an absolutely gorgeous card that uses both bundles.  Thank you Tracy for sharing it!  I love all of the different elements on it.  The zig-zag borders and the detailed die cut heart are from the Be Mine Stitched Framelits and the little die cut flowers and leaves are from the Lovely Flowers Edgelits.  Isn’t the embossed Lovely Lipstick Foil Sheet amazing?  It was embossed with the Lace Dynamic Textured Impressions Embossing Folder which is part of another suite of products.

What’s nice about both of the stamp sets in the All My Love Suite is that they include sentiments that are just about Valentine’s Day or love.  Both bundles can be used for other occasions too.

Have a great day!  Take care and Happy Stamping!


Forever Lovely Floral

Forever Lovely.blog.0119Today I have a card for you featuring the Forever Lovely stamp set which is part of the All My Love Suite that I was telling you about yesterday.  I also have a stamping tip for you.

Stampin’ Up! makes things easy for us.  They designed this stamp set so that all the flower images are on one stamp and all of the leafy images are on another stamp and to make things even better for us stampers the stamps are photopolymer which means they are clear and you can see through them to line your images up perfectly!  Stamps like this also work perfectly on your Stamparatus!

The images in this stamp set are beautiful.  I love the look of the Distinktive stamps.  They have so much dimension to them.  Do you have any of these newer types of stamps?  If not, you should consider purchasing some or come to a class sometime and check them out.

Tuesday’s Tip today has to do with your Photopolymer stamps and placing them on the clear blocks.  I designed this card for last week’s class.  When I’m working on a class I usually design the set of cards for the class first so I know what supplies I may need to order.  Then, when I’m cutting the card stock and getting the supplies for each card organized I make another sample of each card.  Well, last week when I was getting ready for the class and trying to make the second sample of this card I couldn’t get the flower images and the leafy images to line up at all!  Oh, sure, sometimes when you’re stamping coordinating images like this you’ll be a little bit off but my images were WAY off and I was getting frustrated.  I hadn’t had trouble making the first sample at all!  I finally got out my Stamparatus and used that and things worked fine.

It was still bothering me though why I had had so much trouble.  Hmmm…..and then it finally dawned on me what I had done wrong.  This is where Tuesday’s Tip comes in!

TUESDAY’S TIP:  When you go to adhere your photopolymer stamp to the block, especially when they are larger, place the stamp on a flat surface like your table, image side down, and then place your block on top of the stamp.  DO NOT put the stamp on the block…..you may not get it on straight.  That is what had happened to me.  When I placed the stamp on the block I must have “bent” it a little.  This meant that my images wouldn’t line up no matter how many times I tried.  Sheesh!  You’d think I would have know that or at least figured out my problem right away.  Oh well, live and learn, right?  🙂

Have a great day!  Take care and Happy Stamping!

All My Love Suite

CM11022BI love that Stampin’ Up! puts products together in suites for us.  It makes coordination SO easy!  The All My Love Suite is the first suite in the 2019 Occasions Catalog and you can find it on pages 4 & 5.  This suite includes the Forever Lovely stamp set, the Lovely Flowers Edgelits Dies, the beautiful All My Love Designer Series Paper, the All My Love Ribbon Combo Pack, the Heart Epoxy Droplets and the All My Love Cardstock Pack and they all coordinate together perfectly!  I love it when someone else does all the work!

stampsThis suite is gorgeous!  The Forever Lovely stamp set is a Distinktive stamp set.  “Distinktive stamps have a special texture that gives added depth and dimension in a single step.”

The floral images in this set are beautiful and when you combine them with the Lovely Flowers Edgelits Dies they make gorgeous cards.  Check out some of the projects above.

The bunch of hearts are a great image too.  I’ve seen some fun projects made with them.

paperThe All My Love Designer Series paper is perfect for Valentine’s Day yet has plenty of sheets that can be used for other occasions.  There are actually only two sheets with heart images on them.  Most sheets have lovely floral images.

I like the color combination on this designer paper pack:  Crumb Cake, Lovely Lipstick and Flirty Flamingo. Those same colors are in the All My Love Cardstock Pack.

I’ll be sharing this suite with you all week so be sure to come back and check it out.  Have a great day!  Take care and Happy Stamping!


Hey Love!

Who remembers signing valentines for your entire class and decorating a shoebox with a slit in the lid for all the valentines that you would receive in class?  Do they still do that anymore?  I have no idea.  It’s been ages since my kids were that age and I don’t have any grandchildren yet.

Hey Love.0119If they do still do that in the schools and you have younger kiddos around, Stampin’ Up! has the perfect stamp set for you (and said kiddos) to make some adorable valentines.  The Hey Love stamp set is perfect for kiddos.  It has 6 adorable little critters and 4 fun little sentiments.

Not only would this stamp set make cute valentines for kids to send/give but it makes perfect cards for you to make for said kiddos!

We made this fun card in class the other day.  We stamped the little skunk the Memento Tuxedo Black  ink and heat embossed him with Clear Embossing Powder.  We then colored him with Stampin’ Blends.  Too fun!  We used the sentiment “Stinkin’ Sweet” on the inside of the card.

hey love photoThis stamp set is also perfect for decorating those Valentine’s Day treats.  This picture is from the catalog.  Too fun!

Valentine’s Day is sneaking up on us fast so get that order in so that you can make fun valentines and treats to share!

Have a great day!  Take care and Happy Stamping!