
 Today I have a card for you featuring the Forever Lovely stamp set which is part of the All My Love Suite that I was telling you about yesterday. I also have a stamping tip for you.
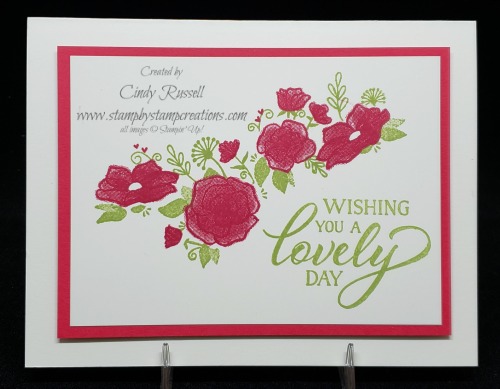
Stampin’ Up! makes things easy for us. They designed this stamp set so that all the flower images are on one stamp and all of the leafy images are on another stamp and to make things even better for us stampers the stamps are photopolymer which means they are clear and you can see through them to line your images up perfectly! Stamps like this also work perfectly on your Stamparatus!
The images in this stamp set are beautiful. I love the look of the Distinktive stamps. They have so much dimension to them. Do you have any of these newer types of stamps? If not, you should consider purchasing some or come to a class sometime and check them out.
Tuesday’s Tip today has to do with your Photopolymer stamps and placing them on the clear blocks. I designed this card for last week’s class. When I’m working on a class I usually design the set of cards for the class first so I know what supplies I may need to order. Then, when I’m cutting the card stock and getting the supplies for each card organized I make another sample of each card. Well, last week when I was getting ready for the class and trying to make the second sample of this card I couldn’t get the flower images and the leafy images to line up at all! Oh, sure, sometimes when you’re stamping coordinating images like this you’ll be a little bit off but my images were WAY off and I was getting frustrated. I hadn’t had trouble making the first sample at all! I finally got out my Stamparatus and used that and things worked fine.
It was still bothering me though why I had had so much trouble. Hmmm…..and then it finally dawned on me what I had done wrong. This is where Tuesday’s Tip comes in!
TUESDAY’S TIP: When you go to adhere your photopolymer stamp to the block, especially when they are larger, place the stamp on a flat surface like your table, image side down, and then place your block on top of the stamp. DO NOT put the stamp on the block…..you may not get it on straight. That is what had happened to me. When I placed the stamp on the block I must have “bent” it a little. This meant that my images wouldn’t line up no matter how many times I tried. Sheesh! You’d think I would have know that or at least figured out my problem right away. Oh well, live and learn, right? 🙂
Have a great day! Take care and Happy Stamping!