Tuesday’s Tool Tip: The New 3D Embossing Folder Plate

Whew…That title is a mouthful!

What? You’ve not heard of the new 3D Embossing Folder Plate? Well, it’s not in the new Annual Catalog. It became available a few weeks after the new catalog launched.

When Stampin’ Up! partnered with Sizzix the embossing folders that gave you really deep impressions were called 3D Dynamic Textured Impressions Embossing Folders. (Another mouthful!). These embossing folders were a little less than 1/4″ thick.

Now that Stampin’ Up! is on their own in the die-cutting/embossing market these deep impression embossing folders are simply called 3D Embossing Folders. Stampin’ Up!’s 3D folders aren’t quite as thick as the Sizzix ones. They are only a little over 1/8″ thick. This means that when you try to run them through your die-cutting machine the “sandwhich” of folder and plates that you used to use isn’t quite thick enough. This is where the new 3D Embossing Folder Plate comes into play.
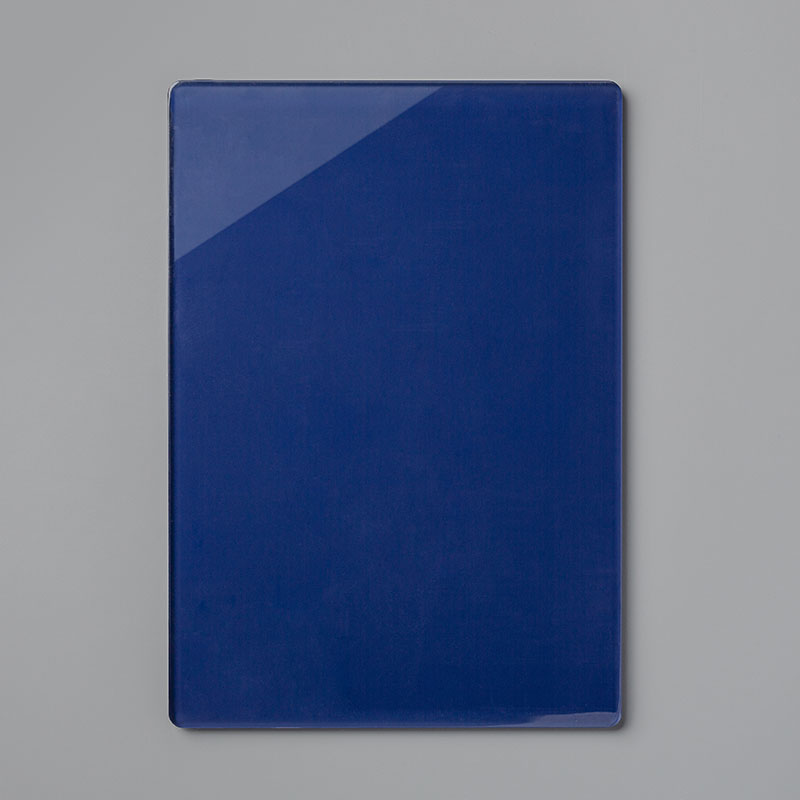
3D Embossing Folder Plate
#149658 $10

This is just like the standard cutting pads that you used with the Big Shot…except it’s a little thicker…and it’s blue! It’s great that it’s a different color so that you grab the right plate when embossing!

Even though all of the embossing folders that carried over from last years Annual Catalog are listed in the new Annual Catalog not all of them are available as Stampin’ Up! is still converting them to the new thickness. The folders that aren’t available yet are the Corrugated 3D Embossing Folder, the Layered Leaves 3D Embossing Folder and the Tufted 3D Embossing Folder.

So if you’re purchasing any 3D Embossing Folders from the 2019-2020 Annual Catalog you’re going to want to invest in the new 3D Embossing Folder Plate. The item number is #149658 and it’s $10.

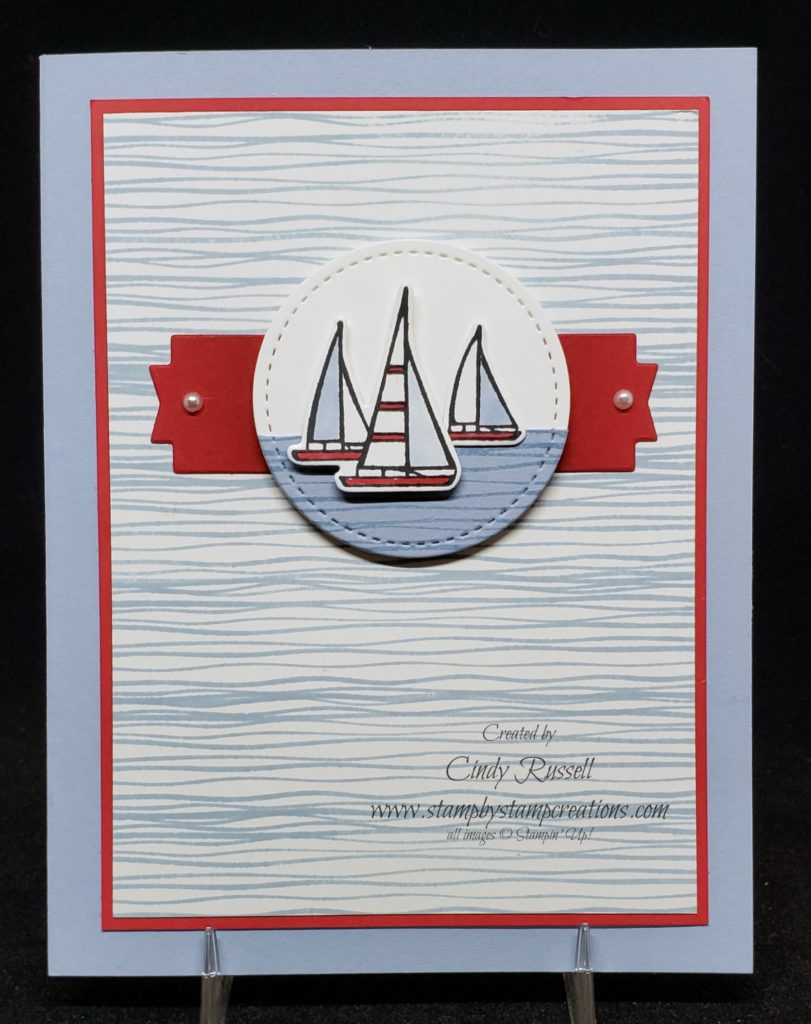
Lily Pad Lake Sailing

Lilypad Lake Sailing

Ah, summer. Doesn’t this card just shout “SUMMER!”? Here in Colorado summer is almost over. In many school districts around school begins this week or next week! Yikes! But for many of us who don’t have school age kids summer continues until Labor Day unless you’re following the calendar and then it actually goes until September 22nd.

What are you doing your last days of summer? It’s been SO hot here tis summer, it’s crazy. If I lived on a lake and had a sailboat this is definitely what I’d want to be doing. Out on the cool water with a nice breeze. Ah, I can just imagine it now.

I joined this Facebook group where I design a card and upload the card and a set of instructions for it to group. Then anyone in the group can use the card/directions for their classes, send out to customers or whatever they’d like. There is a theme every month and this month the theme was Seasons so I chose summer and came up with this design.

I used the Lilypad Lake stamp set . I think it was new in last year’s Annual Catalog. I love the images and the sentiments are beautiful. Of course the coordinating dies make it even better! 😀

Lilypad Lake Stamp Set & Lakeside Dies

I started the design with the wavy/watery image and decided to use it as a background. I chose the new Seaside Spray for the color….it’s one of my new favorites!

Once I had the background done I stamped, colored and die cut my sailboats. After that I just played around until I got the look I liked and ta da!…..my card was done!

I hope this card makes you think of summer. Have a great day and enjoy the rest of your summer! Take care and Happy Stamping!

Fun Friday! Over the Moon

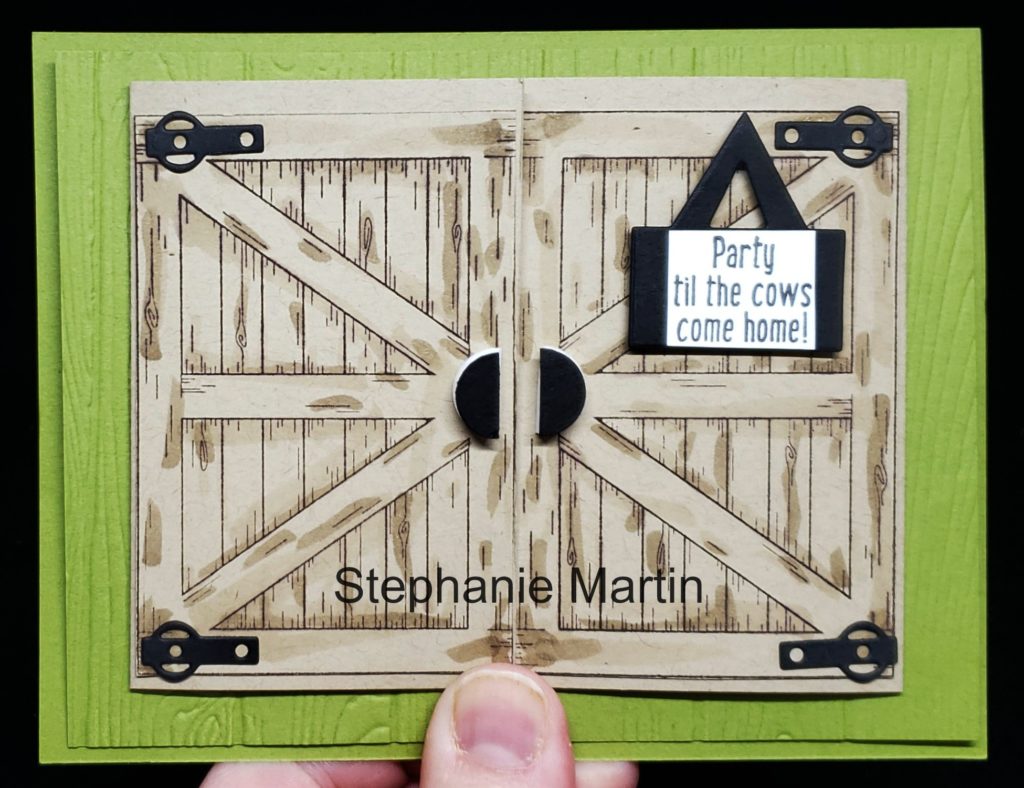
Over the Moon/Barn Door

I received today’s card at an event I attended in June. I just had to smile when I saw it and of course wonder why I can’t think of creative ideas like this. This card was from Stephanie Martin. Don’t you love it? I do have the Barn Door stamp set and coordinating dies but of course I haven’t used them yet. 🙁

My thumb is in the picture because I had to hold the barn doors closed so that you wouldn’t get a sneak peek of what’s inside.

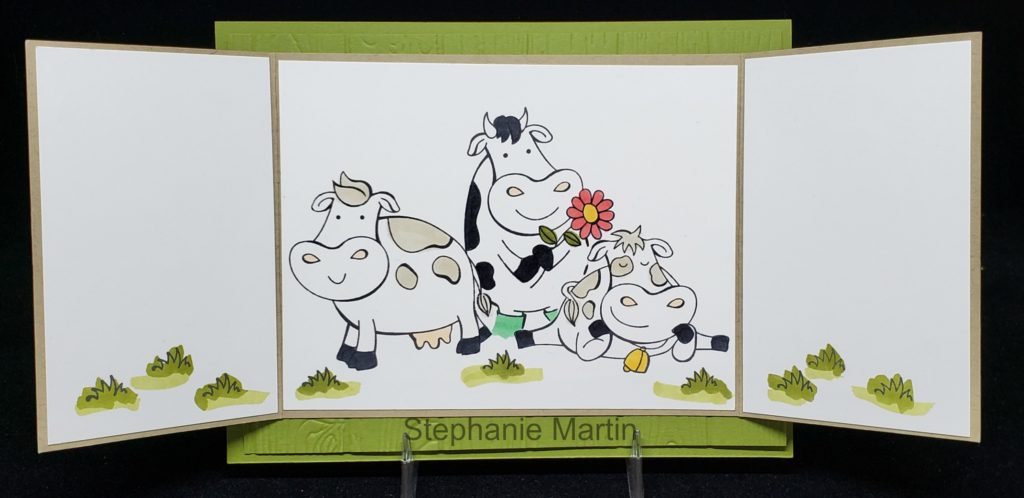
Inside Barn Doors

Is this card not adorable?!!! How clever! I love the cows hanging out inside. I knew when I first saw this card that it would be perfect for a Fun Friday post! Not only do you get a fun card but it’s also a fun fold! Doesn’t this card make you want to run out and buy both the Over the Moon stamp set and the Barn Door stamp set and dies? (Just head on over to my online store if you need them!)

I hope you enjoyed today’s card. I know I did! Have a great weekend. Take care and Happy Stamping!

Throwback Thursday: Happy Hour

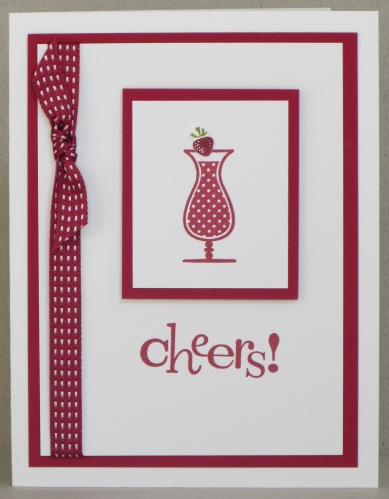
Happy Hour

I was scrolling through the photo library here on my blog looking for the perfect card for today’s Throwback Thursday. I came upon this card and knew it was the one. It’s perfect because one week from today I’m heading to Portland, OR for what I’m calling Female Family Fun weekend. It’s a weekend I put together to celebrate my big 6-0 birthday that I recently celebrated and my cousin will celebrate her 65th next week. Yes, we’re old, but we’re a lot of fun!

There are eight of us going. My cousin Sally, her daughters Janet and Julie, my sister Lori and her daughter Allison, me and my daughter-in-law Margot and my neighbor-daughter Lauren. It should be a lot of fun. We’re going on a wine tasting tour on Friday which should be a lot of fun. We’ve rented a house through Airbnb so we’re ready to go!

The card above was made with the Happy Hour stamp set. I checked my “saved” stash but I couldn’t find it. I can’t believe I would have got rid of it although I did find two other “drinking” stamp sets. Speaking of “drinking” stamp sets there is a new bundle in the upcoming Holiday Catalog called “Sip, Sip Hooray”. What a great name! And yes, it’s on my wish list! Ha!

The color on this card was Raspberry Ripple I believe. It was an In-Color along with Midnight Muse. If I read the tag on this photo correctly this card was from January or February 2013. Many moons ago! It’s definitely a “Cindy card” with the many layers and the ribbon. 🙂

Have a great day! Take care and Happy Stamping!

It Starts With Art!

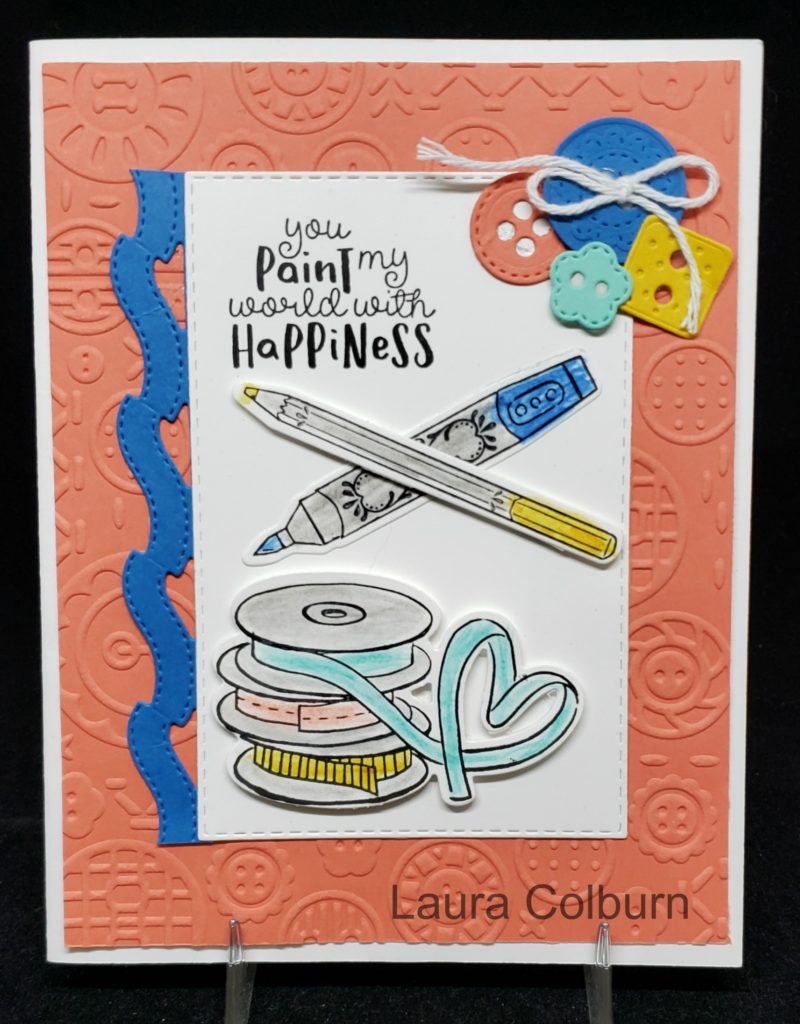
It Starts With Art – Laura Colburn

I was trying to figure out what to post today and realized that I had only posted a few of the projects from my Sassy Stampers & Friends Summer Stamp Camp last June. That’s what happens when you go on vacation!

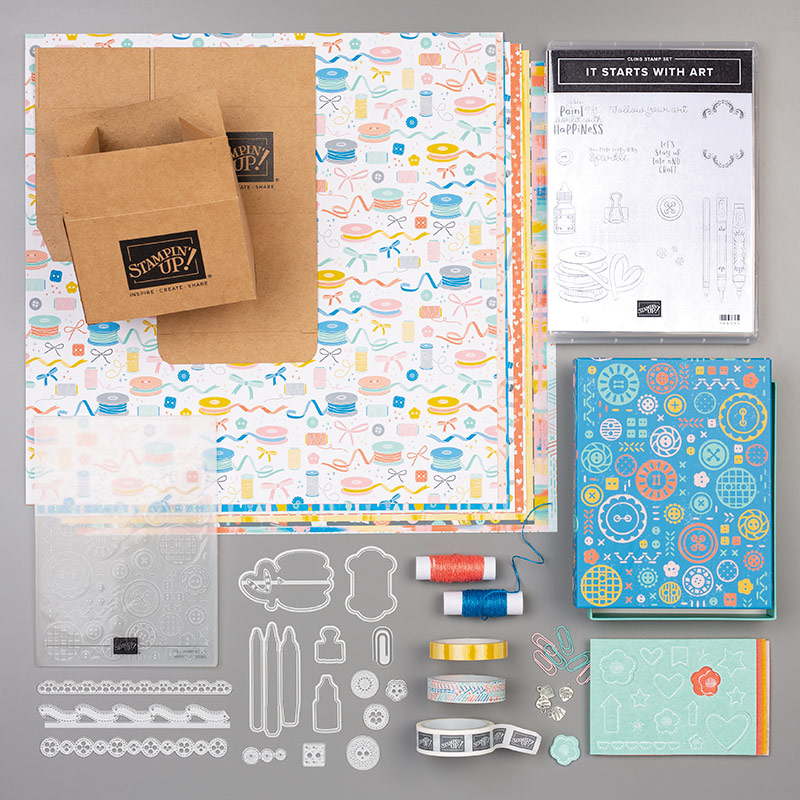
This card was one that Laura C. designed for our Stamp Camp using products from the Follow Your Art Suite which is found on page 53 of the Annual Catalog. Laura used the stamp set, the dies and the coordinating embossing folder. Also in this suite of products you can find an embellishment kit and designer paper as well mini shipping boxes with the Stampin’ Up! logo on it and a washi tape assortment, one of which also has the Stampin’ Up! logo on it! Too fun!

Follow Your Art Suite

These mini shipping boxes are adorable! I had to have them but I’m still trying to figure out a fun project for them. I’ll let you know when I do! 🙂

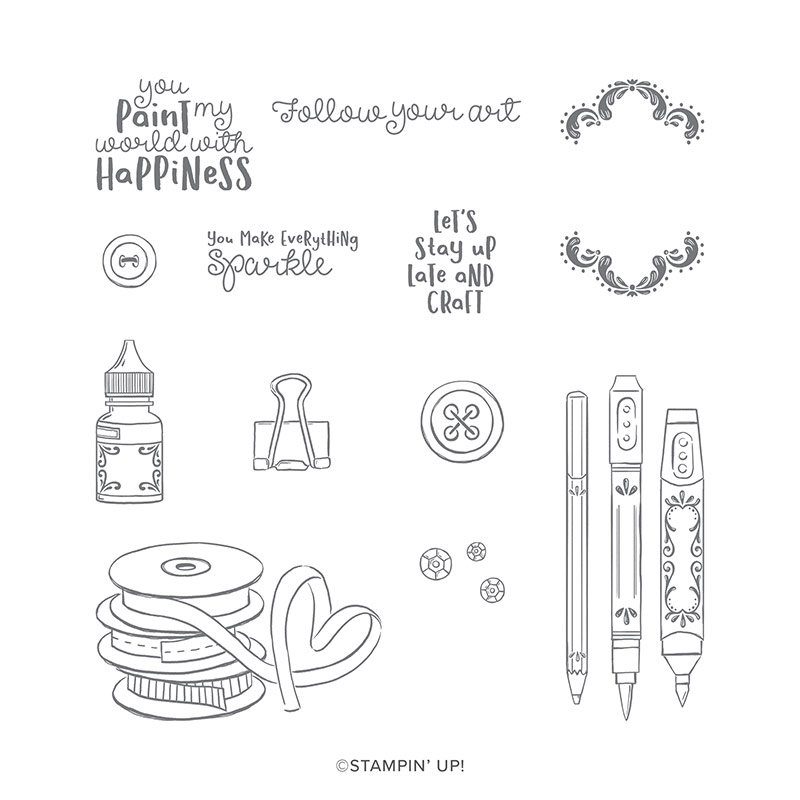
It Starts With Art

Anyway, back to Laura’s project and this fun stamp set. The It Starts With Art stamp set is perfect for those paper crafters whether they make cards or scrapbook pages. I love the sentiments! There is so much fun to be had with stamp set and the rest of the suite.

As I mentioned, the mini shipping boxes are my favorite part of the suite. Which is your favorite part? Leave a comment and let me know! Have a great day! Take care and Happy Stamping!

Tuesday’s Tool Tip: Take Your Pick Tool

Take Your Pick Tool

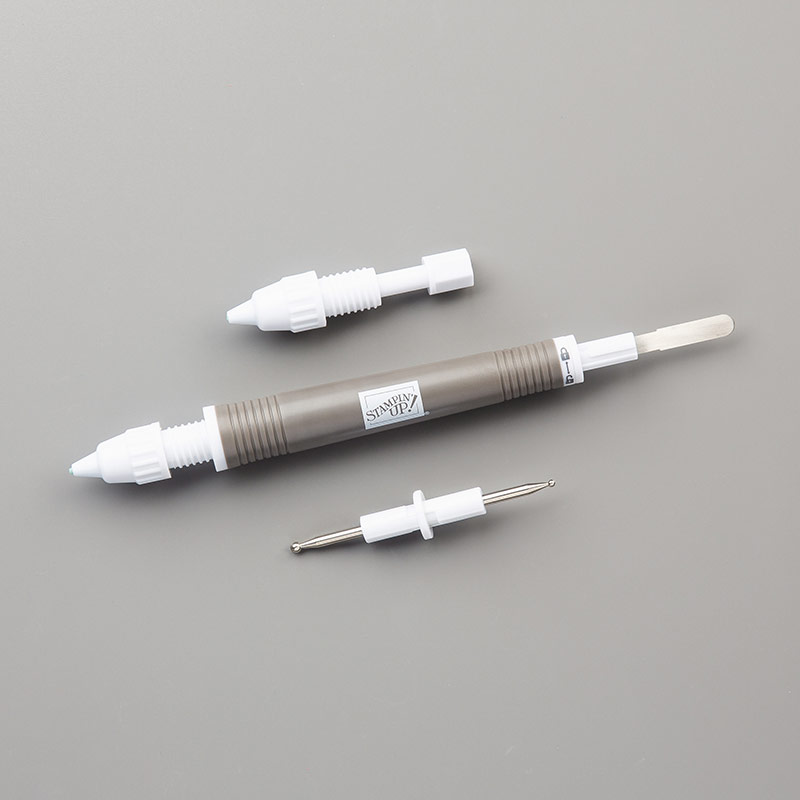
The Take Your Pick Tool was first introduced in last year’s Holiday Catalog. It’s a great little versatile tool. It comes with all of the pieces you see in the photo above. The left side has a tacky putty tip to use when picking up small things like sequins. The little spatula end on the right is great for picking up pearls and rhinestones from the sheets they come on and then placing them where you want on your project. If you remove this end you can turn it around and you have a pointy paper piercing tool. This is the end that saved me yesterday.

Take Your Pick Tool & Mini Dimensionals

I was working on creating 17 of the same project yesterday and each project called for 6-7 Mini Stampin’ Dimensionals. I have short, stubby little fingers and it was a little difficult getting this itty bitty dimensionals off the sheet. I also have short fingernails so I was having a little difficulty getting the backing off the dimensionals.

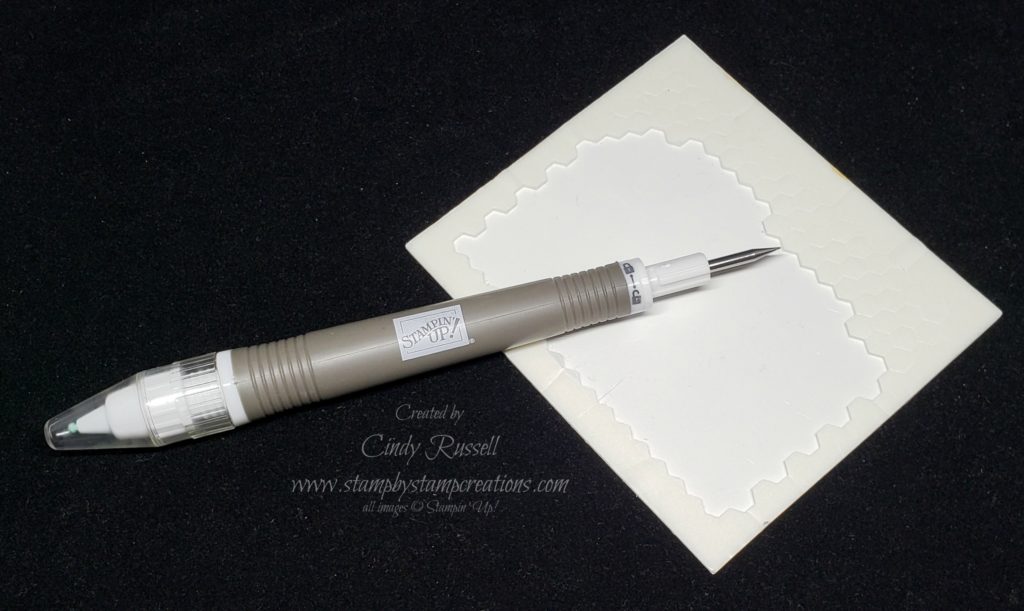
Take Your Pick Tool (TYPT) to my rescue! I grabbed my TYPT, got the pointy end out and had no problem at all getting the mini dimensionals off the sheet and onto my project. The TYPT also made it SO easy to get the backing off these little buggers.

I love it when I can think of a solution to a problem! Maybe there is still some life left in this old brain. Ha! 😀

I hope you’ve enjoyed today’s tip. You can find the TYPT and it’s accessories in my online store. Have a great day! Take care and Happy Stamping!

Don’t Miss Out on Bonus Days!

There are only a few days left of Bonus Days! Don’t miss out! For every $50 you spend in July you earn a $5 Bonus Day Coupon to spend in August! Now that’s a deal!

Bonus Days are the perfect time to stock up on the essentials. Adhesive, paper and envelopes! Get ready for all that holiday crafting you’ll be doing! Or grab some of those Uninked Stampin’ Spots and Stamp Cases that I was telling you about last week.

I’m working on my July order, are you? Don’t forget….July 31st is the very last day to earn your Bonus Days Coupons!

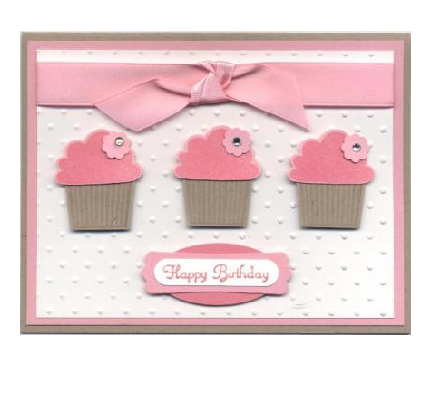
Throwback Thursday: Create a Cupcake

Who doesn’t love cupcakes?!! Yum! Since I celebrated a birthday earlier this week it’s only right that I post a birthday card today. 😀

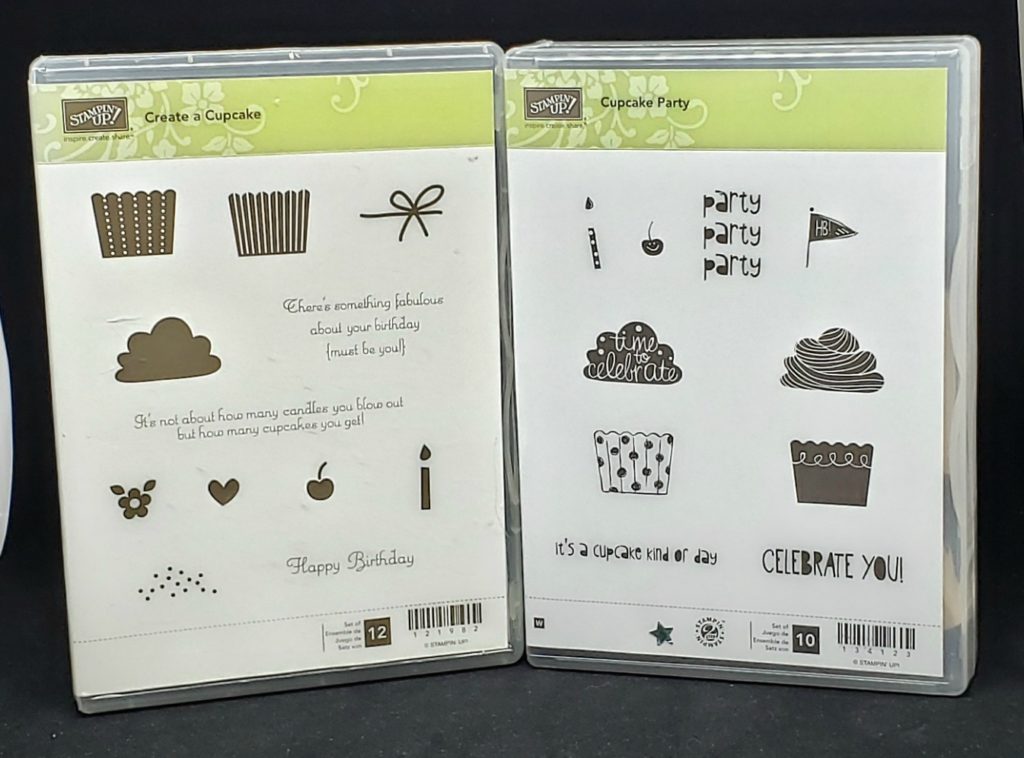
Create a Cupcake

The only reason that I know the name of this stamp set is that it’s the name of the photo. Ha! Who remembers Create a Cupcake and the coordinating cupcake punch? I do….as a matter of fact…and I just verified this…I still have them as well as another stamp set that replaced Create a Cupcake!

cupcakes

I had to run and check my stash of old items to see if I still had these and I did! Crazy! I’m not sure while I’m still holding on to them but you never know….you may want a cupcake punch and the coordinating stamp sets sometime, right?

I do remember that these were fun stamp sets and it was easy to use the coordinating punch. I tried to include the punch in the photo but kept getting too much glare on it.

Does anyone else hold on to old items….just in case? It doesn’t have to be craft items, it could be anything. I’m bad but I am trying to clean out my craft room. I’d love to get it really organized (someday). We’ll see….

I hope you are enjoying Throwback Thursdays. Have a great day! Take care and Happy Stamping!

It’s Coming!

I spent most of yesterday afternoon scrolling through the online version of the upcoming 2019 Holiday Catalog. Yes, as a demonstrator I get to view it WAY before you do. That’s one of the many perks of being a demonstrator! A perk that’s just as good as seeing this new, upcoming catalog early is the fact that I get a discount on all of these products AND I get to order them starting August 1st! Woo Hoo!

Have you read through all of the info I posted above? Check out all of the great things included in this upcoming catalog! I know you’re going to LOVE it….especially if you love everything holiday!

Variety is the key word! There is variety in holidays. Variety in style. Variety in colors….and the list continues!

If you want to receive a copy of this amazing, upcoming catalog please make sure that I have your mailing address. You can email me at cindy@stampbystampcreations.com.

Have a great day! Take care and Happy Stamping!

Tip Tuesday: Stampin’ Spots

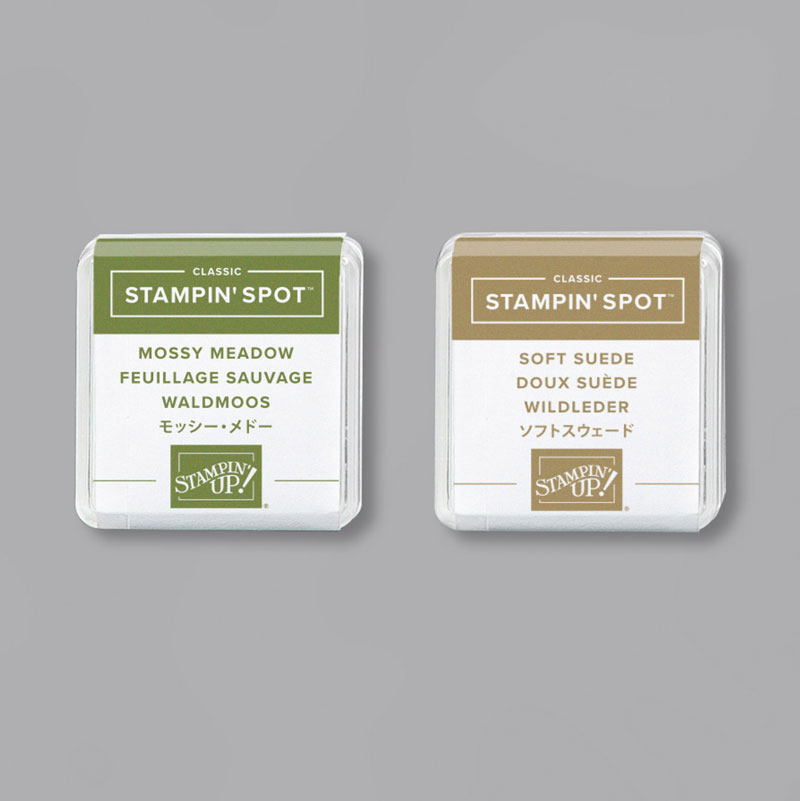
Are you a Paper Pumpkin subscriber? If so, you know what a Stampin’ Spot is. They are the small square ink pads that you get in your kit every month. Stampin’ Up! has also featured a few Stampin’ Spots in recent catalogs. The duo pictured below is featured in the Experience Creativity Beginners Brochure. This is a great publication for new stampers and it features some products that aren’t available in the Annual Catalog.

Stampin’ Spots

Stampin’ Spots are great. They are 1 3/8″ x 1 3/8″. They are the perfect size to take when traveling or on the go and I absolutely love using them with my Stamparatus so that I don’t get ink all over the plates!

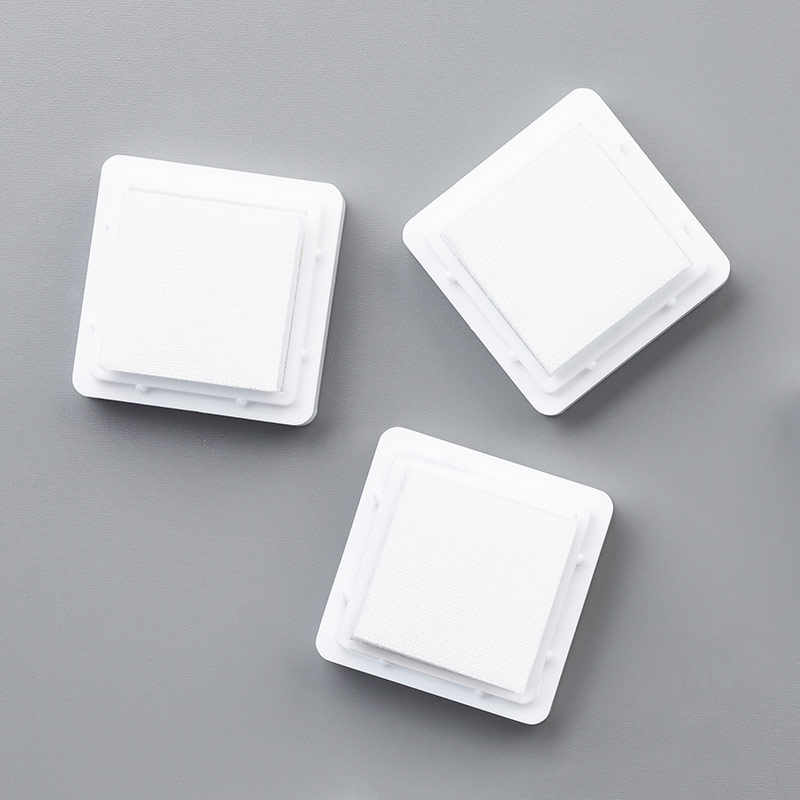
What do you do though if you are a Paper Pumpkin subscriber and want to use Stampin’ Spots on your projects? No worries….Stampin’ Up! has you covered! In the Annual Catalog you can find Uninked Stampin’ Spots! Just purchase the ink refills of your choice and ink up the Uninked Stampin’ Spots! When inking up the uninked spots you don’t have to saturate the entire spot. You can just add enough ink to go down about 1/4″ or so.

Uninked Stampin’ Spots
( #141822 $9 for 5 spots)

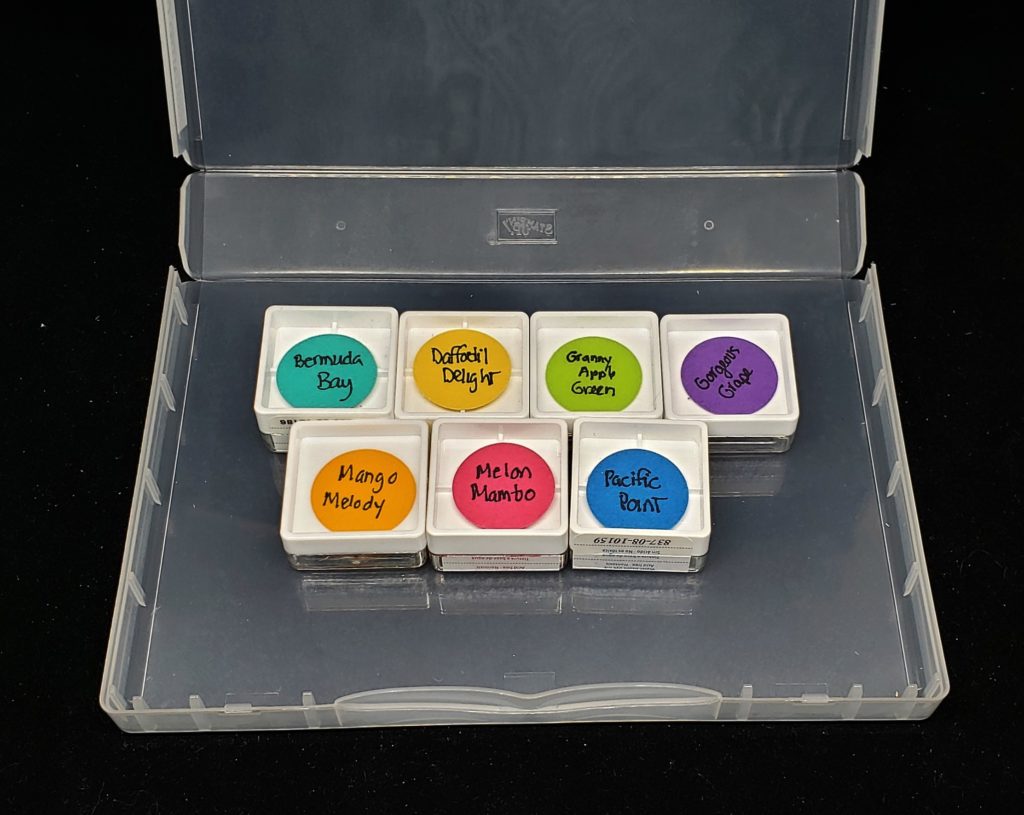
So, how do you tell what color the Stampin’ Spots are if you ink the uninked ones? I actually punch a 1″ circle of the same color cardstock and write the color name on the circle then attach it to the BOTTOM of the spot. Why the bottom you ask? I put the name on the bottom of both my Paper Pumpkin Stampin’ Spots and the spots I’ve created myself. The reason is that you want to store them upside down so that the ink is at the top of the Stampin’ Spot when you go to use it. I also punch a circle of card stock for the top of the spots that I create too so when I’m using them and they’re sitting on my desk I know what color to use.

Stampin’ Spot Storage

I store my Stampin’ Spots UPSIDE DOWN in a Full Wide Stamp Case (#127551 $7 for 4 cases). As you can see in the above photo I don’t quite have all of the Brights colors in Stampin’ Spots but I can create them as needed as long as I have ink refills and the Uninked Stampin’ Spots on hand!

Leave me a comment and let me know what you think of this tip! Have a great day. Take care and Happy Stamping!

A Wonderful Romance Wedding Card

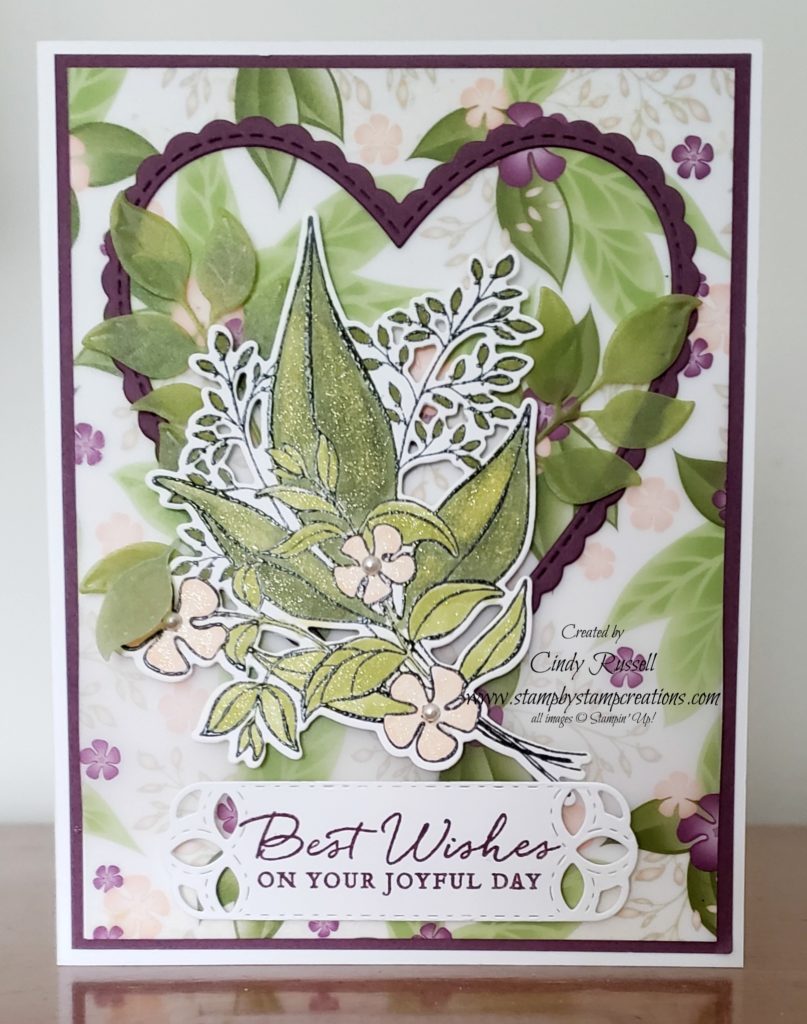
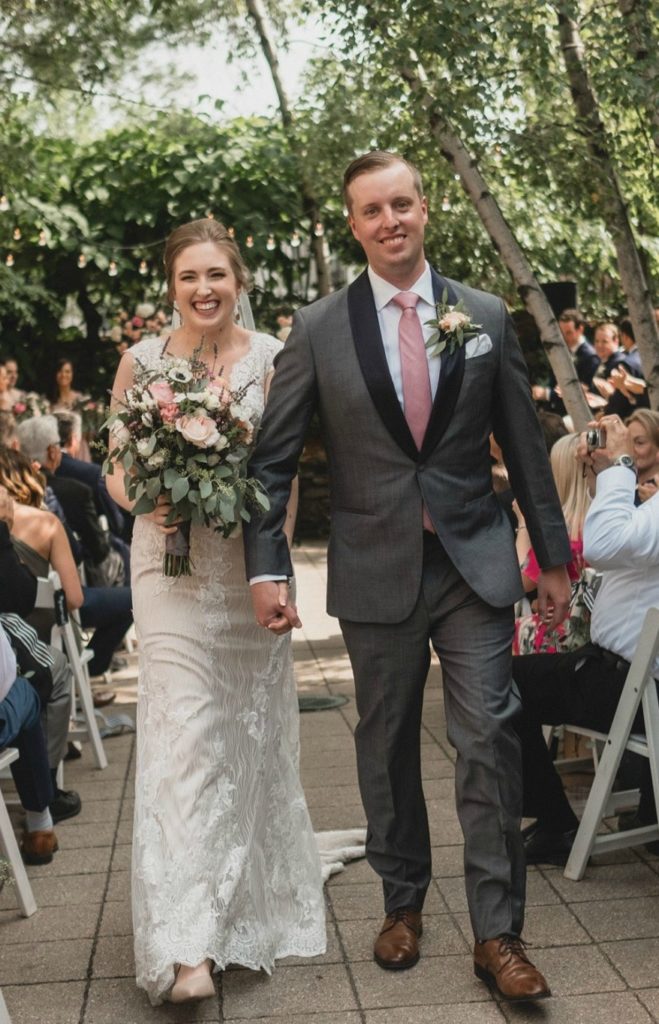
Last week I shared with you some photos from our recent trip to the MN Homeland including a picture of my nephew and his new wife. Today I want to share with you the wedding card I designed for them.

Leirdahl Wedding Card

When the 2019 Occasions Catalog was live I had purchased the Wonderful Romance Bundle and sad to say, never had a chance to use it. When I was thinking about designing a wedding card for Matt & Emma I knew I wanted to use that bundle. The stamp images and the coordinating designer paper were perfect for the wedding card. I love the printed vellum (retired) that I used as the background for the card. So soft and beautiful.

I did use some current products on the card. Of course the ink and the Stampin’ Blends markers are current. I used the Be Mine Stitched Framelits to die cut the heart. These framelits were in the recent Occasions Catalog and are now in the current Annual Catalog. It’s nice to have heart framelits again.

The sentiment is from a brand new stamp set called Path of Petals that is found in the Pressed Petals Suite of products. It has sentiments for sympathy, thank you and wedding. There are sentiments for both the outside and the inside of the card. The coordinating set of framelits has 3 pretty label dies in it which naturally fit the sentiments perfectly.

It was fun designing a card that was out of my comfort zone. I’ll have to try it again soon!

Have a great day! Take care and Happy Stamping!

Bonus Days!

Bonus Days!

It’s Stampin’ Up! Bonus Days! Have you placed your order yet?

For every $50 you spend during the month of July you can earn a $5 Bonus Days Coupon Code to spend in August! How great is that? I’ve already placed one order this month and I’m sure I’ll be placing another before the month is over. Check out that new Annual Catalog and make that wish list!

You can place your orders directly through my online store or you can contact me and I can place your order for you.

Don’t procrastinate! Bonus Days end on July 31st!

Have a great day! Take care and Happy Stamping!

Back Once Again

Being away from home and my computer for a little over two weeks was a nice break. I didn’t have to worry about cleaning or figuring out what to post or designing for classes, what to buy at the grocery store…..you get it, I know. Now I’m back and it’s time to get back on schedule.

We traveled back to MN for my nephew’s wedding but we also squeezed in a trip to the family cabin. It was nice to have both my boys and my daughter-in-law with us.

We do clean up well!
Bride Emma and Groom Matt
Mom, Dad and their three girls
The three sisters: Cindy, Linda and Lori

It was a fun wedding but it was HOT! My hair looked quite nice before I left the house but the humidity was in the “tropical” level and any body I had went completely flat.

It was a nice time away but it sure is good to be home. Now if I can just get motivated again!

Have a great day! Take care and Happy Stamping!

Butterfly Wishes Fun Fold

Butterfly Wishes

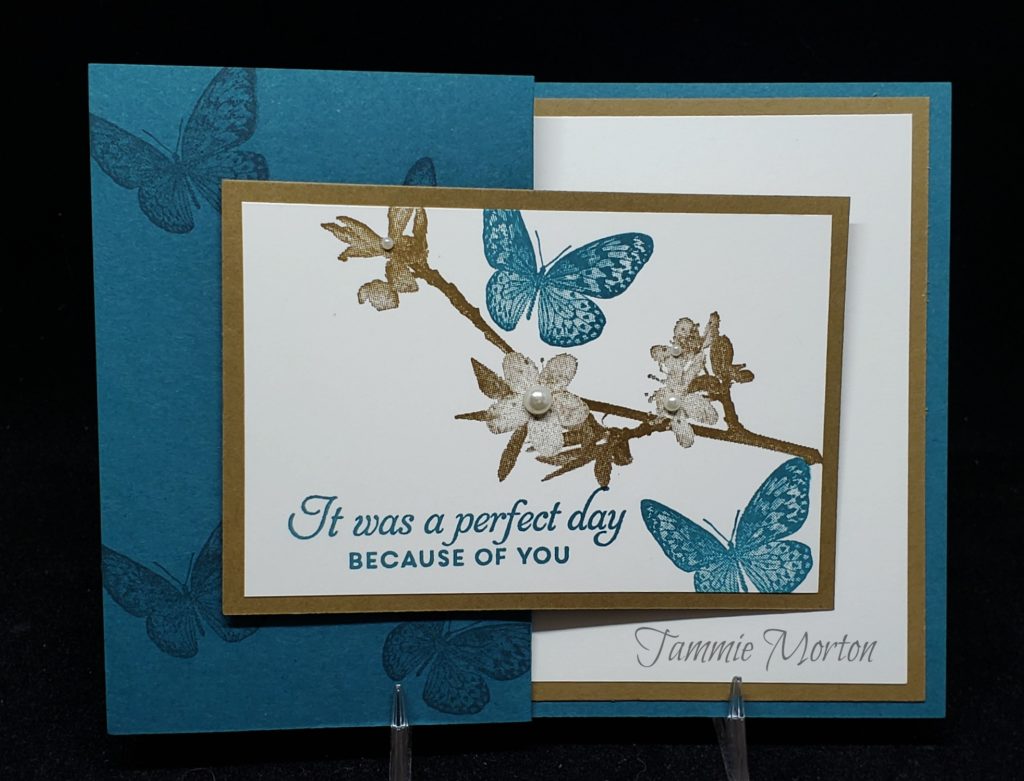
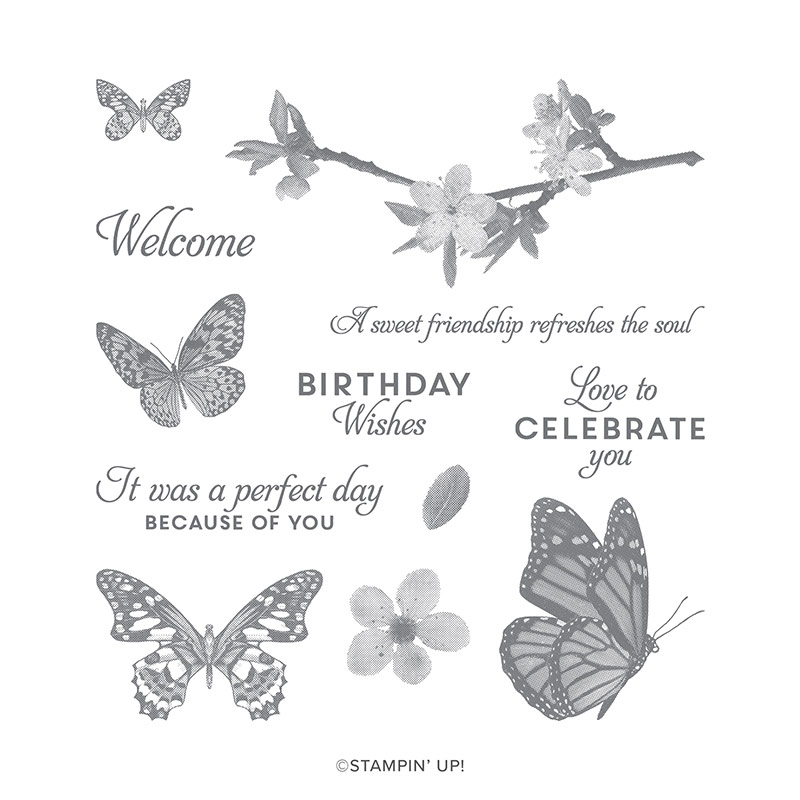
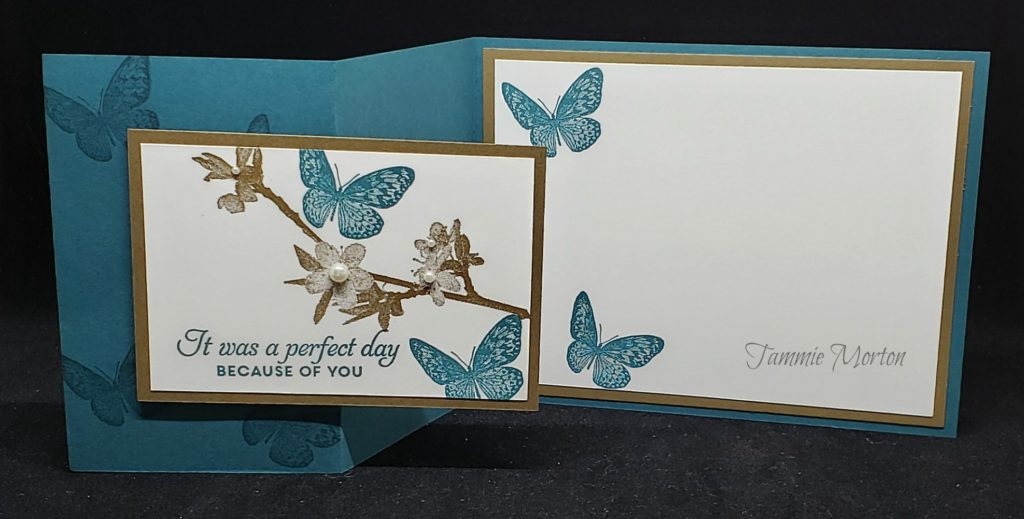
Well….here’s another stamp set that I didn’t think I needed. After seeing this card designed by my fellow Sassy Stamper Tammie I now know I was wrong. I am probably going to end up purchasing this set….maybe I can hold off until next spring though…

This is one of the eight projects that our guests got to make at our recent Sassy Stampers & Friends Summer Stamp Camp. Isn’t it beautiful? I LOVE the color combination of Pretty Peacock and Soft Suede. Stunning!

Butterfly Wishes

Butterfly Wishes is new to the 2019-2020 Annual Catalog and it coordinates with the Butterfly Duet Punch. Since I already have the Buttefly Gala stamp set that also coordinates with the Butterfly Duet Punch I didn’t think I needed another butterfly stamp set. What I do need though is the gorgeous floral branch. Ok…I don’t really NEED it but I think it would be a good addition to my stash of stamp set. 🙂

Butterfly Wishes Z fold

Tammie’s card is a Z Fold. I love fun fold cards. Do you? I especially like easy ones like this. I think fun folds take a card to the next level just because they’re a little different.

Here’s a question for you…What do you like best about this card? The color combination or the card design itself? Leave a comment and let me know!

Have a great day! Take care and Happy Stamping!

Ah, Summer!

It’s Throwback Thursday and today I decided to go back to the beginning of this blog and share. Summer has finally hit Colorado. It’s going to be a warm one today. It’s funny to think that since this past weekend some places in the mountains received almost 2 FEET of snow! Yep. That’s life in Colorado for you!

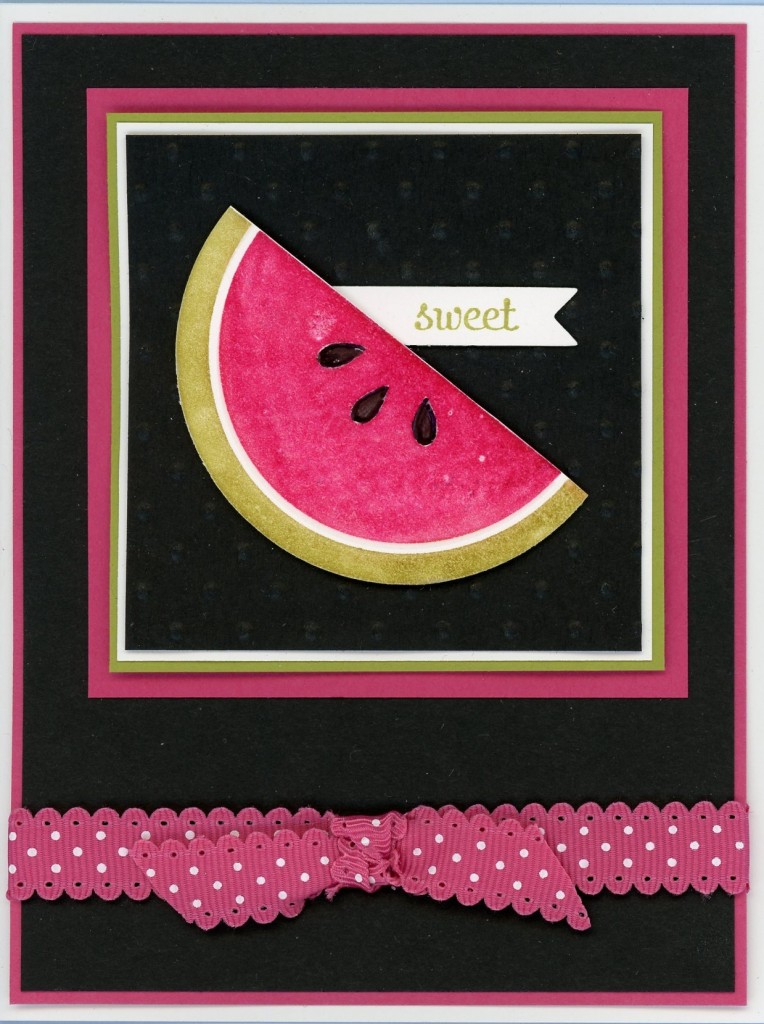
One of things that makes me think of summer is watermelon. It’s the perfect fruit for those hot and sunny days. That’s why I chose this oldie but goody card to share with you today.

Mouthwatering

The name of this old stamp set is Mouthwatering. Appropriate, right? This card definitely makes me think of summer and it makes be smile….and not just because it’s pink! I did use my favorite Melon Mambo on it. 🙂

I was reading the original post and discovered that I had used embossing powder on the watermelon. That made sense once I looked closer at the photo. What really surprised me though was when the post said ” should have used the Melon Scented Embossing Powder”. Who remembers Stampin’ Up! carrying scented embossing powder? I sure don’t! It would have made a fun addition to the card though.

I loved the ribbon I used on this card. Melon Mambo & Polka Dots. How can you go wrong….especially when you add a cute scallop edge to it?! I do remember the ribbon…I may even have some tucked away somewhere. I had to get out an old catalog to check this ribbon out. It came in a ton of colors and I’m sure I had them all!

I hope you enjoyed this blast from the past! Have a great day! Take care and Happy Stamping!