It’s been a while since I’ve done a Make-It-Mine Monday post, and I’ve missed it. I love getting inspiration from other people’s projects and Make-It-Mine Monday is the perfect way to showcase that!
I try to write an email newsletter every week which I send out on Tuesdays or Wednesdays. I try to share a project each week.
(If you you’d like to be on my email list to receive my newsletter as well as other emails, please sign up in the box to the right of this post or in the pop up box when it appears.)
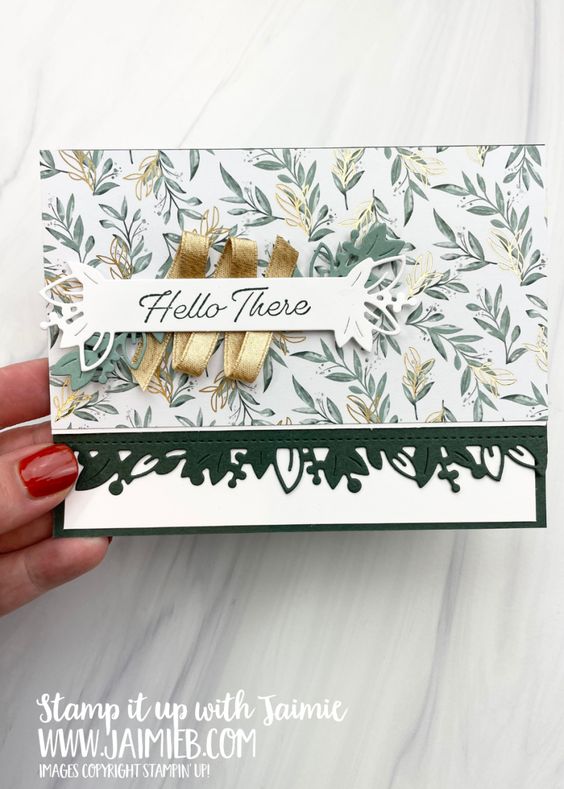
In last week’s newsletter I shared this card that I made at Stampin’ Up!’s On Stage event in March. I had explained how it was a very nice card, but it just wasn’t me. The combination of colors isn’t me and the design itself isn’t really me. The card did inspire me though.
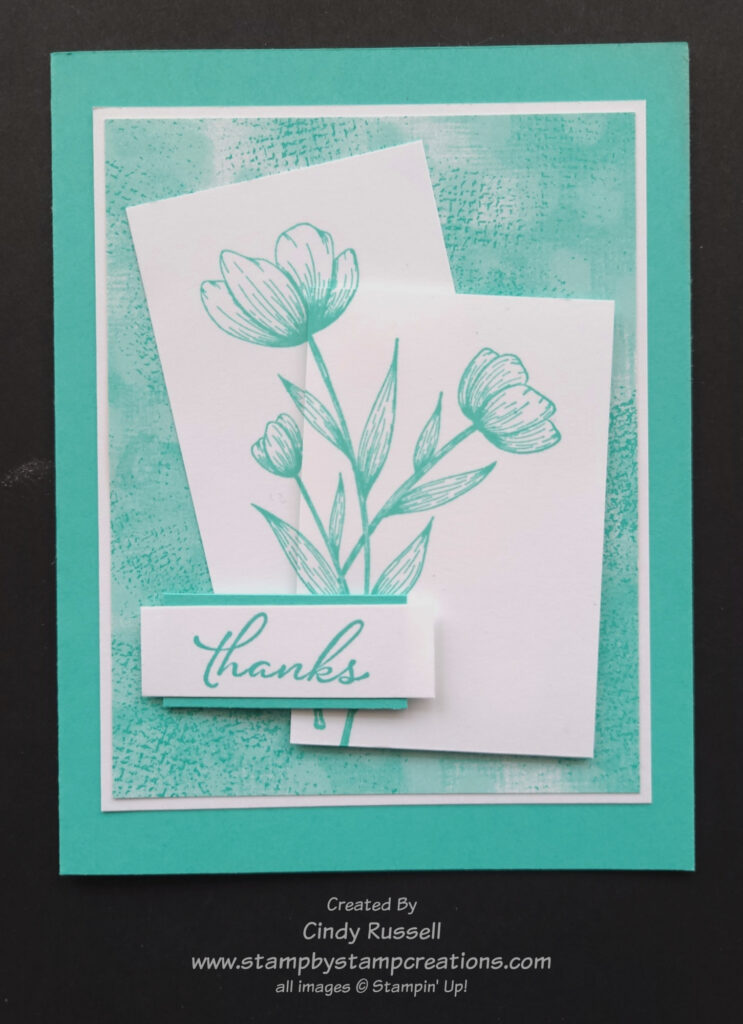
It inspired me so much that I had to make it mine! Nothing against Stampin’ Up! designers, but I do like my card better. Their card was way outside of my comfort zone. The Stampin’ Up! designer used the new Spotlight in Nature (#163579 $23) which will be in the 2024-2025 Annual Catalog and since I had that stamp set I used it on my card too. For my card I decided to stick with a single color and white. To choose a color I started with the designer paper that I used on the layer behind the flowers. I used the new Unbounded Bounty Beauty Designer Series Paper (#163372 $12.50) which you can find on page 55 of the new catalog or in my online store starting on Wednesday. The color I used is the new 2024-2026 In-Color, Summer Splash. So pretty!
The angled pieces that the flowers are on aren’t something that I would usually use on a card but I did find the technique intriguing, so I decided to give it another shot. It’s not hard to line up the two images after stamping them, the hard part is stamping them and making sure that the two pieces will fit on the layer underneath them.
I could have heat embossed the sentiment in white on a piece Summer Splash cardstock but I think my layered sentiment works a little better on this card.
As I mentioned above, I love being inspired by other people’s work. It’s nice to have a starting point and go from there. Give it a try! Take my card and make it your own by changing a little something about the card or a lot. The choice is yours! Have a great day! Take care and Happy Stamping!