Magnetic Picture Frame

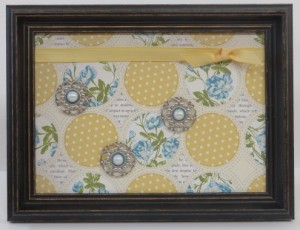
022We made this fun and easy project at my Mini Stamp Camp earlier in the month.  It’s a magnetic board.

To make one of these easy projects you need a 5″ x 7″ picture frame, a 5 ” x 7″ piece of aluminum flashing, a 5 ” x 7″ piece of designer paper and two pieces of ribbon, 8″ and 4″.

Adhere the long ribbon to the designer paper and then layer the paper, the flashing, the glass from the picture from (behind the flashing) and the back of the picture frame.  Wrap the short piece of ribbon around the first and tie.  That’s it.  The frame is done!

021Now you need the magnets!  These are simple too.  You need a designer brad, a small circle of card stock ,a large pearl and some small magnets!  I used the circle punch from the Itty Bitty Punch Pack to punch out my circles and they fit perfectly!

The great thing about this project is that you can change the look simply by changing the designer paper!  How fun is that?!

Have a great day!  Take care and Happy Stamping!


Bloomin’ Bouqet Kit

Bloomin' Bouquet Kit.0413It’s another fun kit from Stampin’ Up!!  Here’s what they have to say about it:

“Mother’s Day.  Teacher appreciation.  Just because.  Say thank you with this no-maintenance bouqet.  There’s no watering, no weeding-just enjoying.  This easy-to-assemble kit comes complete with the petals, stems and buttons to creat the flowers, as well as four different tags to make this the perfect gift for any occasion.  All you need is some paper, ribbon or a vase to add the finishing touches to the bouquet.

Kit contents:

2 sheets of preprinted and precut flowers on 12″ x 12″ cardstock; makes 13 flowers using Pool party, Gumbal Green, Calypso Coral, Daffodil Delight, and Rich Razzleberry

13 Vintage Faceted Buttons

13 green floral wire stems

adhesive not included (glue gun recommended)”

It looks SO cute!  I can’t wait to try it!  Stampin’ Up! has even made a video showing exactly how to put the flowers together!  They think of everything.  Order your kit today!  They’re only available while supplies last!

Have a great day!  Take care and Happy Stamping!
Happy Easter!

005Easter Blessings to all!  It’s the last day of our fun “What Can You Do With A Circle?” month so I had to show something with circles, right?  I was in a quandry of what to show you and then I saw it….this cute little Easter bonnet just sitting on the shelf in my craft room.  It has patiently been waiting for it’s debut…and the day has finally arrived!

I made this little hat years ago.  You can tell because Stampin’ Up! no longer carries the wide satin ribbon or these little flowers.  The entire hat is made from paper.  The top is a 2 5/8″ Circle and the bottom is 4 1/2″.   I must have used some kind of circle cutting tool for those….it’s been so long I can’t even remember!

This is actually a little treat container.  The top comes off.  There’s a band attached to the top and a band attached to the bottom with the top band being a little larger than the bottom.  I don’t have directions for this but if you’re interested in how to make this I could probably figure it out and make a little tutorial.  Just leave a comment or e-mail me at cindy@stampbystampcreations.com if you’re interested.

Easter Blessings!  Have a great day and Happy Stamping!


Valentine Treats

Guest Treat.0213Who doesn’t love getting a little treat?  Especially a little Valentine treat with Ghirardelli chocolate in them?!  😀

These little treat holders are SO easy to make!  Just start with a piece of card stock that is 7 1/2″ x 2 1/2″.  Score along a long edge at 3 5/8″ and 3 7/8″.  (I used the Real Red Core’dinations Card Stock again for this little project.)

Place the Word Window Punch about 1 1/4″ in from one of the short edges and punch.  You now need to expand your punched window a little bit towards each long edge in order for the candy to be able to fit.

Fold the treat holder and line up the short edges.  Use your Crop-o-dile to punch two holes through both layers.  Thread your ribbon through and tie.  Decorate your treat holder how ever you’d like.  (Guess what I used….Hearts A Flutter….surprise!)

Easy, easy easy!  I whipped 10 of these up in no time at all!

Have a great day!  Take care and Happy Stamping!

Valentine Hostess Treat

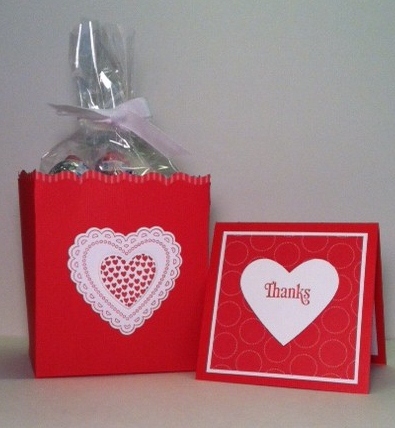
Hostess Thanks.0213Yes, Valentines Day is next week.   Are you ready?   I have a class/workshop tonight and this is my gift for the hostess.  She and seven friends are excited to make some cards!  Woo Hoo!

I made the little treat holder with the Fancy Favor Die for the Big Shot using the Real Red Core’dinations Card Stock.  I like the Core’dinations Card Stock even when you don’t emboss it to get the weathered look although I do miss Stampin’ Up!’s textured card stock.  It was perfect when you just neeeded that little something extra on your project!

To get the little border of designer paper to line up perfectly with the box I used a little bit of temporary adhesive and stuck the edges of the designer paper and Core’dinations card stock together BEFORE I ran them through the Big Shot.  Then I separated them, moved the designer paper up a bit and adhered them together with Sticky Strip.  It adds that little something extra to the box.

The hearts on the box are from my favorite:  Hearts a Flutter and die cut with the coordinating Framelits.  Add a bag of Hershey Kisses and you have a cute valentine treat!  😀

Wish me luck tonight!  Have a great day and Happy Stamping!  What are you making for your Valentine?  Let me know!

Oh, Whale! Valentine Treat Holder

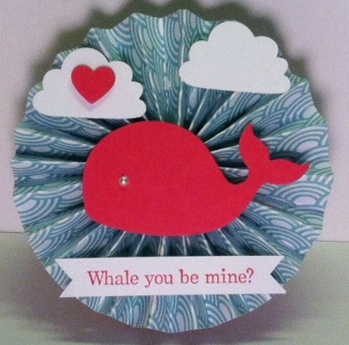
Oh, Whale Treat Holder.0213Oh, Whale Treat Holder.1.0213Have I told you that I LOVE this little whale? Ha!  I probably have mentioned it a time or two!  Isn’t this the cutest treat holder you’ve seen in a long time?  I came across it online the other day and had to drop everything I was doing to make it!  Did you notice my cute little whale is PINK?  😉

I made the lollie with the Simply Scored, scoring at every 1/2″.  I used two strips of 1 5/8″ x 12″ pieces of designer paper from the Sale-a-bration Sycamore Street pack.  Can you guess where the clouds came from?  The Cupcake Builder Punch!

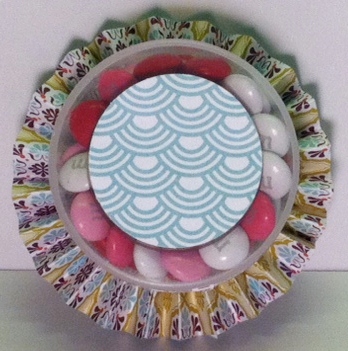
Check out the second picture….whoever thought of using a button/brad container for treats?!  Some people can definitely see outside the box!  Have a great day!  Take care and Happy Stamping!
Sealed With Love Simply Sent Kit

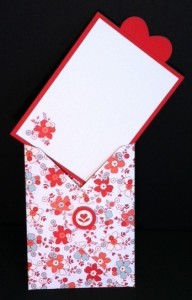
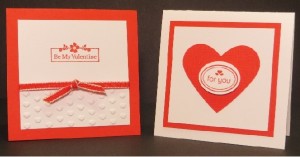
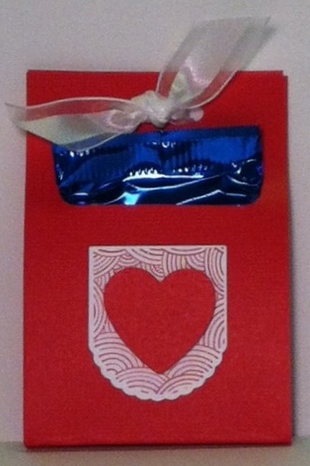
Sealed With Love Simply Sent.0113Here’s a little project I made with the Sealed With Love Simply Sent Kit that you get when you order the My Little Valentine Stamp Set (#132242) for only $9.95.  I made a little pocket with the flowered fold-out envelope and then trimmed down the card piece and mounted it on Real Red card stock.  I punched out a heart from Real Red card stock to use to pull out the card from the pocket.  So simple!

Don’t forget that the last day to order these fun Valentine items is tomorrow!  (Monday 1/21!)

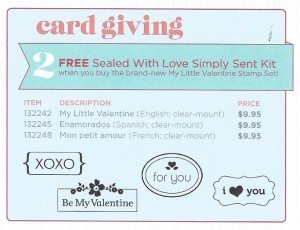
My Little Valentine (#132242) $9.95

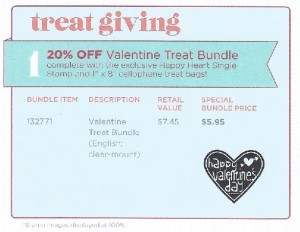
Valentine Treat Bundle (#132771) $5.95  (see Thursday’s post for samples)

Have a great day!  Take care and Happy Stamping!
Stampin’ Up! Valentine Bundles

UntitledHappy Heart.0113Valentines Day is fast approaching!  Have you thought about what type of valentines you’ll be making this year?  Stampin’ Up! is making it easy for you but you have to act fast!  These fun bundles are only available until Monday 1/21!

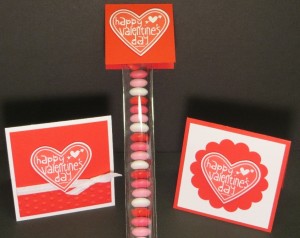
This first bundle is perfect for those classroom treats or treats My Little Valentine2013for the neighbors.  For only $5.95 (item #132771) you will receive the Happy Heart Single Stamp and a package of 1″ x 8″ cello treat bags!  How fun!My Little Valentine.2.0113

The second bundle is just as fun!  With this bundle you receive the My Little Valentine Stamp Set along with the Sealed With Love Simply Sent Kit from the Holiday Catalog.  Click here to see a sample of the Simply Sent Kit.  This little stamp set is SO cute!  The price for this adorable bundle (item #132242) is only $9.95!  Just think….you can get both of these fun valentine bundles for less than $20!

Don’t wait…order yours TODAY!  You can either contact me directly (cindy@stampbystampcreations.com) or click on the Order On-line button at the right!  The deadline is Monday 1/21!  Don’t miss out!

Scentsational Season Shadow Box

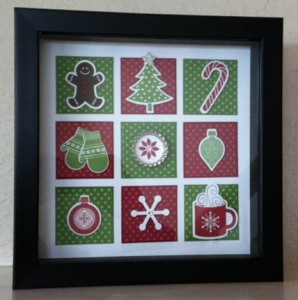
OMG!  This is TSC!  Too Stinkin’ Cute!  I wanted to post this yesterday when I had it done but I couldn’t get a good picture….today’s picture isn’t great but the shadows and glare are at a minimum.  I saw something similar to this on Pinterest so I had to give it a try.  Can I say it again?  TSC!!!

I started with an 8″x 8″ shadow box from one of the big box craft stores.  The designer paper squares are 1 7/8″ x 1 7/8″ and mounted on a square of 2″ x 2″ card stock.  The hardest part was figuring out the size and placement of the squares and what to put on them.  Most of the squares have stamped images that were die-cut with framelits or punched.  Did you notice the center square?  It has a new special item from the upcoming Spring Catalog….a Soda Pop Top!  How fun!  I actually made two of these for gifts and now I’m thinking I really need one for myself!

Simple Christmas Tags


Stamp Set: Scentsational Season
Card Stock: Gumball Green, Cherry Cobbler, Early Espresso
Ink: Gumball Green, Cherry Cobbler, Early Espresso
Accessories: Stampin’ Dimensionals, 1/4 ” Sweater Trim/Gumball Green, Cherry Cobbler, Whisper White

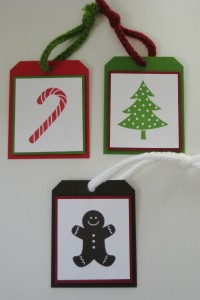
Hello!  Yesterday I did an Open House at a friend’s home.  I had a table with a bunch of samples as well as a simple make-and-take project.  All in all it was a successful event and everyone loved making these cute little Christmas tags.

They are SO simple.  Stamp your image, adhere it to a piece of card stock and then adhere it to the tag with Stampin’ Dimensionals.  Thread the adorable sweater trim through the hole and you have a cute and simple tag!

Don’t you want to make these for all of your gifts?  😉

Table Decorations

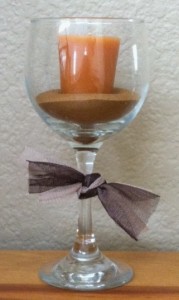
Hello!  I’m still recovering from Thanksgiving.  Last night we hosted our annual “Left-over Night”.  Yes, just another excuse to get together with friends and eat more but we always have a good time!  This is one of my table decorations from Thanksgiving.  I had all of this Stampin’ Up! tulle in my drawer and wanted something easy to do with it.  Ta-da!  Tie a bow around a wine glass, add a little sand and a candle and you have a table decoration!  This isn’t a great picture but it gives you an idea of what I did.  Change the tulle to Cherry Cobbler and add a red or green candle for your Christmas table.  I do have to give you a little tip.  My wine glasses (12 for $10!) had a narrower top than bowl and once the candles melted we had a bit of trouble getting them out of the wine glass!  Just a little something to think about!  😉

I saw this picture on Facebook yesterday and just had to share.  It was made just for me!  Ha!  😀


Happy Black Friday!

Stamp Set: Wonderfall, Fabulous Phrases
Card Stock: Island Indigo, Very Vanilla
Designer Paper: Orchard Harvest
Accessories: Island Indigo Ruffled Ribbon
Tools: Simply Scored.

How many of you have been or are planning to go shopping today?  Not I!  I’m planning on staying home being a slug all day.  Ok, maybe I’ll straighten things up a bit and/or cut some card stock for classes next week but everything will be done slowly and leisurely!  Luckily the neighbors left my house in pretty good condition last night so there’s not too terribly much to do!

Yesterday I mentioned that I’d show you my table decorations…..well…here’s a picture of the little treat holders that I made for the tables.  They are SO easy.   Maybe while I’m doing nothing today I’ll put together a tutorial….probably not video since I haven’t mastered that yet but probably a PDF or something.  The one thing you’ll need to make them is your Simply Scored with the Diagonal Plate.

I’m off to do nothing.  Yesterday I was exhausted before the company even showed up so today I’m taking it easy and moving slow.  I thought about taking a walk but it sounds too much like work!  Ha!  Have a great day and I hope you score some great deals if you’re out shopping.  Oh….speaking of shopping…..don’t forget to check out the Online Extravaganza!  Just click on the “Order Online” button at the right and it will take you to my Stampin’ Up! store.  Happy shopping!  😀

Merry Minis Stamp Camp Project

Stamp Sets: Merry Minis, Chock Full of Cheer
Card Stock: Garden Green, Real Red, Whisper White
Ink: Garden Green, Real Red
Accessories: Real Red 1/4″ Stitched Grosgrain Ribbon, Mini Glue Dots, Stampin’ Dimensionals
Tools: Big Shot, Scallop Envelope Die, Window Frame Framelits, Merry Minis Punch Pack, Perfect Polka Dots Embossing Folder, Crop-o-dile

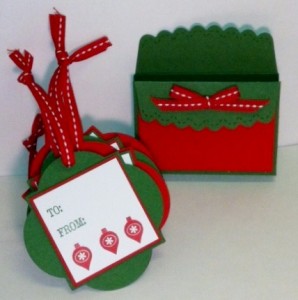
Hello!  Stamp Camp on Saturday went very well.  I think everyone enjoyed themselves and things went quite smoothly.  This is one of the projects I designed for camp.  I need to thank my wonderful friend and downline Cindy for cutting everything for this project.  I never would have gotten it done without her help!

The little box is made from two Scallop Envelopes die cut on the Big Shot.  The little tags are made with one of the Window Frame Framelits.  How did we every make cards and projects without the Big Shot?!

Wouldn’t this little box of tags make a cute hostess gift for all of those holiday parties you’ll be attending soon?  Have a great day!  Take care and Happy Stamping!
Toxic Treats Treat Box

Stamp Set: Toxic Treats
Card Stock: Basic Black, Basic Gray, Pumpkin Pie, Very Vanilla
Ink: Basic Black
Accessories: Stampin’ Dimensionals
Tools: Big Shot, Fancy Favor Die, Labels Collection Framelits

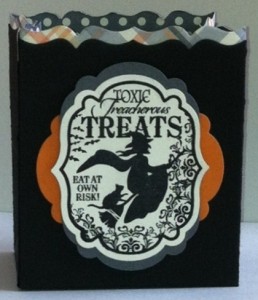
Yes, Halloween is definitely on it’s way and it’s time for more spooky treats.  What better way to present your treats than in this adorable Toxic Treats Treat Box! (Wow!  That’s a mouthful!)  This little box is SO easy to make.   I cut a strip of designer paper and with temporary adhesive attached it to the edge of the Basic Black card stock before running it through the Big Shot with your Fancy Favor Die.  When everything was die cut I removed the designer paper and then re-attached it with a little border BEFORE putting my box together.

If you read the ingredients for my project under the picture you noticed that I used Basic Black ink and Very Vanilla card stock.  Stampin’ Up! has recommended not using this combination because the new formula of Basic Black ink doesn’t seem to dry on Very Vanilla and Whisper White card stock (They’re working on this…).  They recommend using the StazOn Black ink for these papers.  Well, I wasn’t liking the way that my StazOn was covering (yes, I probably could have re-inked the ink pad) so I went with the Basic Black.  The secret is to heat set the ink with your heat tool!  A simple solution to the problem.

You’ll notice that I don’t have any treats in my treat box….well, I don’t think I’m going to buy my candy until 4 pm on October 31st.  I simply don’t have any will power!  Unfortunately, I like to be prepared so we’ll see how long this idea really lasts!

Have a great day!  Take care and Happy Stamping!
Halloween is coming soon!

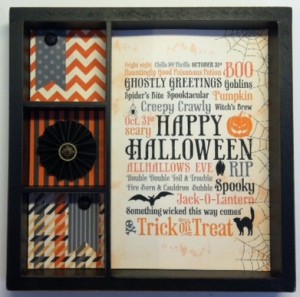
Hello!  Halloween is just around the corner.  Are you ready?  Have you decorated yet?  Well, here is an adorable decoration for you!  A 6″ x 6″ Halloween Printer’s Tray/Shadow Box.  I was inspired by the incentive that Stampin’ Up! offered in August and September for new recruits.  I wanted to make something very similar to the one SU offered but I couldn’t find a printer’s tray that was like the one SU had.  I came across these small ones and figured they’d probably even be better (and less expensive!).  They had them at the local craft stores but I needed so many I ordered them on-line.

The adorable wall art is from Stampin’ Up!’s My Digital Studio.  It’s the Toxic Framable Digital Designer Template.  Don’t you LOVE it!  It’s so spooky!

The hardest part of the project was figuring out what to put in the small sections after I filled them with the Howlstooth & Scaringbone Designer Papers.  I finally decided upon a couple little banners held in place with Black Glimmer Brads.  For the center section I made a tiny little lollie and put a Vintage Brad in the center.  I think it turned out pretty darn cute!  Now I just need to put it out to decorate my home.

Have a great day!  Take care and Happy Stamping!