
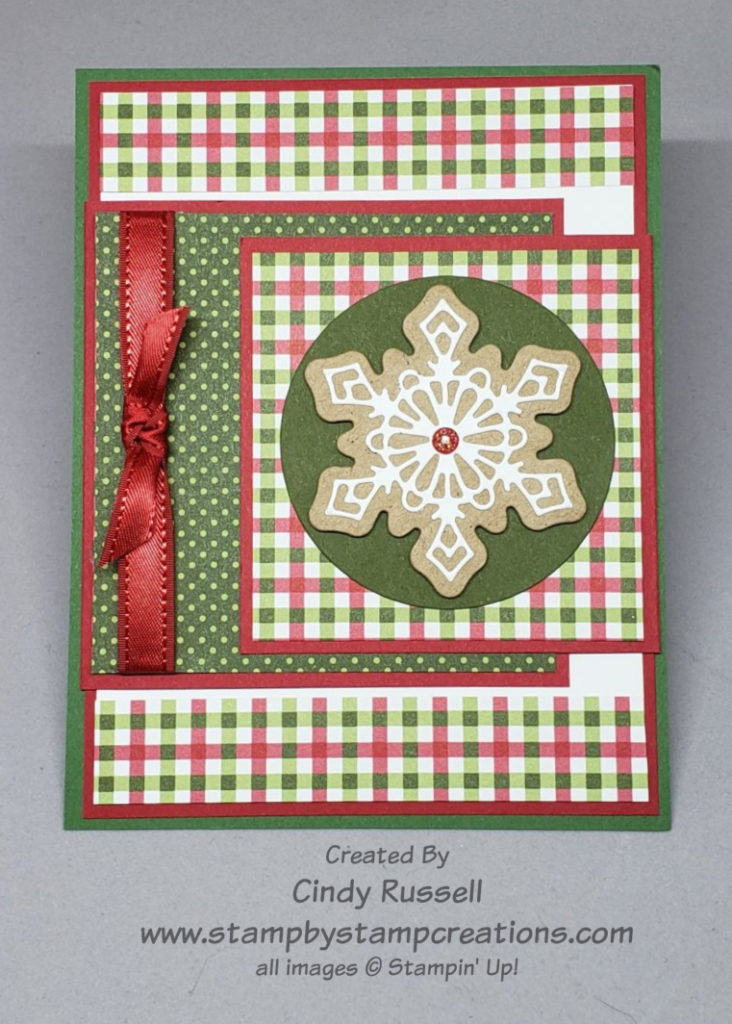
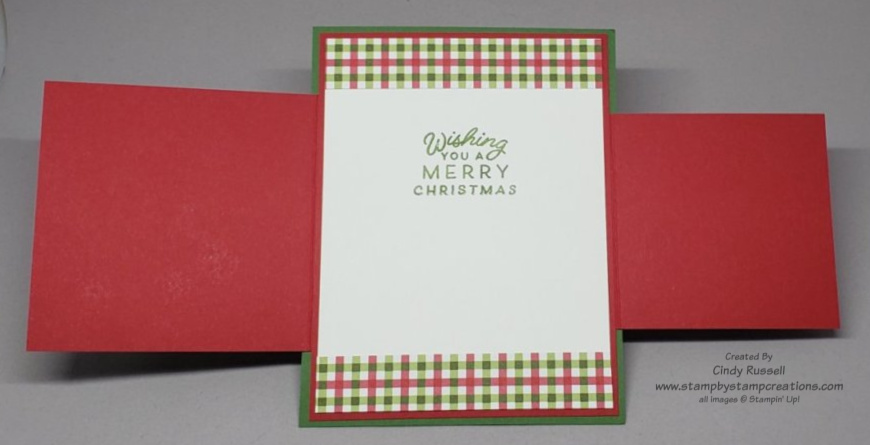
Today’s Fun Fold Card is the Overlapping Fun Fold. The person online where I first saw this fold just called it a “Fun Fold”. I like to be a little more descriptive with my titles as it makes it easier to go back and find. I couldn’t think of anything real creative so I just called it like it was. There are two side flaps on this card and they overlap each other. That’s as clever as I got with this one. Ha!
This fun fold isn’t difficult but it’s not as easy as some of the others I’ve been sharing with you either. The only “tricky” part of this fold is adhering the front flaps of the card so they don’t show on the back.
The fun part of making this card is deciding on your pattern(s) of designer paper. I said pattern or patterns because you could go from having all of the patterns of paper the same to having them all different! I used Stampin’ Up!’s Heartwarming Hugs Designer Series Paper which you can find in the July-December Mini Catalog on page 57. I was so glad to see these papers carry over from last year because they are fun patterns in your traditional Christmas colors.
The key to getting everything lined up correctly on this card is to first adhere the small strips of designer paper to the top and bottom of the inside sheet of cardstock. You want to do this so that you can line up your flaps on them.
Below is a video that shows the basics on how to put this card together.
Here are the dimensions of the pieces you need for this card:
Garden Green (base): 5 1/2″ x 4 1/4″ Real Red Layer: 5 1/4″ x 4 Basic White: 5 1/8″ x 3 7/8″ Real Red Left Panel: 4″ x 3 1/2″ score 1/2″ on 4″ side Real Red Right Panel: 3 1/2″ x 3″ score 1/2″ on 3 1/2″ side Designer Paper: 3/4″ x 4″ (cut 2), 3 1/4″ x 3 1/4″, 2 3/4″ x 2 3/4″
I hope you enjoy this fun fold. Have a great day! Take care and Happy Stamping!