Sneak Peek: Sealed With Love

sealedwithlovesu-1216Christmas is just a few short days away but have you started thinking about Valentines Day yet?  Ha!  Of course you haven’t unless you’re a Stampin’ Up! Demonstrator and have a chance to play with some of the new products in the upcoming Occasions Catalog!  🙂

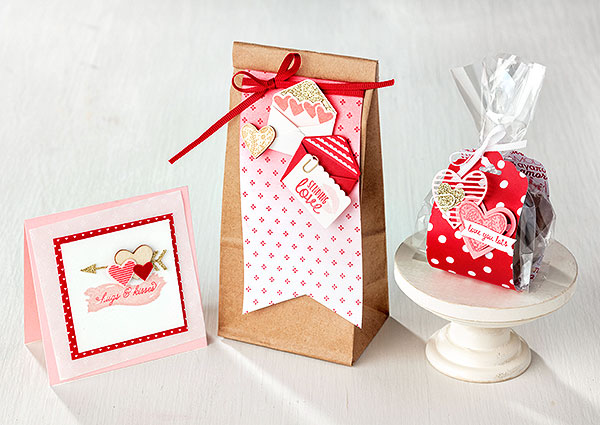
Stampin’ Up! posted this photo in our weekly email.  Aren’t these projects cute?  I have just a few more Christmas things to take care of this week and then I can sit down and play.  I do have my projects designed for my first two classes of 2017 but I’d like to just sit and make some cards for the fun of it!

The three projects in the photo use almost all of the products you can find in the Sending Love Suite.  There is an adorable stamp set with COORDINATING framelits, ribbon, embellishments and of course a Designer Series Paper Stack!  Plenty of fun products to make all of those Valentines you’re going to want to send out!  You can see them online starting on January 4th or let me know and I can pop a catalog in the mail for you now!  You’re going to love the new Occasions Catalog.  There’s a little something for everyone!

Have a great day!  Take care and Happy Stamping!

Washi Tape Thank You

endless-thanks-1016Is there still a cold spell in your neck of the woods?  We’re warming up a bit here in Denver and tomorrow we might hit 50 degrees!  That will feel so good after single-digit and below-zero temperatures!  🙂

This card feels warm and springy and will be perfect for those holiday thank you notes that you’ll want to send out.

It’s been so long since I actually designed this card that I’m not sure where I originally found the idea.  I know that I liked that the design used washi tape.  I love the look washi tape but can never really figure out how to incorporate it into my cards.  This was definitely a fun design.

I used the Endless Wishes stamp set on this card and it coordinated well with the Affectionately Yours washi tape.  I just love the font in this stamp set!

I started with the strips of washi tape.  To get the leaves peeking out from behind the tape I simple covered (masked) the tap with a piece of computer paper which is light-weight and thin.  You don’t want to use a thick piece of card stock because you may have trouble getting the image to stamp right next to your mask.

I did have to cut out the Calypso Coral florals by hand….no punches or dies for this.  🙁

I should try this design with some of the other washi tape sets.  I bet the card would look totally different.  Hmmm….

Have a great day!  Take care and Happy Stamping!


Christmas Pines Noel

christmas-pines-1016
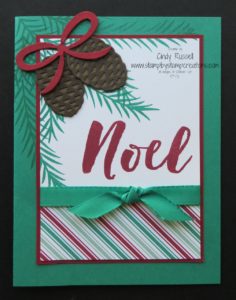
Check out these pine cones?  Aren’t they great?  They’re so festive and dimensional with the two separate pieces.  Of course that bow is pretty darn cute too!

Are you wondering how I lined up the pine boughs on the card front and the white card stock?  It’s pretty easy.  Using just a little bit of TEMPORARY adhesive, adhere the white card stock where you want it lined up on the card front.  Now stamp your pine boughs.  Part of the pine bough will be on the card front and part on the white card stock.  There may be a little strip right around the edge of the white card stock that doesn’t get stamped but when you add your border of Cherry Cobbler it covers up the space!  My border is a little narrow so it doesn’t cover quite as well as a wider border would but it still is a neat technique.

This was a very popular card in my classes and workshops.  It’s funny because it’s not necessarily my favorite.  It just goes to show that not everyone likes the same type of cards.  I need to remember that when I design.  Just because I don’t love it doesn’t mean that my customers won’t.

Right now I’m working on designing cards for my Love & Friendship class that I’m having in January.  It’s pretty fun playing with new products.  I can’t wait for you to see the new Occasions Catalog and the 2017 Sale-a-bration Brochure!  Fun stuff!

Have a great day!  Take care and Happy Stamping!

Sale-a-bration Sneak Peek: Hey, Chick

hey-chick-1216This 2017 Sale-a-bration stamp set has got to be one of the cutest stamp sets EVER!!!!  OMG!  I’m in love!

This stamp set has three different chickens, a little egg with feet and three sentiments.  Have I mentioned that I LOVE it?!!!

This little chicken with the crazy hair is probably my favorite.  I can’t wait to play with this stamp set some more.

I designed this adorable (if I do say so myself!) card for my team holiday gathering last Saturday.  We had brunch, chatted and made three different cards.  This one was my favorite by far.  How can you not fall in love with this chick?  🙂

This stamp set will be available starting January 4th.  It can be yours for FREE with a $50 purchase!  Sale-a-bration:  a stamper’s favorite time of year.  Purchase the products you love and get FREE products!  Woo Hoo!  FREE stuff!  It doesn’t get any better!  Are you ready for Sale-a-bration and the new Occasions Catalog?  I sure am!

Have a great day!  Take care and Happy Stamping!

Holly Berry Happiness

holly-berry-happiness-1016
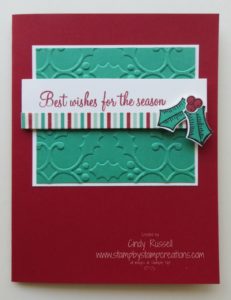
This is another of my favorite cards from this fall.  Simple, yet elegant.

As soon as I saw the Holly Embossing Folder in the Annual Catalog I knew I wanted to use it on one of my Christmas cards.  Of course it goes perfectly with the Holly Berry Happiness stamp set.  🙂

What do you think of this design?  I copied it straight from the Holiday Catalog.  Have I mentioned how much I love the samples in Stampin’ Up! catalogs?   You don’t have to look too far for inspiration.  It’s right at your fingertips!

holiday16_p26c-110-2This card was also the perfect chance to use washi tape.  I really like washi tape but I have a hard time trying to figure out how to incorporate it into my card designs.  I thought using it on this card turned out pretty well.  What do you think?

Yesterday I hit the post office to mail my holiday packages.  I only had to wait 35-40 minutes.  Not too bad at all.  Ha!  If it had been any other time of the year I would probably have been fuming!  Good thing it’s the season of good will.  🙂

Have a great day!  Take care and Happy Stamping!

Simple Christmas Pines

christmas-pines-1116
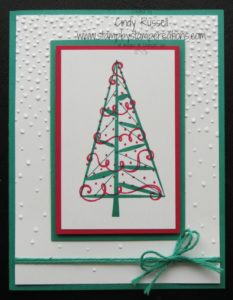
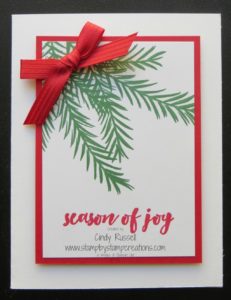
It’s time for another easy Christmas card in case you haven’t completed yours.  This one is made with the Christmas Pines stamp set.

If you have this stamp set did you notice that there are two sets of pine boughs?  One is a little thicker than the other.  When you use them together (it’s easy to do because they’re photopolymer) you get more of a 3D look.  You can see the double stamping more on the ends of my boughs.

I just stamped the boughs a few times in the corner, added my sentiment, bow and some dimensionals and my card was done!  Simple yet elegant.  My favorite!

I was a bit under the weather yesterday and spent most of it reading and messing around.  I did get the out-of-town gifts wrapped and ready for the post office though.  Now today I get the pleasure of standing in line at the post office.  I figured that today should be a little better than yesterday would have been but who knows.  I don’t have any other big plans other than shopping for stocking stuffers and a quick trip to the grocery store.  The big thing is that I need to remember to purchase Christmas stamps at the post office so I can mail my Christmas cards.  I did get the majority of them written out on Sunday so I’m pretty pleased.  Usually I’m pounding through them the weekend right before Christmas so I’m ahead of the game this year!  🙂

I hope you’re on top of all of your Christmas preparations.  Have a great day!  Take care and Happy Stamping!

Merriest Wishes Tags

merriest-wishes-1-1116 merriest-wishes-2-1116
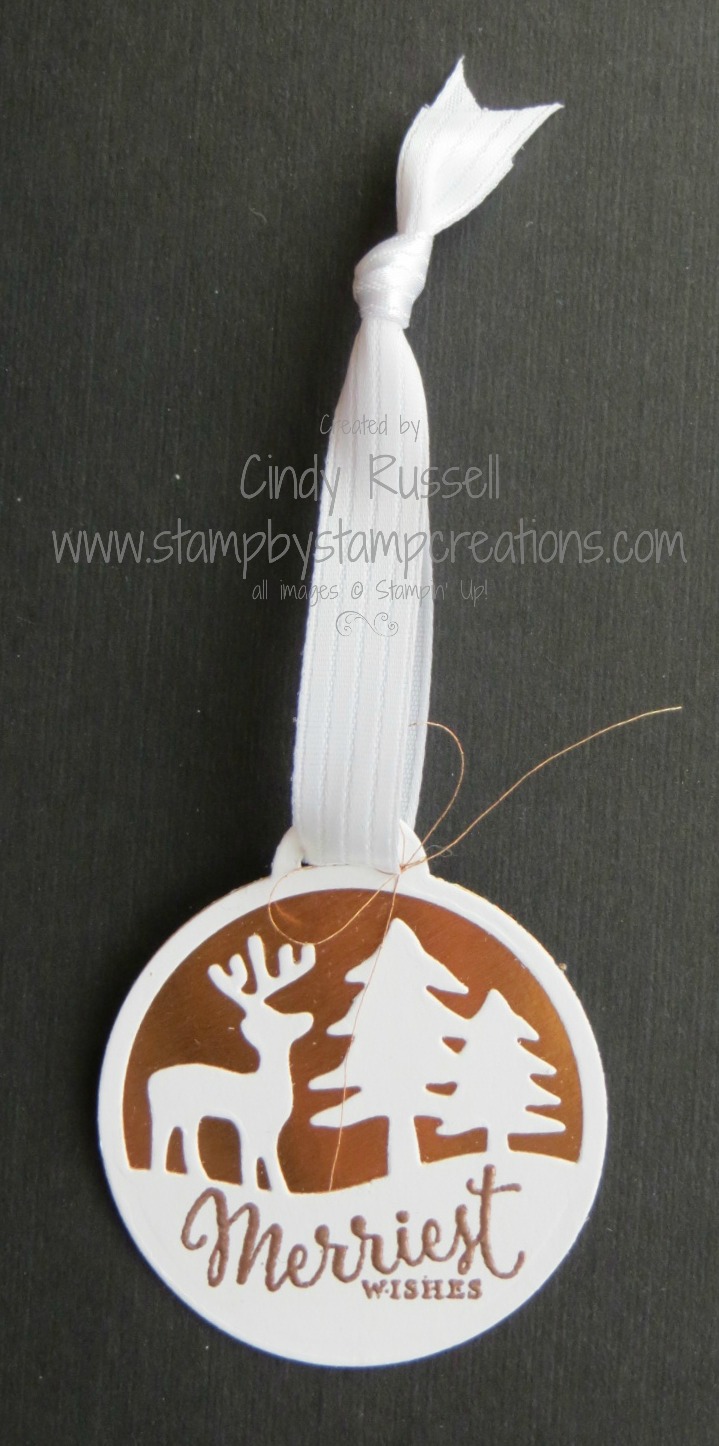
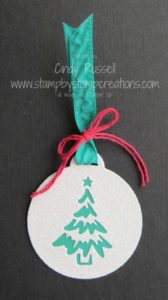
I had my Christmas Tag Class a few weeks ago and these were a couple of the easier tags we made.

With the Merriest Wishes stamp set and the COORDINATING Merry Tags Framelits making Christmas tags doesn’t get much easier.

On the first tag I die cut the tag from Whisper White card stock then heat embossed the sentiment with the Copper Embossing Powder.  Punch out a 2″ circle from a Copper Foil Sheet (love these!) and adhere it to the back of the tag.  I added some ribbon and I was done.  OK…you caught me.  The Whisper White Striped Satin Ribbon is retired so in class we used the Whisper White Thick Baker’s Twine.  🙂

The second tag we made using this bundle was even easier because there was no stamping involved.  Die cut the tag from the Dazzling Diamonds Glimmer Paper then punch a 2″ circle from Emerald Envy card stock.  Add some ribbon and baker’s twine and you’re done!

Hmmm…as I’m writing how easy these are to make I’m thinking that I should whip up a bunch for gifts this year……Do you have any homemade gifts that you’re giving this year?  Leave a comment and let me know!

Have a great day!  Take care and Happy Stamping!

My Balloon Adventures

balloon-advnetures-1216Yesterday I had a team gathering of my SASsy Stampers and Friends.  I’ve added the “and friends” because I know a number of demonstrators who don’t have an active upline or who are simply my friends and I want to include them in my group.  There were a total of nine of us (which is pretty good for this time of year!).  We gathered together, chatted, had brunch and made some cards!  I’m kicking myself now because I wanted to take a picture of the group and I forgot!  Sheesh!

We did have a good time.  My three newest recruits were there so I had everyone go around the table and introduce themselves and tell how they met/knew me.  It was fun to hear some of the stories.  Naturally we got off topic a number of times but itsn’t that half the fun!  🙂

If you’d like to be part of my SASsy Stampers team Sale-a-bration will be the perfect time to join!  For $99 you will get to choose $125 worth of merchandise AND 2 free stamp sets of your choice!  Sale-a-bration runs from January 4 – March 31.  Start thinking about it!  I’d love to have you join my team!  Contact me with any questions you may have!

balloon-adventures-onstage-1Now, on to stamping!  I designed two projects for this gathering using products from the upcoming Occasions Catalog and one project using a product from the 2017 Sale-a-bration Brochure.  This project may look a bit familiar.  I took one of the cards that we made at the OnStage event I attended in Phoenix last month and made it my own.  You can see that I didn’t change much on the front.  I changed the card base color and added a few layers.  You know me and my layers!  Ha!

The only differences on the inside of the card are the colors of the balloons and the designer paper I used on the edges.  You can view the original card here.  Sometimes it’s nice not to tax your brain coming up with balloon-advnetures2-1216your own design.  🙂

Have a great day!  Take care and Happy Stamping!  Don’t forget to think about joining the SASsy Stampers!  🙂

Silver Bells, Silver Bells….it’s Christmas Time in the City….

seasonal-bells-1116I told you that I start singing when certain words or phrases are written or spoken.  I can’t help myself!  My MIL is the queen of this!  Of course most of the songs that she starts singing are REALLY old and I’ve never heard of them.  Ha!

This is a card that I designed for my Christmas Card Buffet and I also used it for a few workshops/parties.  Simple, yet elegant.  That’s the kind of card I really like.  A card that says “wow” but doesn’t take three hours to create.  The Silver Foil Sheet is what gave this card the “wow” factor.  I could have used Smoky Slate card stock but it just wouldn’t have been the same.

Be sure to use Black StazOn Ink when stamping directly on the Silver Foil Sheets.  It won’t smear.  Speaking of Silver Foil Sheets…I think I would have actually used another layer of Silver Foil between the white background and the blue card to tie things together.  I think it would have given the card a more finished look.  I didn’t do it for class just to make things a little simpler.  Another little tip when using the foil sheets is that you should use Mini Glue Dots or Fast Fuse Adhesive.  You need a strong adhesive when working with the shiny, glossy surface.

It’s been a chilly few days here in Denver.  I thought I was back in the Minnesota Homeland there for awhile with high temperatures in the low teens and lows actually below zero!  BRRRR!  Lucky for us it’s warming up today and I can put the parka in the back of the closet until the next cold front arrives!

Have a warm and cozy day!  Take care and Happy Stamping!

Christmas Trees

greetings-from-santa-1116Simple yet beautiful!  The perfect card for this time of year when we’re all running here and there trying to prepare for the holidays.

Isn’t this little trio of trees cute?  The tree is from the Greetings from Santa stamp set.  I added a little falling snow and I have the perfect Christmas card.

What is your Christmas tree like?  Here’s a picture of our tree at night.  I love keeping all 20161207_210326-2of the room lights off and just have the glow of the lights on the tree.  I don’t really like decorating the tree because I know that sooner rather than later I have to take all of the decorations off the tree.  I know…kind of weird thinking.  I do like looking at all of the ornaments though.  Most of them are dated or I can remember when or where we got them.  I use to try to find an ornament each year for my sons that had something to do with what they did in the past year.  For example, the year we moved to Colorado they got little clay figures that were skiing and snowboarding.  I try to get my husband and I an ornament each year too.  If we haven’t gone a trip I’ll just get something that I really like.

What type of decorations do you put on your tree.  Leave a comment and let me know!

Have a great day!  Take care and Happy Stamping!

Santa’s Sleigh

santas-sleigh-1016
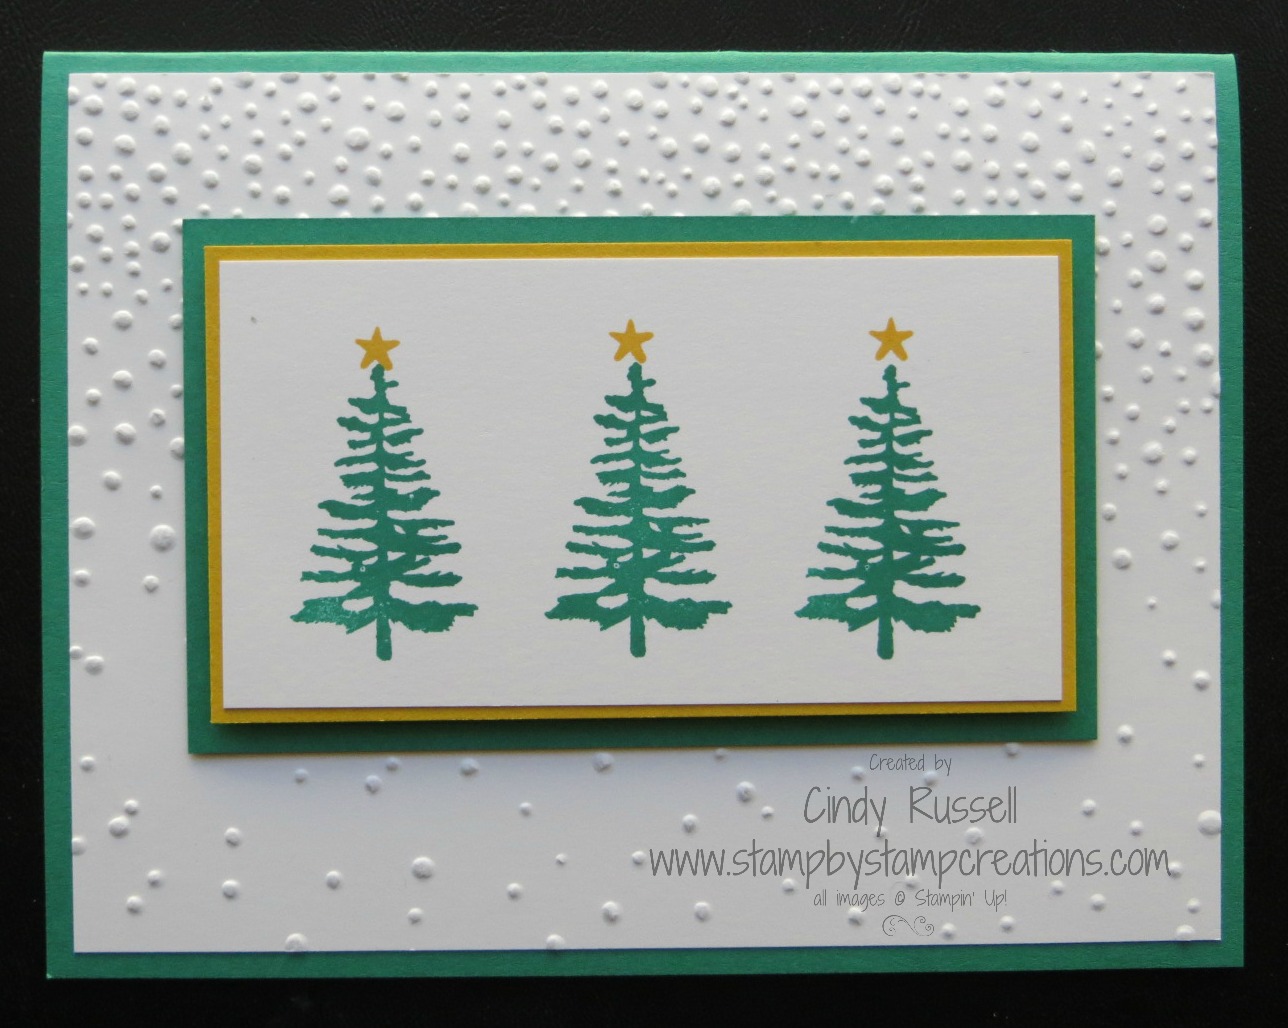
It’s definitely beginning to look a lot like Christmas here in Denver.  We had a little snow overnight and woke up to temperatures in the teens.  Brrrrr!  We don’t usually get that cold!

This is another one of my favorite cards that we made in class this fall.  My favorite part is the tree.  It’s a really cool tree!  🙂

The embossed falling snow is perfect because it’s still lightly snowing.  One nice thing about Denver is that even though it’s cold and snowy today, tomorrow it will get up to 50 degrees and the snow will be gone!

All of the images are die-cut with the COORDINATING Santa’s Sleigh Thinlits.  Boy does that make things easy!  One of the tips I have for you on this card is to remember to stamp the sentiment on the white card stock BEFORE running it through the Big Shot!  It’s makes things SO much easier!  🙂

The other tip would be to cut a little slit in the wreath in order to get it around the deer’s neck.  It will go over the head but with a lot of work and you could bend the antlers.

I’m all ready to snuggle up in my warm and cozy house on this chilly day.  I’d love to read a book all day but there’s too much to do!

Have a great day!  Take care and Happy Stamping!

Hang Your Stocking

hang-your-stocking-1-0816Christmas stockings are so much fun!  The Hang Your Stocking stamp set and the COORDINATING Thinlits were some of my first purchases from the Holiday Catalog.

Christmas stockings come in all shapes and sizes.  When I go to someone’s house over the holidays I love to see what their Christmas stockings look like.

When my oldest son was born I made Christmas stockings for the three of us.  I cross-stitched the tops of all of them and sewed them together.  We each have a different little design next to our names.  They turned out pretty cute and I made another one for my younger son after he was born.  However….my poor daughter-in-law doesn’t have her own yet.  When my parents were cleaning out their house before they moved my mom gave me my stocking from my childhood that my grandmother had made for me.  It’s felt with a felt design on it and all sorts of sequins and such.  I use that one for me now and my DIL gets to use my cross-stitched one with a little tag with her name pinned to it.  It’s pretty lame.  One of these days I AM going to make her a stocking!  🙂

But back to paper crafting!  What do you think of the cable knit background?  Don’t you just love the new Cable Knit Dynamic Embossing Folder.  It gives such a deep, dimensional impression!  I knew I had to pair it with the Christmas stocking!

I bet you’re wondering how I made my hand-drawn stitches so perfectly….well, its your Tip of the Day!  I first die cut my oval.  Then I took the next smallest oval die and laid it on top of the die cut oval.  The outside of the smaller die lined up perfectly with the outside of the die cut image.  Then I was able to use the inside of the smaller die as my template and drew my little stitch marks!  How clever is that?!  🙂

Send me a photo of your Christmas stockings!  I’d love to see them!

Have a great day!  Take care and Happy Stamping.

Jolly Santa Hat

hat-builder-1116At Stamp Camp in October my friend Jan had decorated all the gift bags for the participants with this adorable design.  I knew the design itself was simple enough for a Card Buffet class but I also knew that die-cutting the “jolly” would be a little more time consuming for people and might not work for the class.

So…I came up with design #2.  It had the same basic layout:  hat, jolly, and layers.  At first I thought “Hmm…this could work”.  But you know what?  I was missing the sparkle!

How can you not use Glimmer paper on a Christmas card?  Sheesh!  It was no contest.  I had to use design #1 in the class so I pre-cut all the “jolly” elements for people.  It really wasn’t too bad.  Tip:  I used wax paper between the die and the glimmer paper along with using the Precision Base Plate on my Big Shot and the Big Shot Die Brush and the words popped out easily.   I even used this card in a couple parties because it is TSC!  Too Stinkin’ Cute!  🙂

Tip:  When using the Glimmer Paper you need to use either Fast Fuse, Tear & Tape or Mini Glue Dots to adhere something to the Glimmer Paper or to adhere the Glimmer Paper to something else because of the glitter and the thickness of the paper.

Which card do you like best?  Leave a comment and let me know.

Have a jolly day!  Take care and Happy Stamping!

Simple Saturday: Twinkle Trees

twinkle-trees-1116
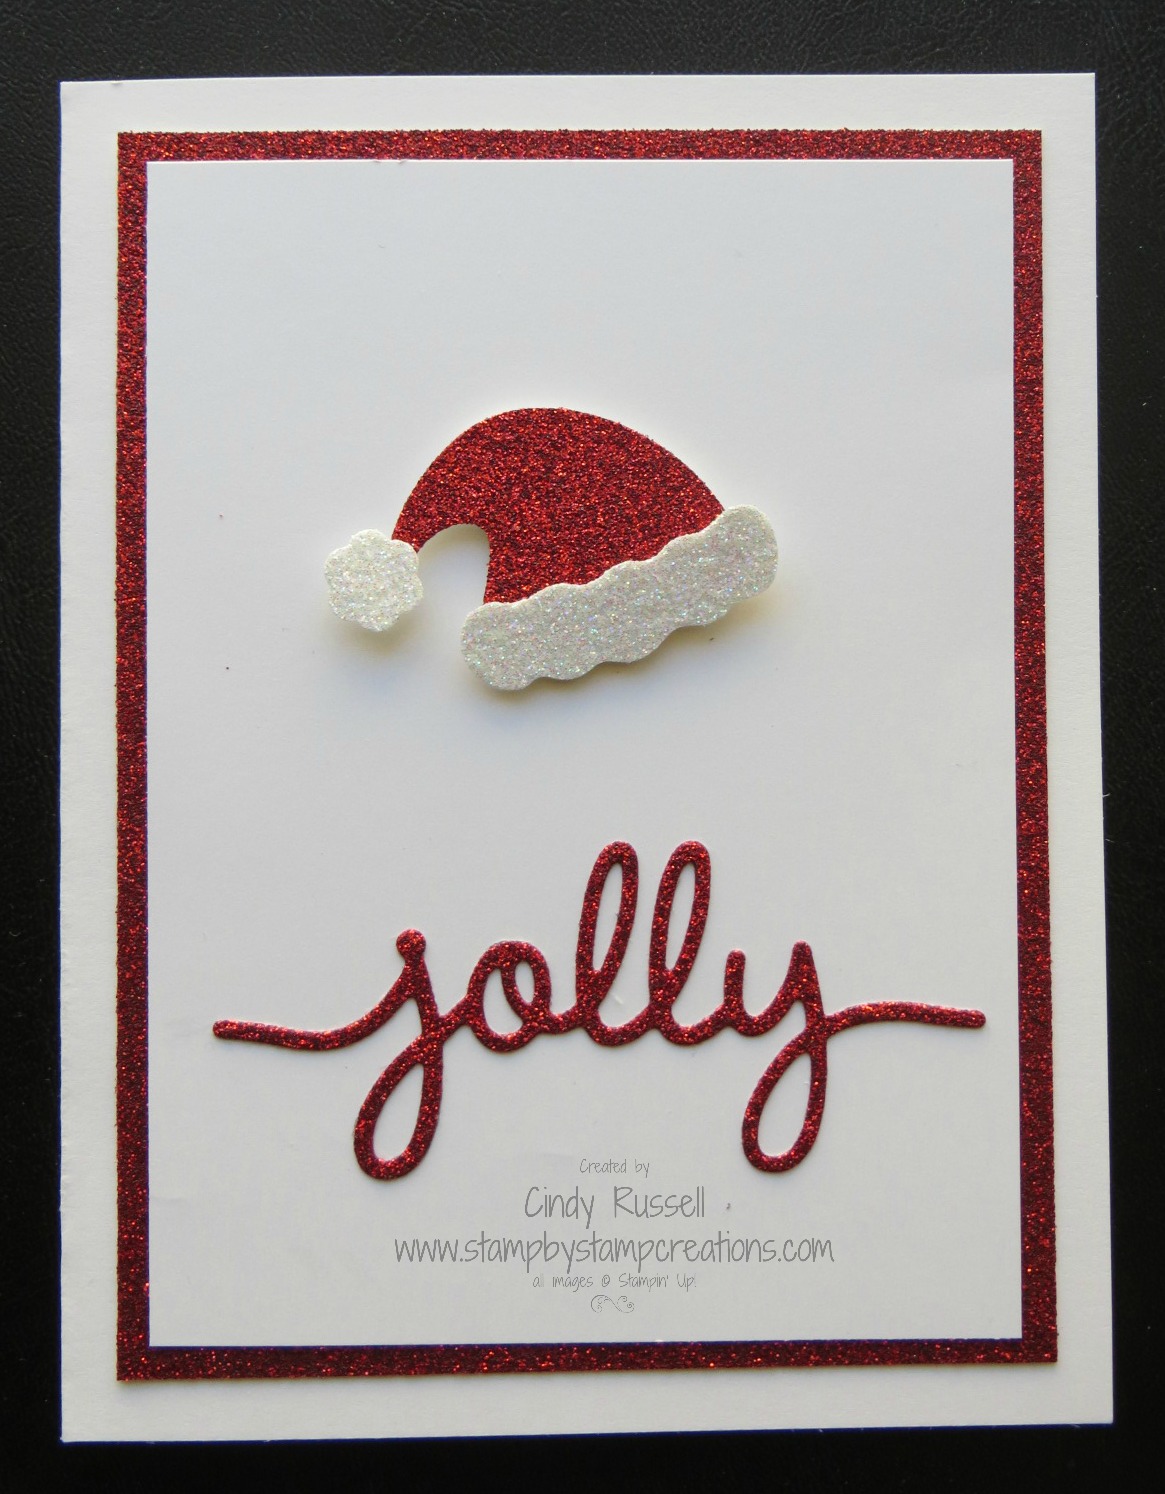
Yep!  It’s time to start thinking about Christmas.  I finally have my Thanksgiving things put away and it’s on to Christmas.  I’m not sure if we’ll put the tree up this weekend but I will get the space cleared for it.

When do you all put your tree up? We don’t have a specific time/weekend or anything.  It goes up when we get around to it.  I’d love to know your traditions so leave a comment and share!

This is a nice and simple card for Simple Saturday.  A few layers, some baker’s twine and the option of some falling “snow” run through the Big Shot.  The “garland” is simple to line up over the tree because the Twinkle Trees stamp set is photopolymer.  I’m really liking photopolymer lately.  The only bad thing about it is that it stains but even then you can still see through it..  I did pop up the red layer to add a little dimension to this easy card.

I hope your Saturday is simple.  Don’t fret or worry.  Just do your thing.  I’m going to get ready for my Christmas tree as well as design some cards using new products for my team gathering next Saturday.  Have a great day! Take care and Happy Stamping!

Cookie Cutter Reindeer

cookie-cutter-christmas-1116
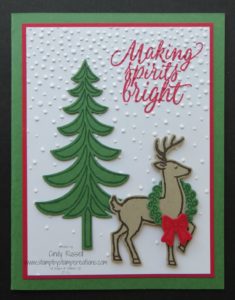
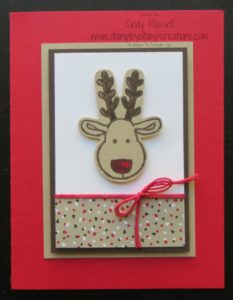
TSC!  Too Stinkin’ Cute!  I love this little reindeer!  I was pretty tickled with the way that this card turned out.  I needed a simple card for my Christmas Card Buffet but I still wanted a card with a little something extra.  I think I hit the mark with this one.  My philosophy is that you can’t go wrong with layers and a little ribbon (baker’s twine).  I popped up the Early Espresso layer as well as the reindeer head.

I’m still amazed at how if you can punch out this little guy using the Cookie Cutter Builder Punch which looks like a gingerbread man.  That is pretty darn creative if you ask me.

It’s Year-end Closeout time at Stampin’ Up! and I’m happy to say that the Cookie Cutter Christmas stamp set and the Cookie Cutter Builder Punch are sticking around for a little while but if you want the Cookie Cutter Halloween stamp set you better order it before December 21st.  After that it will only be available while supplies last and who knows how long that will be.

yearendcloseout_shareables_eng_6If you haven’t had a chance to shop the Closeout Sale hop on over to my online store and check it out!  There are some great deals.  The Closeout Sale has items from the Clearance Rack, items from the Holiday Catalog that won’t be carrying over as well as items from the Annual Catalog with excessive inventory.  Don’t miss out!  Some items are available only while supplies last!

Have a great day!  Take care and Happy Stamping!