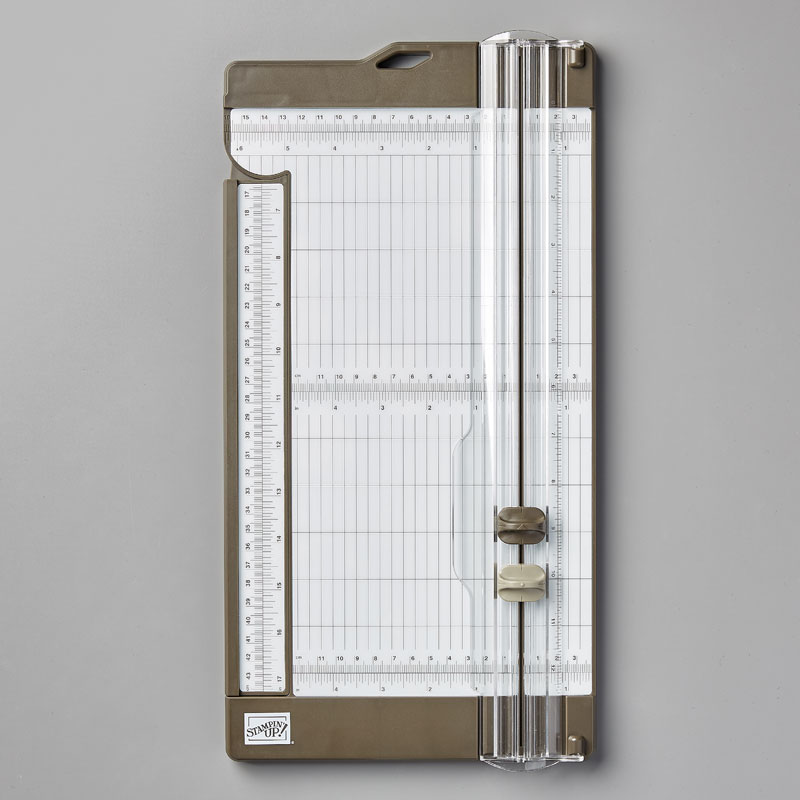
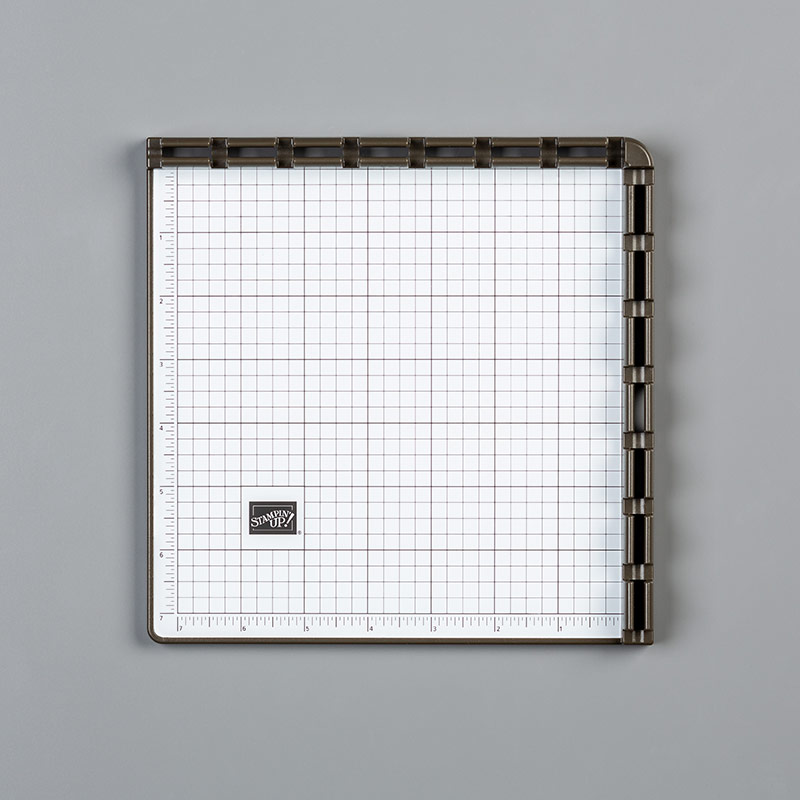
Tool Time Tuesday! The new Stampin’ Up! Trimmer is here and you’re going to LOVE it!
My favorite things about it are the longer cutting blade and the improved ruler on it so that you don’t lose the measurements between 6″ and 7″! 🙂
This new trimmer is a little easier to store and transport since it is rectangular and lighter than the old one. The cutting guide snaps down to hold it in place so there is no separate lock.
This new and improved trimmer is lighter and the rectangular shape will make it easier to transport and store.
Head on over to my online store to find out the complete details on the fabulous new trimmer. At $25 the price is right! Order yours today or maybe order one for a holiday gift!
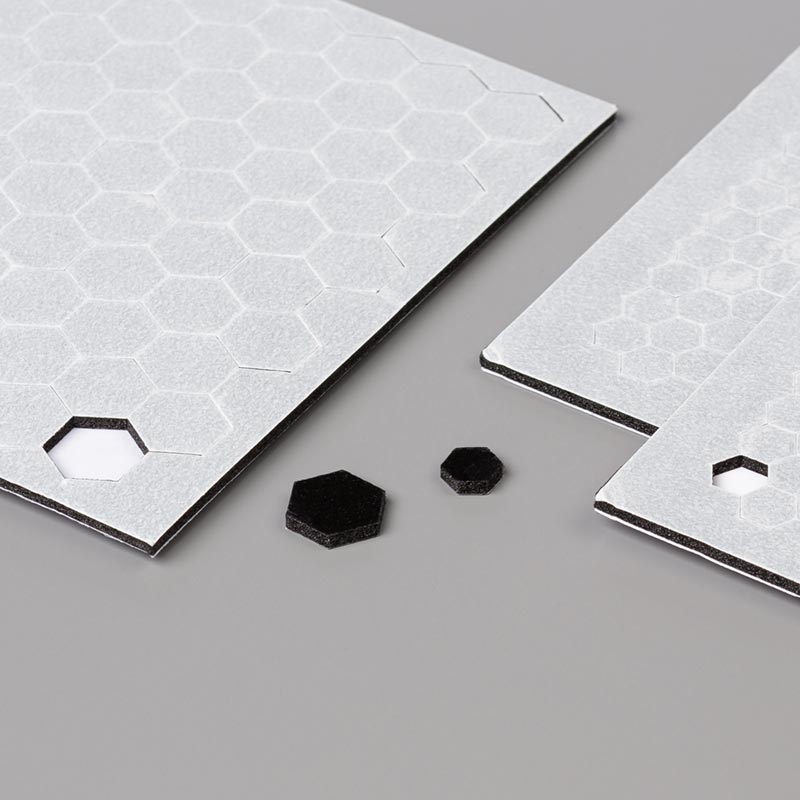
It’s Tuesday! Time for a tip or talking about a tool. One of my favorite new products in Stampin’ Up!’s Catalog is the Black Stampin’ Dimensionals. I’m going to classify them as a tool since they’re a type of adhesive and you use them to make your projects.
Anyway, these Black Stampin’ Dimensionals are perfect for your Halloween projects or any project that you use dark colored cardstock on.
Black Stampin’ Dimensionals
These dimensionals come in a combination pack with both regular size and mini size dimensionals. Did you notice them on page 55 of the Holiday Catalog or did you miss them like I did the first time I looked through the catalog? 🙂
Spooktacular Bash
Of course I couldn’t talk about the new Black Stampin’ Dimensionals without sharing a project with you! Here is another fun Halloween card that I made for my Fall and Halloween Card Buffet a few weeks ago.
Isn’t this little Dracula adorable? I guess “adorable” really isn’t the word you would normally use to describe something like Dracula but this little one is SO cute!
I used the Black Dimensionals to adhere the coffin to the card and also to adhere the frame to the coffin. I used the fun Coffin Treat Boxes as a template for the coffin on my card. It’s hard to tell but I also ran the coffin through the Big Shot with my favorite Subtle Embossing Folder to add a little texture. Too fun!
Have a fun and spooky day! There’s still time to order those supplies for your Halloween cards and projects!
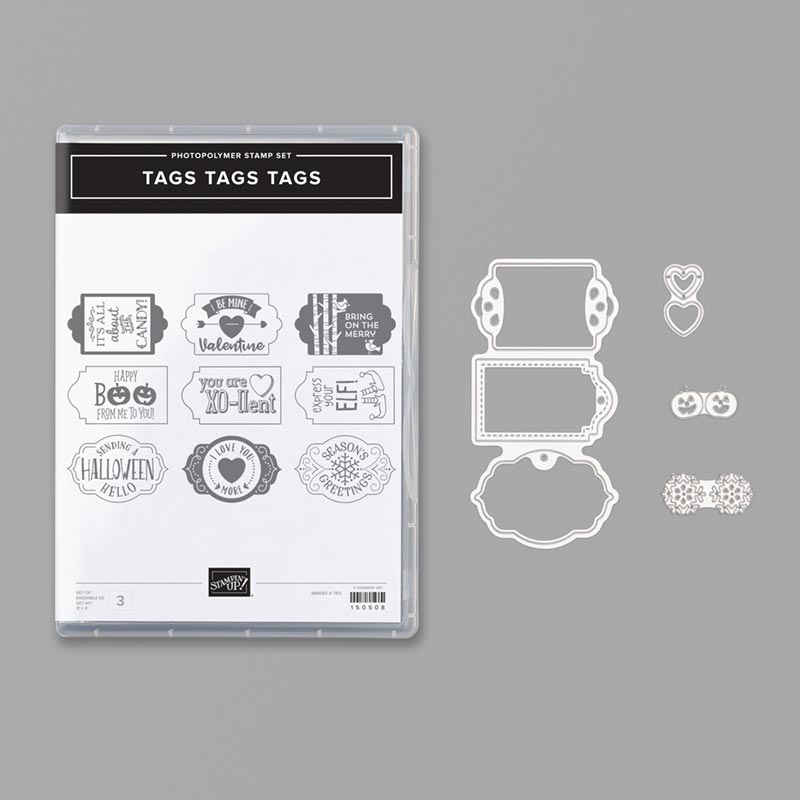
Have you checked out the Tags Tags Tags stamp set and coordinating dies on page 56 of Stampin’ Up!’s Holiday Catalog?
Tags Tags Tags
This stamp set and the coordinating dies are quite interesting. In the stamp set you can see that there are 3 Halloween tags, 3 Valentine tags and 3 Christmas tags. Each holiday has one of each different shape die. Now look at the die itself. The dies are connected. The stamps are also connected. The three Halloween images are all on one stamp! (As are the Valentine and Christmas stamps). This makes it easy to stamp and cut the multiple images.
Tags Tags Tags Card
The card above is one I designed for my Fall & Halloween Card Buffet. As you can see, I only used one of the Halloween tags on my card. Since it was the tag on one of the ends of the stamp I was able to only ink it up so as not to waste paper…although I probably could have come up with a use for other images.
For this card I needed to only stamp the word “Halloween” from the tag on a strip of Terracotta Tile cardstock. I tried using the Basic Black Stampin’ Write Marker but it didn’t cover very well on the photopolymer stamp and I also had a hard time getting just the word I wanted inked up. Sticky Notes to the rescue! I used four sticky notes, one on each side of the word, to cover up the areas of the stamp I didn’t want to ink up. I then inked up the stamp, sticky notes and all, in my Memento Tuxedo Black ink. The next step was to remove the sticky notes from the stamp, huff on the stamp (your breath will re-wet the ink), and then I stamped the image on my strip of Terracotta Tile cardstock. The important thing is to remember to remove the sticky notes or you’ll have a big mess when you stamp. Ha!
I backed the tag with a 1 1/2″ circle of Basic Black cardstock before adhering the tag to the front of my card.
The hardest part of this card was making the little strip of Terracotta Tile cardstpck and stamping on it. This is a pretty simple card since the only stamping on it is the little tag. Easy Peasy with the cute images in the Monster Bash Designer Series Paper!
You’ve still got time to make those Halloween cards! Head on over to my online store today!
It’s already the 11th of October and I don’t have my Halloween stuff out yet. I guess I better get that out this weekend so I have at least a few weeks to enjoy it!
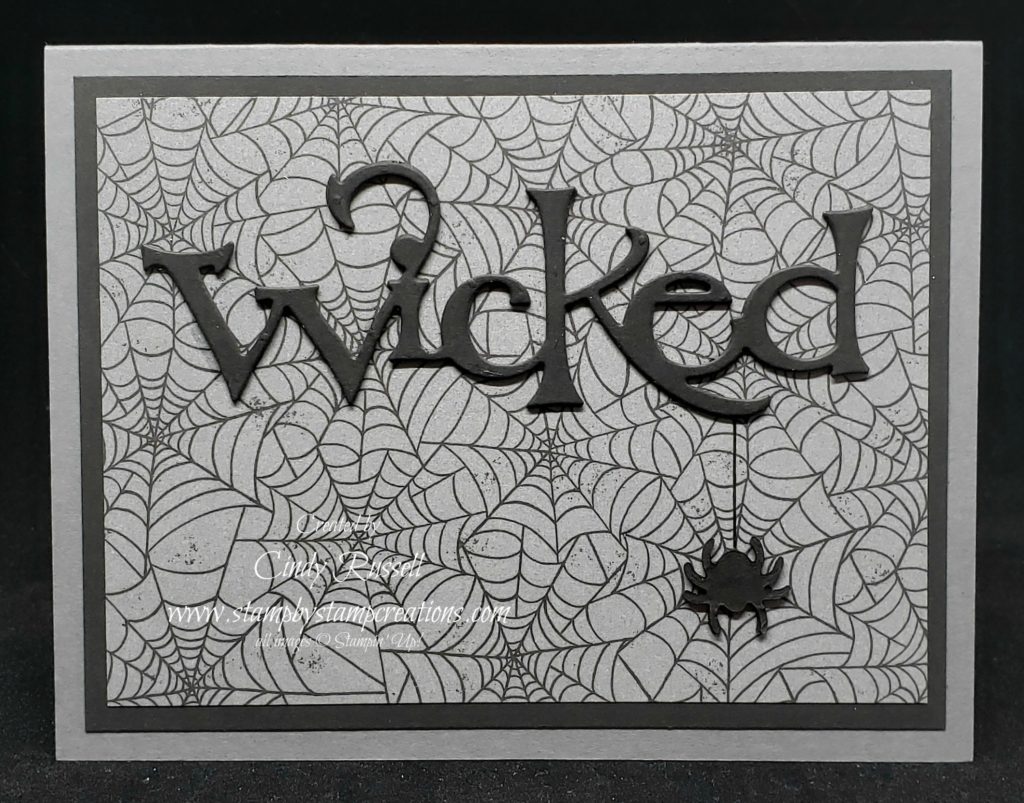
I couldn’t resist the Wonderfully Wicked stamp set and coordinating dies in Stampin’ Up!’s 2019 Holiday Catalog (pg. 55). The dies were what sold me on the bundle. I love the font of “wicked”. Then when I saw this spider web paper in the Monster Bash Designer Series Paper pack I had my card.
The images in the Wonderfully Wicked stamp set are pretty darn cute too. I always tell myself I’m going to skip the Halloween items in the Holiday Catalog but I never do. There’s something that always grabs me!
When we made this card in class a few weeks ago I only had the gals die cut one “wicked” and one spider for their cards to save a little time and keep the line at the Big Shot down. If you look closely at my card (and it is quite hard to notice), I’ve actually die cut the images 3 times and adhered them together to give my card some dimension.
Another thing I did that you can’t really notice on the card is that after I drew the line from the word “wicked” down to the spider I went over it with my Wink of Stella Glitter Brush to make it look a little more like a spider web. Very subtle.
On the inside of the card (which I should have photographed) I just stamped the words “Happy Halloween” and the big spider. The spider was stamped on the left side and then I drew a line from the top of the page to the spider.
Even though I wasn’t going to make Halloween cards this year I sure did have fun doing it! I hope you have fun making your cards too! You can find the supplies I used on this card below.
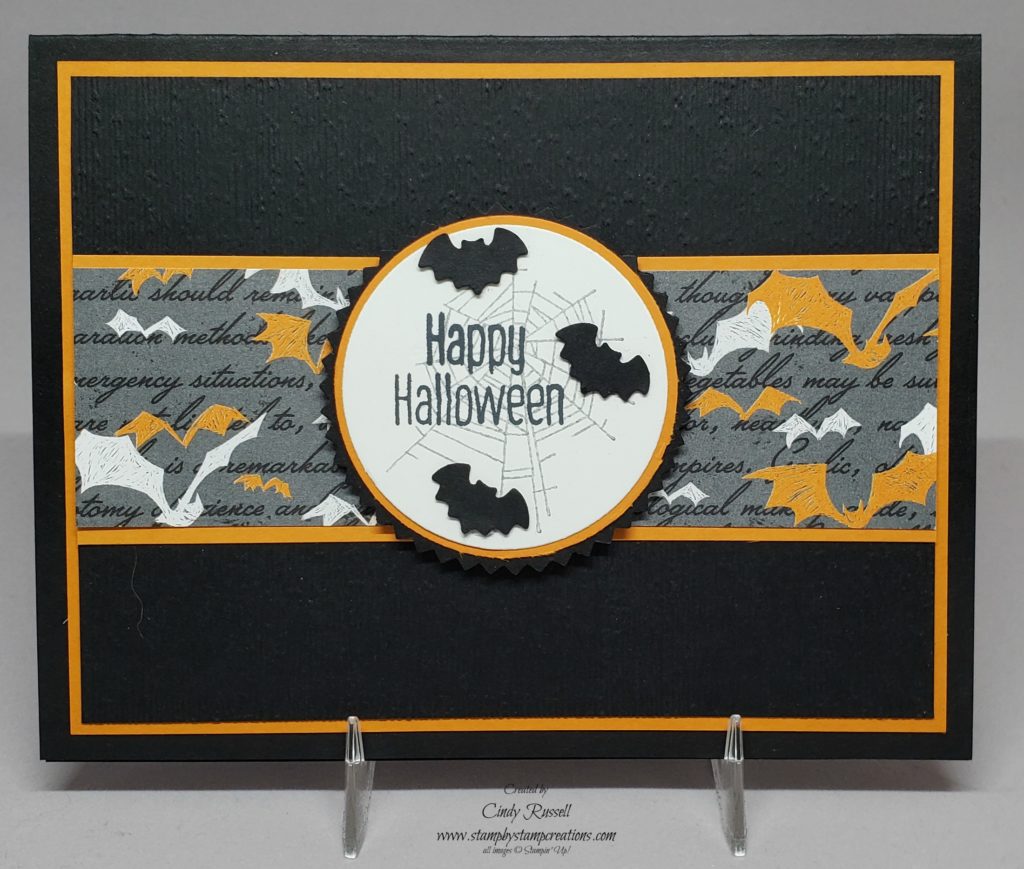
It’s October! Happy Halloween! Ha! We’ve got a few weeks left before Halloween but it’s definitely time for me to share some Halloween projects with you!
To Every Season/Halloween
I just LOVE the little punched bats on this card! They are SO cute! This card was made using the To Every Season Season Bundle which you can find on page 50 of Stampin’ Up!’s Holiday Catalog. This stamp set is so versatile. Not only are there Halloween images and sentiments but there are also images and sentiments for Fall, Christmas and Valentines Day! The stamp set is bundled with the Every Season Punch Pack which has little mini punches for Halloween, Fall, Christmas and Valentines Day. I love purchasing items like this that are so versatile!
The sentiment and the punched bats are from the To Every Season Bundle but the spider web is from another the Wonderfully Wicked stamp set on page 55 of the Holiday Catalog.
This card went together pretty easily and would be perfect for the little ghouls and goblins in your life! You can see all of the items below that I used on this project and they can all be purchased in my online store. To make it even easier you can just click on the photo of the item(s) you’d like to purchase and it will take you directly to that item in my online store.
It’s Throwback Thursday! This morning when I woke up it felt like Fall! I LOVE Fall! It’s my favorite time of year. I would much rather have to put on a jacket and wear jeans than be all hot and deal with humidity. Since it felt like Fall I figured I should choose a Fall card for Throwback Thursday.
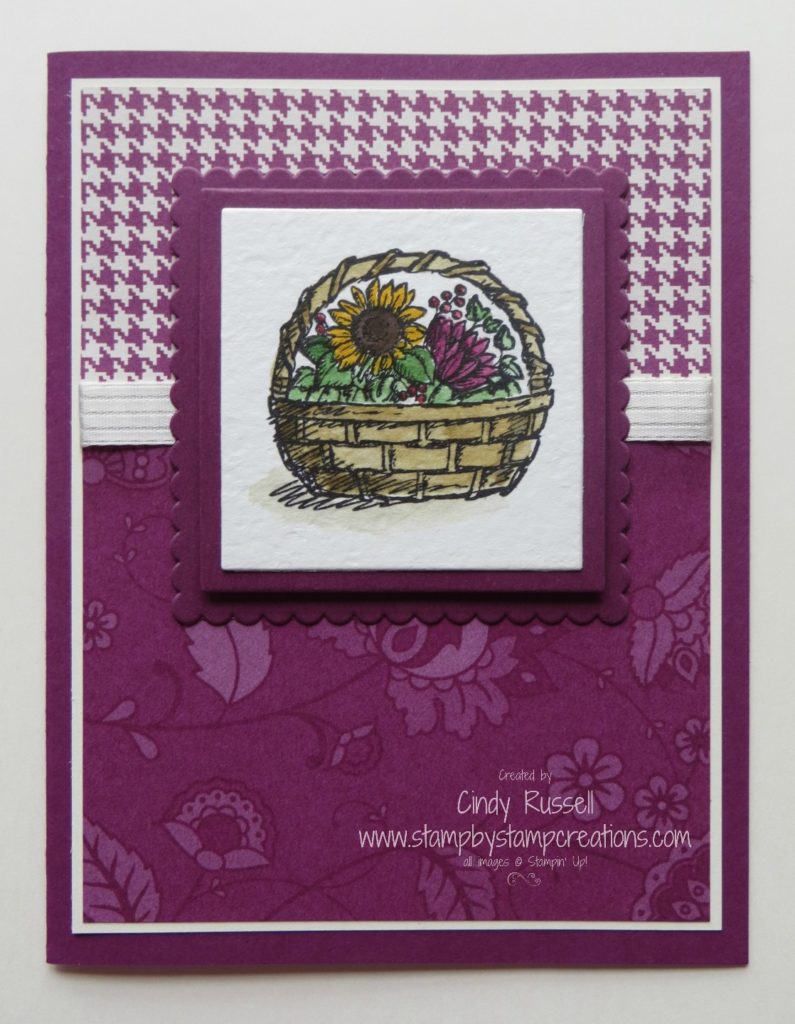
Basket of Wishes
As I was looking through my old blog posts to come up with the perfect card for today I found this one. It’s fallish yet still summery. This card was made back in 2016 so it’s not too old. The stamp set I used on this card was called Basket of Wishes. It had a few different images that you could “fill” the basket with. I water colored it with my ink pads and both an Aquapainter and Blender Pen on water color paper.
Isn’t Rich Razzleberry a great color? It’s bright and it makes me smile. Which of Stampin’ Up!’s colors make you smile? Leave me a comment and let me know!
Hello, my name is Cindy and I’m a Designer Paper Hoarder. Yes, I LOVE Designer Paper! Designer Paper adds so much to a card. It can add that little bit of color and design that you’re looking for on a project or it can be the focal point of your project.
When my church card group has to make a lot of cards for the office I usually go for a simple design like the one below. I layer some Designer Paper on matching cardstock, add it to the front of the card and I’m done!
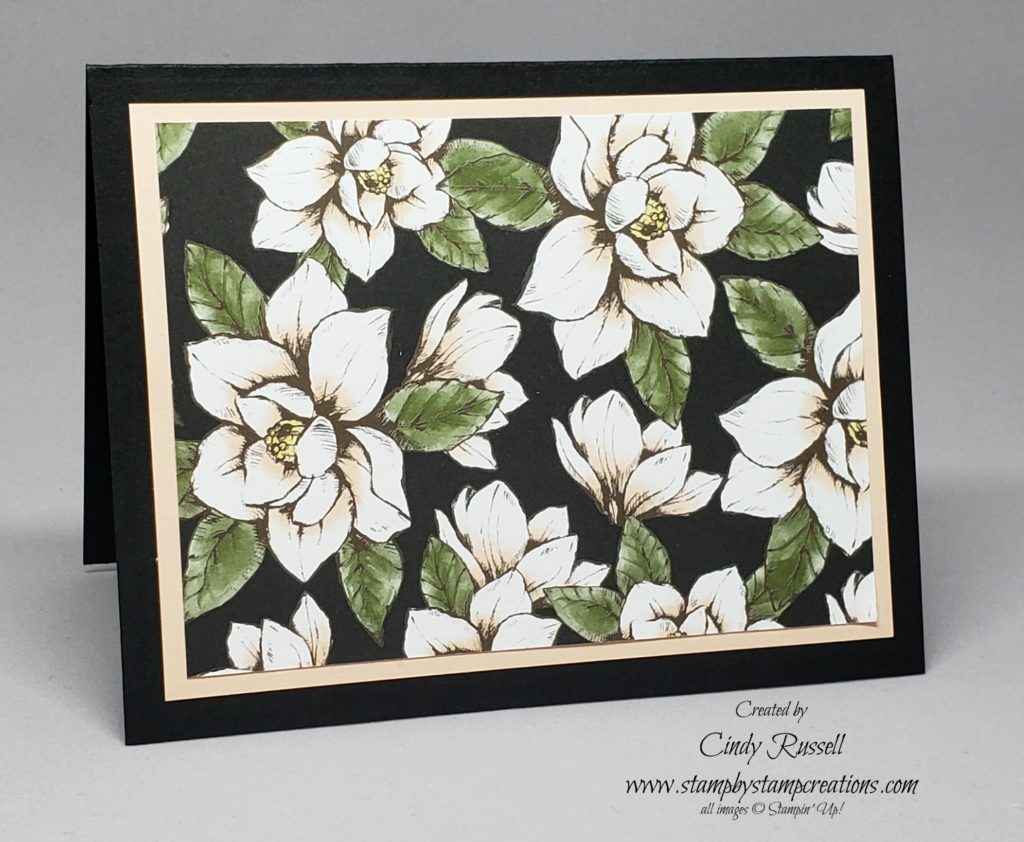
Simple Designer Paper Card
This simple card idea is perfect for any occasion so you can keep a stash on hand. Just add a message on the inside and you’re good to go! On this card I used the gorgeous Magnolia Lane Designer Series Paper, a layer of Petal Pink cardstock and a Basic Black card. Easy Peasy!
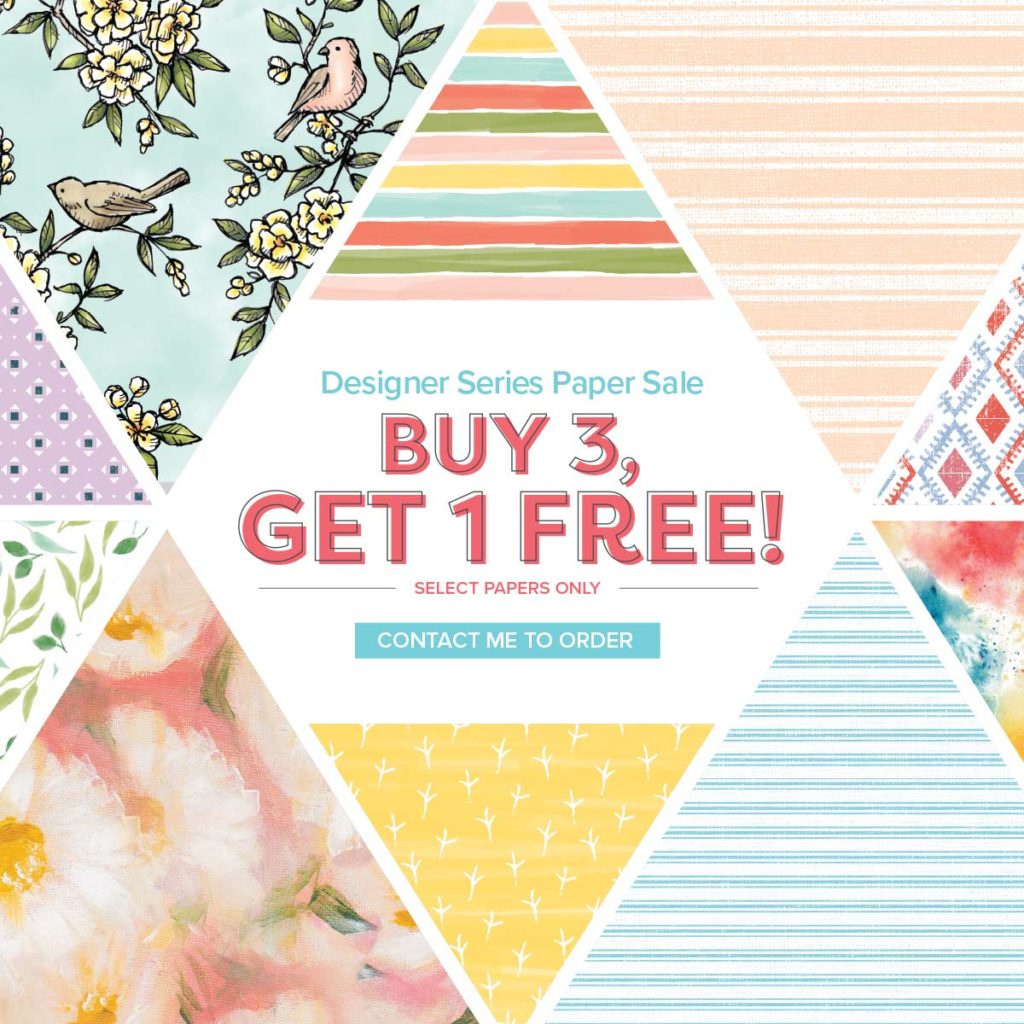
Did you know that Stampin’ Up! now has a sale on some of the designer series papers in the Annual Catalog? Yep! 10 different paper packages are included in the Buy 3, Get 1 Free sale! Woo Hoo!
Now is the time to stock up on your favorite Designer Series Papers! This fabulous sale only last until September 30th so get that order in today!
Do you have a Stamparatus (#146276 $49)? It’s a great tool. It really comes in handy when you’re making multiples of the same design. I was working on some swap cards and wanted to get the sentiment in the same spot on all of the cards so I got out my trusty Stamparatus. It worked perfectly!
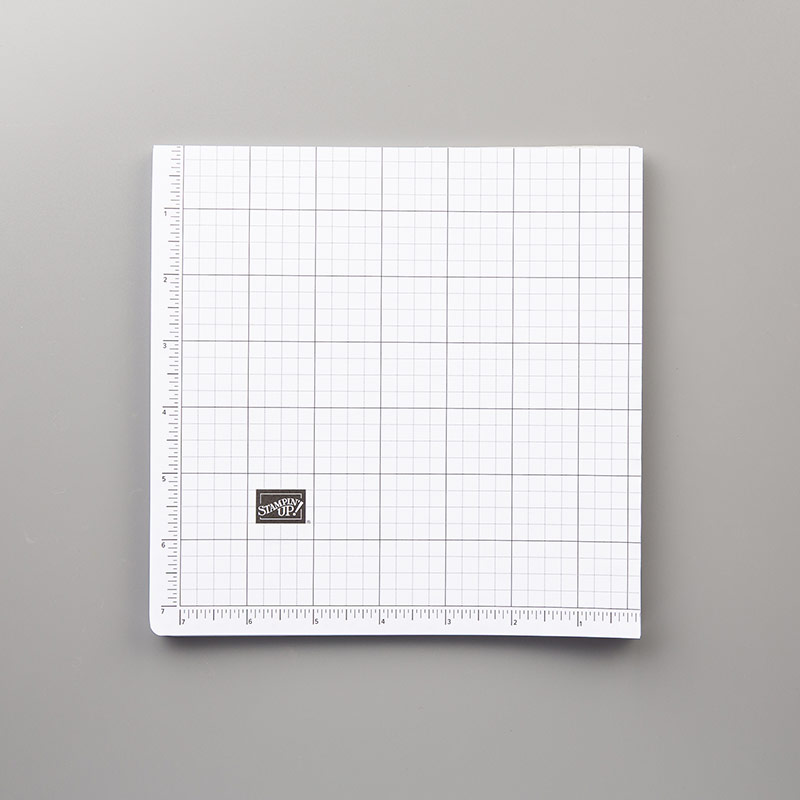
The Stamparatus comes with a foam mat that you use with photopolymer stamps since they’re not as thick as red rubber cling stamps. You can purchase replacements for this pad if need be but I just recently discovered that you can also purchase a Deluxe Foam Mat (#150866 $6). It’s similar to the foam mat that comes with the Stamparatus but it has a plastic grid laminated to the top of it so it looks just like the bottom of the Stamparatus with the laminated grid on it. I used it when I was making my swaps and it was great!
Deluxe Foam Mat for Stamparatus
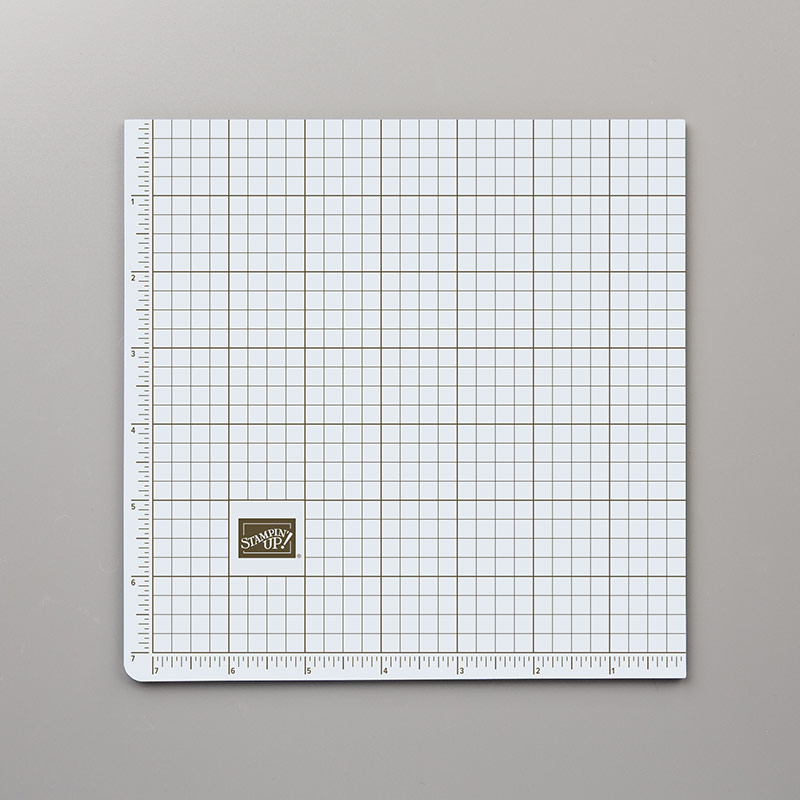
Grid marks are a definite plus when lining up images when making multiples of your projects. I really liked this new Deluxe Foam Mat but I do also like the Small Grid Paper (#149621 $6.50) that you can get for the Stamparatus. This Small Grid Paper fits the Stamparatus perfectly and you can mark on. This is especially helpful to me if I’m using it for a class so my guests can know exactly where to place their paper.
Small Grid Paper for Stamparatus
If you don’t own the amazing Stamparatus tool you should definitely consider it on your next purchase. If you do own the Stamparatus, you should consider purchasing either the Small Grid Paper or the Deluxe Foam Mat to use with it. Have a great day! Take care and Happy Stamping!
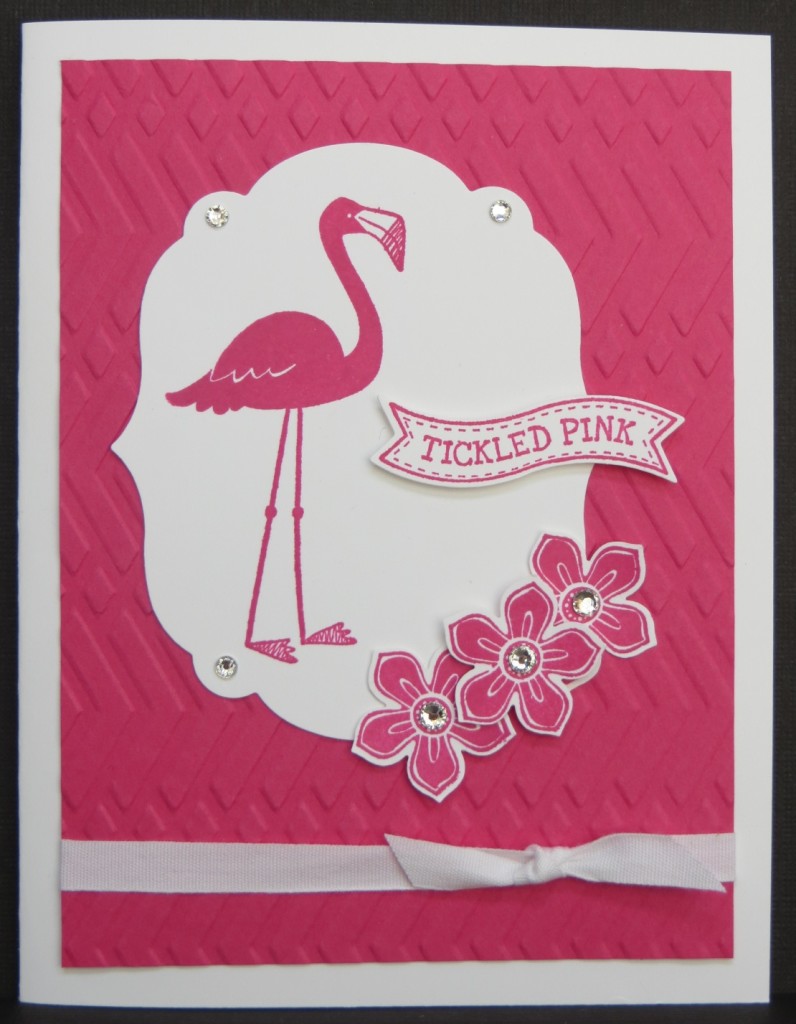
Who loves pink? Who loves flamingos? I do! I do! I was scrolling through old posts here on my blog trying to find something fun to share with you today. As soon as I saw this photo I knew it was the card to share for Throwback Thursday!
Can you guess when the original post for this card was? Many moons ago. I originally posted this card in June of 2014! Five years ago! Wow! I loved this stamp set. It was so fun and whimsical. That’s how I like my flamingos. Sure, I like realistic ones but the more whimsical, the better.
I went back to the original post to try and see what the name of the embossing folder was that I used on the background. Unfortunately I didn’t mention it in my post. It was a fun zig-zag kind of pattern. I did discover though that back in 2014 this Tickled Pink stamp set was a Ronald McDonald set meaning that for everyone of these stamp sets that Stampin’ Up! sold they would donate $3 to Ronald McDonald houses. They don’t support Ronald McDonald houses anymore but they do other philanthropic work.
Doesn’t this card make you smile? I hope so! Have a great day! Take care and Happy Throwback Thursday!
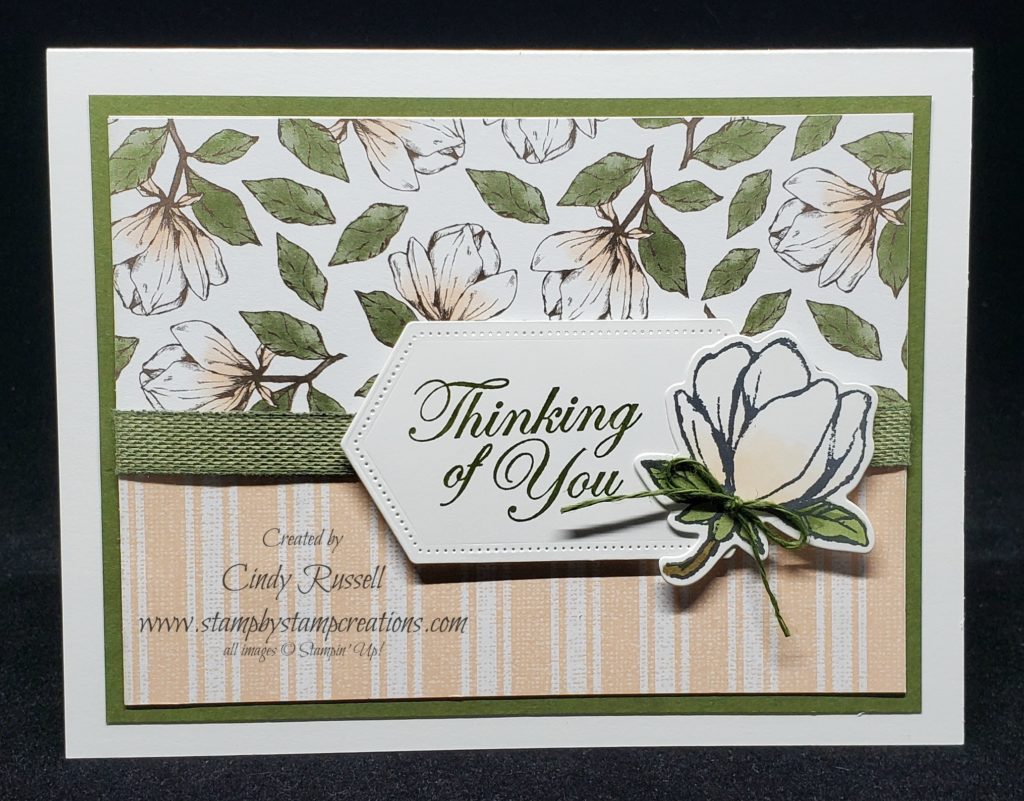
Good morning and Happy Monday! I had a relaxing weekend but got a lot done. How about you? It’s Make it Mine Monday and today I used the Magnolia Lane Suite.
I love everything about the Magnolia Lane Suite in Stampin’ Up!’s 2019-2020 Annual Catalog, especially the Magnolia Lane designer paper. The images are so beautiful! Everything on this card but the cardstock, ink and label die are part of the suite. You’ll notice that the ribbon is Mossy Meadow but when you see it in the catalog as part of the suite it’s linen colored. Hmmm….how did I do that? I colored it with my Mossy Meadow Stampin’ Blend marker! So easy! Coloring your ribbon with Stampin’ Blends is so much easier than try to color it with a sponge dauber/sponge and ink pad.
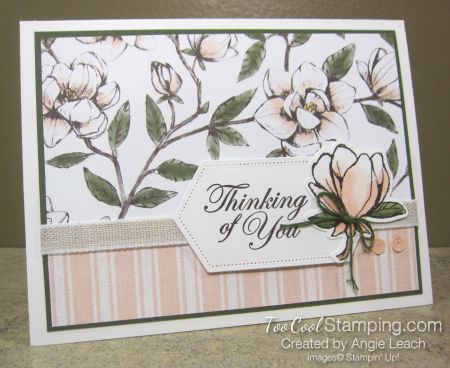
I CASEd (copy and share everything) from Angie Leach. The only things I really changed were some of the dimensions and the color of the ribbon. Now that I’m comparing them side by side I see that I changed the floral patterned paper too. It’s nice when someone does the basic planning for you and you just need to add your own touch. Thank you Angie for sharing your card.
I hope you all have a great day and a wonderful week! Take care and Happy Stamping!
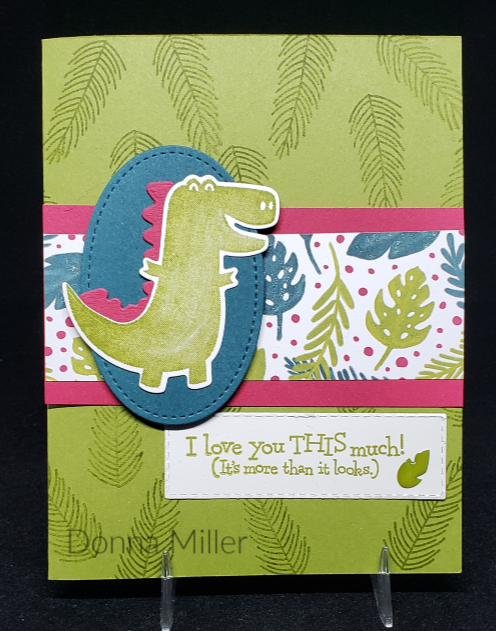
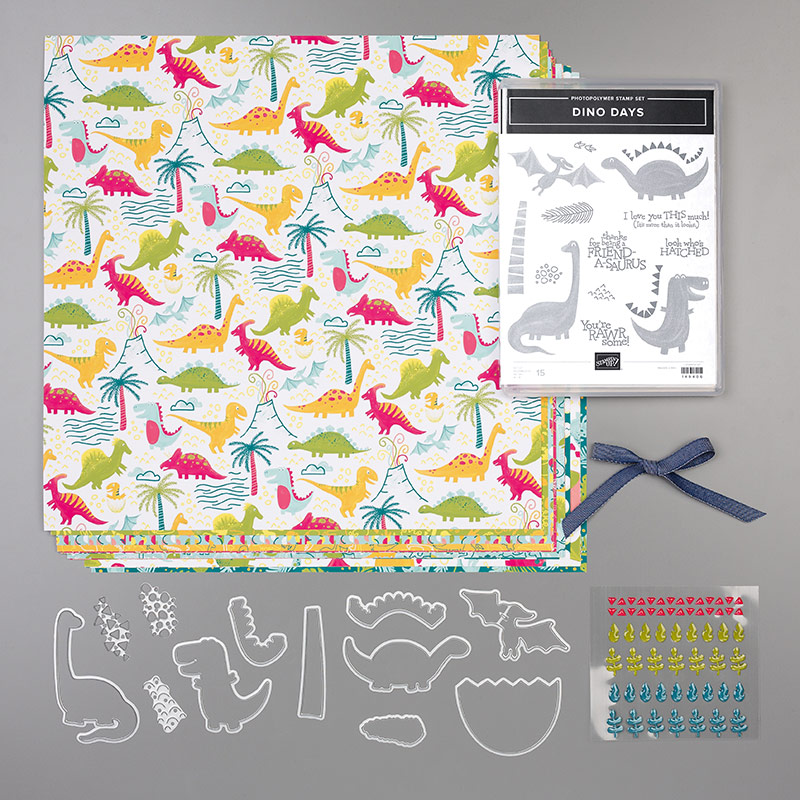
I must be getting old…oh, wait….I am! Ha! I don’t like cutsy, I don’t make cutsy cards. Ha, again! I LOVE this little dinosaur, especially with this sentiment! It’s adorable. And yes, I do have the entire Dinoroar Suite of products (pg. 99 in the Annual Catalog) Sheesh! I’m ruining my image confessing this all to you.
I’m all over cutsy stamp sets and such these days and I can’t seem to get enough of these dinosaurs. I didn’t make this card but next week I’ll share a card with you that I did make with the Dinoroar Suite of products.
I received this swap card at the event I attended in June. Isn’t it adorable? How can you not love the little sentiment and the little T-rex with the short arms?!
Almost every product in the Dinoroar Suite was used on this card except the ribbon: stamp set, dies, designer paper and enamel shapes. This card is TSC! Too stinkin’ cute!
I hope this card makes you head into the weekend with a big smile on your face! Have a great day! Take care and Happy Stamping!
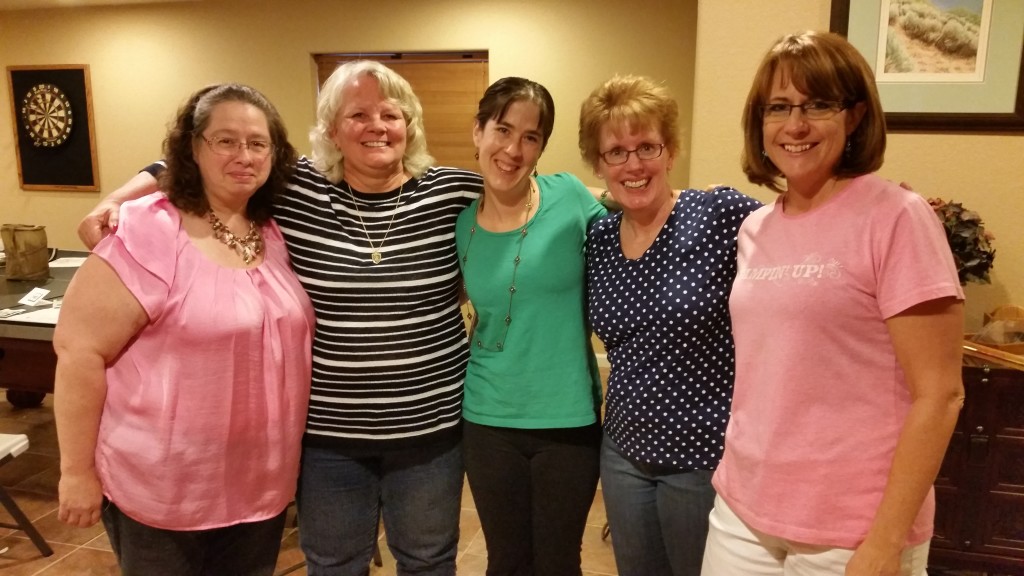
It’s Throwback Thursday! I was scrolling through the old photos that I’ve posted here on my blog and came across this beauty. This was taken almost 5 years ago exactly. Yikes!
Starting on the right you can see my upline Tara, me, my downline Andrea, her downline Janet and Janet’s downline Angela. What’s great is that we are all still demonstrators! Some of us are more involved than others but we’re still Stampin’ Up! Demonstrators.
That’s the great thing about being a demonstrator. You can be as involved as you like. You can hold classes and workshops, be a social media star or you can simply be in it for the discount on the fabulous products. The choice is yours!
If you’ve ever thought about earning a little extra income for the holidays or something special or maybe just saving a little on Stampin’ Up! products with the discount, NOW is definitely the time to give it a try. From now until August 31st you can choose $155 worth of product in your Starter Kit for only $99! Wow! That is a great deal!
Contact me if you’d like to learn more about being a Stampin’ Up! Demonstrator. I’d love to have you as a member of my team! Have a great day! Take care and Happy Stamping!
Card Swaps are a great way to get card ideas. A swap is an event where you design a card for the event and then make a certain number of those cards and trade your card for someone else’s card. As a demonstrator I like to participate in them whenever I can. Most of the time when there is an event with a bunch of demonstrators there is usually some type of swap. In June I attended a large event and participated in the organized swap. You can click here to see the card I made to swap.
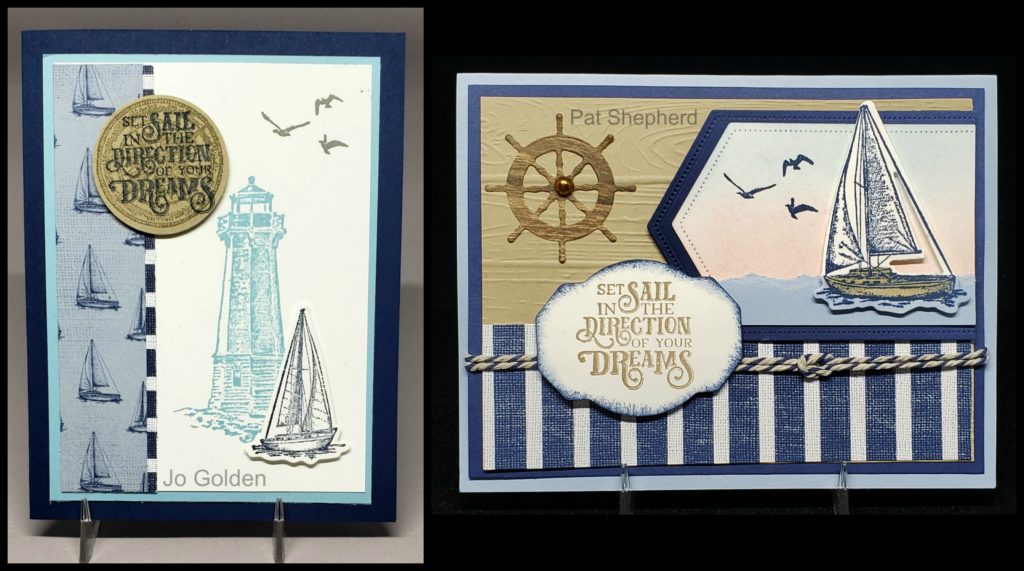
I received a lot of really nice cards. The Sailing Home stamp set was a very popular choice to use on swaps. Today I’d like to share a few of them with you.
Carol Davis
This card by Carol Davis was one of my favorites made using the Sailing Home stamp set and dies. Simple, yet elegant comes to mind when I look at it. I like how she used one of the Stitched Nested Label Dies as the background for the light house.
Sailing Home
Here are a couple of the other Sailing Home cards that I received that day. Aren’t they lovely? This stamp set and die set is so perfect for that masculine card you need to make. Which of these three cards is our favorite? Leave me a comment and let me know.
I just returned from a fabulous weekend in Portland, Oregon with the fabulous ladies you see with me in the photo above. From left to right you have my cousin’s daughter Julie who live here in Denver, my cousin’s daughter Janet from WI, my cousin Sally from Chicago, me, my sister Lori from MN, my neighbor-daughter Lauren from Denver, my daughter-in-law Margot from Los Angeles and my niece Allison from MN. As you can see we came from all over to gather for a fun weekend. My cousin Sally turned 65 last Monday and I turned 60 in July so we wanted to celebrate BIG!
We had a blast! This photo is taken from day one when we did a wine tasting tour in the Wilamette (sounds like dammit) Valley south of Portland. Fun, fun day! Lots of wine, lots of beautiful scenery and lots of fun together.
Willamette Wine Tasting
One of the wineries had fantastic views and you could sit in these adirnodack chairs and enjoy both the views and the wine. Can you see the wine glasses in the pictures? These wine glasses will fit an ENTIRE bottle of wine! Honest, it’s true. At one of the wineries they filled an empty wine bottle with water and poured it in the glass! It’s amazing!
Day 2 we toured the grounds of the Pittock Mansion that overlooks the Portland area and visited an amazing rose garden, had a fun lunch and then hung out at our Airbnb.
Now it’s time to recooperate and get back to some stamping! Have a great day! Take care and Happy Stamping!
What? You’ve not heard of the new 3D Embossing Folder Plate? Well, it’s not in the new Annual Catalog. It became available a few weeks after the new catalog launched.
When Stampin’ Up! partnered with Sizzix the embossing folders that gave you really deep impressions were called 3D Dynamic Textured Impressions Embossing Folders. (Another mouthful!). These embossing folders were a little less than 1/4″ thick.
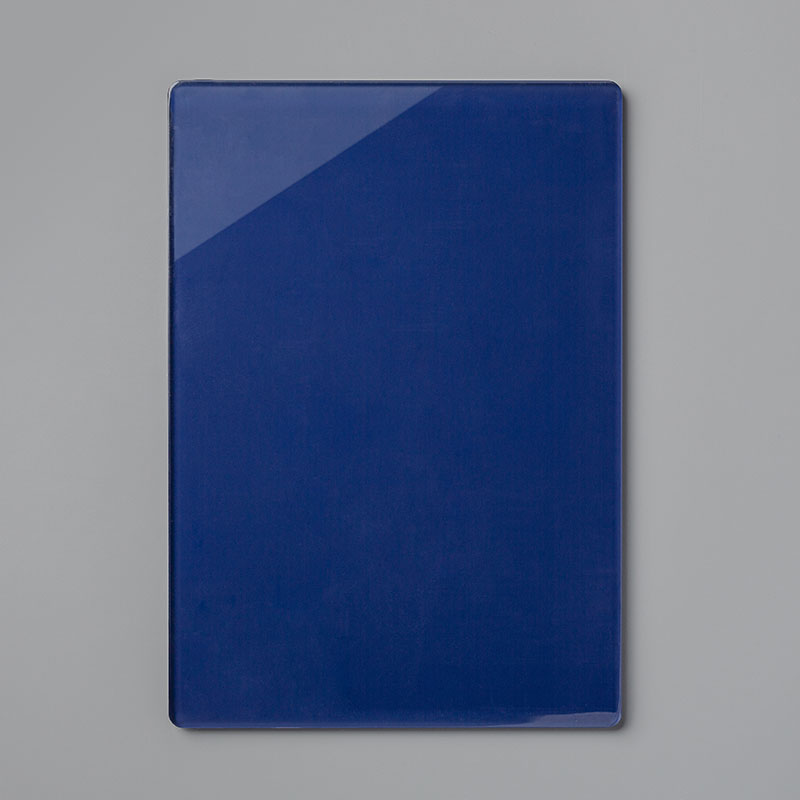
Now that Stampin’ Up! is on their own in the die-cutting/embossing market these deep impression embossing folders are simply called 3D Embossing Folders. Stampin’ Up!’s 3D folders aren’t quite as thick as the Sizzix ones. They are only a little over 1/8″ thick. This means that when you try to run them through your die-cutting machine the “sandwhich” of folder and plates that you used to use isn’t quite thick enough. This is where the new 3D Embossing Folder Plate comes into play.
3D Embossing Folder Plate #149658 $10
This is just like the standard cutting pads that you used with the Big Shot…except it’s a little thicker…and it’s blue! It’s great that it’s a different color so that you grab the right plate when embossing!
Even though all of the embossing folders that carried over from last years Annual Catalog are listed in the new Annual Catalog not all of them are available as Stampin’ Up! is still converting them to the new thickness. The folders that aren’t available yet are the Corrugated 3D Embossing Folder, the Layered Leaves 3D Embossing Folder and the Tufted 3D Embossing Folder.
So if you’re purchasing any 3D Embossing Folders from the 2019-2020 Annual Catalog you’re going to want to invest in the new 3D Embossing Folder Plate. The item number is #149658 and it’s $10.