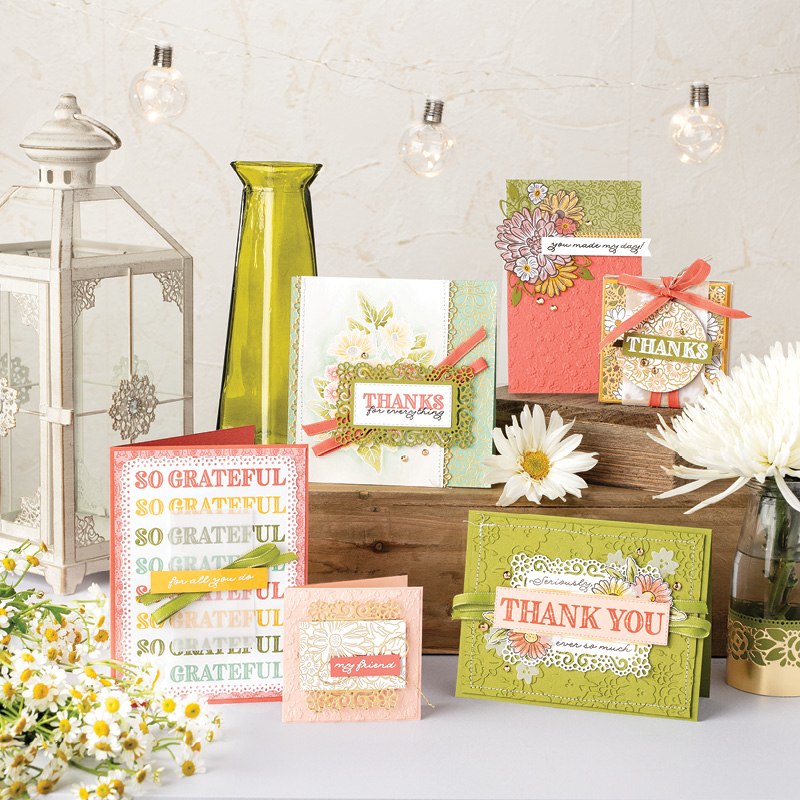
It’s new! It’s beautiful! And the Ornate Garden Suite of products can be yours! What better way to make you smile than a whole suite of flowers?!
Ornate Garden Suite
This suite of products contains 2 bundles (each containing a stamp set and a set of dies), a floral embossing folder, a ribbon combo pack and GORGEOUS designer series paper! These products can be purchased separately or all together in a suite.
The Ornate Garden Suite
Head on over to my online store and see all of the products included in this suite. I think you’re going to like them! I can’t wait to start playing with these products and sharing them with you!
Have a great day! Take care, happy stamping and stay healthy!
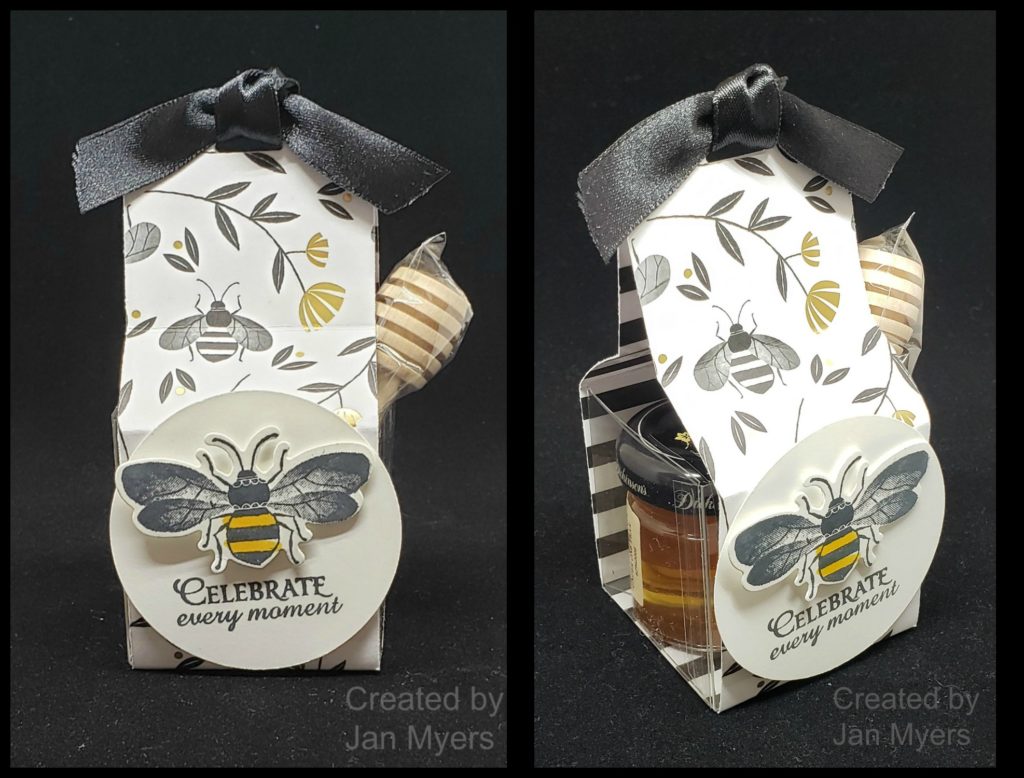
Life is crazy, that’s for sure. I hope you and your loved ones are all doing well. How about a little sweetness on this Monday morning? This little treat is one that my friend Jan designed for “The Stamp Camp That Didn’t Happen”.
How clever is this with the little jar of honey and the honey dipper stick? I think it’s adorable! This cute Golden Honey designer paper was a Sale-a-bration choice but unfortunately it’s no longer available.
Instead of designing a box that would hold the honey and the honey dipper stick, Jan started her project with a Clear Tiny Treat Box (#141699 $7.50/16). She just snipped of the lid before assembling it. She then cut a 2″ x 12″ strip of designer paper and scored it on the long edge at 2″, 3″, 5″, 7″, 9″ and 10″. Lay the paper on the table with the side of the paper that you want showing on the outside towards the table. Now the inside score marks (3″, 5″, 7″ and 9″) get folded in a valley fold (V) to make the folds that go around the box and the two outside score marks (2″, 10″) get folded the opposite way in a mountain fold to help make the straight piece on top. This is a pretty easy project and would be perfect for anything that you can fit in a little 2″ x 2″ box.
My friend Jan is really good at coming up with all of these fun little treat packaging for our stamp camps. I always look forward to seeing what she comes up with for us.
I hope you enjoyed your little taste of sweetest with this little Honey Treat. Have a great day. Take care, happy stamping and stay healthy!
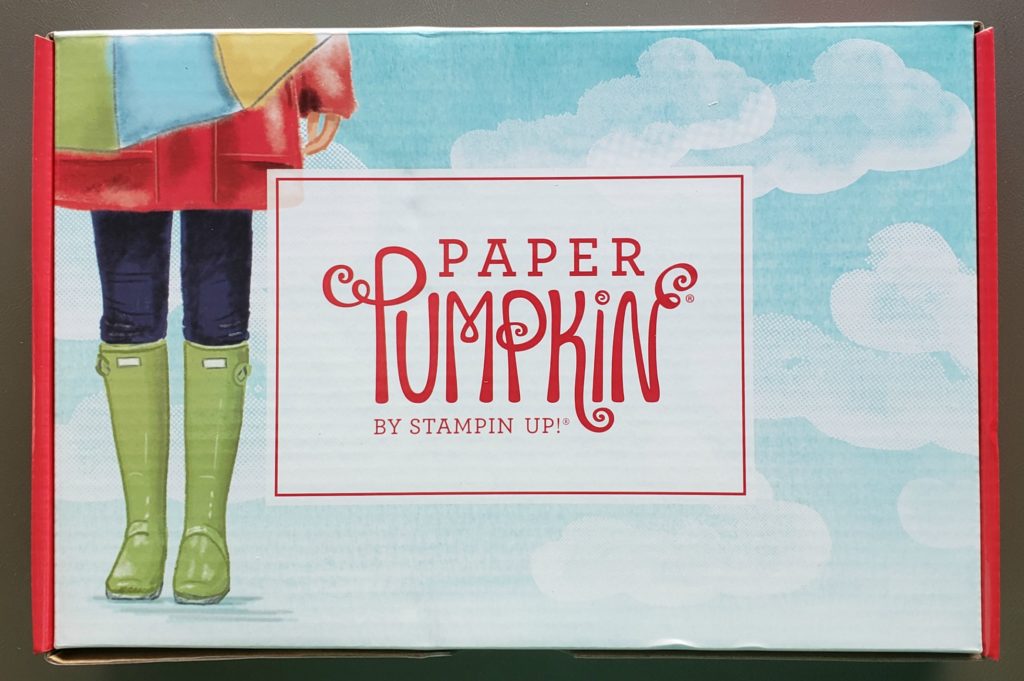
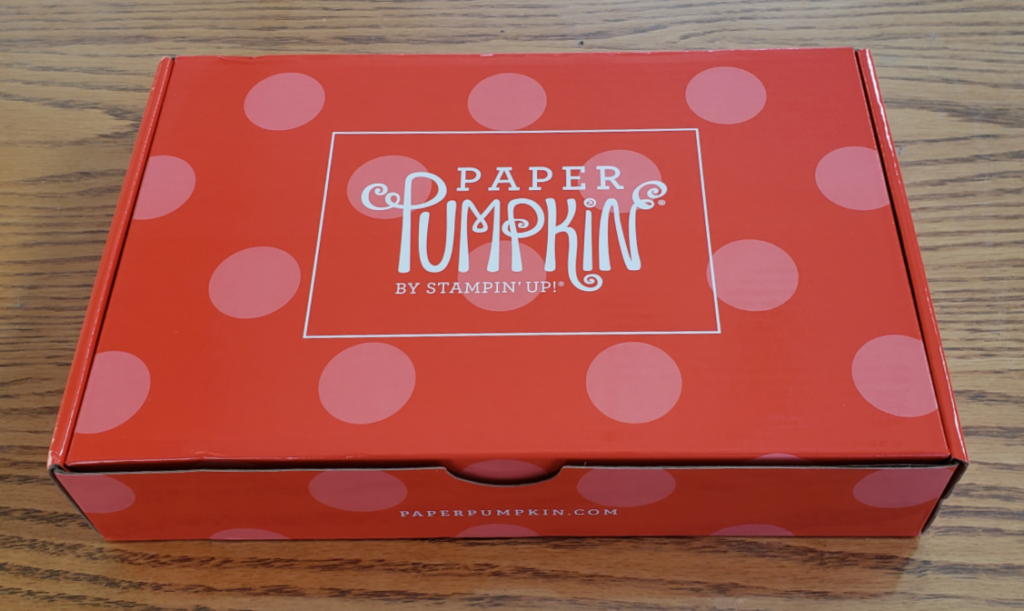
Oh, my gosh! The March Paper Pumpkin Kit is fabulous! I’m in love! I received my March Paper Pumpkin kit this past weekend and I finally got around to playing with it yesterday. I’ve just been so busy lately what with having to social distance and stay in my house. You’d think that with at least 8362 things I could be doing I might actually do something! Ha!
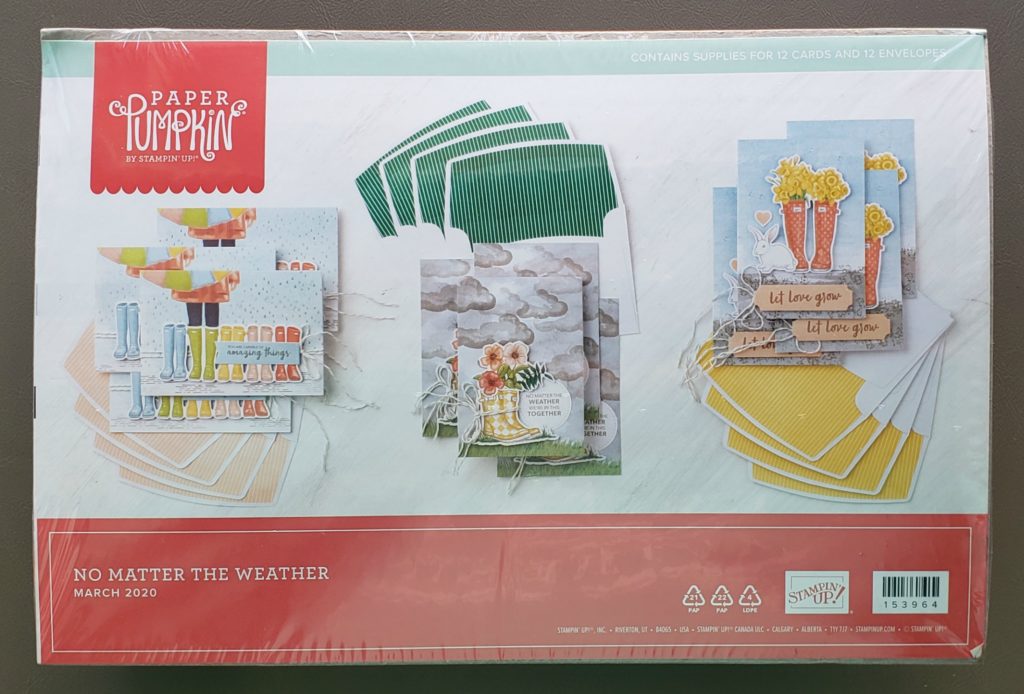
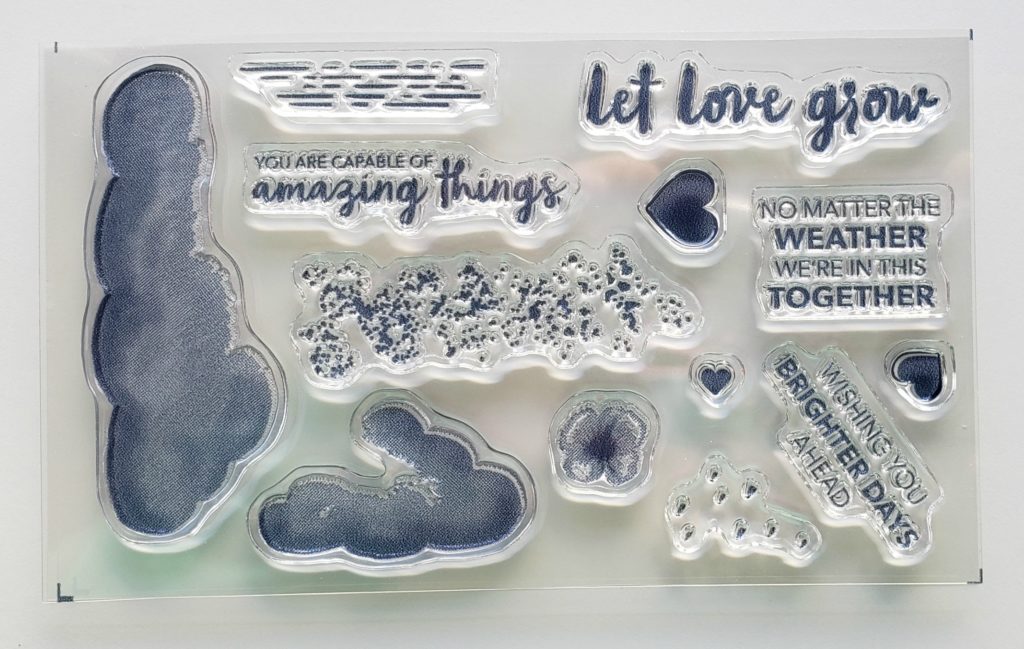
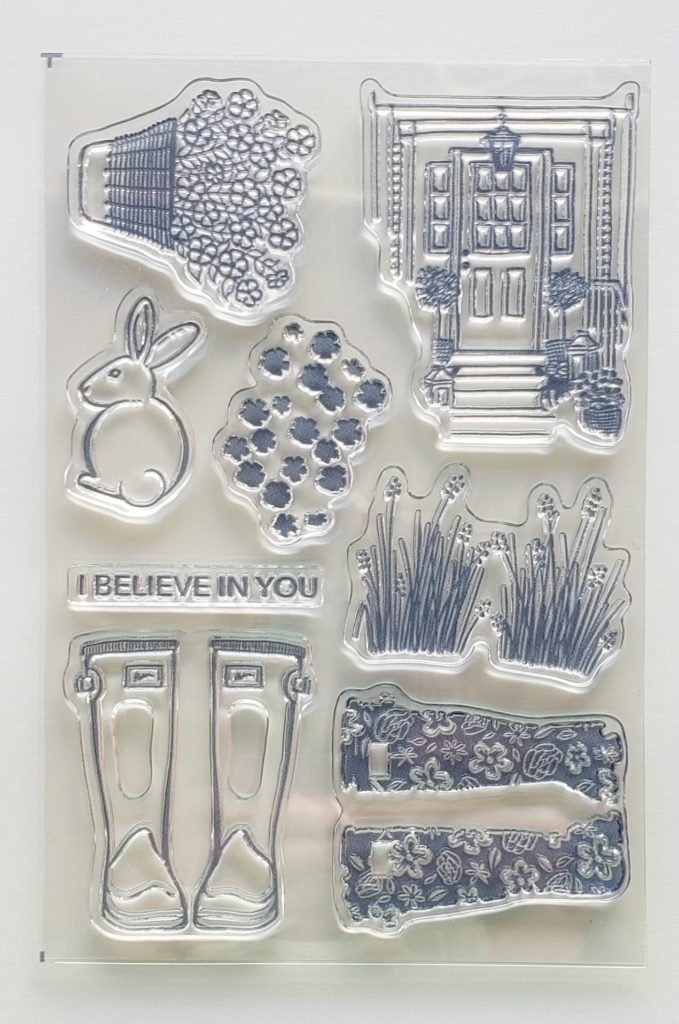
Back to this amazing kit. Just look at that adorable box! Don’t you love the rain boots? Rain boots are definitely the theme for the kit. Below you can see the directions sheet which shows the three different cards you can make with the kit.
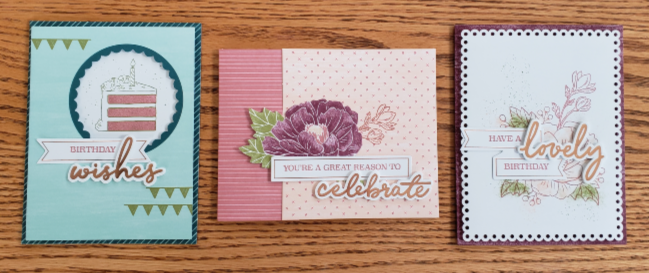
One of the sentiments included in the stamp set is perfect during these trying times: “No matter the weather we’re in this together”. I decided to use this sentiment on all of the cards. I’m planning on sending them out to my friends and family that I can’t see right now. Below you can see my cards. I kept them a little simpler than the samples but that’s the beauty of the kits. You can make them how ever you’d like.
The two cards without sentiments on the front have the sentiment on the inside. I’m really excited about sending these out. I hope they make someone’s day. These cards are note card size. I thought about making them into a full size card but the I fell into the cute, lined envelopes! Ha!
Did you know that as a Paper Pumpkin subscriber you can order refill kits for the monthly kits? I am definitely order at least one refill kit. I’m in love with these cards!
March is Paper Pumpkin’s birthday month. To celebrate Paper Pumpkin included an extra full-size stamp set in the kit that coordinates. Check it out in the photo below. I can’t wait to play with it! I’ve seen some great samples made from it online already. I’ll definitely keep this set in my stash.
Now that I’ve finished with the March Paper Pumpkin kit I can hardly wait for the April kit. It’s all about family and relationships and the kit will contain 8 full size cards for you to make. If you want to subscribe to Paper Pumpkin just click here. Or, if you’d like to purchase a prepaid subscription and earn a Sale-a-bration item or two during this last week of Sale-a-bration just head on over to my online store.
Have a great day! Take care, happy stamping and stay healthy!
Wow! This has sure been a crazy couple of weeks. A little over a week ago my SASSY Stampers & Friends were going to hold a Stamp Camp for almost 48 people at my church.
Needless to say, we had to cancel the event. I was a little stressed out for a few days and now I’m almost lethargic. Not really, I just can’t seem to get motivated. As I told my husband, “I have 8362 things I could be doing but I don’t feel like doing any of them”. It pretty much sums up my days.
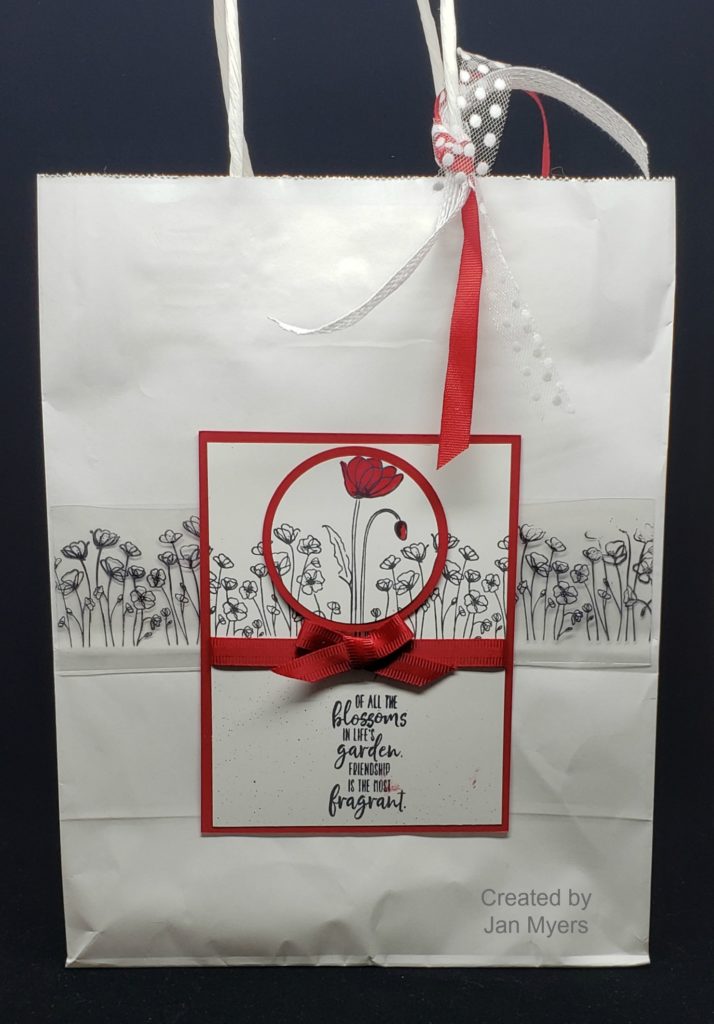
But enough about me. I need to share the projects from the Stamp Camp that didn’t happen. The first project I want to share with you is “the bag”. For our stamp camps we like to give the participants a decorated bag to put all of their completed projects in. It also holds the little treats we’ve made for them. The fun thing about these bags is that you can usually take off part of the decoration and make it into a card!
Stamp Camp Bag
Isn’t it pretty? Simple, yet elegant. My friend Jan designed all of the little gifts and the bag. To make sure everything lined up she made a couple of templates. She had a template for the acetate so that the rows of poppies lined up. The poppies were stamped with StazOn on the acetate.
Jan then had a template for the stamped Whisper White cardstock. The cardstock was lined up on the template so that you knew where to stamp the large poppy, then the rows of poppies. The flowers were stamped with Memento ink so the large flower could be colored with the Real Red Stampin’ Blend Marker.
Once the poppies were stamped we punched out the large flower with the 2 1/4″ Circle Punch and then adhered that to a Real Red 2 1/2″ circle and popped up with Stampin’ Dimensionals.
The cardstock focal point is the exact size of a card front. Remove it from the bag and adhere it to a card!
Stay tuned this week to see some of the fun projects we put in the bag! 🙂 Have a great day! Take care and Happy Stamping! Stay Healthy!
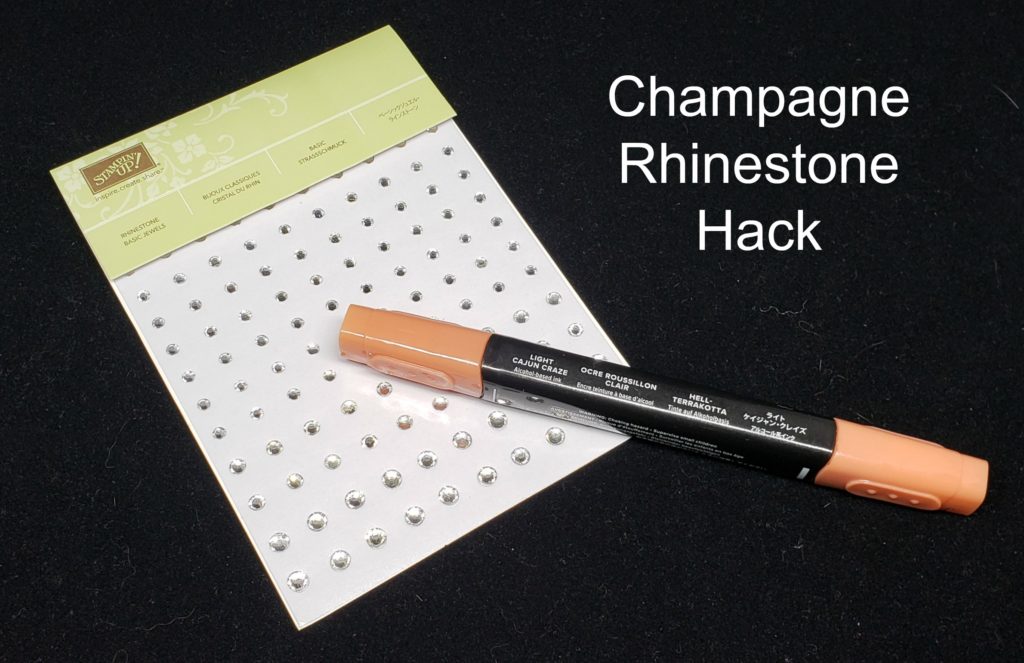
The Champagne Rhinestones in Stampin’ Up!’s 2020 Mini Catalog are gorgeous and they look fantastic on projects. However…..Stampin’ Up! is having a hard time getting them restocked due to the darn Corona virus. Never fear though…..
Your favorite demonstrator has a hack for you! I wanted to use them on a project for my class last month and couldn’t order them. Of course, I had already designed the card and didn’t want to design another one so I got out my Stampin’ Blends markers and tried to come up with the same color.
The Petal Pink Stampin’ Blends were too light. I tried adding other colors to it but it just didn’t work. I finally got out my Light Cajun Craze marker…and it was perfect! Well, as perfect as you can get without having the real thing.
I’m telling you…it really works! You will definitely want to give this a try! It’s amazing what you can do with the Stampin’ Blend markers. They color ribbon, rhinestones…even paper! Ha!
I hope you’ve enjoyed today’s tip! Have a great day! Take care and Happy Stamping!
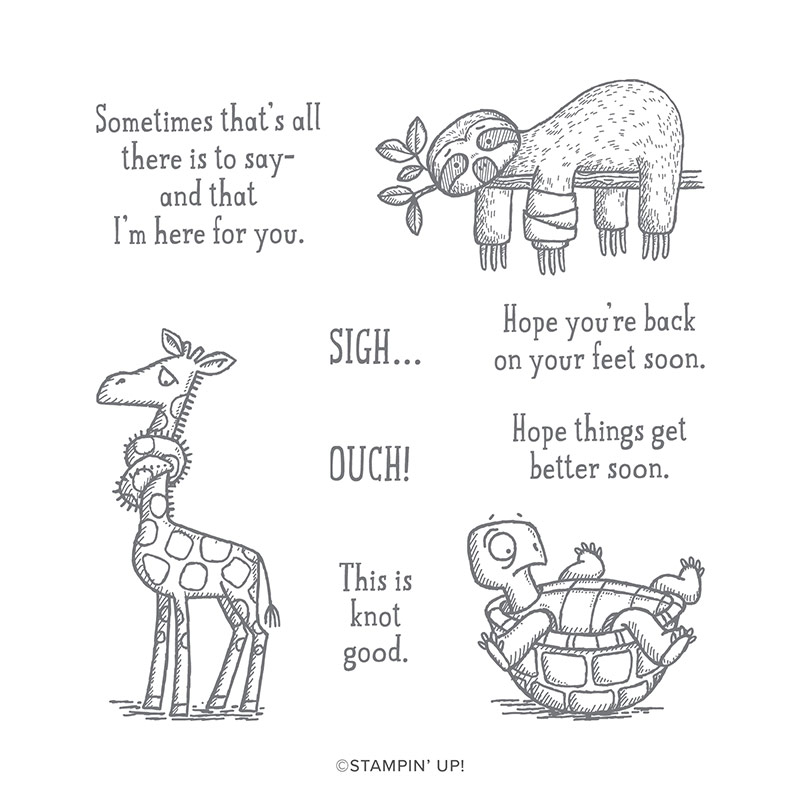
The Back on Your Feet stamp set is absolutely adorable and perfect to send to someone who’s had an accident, is ill or is just going through a rough time. If nothing else, the images of the critters in the stamp set will make you smile.
Back On Your Feet
I mean really, what’s not to love about the injured sloth, the knotted neck giraffe or the poor little turtle stuck on his back?! This is definitely a stamp set I will hold on to for awhile. Which critter is your favorite?
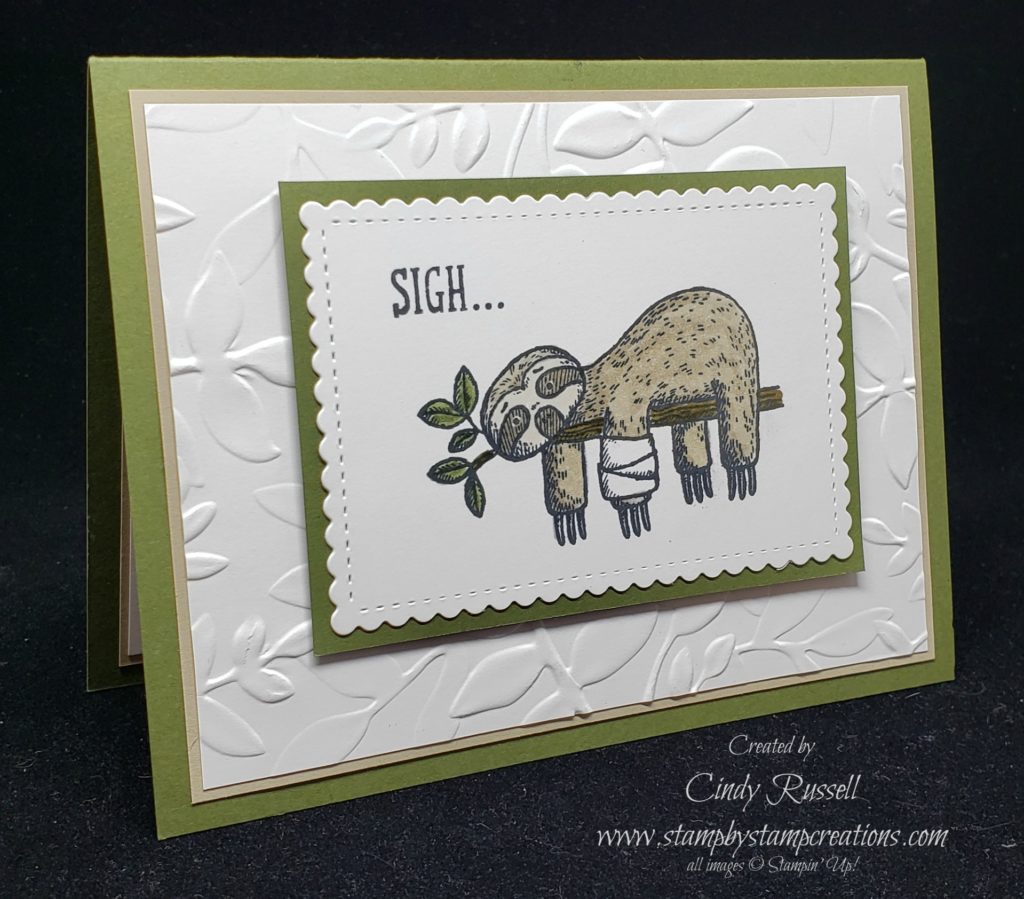
I knew I wanted to use this stamp set in a class and I decided on the adorable sloth laying on a tree branch. For the sentiments I chose “Sigh…Sometimes that’s all there is to say–and that I’m here for you”. Even though the little sloth has a cast on his arm I think you could use this card for someone going through a rough time or is ill.
I stamped the sloth with Memento Tuxedo Black ink and colored him in with my Stampin’ Blend markers. I then die cut the cardstock with my new favorite dies, the Stitched So Sweetly Dies. I love the new scalloped, stitched rectangle dies in this set of dies! They set off the focal point of your card perfectly! The background is embossed with the Layered Leaves 3D Embossing Folder. There’s nothing too fancy about this card but I do think it will make the recipient smile…unless of course they despise sloths!
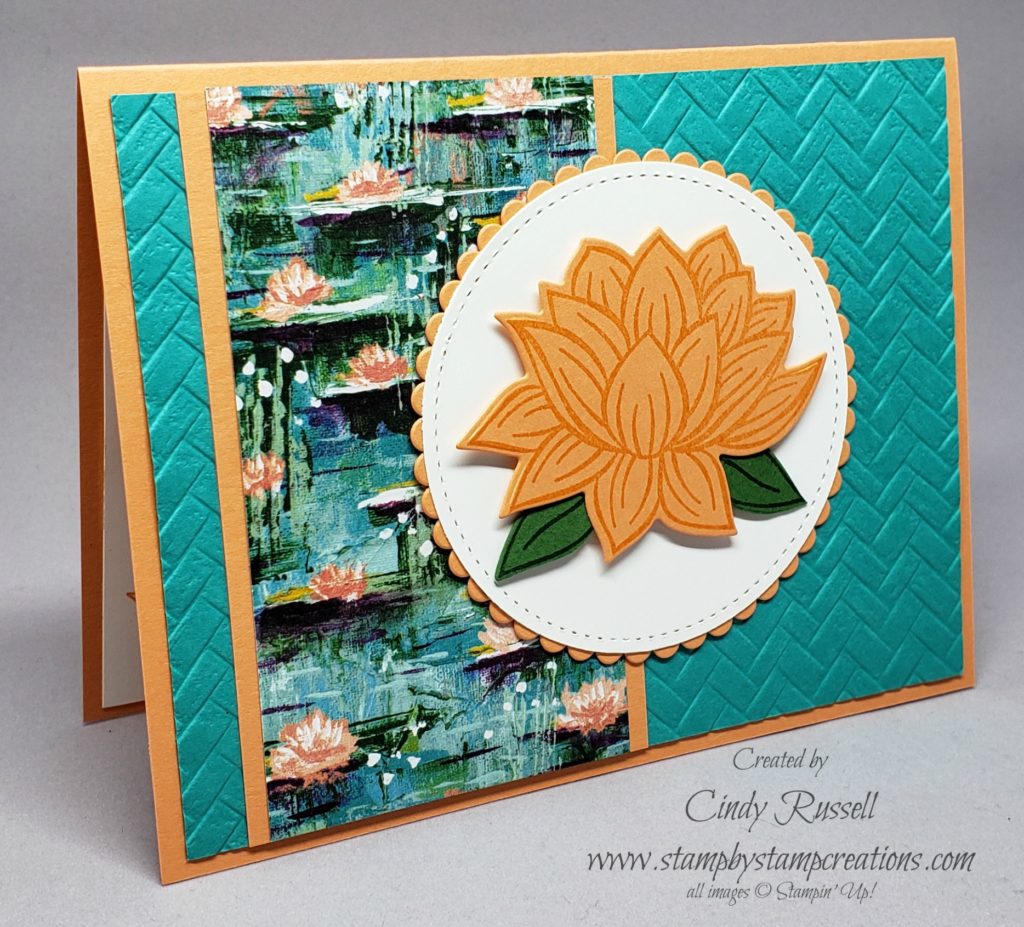
How can anyone not LOVE Sale-a-bration?! FREE products! This card was made using 3, YES 3!, Sale-a-bration products! What are they? They are the Lovely Lily Pad stamp set (free with a $50 purchase), the COORDINATING Lily Pad dies (free with a $100 purchase) and the gorgeous Lily Impressions Designer Series Paper (free with a $50).
After the adorable The Gang’s All Meer stamp set these lily products were my next Sale-a-bration choices. Beautiful! If you go on Pinterest and search for Lovely Lily Pad you will find TONS of projects made with these products. I do have to admit I did CASE this card from Pinterest. I used Bonnie O’Neill’s card and basically just changed the size of the circles and put my lily inside the circle.
I really didn’t change too much on Bonnie’s card. Why mess with a good thing, right?
You can see all of the products I used below this post. Did you know that if you click on a product it will take you directly to my online store? Pretty neat, huh? 🙂
I need to work on some other samples using these products. My group’s stamp camp is next week and I’m using these products on my project. Now I need samples so the guests can see what else you can do with the products. I guess I better get busy…
Sale-a-bration is over on March 31st and these products will be gone for good. Go and start making that wish list and place that order! Have a great day! Take care and Happy Stamping!
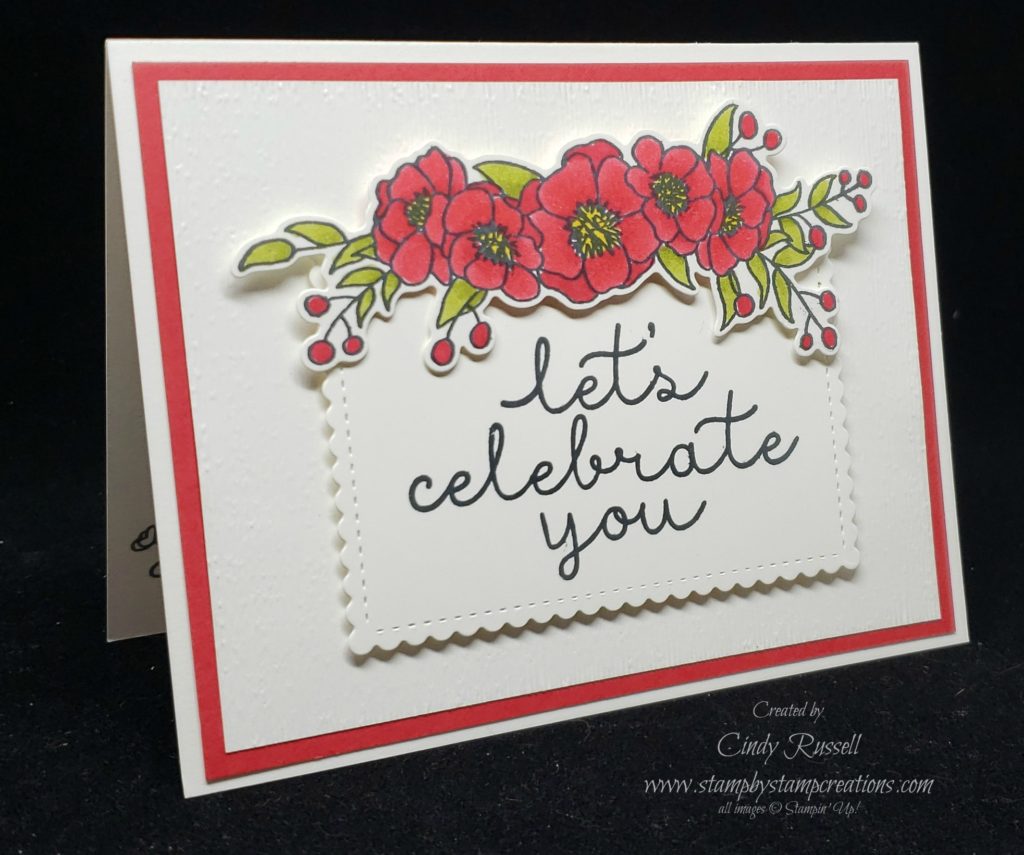
Not only is Bloom & grow a good name for a Stamp Set it’s also a good mantra for life! Be your best and always strive to improve. None of us are perfect and there is always something we can do better if we try. I do know this for a fact…. 🙂
Bloom & Grow
Let’s get back to the Bloom & Grow stamp set though. It’s a beautiful stamp set with lovely sentiments AND coordinating dies! This stamp set can be found in the main catalog and it’s actually been around a year or two.
I wanted to design a card that wasn’t too difficult since it’s for my classes this week. This card fits the bill! A few layers (ok…I could maybe have cut back a litte here…), a little coloring and a little die-cutting. That’s it!
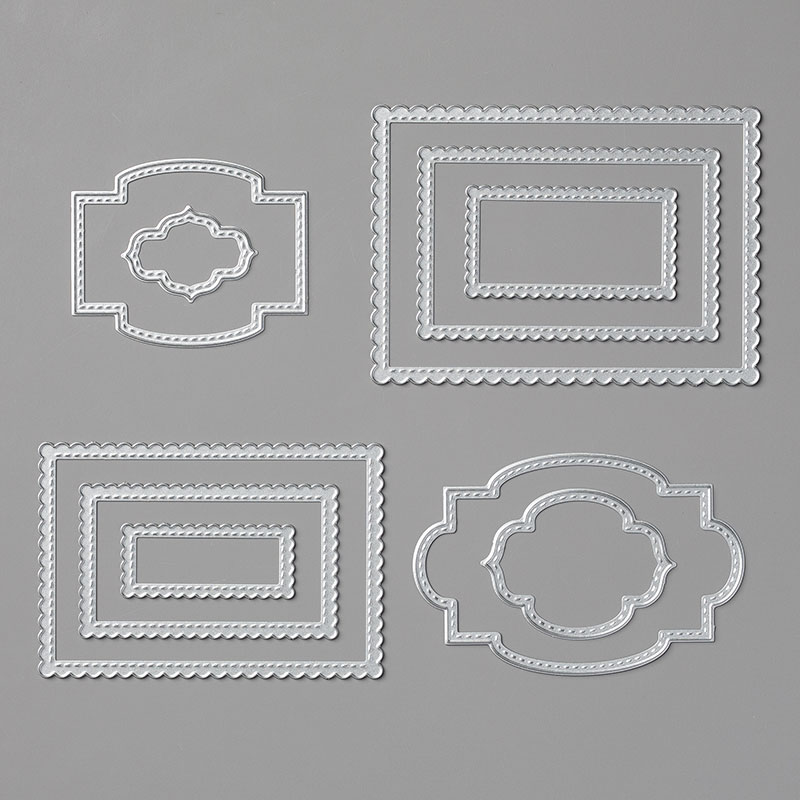
I am loving the Stitched So Sweetly dies! This set of dies has these cute scalloped, stitched rectangles as well as fun stitched labels that layer beautifully! I actually used these dies on a number of the cards we’re making in class this week! These dies are one of my favorite purchases from the new Mini Catalog.
Stitched So Sweetly Dies #151690 $32
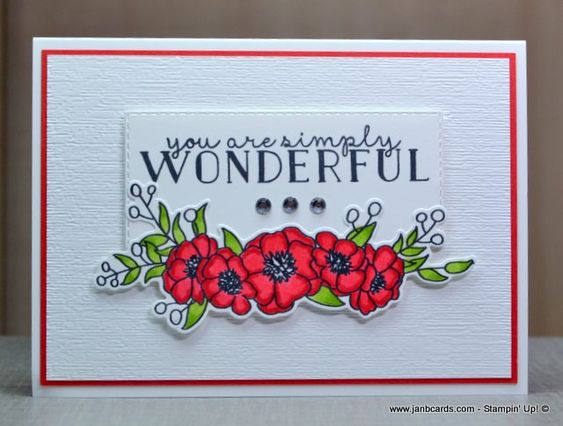
I did get the idea for this card online. I did change it up a little bit as you can see from the original card below:
OK….I didn’t change much on it did I? I switched the flowers from the bottom to the top, left off the rhinestones and had a wider border. But that’s why we share our creations…to inspire others and give them ideas to use! Thank you Jan for sharing your card and inspiring me!
When you see my Make It Mine Monday creations I hope you all see how easy it is to either recreate someone else’s design or to switch a few things up and make it your own!
Woo Hoo! Look what came in the mail on Saturday! My February Paper Pumpkin Kit! Now that I’ve challenged myself to actually put my Paper Pumpkin kits together once I receive them in the mail I’m getting pretty excited about them!
February 2020 Paper Pumpkin Kit
Here is the direction sheet with the color photograph of the completed projects. Nine birthday cards! Who doesn’t need birthday cards?! They were all fun and easy to put together. A little stamping, a few Stampin’ Dimensionals and a few glue dots was all it took for these fun cards.
My finished cards
My favorite part of these cards, which you can’t really tell from the photos, was the blush pink foil outlines on the banners and the large words of each card. It really adds that special touch. And face it, you can’t go wrong with pink. Ha!
Have you tried Paper Pumpkin recently? I’m loving it! We demonstrators are now getting little teasers about the next month’s kits. Yes, most of the time we now know ahead of time if the kit will contain cards or 3D projects. We also get a hint of the theme of the kit. For example, we knew that this kit contained birthday cards.
So what’s coming next month? Well….it’s going to be special because March is Paper Pumpkin’s birthday. Paper Pumpkin has been around for 7 years! Wow! As a special thank you, the March kit will contain a FREE stamp set! No, not just the one that comes with the kit, an extra FREE stamp set! Wow!
March 2020 Paper Pumpkin
Here’s your teaser for the March Paper Pumpkin kit. The name of the kit is “No Matter the Weather”. Think Spring, daffodils, umbrellas, rubber boots….and a FREE stamp set! Check out those fun colors on the specially designed box! There’s still time to get in on the March Paper Pumpkin kit. Just sign up today!
There are a couple different ways to sign up for Paper Pumpkin. The first way is to simply head on over to the Paper Pumpkin website and sign up with your credit card. Your card will be charged $22 (includes shipping) each month just before the kit is sent. You can put a hold on your account at any time or cancel if you aren’t enjoying the kits.
The second way to sign up for Paper Pumpkin is to purchase a prepaid subscription. You can purchase a 1 month ($21), 3 month ($63), 6 month ($114) or 12 month ($220) subscription. The nice thing about a prepaid subscription is that you can add other Stampin’ Up! products to your order when you pay for your subscription. And guess what? You can earn Stampin’ Rewards or Sale-a-bration items with your prepaid subscriptions with qualifying orders! To purchase your prepaid subscription just head on over to my online store!
If you have never subscribed to Paper Pumpkin now is the perfect time to give it a try. If you are a past Paper Pumpkin subscriber now is the perfect time to give it another try. Seriously, these kits just keep getting better and better!
Be sure to contact me if you have any questions on Paper Pumpkin! I’d love for you to give it a try. Have a great day! Take care and Happy Stamping!
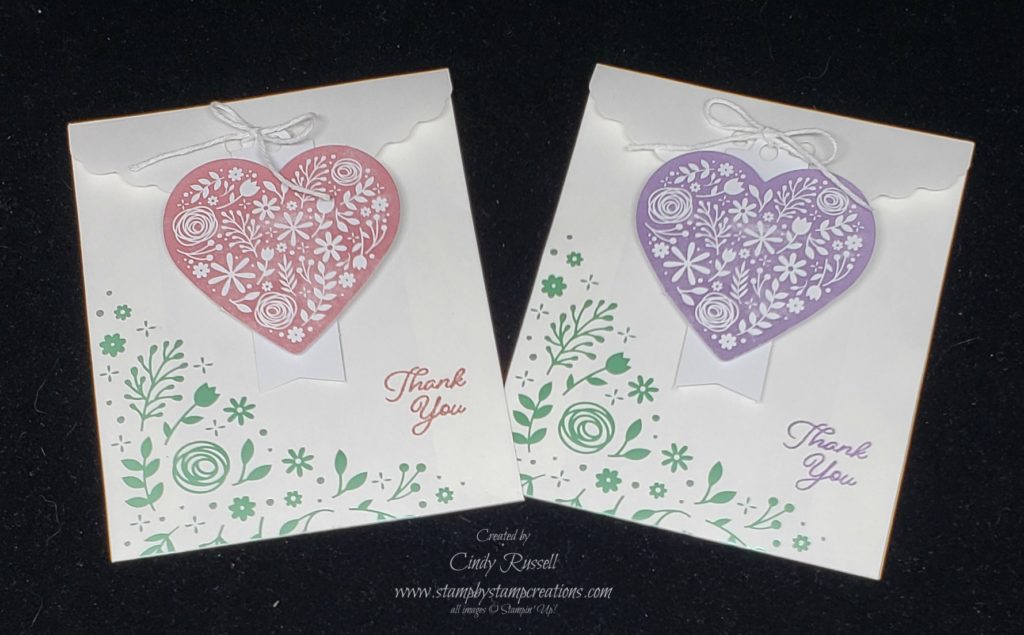
A few weeks ago I shared with you my January Paper Pumpkin Kit and all of the projects I made with it. The kit included small 3″ x 3″ cards as well as some Valentine treat bags. When I started making my projects I repurposed the little treat bags as I didn’t think I had anyone to give them to…or so I thought. Then it dawned on me that I could put a “thank you” on them instead of a valentine saying. That is exactly what I did. I ended up with about 10 or so.
Paper Pumpkin Treat Bags
Aren’t they cute? I made them exactly as the directions said. I am still in the mountains at our time-share and I brought them with me. I’ve been handing them out to anyone who has been helpful to me: waiters & waitresses, shuttle drivers, desk help here at the resort and even maintenance works! Everyone has been pleasantly surprised and grateful that someone thought enough of them to give them a little something extra.
Random acts of kindness really do go a long way. I really need to do something like this more often in my life…not just when I make cute treat bags with my Paper Pumpkin kit.
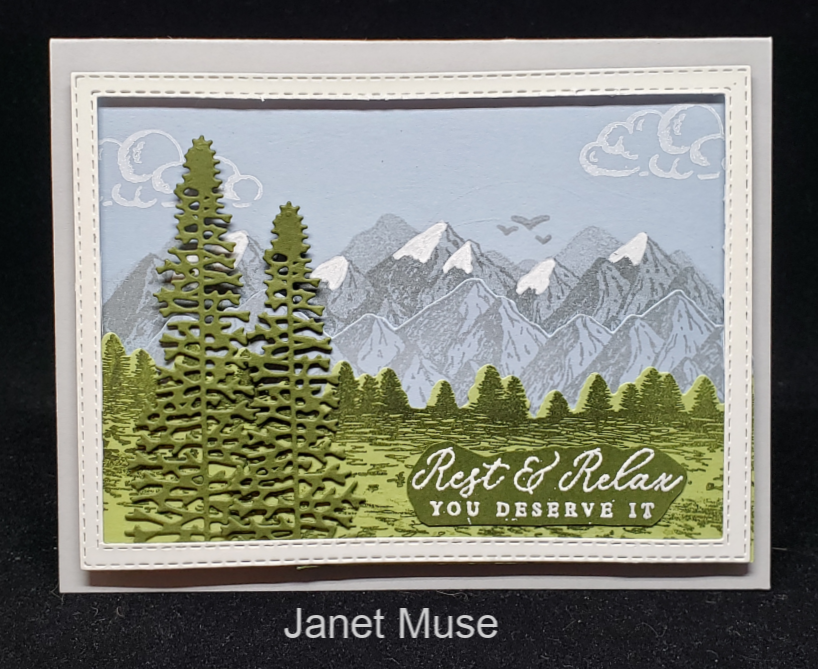
We finally made it up into the mountains a day after we had planned due to a 24 hr snow storm. We are enjoying ourselves as usual. Rest, relaxation, too much food and skiing for some of us.
When you’re in the mountains you need to post a mountain card! This gorgeous card was made by my friend and fellow demonstrator Janet Muse. A lot of work went into this card with all of the different layers. Janet used the Mountain Air stamp set and the coordinating Majestic Mountain Dies.
The Mountain Air stamp set is one of the new Reversibles stamp. These type of stamps are fun to use. The stamps have an image on each side of the stamp. One side is usually the outline/intricate image and the other side is a solid image that will fill in the first image. Of course each side can be used separately if desired. Check out the video below for more information on this stamp set and the coordinating dies.
I haven’t played with these fun products yet but they will probably be on my next order! How about you?
It’s that time of year when we have our time share week in Breckenridge, CO. We love it up there and look forward to our time in the mountains. However…Mother Nature is not cooperating. It’s absolutely beautiful out this morning…if you like SNOW! Down here in the Denver area we have probably close to 6″ on the ground and it’s still snowing. In the mountains they could get close to 3 FEET and many of the roads are closed.
It’s looking like our week in the mountains may be shortened by a day. I guess I’d rather be safe than sorry though.
Breckenridge, CO
If you haven’t been to Breckenridge you should put it on your list of places to visit. It’s a fun little mountain town all year around. I haven’t skied for a few years now but I’ll be getting back on the mountain one of these years. I enjoy just relaxing in our place or wandering around downtown. There are tons of cute little shops as well as my favorite little wine bar. 🙂
It’s time to go pack just in case the roads clear up later. Have a great day! Stay warm and Happy Stamping!
We can all use a little love in our lives whether it comes from family, friends or a complete stranger. It’s Throwback Thursday but I’m only going back about a year. I love this little project L-O-V-E project!
LOVE Banner
This was pretty easy to make and guess what? Many of the products I used on the banner are still available! The Lovely Lipstick Foil Sheets aren’t available any longer but that’s the only item you’ll have to come up with another plan for.
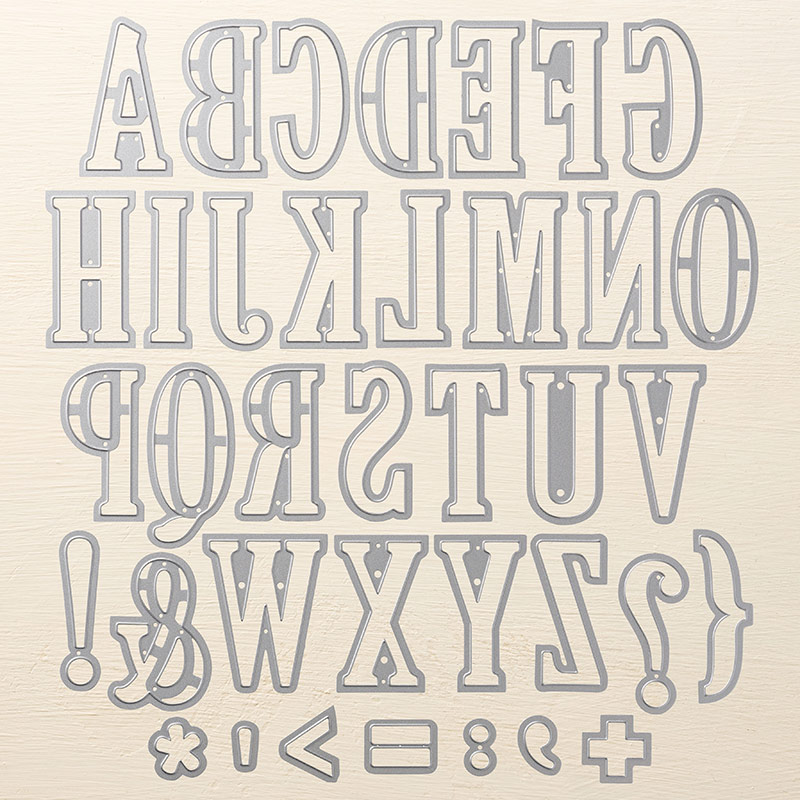
The hearts are all made using the Stitched Be Mine dies (#148527 $35) and the letters are from the Large Letters Framelits dies that are now on the clearance rack (141712 $59.40) at almost half off the orginal price! I would definitely think about picking these dies up if you don’t have them. There are lots of projects that you can make using them.
Large Letters
Here is the link to the original post where you can get instructions on how I made it. This little banner was pretty easy to make. You can easily swap red or pink paper for the foil sheets. You could also punch out the large hearts from the From My Heart Specialty Designer Paper in the current Mini Catalog if you want. There are all sorts of ways to change this banner. You could even use the Hand-Lettered Prose dies instead of the Large Letters if you wanted.
I hope you find a little L-O-V-E in your lives. Have a great day! Take care and Happy Stamping!
Brrrr! I feel like I’m back in the Minnesota Homeland! When I woke up this morning the temperature was in the single digits and barely above zero! For Colorado that’s VERY VERY COLD! I want to go to the tropics where it’s WARM!
Since I can’t just jump on an airplane right now I can do the next best thing and dream of a tropical vacation while playing with my crafting supplies…or just staring at tropical cards my fellow demonstrators have made. 🙂
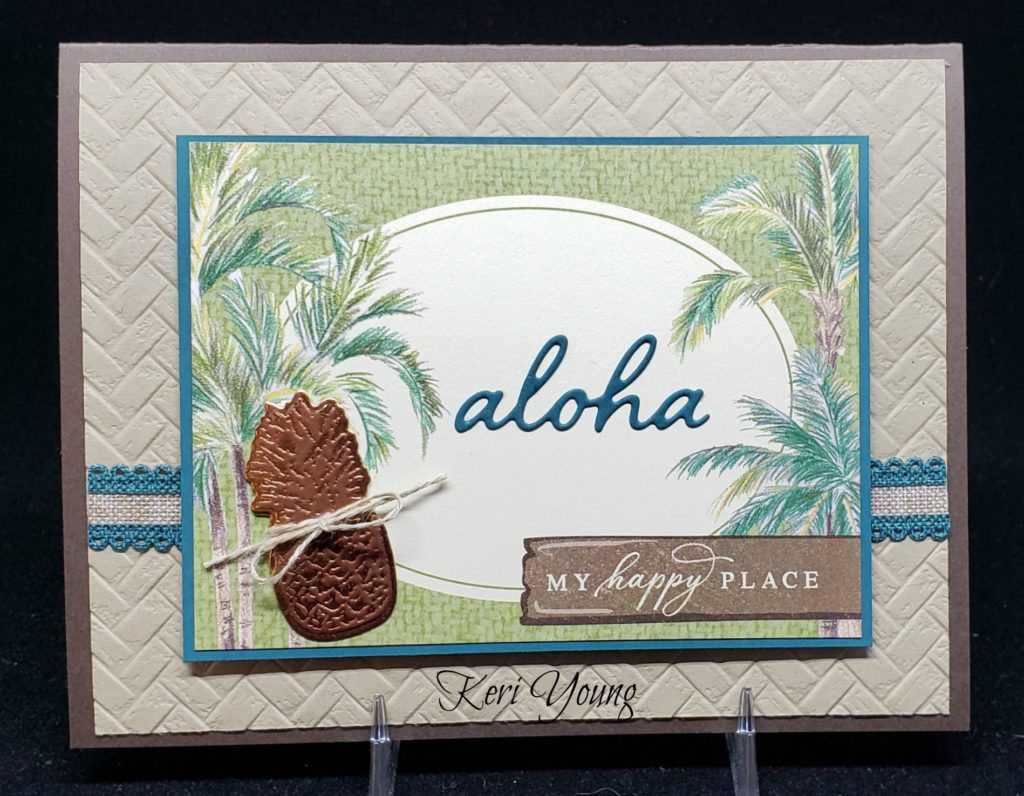
Tropical Oasis Memory & More Cards
Check out this fabulous card that my friend and fellow demonstrator Keri Young designed. Don’t you love it? Keri made this for the recent swap I hosted. The rectangular focal point is one of the Memory & More cards from the Tropical Oasis Suite. Keri used many of the different cards for her swap cards but kept the basic card design the same. Clever! I’m telling you….the tropics, or at least thinking about them will be my happy place today!
Have you played with any of the Memory & More cards yet? You don’t have to be a scrapbooker to use these cards. As you can see from Keri’s card above the cards can work perfectly on a greeting card! I have a set of these Tropical Oasis Memory & More cards. Now I just need to sit down and play with them…..and today may just be the day! Brrr!
I hope you have a warm and productive day! Take care and Happy Stamping!
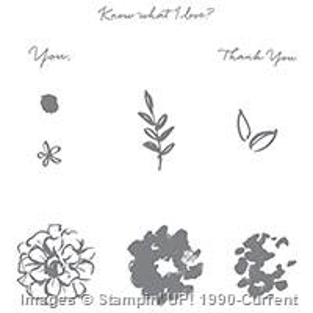
It’s Throwback Thursday! Who remembers the What I Love Sale-a-bration stamp set from 2016? This was one of my all time favorite Sale-a-bration stamp sets. I just love those flowers.
What I Love
Before Stampin’ Up! had DistINKtive stamps that look realistic you had to rely on two or three step stamping to get your dimensional-looking image. This stamp set was easy to work with because it was easy to line up the different images.
I still love this stamp set and will be sad if it’s not in my stash of retired stamps. The good news is that Stampin’ Up! keeps coming out with new stamp sets to replace our old favorites! Ha!