Tuesday Tip: Wood Mount Stamp Puzzle

IMG_7430Like Stampin’ Up! founder and CEO Shelli Gardner, I love my wood stamps.  I love being able to just open the case, grab the stamp I want and stamp away.  Yes, they take up a little more room on the shelf but they’re my favorite.

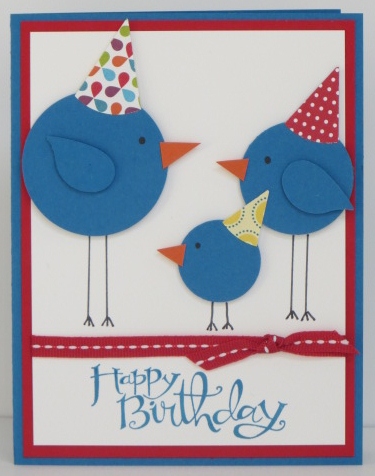
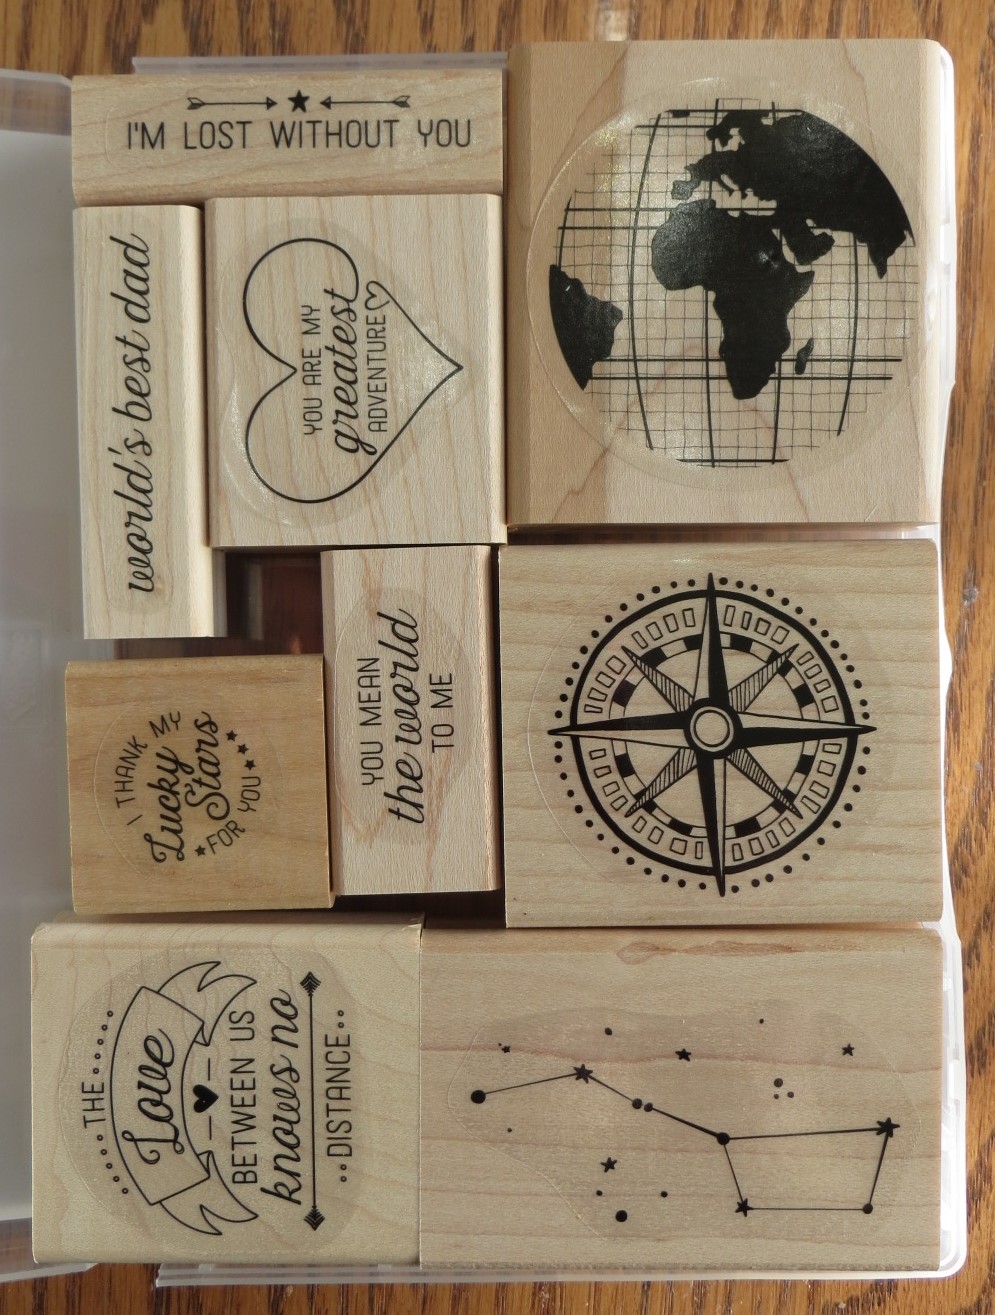
Some of the new stamp sets have a lot of images and this can be a problem with wooden stamps because you have to work out the puzzle of getting them all back in the case.

Today’s tip is a very SIMPLE solution to this little problem.  As I’m mounting the stamps onto the wood blocks I only take out one block at a time, mount the rubber on the block, put the label on the other side and put it back right where I got it!

20160110_153856_resized (2)
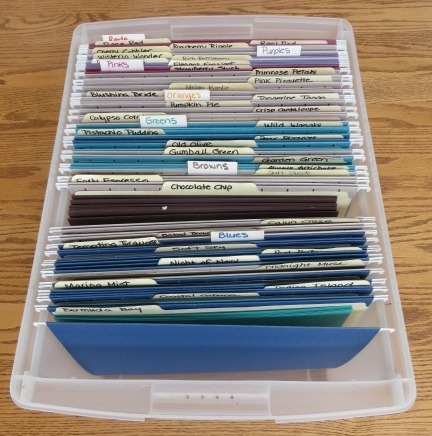
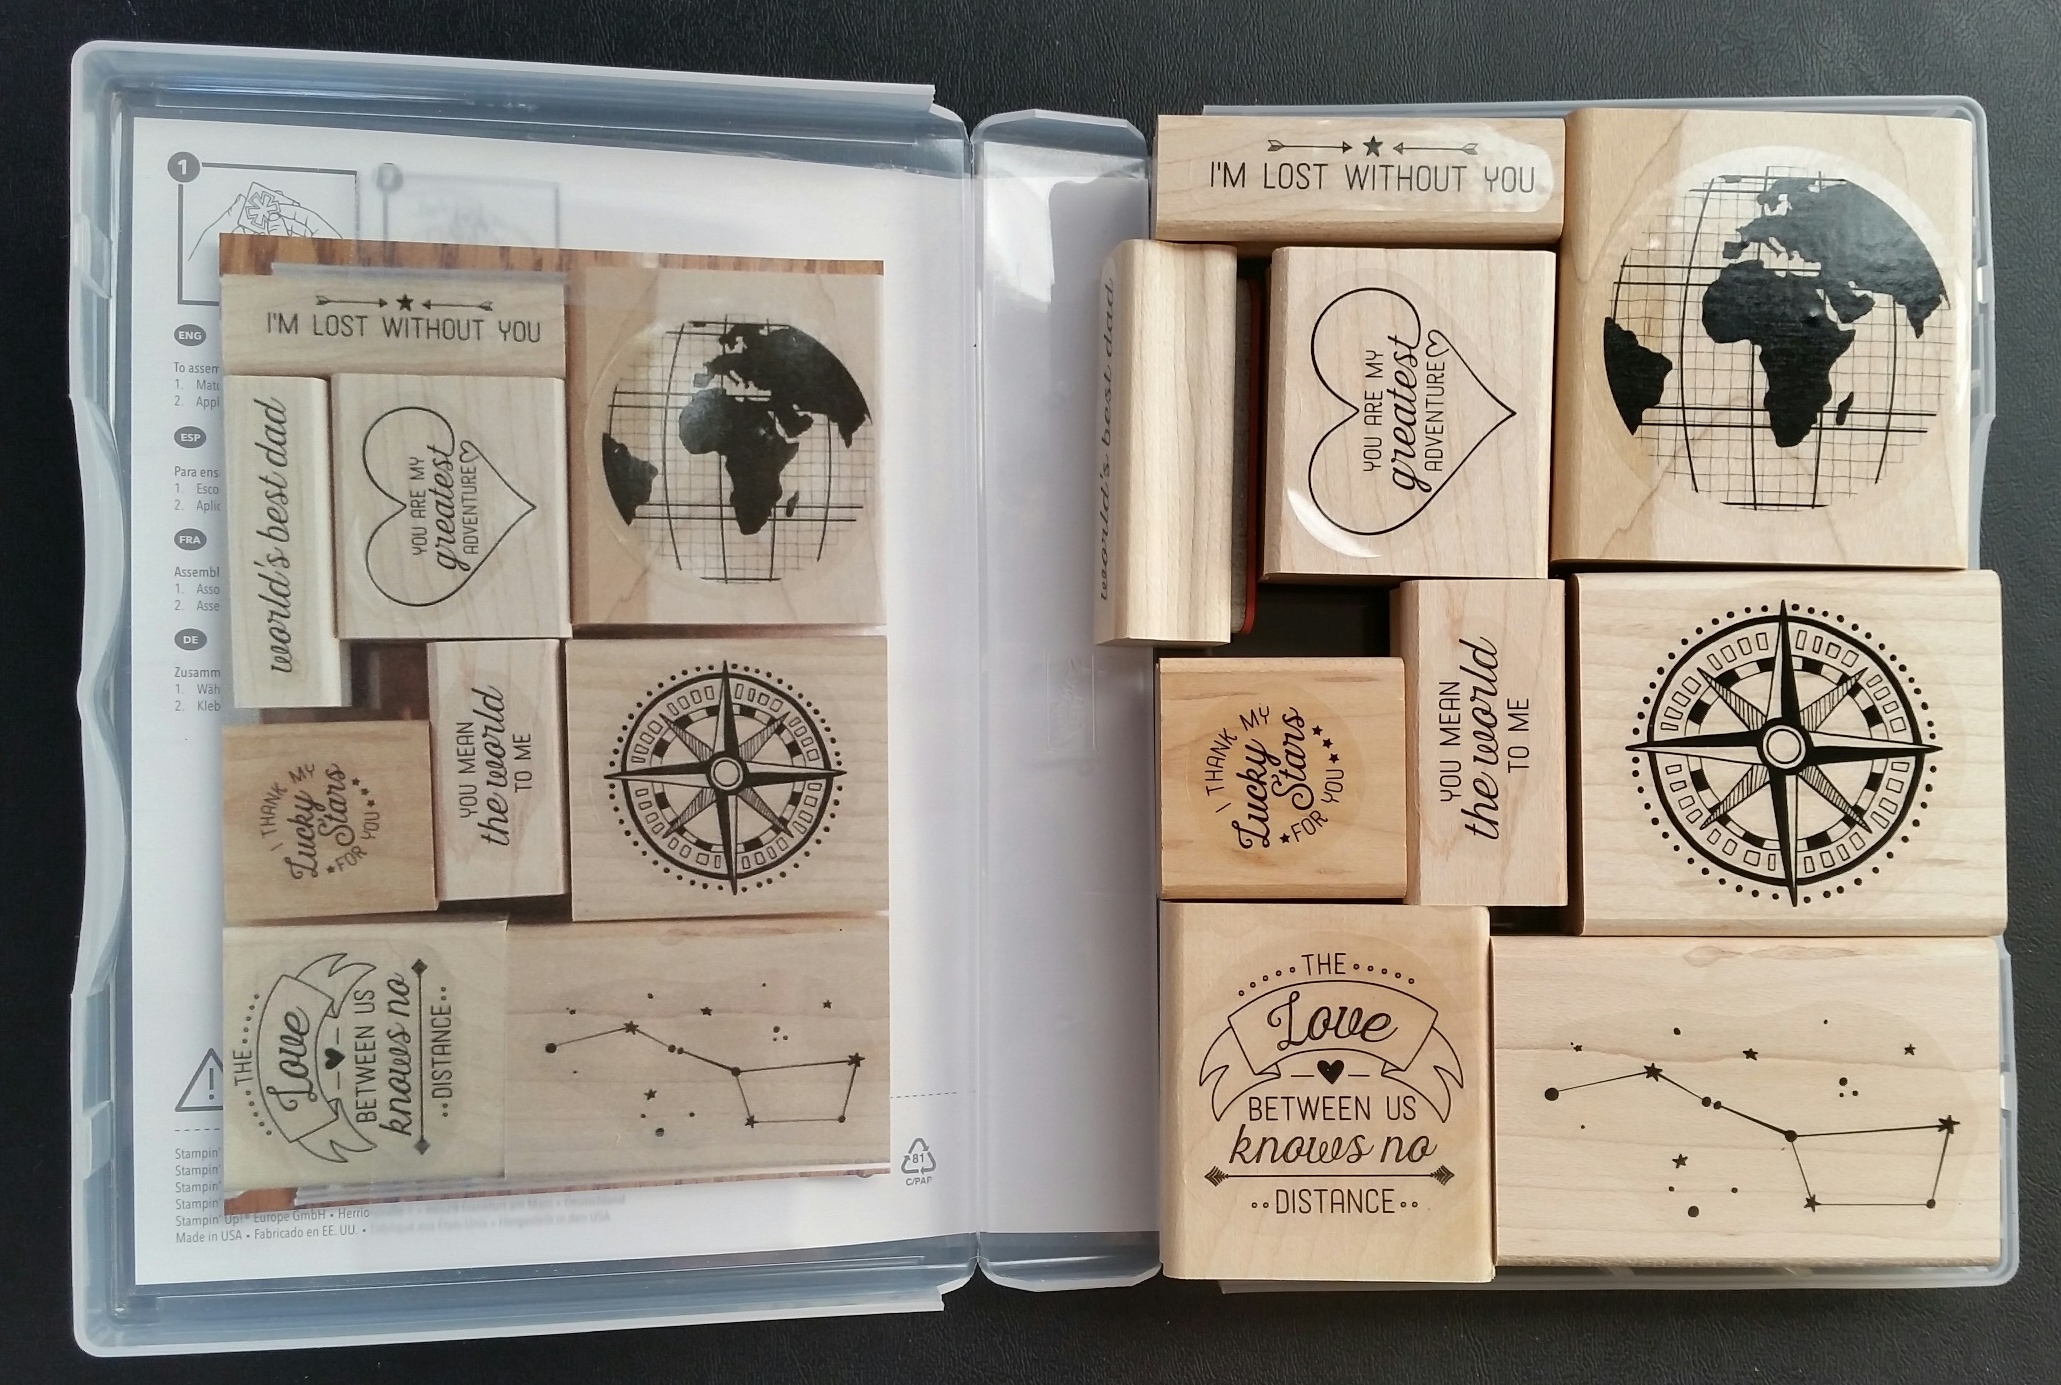
Now here’s the big tip….after you have all of the pieces back in the box take a picture of the blocks in the box.  Print your picture, trim it down and tape it to the inside cover of the stamp box.  Woo Hoo!  You’ll never have trouble putting those stamps back in the box again!  Woo Hoo!

Did you like today’s tip?  Leave a comment and let me know!

Have a great day!  Take care and Happy Stamping!

Use Your Chalk Marker For More Than Writing!

019Tip of the day Tuesday!  Is your Chalk Marker good for anything other than writing?  The answer is YES!  You can color with it too!  Check out the flowers on my card.  I colored them with my Chalk Marker.

The flowers are from the Peaceful Petals stamp set in the Occasions Catalog.  I colored the stems and the flower centers with markers.

I used the Beautifully Baroque Embossing Folder on the background and then lightly rubbed Crumb Cake ink over it to highlight the design.  I like doing that to embossed backgrounds….it really brings out the design.

Have you placed your order yet of retiring products?  Some of the items are already sold out.  Don’t miss out on the items you want.  Place that order today!

Have a great day.  Take care and Happy Stamping!


Simple Stems Shaker Card

021It’s Spring!  It’s going to be a gorgeous day here in Colorado so we need a card that shouts SPRING!  I think this one will do.

This card was a prototype for my Flower Cards Class next week but didn’t make the cut.  I had designed too many cute cards!  Ha!

I knew I wanted to use the Simple Stems stamp set from the Occasions Catalog but wasn’t sure what to do with it.  Then I saw a shaker card like this online and had my idea!

This shaker card is pretty simple.  I first die cut the oval in the Wisteria Wonder card stock with the Oval Framelits and then I ran it through the Big Shot with the Decorative Dots Embossing Folder.  You have to do it in this order or you’ll squish your embossed dots!

To make the shaker part of the card I cut down a 4″ x 6″ cello bag and put some Silver Glass Stampin’ Glitter in it.  You don’t want too much but then I don’t think I put enough in mine.  I closed up my cello bag with tape and then adhered it directly to the back of the embossed Wisteria Wonder card stock.  That’s it!  Easy Shaker card!

Have a wonderful Spring day!  Take care and Happy Stamping!

Tip of the Day Tuesday: Coloring Doilies

007It’s Tuesday and I have a little tip for you!  Did you know that you can color Stampin’ Up! Doilies?  Well, I suppose you could color any doily but why wouldn’t you use Stampin’ Up!’s?  🙂

It’s pretty easy.  You just need an ink refill, a spritzer and 70% Rubbing Alcohol.  Is this sounding familiar?  It should.  I used the exact same technique I use when coloring the Whisper White Taffeta Ribbon!  Mix your alcohol and ink refill in your spritzer and spritz away!  The more saturated the color you want the more ink refill you need to use.  That’s it!  Now you can have any color doily (or ribbon) that you want!

Doesn’t the Strawberry Slush doily really add to the card?  I stamped the tulips from the Blessed Easter stamp on Shimmery White card stock before coloring with my Blender Pen.  Shimmery White is my favorite paper to use when coloring lately.  I can hardly wait for the new Blendabilities Markers to come out.  Unfortunately there’s been a slight delay with the manufacturer but I know they’ll be available some day!  They will make coloring so much fun!  I’ll definitely keep you posted!

Have a great day!  Take care and Happy Stamping!

Vivid Vases

photoHello!  Yesterday was a very productive day.  I got a lot of things done in my craft room preparing for next week’s classes as well as figuring out some ideas for the classes after that.  It was good to have a full day not having to go anywhere!

Today’s card is one of the Make-n-Take projects from Leadership Conference.  They always have great projects for us to make.  This one is made with the Vivid Vases stamp (#133818  $11.95).    I know when you first saw the picture you thought “this isn’t a Cindy card…”.  Well, you were right.  It’s definitely not something I’d design myself, but isn’t it cute?

I’m always a little nervous about watercoloring….afraid that I won’t do it right.  Silly me…..the beauty of watercoloring is that you don’t need to stay in the lines!  That is my tip of the day:  You don’t have to stay in the lines when you watercolor…you can of course, but you don’t have to!  🙂

Speaking of coloring….Stampin’ Up! is coming out with a FABULOUS new product for those of you who like to color.  Blendabilities!  They are alcohol-based markers that blend wonderfully.  They will launch sometime during this first quarter of 2013!  Woo Hoo!  I LOVE new products!

Have a great day!  Take care and Happy Stamping!

Tip of the Day Tuesday: Thinlits

001I know, I know….it’s not even Halloween yet and I’m showing you Thanksgiving cards.  You can never be to ahead of the game though!

I made this card using the Harvest of Thanks stamp set and the Expressions Thinlits Dies.  I just love these new Thinlits….especially since I now know the secret to them!  Do you want to know?  Of course you do!  😀

The secret to getting the die-cut image out of the Thinlit easily is using wax paper and a toothpick!  Just place a piece of wax paper between your card stock and the die.  It makes the card stock slip right out of the die.  If it doesn’t simply fall out just use a toothpick in the little holes found on the die to give the card stock a little poke.  If you use anything sharper like a paper piercing tool you make leave a little hole in the card stock.  That is your tip of the day:  wax paper and a toothpick!  Don’t you love it when you can use everyday things found in your home!

Have a great day!  Take care and Happy Stamping!

Fishin’ Around

035Stinkin’ cute!  Yep!  That’s what the Fishin’ Around stamp is….especially when you make it into a little fish bowl with real water using a Treat Cup!

I CASEd this idea right from Stampin’ Up!  Check out the adorable card on page 58 of the catalog.

To make this card I first stamped the fish bowl on water color paper with Black StazOn ink and then colored it with my ink pads and aquapainter.  Next I peeled the adhesive backing from the rim of  the treat cup, filled it with water and then stuck a piece of Window Sheet to Treat Cup.  Then I centered the filled Treat Cup over the stamped, colored image and adhered them together.  After stamping the fish bowl on the Whisper White card stock I punched out the center of it using the 1 3/4″ Circle Punch.  Those are the little tips for making this type of card.  Are you going to make one?  It’s pretty darn cute!  😀

Have a great day!  Take care and Happy Stamping!

Tip of the Day (or Technique) Tuesday: Splatters!

ARoundArray.0513I would call today’s card a generic card.  You could use it for a guy or a gal.  I used the Epic Day Designer Paper as well as the A Round Array stamp set.

This card was kind of fun to make.  Since Stampin’ Up! doesn’t carry the Spritzer Tool anymore I had to find a different way to make splatters on my card.  The Epic Day Designer Paper just screams for splatters since some of the papers are splattered!  Ha!

The easiest way to splatter is to squish the lid of your ink pad to pick up some of the ink.  Then take your Aquapainter, pick up some of the ink and then tap the Aquapainter against your finger.  You do want to make sure that your Aquapainter has a bit of water on it to help the splatters.  That’s it!  Now you can easily splatter away in any color!

Have a great day!  Take care and Happy Stamping!

Tip of the Day: Storing Card Stock

025Once again it’s time for your tip of the day!  Today I want to share with you how I store my card stock.

It’s very similar to the way I store my scraps except I have a separate file folder for each color.  I start with a plastic bin that has grooves on the sides for hanging files.  I have a separate hanging file for each color with a labeled file folder in it.  Like my scraps I organize by color.  Blues, greens, reds, pinks, etc.

That’s it!  A pretty simple and straight-forward method of storing my paper.  I keep all my bins in the closet in my craft room.  The bin with full sheets of card stock is on the floor and the scrap bin is on a shelf since it’s a little lighter.

How do you store your paper?  Leave me a comment and let me know!

Have a great day!  Take care and Happy Stamping!

Tip of the Day: Storing Paper Scraps

021 020I’ve been working on organizing….putting all of my new colors of ink pads and paper away.  So much fun!  Since I had to clean everything out and it’s Tip of the Day Tuesday, I thought I’d share with you how I store my paper scraps.  We all have them…some more than others…but what do you do with them?

I start with an expandable pocket folder.  I’ve sorted my card stock by color.  Then I have 2-3 colors of card stock in each folder.  I put a full sheet of each color in the folder and then I will place the scraps in front of the full sheet that has the color’s name written on it.  I also took a long piece of clear packing tape and put it over the name of the card stock and the top edge to protect it a bit.  I have all my folders of scraps in a plastic file bin.

This method works well for me.  When I want a certain color scrap I just got to the correct folder and find the size I need.  What do you think of my method?  How do you store your scraps?  Leave a comment and let me know!

Have a great day!  Take care and Happy Stamping!

Soda Pop Top Wrist Watch

299Well, I looked to my fellow talented demonstrators for this card.  Once again I never would have thought of this trick on my own…

Turn a flattened Soda Pop Top into a wrist watch!  Not only do you punch out the watch face and glue it into the flattened Soda Pop Top but then you fill it with Crystal Effects to make it shiny like a watch crystal!  Who thinks of these things?!  I really need to start thinking outside the box a little more!  😀

The watch is from the “Dapper Dad” stamp set in the Spring Catalog and the sentiment is from the “Happy Hour” stamp set.

Have a great day!  Take care and Happy Stamping!

Tip of the Day Tuesday: Toothpaste!

photo (5)It’s time for a new feature at Stamp by Stamp Creations!  Like MDS Monday, I can’t guarantee that I’ll have a tip for you every week but if I do, look for it on Tuesdays.

I am SO excited share this fun tip with you because it really works!  Last week in class we were using the Designer Type Photopolymer Stamp Set with these itty bitty numbers and Black StazOn ink.  My itty bitty clear block was practically black by the end of class because people were pressing down on the ink pad just a little too hard with those itty bitty stamps.  What was I to do?

So, we got talking at the end of class about how I could try and get those little things clean.  We were using StazOn ink which is suppose to….stay on!  It’s permanent right?  We tried a few different suggestions but nothing was working….UNTIL Teresa suggested that I try toothpaste.  Not just any toothpaste….it had to be Crest tooth PASTE, not gel.  Well, low and behold….it worked!  Magic!  It took a little elbow grease along with the toothpaste but it worked!

I only had a little travel size tube on hand so I need to go and put a full size tube on my grocery list!  How about you?!

It’s “What Can You Do With A Circle?” Month!

Sassy Salutations.0213What can you do with a circle?  There are circle punches, circle dies, circle stamps….circle lots of things!  But what can you do with them?  Join me this month as I show you what you can do with a circle!  Throughout the month I’ll be posting projects, tips and techniques that all use circles.  You’ll want to make sure to visit my blog, my Facebook page and be signed up on my mailing list.  I will posting different things in all three places!  Don’t miss out!

I made this adorable card for my niece Abbey’s birthday.  Aren’t these litle birds stinkin’ cute?  I just LOVE them!  I used the 1 3/4″, 1 1/4″ and the 1″ Circle punches to make these little critters.  The wings are from the Bird Builder Punch (of course!)  🙂  The party hats are made with the Pennant Builder Punch.  Guess how I rounded the edge of the hats?  Yep!  With a circle punch! (Check out the photo below.)

Wow!  A project and a tip on the very first day of “What Can You Do With A Circle?” month!  Are you ready for more?  Stay tuned throughout the month a make sure you’ve signed up for my mailing list (this page, top left) and that you’ve “Liked” my Facebook Page (www.facebook013 (2).com/stampbystamp)

Have a great day!  Take care and Happy Stamping!