Sale-a-bration 2013: More Patterned Occasions Mini Cards

038041042
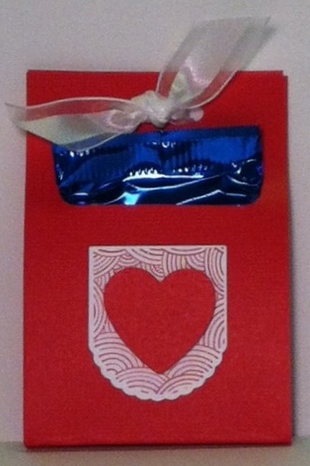
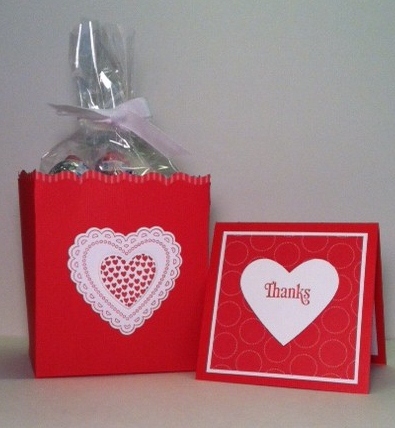
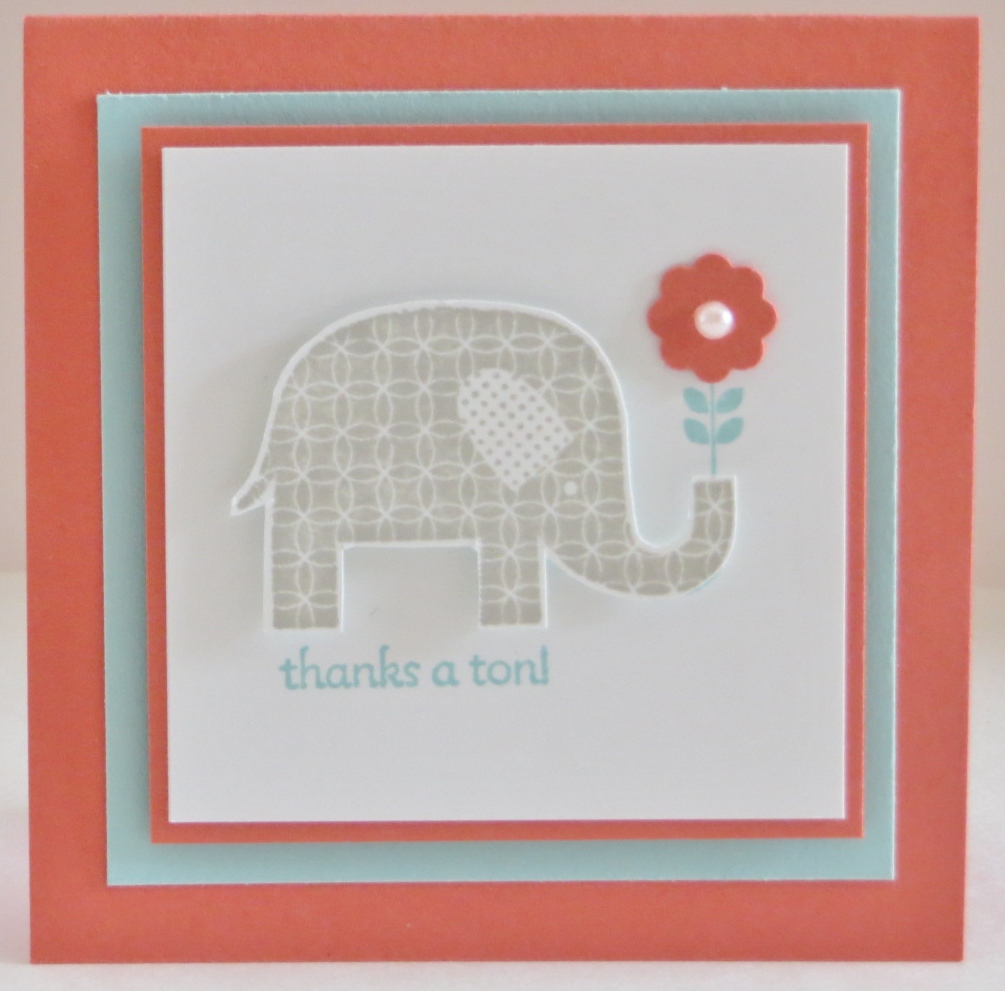
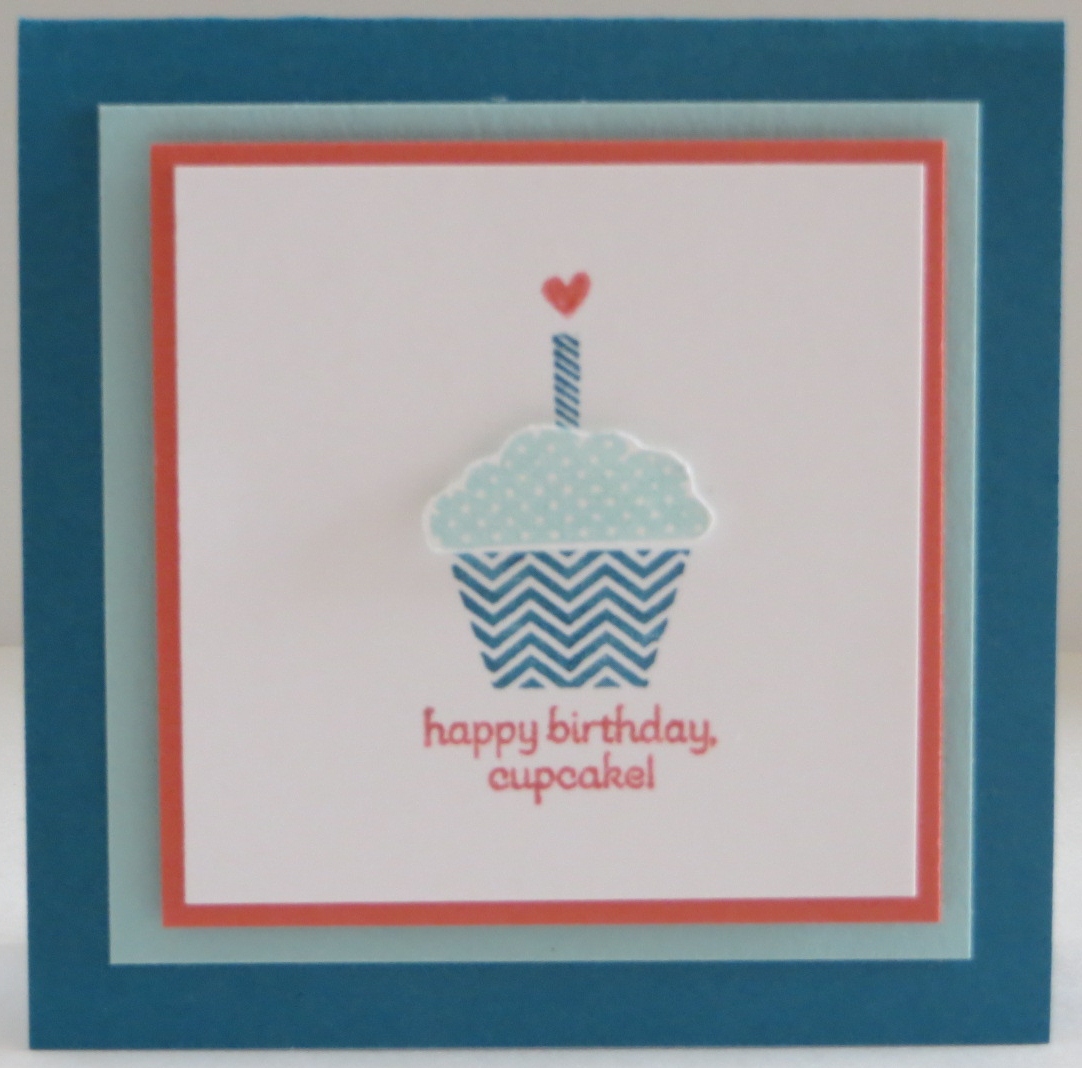
I told you I liked this stamp set!  Here are 3 more mini cards made using the adorable Patterned Occasions stamp set.  Have you placed your Sale-a-bration order yet so you can get this set for free?  🙂

Of these three adorable images I think I like the elephant the best.  There’s a lot of cute cards with him out there.  In fact, we made one in classes this week that I’ll be sharing with you soon!

I think I’ll have to make my son’s fiance a card using the little cupcake.  She’s a cupcake maker so it’ll be perfect for her and her birthday’s next month!  She made us some yummy mini cupcakes for our Super Bowl Party.  She had a cupcake with a purple berry frosting for the Ravens and she made red velvet mini cupcakes with gold sprinkles for the 49ers.  She’s so creative!

Who are you going to make a card for using this set?  Don’t miss out!  Place your Sale-a-bration order of $50 today so you can get this stinkin’ cute stamp set for FREE!  😀 Have a great day!  Take care and Happy Stamping!

Sale-a-Bration 2013: Patterned Occasions Mini Cards

040

043

The Patterned Occasions stamp set in the Sale-a-bration brochure has to be one of my favorites.  All of the images are SO darn cute!  I’m not sure if I could pick just one as my favorite.  Here are a couple of little   3″ x 3″ cards that I made using this adorable stamp set.

Wouldn’t this congratulations stamp be perfect for a graduation?  I’ll have to make a full size card with it as one of the neighbors is graduating this year.

This band-aid stamp is too stinkin’ cute!  Too bad my card is crooked!  (Yikes!)  I did CASE this idea with torn paper and the band-aid holding it together.  Isn’t that clever?  I know I never would have thought of it!  I’ve seen some pretty cute cards made with this stamp and the whole stamp set actually. This is definitely a stamp set I’ll be holding on to!

Have a great day!  Take care and Happy Stamping!


Creative Elements Butterfly

Creative Elements.class.0213I told you….I’m working on simple and here’s another example for you.  We made this card at a class I gave recently.   Actually, if you look at this card closely you’ll notice that it’s the same layout as yesterday’s card!  That’s the beauty of stamping!  You can make things different by keeping them the same!  OK…that didn’t really make sense but it sounded rather profound when I wrote it…  🙂

For this card I stamped the flourish from the Creative Elements stamp set in the bottom corner of the small piece of Whisper White card stock.  Then I ran a piece of Raspberry Ripple card stock through the Big Shot with the Lacy Brocade (my favorite!) Embossing Folder and finally punched out a butterfly with the Elegant Butterfly Punch.  Pop up the butterfly with a Stampin’ Dimensional and you have a beautiful card!

The class that I used this card for was just before Valentines Day so I had the Full Heart Punch available for them to use so they could make the card a valentine if they wanted.  Versatility!  I love it!

Have a great day!  Take care and Happy Stamping!

Button Buddies Thank You

Button Buddies.thanksHere’s another card made with the adorable Button Buddies stamp set.  It’s very similar to the one I showed you a few days ago.  In fact the only difference is that I used the pumpkin instead of the cherries and the ribbon is on the side inside of the top!  I even used the same sentiment stamp set (A Word for You).

These turned out so cute I may have to make some more.  I like using buttons on cards and the Button Buddies stamp set makes it SO easy!  😀

Have a great day!  Take care and Happy Stamping!

Flowering Flourishes

Flowering Flourishes.1212Here’s another quick and easy card for you.  One color of ink, some ribbon and just a few layers and it would work well with any sentiment stamp set.  I actually think I’d like it better using the Sweet Essentials stamp set from yesterday’s card.  This sentiment is from the Petite Pairs stamp set.  It’s what we used in class last month.

The Flowering Flourishes stamp set is one of those that didn’t WOW me when I first saw it in the catalog but grew on me the more I saw it used on cards.

I design a card a little backwards sometimes.  I kind of knew what I wanted the card to look like but I chose the color according to the ribbons available!  Yep, I chose the ribbon first!  I do that a lot since I hardly ever make a card without it.  On this card I chose Elegant Eggplant Scallop Dot Ribbon since I wanted a wider ribbon.  I know, it’s kind of weird.  The ribbons are also the first things I purchase when a new catalog comes out!  🙂

Have a great day!  Take care and Happy Stamping!

Love & Sympathy Banner Card

Love & Sympathy.bannersI think that this Love & Sympathy stamp set is gorgeous.  When I first saw it, I knew I had to have it.  Then when I saw a card similar to this I knew I had to make it!  (Have I mentioned that I LOVE to CASE?!)

This card is pretty easy to make.  Probably the hardest part is getting the notches on the banner even!  I can help with that!  At one of the recent Stampin’ Up! events that I attended one of the gals from the home office gave us this tip…..start by making a little slit from the bottom edge up to where you want the center point of your banner to be.  Now simply trim from each bottom corner to that center point!  😀  What an easy way to do it!

If you’re wondering, the sentiment is from the Sweet Essentials stamp set.  What a classy font…don’t you think?

Have a great day!  Take care and Happy Stamping!

Sale-a-Bration Thank You

SAB13.thankyouHello!  Here is an easy thank you card you can make with some of the fabulous 2013 Sale-a-bration items.  Cute and simple!  That’s the way to make a card!

I used the Vintage Verses Sale-a-bration stamp set for the “thanks” and the Sycamore Street Designer Paper.  A few layers, some ribbon and the card is done!  I could have used the ribbon from the Sycamore Street Ribbon and Button Pack since it does come in Calypso Coral and Island Indigo but the ribbon was a little narrower and I liked the thicker ribbon.

Like I mentioned before….cute and SIMPLE!   Have a great day!  Take care and Happy Stamping!

Button Buddies Birthday!

Button Buddies.birthdayHappy Valentines Day!  I don’t have a Valentines project for you today but I do have a cute card!  😉

I LOVE the Button Buddies stamp set!  The little piggy is actually my favorite but I love what you can do with all of the images.  This is a cute and simple card.  You really could use any of the adorable images for the card but this saying from the “A Word for You” stamp set worked perfectly with the cherries!  A few layers, some ribbon and of course the buttons and you have a quick and easy birthday card.

We’re up in Breckenridge, CO at our time share for the week and enjoying every minute of it.  I skied a little this weekend with my cousin but the rest of the time I’ve been taking it easy.  Yesterday I went to the spa here at the resort.  I had a sea salt scrub with massage and a pedicure!  Pure heaven!  I didn’t want it to end.  I will hit the slopes again on Friday but I am enjoying taking it easy.

Have a great day!  Take care and Happy Stamping!

Bloomin’ Marvelous

Bloomin' Marvelous.workshop.0113Hello!  Here’s a nice and easy card using one of the cute, new Sale-a-bration items.   I love the little sayings in the “Bloomin’ Marvelous” stamp set.  I designed (CASEd) this card for a workshop/class I had last week with some newer stampers.  Cute and simple.  Perfect for beginner stampers.

Have you picked out your favorite Sale-a-bration item yet?  This “Bloomin’ Marvelous” stamp set is one of my favorites along with the “Patterned Occasions” stamp set.  Don’t miss out on the great items found in the Sale-a-bration brochure.  They’re only available until March 22nd.  Put your order together today!  😀


Valentine Treats

Guest Treat.0213Who doesn’t love getting a little treat?  Especially a little Valentine treat with Ghirardelli chocolate in them?!  😀

These little treat holders are SO easy to make!  Just start with a piece of card stock that is 7 1/2″ x 2 1/2″.  Score along a long edge at 3 5/8″ and 3 7/8″.  (I used the Real Red Core’dinations Card Stock again for this little project.)

Place the Word Window Punch about 1 1/4″ in from one of the short edges and punch.  You now need to expand your punched window a little bit towards each long edge in order for the candy to be able to fit.

Fold the treat holder and line up the short edges.  Use your Crop-o-dile to punch two holes through both layers.  Thread your ribbon through and tie.  Decorate your treat holder how ever you’d like.  (Guess what I used….Hearts A Flutter….surprise!)

Easy, easy easy!  I whipped 10 of these up in no time at all!

Have a great day!  Take care and Happy Stamping!

Valentine Hostess Treat

Hostess Thanks.0213Yes, Valentines Day is next week.   Are you ready?   I have a class/workshop tonight and this is my gift for the hostess.  She and seven friends are excited to make some cards!  Woo Hoo!

I made the little treat holder with the Fancy Favor Die for the Big Shot using the Real Red Core’dinations Card Stock.  I like the Core’dinations Card Stock even when you don’t emboss it to get the weathered look although I do miss Stampin’ Up!’s textured card stock.  It was perfect when you just neeeded that little something extra on your project!

To get the little border of designer paper to line up perfectly with the box I used a little bit of temporary adhesive and stuck the edges of the designer paper and Core’dinations card stock together BEFORE I ran them through the Big Shot.  Then I separated them, moved the designer paper up a bit and adhered them together with Sticky Strip.  It adds that little something extra to the box.

The hearts on the box are from my favorite:  Hearts a Flutter and die cut with the coordinating Framelits.  Add a bag of Hershey Kisses and you have a cute valentine treat!  😀

Wish me luck tonight!  Have a great day and Happy Stamping!  What are you making for your Valentine?  Let me know!

Masculine Love and Sympathy Card

Love and Sympathy.1212Here’s another sympathy card.  They’re always tough to make, don’t you think?  We actually made this card in classes back in December.  Do you think I have enough layers on it?  I started out with just a few layers but it didn’t look complete until I had all six, yes six!, layers on it.  I know….I got carried away but it sure is a nice looking card!  🙂

This would have been perfect for my neighbor.  Unfortunately I didn’t have any on had and since I had to start from scratch I figured I’d create something new!

Sunday’s Super Bowl Party went well and we did have tons of wings leftover.  That’s what they make freezers for isn’t it?  I love throwing these parties but I never actually get to see the game (or the commercials).  Every year I keep saying that I’m going to sit and watch the game but then someone new comes in and I have to great them and start chatting away….maybe it would help if I was shy….. HA!

Have a great day!  Take care and Happy Stamping!

A Masculine Sympathy Card

Sympathy.0213Masculine cards of any sort are tough for me but this sympathy card came together rather quickly.  The mother of our neighbor across the street passed away last week so I needed to make a card for them.  It was his mother so I didn’t want to go with too many flowers or anything.  I do have flowers on the card and of course the doily and pearls but I think overall it’s an ok card for a guy, don’t you?

I love the font on the “Loving Thoughts” stamp set.  I’d love to see Stampin’ Up! come up with another similar set.  This is a pretty basic card but I think the doily adds a lot to it, don’t you?  Let me know what you think….leave a comment!

Itty Bitty Banner Valentine Card

Itty Bitty Banners.0113Happy Super Bowl Sunday!  I sure wish my Denver Broncos were playing but a girl can’t have everything!  🙂  We’ll have a party anyway.  We try to plan the food with a theme corresponding to one or both teams.  This year we had it easy….the Ravens are playing….they’re a bird….so we’re serving wings!  We are making three different types and I’m sure we’ll have WAY too many.  I’ll keep you posted.

There’s still plenty of time to make your Valentines.  Here’s a cute and simple one we made in our classes last week.  The scallop heart is actually cut from one of the pieces of designer paper from the More Amore pack.  On one sheet the one side is white and the other side is Real Red and on the second sheet the other side of the heart is Primrose Petals.

It’s hard to tell from the picture but the large piece of Real Red card stock is Real Red Core’dinations card stock.  That little bit of texture really adds a lot to the card.

Have a great day!  Take care, Happy Stamping and go 49ers!

Oh, Whale! Valentine Treat Holder

Oh, Whale Treat Holder.0213Oh, Whale Treat Holder.1.0213Have I told you that I LOVE this little whale? Ha!  I probably have mentioned it a time or two!  Isn’t this the cutest treat holder you’ve seen in a long time?  I came across it online the other day and had to drop everything I was doing to make it!  Did you notice my cute little whale is PINK?  😉

I made the lollie with the Simply Scored, scoring at every 1/2″.  I used two strips of 1 5/8″ x 12″ pieces of designer paper from the Sale-a-bration Sycamore Street pack.  Can you guess where the clouds came from?  The Cupcake Builder Punch!

Check out the second picture….whoever thought of using a button/brad container for treats?!  Some people can definitely see outside the box!  Have a great day!  Take care and Happy Stamping!