Gift Card Envelope With Bling!

IMG_5711
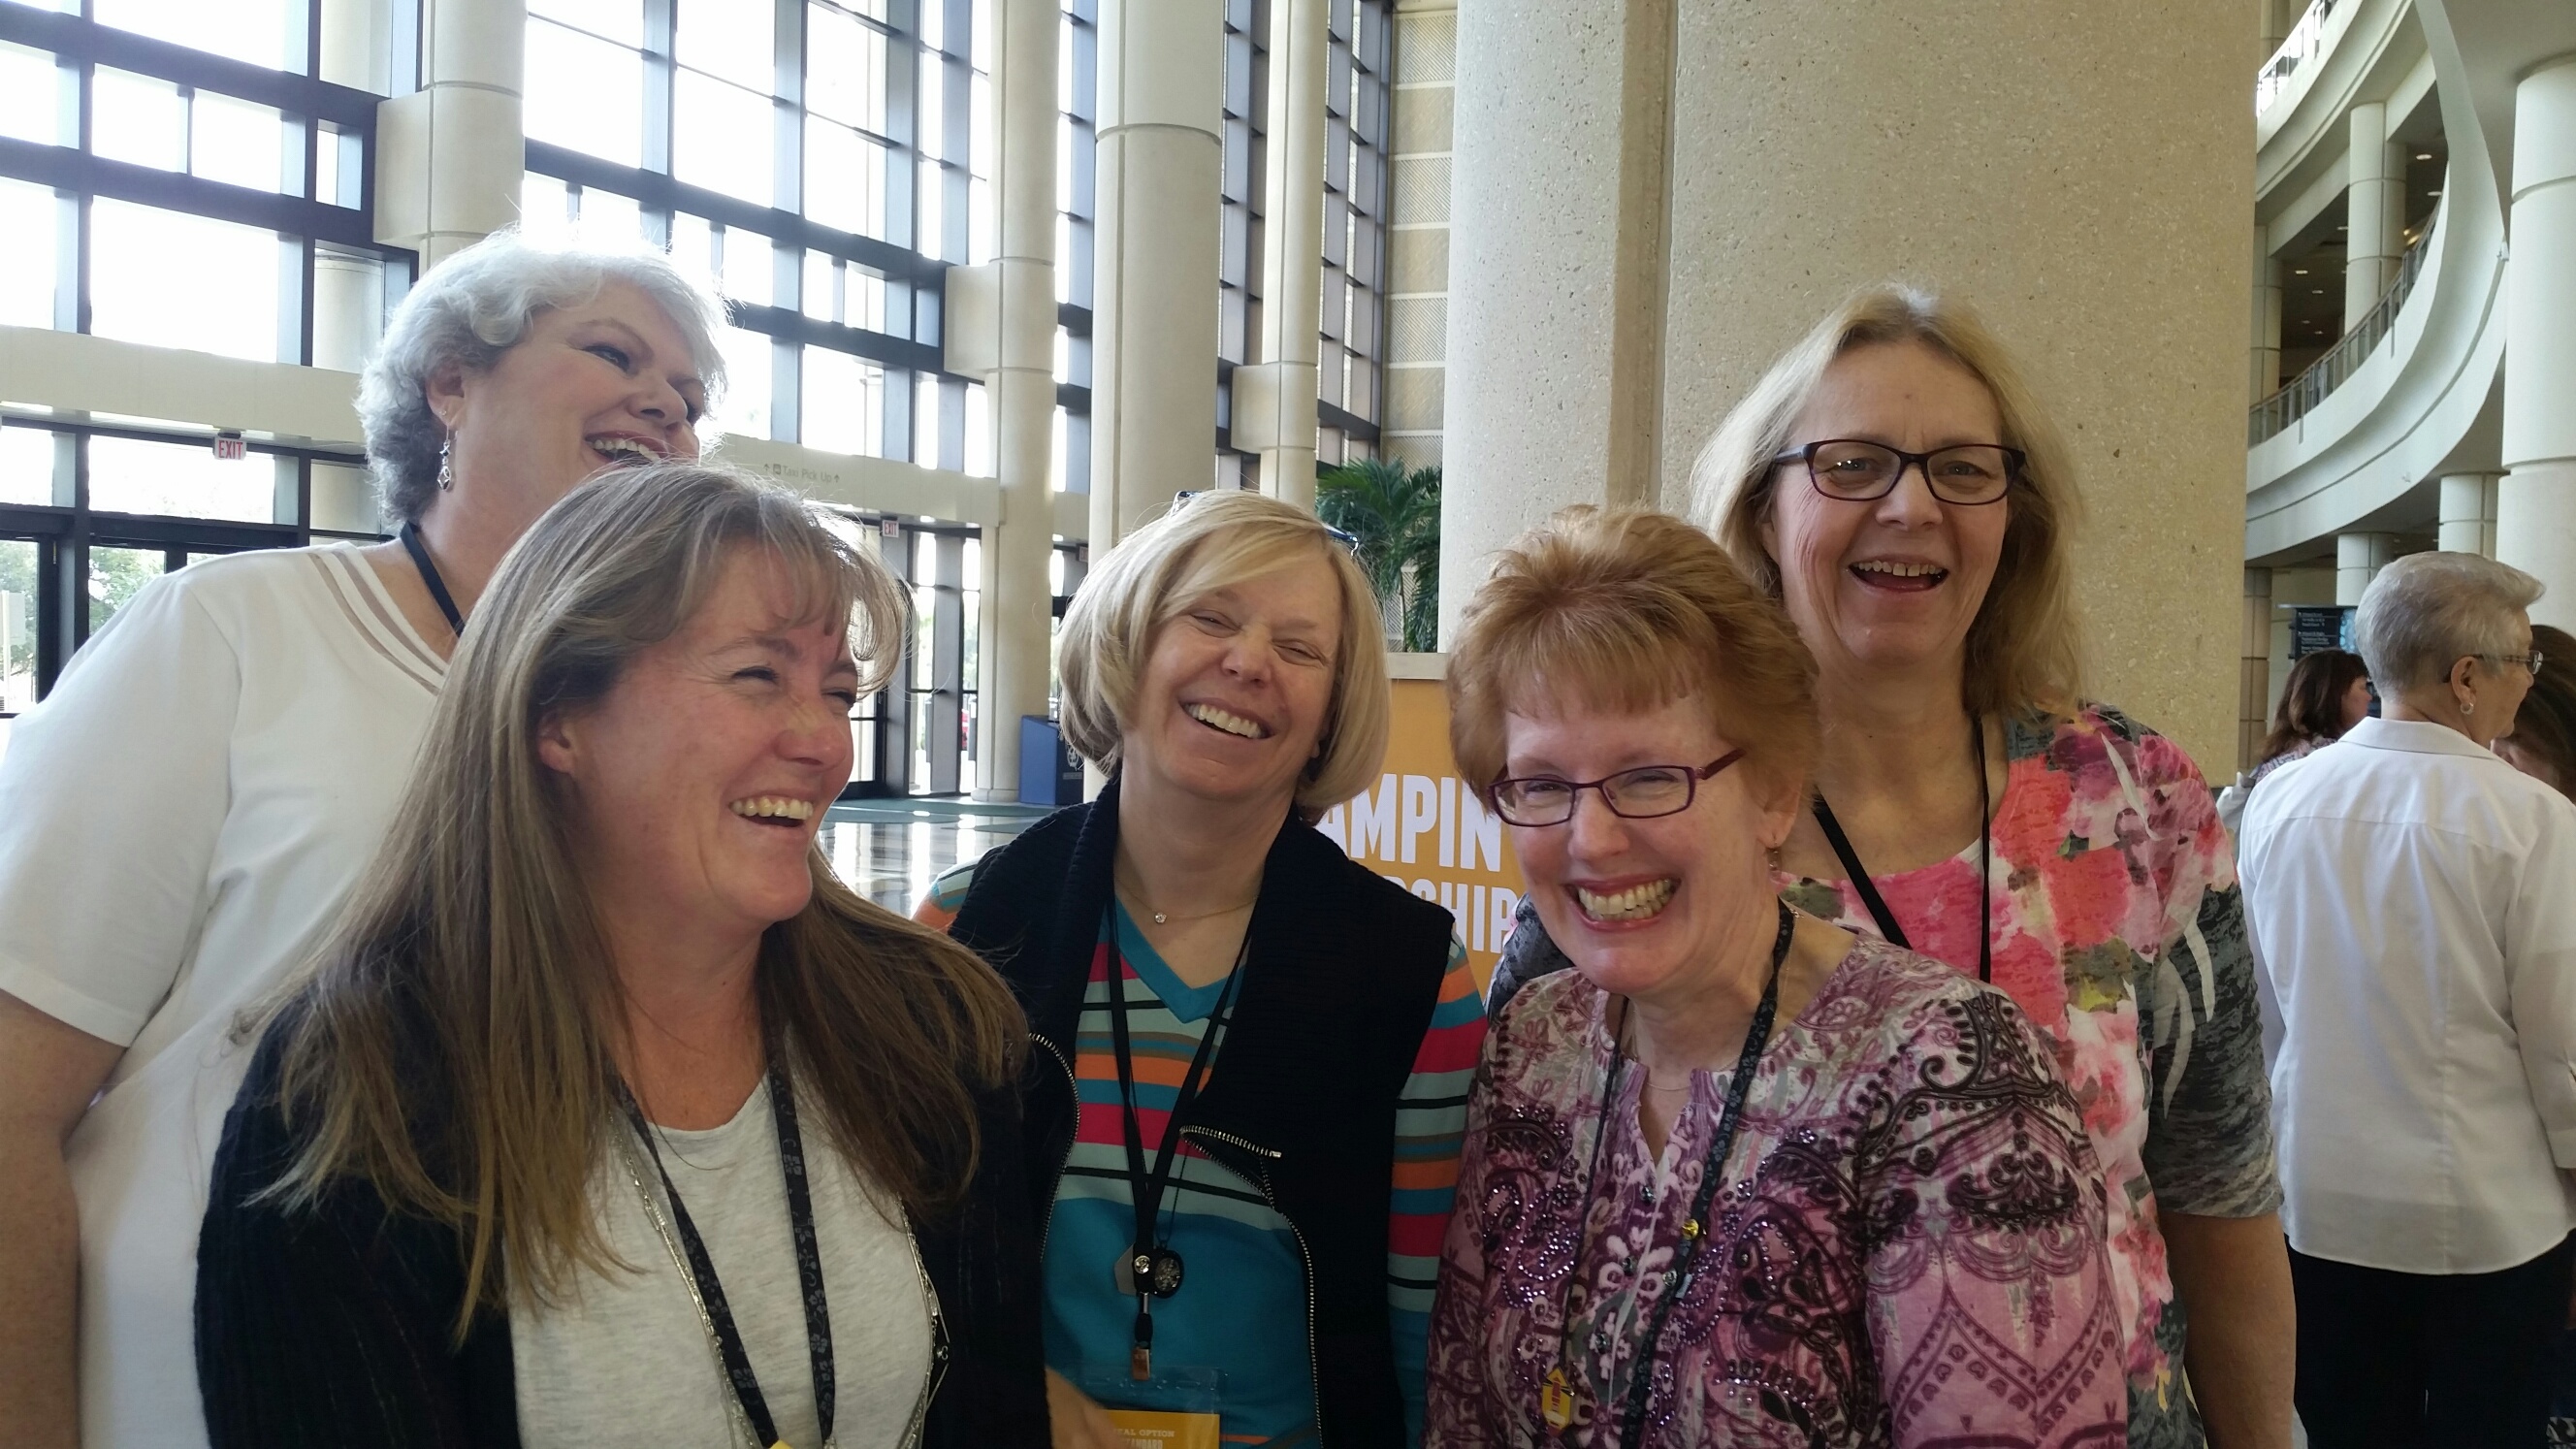
Isn’t this gorgeous?!!  My friend and fellow demonstrator, Jan, made this fun little gift for our little gang at Leadership last week.  I LOVE it!

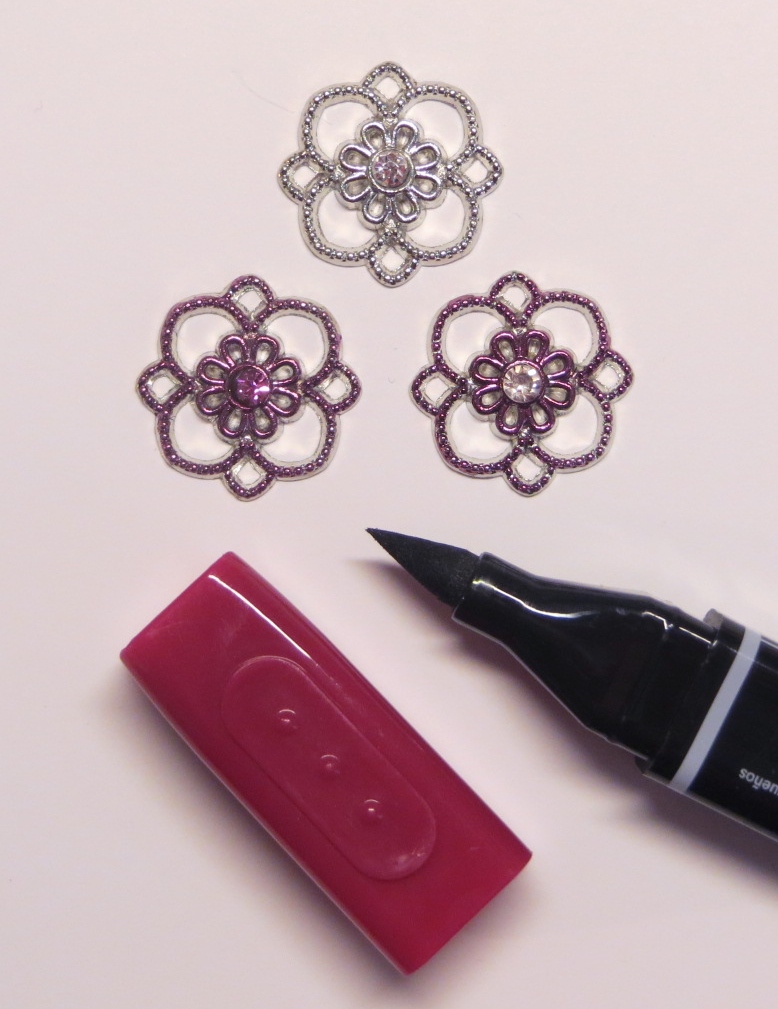
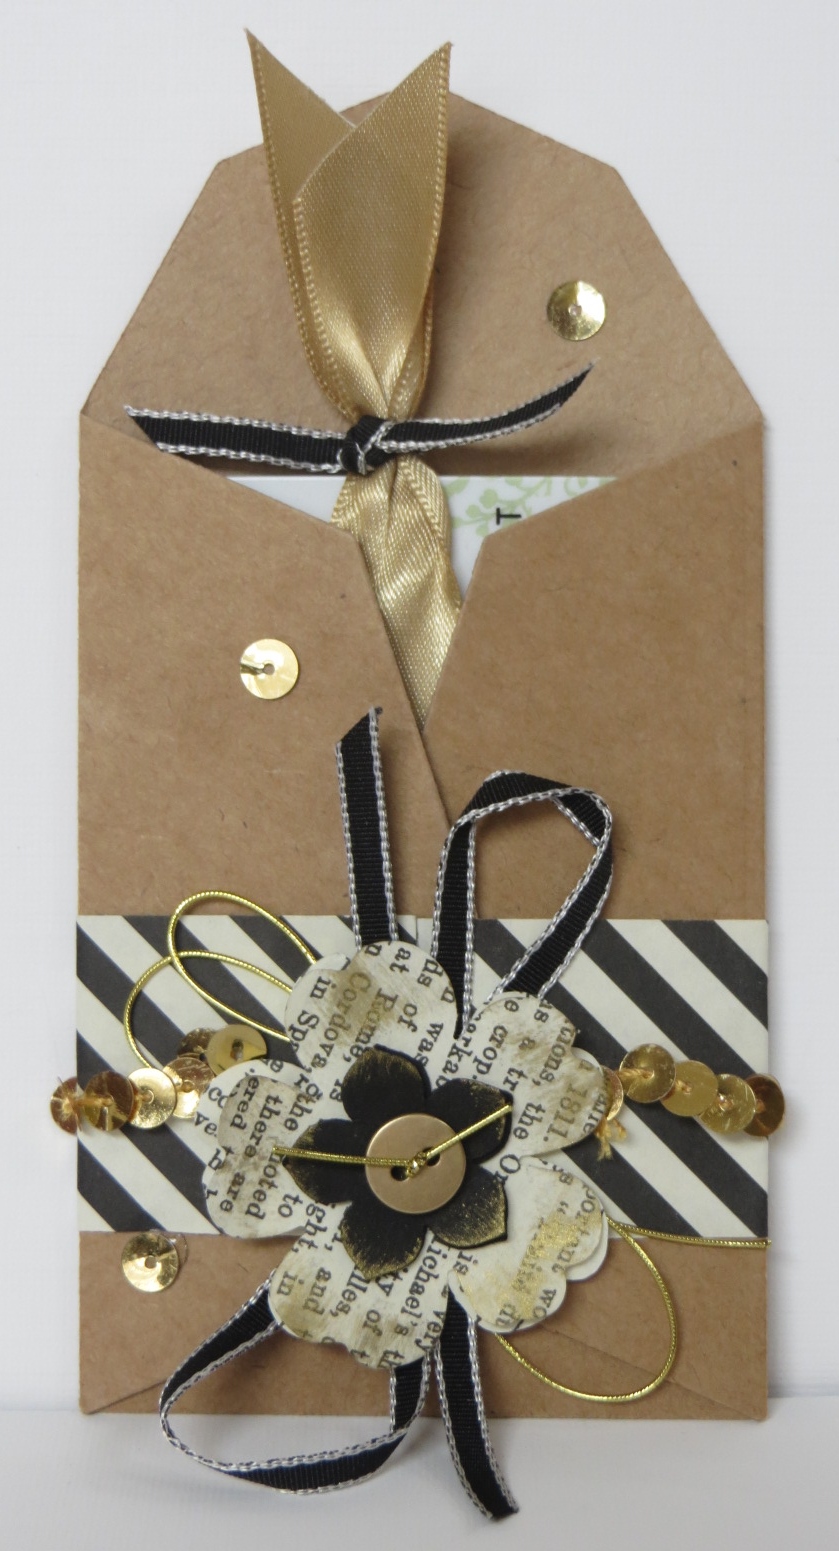
Jan used the Gift Card Envelope & Trims Thinlits Die.  It’s a carryover item from the Holiday Catalog.  If you want to check it out it’s on page 49 of the new Occasions Catalog.  Don’t you love the black and gold and Crumb Cake together?   It just screams “classy”!  The flowers just pop with that touch of gold on them.  I love the squiggly ribbons behind the flowers too.  It’s definitely something that I’d have problems since I can’t do random.  Sheesh!

Gorgeous, gorgeous, gorgeous!  What else can I say?  I may have to recreate this for a class sometime.  What’s your favorite part of this fun project?   Leave me a message and let me know.

Have a great day!  Take care and Happy Stamping!

You Brighten My Day!

IMG_5121Who doesn’t LOVE Sale-a-bration?  Check out this fun little stamp set, You Brighten My Day, that you can get for FREE with a $50 purchase!  I love FREE stuff….do you?

I started with a notecard for this little card.  The designer paper and the ribbon are also Sale-a-bration items that you can get for FREE!.  They are the Best Year Ever Designer Paper and the Best Year Ever Accessory Pack.  The accessory pack is great because you get THREE rolls of ribbon and THREE small packages of buttons!  Wow!

I stamped the light bulb and the saying on Whisper White card stock and punched them out with the Note Tag Punch.  Too cute!

I colored the light bulb with the dark Daffodil Delight Blendabilities marker.  I LOVE Blendabilities!  You can do so much with them!  Did you know that Blendabiities markers are also items you can get for FREE during Sale-a-bration?  How great is that?!!!

Start making that wish list now so you can get some FREE stuff!

Technique Tuesday: Blendabilities

IMG_5705It’s Technique Tuesday!  Look at what I learned at Leadership!  I knew you could color the rhinestones and pearls with the Blendabilities Markers but I didn’t realize that you could color whole embellishments and the metal portion too!  Wow!

I was pretty impressed to learn that I could take the brush tip of my Blendabilities Marker (I used the dark Melon Mambo shade) and color on my Something Borrowed Embellishment.  On the first colored embellishment I colored the whole thing .  In the second one I colored everything but the center rhinestone.  This is SO cool!  Now I’m going to have to design a card around these colored embellishments!  Well….I design cards around the ribbon I have, I can certainly design around a colored embellishment!  Ha!

You can color almost anything with a Blendabilities Marker.  Show me what you can color!  I’d love to see it!

Have a great day!  Take care and Happy Stamping!

Back From Leadership!

20150129_091058_resizedI’ve returned from a fun-filled weekend!  Wow!  It went by so fast!   I love hanging out with friends.  This is the group of gals hung out with.  I posted the “serious” view of this photo on my Facebook Page but after looking at this photo more it definitely is a more accurate view of us!  🙂

From the left we have Glenda, Tammie, Jan, me and Laura.  Too fun!  It was kind of sad to learn that this was the last January Leadership Conference Stampin’ Up! will be holding.  They’re moving on to different types of events and a different schedule.  I know we’ll enjoy those just as much.

20150130_161408_resizedHere is a picture of me posing with a couple of the cards I designed for a contest Stampin’ Up! is holding.  Wish me luck!  I’ll be sure to post the individual cards at later so you can enjoy them!  😉

Now I need to go play catch up on my life!  Ha!  I also need to catch up on sleep.  A 7 am flight leaving and getting home at 3 am just isn’t as easy as it used to be!  Ha!  I’m still recovering from driving home in a blizzard with white-out conditions too!  Yikes!  A little bit stressful.  All is well though.

Have a great day!  Take care and Happy Stamping!

Fun Painted Petals

IMG_5050Yes.  I am into tags.  I told you that yesterday.  🙂

I made this fun tag card for a swap I participated in.  I used the absolutely gorgeous new stamp set Painted Petals.  The images are so soft and beautiful.  I didn’t use any of it on this card but have you seen the COORDINATING Painted Blooms Designer Series Paper?  OMG!  You’re going to LOVE it!  You could take the sheets of this paper, frame them, and then put them on your wall they’re that GORGEOUS!  Check it out here!  Oh, and while we’re talking about COORDINATION don’t forget to check out the Spring Flowers Embossing Folder.  Sheesh!  Three fabulous new products that all work together!  I LOVE it!  🙂

I made the background for the tag by repeatedly stamping the line of dots from the stamp set on the card stock.  I have the photopolymer type stamps of this set so it was real easy to line everything up.  I’m really liking the photopolymer stamps for that very reason.  The only drawback to them is that some of the darker colors stain the stamp.  You can still see through them but they’re tinted.  Oh, well.

Today is the last day of Leadership.  I’m heading home late tonight as tomorrow is the Super Bowl.  We were hoping that Denver would be in it again but alas they’re not.  🙁  Next year?

Have a great day!  Take care and Happy Stamping!

Best Day Ever!

IMG_5127OK…I don’t know if today will actually be the best day I’ve ever had but I know it will be a good one because I’m at Leadership Conference with my friends!  🙂

The Best Day Ever stamp set is one of the items you can get for FREE during Sale-a-bration when you spend $50.  It’s a stamper’s favorite time of the year!  This stamp set is pretty darn cute with lots of fun images.  You can check out all of the Sale-a-bration items here!

I used 3 different Sale-a-bration items on this card.  Can you spot them?  I used the Best Day Ever stamp set, the Best Year Ever Designer Series Paper and ribbon from the Best Year Ever Accessory Pack.  Whew!  I even used a new item from the Occasions Catalog…the Ornate Tag Topper Punch.  I love my new products!  🙂

I’m really liking the new tag topper punches.  They make cute and easy embellishments for your cards and projects.  Have you tried any of them yet?  I’d love to see your projects using the tag topper punches.  Please share!

Have a great day!  Take care and Happy Stamping!

Banner Blessings Swap Card

005One of the fun things about Stampin’ Up! events is swapping.  This is where you exchange cards that you’ve made with ones from other stampers.  Today’s card is the one I made to trade.  Cute, huh?  🙂

I used the Banner Blessings stamp set.  Like the Snuggles and Smooches stamp set that I showed you the other day this stamp set isn’t in a catalog.  It’s one of the photopolymer stamp sets that comes out each month.  The banner over the word friend has a Bible verse on it.  You can check out the other three images here in my online store.

The little hearts at the top of the card are punched with the fun new Confetti Heart Border Punch.  After punching the hearts I embossed only the lower portion of the card stock with the Perfect Polka Dots Embossing Folder and added my ribbon.

I did have to cut out the banner by hand after stamping it on the Strawberry Slush card stock.  It wasn’t too bad though….even doing 35!  I popped the sentiment oval up with Stampin’ Dimensionals, added some layers to the card and it was done!

Have a blessed day!  Take care and Happy Stamping!

Leadership Conference Gifts

I’m on my way to Leadership!  Woo Hoo!  I had to leave my house at o’dark thirty this morning for my 7 am flight.  Yuk!  It’ll be worth it though!  I love Stampin’ Up! events!  I’m traveling with my friends Jan and Laura and we’ll meet up with other friends in Orlando.  Be sure to check out my Stamp by Stamp Facebook Page over the next few days to see what crazy things we’re doing!  🙂

IMG_5117It’s always fun to bring little gifts for the gals I’m hanging around with.  I was so excited when I came up with this fun little gift.  These little Tiny Treat Boxes are adorable!  They’re fun and easy to decorate too.

I used the Stacked with Love Designer Series Paper Stack and the You Plus Me stamp set to decorate my Tiny Treat Boxes.  I just layered the pieces of designer paper on Whisper White card stock and put a piece on each side.  After filling the box with Hershey Kisses (have you tried the caramel ones?  YUM!) I tied a little bow with Whisper White Satin Ribbon.  To finish it off I tied one of the new Something Borrowed Embellishments on top with a piece of baker’s twine.  Beautiful!  Wouldn’t you like to get one of these fun gifts?  🙂

Have a great day!  Take care and Happy Stamping!


Butterfly Basics

IMG_5061Butterflies in January?  Are you serious?  Yes I am!  It was 70 degrees here in Denver yesterday!  Woo Hoo!  Heat wave!  I live on the shady side of the street so there’s still a little snow in my front yard but not too much.  Sorry East Coast, I know you’re getting hit hard!

Back to butterflies….

This card was made using the fabulous new Butterfly Basics stamp set and the COORDINATING Butterflies Thinlits Dies.   There it is again….my favorite word….COORDINATION!  I know you get tired of hearing me say it but coordination makes a stamper’s life so much easier!  🙂

My friend Laura made this card for a swap I participated in.  Soft, pretty and it just shouts SPRING!  It’s a little hard to tell from the picture but I love the way that Laura embossed the Whisper White card stock with the Fancy Fan Embossing Folder after she stamped the collage of images on it.  Very pretty!

Since it’s Technique Tuesday I’m going to give you a little hint about die cutting the butterfly:  place a piece of wax paper between your card stock and the die.  It will make your life SO much easier.  It will be a cinch to pop out all of those little pieces.  You may also want to try using a shim.  The first time I die cut a butterfly like this my pieces didn’t pop out easily even with the wax paper.  I slid an extra piece of card stock underneath my bottom cutting plate and it was enough extra thickness to give me a better cut.  Give it a try and see how easy and beautiful these butterflies can be!

Have a great day!  Take care and Happy Stamping!

Let’s Get Away

IMG_5055Let’s Get Away!  What a fun name for a fun new stamp set.  This stamp set is a Project Life stamp set that coordinates with the  Let’s Get Away Project Life Card Collection and the Let’s Get Away Project Life Accessory Pack.   These fun Project Life items can be found on page 47 of the new Occasions Catalog.

Just looking at the stamp set in the catalog makes me want to start scrapbooking all those photos I have on my computer.  It’s just a matter of finding….no….making…the time!

My down-line Janet made this fun card for a swap I hosted.  The designer paper is the fun new Birthday Bash Specialty Designer Paper in the Occasions Catalog.  I love the way Janet embossed the Whisper White card stock with the Stylish Stripes Embossing Folder and then stamped the words and the little airplane in the space between the embossing.  Too fun!

I chose to share this card today because it’s adorable and also because I’m traveling next week to Stampin’ Up!’s Leadership Conference in Orlando.  Woo Hoo!  I can’t wait to hang out with my fellow demonstrators, learn new things and just have a grand old time!

Have a great day!  Take care and Happy Stamping!

More Snuggles & Smooches

IMG_5047I just love the name of the stamp set!  How can it not be adorable with a name like Snuggles and Smooches?!!  You can check out all of the cute images here.

If the gift bag looks familiar it should.  I showed it to you last week but in Real Red.  I will admit that I like the project much better in Real Red but I started with this try in Calypso Coral.  It’s not bad but it’s SO much better in red!

Yesterday I showed you how you can make the same project in different sizes.  Well, today I’m showing you how you can take the same basic design and make a card and a gift bag.  I think I like the gift bag better than the card.  How about you?  Which one do you like?

I think it’s the polka dots.  I might like the card better with polka dots….hmmm…I just thought of a way I could get polka dots on the card.  I’ll give it a try.  If it works I’ll let you know!

Have a great day!  Take care and Happy Stamping.

3 x 3 Thursday: A Happy Heart Thanks

IMG_5037It’s 3 x 3 Thursday!  Not only do you get an adorable 3 x 3 card today but you get it’s matching full-size card!  Woo Hoo!

Aren’t today’s card’s sweet?  How can they not be when I used the adorable new Happy Heart Textured Impressions Embossing Folder.  Wouldn’t these hearts look cute on a baby card?  Hmmm….I may have to give that a try!  I just love all those little hearts.  They make me smile.  🙂

These cards were so easy to make.  I first embossed my piece of Strawberry Slush card stock.  Then I stamped my “thanks!” from the Lot’s of Thanks stamp set on Pink Pirouette card stock and punched it out with the Sweetheart Punch.  I added some layers and ribbon on the larger card and I was done!  Adorable and EASY!

I started playing with my Sale-a-bration items last night.  Woo Hoo!  Have you picked out your favorite SAB item?  What is it?  Leave me a comment and let me know!

Have a great day.  Take care and Happy Stamping!

Celebrate Today!

IMG_5042Who doesn’t love a cute birthday card?

I made this fun birthday card for a swap I recently hosted.  I used the new birthday stamp set “Celebrate Today” from the Occasions Catalog.   I love all the balloons and banners in this stamp set.  Too fun!

Don’t you love my balloon?  I didn’t stamp it.  I actually used a Stampin’ Sponge to rub color on a piece of Vellum Card Stock.  Then I die cut the balloon with the COORDINATING Balloon Framelits.  Yes!  Hooray for COORDINATION!!!  I thought I gave the balloon a fun look and you can see the confetti through it!

If you’re wondering where the “celebrate” is from it’s actually from my favorite birthday stamp set “Endless Birthday Wishes” (#137553  $13.95).  This stamp set isn’t in a catalog.  It’s one of the monthly photopolymer stamp sets that Stampin’ Up! comes out with.  Click on the link and see all of the fun stamps included in this set.  Order yours today because once they’re gone….they’re gone.

I used a color combination of Bermuda Bay and Strawberry Slush on this card.  What color combination would you choose?  Leave me a comment and let me know!

Have a great day!  Take care and Happy Stamping!

Golf Anyone?

076I don’t golf.  I don’t know how to golf.  Ok…I can play Miniature Golf.  So why would I create a golf card?  Well….my father-in-law’s birthday was last month and he loves to golf.  I was going to send him this card.  Notice how I said “was going to”.  Sheesh!  I thought about his birthday, I even made the card.  I just didn’t get it in the mail.  What’s worse is that I even brought said card to MN with me so I could give it to him in person.  Did I?  Heck no!  I can’t even hand people cards in person.  What’s wrong with me?!  Yikes!  I guess I’ll save it for next year….

This is a pretty easy punch art card.  An oval, a circle and a pennant.  That’s all you need!  Hmmm…..it’s so easy maybe I should recreate it for Father’s Day…….

Have a great day!  Take care and Happy Stamping!


You Plus Me (again!)

013Here it is….the last valentine I made back in December.  I haven’t had a chance to create yet in January and it’s already closing in on the end of the month!  I do plan to remedy that this week.  🙂

Just like on yesterday’s cards I started with one of the Crumb Cake Note Cards, the You Plus Me stamp set and the Stacked With Love Designer Series Paper Stack.  This card is a little more involved only because you have to die cut the banners.  Other than that it’s easy peasy!

I hope you’ve been inspired to start on your valentines. 😉

Have a great day!  Take care and Happy Stamping!