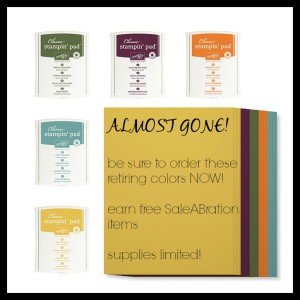
The Retiring 2014-2016 Stampin’Up! colors

f5f7b008-79a9-4185-b147-f28a226a16a7Every year Stampin’ Up! retires the current In-Colors.  Every year these items go FAST!  The ink pads, the card stock, the ribbon, the embellishments and especially, the ink refills.

I really like these colors and am going to miss them.  I’ll especially miss Mossy Meadow and Blackberry Bliss.  They’re such rich colors.

I have my ink pads but I’m going to have to double-check my ink refills and my card stock supplies.  I always like to keep some of these items on hand after they’re gone.

Do you have these colors?  Mossy Meadow, Blackberry Bliss, Tangelo Twist, Lost Lagoon and Hello Honey?  If  you don’t, get them now!  Don’t wait.  Once the retired list comes out in May these items will go fast and they’ll only be available while supplies last.

If you own the ink pads, but don’t own the ink refills order them TODAY!  Ink refills go really fast and your ink pad isn’t going to do you much good if it dries out.

Don’t forget that Sale-a-bration ends soon (3/31).  Stock up on your 2014-2016 In-Color items today and earn a FREE Sale-a-bration item!  It’s a win-win situation!

Have a great day!  Take care and Happy Stamping!

Gorgeous ‘What I Love’

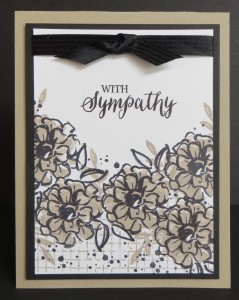
IMG_7637If you don’t have the ‘What I Love’ Sale-a-bration stamp set you still have a few weeks to get it.  I LOVE this stamp set and this flower.  It’s gorgeous!

I wanted to use this stamp set in a class again before the end of Sale-a-bration but I wasn’t sure what to do with it.  As I was perusing Pinterest I came across a card in Basic Black, Crumb Cake and Whisper White.  I was in love.  I thought it was gorgeous and knew I had to do my own thing with it.

The Whisper White piece of my card is pretty much as the same as the card I saw on Pinterest but then I added more layers and the ribbon to make it a “Cindy” card.  You know me.  It’s hard for me to have a card with out those two items!  🙂

One of the best things about this card is that you can use it for most any occasion.  My customers have been asking for sympathy cards and I knew this would be perfect for that.

Now don’t forget!  Sale-a-bration ends on March 31st!  Put together that order and get your FREE stuff!  One free Sale-a-bration item with every $50 you spend!  Shop NOW!

Have a great day!  Take care and Happy Stamping!

Shimmery Flowering Fields

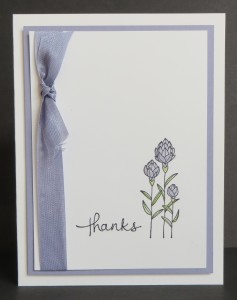
Flowering Fields.0316A simple and lovely card.  That pretty much describes this one.  This card was one of the favorites in class this week along with the Wink of Stella vellum card I showed you yesterday.

You can’t tell from the picture but there’s a lot of shimmer going on with this card.  The card is made using Shimmery White card stock (my new favorite!) and the flowers are colored with the clear Wink of Stella Glitter Brush.

I know that you’re thinking “Wisteria Wonder”?  She never uses that color….well, this was one of those times where I sat looking at my collections of ribbon trying to figure out what ribbon I could use to figure out the colors for my card.  It’s crazy, but that’s how I work.  If I know I want to use ribbon on my card I start with ribbon and go from there.

How do you decide on the color combination for your cards?  I’d love to know!  Leave me a comment!

Have a great day.  Take care and Happy Stamping!

Wink of Stella Meets Vellum

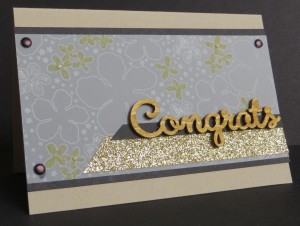
IMG_7644It’s a sparkly day….at least according to this card!  Shimmery and sparkly.  It doesn’t get any better than that!  🙂

There’s only two weeks left of Sale-a-bration so I wanted to use Sale-a-bration items in my classes this week.  On this card I used TWO items!  Can you spot them?

The first Sale-a-bration item that I used was the new gold Metallic Glitter Tape.  So fun!  It comes in a package of three with gold, silver and white.  The white is pretty fun because you can color it any color you’d like!

The second Sale-a-bration item I used was the Botanical Gardens Vellum.  It’s so fun because the designs in the vellum match the designs of the Botanical Gardens Designer Series Paper.  For my note card I chose to just mount the vellum on Basic Black card stock.  Then, to jazz it up a little bit I used my Wink of stella Glitter Brushes.  I used the gold one on the little flowers and the clear one on the slightly larger flowers.  The clear glitter flowers don’t show up too well in my photo but they look real sparkly in person.

One more thing I did to add a little sparkle to my card was to use the gold Wink of Stella Glitter Brush on the wooden “congrats”.  Again, it’s hard to tell from the photo but it really adds a lot to the card.

Sparkle, shimmer and shine.  I just can’t get enough!  Have a great day!  Take care and Happy Stamping!

Pedal Pusher!

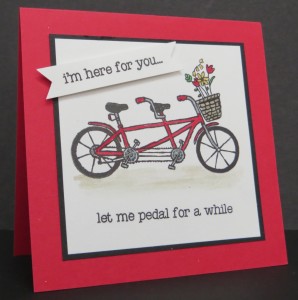
Pedal Pushers.0316There’s just something about a tandem bike.  It definitely makes cycling look like more fun than exercise.  I don’t think I’ve ever been on a tandem bike but I have a friend from church who rides them all the time.  Her and her husband actually go on trips all over the world with their bike.  It fold up and fits in two suitcases!  They’ve been to France, Vietnam and all over the U.S..  Soon they will be leaving for the Netherlands to see the tulips!  How fun is that?

This card just makes me smile.  A fun tandem bike and a basket full of flowers.  What more do you need to brighten your day?

I was going to color this image with my ink pads and blender pens.  Then I though…why go to all that work when I have a gazillion perfectly good markers.  I usually don’t grab my markers to color just because the area to color is large and the blender pen/ink pad combo covers a little better but the areas to be colored are pretty small so the markers worked perfectly!  I did have my Aqua Painter on hand to add a little dirt under the bike to ground it so my bike wouldn’t be floating in space.  I hate floating images…Ha!

This stamp set is one of the new Sale-a-bration stamp sets that came out in February.  It’s pretty fun.  Don’t forget that Sale-a-bration ends in just a few short weeks!  Don’t miss out on getting your FREE Sale-a-bration item just by placing a $50 order.  Shop now!

Have a great day!  Take care and Happy Stamping!

Easter Lamb

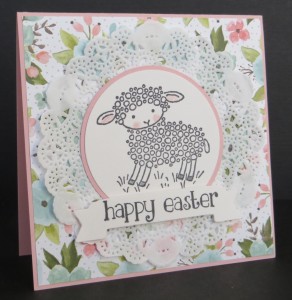
Easter Lamb.0316I LOVE this little lamb!  Isn’t he adorable?  When I first saw him in the Occasions Catalog back in November I couldn’t wait until Easter!

With the combination of the Easter Lamb and the Birthday Bouquet Designer Series Paper how can you go wrong?  The paper is absolutely gorgeous!

I made sure to cut a few extras of this card when I was cutting for class.  I made a few Easter cards but then on a few I left off the “Happy Easter” banner so I could use them as baby cards!  Pretty clever of me don’t you think?  🙂

I’ve been trying to stamp up a storm this week.  I want to plan my next few classes well in advance so I don’t get that last minute panic the week before.  I have my next two classes planned so I’m doing pretty good.  Of course I keep changing my mind on what cards to do in which class but it all works out.  🙂

Have a great day!  Take care and Happy Stamping!

Pyramid Pals Bunny

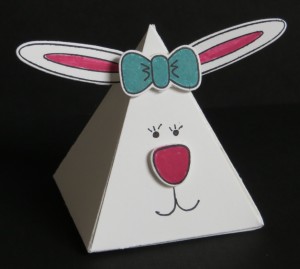
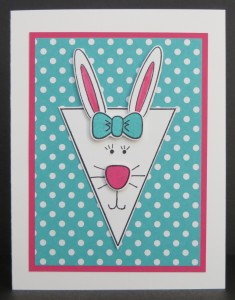
Playful Pals.0316IMG_7652Look familiar?  It should if you read yesterday’s post.  Yesterday I showed you a bunny card made using the Playful Pals stamp set and the Pyramid Pals Thinlits.  Today I have a little 3-D bunny made with the same two items!  🙂

This little 3-D critter was pretty easy to make.  I just stamped and die cut all the little pieces and put them together.  Oh no!  I just noticed that I forgot her little whiskers!  Poor little bunny!

You make the pyramid base by cutting two  base pieces and adhering them together.  The only thing I haven’t figured out yet is how to put something on the inside of the pyramid like candy and then be able to get it back out without ruining your little critter.  I will definitely let you know how to do that once I get it figured out.

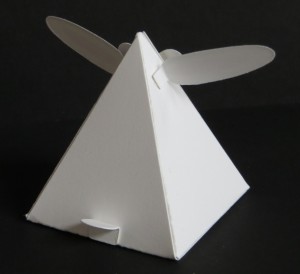
The little pieces like the ears and the tail are easy to adhere to the pyramid because they have little flaps which you can see in the second picture.  I think the little tail really finished off this little bunny, don’t you?  🙂

Now to figure out which little Pyramid Pal to make next.  The photo on page 44 of the Occasions have a number of ideas but wait until you check out Pinterest!  There are TONS of ideas.  Hmmm…

Have a great day!  Take care and Happy Stamping!

Playful Pals Bunny Card

IMG_7606It’s another bunny card! I guess you can never have too many.  Ha!

This little gal is made with the Playful Pals stamp set.  This stamp set has all sorts of pieces and parts that coordinate perfectly with the Pyramid Pals Thinlits to make all types of adorable creatures but wouldn’t have thought to use the stamps and thinlits to make a little critter on a card.  Just goes to show who’s lacking in imagination! 😉

You may have guessed that this stamp set and the framelits weren’t on my top ten list of things to purchase from the Occasions Catalog…I don’t have a lot of little kiddos around at this point in my life.  But then I received the cards from a swap I participated in and the rest is history….someone had made a little bunny face with the stamp set and the framelits and I knew I had to do the same for my Easter class.

TSC!  Too Stinkin’ Cute!  What more its there to say?  I can hardly wait to make some more fun little critters!  I wonder what I should attempt next…..

Have a great day!  Take care and Happy Stamping!

Happy Birthday Paper Pumpkin!

10710627_1683725421885333_2378043544455557873_nYou’ve come a long way baby!  Paper Pumpkin is celebrating it’s 3rd birthday!  Wow!  Don’t miss out on this special celebration kit for March.  The deadline to sign up to receive it is Thursday March 10th!

Some of you may be asking what Paper Pumpkin is….well let me tell you!  Paper Pumpkin is a fully designed project kit that arrives at your door each month with stamps, ink and paper–everything cut and ready to go.  It will surprise you with fun projects like cards, gift packaging, home décor, and more for only $19.95 a month (shipping included).

IMG_7635The projects are wonderful!  Check out the photo on the left of the cards I made with February’s kit.  They’re fun and easy to put together!

There are two different ways you can sign up.  You can sign up for a monthly subscription where your credit card is automatically charged every month.  With this method you can put a hold on your account for a month or so if you’re real busy or easily stop the subscription by signing into your account.  To sign up for a monthly subscription simply click here.

The second method of signing up for Paper Pumpkin is a prepaid subscription.  You can purchase a prepaid subscription for 1 month, 3 months, 6 months or 12 months.  With a 6 month subscription you will save $1/month and with a 12 month subscription you will save $2/month.  Now through the end of March the 3 month subscription is on sale for only $55!  Woo Hoo!

Did you know that if you purchase a 3 month, 6 month or 12 month subscription now you can receive Sale-a-bration benefits?  Free stuff!  Click here to sign up for a prepaid subscription.

Don’t miss out!  Sign up for Paper Pumpkin today!  Remember that Thursday, March 10th is the last day to sign up for the March kit.  If you sign up after the 10th the first kit you receive will be the April kit.  Give it a try!  I think you’ll like it!  🙂

Contact me with any questions you may have.  Take care and Happy Stamping!

Technique Tuesday: Friends & Flowers Bunny

IMG_7600You can never have enough bunnies….did I really say that?  OK…you can never have enough bunnies on cards, or stuffed bunnies for little kids but the real ones….yes, you can have enough.    In the spring and summer we can have way too many in our yard and they’re not afraid of us.  They just sit there and look at you with those cute little faces eating our grass.  Good thing I don’t have a garden!

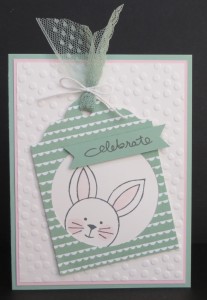
I like bunnies on cards.  How about this adorable little fellow peeking out at you?  He’s from the Friends & Flowers stamp set.  I actually cased the tag portion of this card right from the Occasions Catalog.  I love it when someone else does the work for me!  Ha!

If you’re wondering how to stamp the ears behind the head it’s a simple technique called masking.  I first stamped the little bunny face on my card stock.  Then I punched a 1 1/4″ circle from a sticky note and placed it right over the bunny face.  The next step is to stamp your ears.  The bottom portion of the ear stamps on to the sticky note so when you remove the sticky note you only see the top portion of the ears.  Ta da!  It’s magic and one of the easiest techniques you’ll find in stamping.  It works great when you want to stamp leaves peeking out from behind a flower and things like that.  Give it a try!

Have a great day!  Take care and Happy Stamping!

Circle of Spring

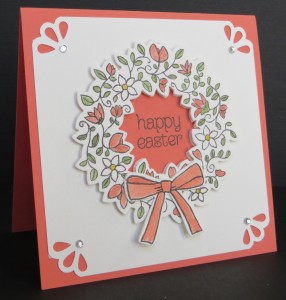
Circle of Spring.0316I LOVE it when a plan comes together!  This card turned out beautifully!  If you like the picture, it’s even better in person!  🙂

I saw a similar card and just had to try it.  I love the way the center of the wreath is cut out on both the background piece and the wreath itself.  It’s really striking when you pop up the wreath with dimensionals.

Another thing I love….my new favorite punch….the Curvey Corner Trio Punch!  It just adds so much to a card.  It’s the perfect finish to a card.

This Circle of Spring stamp set has 6 different sentiments which makes it perfect for any occasion.  Guess what?  I’m going to use my favorite stamping word….COORDINATION!  Yep…The Circle of Spring stamp set coordinates with the Wonderful Wreath Framelits.  Woo Hoo!  Coordination!

I have a great tip for you when you use the Wonderful Wreath Framelits.  Instead of stamping your image first you want to die cut the middle of the wreath.  There’s a little “arrow” on the framelit.  Note which direction it’s pointing when you die cut the center.  Now you want to line up the stamp with the “arrow” on the stamp pointing in the same direction the framelit “arrow” pointed.  This should make it easy-peasy to line up the stamp around the die cut center!  If you stamp first and then try to line up the center framelit you can’t really see where things go.  The first time I tried this I was amazed at how much easier it went.  Give it a try!

Have a great day!  Take care and Happy Stamping!

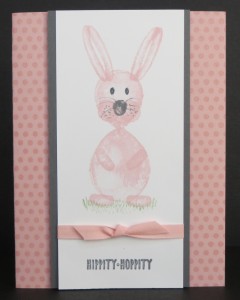
Hippity-Hoppity Easter’s On It’s Way!

IMG_7602Can you believe that Easter will be here in a little over 3 weeks?  Yikes!  I’m trying to figure out if it’s worth the effort to get my Easter decorations down from the attic and put up.  By the time I get it done Easter will be here and over!  Ha!

I’ve had my snowmen decorations up since I took my Christmas things down.  They’ve sure looked strange lately though since the temperatures in Denver have been in the upper 60’s for the past 3 weeks!  Sheesh!

Easter is on it’s way and it’s time to embrace it.  Time to get those Easter decorations up and make those Easter cards!  We made Easter/Spring cards in classes this week.

This cute little bunny is made with the Balloon Builders stamp set.  Yep.  Another stamp set I didn’t think I needed but ended up getting because I’ve seen so many adorable cards made with it.  You need to check out this stamp set (pg 14 of the Occasions Catalog).  Looking at all the little pieces you’re thinking “and what am I going to do with this stamp set?”.  Then you look at the bottom of page 14 and see all of the cute critters the Stampin’ Up! artists designed.  After that you go on Pinterest and check out even more cute critters.  That’s when you know you have to have the darn stamp set!  🙂

I can’t wait to try out some of the other cute critters I’ve come across.  I’ll be sure to share.

Have a great day!  Take care and Happy Stamping!

SASSY Stampers!

Generations.0814

We are the Sassy Stampers and we would love for you to join our team!  Yes, we are sassy but the SAS in sassy stands for Seriously Addicted to Stamping (or as we like to call ourselves, Smart-Ass Stampers).  However you choose to describe us we LOVE to stamp.
I have met some of my dearest friends through stamping and Stampin’ Up! and I can’t imagine my life without them.  The picture here is one “branch” of my team.  On the right you have my upline, Tara, me, my direct downline Andrea, her downline Janet and then Janet’s downline Angela.  We were all together at an event.
The friendships are definitely at the top of the list of why I love being a Stampin’ Up! Demonstrator but there are many items on my list.
20% Discount on Stampin’ Up! products.  Woo Hoo!  I love my discount!  Many people become demonstrator just for the discount.  You don’t have to have a team or have a gazillion dollars in sales to be a demonstrator.  As long as you have sales (and yes, whatever you purchase for yourself is included in your sales) of $300 per quarter you will remain an active demonstrator.  This discount is the main reason that many people become demonstrators.  In fact, most everyone on my team are demonstrators only for the discount.  They don’t hold classes, they don’t have parties, they just buy fabulous Stampin’ Up! products for themselves and maybe sell to a few friends.  That’s the beauty of being a Stampin’ Up! demonstrator.  You can do things YOUR way!  You can be involved as much as or as little as you’d like.  If you love Stampin’ Up! products and would love that 20% discount….let’s talk.  I’d love to have you join my team.  Contact me today!
Stampin’ Up! Events.  I love Stampin’ Up! events.  I love the excitement.  I love the sneak peek at new products, I love all the samples and ideas I come home with.  I love hanging out with my friends away from home!
Extra Income.  I love the extra income I can earn by being a demonstrator.  I love being able to support my stamping habit as well as having a little extra to spend on me, my family or on whatever I want!
Starter Kit.  Did you know that when you sign up to become a demonstrator and purchase the Starter Kit you get to choose EVERYTHING in it?  Yep!  Everything!  All $155 in merchandise in the kit is what you want, not what someone else thinks you should have.  How great is that?  You also get $50 in business supplies.  A value of $205 for only $99.  Woo Hoo!
If you’re thinking “I can’t believe I haven’t done this yet!” you can just click right here and sign up right now!  If you’re not quite ready, give me a call or send me an email with any questions you may have.  Who doesn’t want to save 20% on all Stampin’ Up! products!  🙂
Do you live outside the Denver area?  You can still be part of our team.  With cell phones, Skype, FaceTime and social media, keeping in touch and helping each other out is EASY!  Join us today!  I’m here for you with any questions you may have.
Take care and Happy Stamping!
A Nice Cuppa

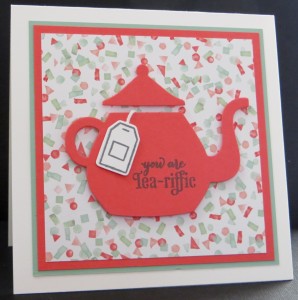
A Nice Cuppa.0216I LOVE all the different suites that Stampin’ Up! has in the new Occasions Catalog.  The Have a Cuppa suite is too fun.  Whether you drink coffee or tea this suite is for you.

The stamp set, A Nice Cuppa, has fun images but the coordinating Cups & Kettles Framelits are even better!  With the framelits you have four different cups/mugs, the tea pot, silverware, a tea bag and some designs for cups.  Wow!

I chose the tea pot and the tea bag for my card.  Once again my design worked best on a 4 1/4″ x 4 1/4″ card.  Sometimes, less is more.  I turned this card into a birthday card and sent it to a friend who’s birthday is today.   Every year her and her mother go to tea for her birthday so I thought this card was perfect for her.

I’m going to confess that Mint Macaron isn’t my favorite color but the fabulous Birthday Bouquet Designer Paper is making me love it!  The designer paper on this card is from that pack.

Hmmm…just looking at this cute little tea pot is making me want to make a cup of tea.  I guess I better go….

Have a great day!  Take care and Happy Stamping!

Birthday Blooms

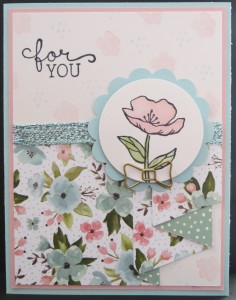
Birthday Blooms.0216Can you believe it’s March 1st already?  Unbelievable!  I think it only snowed once, maybe twice here in Denver and the temperature has been in the 50’s and 60’s for weeks with no end in sight!  It make’s me a little nervous for April!  Ha!

Stampin’ Up!’s Birthday Bouquet Suite in the Occasions Catalog is beautiful.  There are so many fun products in it.  The Birthday Blooms stamp set is sweet, the accessories are fun and the Birthday Bouquet Designer Paper is absolutely gorgeous.

On this one card you can see 5 of the 7 products shown page 9 of the Occasions Catalog!  Wow!  Which product on the card is your favorite?  I think I like the Pool Party Glitter Ribbon the best.

Don’t you love the Pleated Skirt Fold made with the designer paper?  I CASEd this card from Becky Roberts but of course had to switch things up a little bit.  You can find her Pleated Skirt Fold tutorial here.  It’s pretty simple once you have the measurements and such.  Give it a try!  The gorgeous Birthday Bouquet designer paper works perfectly for this technique.

Have a great day!  Take care and Happy Stamping!