Sip, Snack and Stamp!

Today I’m holding a new event call Sip, Snack and Stamp.  It’s an open house style event where you can drop in, visit and make a couple of cards.  You can even play a little with the new In-Colors.  So if you’re in the south Denver area pop on in.  9 am – 11 am and 4 pm – 7 pm!  🙂

At our On Stage event last month Stampin’ Up! challenged us to hold a new event each month for the next six months.  ‪#‎6monthstampingoals  My Sip, Snack and Stamp event is my first new event.  I don’t have a lot of RSVP’s but I think we’ll still have a nice time.

IMG_8396
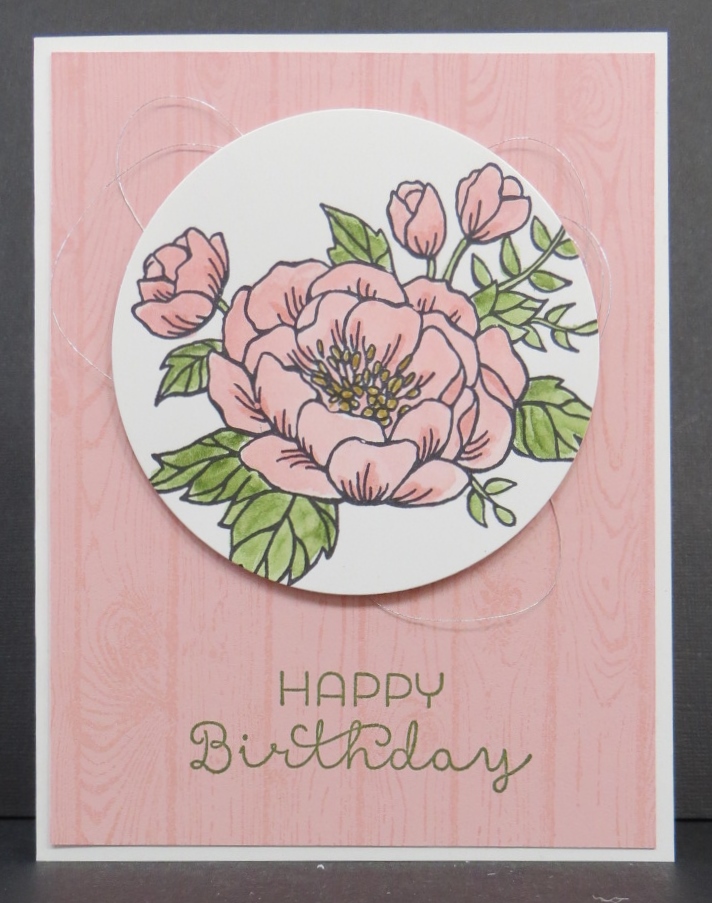
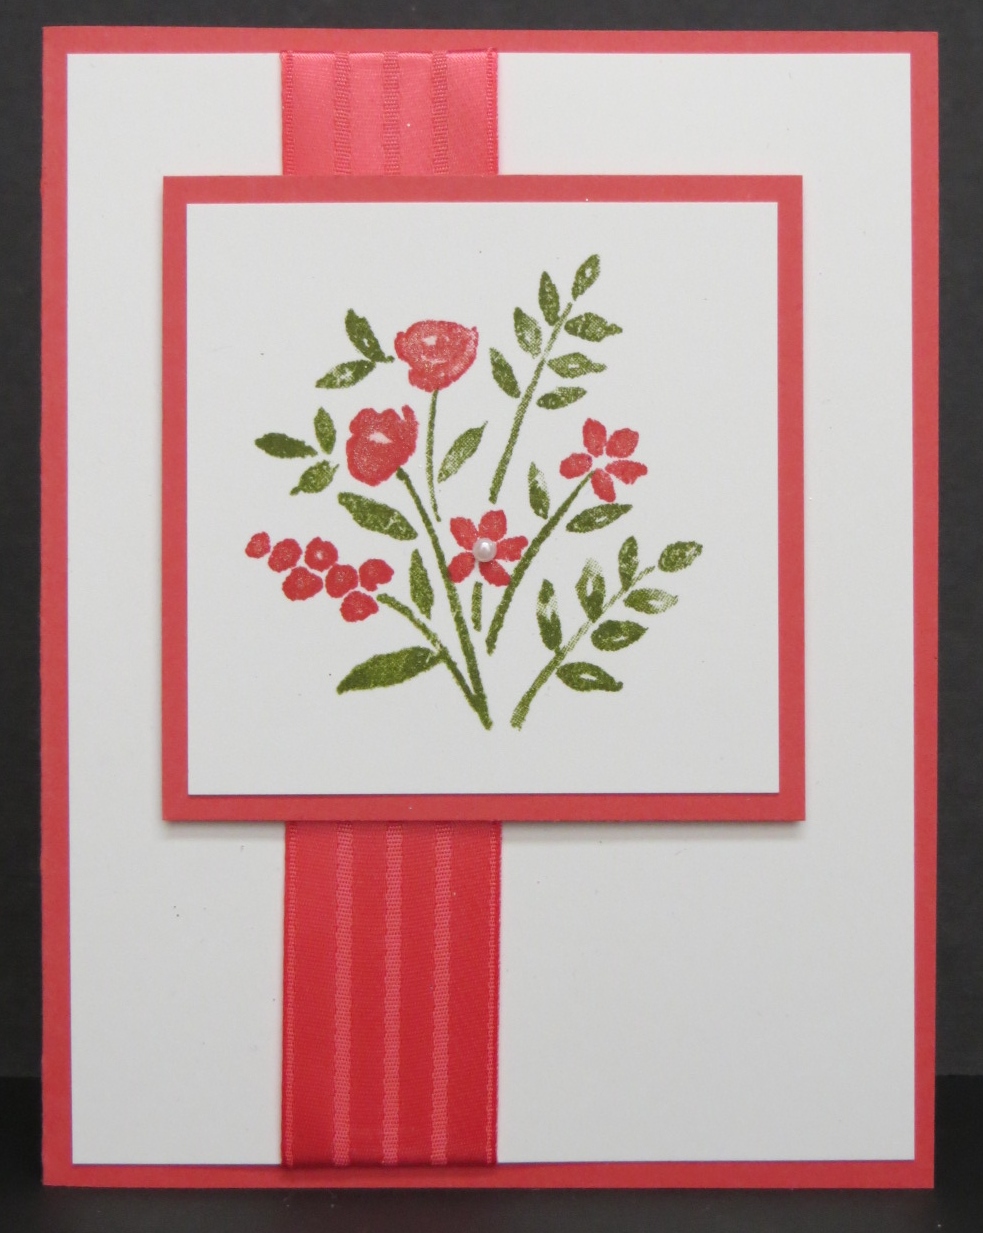
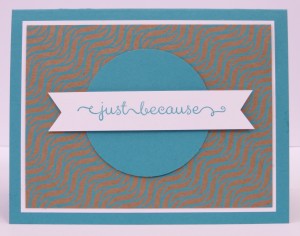
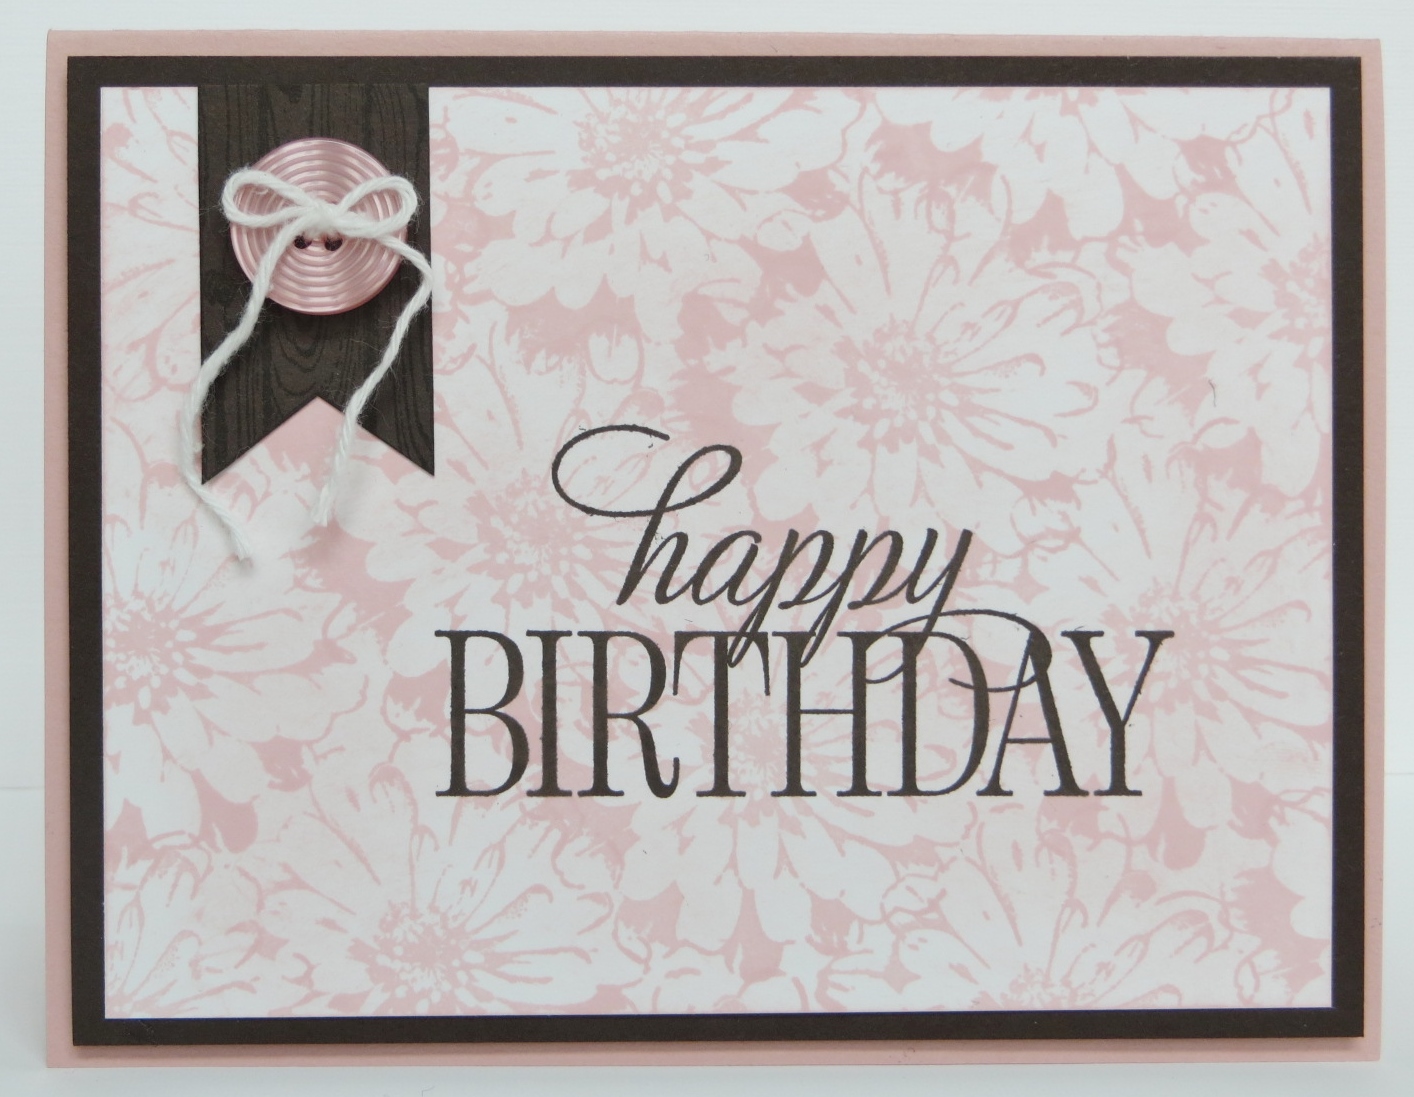
Today’s card is one of the one’s we’ll be making at our event.  I used the retiring stamp set Choose Happiness.  I’ve used this stamp set a few times in the past and I really love the flower in it.  Can you see the gorgeous background I made with it?  Of course once I had the background done I had to figure out what to put on it….hmmm…..  Then I remembered that I had the hostess set Happy Birthday Everyone that I had never used.  (Sheesh….do you think I have too many stamps?!)  It worked perfectly on the card but then it still needed a little something.  A matching button!  Yes!  A button worked perfectly on the card.  I had a bunch of buttons that of course I hardly ever used.  (Do you see a theme here….?)

I’m pretty tickled with this card.  So tickled that I’ll probably have to hold on to this stamp set for a while….just in case I want to make more of this card.  Sheesh!  Out with the old….In with the new!  Just let it go girl!  I’m hopeless.  Oh, well….

Have a great day!  Take care and Happy Stamping!

Simple Rose Card

IMG_7672One last card from our Flower Power class a few weeks ago.  This card is simple, yet elegant.  One of my favorite kinds of cards.

When I say simple, I mean simple.  The hardest part of the card is die cutting the flower and then roller over the die with the Big Shot Die brush to loosen the paper from the die…..and if you’ve ever done that you know that it’s not hard!

You don’t even have to glue the die cut flower to the card stock!  Nope.  Just lay the flower where you want it, fold the pieces that over-hang to the back and use regular tape to adhere the pieces to the back of the card stock.  Easy-peasy!  Your card is practically done!

Besides being striking, this card is very versatile.  You can use any type of sentiment that you’d like!  The Rose Wonder stamp set comes with quite a few sentiments as well as the fun label.  Don’t you just love the font on this sentiment?  All of the sentiments in this set are written in this font.  Beautiful!  I made my card a birthday card but this card would work perfectly for a sympathy card too.

I think I’ve found a new favorite color combination.  I really like Crumb Cake and Basic Black together.   They really look sharp together.  Do you have a favorite color combination?  What is it?  Leave me a comment and let me know!

Have a great day!  Take care and Happy Stamping!

Technique Tuesday: Rose Garden Puzzle

IMG_7704It’s the second day of sun!  Woo Hoo!  The snow is gone and Spring is finally here (for now…)!  It’s time to celebrate with another flower card!

Not only do I have a flower card for you today but I also have a new technique and a little trick to make it easier for you.  I’m not sure of the official name (if there is one) for this little technique but I’ve heard it called the Puzzle Technique so that’s what I’m calling it.  🙂

If you look closely at the rose you can see that there are two different colors of petals.  (Yes….you need to look CLOSELY!)  I used Watermelon Wonder and Calypso Coral for my rose.  The first thing I did was die cut the rose from Basic Black card stock to get my outline.  Then I die cut the rose two more times from the Watermelon Wonder and the Calypso Coral and placed some pieces of each color in the black outline.  But wait….this is where the tip comes in…….

When making your “sandwich” on your Big Shot you want to place your card stock on a piece (the sticky side) of Glad Press ‘n Seal wrap (found at your local grocery store).  Now layer as usual and run through the Big Shot.   This little trick has (most of) your little pieces sticking to the Press ‘n Seal wrap in the shape of the flower.  This makes it much easier to know which piece goes where when you place them in the Basic Black outline flower.

IMG_7703Once you have your colored roses die cut it’s time to place the pieces in the black outline.  Here’s where things get totally random.  Yes, I know….I don’t do random well but I think I did ok on this flower.  Actually, the great thing about this technique is that you have enough pieces for 2 flowers!

This technique is really quite fun but you need a little patience and a pair of tweezers comes in handy for those little bitty pieces as does the Fine-Tip Glue Pen.  I would definitely give this technique a try sometime.

Oh…..if you like the designs on the corners of the Whisper White card stock you might want to run to my store and grab a Curvy Corner Trio Punch before they’re gone.  I’m so sad that this punch is retiring and won’t be in the new catalog on June 1st.  🙁

Have a great day!  Take care and Happy Stamping!

It’s STILL Snowing!

IMG_7759Happy May Day!  It’s unbelievable.  It is still snowing!  That’s 4 days in a row.  Yikes!  Good thing it’s been fairly warm.  I can’t even imagine how much snow we’d have if this was March!  It’s been a light, drizzly snow since Thursday!  Sheesh!  At least the weather report says it should be nice and warm by the end of the week!

Since it is actually May today I needed more flowers!  Good thing we made lots of flower cards in our Flower Power class!

This card is made with my favorite color so it should cheer me up a bit today!  I used a new technique while coloring these flowers from the Helping Me Grow stamp set.  I used my Clear Wink of Stella Glitter Brush to pick up the Melon Mambo ink to color the flowers!  You can’t tell from the picture but the flowers are very sparkly!

I’m going to miss my Melon Mambo ribbon since it’s retiring.  I loved having it the catalog….I actually had two choices of Melon Mambo ribbon but sad to say they’re both going away.  If you love Melon Mambo ribbon as much as I do stock up now….I did!  🙂

Stay warm and dry!  Have a great day!  Take care and Happy Stamping!

Picture Perfect

IMG_7761I had to post a flower card today to remind me that it actually is spring….

It snowed ALL day yesterday and it’s still snowing!  YUK!  It actually started on Thursday.  Luckily it wasn’t quite cold enough for the snow to stick to the roads and such but there is snow on the ground.  Welcome to springtime in the Rockies.

Once again I’m using a stamp set that I had no desire to get.  I didn’t need another flower stamp and I didn’t want the hummingbird or the starfish found in the Picture Perfect stamp set.  But then I saw some cards made with the 3-step flower stamps and knew I had to give it a go.  The flower is beautiful…..and I really like the way this card turned out.

Of course I copied the basic idea for this card.  Sometimes you just have to keep things simple.  🙂

I’ve been scaring myself the last few days because I’m actually cleaning up my stamp room.  Not only that….I’m getting rid of stuff.  I’ve decided to have my sale at the beginning of June when I have my new catalog open house.  That way I’m not holding on to it all summer.  Another reason is that we’re having out-of-town guests in the middle of June so I have to clear out all of the stuff!  Ha!  This past week and this upcoming week are pretty open for me so I’m hoping to get a lot done.  MAYBE….if I ever get this room looking good…I’ll actually post a picture or two of my craft space.  Don’t hold your breath though.  I’ve had good intentions before and they’ve never actually panned out.  A girl can only try, right?

Have a great day.  Take care and Happy Stamping!

Birthday Blooms

IMG_7756I can’t believe that the weekend is here already.  I also can’t believe what a slacker I’ve been about my posting to my blog….ok….I can believe it.  I’m just glad that you stick with me and continue to read my blog (at least once in awhile).

Today’s card is one we made in our Flower Power class last week.  The whole class was centered around flowers….perfect for Mother’s day or any occasion.

I kind of feel sorrow for the flowers around here in Denver.  They’re going to get pretty cold in the next day or so….Yep!  It’s suppose to snow again.  Actually it was snowing this morning a bit when I went out but the rest of the day has just been damp and dreary.  We’ll see if the weatherman is correct.

I tried something a little different (at least for me) on this card.  I watercolored the image with my Aqua Painter and ink pads but then I went over the parts I wanted a little darker with the coordinating marker.  It really turned out nicely.  I liked it too because I didn’t over-saturate the card stock by going over it again and again with my Aqua Painter.  I’ll have to try and remember that trick for the next time I water color.

Did you notice that I did “the random thing” with the silver thread?  Ha!  You know how much trouble I have with random but I thought I’d give it a try again.  It does do a little something for the card.  I just have to get over trying to hard when I do random!

Wishing you all a warm and snowless day!  Happy Stamping!

A Teeny Tiny Gift Box

IMG_7788This adorable little gift box is teeny tiny.  It’s only about 1″ square and fits one Hershey Kiss perfectly.

Yes, this is another find from Pinterest.  How did we ever survive without Pinterest?  🙂

And yes….I’m giving you a link to someone else’s blog so they can show you how to make this adorable little box.  As I mentioned yesterday one of my goals in the near future is to shoot and edit a video for you.  Someday…

This box is really quite easy.  You make it with the Envelope Punch Board!  A few punches and score lines and you have this fun little box.   Once again I used the Botanical Gardens Designer Series Paper.  It’s my favorite paper in the Occasions Catalog.

What’s your favorite designer paper in the Occasions Catalog?  Let me know!

Have a great day!  Take care and Happy Stamping!

Little Gift Purse

IMG_7790 One of the fun parts of getting ready for On Stage (convention) events is making little gifts for my friends who I’ll be hanging out with.  Sometimes it’s a little stressful trying to come up with the idea but making them is always fun.  I actually don’t come up with my own ideas….I get on that wonderful website Pinterest and search until I find something cute to make.  🙂

The first little gift I made was this little purse that one yummy Ghirardelli chocolate candy fits in.  Yep.  Just one.

I used the gorgeous Botanical Gardens Designer Series Paper on the purses and then of course had to die-cut a fun little flower with the Botanical Builder Framelits to finish it off.

The outside of my cute little purse is about 3 1/2″ x 2 1/4″.  I started with a piece of paper that was 5″ x 4″.

Here’s the link to the website and video where I learned how to make this little treat purse.  One of these days I will learn to make my own video and not have to copy others!  Ha!  Honest….one of these days…..  🙂

Have a great day!  Take care and Happy Stamping!


Number of Years Floral Card

IMG_7614Hello!  Here’s another swap card I made for OnStage 2016.  We’re also making it in class this week.

Watermelon Wonder is definitely one of my new favorites.  It’s right up there with Melon Mambo!  I especially love the new Watermelon Wonder 1″ Stitched Satin Ribbon.  It’s gorgeous!  I’ve been holding on to it trying to figure out what to do with it and I think I found the perfect thing!  🙂

You can’t see all of the pretties on this card in the photograph.  I used Shimmery White card stock (another new favorite!) and I just had to use the Clear Wink of Stella Glitter Brush (another favorite!) on the flowers.  Oh…don’t forget the little tiny pearls on the five-petal flowers.

Pretty.  Pretty.  Pretty.  I do have to admit that I’m pretty pleased with the way this card turned out.  Simple, yet elegant.  My favorite.  🙂

Have a great day!  Take care and Happy Stamping!

Bear Hugs Baby Buggy

IMG_7743Hello!  Have you checked out the Retired List?  You can check out the actual list here or you can go to my store and see the actual items that are on sale.  Don’t miss out!  The stamps will all be available through May 22nd but the everything will only be available while supplies last.  Some of the items may be up to 50% off!  Woo Hoo!

Today’s card is one I made for a swap last week.  I can’t seem to get enough of the bears!  (They’ll be in the new catalog!  Woo Hoo!)  I loved the little saying from the Suite Sayings stamp set so I had to figure out a design to use both the saying and the bear!  🙂

IMG_7751The second card you see here is actually my first attempt.  IT turned out and I liked it, but I didn’t love it.   What to do.  Hmmm….That’s when I decided to try it with my favorite color, Melon Mambo!  What a difference it made!  What do you think?  Do you like the pastel colors or the bright colors?  Be sure to leave me a comment and let me know.

Usually when I participate in a swap you only make the card front.  This swap asked for the full card so I figured I had to do something fun with the inside too, right?   I decided I could add another bear along with the little heart and the saying.

IMG_7748I did receive a lot of really nice cards from this swap.  I’m sure I’ll be sharing some of them with you or at least CASEing them and putting my own twist on them.

Have a great day!  Take care and Happy Stamping!


Back From OnStage 2106

13012807_10154145709533966_925708510172677422_nI’m back!  We had another fabulous time in Salt Lake City.  Here’s a picture of (most of) the gals that I hung out with.  Laura, Laura, me, Jan and Janet.

The event didn’t actually start until Thursday afternoon but we went on Wednesday and gathered that evening to make cards.  (What?  Stampin’ Up! Demonstrators making cards?!)  We each brought all the pieces and parts of our cards that were already stamped, die cut and punched.  Then we put together each other’s cards.  It was a lot of fun.  The cards were pretty cute too.  I may have to borrow imagesome of them for a future class!

As always, we had tons of fun together.  Did I mention that we got to see the FABULOUS new catalog that will come out on June 1st?  🙂

I can’t share anything about it yet but I know you’re going to LOVE it!

Be sure to stay tuned all week as I share things from On Stage 2016!  #onstage2016

Mini Treat Bag Birthday Card

IMG_7778We’re off!  Yep!  We’re on our way to Salt Lake City for Stampin’ Up!’s On Stage Event.  Woo Hoo!

There aren’t any Stampin’ Up! events scheduled today so we’re going to hang out, have a nice dinner and then go back to the hotel to play.

We’ve each designed a card and brought all of the pieces and parts with us.  Everything is stamped and die cut for us so all we’ll have to do is put each other’s cards together.  Should be fun.

This is my little card/project for tonight.  I made a birthday card using the Mini Treat Bag Thinlits Dies.  If you read my post from yesterday you know that these thinlits are on the Weekly Deals this week and you can get them at a discounted price!  How great is that?!!!  Check out all of the deals here!  Don’t miss out!  These are the last Weekly Deals ever!

IMG_7780Back to my fun little card….Not only did I use the fun Mini Treat Bag Thinlits but I used my very favorite Bear Hugs Thinlits.   If you’re looking at the first picture and wondering what that pink thing poking out of the bag is….it’s a balloon!  This way you have something to grab on to so you can pull the card out of the Mini Treat Bag easily.   Pretty clever, huh?  🙂

This type of card wasn’t exactly my idea.  I actually received a similar card (without the bear!) at convention last summer.  It’s been sitting on my desk since then waiting for my brain to decide to copy it.  I knew I wanted to use the bear on my project for this evening but wasn’t sure what to do with him.  Then I figured out that he fit perfectly on the front of the Mini Treat Bag and the rest is history!

IMG_7781I used all sorts of fun products on this card.  You can check them all out below.  Don’t you love it when things coordinate like the designer paper and the washi tape!  You do know that it’s my favorite crafting word!  🙂

Have a great day!  Take care and Happy Stamping!  Don’t forget to like my Stamp by Stamp page on Facebook so you can see all the crazy things we’re doing!

You Are Going to Want to See This!

Oh my gosh!  You have got to see all of the fabulous items on this week’s Weekly Deals!  The LAST Weekly Deals EVER!  I counted and there are 7 different sets of Framelits on sale!  SEVEN!  You can check out all of the items below.  Just click on an item below to purchase it from my store or go directly to my store here.

I’m definitely going to be making a list.  How about you?  Don’t forget that Monday, April 18th is the absolute last day to order any of these items!

Have a great day!  Take care and Happy Stamping!

Shine On Designer Paper

IMG_7659
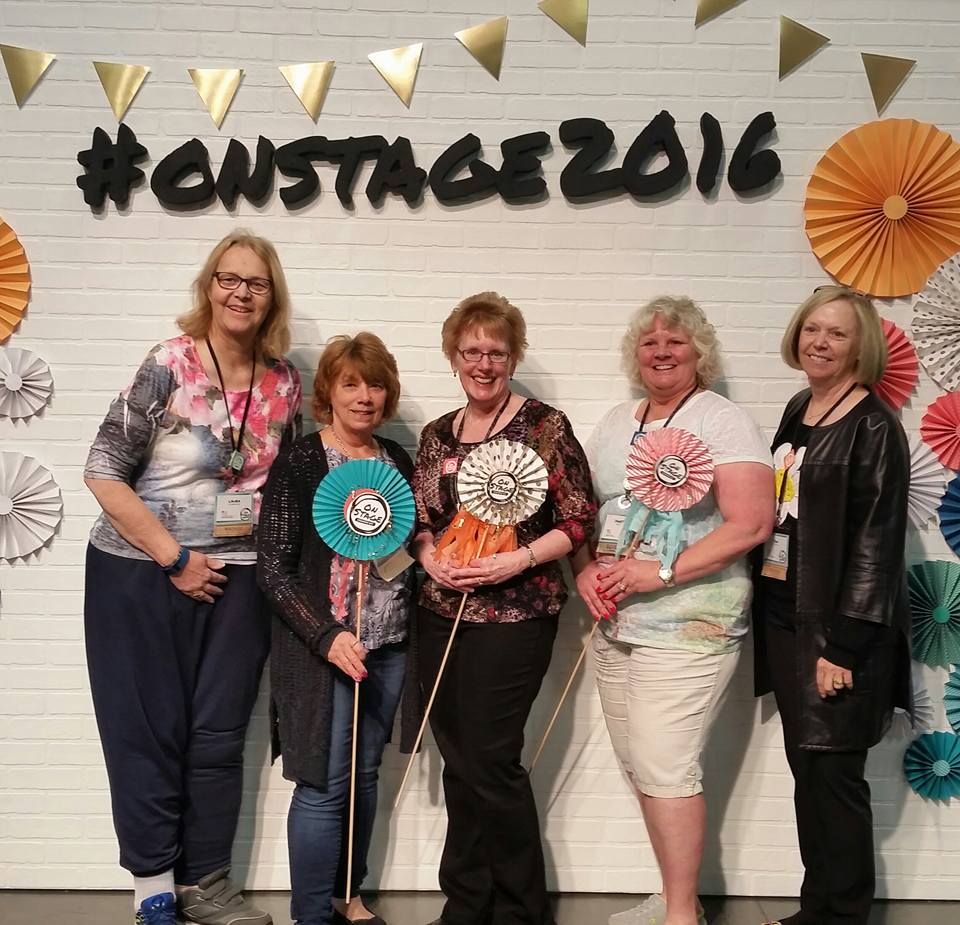
April showers have begun here in Denver and unfortunately the weather report looks like it will be raining in Salt Lake City later this week while we’re there for On Stage.  Oh, well.  I’ll have to remember my raincoat and umbrella!

This is another fun and easy card that we made in our Stamp-a-Stack Class last week.  Have you checked out the fun Shine On Designer Paper?  You definitely should!

This paper is heavy kraft paper.  One side has designs in the fun, bright colors of Bermuda Bay, Cucumber Crush and Watermelon Wonder.  The other side has designs made with Silver Foil.  It really is fun!

I thought the design of this card was simple enough to show off the fun designs of this paper.  I just used the colored sides of this paper on my cards.  I’m definitely going to have to try a card with using the silver foil side of the paper sometime….maybe combine it with a Silver Foil Sheet….hmmm….I like that idea!

What side would you rather work with?  The colored side or the silver foil side?  Leave a comment and let me know.

Have a great day!  Take care and Happy Stamping!

Simple Saturday: Sympathy

Corner Garden.0416Simple Saturday….when you need a quick card.

My customers loved this card!  Quick and easy.  Stamp the image, stamp the sentiment, add your ribbon and an extra layer and you’re done!  The only way it could be any quicker would be if you left off the ribbon and stamped your image and sentiment directly on to the white card itself.  Of course I couldn’t do that…..if you can put extra layers and ribbon on a card I need to do it!  🙂

Are you into the adult coloring movement?  More than one customer this week mentioned how fun this image would be to color.  I’ve seen it colored and it is gorgeous but I’m pretty sure that I don’t have the patience to do it.  Do you?

What do you have planned this weekend?  I’m having a few friends over tonight to watch the season premier of Outlander this evening.  Snacks, beverages and Jamie Frasier.  It doesn’t get much better than that!  🙂

Have a great day!  Take care and Happy Stamping!