Candle Border Punch Birthday Card

Candle Border Punch.0217Well, vacation is over and it’s time to get back to work!  I had a great time up in the mountains doing pretty much nothing.  My cousin got me hooked on HGTV again and that’s probably not a good thing.  I usually don’t watch much TV and now I seem to have it on constantly.  The one good thing about that is that I haven’t bee reading too much.  Hmm…it’s sounding like I have trouble staying on task…..

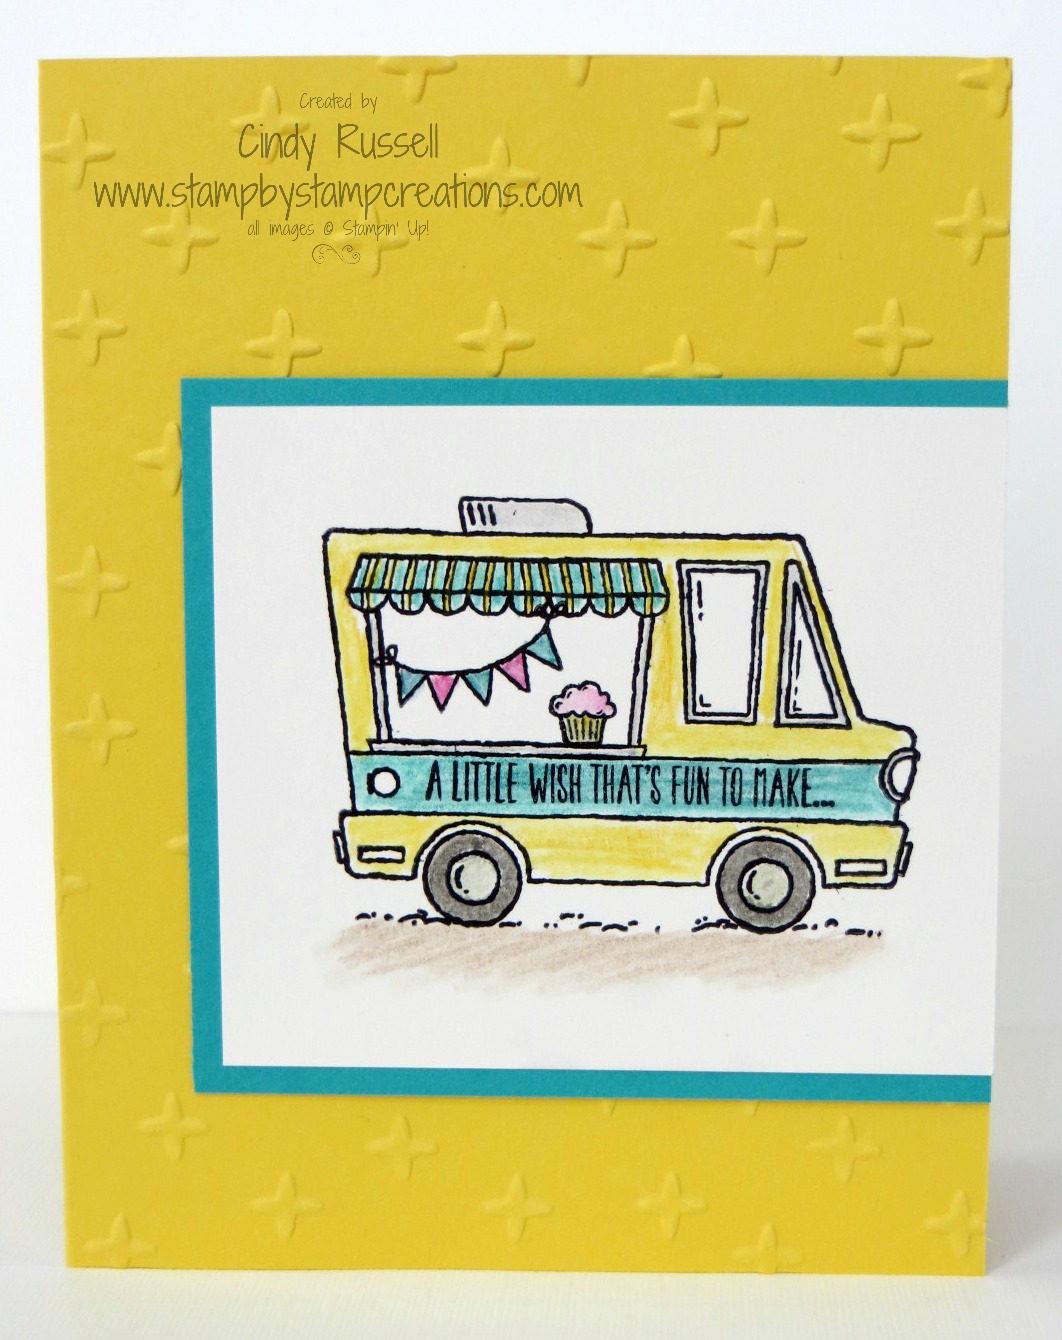
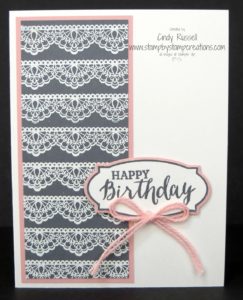
This is one of the 8 cards that I’ve designed for my All-Occasion Card Buffet Class next week.  I think it’s pretty fun.  A person can never have too many birthday cards on hand, right?

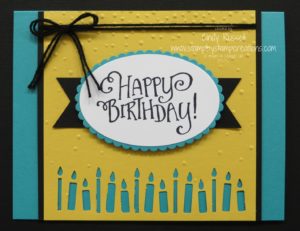
Don’t you love the row of candles punch on the bottom of the card?  They’re made with the new Candle Border Punch found at the bottom of page 7 in the Occasions Catalog.  It’s easy to miss because it’s so small.

I punched my row of candles first before running the Daffodil Delight card stock  through the Big Shot with the Softly Falling Embossing Folder.  That way I could figure out how to place the card stock on the embossing folder.

I used the Stylized Birthday stamp for my sentiment.  This is one of those stamps that was collecting dust on my shelf.  So glad I found a use for it finally!  It’s a great size to be the focal point on a card.  I’m not sure why I haven’t used it before now!  Sheesh!

If you’re in the Denver area and would like to attend my Card Buffet next Tuesday (morning or evening session) just let me know!  There’s plenty of room!  🙂

Have a great day!  Take care and Happy Stamping!

Happy Valentine’s Day from Breckenridge Colorado!

Breck.0217Hubby and I are up in the mountains of Colorado at our time share for the week.  That’s why you haven’t heard much from me.  My cousin, her husband, daughter and daughter’s boyfriend were up for the weekend and we had a really great time.  We ate, drank and just enjoyed each other’s company.  Some of us went skiing and other’s of us didn’t.  Now we’re recuperating before the next batch of company shows up.  🙂

Hubby and I had an early Valentine’s dinner last night at our favorite seafood restaurant here in Breckenridge and will probably just lay low today.  Do you have any exciting plans to celebrate with your valentine?

Birthday Blast Swap Card

IMG_9398It’s another gorgeous swap card.  I love doing swaps because I get so many great samples and ideas.

I love the black and gold on this card.  So elegant and fun.  Thank you to Carn Meagher for this great sample card.  Carn used the Birthday Blast stamp set and the Star Blast Edgelits Dies on this card.  I actually don’t own these yet but they are definitely on my wish list!  I love the stars!

Speaking of stars…if you look closely at the card you can see that Carn used the Lucky Stars Embossing Folder on the background piece.  It really adds to the card.

OK…this is probably going to be on my next order…..what’s on yours?

Have a great day!  Take care and Happy Stamping!

Traditional Sealed with Love Valentine

Sealed With Love.0117Yesterday I showed you not-so-traditional valentine so today it’s time for a traditional one.

I actually made this card way back in December for a make-and-take project at my team’s Holiday Party.  Red and white….you can’t get a more traditional color combination for Valentines Day.  This is a little 4 1/4″ x 4 1/4″ square card.  I cut 3/8″ of an inch off the front of the card so that the die-cut heart edge would overlap the right edge of the card.

Can you tell that the little hearts kind of pop up?  The outside edges of the hearts are die cut but the very centers of the are attached.  They’re pretty cute.  The Sealed with Love stamp set is photopolymer so you can stamp perfectly in the little die cut areas of the hearts.

Have you played with the Stitched Shapes Framelits yet?  They are great and they add so much to a card!  They work wonderfully on my little valentine and layer perfectly with the Layering Circles Framelits!  You know me….I LOVE products that coordinate and work together!

Have a great day!  Take care and Happy Stamping!

Masculine Sealed with Love

IMG_9328Thank you to Katherine Anderson for this fun masculine valentine.  I love how she used non-traditional valentine colors on the card.  It’s absolutely perfect for a guy.  Hmm…I may have to give this to my husband next week.  I wonder if he’d realize that I didn’t make it.  😉

Katherine used the Sealed with Love stamp set, the Sending Love Embellishments and the Love Notes Framelits along with the Urban Underground Specialty Designer Series Paper.  What a great combination!

Do you think outside the box like Katherine did on this card?  I have to admit that I don’t.  I’m pretty traditional with my color combinations and my card designs.  That’s why I really enjoy seeing what other people come up with.

Where do you like to go for inspiration?  (other than my blog of course…ha!)  I really like Pinterest.  I can type in the name of a stamp set and find all sorts of samples for that set and get inspired.  I love being inspired.

I hope you have an inspiring day!  Take care and Happy Stamping!

Make it Mine Monday: Sweet Delicate Details Card

Delicate Detail.0117
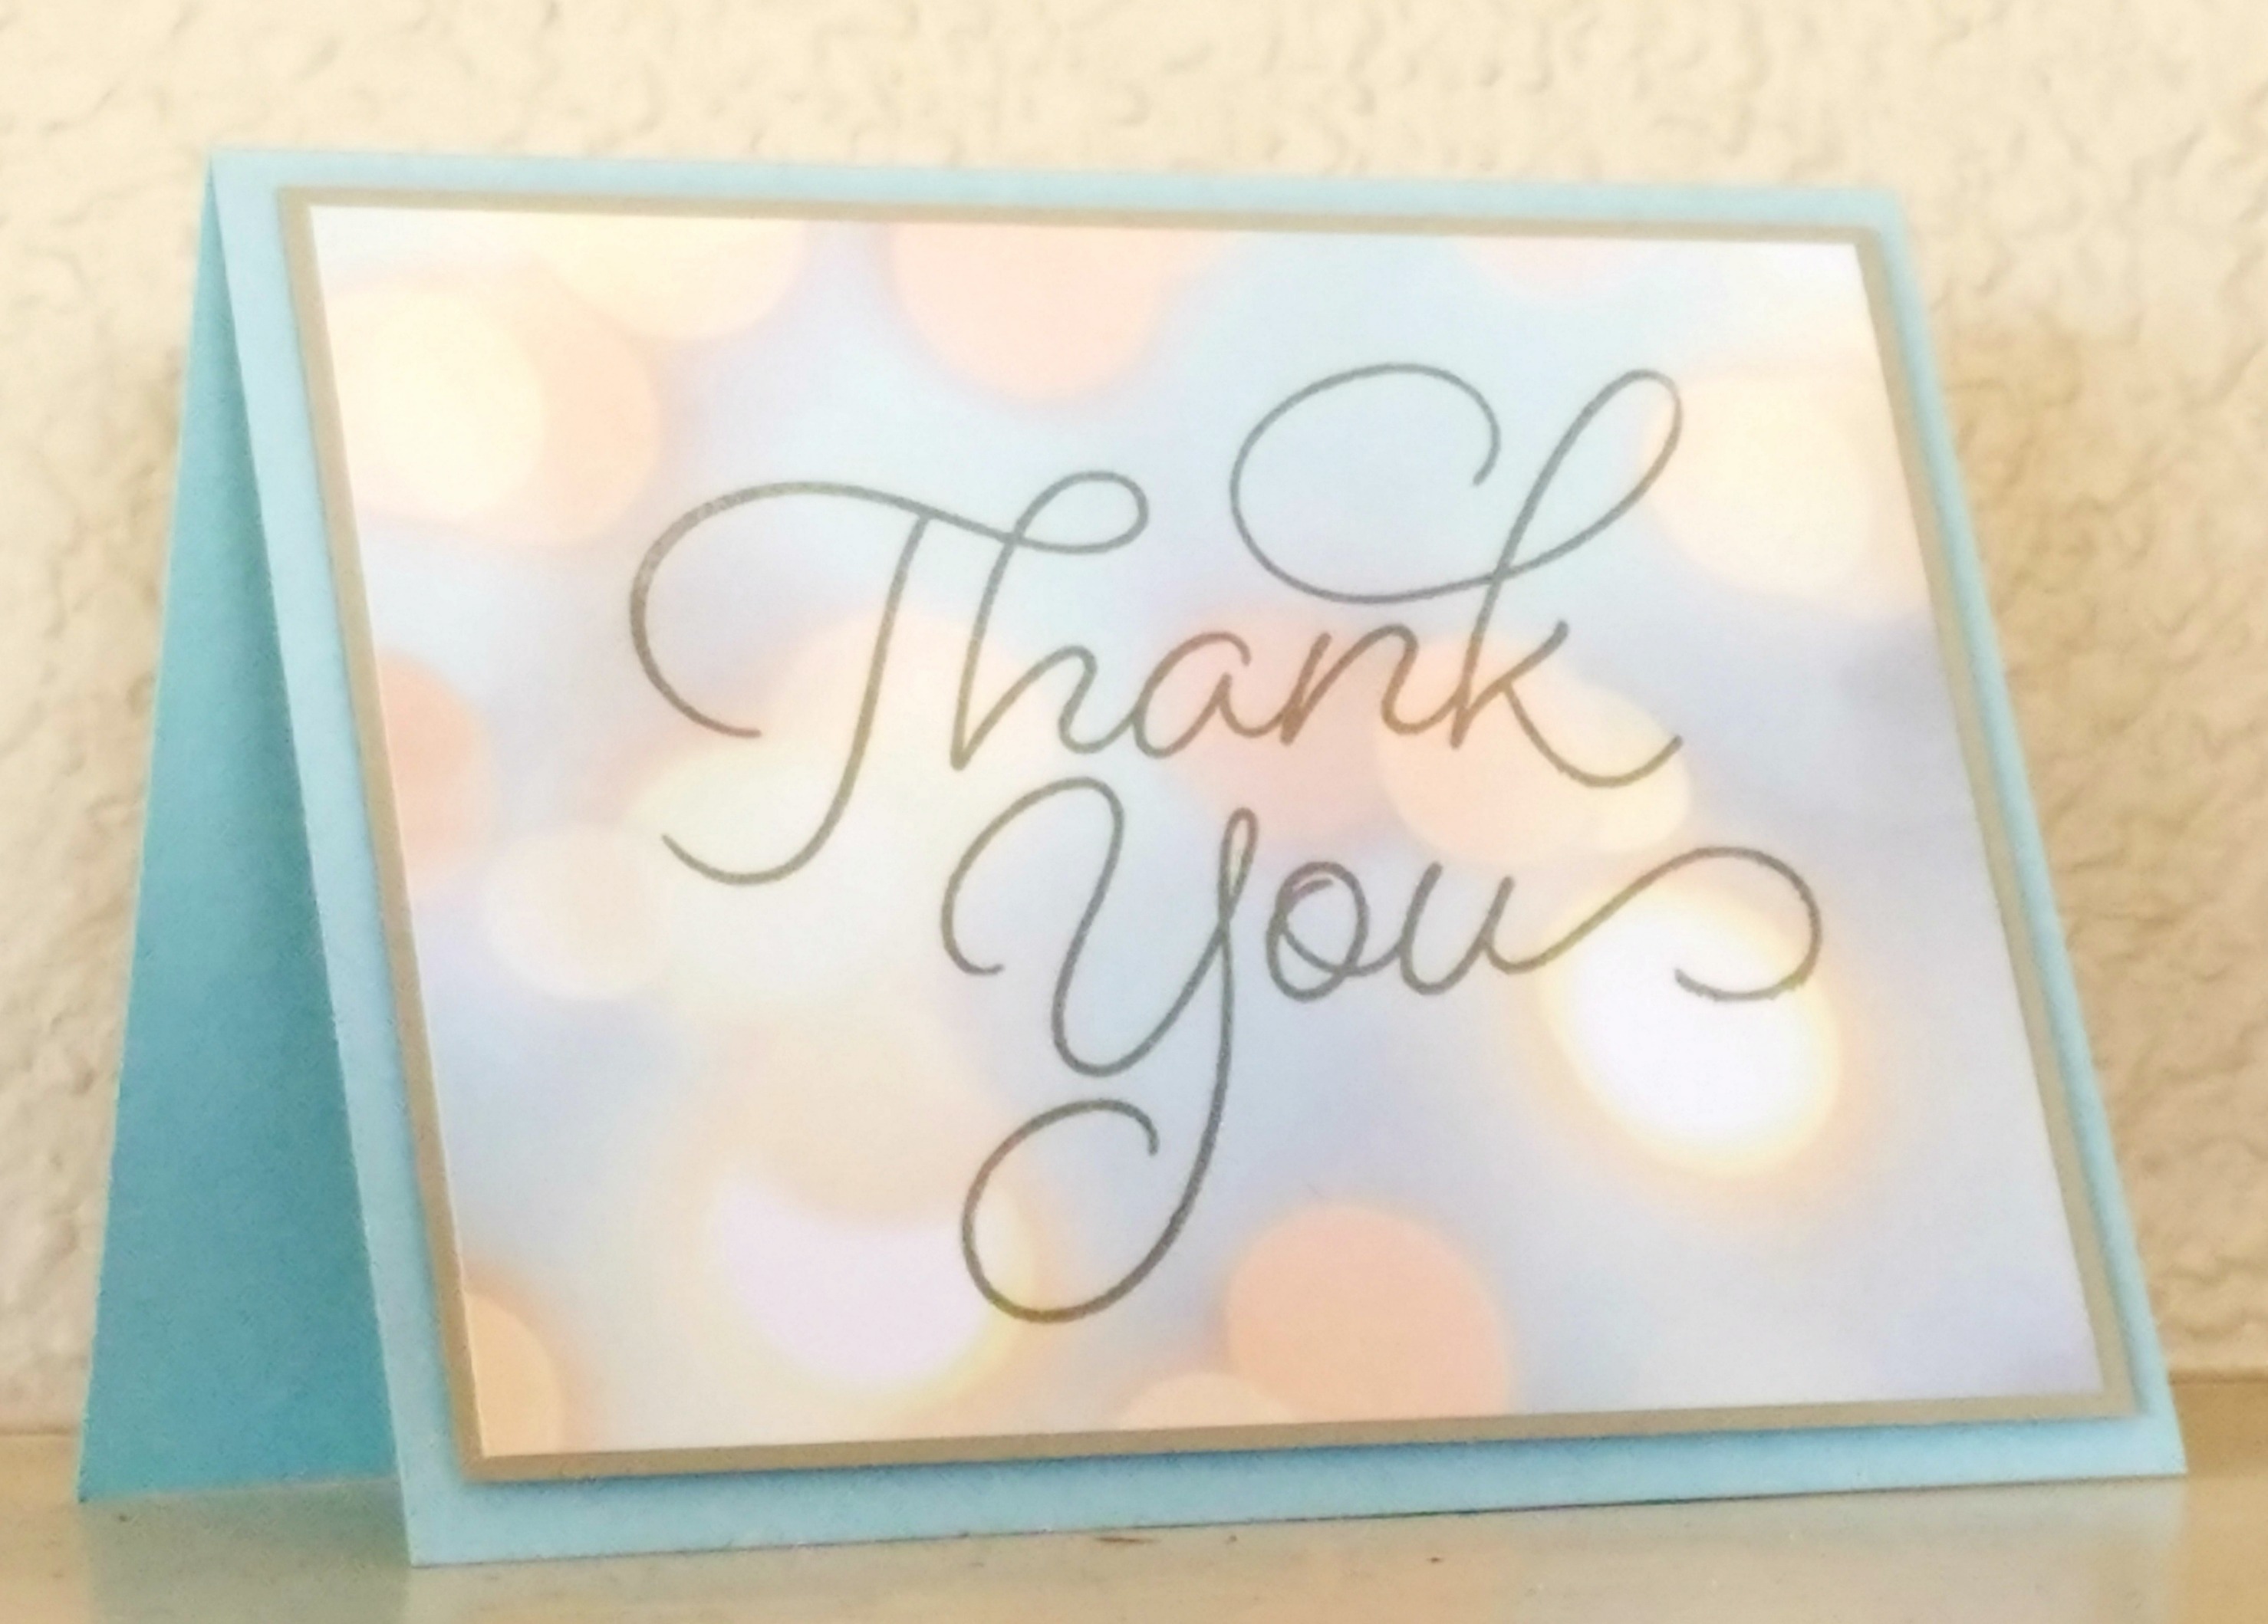
Ah, so sweet.  That’s what this color combination says to me.  It’s soft and relaxing.  The lace from the Sale-a-bration stamp set Delicate Details makes it sweet too.

Here again I stuck close to the original card keeping the basic layout.  When I was making my card I tried all of the different designs on the same piece of card stock like the original but I just couldn’t get it to look right.  That’s when I decided to stick with one pattern.  Not only did I stick to one pattern of lace but I decided to take my card a step further and I embossed it!  I really like the look of the embossed lace, don’t you?

Once I had that piece taken care of it was on to the 2250deb76fd346f8c49868b4d597ba84label.  I could have just copied Brenda’s label because I do like it but I wanted something a little simpler.  I opted to go with the little label and sentiments from the Rose Wonder stamp set.  If you have used this stamp set and coordinating framelits you my be wondering how I got two different sizes of the labels.  Well…I cheated.  The Blushing Bride label is the size of the framelit.  I stamped my label and sentiment and then simply cut the stamped label out with scissors right next to the stamped image.   Pretty clever, huh?  Not really, but it was a simple way to get the same shaped border.  🙂

Have you played with the Blushing Bride Baker’s Twine yet?  You should.  It’s so pretty and soft to touch.

As I mentioned before, the Delicate Details is a Sale-a-bration item.  It’s one of the items you can choose for free when you place a $50 order.  Have you placed your Sale-a-bration order yet?

Have a great day!  Take care and Happy Stamping!

Simple Saturday: Dragonflies

Detailed Dragonfly.0117
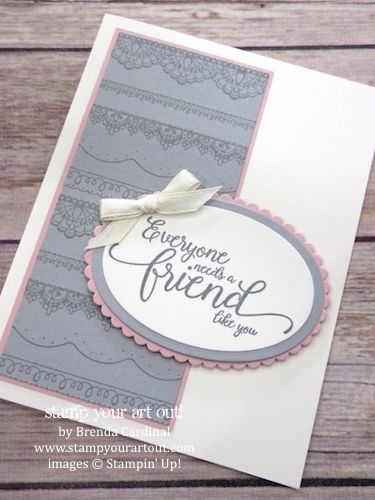
This was one of those cards that just made me smile when I finished designing it.  🙂

How can you go wrong with dragonflies, pink Bokeh paper and Cooper Foil Sheets?  I mean really…..

I took three of my favorite Stampin’ Up! products and put them together on a card….an easy card!  No stamping involved.  I just die cut some dragonflies, added a few layers and had this fabulous looking card.  LOVE IT!

Isn’t it great when you come up with a design that makes you feel good and then have it so easy to make too?  I designed this card for a swap that my team did for the new Occasions Catalog.  It was tough to decide on a card since there are so many great products to choose from.

Do you have a favorite product from the Occasions Catalog?  I’m pretty sure that the Dragonfly Dreams Bundle is my favorite.  Let me know what yours is!

Have a great day!  Take care and Happy Stamping!

Hey, Chick!

Hey Chick.0117I LOVE this stamp set!  I know…I keep telling you this but it’s true!  TSC!  Too Stinkin’ Cute!  I can’t get enough of these chickens!

Ok…I’m done telling you how much I like this stamp set.  What do you think about the “chicken wire”?  I certainly didn’t come up with the idea to use the Hexagons Dynamic Embossing Folder as chicken wire but it certainly works!  I love finding the clever ways other people have used products.  I don’t manage to come up with any of these clever ideas myself but I’m happy to share other people’s creativity.

To make my chicken wire pop on the card I used a sponge brayer and the Crumb Cake ink on it after I embossed it.  Worked like a charm to highlight the raised portions of embossed card stock.

I used the Real Red and Pumpkin Pie markers to color in a few areas of my chicken and basically left the rest of it plain.  I did add just a bit of Smoky Slate and Crumb Cake ink to the body with an Aqua Painter just to add a bit of dimension.  I also added a little Crumb Cake ink by the chicken’s feet to “ground” it so it wasn’t floating in the air.  🙂

Speaking of GROUND….It’s Groundhog Day!  Unfortunately Punxsutawney Phil predicted 6 more weeks of Winter.  Does that make you happy or sad?  We haven’t had much of a winter here in Denver but the mountains in Colorado have been slammed with snow.  What type of winter have you been having where you live?

Have a great day!  Take care and Happy Stamping!

New Offering! Class Kit to Go!

eviteCollage.1.0117It’s here!  My very first Class Kit to Go!

I’m pretty excited to be able to offer the Balloon Adventures Class Kit to Go to you starting today.

This kit contains all of card stock cut, scored, die cut, embossed or punched that you need to make 6 birthday cards and a decorated case to store them in.

When purchasing the kit you will have the option of getting it with or without the Balloon Adventures stamp set.  For all of the details on this fun Class Kit to Go and to purchase it click HERE!  I hope you’ll enjoy my very first Class Kit to Go.  Be sure to contact me with any questions you may have and feel free to share the link with your friends!

Have a great day!  Take care and Happy Stamping!


Avant Garden Birthday Wishes

Avante Garden.0117Happy Birthday!  I know it has to be someone’s birthday today so here’s a shout out to you!  🙂

There are so many great products in this year’s Sale-a-bration Brochure.  I love this flower from the Avant Garden stamp set.  It’s kind of fun and whimsical to me.

Isn’t this a fun color combination?  I was going to use the Peekaboo Peach with Watermelon Wonder but I didn’t have a ribbon in Watermelon Wonder that would work on this card design so I had to switch it up to Calypso Coral.  (I told you I have to design my cards around what ribbons are available! Ha!)

I think that if I remade this card I’d add more flowers….maybe fill up the lower portion of the card.  Overall though, I think it turned out nice and I’d be happy to send it to anyone.

If you love this card and want the stamp set remember that you can choose it for FREE during Sale-a-bration just by spending $50!  I LOVE Sale-a-bration!

Have a great day!  Take care and Happy Stamping!

Make it Mine Monday: Dragonfly Dreams

Inside the Line.0117
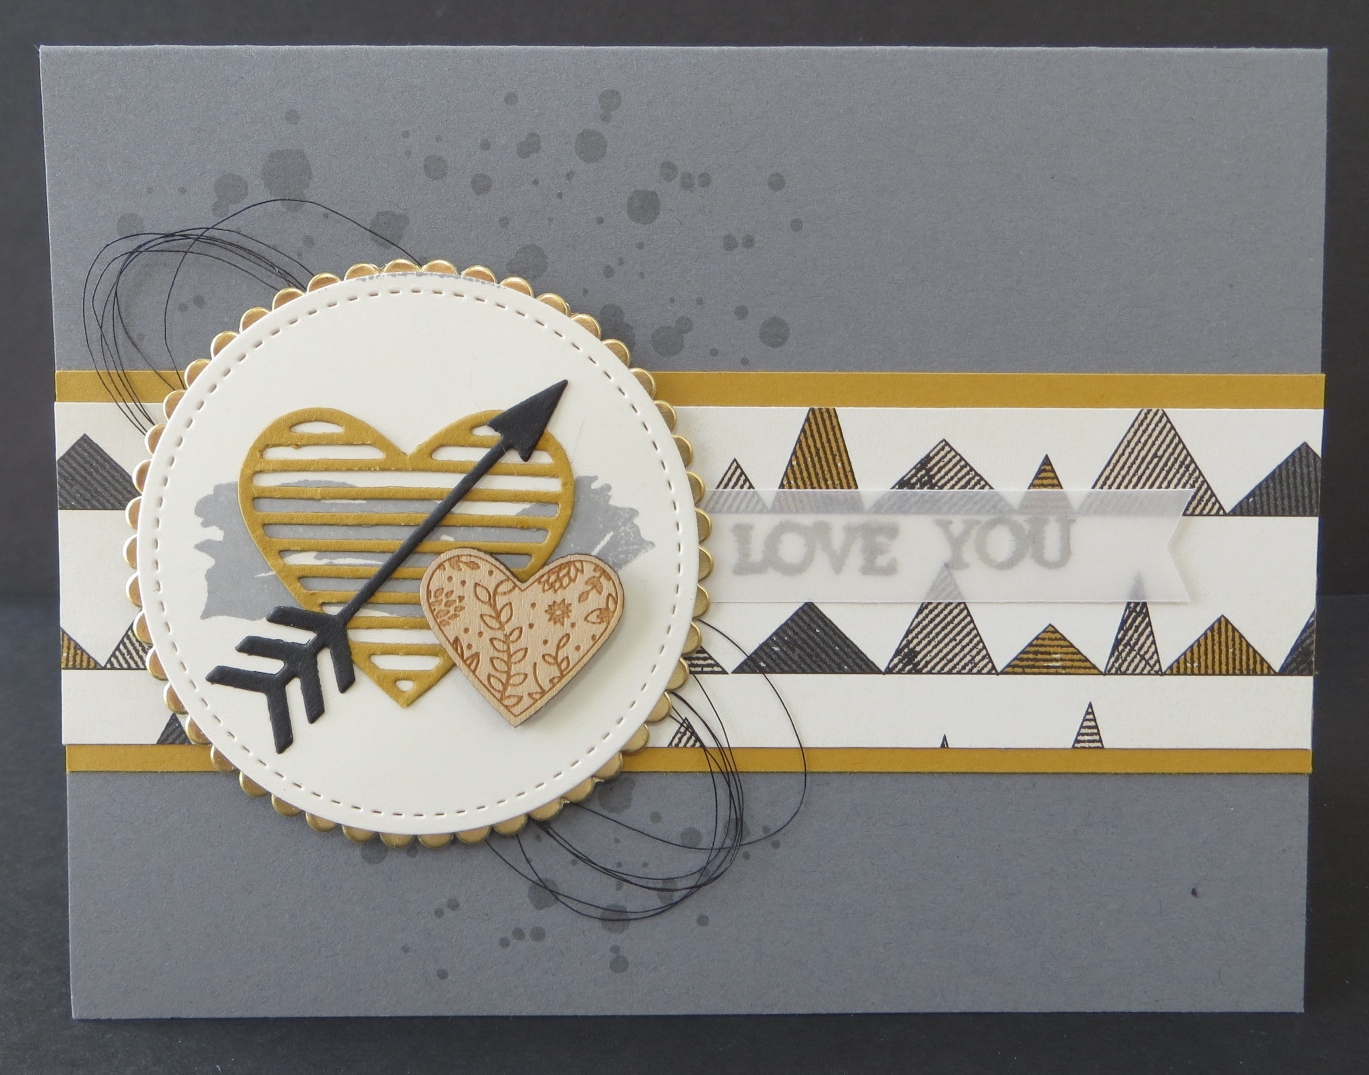
It’s another episode of Make it Mine Monday.  This week’s card features the fabulous Dragonfly Dreams Bundle.

Dragonflies might be right up there with flamingoes and whales as some of my favorite creatures.  I’m not sure what it is about them but I like them a lot.  How about you?  Do you like dragonflies?

If you’re new to my blog, Make it Mine Monday is a weekly feature where I show you how I took a card that I really liked and switched it up to make it my own design.  Sometimes there at big changes and sometimes not.

Check out the differences between this week’s cards.  The untitledtop card is mine and the bottom one is the one I CASEd.  (Thank you LeeAnn Greff!)  I kept the base of the card the same using the Sale-a-bration paper Inside the Lines as my background.  On my card I chose to use the intricate die cut for my dragonfly and added a strip of card stock on the front for my sentiment instead of the square.

To color my designer paper I used the new Sponge Brayers.  I rolled them on the ink pad and then lightly rolled them on the paper.  Definitely an easy way to add color to the paper.

To get the lighter colored wings on my dragonfly I die cut a second solid dragonfly and trimmed away the body.  Then I lightly rolled both of the colors on my wings and went over the whole thing before adhering them to the back of the intricate die cut wings.

As you can see, the cards are similar yet quite different.  It’s fun to take someone else’s beautiful card and put your own twist on it.  Have you tried this?  If so, share your “make-it-mine” card with me.  I’d love to see it!

Have a great day!  Take care and Happy Stamping!

Simple Saturday: So Very Much Thank You

So Very Much.0117A very simple card for Simple Saturday!  It doesn’t get a whole lost simpler unless I had a single layer card.

Do you remember that gorgeous designer series paper I was talking about yesterday?  Well, I used it again on this card.  This is actually the blue Bokeh pattern I mentioned in yesterday’s post.  The Falling in Love Designer Series Paper is GORGEOUS!

I was playing around yesterday and needed to design a card for the church office.  As I’ve mentioned before, I’m in charge of a group at church who make cards for the church office staff to send out.  The gals in the office just contact me when they are in need of cards and I either get the group together to make the cards or whip them up myself depending on how many cards they need and what my calendar looks like.   My schedule is pretty filled up this coming week so I’m making them myself this time since there isn’t too many.

One of the cards needed was a thank you card.  I have all of my Occasions Catalog stamp sets and Sale-a-bration stamp sets together on a book shelf so I just too a look to see if there were any new sets that would work.  The So Very Much stamp set was perfect for my needs.  Since I’m making a quantity of cards I like to keep them simple and I definitely did that on this card.  Stamp on the card, layer it and pop it on the card front.  Easy Peasy!

The So Very Much stamp set is a Sale-a-bration item that you can choose for FREE with a $50 order!  Woo Hoo!  FREE stuff!  Check out the Sale-a-bration Brochure to see what other great items you can choose for free.  Just click on the Sale-a-bration Brouchure on the right.

Have a great day!  Take care and Happy Stamping!

So in Love

So in Love.0117
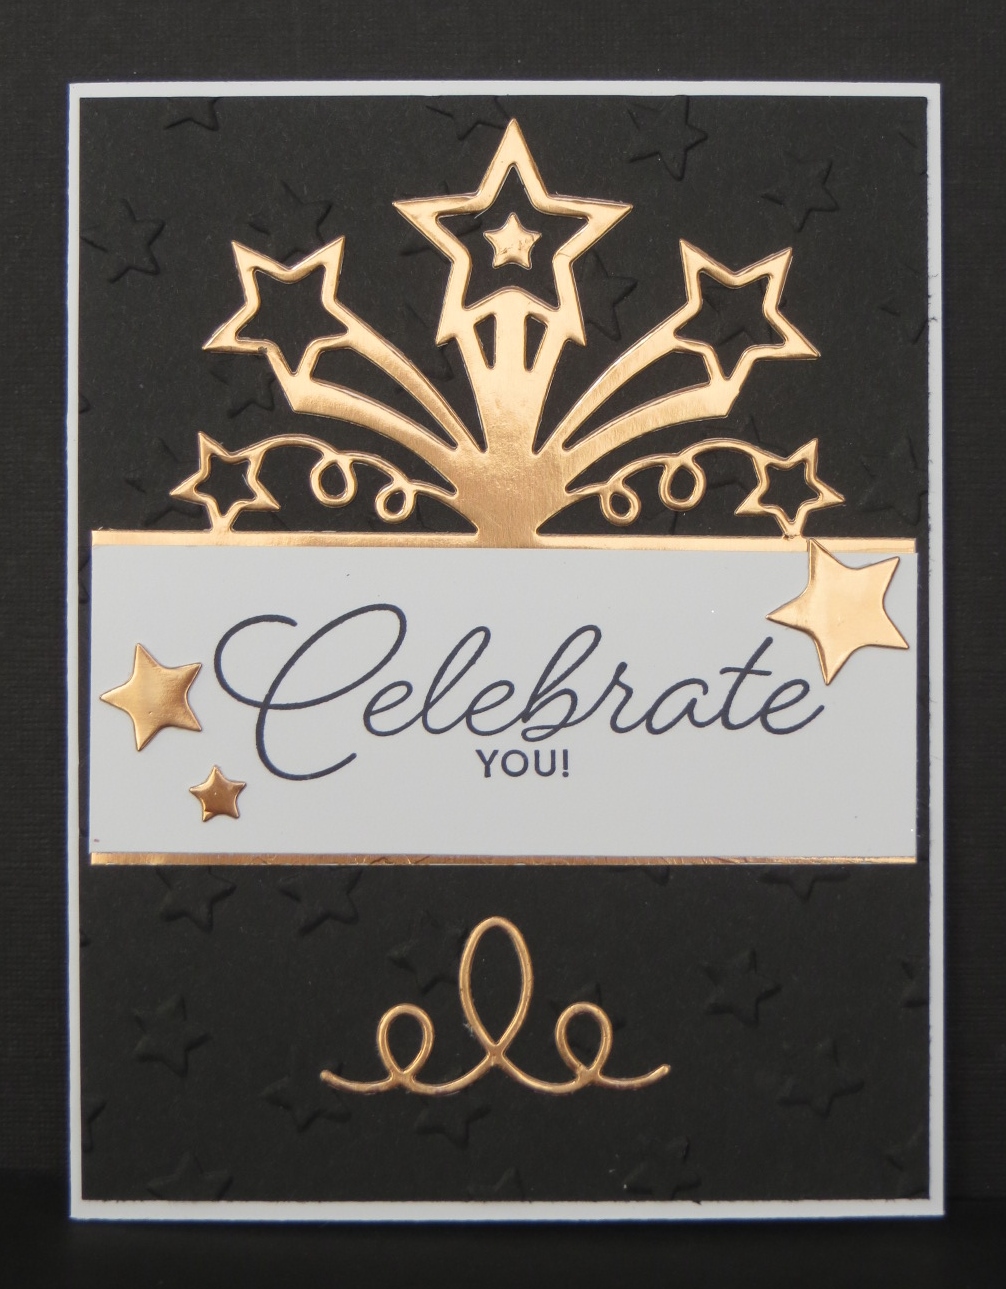
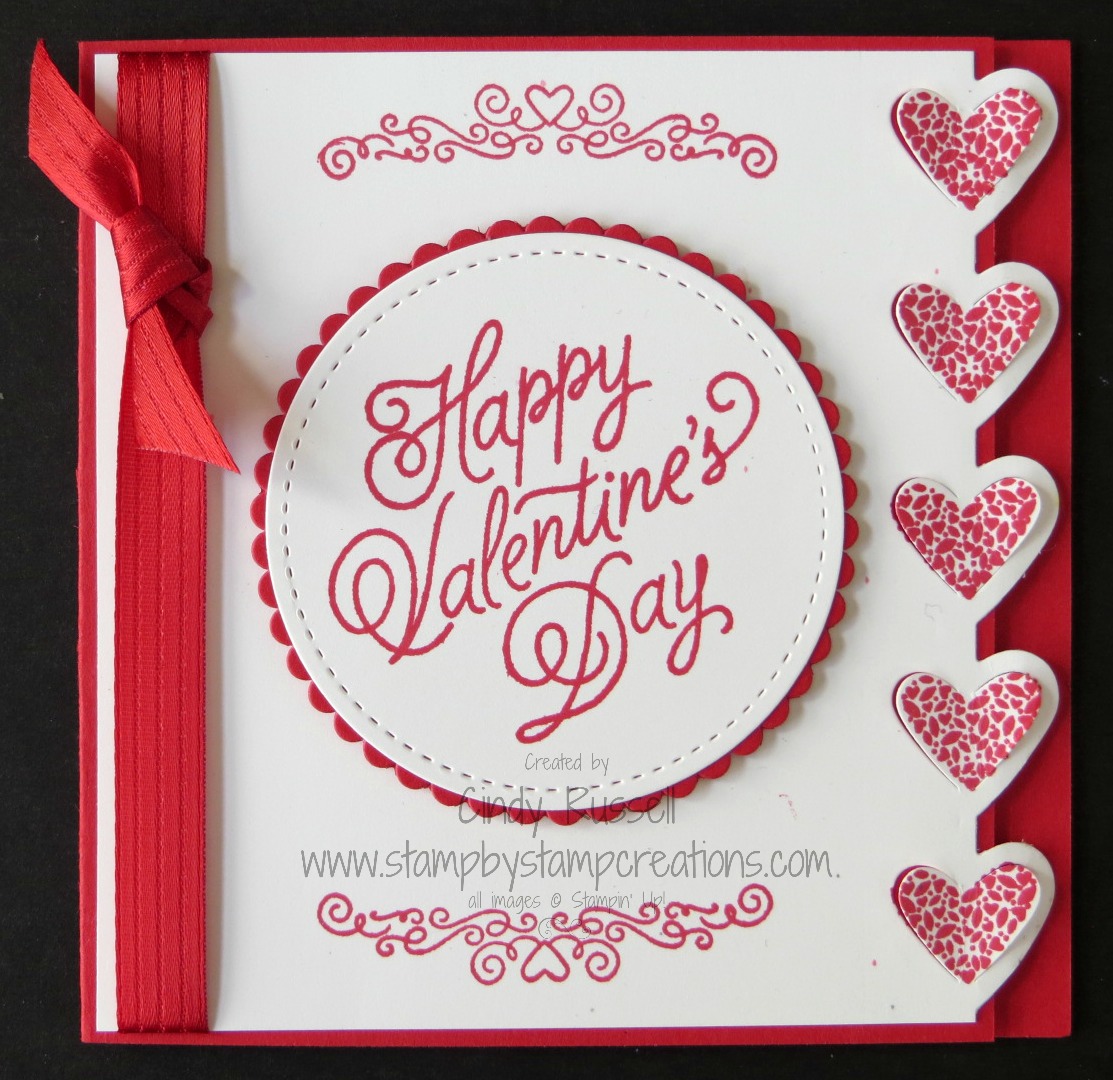
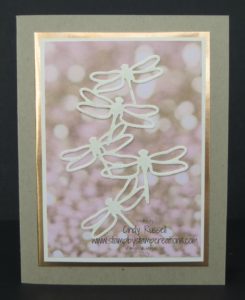
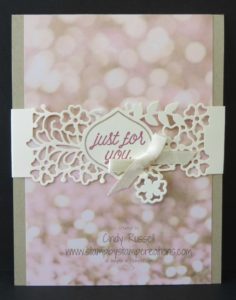
Is it a Valentine?  Is it a wedding card?  Is it an anniversary card or maybe just a friendship card?  This card could be used for so many different occasions.

I CASEd this card straight from Stampin’ Up!.  We made one just like this at the On Stage event last November except the designer paper was a different color.

Speaking of the designer paper….don’t you love this Bokeh pattern?  I especially love it because it’s PINK!  The card I CASEd (copy and share everything) used a blue Bokeh pattern.  The paper comes in the Falling in Love Designer Series Paper Package.  All of the patterns in this pack are gorgeous!  I love the soft colors.

The gorgeous belly band for the card is made with the So Detailed Thinlits dies.  There are three beautiful, intricate designs in the package.

So I have to ask….do you notice anything a bit strange on this card?  Well, not the card per se but the photography of the card?  When someone took the picture they didn’t check to see that the front of the embellishment was showing….although the back does coordinate nicely with the card….

142791This photo is what the front of the Falling in Love Embellishments look like.  The front is a tad bit prettier than the back.  Ha!

I can’t wait to play more with this gorgeous suite of products.  Have a fabulous day!  Take care and Happy Stamping!

Balloon Celebration – It’s Easy!

Balloon Celebration.1216My friend Donnis is celebrating her birthday today so I thought I would share another birthday card from my last Card Buffet.

Once again you can see how Basic Black coordinates with pretty much any color.  It makes everything pop!  On this card I paired it with the beautiful Bermuda Bay.

I used the Balloon Celebration stamp set on this card.  Don’t you love the balloon string made of words?

Here’s a little tip I found when stamping the balloon with the confetti inside….stamp the confetti first, then stamp the balloon.  It seems backwards but it’s easier because the confetti is stamped full strength while you stamp off the balloon before stamping it so it’s a bit easier to see through the photopolymer stamp.

At first I had the balloon focal point on a plain card front.  Then it came to me to use the Softly Falling Embossing Folder upside down so it mimics the confetti in the balloon!  Clever!  🙂

I’ve already wished Donnis a happy birthday on Facebook.  Now I just need to remember to bring her a card at church choir tonight!  Have a great day!  Take care and Happy Stamping!

Tasty Trucks and the Watercolor Pencils

Tasty Trucks.0117Since I was talking about the new Watercolor Pencils yesterday I thought I should share a card featuring them.  This card is one we’ll be making next week during our Sale-a-bration class.

Don’t you just love this little food truck?  It’s so darn CUTE!  🙂

The Tasty Trucks stamp set is a Sale-a-bration item.  That means that it is one of the items you can choose for FREE with a $50 purchase.  How great is that?

I stamped the adorable truck on Shimmery White card stock with Basic Black Archival Ink.  Then I used my Watercolor Pencils to color the image.  When I was done coloring I smoothed out the colors with an Aqua Painter and Blender Pen.  I used the Blender Pen on the smaller areas.  The hardest part about using the new Watercolor Pencils was figuring out which colors to use! Ha!

TSC!  Too Stinkin’ Cute!  Along with the chickens in the Hey, Chick stamp set this little truck is one of my favorite Sale-a-bration items.  What is your favorite?  Leave a comment and let me know!

Have a great day!  Take care and Happy Stamping!