Stampin’ Up! Leadership 2013

The Sorting Hat
The Sorting Hat
photo (15)
Getting ready for the Stampin’ Up! Pajama Party with my roomies Laura and Gina
photo (16)
Jammie twins with Shannon West from the Stampin’ Up! home office.

Hello!  I’m back from Leadership, exhausted but motivated!  😀  I LOVE going to these Stampin’ Up! events.  I get to meet new friends, hang out with old friends and learn all sorts of new ideas to share with you!  Before I left I told you that I’d try to post at least a few times while I was away.  Unfortunately I had problems with the internet at the hotel so I’ll just have to share with you now!

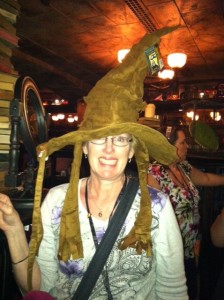
On  Thursday night I got to attend my very first Manager’s Reception.  Those demonstrators with the title of Manager or above were invited to visit the Wizarding World of Harry Potter!  It was awesome!  We got to drink Butter Beer, go on the rides and check out some of the little shops.  The 3D ride is amazing!  The evening went by too fast!

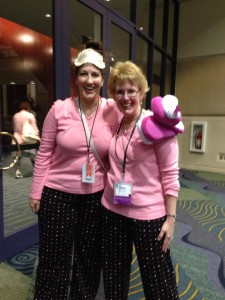
The conference itself started on Friday.  We attended general sessions and classes where we learn how the company is doing, learn some things that are coming up (new products, etc.) and watch fabulous stamping demonstrations.  The best part is all of the stamping demonstrations!  Friday night there was a pajama party where we got to see even more demonstrations!  Too fun!  Saturday was the last day doing many of the same things we did on Friday.

It’s always sad to leave your friends and the excitement of the conference but it’s good to be home.  I just wish I had about three weeks with nothing to do but stamp and try all of the new things I  just learned!  😀  Maybe you can join my next year!  …..or how about convention in July?!

Have a great day!  Take care and Happy Stamping!


The Paper Pumpkin is Coming!

imageThe Paper Pumpkin is coming to a mailbox near you!  The Paper Pumpkin is kit monthly kit subscription.  Each month you will receive a kit in the mail with all of the supplies needed to make that month’s project except adhesive. How fun is that?!  The cost will  be only $19.95 per month and that will INCLUDE shipping!  I can’t wait to share more!  Check out the website for this program at www.mypaperpumpkin.com.

Stop by Monday for more info on this fabulous new program!

Have a great day!  Take care and Happy Stamping!


Oh, Whale! Thank You

Stamp Set:  Oh, Whale!
Stamp Set: Oh, Whale!
Card Stock: Basic Gray, Tempting Turquoise, Whisper White
Ink: Basic Gray, Tempting Turquoise
Accessories: Stampin’ Dimensionals, Basic Gray/Basic Black 1 1/4″ Two-Tone Ribbon

I told you the other day that I love this little whale.  You’ll probably be seeing more of him in the near future!  😉  I just can’t seem to get enough of him!  He’s too darn cute!  I love this new two-tone ribbon….it’s kind of shimmery!  You can also get it in the combination of Pink Pirouette/Rose Red.  Too fun!

By the time you read this I will probably be on a plane on my way to Orlando and Stampin’ Up!’s Leadership Conference.  Woo Hoo!  I am SO excited…especially for the Manager’s Reception!  I can’t wait to share so keep checking back!  I’ll try to post from Orlando once or twice at least.

Have a great day!  Take care and Happy Stamping!

Oh, Whale!

Stamp Set:  Oh, Whale
Stamp Set: Oh, Whale!
Wheel: Oh, Wave!
Card Stock: Whisper White, Pacific Point, Basic Gray
Designer Paper: Sunshine & Sprinkles
Ink: Pacific Point
Accessories: Frost White Shimmer Paint Mist, Stampin’ Dimensionals, Basic Pearls
Tools: Big Shot, Happy Whale Clearlit

I LOVE the Oh, Whale! stamp set and the coordinating Happy Whale Sizzlit!  These were the first items from the Spring Catalog that I knew I had to have.  Isn’t this little whale too cute?!  He’s even cuter in person because I spritzed him with shimmer mist to make him sparkly!  How fun!

This fun little card is my swap for Leadership.  I can’t wait to see the cute samples I’ll get in return!

Have a great day!  Take care and Happy Stamping!

Happy New Year!

Stamp Set:  Wishes Your Way, Distressed Dots
Stamp Set: Wishes Your Way, Distressed Dots
Card Stock: Melon Mambo, Whisper White
Ink: Melon Mambo
Accessories: Stampin’ Dimensionals, Melon Mambo 3/8″ Strpied Organdy Ribbon, Metallic Brads
Tools: Big Shot, Perfect Polka Dots Embossing Folder, Pinwheel Sizzlits Die

Happy New Year and Happy Spring Catalog!  Isn’t it fun to start the new year with a new catalog?  I love the Spring Catalog!  There are so many fun and exciting products!

This is a card I made for a swap that I hosted.  Cute, huh?  You can’t go wrong with Melon Mambo and a pinwheel!  😀

I need to apologize for being away for so long.  Of course the holidays were a busy time but I also came down with a nasty cold/flu bug in the MN homeland.  I’m on the mend now so hopefully I can keep up with things.  I just got all of the Christmas decorations packed up and put away but we still have to take the ornaments off the trees (yes, two trees…) and pack them away.  Hopefully I can get that done before I leave for Stampin’ Up!’s Leadership Conference in Orlando on Wednesday!

I’m SO excited for Leadership!  It’s always a great time filled with lots of great information and ideas but this year I get to go to the Manager’s Recepton.    It’s a special event for those of us with the title of Manager or above and this year we have the Wizarding World of Harry Potter all to ourselves!  I can’t wait!  I’ll definitely tell you all about it!

Have a great day and Happy Stamping!

‘Twas the Night Before Christmas……

image‘Twas the night before Christmas and all through the house…..the crafts were finally done!  Mom and I made about 20 of these cute little guys for dinner tonight.  I’m sure all the young men in the family will just love them!  🙂

Aren’t these little guys adorable?  My mom asked me if I came up with the idea and I just had to laugh!  Ha!  Why would I come up with my own idea if I can just copy someone else?  Besides I don’t see all the different uses for a punch like some creative people.  Who sees shoes in a butterfly punch?  More power to them!  I’m just grateful that they share their brilliant ideas.

If you want to make these cute little guys for next Christmas I’ll let you know that I had to order the red Tic Tacs online.  Now I really need to go wrap presents since we open gifts tonight at my mom’s.

I wish you all a blessed and safe Christmas!

Rejoicing With You

Rejoicing With You.1012
Stamp Set: Rejoicing With You
Card Stock: Early Espresso, Very Vanilla
Ink: Early Espresso
Accessories: Champagne Shimmer Mist Paint, Stampin’ Dimensionals
Tools: Stampin’ Spritzer, Big Shot, Lacy Brocade Embossing Folder

Wow!  Christmas is just around the corner and I don’t have my cards out yet?  Do you?  I did finish getting them made.  Now I just need to sign and address them all!

The majority of the cards I’ll be sending out are this design.  This is one of the cards we made in our Christmas Card Stamp-a-Stack.  It’s a lot prettier in person.  It’s hard to see the embossed background from the photo and you definitely can’t see that both pieces of Very Vanilla card stock are shimmery!  That’s the best part I think.  It sparkles!  😀

Hopefully I can get my cards mailed by early next week.  I’m not going to stress over it though.  I’m sure they’ll be mailed before I leave for Minnesota!  Have a great day!  Take care and Happy Stamping!

Scentsational Season Shadow Box

OMG!  This is TSC!  Too Stinkin’ Cute!  I wanted to post this yesterday when I had it done but I couldn’t get a good picture….today’s picture isn’t great but the shadows and glare are at a minimum.  I saw something similar to this on Pinterest so I had to give it a try.  Can I say it again?  TSC!!!

I started with an 8″x 8″ shadow box from one of the big box craft stores.  The designer paper squares are 1 7/8″ x 1 7/8″ and mounted on a square of 2″ x 2″ card stock.  The hardest part was figuring out the size and placement of the squares and what to put on them.  Most of the squares have stamped images that were die-cut with framelits or punched.  Did you notice the center square?  It has a new special item from the upcoming Spring Catalog….a Soda Pop Top!  How fun!  I actually made two of these for gifts and now I’m thinking I really need one for myself!

Bold Snowflake Single Stamp

Stamp Set: Bold Snowflake
Card Stock: Midnight Muse, Whisper White
Ink: Midnight Muse
Accessories: Midnight Muse Striped Satin Ribbon
Stampin’ Dimensionals, Basic Rhinestone Jewel
Tools: Big Shot, Northern Flurry Embossing Folder,
Blossom Punch

Hello!  I have snowflakes on my mind!  We may get a little bit of snow this weekend.  At least it will be cold.  Almost 70 degrees in December is a bit much unless you’re in Florida or California!  Back to the card though!  I used the new single stamp Bold Snowflake on this card.  I just love it….especially because you can punch it out!  Just grab your Blossom Punch and go!

This card was from our Christmas card Stamp-a-Stack.  Nice and simple.  Emboss your background.  Stamp your snowflake, punch it out and adhere it to the front of the card.  Add some ribbon and a rhinestone jewel and you’re all set to go!  Simple is good!  I just need to remember that mantra!  Sometimes I get a bit carried away with layers and such.  Oh, well…what’s a girl to do!  Have a great day!

Snowflake Soiree

Stamp Set: Snow Soiree, Petite Pairs
Card Stock: Crumb Cake, Very Vanilla
Ink: Crumb cake, Illuminate
Accessories: Champaigne Shimmer Paint Mist
Very Vanilla Seam Binding
Stampin’ Dimensionals, Mini Glue Dots
Tools: Big Shot,
Lots of Tags Sizzlits
1/8″ Circle Punch, Fork

I love snowflakes and am waiting patiently for a few to fall here in Denver.  We haven’t had a good snowfall yet this fall and we’re due!  We need snow in the mountains desperately.

This is another card from our Glitz, Glimmer and Glam class.  It’s hard to see the glitz, glimmer or glam from this picture but it’s there!  First you get some Glitz by spritzing the stamped snowflakes with the Champagne Shimmer Paint Mist.   The Glimmer comes from stamping snowflakes on the tag with the Illuminate Ink (you definitely can’t see this in the picture!) and the Glam comes from the adorable little fork bow.  Yes, one of these days I promise to make a video on how to make these perfect and adorable bows!

Ornamental Elegance Kits

Don’t you love the ornament on the front of the Holiday Catalog?  I haven’t made any yet but I sure want to give them a try.  If you’ve been wanting to make them but don’t have all the pieces and parts now is your chance!  For a limited time only Stampin’ Up! is offering the Ornamental Elegance Kit just for you!

The Ornamental Elegance Kit (item #132832) is $14.95 and includes:

  • Die-Cut Cardstock Elements
  • Cherry Cobbler 3-1/2″ Scalloped Tulle Ribbon
  • Natural Linen Thread
  • Vintage Faceted Designer Buttons
  • Large Pearl Basic Jewels

The kit comes with enough supplies to make 10 ornaments.  In addition to the kit, all you need is a glue gun, scissors, and adhesive.  Don’t wait!  Order yours today!

Simple Christmas Tags


Stamp Set: Scentsational Season
Card Stock: Gumball Green, Cherry Cobbler, Early Espresso
Ink: Gumball Green, Cherry Cobbler, Early Espresso
Accessories: Stampin’ Dimensionals, 1/4 ” Sweater Trim/Gumball Green, Cherry Cobbler, Whisper White

Hello!  Yesterday I did an Open House at a friend’s home.  I had a table with a bunch of samples as well as a simple make-and-take project.  All in all it was a successful event and everyone loved making these cute little Christmas tags.

They are SO simple.  Stamp your image, adhere it to a piece of card stock and then adhere it to the tag with Stampin’ Dimensionals.  Thread the adorable sweater trim through the hole and you have a cute and simple tag!

Don’t you want to make these for all of your gifts?  😉

All The Cuteness without All The Work!

Stampin’ Up! has come up with a couple of really cute gift packaging ideas for you!  Check out these really cute bundles!

The first bundle is the Petite Treats Bundle.  With this bundle you receive 10 little glassine bags, 10 yards of Gumball Green Satin Ribbon and 8 Handmade Holidays Stitched Felt Ornaments.  Too cute!

The Trimmings & Tags Bundle includes 25 Gusseted Cellophane Bags, 25 double-sided Snow Festival Designer Printed Tags and 10 yards of the Cherry Cobbler 1/4″ Sweater Trim!

These little bundles will be perfect for packaging those treats and gifts for co-workers, teachers, neighbors and friends.  Order yours today!

In other exciting news Stampin’ Up! has redesigned their customer website!  It is AWESOME!  Check it out!  You’re going to LOVE it!  Not only is it gorgeous but it’s full of ideas and inspiration for you!  They have even started a Stampin’ Up! blog!  😀

Glizty Snowflake

Card Stock: Night of Navy, Whisper White, Shimmery White, Silver Glimmer Paper
Accessories: Frost White Shimmer Paint, White Organza Ribbon, Rubbing Alcohol, Mini Glue Dots, Stampin’ Dimensionals, Large Basic Pearl Jewels
Tools: Big Shot, Snow Flurry Die, Northern Flurry Embossing Folder

Another card from the Glitz, Glimmer and Glam Christmas Card Class.  Very sparkly!  😀  That was a really fun class!  Sorry you missed it!  🙁 It’s hard to see but the Night of Navy background is embossed with the Northern Flurry Embossing Folder.  Then I spritzed it with a mixture of Frost White Shimmer Paint and rubbing alchohol.  When you make your own mixture like this be sure to use 70% rubbing alcohol.  A higher percentage will mess up your spritzer.  Have you tried the new Stampin’ Spritzers?  They work great!   Once again, I’m not please with this picture.  There’s almost too much shine!  Not in person though….just enough glitz!

Classes went well this week.  Now I just need to plan the one class for December.  Speaking of December…can you believe it will be here in just a few days?  Yikes!  I’m really kind of anxious for December 1st so I can place a pre-order from the new Spring Catalog!  It’s fabulous!  😀  Unfortunately you have to wait until January for yours.  Bummer!  If you’re lucky though and I find time maybe I’ll make a card to share with you using some of the new product.

Have a wonderful day.  Take care and Happy Stamping!

Glitz, Glimmer & Glam Evergreen

Here’s another card from our Glitz, Glimmer and Glam Christmas Card class.  I just love this tree from the Evergreen Stamp Set!  My picture looks a little fuzzy but I think it’s just all of the shimmer and shine on it!

The green tree is stamped on Very Vanilla card stock and the outline is embossed on Vellum Card Stock with Gold Embossing Powder.  I used a neat trick I learned on Pinterest to adhere the vellum to the regular card stock.  Here’s the trick:  “paint” a little bit of Crystal Effects in each corner of the Vellum to use as your adhesive.  It dries clear!  Wow!  I love learning new stuff!  😀

Stay tuned tomorrow for more Glitz, Glimmer and Glam!  Have a great day!  Take care and Happy Stamping!